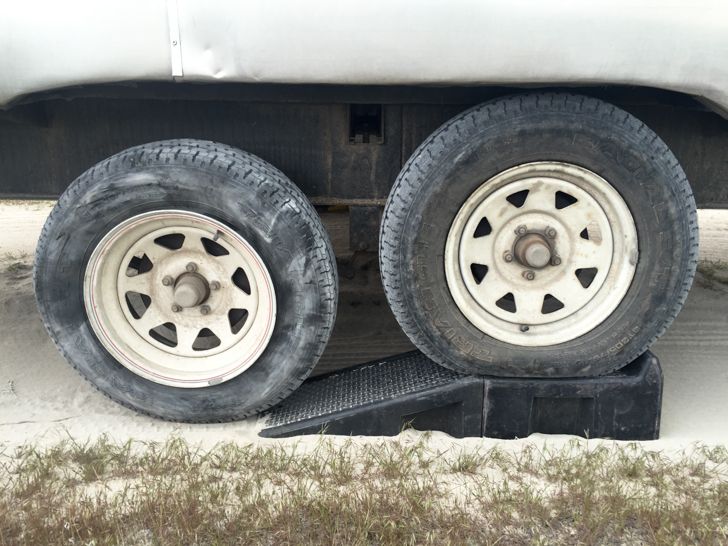
Every RV owner should know the significance of tire pressure and how to monitor tire pressure in order to decrease the chances of tire blowouts and other problems that may arise. We looked into the factors that go into determining the tire pressure of an RV, and we made a comprehensive guide to shed some light on the topic.
The tire pressure on an average 16" RV tire can be anything between 35-80 PSI or 280-550 kPa. That's a wide range - and you need to find the right number for your specific weight and number of wheels. Manufacturers provide data-plates in all RVs that include the recommended maximum tire pressure, based on the maximum weight of the RV. Therefore, if you load your RV lightly, then your tires may be overinflated.
There are other factors that go into determining the correct tire pressure for the tires on your RV, but you should be alright if you base your decision on the manufacturer's recommendation and make sure that your RV is not loaded too lightly. If it is loaded lightly, then make the needed adjustments so that you do not damage your tires.
Before you continue reading, let us say we hope you find the links here useful. If you purchase something through a link on this page, we may get a commission, so thank you!
In this article, we will go more in-depth on the topic of determining the tire pressure for the tires on your RV. We will also go over the basics of tire air pressure, the significance of tire pressure, what happens if your tires are under or over-inflated, where to find tire specifications, and how to monitor your tire pressure.
PSI, or pounds (of force) per square inch, is the unit of pressure chosen by most people in the US to represent tire air pressure. You may also see kPa mentioned here and there - that's kilopascal, a unit that represents the same measurement but on a different scale.
Maintaining the proper tire air pressure is a matter of safety for you, the passengers you may have, and the vehicles that may be around you.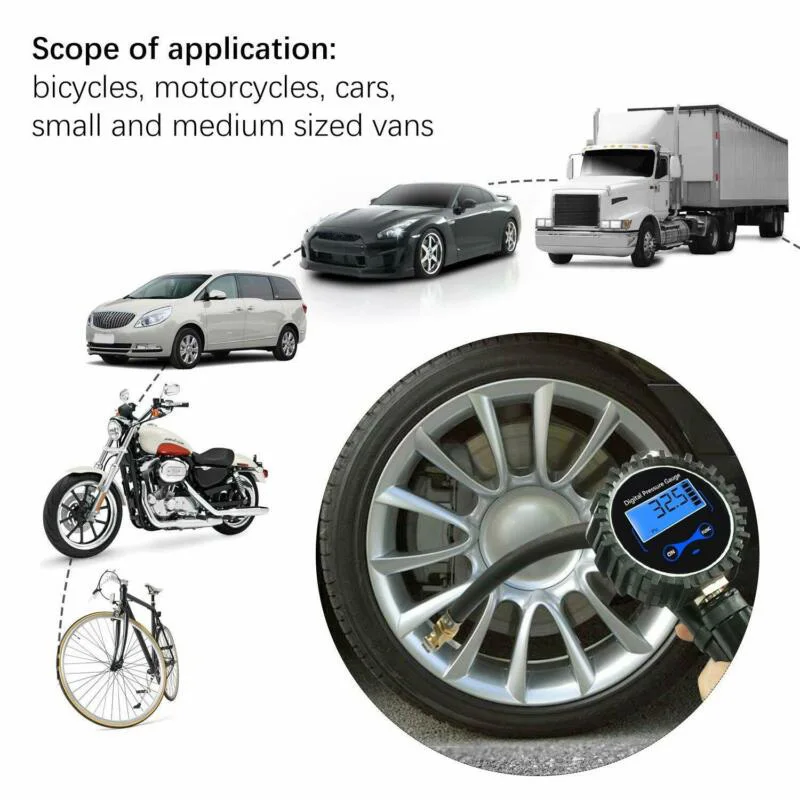
Driving your motorhome or towing your travel trailer or 5th wheel with the wrong level of tire pressure can lead to all sorts of problems, affecting your stability, ease of ride and even gas mileage.
The over-inflation of tires makes the sidewalls and tread of the tire harder than normal. This can limit the performance and traction of the tire. Also, it may cause uneven tire wear.
Also, tire pressure that is too high can cause a slight increase in gas mileage by reducing the rolling resistance of your tires.
Plus, overinflation will lead to a harsh ride, wobbly handling in the wind, and reduced braking effectiveness that is especially reduced on wet roads. If you're towing a travel trailer, it could also lead to sway issues. Read more on how to prevent travel trailer sway in this post.
Most tire blowouts are caused by underinflation.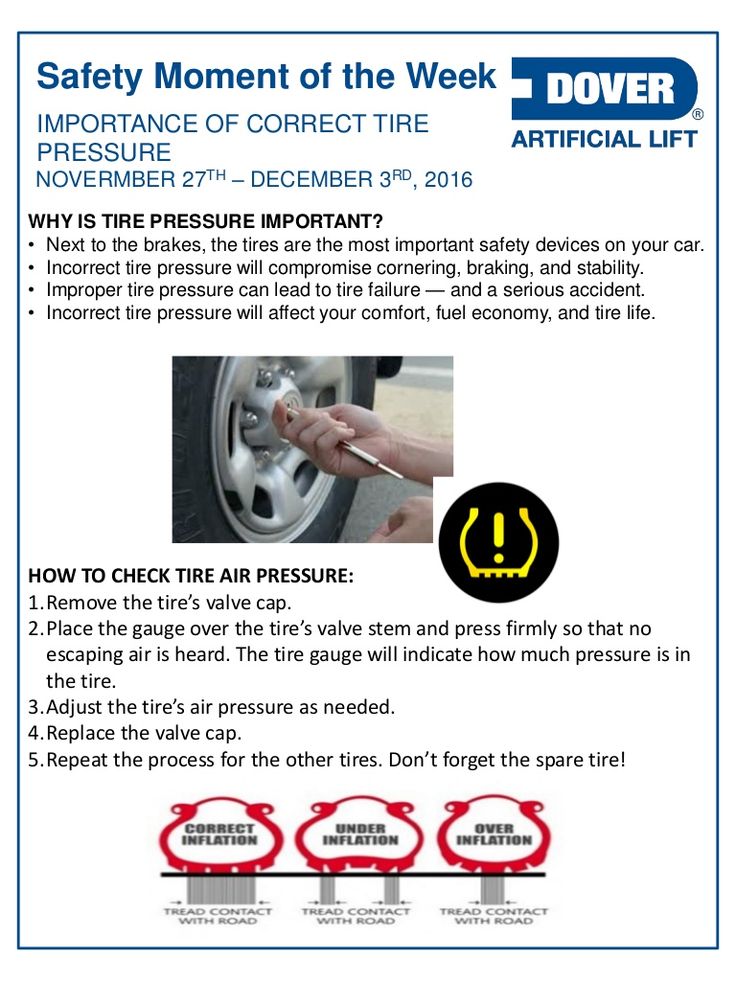 Underinflation will force tires to come into contact with the ground more than properly inflated tires would. Read more on RV tire blowouts (and how to prevent them) in this post.
To be more specific, the sides, or shoulders, of tires flex more when overinflated which produces an excessive amount of heat, and excessive amounts of heat lead to tire failure.
If your tires are under-inflated by just 10 or 15 psi, then the temperatures on the sides of the tires can reach 200 degrees Fahrenheit.
Is High or Low Tire Pressure More Dangerous?There is a simple answer to this. Low tire pressure is more dangerous than high tire pressure.
Low tire pressure leads to dangerous blowouts while high tire pressure is generally less dangerous. This is true as long as the tire pressure is below the "maximum inflation pressure." If you go over that, you could end up with a blowout as well. Of course, there are other safety issues associated with high tire pressure, such as increased sway when towing.
Overall - sticking to your right tire pressure recommendation is always best.
There is almost always more than one place to check your tire's recommended specifications.
WARNING: Keep in mind that the previously stated places will typically only represent the minimum or maximum PSI, and they do not necessarily represent the best possible tire pressure for your vehicle. Read the next paragraph for more information on finding the correct tire pressure for your vehicle.
Setting the correct tire pressure on the tires on your RV is crucial to the tire performance, tire life, vehicle handling, and, most importantly, the safety of you and the people that are around you.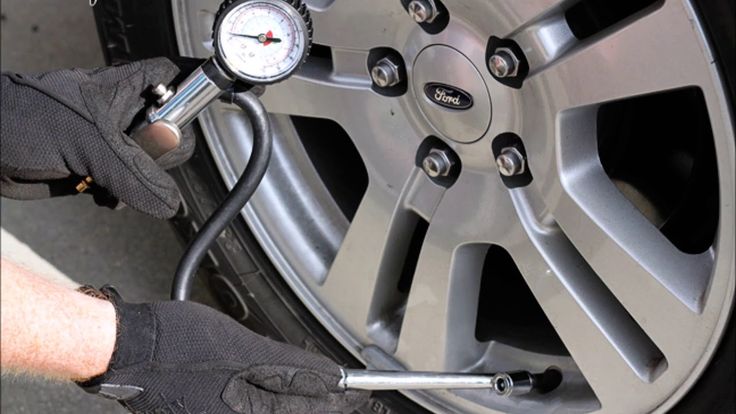
In order to get the best possible tire pressure, you should base your figures on the load being carried by the tires.
When you base the tire pressure on the load being carried by your tires, you ensure that the tires flex properly, are in the correct shape, will not produce an excessive heat build-up, and provide the strength to carry the total weight of your RV without losing tire patch (contact with the road).
Tire manufacturers like Michelin provide detailed tables for load & tire pressure.
The basic rule of manufacturers is to make sure that all tires on the same axle are set to the exact same pressure. This is based on the heaviest side.
Weighing an RV by axle positions and assuming that the load is equal on both sides of an RV is a bad idea. There is no way to calculate tire pressure without knowing the individual wheel weights. You could weigh the full axle, weigh one side, and then subtract from another side to get the weight of the other side.
Keep in mind that it is common for a difference of 1,000 pounds or more to be present between different sides on the exact same axle. Also, dual axles are close together, and they can be treated as a single unit (one wheel).
Get Tire Load Information From the RV DataplateThe next best source of information is the RV dataplate. RV manufacturers are mandated by law to post a recommended tire pressure on the dataplate.
Manufacturers expect the owner to load the unit to its maximum weight. This is why they always post tire pressures based on the maximum weight of the RV.
You probably will load your RV lightly if you use the dataplate as a source. This will eventually lead to overinflated tires. Read the paragraph above to learn about the problems that can arise if you overinflate your tires.
On the flip side, you could load your RV beyond the axle rating (GAWR) or Gross Vehicle Weight Rating (GVWR). In that case, choosing to use the dataplate pressure will lead to under inflation.
Finally, using the dataplate as a source may not be a good idea because it does not take into account the fact that an RV may be loaded in a remarkably unbalanced condition which is quite common.
It is important to understand that the pressure that is shown on the sidewall is not the maximum pressure for the tire. It is the minimum pressure needed to attain the maximum load rating of the tire.
Setting your tires can be set to the pressure indicated on the sidewall will lead to obtaining the design load rating of your tire. Keep in mind that the pressure indicated on the sidewall does not take into account all of the many factors that go into choosing the optimum tire pressure.
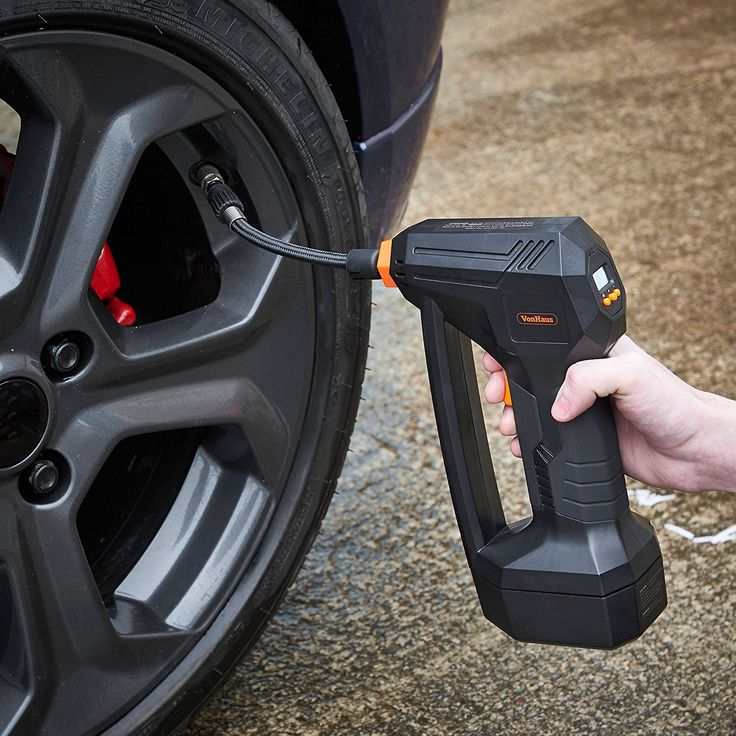
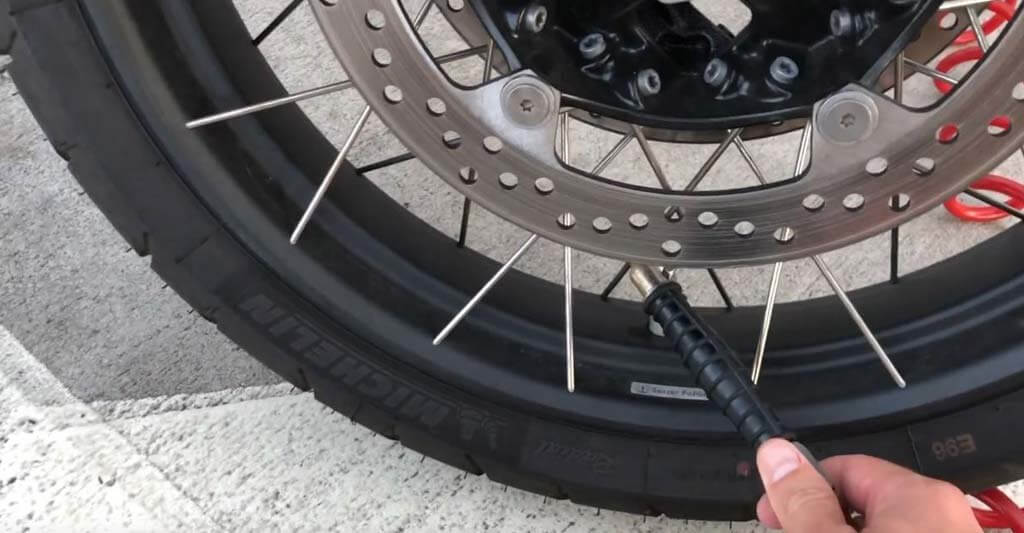
Monitor your tire pressure with a tire pressure monitoring system (TPMS). Your RV might have one pre-installed, but if it does not, then simply buy one and install it in your RV.
You could monitor your tire pressure the old fashion way with a tire pressure gauge too.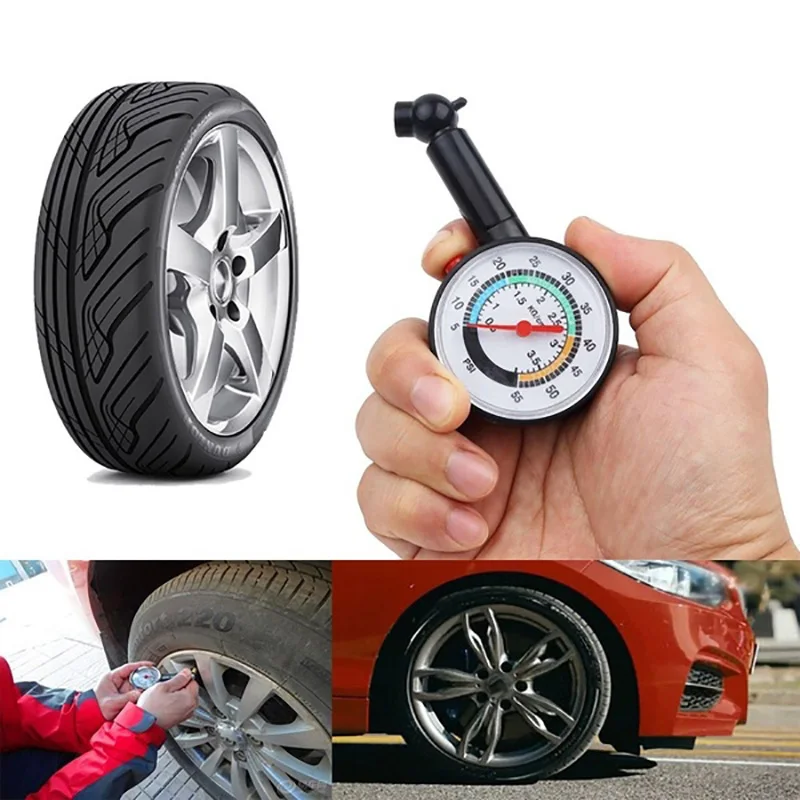 Digital tire pressure gauges are a decent option.
This may seem like common sense, but some people do not realize that tires lose air pressure over time. They lose around 1 pound per square inch (PSI) every thirty days, and they lose around 1 pound per square inch for every 10-degree (Fahrenheit) decrease in temperature.
Remember to monitor your tire's air pressure, or else you may suffer the consequences. You may want to set reminders to check the tire pressure unless you have a tire pressure monitoring system that alerts you when tire pressure is too low or high.
In ConclusionMaintaining the proper PSI, or pounds (of force) per square inch, is very important since it can have an effect on your safety and the safety of those around you.
A tire pressure that is too high and a tire pressure that is too low will lead to tire damage and other issues, but a tire pressure that is too low is worse because it leads to tire blowouts.
You can figure out the specifications and correct tire pressure for your tires in a variety of ways, but the best way to determine the correct tire pressure, in our opinion, is to look at the information that the manufacturers provide in the dataplates that are included in all RVs.
Dataplates include the recommended maximum tire pressure which is based on the maximum weight of the RV. Therefore, if you load your RV lightly, then your tires may be overinflated (if you make your decision based on the manufacturer's recommendation).
Before you go, be sure to check out these guides that pertain to RV safety -
Driving A Motorhome (9 Things You Need To Know Before Getting Behind The Wheel)
Should A Travel Trailer Be Level When Towing?
When Should I Replace My Travel Trailer Tires?
How To Safely Drive An RV On Mountain Roads
Enjoy this article? Do us a favor and hit share!
0shares
Did you upgrade your camper’s tires to a higher load range? Maybe the tire information sticker on your RV has become unreadable or is missing. Maybe you just want to be sure you are getting the best performance out of your tires. Whatever your reason for searching is, you have come to the right place.
Most RV tires should be filled between 40 and 80 PSI. The exact pressure depends on the load range of your tires and how much weight the RV is carrying. There are 3 methods to determine the correct tire pressure:
If you’re like me you have always been taught to fill your tires to the pressure listed on the tire, or to check the stick on your door jam or owner’s manual for the proper pressure. For your average car this is great. The thing about cars is their weight doesn’t change much. Sure, you might fill the trunk after a trip to the home improvement store, or load up the family up to go somewhere, but that’s nothing compared to the thousands of pounds of cargo some RVs can handle.
Why is the proper tire pressure important? Rather than take my word for it, here is a quote from Michelin’s RV Tire Guide.
“An underinflated or overloaded tire will build up more heat that could go beyond the endurance limits of the rubber, steel belts, and radial cords. This could cause sudden tire failure.
Underinflation will cause poor handling, faster and/or irregular tire wear, and a reduction in fuel economy.
Overinflation, on the other hand, will reduce the tire’s contact area with the road surface, which reduces traction, braking ability, and handling. A tire that is overinflated for the weight it is carrying is more prone to a harsh ride, uneven tire wear, and impact damage.”
Now let’s take a look at each method and see how and when each of them should be used.
This method is the safest option if you aren’t sure what to do. The tires are rated for maximum capacity at the pressure embossed into the sidewall. Assuming your tires are a high enough load range for your RV (and everything you have loaded in it), inflating the tires to this value will ensure your tires can carry the weight.
One other reason to use this method is that some tire manufacturers will only warranty tires that are operated at max pressure. Carlisle is one of these manufacturers.
Trailer tire pressures correspond with the load rating. Trailer tires identify the load range using a letter system. Most travel trailer and 5th wheels tires fall between range B and E. As you move up in load range the carrying capacity of the tire increases as does the maximum inflation pressure. The table below lists these load ranges, pressures, and ply ratings. If you’re wonder what ply means, it’s basically a layer, and traditionally the way to make a tire stronger was to add more layers of rubber and fabric to the sidewall. The ply ratings can be confusing because this is not necessarily the number of plys in a modern tire. The ply rating represents the strength of the tire compared to early bias ply tires, modern tires are much stronger and even load range E tires may only have a 2 plys.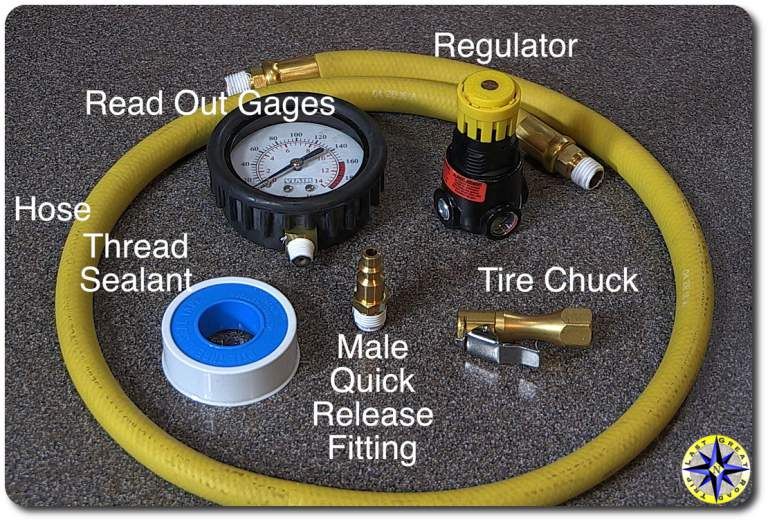
| Load Range | Max Pressure | Ply Rating |
| A | 2 | |
| B | 36 PSI | 4 |
| C | 50 PSI | 6 |
| D | 65 PSI | 8 |
| E | 80 PSI | 10 |
| F | 95 PSI | 12 |
| G * | 110 PSI | 14 |
| H * | 125 PSI | 16 |
| J * | 130 PSI | 18 |
| L * | 20 | |
| M * | 22 | |
| N * | 24 |
* Load Ranges above F are mostly used on commercial vehicles not RVs.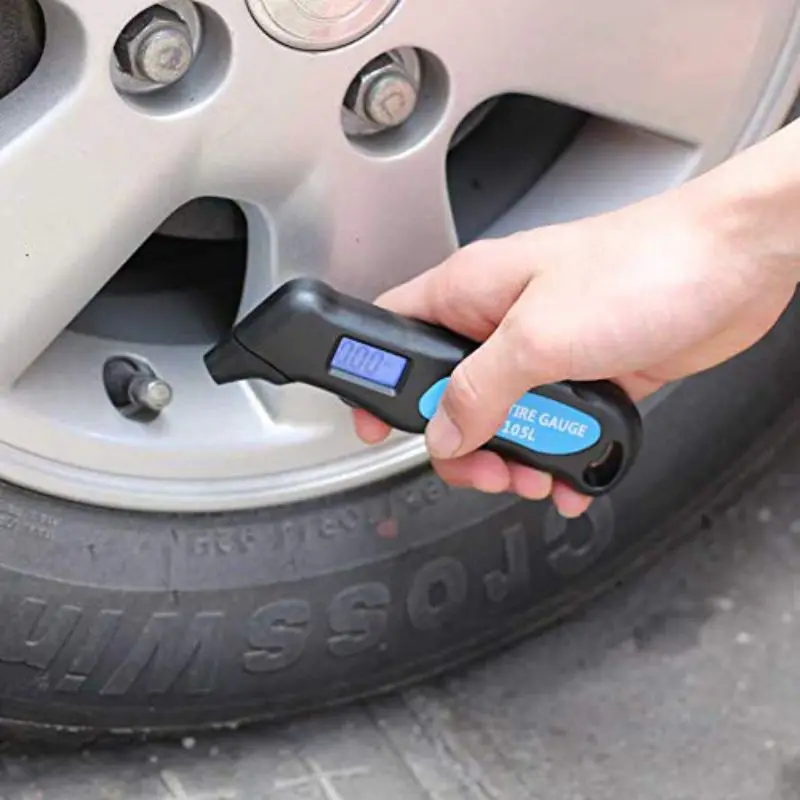
You can find the load range and max inflation pressure on the sidewall of the tire.
tire load markingsWhen RV manufactures design a travel trailer or 5th wheel they specify a maximum weight that includes the equipment they put in the RV and all the cargo, water and waste that you will add, this is known as the GVWR or Gross Vehicle Weight Rating. This maximum weight is usually carried by 1, 2 or 3 axles or 2, 4 or 6 tires. The RV manufacturer also selects the tires that it will put on the RV.
Based on that maximum weight and tire selection the manufacturer will determine the recommended tire pressure. Most of the time this tire pressure will match the max pressure on the sidewall that we discussed in method 1.
Like Method 1 this will provide you with a safe tire pressure capable of carrying your RV down the road. Also, like method 1 this might not be the optimal pressure for the most comfortable ride and tire wear.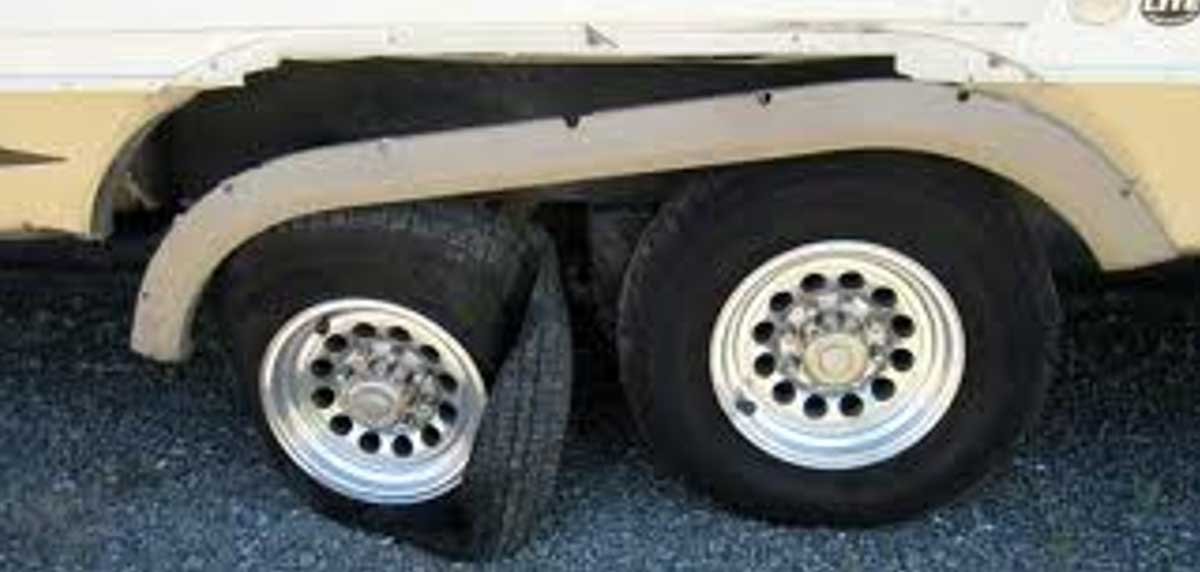 Another potential problem with this method is that if you replaced the factory tires with new ones that have a higher load range, you may be under inflating them.
Warning: You should always check the max pressure on the tire and make sure the sticker value does not exceed the tire rating. If incorrect tires were installed on the trailer you could overinflate them causing a dangerous situation. If you find this is the case your tires need replaced with properly rated ones.
This method has been championed by Robert Marble of RVTireSafety.com. Robert retired from a 40-year career as a tire engineer and now writes and speaks about tire safety. This method requires the most “work” on your part but gives you the best performance from your RV’s tires.
I recommend only following this method for Load Range D or higher. In my opinion the lower load ranges simply don’t have enough variation in pressure and capacity to be worth the effort.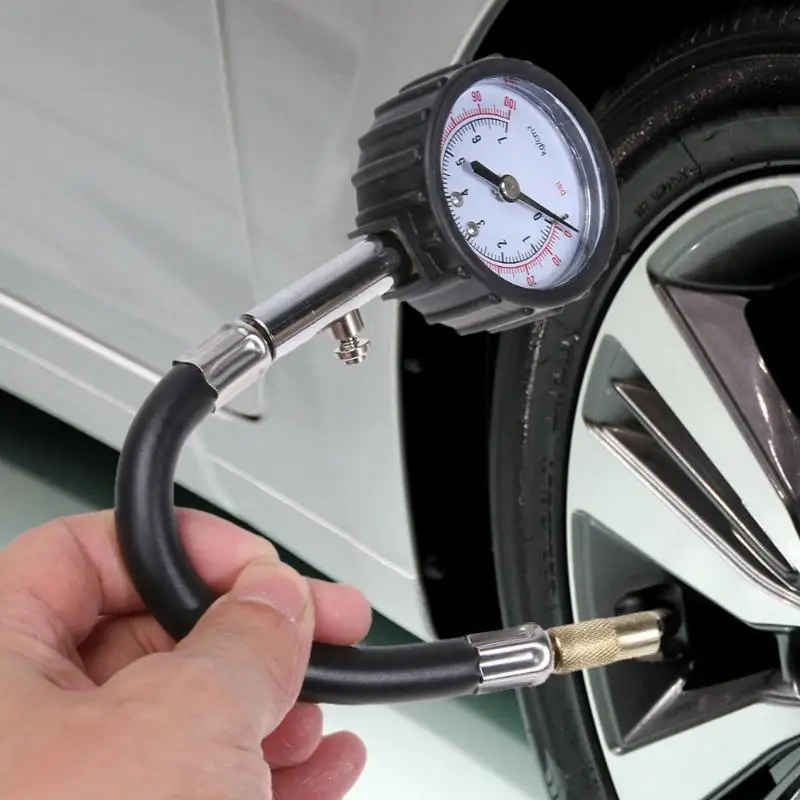
Before we look at the steps involved in this method let’s look at how Tire Load Charts work. Load charts are created by tire manufacturers and are unique for each model and size of tire they make. These charts are continuously updated and reviewed to provide you with the optimum pressure.
Charts vary from manufacturer to manufacturer, but at a minimum, they all list the tire, load and inflation pressure for single and dual wheels (dualy).
Warning: It is important to note that regardless of the difference from side to side all tires on the same axle should be inflated to the same pressure. Inflating tires to different pressures on the same axle will reduce the handling and stability of the vehicle.
Weigh your RV and tow vehicle. You will need to find a scale to weigh your trailer. If you aren’t sure where to find a scale, try searching for CAT scales in your area. You can find scales at some truck stops, or stores that sell things like dirt, sand and gravel by the truck load.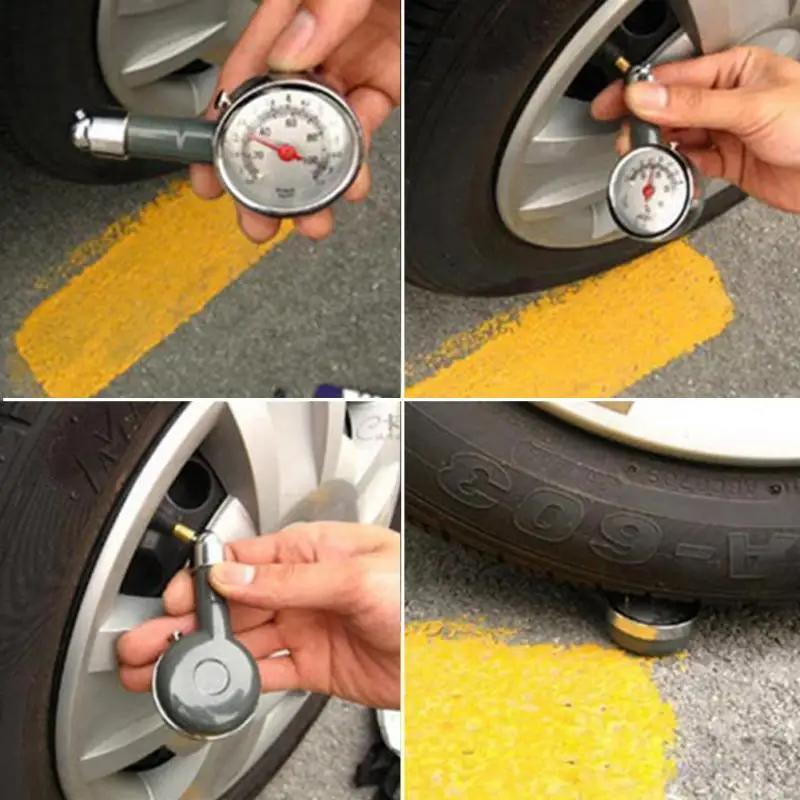
You should load your RV with everything you will take camping with you, including fresh water. Having your tow vehicle weight isn’t absolutely necessary, but it is good information to have. If possible you should get the weight of your tow vehicle without the trailer, that will allow you to check the tongue or pin weight of your rv and make sure you are within the payload rating of your vehicle.
Faded Cougar RV Weight StickerHere are the weights you should get for towed RVs:
Here are the weights for drivable RVs:
Using these weights, you will be able to calculate the weight on each axle to use with the load charts and calculate the combined weight to ensure you are within the ratings of your vehicles.
In this example we will use my truck and RV.
Truck: 2015 Ram 3500 Crew Cab Short bed with single rear wheels
RV: Cougar 334RDB 5th Wheel
RV Tires: Carlisle Radial Trail HD ST235 / 80 R16 Load Range E
Now that we have both axle weights add 10% to each for the safety margin and divide in half to get the load on each tire.
Based on the Load / Inflation Chart below both axles should be set to 55 PSI.
Carlisle Load Inflation ChartAt 50 PSI the tire can only carry 2,600 lbs so that is not enough, but 55 PSI can carry 2,730.
As I mentioned above, Carlisle only warranties tires operated at Max Pressure, so I continue to run my tires at 80 PSI. They only provide the load tables to show the relationship between pressure and load capacity.
All 3 methods require you to read and understand the information on your tire’s sidewall. Below is a quick explanation of some of the markings you will find on a trailer tire and what they mean.
Tire MarkingsTire Type: P- Passenger, LT- Light Truck, ST- Special Trailer, T-Temporary
Tire Width: the approximate width from sidewall to sidewall in millimeters
Aspect Ratio: The ratio of sidewall height to tire width, for example a 60 means that the sidewall height is 60% of the tire width
Construction: R- Radial, B- Bias Ply
Rim: Diameter of Rim in inches
One more thing to keep in mind. After you have your tires set to the proper pressure you need to make sure you keep them there. One option is the check the pressure in each tire before every trip you take. This will ensure you are always getting the best performance and life out of your RV’s tires.
An easier solution is to use a Tire Pressure Monitoring System (TPMS) with your RV. All modern cars and light trucks come with tire pressure sensors installed in the rims to keep you safe, so using the same technology on your RV makes sense. To add a TPMS to your RV you don’t have to install sensors in your tires, all you have to do is remove the caps from your valve stems and screw on a small battery powered sensor. A monitor wireless monitor in your cab displays the tire pressures and will alarm you to a sudden loss of pressure. Top of the line systems also monitor temperature and alert you if that gets too high. If you want more information on RV Tire Pressure Monitoring Systems click this link.
The bottom line is that no matter which method you choose, the most important thing to do is make sure you keep your tires inflated to that pressure and you shouldn’t have any unexpected problems.
Many people talk bad about “China Bombs” Chinese made tires. On the other hand there are plenty of people who have used Chinese tires for years and haven’t hand any issues. The key to long tire life is keeping them properly inflated and within their speed ratings. Excessive speed can cause excessive heat leading to tire failure.
Thanks for reading, please share this article if you found it useful.
Jason
(
Updated:
15/07/2021
)
Article content
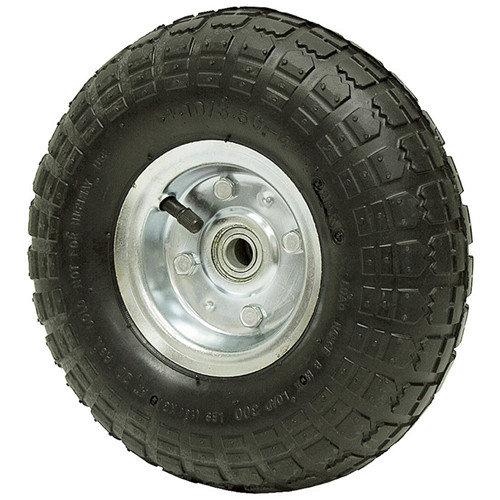
What should be the tire pressure for a light trailer?
The safety of all road users and the life of the tires depend on the correct answer.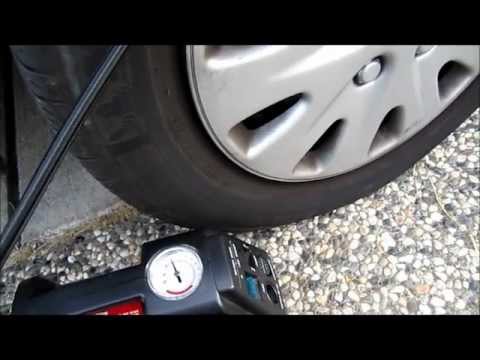 After all, pumped tires can burst on the go, causing an accident, and flat tires are erased around the edges in a couple of seasons. And if you have a passenger car (mini-tractor or walk-behind tractor), you should read this article and find out the control rules, as well as the permissible tire pressures for a single-axle or two-axle trailed construction.
According to the generally accepted classification, a trailer structure for a passenger car (motoblock, mini-tractor) can be:
In addition, trailer structures can be universal or special. On universal models, you can carry anything. Special options are designed for a specific type of cargo, so they can be classified as:

Trailer tire pressure depends on load capacity and construction format. In addition, it is affected by the ambient temperature, the type of suspension, and the design features of the drawbar.
Remember, the recommended tire pressure for a heavy or light trailer tire is determined only by the manufacturer. Therefore, the permissible pressure values are displayed in the technical data sheet of the trailed structure. There are two numbers in this document: the pressure in the tires for single and dual placement on the axle.
In most cases, a car wheel is inflated to 2-2.1 atmospheres. Do the same with trailer tires. However, the pressure in the wheels of a walk-behind tractor trailer can be significantly less. For example, a cargo trailer for a car or motoblock model UAZ-8109 (Ishimmashzavod) allows only 1.1 atmospheres. The Skif-500 and Skif-700 models are designed for the same indicator.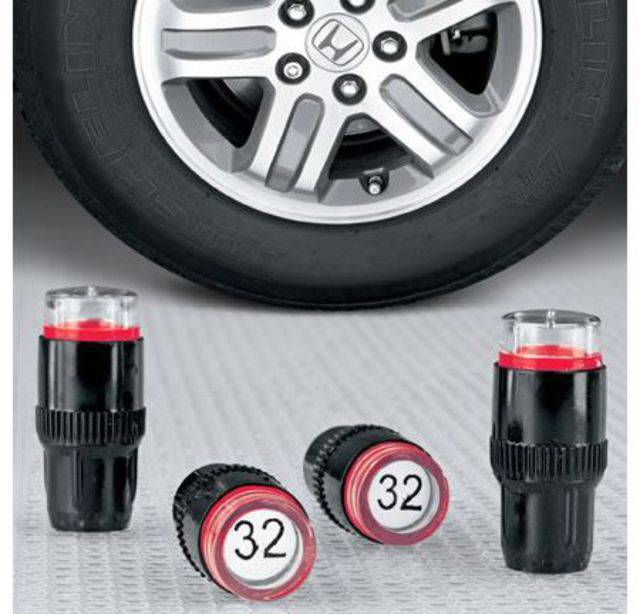
Boat trailer tire pressure does not fall below 2 atmospheres. However, the boat trailer model 81771A of the Moscow Special Vehicles Plant allows pressure up to 2.1-2.4 atmospheres.
Summer Drive Protection Sound Comfort
Rating:
4.5
Tires Goodyear Eagle F1 Asymmetric 3 SUV
Summer Drive protection
Rating:
4.5
Tires Goodyear Eagle Sport TZ
Summer Drive protection
Rating:
4.5
Tires Goodyear EfficientGrip 2 SUV
Summer Drive Protection Run On Flat
Rating:
4. 5
5
Tires Goodyear EfficientGrip Performance
Winter Drive protection
Tires Goodyear UltraGrip Arctic 2 SUV
Winter Drive Protection Sound Comfort
Rating:
4.5
Tires Goodyear UltraGrip Ice 2
Winter Drive Protection Sound Comfort
Rating:
4.5
Tires Goodyear UltraGrip Ice SUV
Winter Drive protection
Tires Goodyear UltraGrip Performance+ SUV
All season Drive Protection
Rating:
5
Tires Goodyear Vector 4Seasons Gen-3 SUV
Summer Drive Protection Run On Flat
Rating:
4
Tires Goodyear Wrangler HP All Weather
All season Drive Protection
Rating:
4. 5
5
Tires Goodyear Vector 4Seasons
Summer
Rating:
4.5
Tires Goodyear Wrangler All-Terrain Adventure with Kevlar
Summer Drive Protection
Rating:
4.5
Tires Goodyear EfficientGrip SUV
Summer Drive Protection Run On Flat
Rating:
4
Tires Goodyear Eagle F1 Asymmetric SUV
Tire pressure can be checked at any workshop.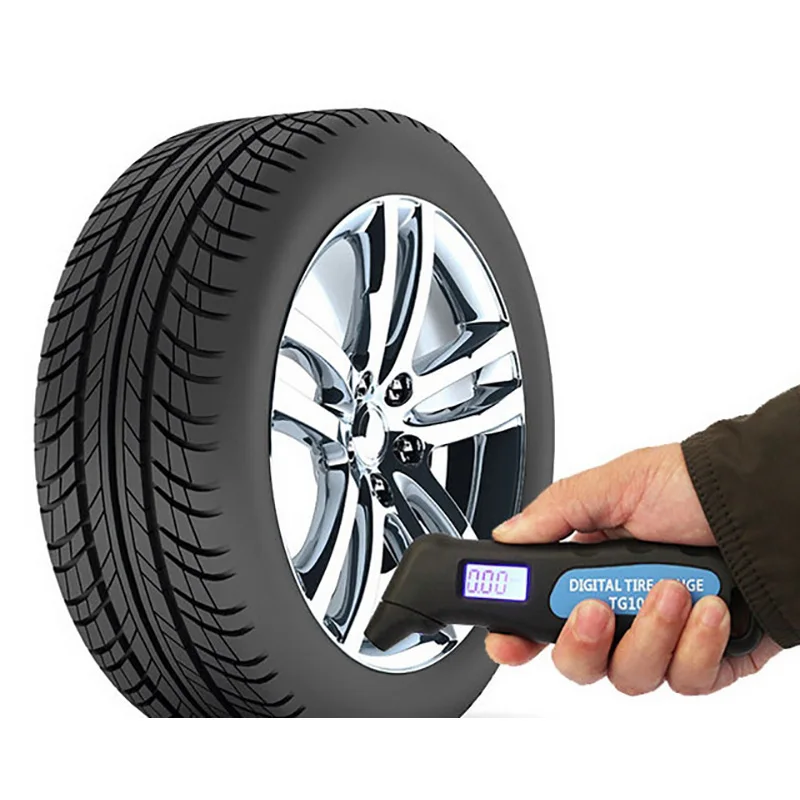 In addition, this can be done with a pressure gauge by connecting the device to the tire nipple. If you don’t want to check tire pressure for money or mess with a pressure gauge, buy a simple display system (caps with labels) or a full-fledged controller connected to a car computer via a wireless channel. Using these devices, you can control the amount of atmosphere in the tire at any time.
Why do this? First of all, to extend the life of the tread. If you overinflate a tire, the tread will wear off in the central part of the contact patch. If you carry loads on a flat tire, the tread will wear off along the edges of the contact patch. In any case, the wheel will last no more than three years (and not 4-5, as stated in the passport).
In addition, to prolong the life of the wheels, you need to think about the degree of appearance of the trailer structure and the speed of the hitch. If the operation of trailers for a walk-behind tractor does not allow a load of more than 500 kg and a speed of more than 80 km / h, do not try to carry a heavier load in the body. And under no circumstances accelerate above the speed limit. Otherwise, the structure will fall apart on the move or push the car into a ditch, using the force of inertia when passing a sharp turn.
Find Goodyear tires for your car
Thinking about tires for our motorhome.
1. The standard size is 225/75/R16, from the factory we ordered a car with winter tires, since a larger dimension is planned for the warm season, which, in fact, this post is dedicated to. By the way, pay attention to the factory marking of tires - "VanContact Winter". The manufacturer seems to be Continental, but this is not indicated anywhere on the tires.
2. After the sale of Defender, I slowly sold out two dead sets of tires through Avito (Goodrich 33" with 30% tread remaining and a studded "winter" 13 years ago, for which a buyer was found on the same evening). Left behind the garage the only spare tire that has never been used. Accordingly, this is the regular size of the Defender.
"California"), the plan is "almost 32", but to be honest - 31.7". The clearance will increase by 3 centimeters, and the speedometer, instead of overestimating the speed by 3-4 kilometers, will underestimate it by about the same amount. Regarding the consumption on the highway, in theory, the increase should be insignificant, since after a hundred, the van’s aerodynamics mostly begin to influence, but we usually don’t drive much above 100 km / h, because there is nowhere to rush.
Another significant plus for me is an increase in driving comfort on bad roads and primers after lowering the air pressure in the tires. The 33-inch wheels of the three-ton Defender, bled to 1.6 atmospheres, gave the feeling that you were floating imposingly over broken asphalt.
The situation with "California" was different. The loaded minibus weighed the same three tons, the 29 "rubber flattened a lot under such pressure, the comfort, of course, increased, but it was incomparable with the Defender - it was still shaking noticeably.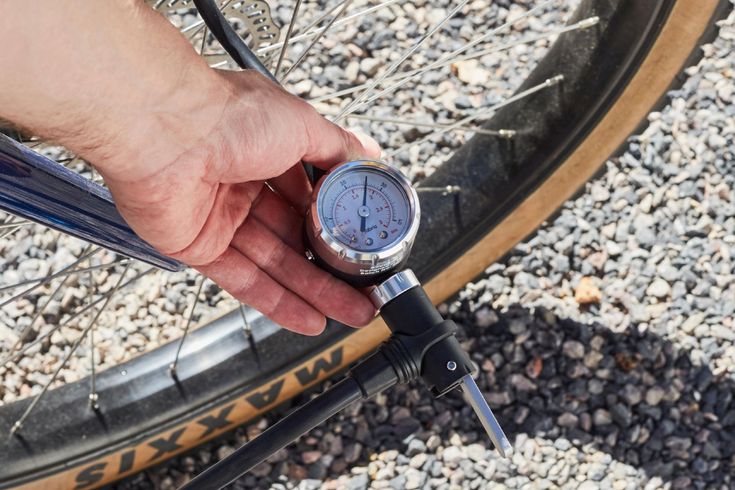 And this despite the fact that on the Defender there were exactly 2 tons, and the minibus had an almost perfect weight distribution along the axes and sides.0005
I really hope that 31.7" in this question will still be closer to 33" than to 29". :)
Nothing rubs or catches anywhere.
6. Full size spare wheel basket folds down.0389
7. With the help of dancing with a tambourine, depressurizing to zero, a mallet and a normal balonnik, the defender wheel is still placed in a standard basket.
8. But, as they say, there are nuances. The wheel fits back-to-back and only in a deflated state, with air pressure inside, does not want to. After installation, you need to pump an atmosphere and a half there, it still has nowhere to go. By the way, on the Bus, I just "tamped" the spare tire into a regular place. The left arrow is where the wheel lay down as it should. Medium - here the protector rests on the diagonal spoke of the basket, as it does not fit in width. You have to put something on. The right arrow is the spare tire mounting bracket.
If you look closely, you can see three holes on the bracket of the basket itself, but the top two are twisted. There is an idea that if you twist it one bolt lower, then putting the wheel in place will be much easier. But this has to be found out by experience. The main thing is that the rubber fits under the rear overhang and you don’t have to be smart with the gates or finding a place inside the cabin.
Summing up.
Of the benefits — clearance, patency (I plan to take AT, because the lion's share of the way — it's hauling on the highway), comfortable movement at low pressure, the strength of the rubber outside the asphalt.
Of the minuses - the complexity of installing a spare tire, the consumption will at least change upwards, the weight of the wheels will also be greater (I didn’t think to weigh the standard spare tire for comparison, but I’ll fix this moment), the load on the transmission is higher.