Biketoworkday is supported by its audience. When you buy through our links, we may earn an affiliate commission. Learn more
Written by Gary Johnson / Fact checked by Henry Speciale
Part of maintaining your bicycle is replacing its bike tires. Even though bike tires are made to be durable and long-lasting, there will come a time that you need to replace them. It will keep the overall performance of your bicycle at the optimum level.
But, how much does it cost to replace a bike tire? Depending on your bike needs, a bike tire usually costs from $15 to $150. The brand also affects the bike tire replacement cost.
Table of Contents
Bikes have specific bike tire requirements. For instance, you cannot install a small-sized tire to large bikes. The tire cannot accommodate the weight of the bicycle, making it hard to use on the road. Basic tires, which fit into commuting bikes, cost $30 to $40.
Road bikes, on the other hand, require compact and narrow tires. You normally use these on highways with flat tracks, so they do not require extra features for durability and do not cost as much. You can find road bike tires for $25.
For mountain bikes, tires showcase strength and resilience since they venture rocky and challenging terrains. You use them for adventure cycling, thus, they also need to bedurable. You will find these kind of tires with prices from $80 to $150.
Then, you have the hybrid types, which usually cost around $50. Tires for children’s bike and BMX requiring small wheels are cheaper at $15 to $25.
2. Bike weightThe bike weight also affects your new bike tire cost. If you have heavier equipment, it is crucial you find tires that accommodates the bulky equipment. The tires must be resilient and durable. It must have strength and elasticity to withstand rough and hard terrains.
3. Bike qualityThe quality of the equipment has a direct affect on the pricing of the tires you need. When you are using a high-standard bicycle, more often than not, s a similar standard of bike tires is required. Quality increases the tire requirement as well as the cost.
Of course, choosing high-quality bike tires is ideal. Strong and durable tires can go a long way compared to low-cost ones. It is worth spending on premium bike tires given the longevity it provides.
Oftentimes, brands correspond to quality. If you want to invest in bicycle tires, brands matter. You should select a good brand with outstanding reputation in the cycling industry. High-end brands offer warrant and after-sales service.

Like any other product, bike tires come with several features. Some products offer a good grip, strength and durability, high speed, and high mileage. The more features you want, the higher the cost.
6. SizeBefore replacing your bike tires, it is crucial to measure the bike rim size to know the cost to replace a bicycle tire. For a regular road bike, you can use a 700 tire as it can easily mount to 700c rims, which are normal for road bikes. If you are using smaller road bike or gravel bikes, go with the 650b tire size.
Mountain bikes normally use 27.5 inch tires or 650b size. You can also use 29 inch wheels depending on your preference. It is important that you conduct a brief research or ask a bicycle shop staff about the tire size needed for your specific bike type.
TPI or treads per inch is also an important factor to consider when buying bicycle tires. The TPI indicates the number of individual threads of nylon or cotton on the tire casing. If you choose a tire with lower TPI casings, you will observe fewer and thicker threads on the tire.
Meanwhile, tires with higher TPI casings usually have a greater number of threads with thinner features. Basically, most cyclists choose higher TPI bike tires because they provide a comfortable ride feel and has strong rolling resistance. However, compared to tires with lower TPI, they are sensitive and respond faster to punctures.
8. Rolling resistanceRolling resistance or Crr refers to the energy lost when your bike tire rolls across a surface or terrain. If you are constantly biking on hard surfaces, the tire will always be in contact with the road causing deformity.
Rolling resistance corresponds to factors like construction, rubber compound used for the tire thread, inflation, and width of both the tire and the tread. If your priority is rolling resistance, pick a bike tire with higher tread counts.
It has better rolling resistance compared to tires with lesser number of tread. For road bike use, a minimal tread count with flexible casing is sufficient.
To give you a clearer picture about the cost to change a bike tire, here is a simple price guide:
1. Low-end bike tireLow-end bike tires, typically manufactured in China or Taiwan, for replacement will only cost you $12 to $50 per pair. They are are only ideal for recreational purposes and cannot be used for road bike adventures. Since they are the cheapest kinds, quality can be compromised.
2. Mid-range to high end bike tireIf you have some cash to spend, and do not want to compromise quality, you can choose tires from this category. These can fit entry level mountain bikes. They are already durable and can last for a longer period of time with proper maintenance. These tires cost around $20 to $70 per pair.
For those heavily invested in cycling as a sport, you must pick the best quality bike tires. These typically cost $75 to $150 per pair. They are made by big bike brands and are made in Europe, Japan, or the United States.
They are the most preferred types of every bike athletes. These tires are made of premium quality materials, resilient, powerful, and durable. You can also expect the tires to last longer because they can withstand punctures.
Bicycle tire is a crucial element that can affect the performance of your bike. You have to pick the appropriate and most excellent bike tire for your equipment. Since there are a wide range of products available in the market, you can get confused about the right costing of a bike tire when you need replacement.
Good thing, this guide on how much does it cost to replace a bike tire gives you the information on how to properly choose bike tires as well as the bicycle tire replacement cost. We also mentioned about the best brands for your reference.
Gary Johnson
“I ride my bike to work for years, but is that enough? Our carelessness towards our surroundings has taken a toll on the environment. And now, everyone is responsible for changes; even the most minor contribution is counted. With this hope and spirit, I started with my partner to establish Biketoworkday to help more individuals commute to their work sites on their bikes.”
Cycling Tips
Bike tires are one of the most important parts of a bicycle, and they can also be one of the most expensive. Depending on the type of bike and the type of tire, the cost of replacing a bike tire can vary greatly. Here is a look at the different factors that can affect the cost of replacing a bike tire.
Based on the quality of your equipment, replacing a bike tire would cost anywhere from $50 to as much as $240. The initial cost is high but its a one-time expense that is going to last you for years and save you much money in the long run.
Table of Contents
| Name | Approximate Price |
| Bike Tires | $15 – $80 |
| Bike Inner Tubes | $8 – $20 |
| Screwdriver | $8 – $20 |
| Allen key/hex wrench set | $3 – $20 |
| Tire pump | $10 -$50 |
| Two levers | $5- $30 |
| Tire repair kit (Optional) | $8 – $20 |
| Total ( Approximate) | $57- $240 |
Once you have purchased the tools to repair your bike, all that is required in terms of cost are either new tires or tubes. However, there are other cost considerations that should be taken into account, especially when you think about the expenses incurred in case of an accident.
The cost of replacing a bike tire varies based on the type and quality.
For example, if you are using Schrader valves then it will be less expensive than with Presta valves. The choice between tubes or tubeless tires also influences the price point. Tubes tend to range from $50-$75 dollars, while tubeless can start at $100 for one wheel and go up depending on what type they’re buying.
For an average rider over rough terrain there should typically be no more than two sets of new bike tires in their lifetime – so replacement is going to happen eventually!
There’s not really any set time frames for replacement, but there are warning signs to look out for.
Tire treads can start to wear thin and the rubber starts to break down which means it’s not doing its job of protecting your bike or you from crashing on uneven terrain.
You may notice a sudden drop in air pressure without any explanation as well as noticeable cupping or wearing along the edges where contact with ground typically occurs.

The following tools are needed for a one-person tire replacement:
If you don’t have any spare tubes with you When replacing tires on bikes that have rim brakes or derailleurs which may need adjustment after installation, it’s best to wait until after those adjustments before inflating your new tire.
There are many different types of bike tires available for your bicycle. Some of these include:
Tubeless tires – These tires have no tubes and are designed to fit over a rim without using air. They are also called tubeless ready tires.
Tube-type tires – These tires use tubes to hold air inside them.
Clincher tires – These tires are made of rubber and have small knobs (called “clinchers”) on their sides
Road bike tires – These tires are designed for road bicycles and are generally wider than mountain bike tires.
Mountain bike tires – These tires were originally designed for off-road cycling but now they are commonly used on road bikes as well.
Cross country bike tires – These tires have tread patterns that allow them to grip better when going up hills and through rough terrain
Gravel bike tires – These tires provide traction on gravel roads and trails.
Freestyle bike tires – These tires feature large knobs that help the rider maintain control while spinning around at high speeds.
BMX bike tires – These tires resemble cross country bike tires but are smaller and narrower.
Kids’ bike tires – These tires come in various sizes and shapes and are designed specifically for children.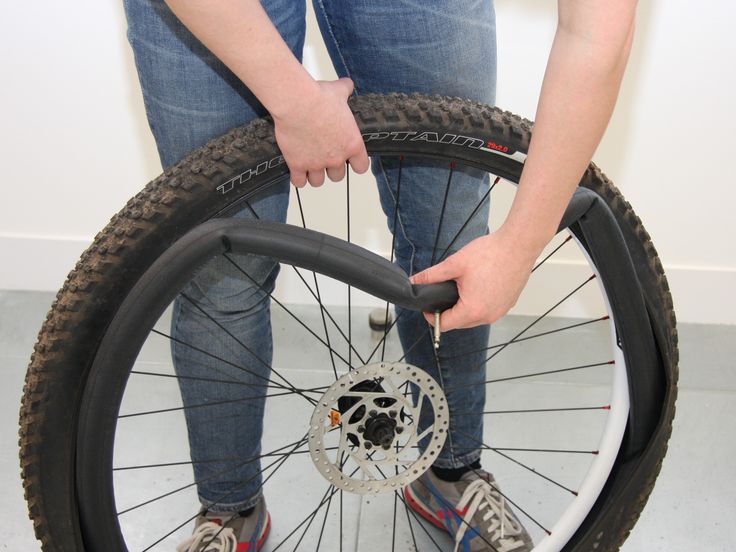
When it comes to choosing bike tires, there are a few things you need to keep in mind. You want to make sure that the tires you choose are the right size for your bike. You also want to make sure that they are the right type of tire for the type of riding you do. And finally, you want to make sure that they are durable and will last long.
The width of your bike tires must be appropriate for the rims on your bike and inflating them to the correct air pressure. The width of the tire affects how much contact it has with the ground, which in turn affects how much grip and traction you have. Wider tires also tend to be more comfortable because they absorb more vibrations from the road.
The tread on your bike tires is the part that comes into contact with the ground. It is what provides traction and grip, especially when riding on wet or slippery surfaces. The deeper the tread, the more grip you will have. However, deep tread can also make the tire heavier and slower. You’ll need to strike a balance between grip and speed when choosing your tire tread.
There are many different brands of bike tires, and each brand has its own strengths and weaknesses. Some brands are known for making fast tires, while others are known for making durable tires. Do some research to find the right brand for your needs.
Some bike tires come with special features, such as puncture-resistant layers or reflective strips. These features can be beneficial, but they also add to the cost of the tire. Decide whether you need these features or if you’re willing to pay extra for them.
Rolling resistance is the force required to keep a tire moving forward. It is affected by the width of the tire, the tread, the pressure, and the material. Wide tires with deep treads will have high rolling resistance, while narrow tires with shallow treads will have low rolling resistance.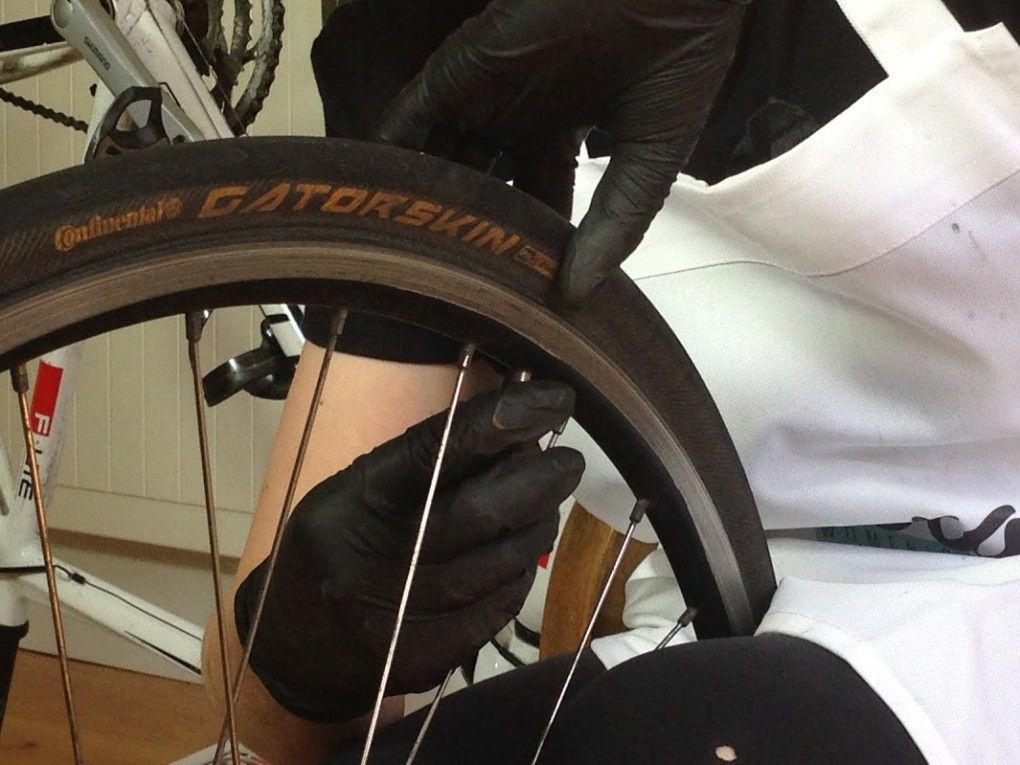
TPI stands for “threads per inch” and is a measure of the density of the threads in the tire. The higher the TPI, the more densely packed the threads are, and the smoother the ride will be. However, high TPI tires are also more susceptible to punctures. Choose a tire with a balance of durability and comfort.
it is important to know how much it costs to replace a bike tire before getting on the road. This will help you be prepared in case of a flat and know how to budget for future repairs. With a little practice, you can change a bike tire yourself and save even more money. So get out there and enjoy the ride!
It depends on how much riding time it gets! The average lifespan lasts about one year before needing replacing again.
Yes, bike tires can go bad. How long a tire will last depends on the type of terrain it’s ridden over and how well it is maintained.
The average price for a bike tire ranges from $15 to $70. It will depend on the type of equipment required and where you are going to have the tires replaced.
Replacing a bike tire is not an easy task. It requires the right tools and equipment to complete this project, so if you are unsure about what to do, take your bike into a bicycle store.
Yes, you can replace tires on a bike
You can find out if your bike needs new tires by taking a look at the tread on the tire. If there is visible wear, then it is time to get new tires. If your bike has good tread and is still riding well, it means that it doesn’t need new tires and you should continue using them until they start wearing down more than usual.
If you have a puncture, it is always best to replace the whole tire because if the tube is not in good condition, there is a chance that it could leak air and cause more damage.
Post Tags: #Replace a bike tire
Harold Williams
Author
Name and scope of work performed
Cost, rub. The service also includes the first free maintenance within a month after assembly.
Crankset replacement with pedal reset
600
Replacement of the rear switch (with adjustment)
700
Replacement of stars (including removal/installation of the connecting rod)
Replacing the carriage/cartridge (including removal/installation of connecting rods)
replacement of pedals
300
Front derailleur replacement (incl. chain removal and installation)
800
Rear derailleur roller replacement
300
Shift cable jacket replacement
400
replacement of rattles / cassettes
400
end / lubrication of shirts without saving the cable
400 9000 side (includes gearshift adjustment, but does not include brake adjustment)
800
Adjustable shifter replacement (1 side)
700
Split bottom bracket overhaul (only if replacement is not possible)
from 1200
Adjustment of the front/rear switch
450
Repair/replacing the chain with length adjustment
400
Lubrication of the shirt of the switch cable without removal
9000 with removal and washing600
Transmission cleaning (includes surface cleaning of stars and washing of the chain with dismantling)
1100
Transmission washing with complete dismantling (includes dismantling of all transmission components)
2000
Washing transmission with full dismantling and switching to paraffin lubricant (includes dismantling all components of the transmission)
2500
Removal of a collapsible carriage of
400 9000 bicycle)
800
Cleaning and lubricating the shifter (includes blowing the shifter with high pressure air and lubricating without disassembling the shifter body)
500
Hydraulic brake replacement incl. Safeing the hydrolyania, pumping, adjustment (one side)
1400
Replacing or shortening the hydrolyania with pumping (1 side)
1000
Replacement of a potassium disc brake with an adjustment of
800 9000 adjustable (one side)
600
Replacing front/rear rim brake
700
Replacement of the brake cable shirt
400
Brake disk replacement (rotor)
300
Brake -handed handle replacement (1 side. Dismantling and installation of flu and configuration)
9000Replacing hydraulic potassium/ handles (1 side, including removal and installation of grips, adjustment and bleeding)
1100
Brake cable replacement (without adjustment)
300
Correction of brake disc curvature (excluding the cost of adjustment)
from 300
Mechanical cleaning of the brake disk with a dismantling
600
pumping of the hydraulic brake (including trading liquid) (1 side)
800
Adjustment of the front/rear rim brake
9000 400Adjustment/posterior adjustment disc brake
300
Cable sheath lubrication (without removal)
200
Trim disc brake mounts
500
Brake disc (rotor) cleaning (without removal)
300
Replacement of a potassium of a hydraulic disk brake with adjustment and pumping
1100
Perenoption of a potassium discharge brake
Perenoption of a potassium/handle of a hydraulic disk brake
90009000 "eight") (NOT including tire fitting)
from 600
Rear hub drum overhaul on balls (includes additional hub overhaul)
2000
Boil of the rear wheel sleeve with a grease without a drum, taking into account the removal/installation of rattles/cassettes
1000
Boil of the front wheel with a lubricant
600
Breeding the rear sleeve (if there are hills)
from 1000
Bulkhead of a single-speed road hub with foot brake
1000
Bulkhead of the front hub on industrial bearings (if bearings are present)
600
Re-spoke (rim/hub/spoke change) without spokes (NOT incl. tire fitting, cassette/ratchet/brake disc removal/installation)
1600
Re-spoke (rim/hub/spoke change) with retain
1800
Rim and hub selection
300
Front hub cone adjustment
rear hub adjustment3 ratchet/cassette mounting)
600
Tire service (tube / tire change): on the rear wheel of a bicycle with foot brake / with planetary hub / with additional wheels
600
Tire service (tube / tire change): wheel with nuts (replacement tube/tire): eccentric wheel
400
0004
700
Converting to a tubeless tire (not including materials)
1000
Wheel assembly using a strain gauge (category 1). Includes the assembly of the wheel from individual components. It is performed using a strain gauge (a device for determining the tension on the spokes around the entire perimeter of the rim). Includes free needle pulling for 2 weeks after assembly.
2000
Wheel assembly using a strain gauge and nipple clamp (category 2). Includes assembly of the wheel from individual components, as well as broaching performed within a month after the assembly of the wheel. Nipple washers and/or nipple threadlocker may be used during assembly. It is performed using a strain gauge (a device for determining the tension on the spokes around the entire perimeter of the rim). Includes free needle pulling for 2 weeks after assembly.
2300
External cleaning/lubrication of the shock -absorption fork
200
Sprinkling of the thread on the threaded rod of the fork
300 per 1 cm. Threads
Replacement of the cycle fork (vkl. Removal
1500
Replacing the steering column with pressing out the cups
1000
Threading 1, 1 1/8 on the threadless fork stem
400 per 1 cm. Threads
Breeding a steering column with a lubricant
700
Selection and replacement of the rear switch “Petukha”
500
Adjustment of the pressure in the air spring of the front/rear shock absorber
9000Regulation/adjustment/adjustment/adjustment/adjustment/adjustment repair of the folding mechanism
from 200
Repair (editing) of the cock rear derailleur bracket *No warranty
400
Installing the anchor in the fork stem
300
Elimination of the steering column play
300
Roll replacement (VCL installation/dismantling of manners, brake handles are paid separately)
9000 9000 500Grip change (pair) without saving
200
Grip change (pair) with save
400
Seat change
300
Front shock absorber zero maintenance
1500
that front shock absorber I - category (spring ammoretors)
1500
The front shock absorber II - category (shock absorbers with air spring) (Dpry maintenance is not included)
9000Complete the front shock -absorption with an air spring
from 2500
Restoration (running) of the bottom bracket thread on the frame without body kit
600
Restoring (driving) the thread with a pedal tap in an aluminum crank
400
Restoring (running) the thread with a tap for a pedal in a steel crank (if the crank cannot be replaced)
600
Restoring the thread in the crank by installing a 900 repair sleeve 9003 900
Manufacture of a "rooster"
from 2000 (from 5 working days)
Locksmith work (standard hour)
1200
Complicated replacement of the carriage with the need to restore the thread of the bottom bracket shell
dated 2000
shortening of the seatpost
400
Corruption of the steering wheel
600
shortening the rod of the plug
400
Replacement of the frame (dismantling, tuning equipment with regulatory)
4500
Complete overhaul of the bike with detailed washing, lubrication and adjustment of all serviceable components (except for the shock absorber overhaul)
6000
Packing the bike in a box or bag for transportation (includes packing material, as well as detailed advice when transporting the bike) except for threaded connections inside the fork, shock, telescopic seatposts, shifters - in accordance with the recommendations of the manufacturer)
1000
Complete bicycle wrap (excluding material cost)
2500
Partial bicycle wrap (excluding material cost) wheels, complete cleaning and lubrication of the transmission with the dismantling of individual components (rear derailleur, cassette, system), if necessary, as well as the removal of traces of adhesive tape, bitumen, stickers and other stubborn stains.
5000
Installation of trunk
of 600
installation of wings (uncomplicated) (includes the set of wings without the need to finalize, cutting threads, etc.) of the wing itself or frame)
500
Installation of wings (complicated) (includes installation of a set of wings with modification (drilling, threading, etc.) of the wing or frame itself.)
from 500
Installation of the holder of the flask
200
Installation of the children's chair
from 700
Installation of additional wheels
of 400
Installation of the rear switch
100
installation of protection on the front star
of 200
9000100
Installing the mirror (without removing the grip)
200
Installing and programming the bike computer
from 700
Installation of the basket
dated 400
installation of the footboard
200-500
Installation of horns
Installation of lighting equipment (pcs. )
)
dated 100
Delivery of a bicycle from the client to the workshop and back
from 1000
Departure of a mechanic (within St. Petersburg and Leningrad Region)
from 1000
Delivery of a bicycle from the client to the workshop or back
from 500
03/05/2013
Probably the most common failure for a cyclist is a tire puncture, especially if he rides in an aggressive style. Either he hit the glass, then a nail, and sometimes he just ran into the curb at speed. Experienced cyclists can change the camera in the bike with his eyes closed, but what about a beginner who can’t even remove the wheel, let alone change the camera. The main thing is not to despair! If you are traveling a long distance (and always better), take a pump with you, a spare tube, or, in extreme cases, a "bike first aid kit" for the wheel. Someday she will save you from the fate of pulling the bike "on yourself".
So, if you punctured the wheel , first you need to get off the bike, in no case continue to move on a flat tire . Firstly, you will tear the tube even more, and secondly, you can ruin the tire, and in the worst case, the rim.
How to change the tube on a bicycle
1) If the wheel has not completely deflated, deflate it to the end, to do this, unscrew the nipple (spool) cap. If you have a nipple (spool) the same as in the car, press something sharp on the small button in the middle and hold until the tire is flat. If you have a cap with a key for the spool, then just unscrew it. If you have a nipple (spool) like in old bicycles, unscrew the lamb and take it out.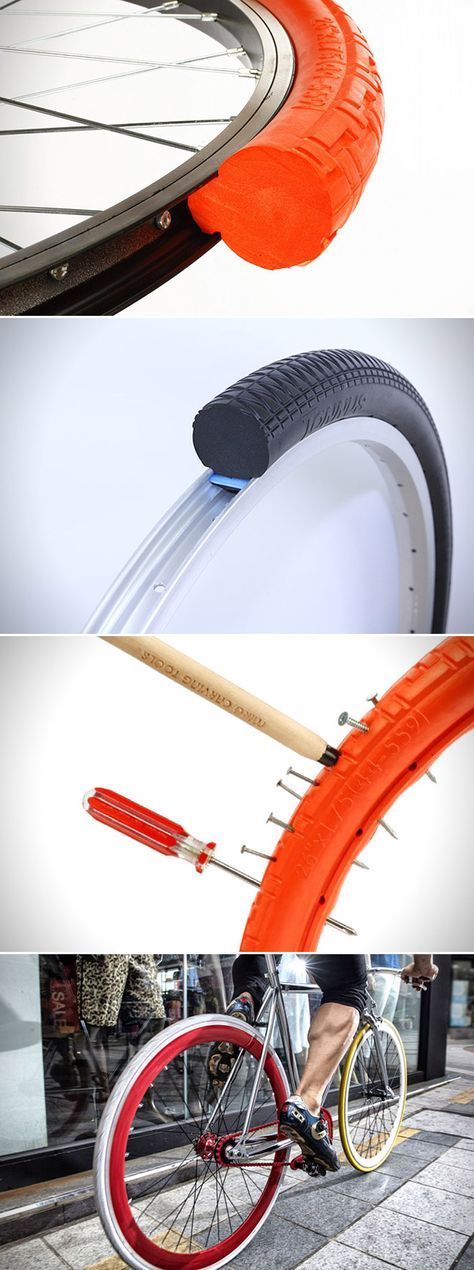
2) Remove the wheel. If the wheel is on an eccentric, removal will not cause difficulties, if not, then keys will be needed (depending on the bike and wheel - 13-17).
3) If you have "pliers", use them to remove the rim from the wheel, if there are no pliers, you can use an improvised tool (wrenches, etc.), but it is advisable not to use objects with a sharp edge - this can lead to damage to the tube or rim. Tear the tire with your tool and, resting it against the rim, press down until the edge of the tire comes out of the rim, then take the second key or mount and do this action again, while NOT removing the first key. When you feel that the keys do not lean back when you release them - just try to move the second key in a circle away from the first key.
4) Remove the camera by simply grasping it with your fingers. Grasp the opposite side of the nipple (spool).
5) In principle, you can insert a new tube, but I recommend removing the tire completely (this can be done by hand or with pliers (wrenches)).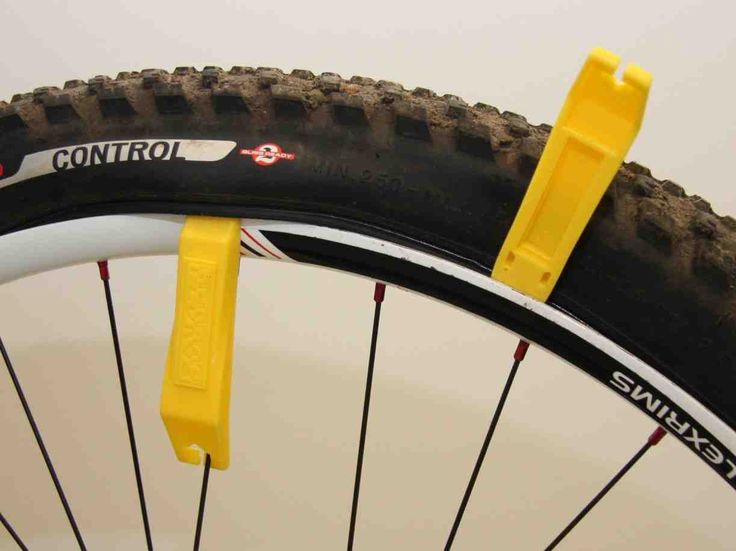
Check the condition of the rim: there are no metal burrs inside, check the condition of the rim tape, look inside the tire. This should be done if you change cameras frequently and don't know where you might have blown a tire.
How to install a tube in a bicycle wheel
1) Take a new tube or a sealed tube (how to glue a tube), squeeze it with one hand and move it around - this will help to clean it of unwanted foreign objects (rubber pieces, metal chips, etc.) .d.)
2) Lightly inflate it, if you removed the tire completely, put it on one rib (if the rubber is directional - make sure you install it correctly (you can peek at the rear wheel if the treads are the same)). Roughly mark where the hole from the nipple (spool) is, put the chamber into the tire without twisting or breaking it. Insert the spool (nipple) into the hole and screw on the cap.
3) With your hands (if the tire is soft) or using the same tool, slide the second rib of the tire onto the rim.