Big improvements can be made in virtually anything via small, free adjustments. These changes aren’t set rules that need to be followed in order to gain an edge, rather certain things you need to test to find the optimal settings.
Tire pressure is one of these factors within the cycling world. Most people just inflate their tires until they feel hard and then go for a ride. Some people may Google the optimal tire pressure for what they’re riding but very few will actually work towards getting the perfect pressure for their riding style.
We are going to explain the best tire pressures for each form of riding in this article but we’re going to concentrate on explaining how to optimize your tire pressure and find the perfect pressure for your preferred riding style.
How to Measure Tire Pressure?Even without a puncture or leak your tires will very slowly leak some air. This can be a result of regular use or a long period of no use. I am oversimplifying this fact as certain tubes and properly installed tubeless tires will take a long time to lose a significant amount of air but the fact remains that it does happen.
Tire pressure fluctuations can be caused by factors other than normal use. Temperature, humidity, pressure and rider weight are all things known for affecting. BMX tires are normally ridden with highly inflated tires. This excessive pressure can affect the hardware and increase the speed at which it loses air.
After reading that you're probably not surprised that I recommend checking your tire very regularly. Advanced riders check their tires before every ride but personally I check mine every week or after every few trips. It's important to develop a habit of checking them regularly without it being too much of a hassle.
There are two ways to check the pressure in your BMX tires. The most obvious is to use a tire pressure gauge. These are normally quite cheap, small in size and super easy to use. Pressure gauges are very simple. Simply press the valve hole onto the tire's valve and then read the meter. The reason it's so simple is that the technology is too. The device will open the valve and allow some air into its chamber, all it has to do then is read the pressure of the air that is pushing on it.
The most important thing when buying one of these products is to get one that fits your innertubes. If you didn't already know, there are two types of valves on a bike. The Schrader valve is the most common. A shorter stem and a rubber cylindrical tube topped with a metal threaded section will help you discern these from the less common Presta valves. These are the tall ones with no rubber and a thin threaded stem. It's highly unlikely for a BMX tire to be using a Presta valve but it's worth mentioning in case you are one of the few that do. A lot of pressure gauges and pumps will come with the functionality of measuring both types of tube but it's always important to check because if you buy the wrong one.
Regular pumps are the second method, most people will use. As the products have improved and the technology has cheapened, it's become very common to find pressure gauges built into the pump itself. Unless you're buying one for portability pressure gauges for BMX riding has become pretty obsolete. Pumps with gauges built-in are now small enough to carry anywhere you need to go while also having the benefit of being able to pump up your tires if need be. The method of use is the same as I mentioned above. Just press onto your valve and read.
Topeak SmartGauge D2Similar to Lezyne, mentioned below, Topeak has been creating cycling accessories for people to use alongside their bicycles. Instead of joining the saturated market of bikes and bike parts, they decided to put all their effort into the things that keep your bike working properly.
Pressure gauges are one of these products. There are so many different variations of pressure gauges that it’s hard to describe the anatomy of the product after the obligatory valve adaptor.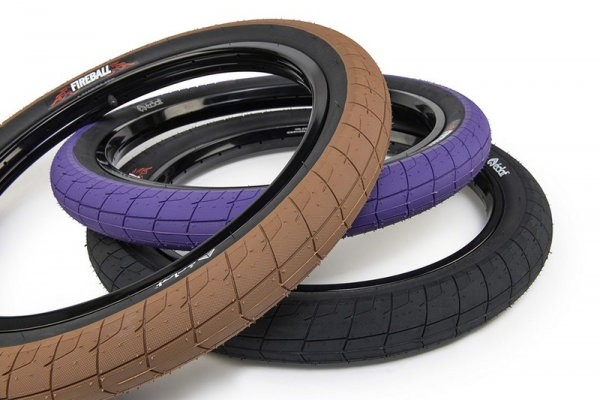
Topeak themselves have nearly 10 different pressure gauges to choose from. All of a similar size and all providing the same functions.
I included the SmartGauge in this post because of the clear screen, easy to use buttons and overall functionality. The gauge can read both Presta and Schrader valves without any extra equipment. The super easy to read screen can show tire pressure in multiple units. The head of the reader can also be rotated so the screen can be read easily at any angle. The reader has a max pressure reading of 250 PSI and is suitable for tires, suspension forks and rear shocks.
Click Here to Check Best PriceTubeless vs Inner tubesTubeless tires were long-only used on cars and motorbikes. Due to the cheapness of inner tubes, bicycles never completely adopted tubeless tires.
Recently you may have noticed tubeless tires becoming more and more popular. The technology involved in creating wheels and tires suitable for tubeless riding has become better and better.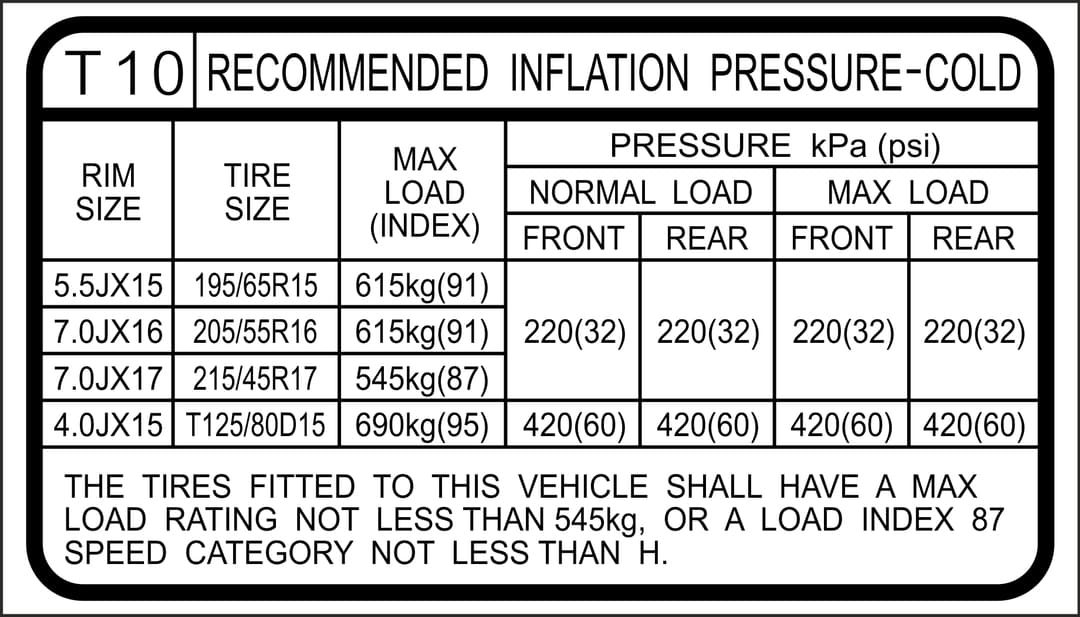
In a tubeless setup the tire, rim and valve are manufactured to create and keep a perfect seal between them. A liquid sealant is often injected inside the to plug any small holes or imperfect areas.
Many bike rims are now tubeless compatible. This means you can attach a valve to the rim and use the wheel without an innertube. It’s great knowing you can switch over to tubeless if you want to but I personally wouldn’t on a BMX.
My reluctance for going tubeless on my BMX is predicated on the fact most of the advantages of tubeless tires are nullified by the basics of BMX setup.
Firstly, a big advantage of tubeless wheels is the ability to run your wheels at lower tire pressures without risking punctures from pinching the innertube. This is great for mountain biking but as you’ll read in this article, there is never any need to have soft tires on a BMX.
The other big issue for me is when you do end up getting a puncture. A sealant is injected into the tires to self fill small punctures before you lose any air.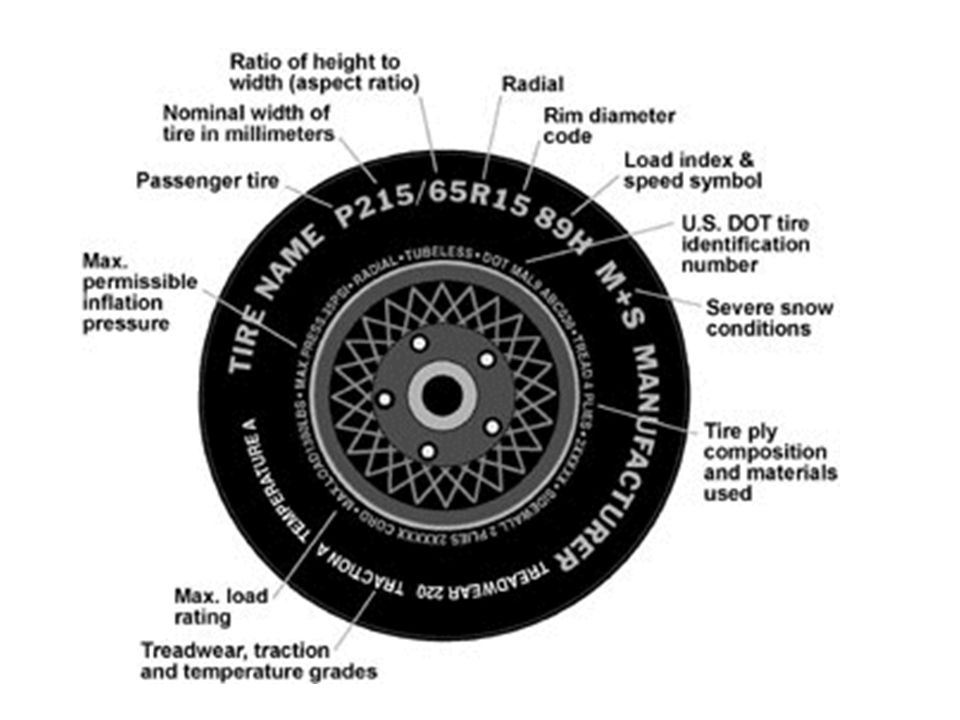 This is great when riding soft tires but hard BMX tires are often reported to simply push the sealant straight through the puncture hole.
It depends! Before I get into the details, professional riders often ride with harder tires.
Both lower tire pressure and fatter tires will offer greater shock absorption at the cost of rolling resistance. Lower tire pressures will offer less balance and an increased likelihood of pinching your innertube and getting a flat, while fat tires may not always fit a BMX and can make it a little harder to control.
In my opinion, harder tires will be better for most riding. Saying ‘harder tires’ doesn’t mean both front and back need to be the same, I think a slightly softer or thicker tire on the back is better.
The softer front tire will keep your bike agile and easy to throw around while the back wheel will protect your wrists from hard landings.
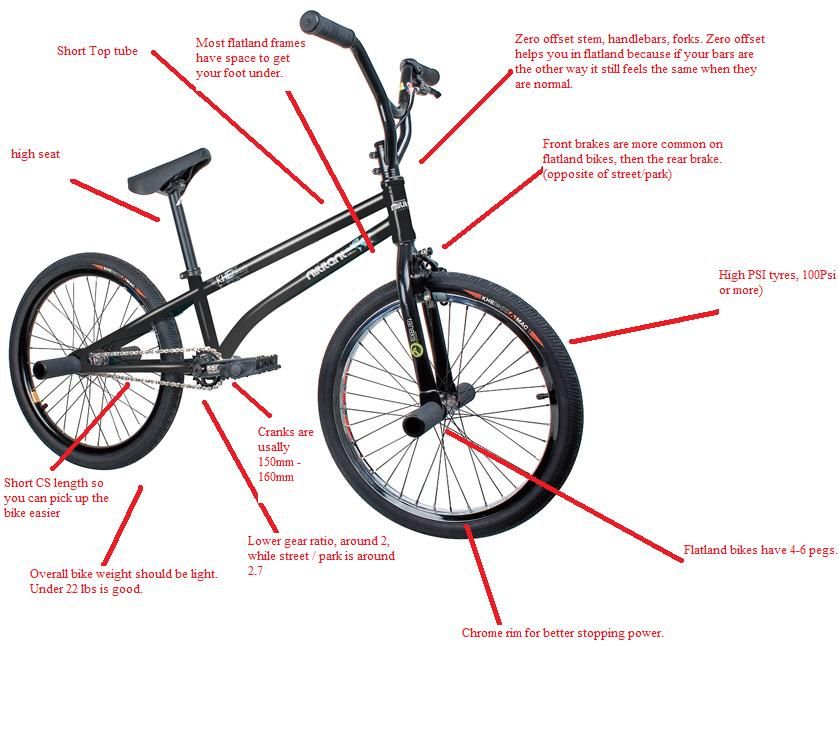
On a final note, different riding styles have different preferential pressures. The two main examples of this are flatland and dirt jumping, the two most opposite styles.
Flatland bikes need harder tires as it’s very floor centric and requires a super nimble bike that gives a lot of feeling. On the other hand, dirt jumping is a lot closer to MTB and can benefit from slightly softer tires. The trails are never as smooth as concrete and you can get some hard landings. It’s important to still keep your tire out of the pinch flat zone when setting up for dirt jumping though.
What PSI should I use?If you’ve read the sections above then you’ll have probably realised there is no definitive answer to the best PSI for BMX, although there is a range of the pressures you should test before aiming for a certain one indefinitely.
The following recommendations are based predominantly on personal preference and averages. Remember that most tires have a maximum tire pressure of around 100 - 110 PSI, while pinch flats happen around 30 - 40 PSI.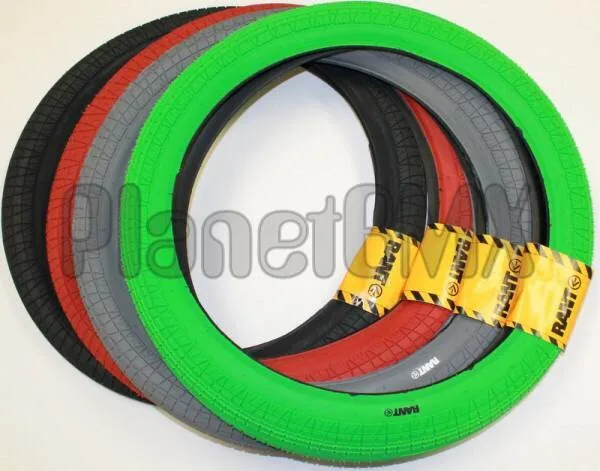 Different sized riders of different skill levels could benefit from different pressures but I think these are a good base digit for most people.
Dirt jumping on a BMX is a complex mix between BMX and mountain biking. Dirt jump tracks designed specifically for DJ bikes and those for BMX bikes can vary quite drastically in terms of smoothness and quality.
For these reasons, it’s quite hard to recommend a specific tire pressure for this type of riding. Presuming you only ride high-quality tracks for BMX bikes I would recommend a relatively hard tire with a slight variation between front and back wheels. Personally I think around 85 in the front and 75 in the back would suit dirt riding well.
Street riding predominantly consists of harsh surfaces, unpredictable terrain and big landings. Unlike park riding where you know pretty much every surface will be smooth and every ramp is dialled in, street riders thrive on the complication of riding anything and everything.
For this fact, I advise having a slightly softer tire, around 55 - 75 PSI. This will protect your wrists while keeping your bike nimble. I would also keep both tires at a similar pressure. This figure is only described as soft relative to the other figures I’ve recommended on this list, the tire should still be quite hard.
As I mentioned above, park riding is a little more forgiving than street riding. The jumps and gaps are often bigger but you can trust the surfaces a little more. The ramps are also professionally designed and, as long as you land correctly, will give you a relatively smooth transition.
I think park riding has the widest range of tire pressures. It’s probably the most popular discipline with the widest range of body types and skill levels. Having said that, my recommendation is around 80 PSI.
Many people ride skateparks with much harder tires, sometimes around 100 PSI, but I think 80 PSI is great for the vast majority of people.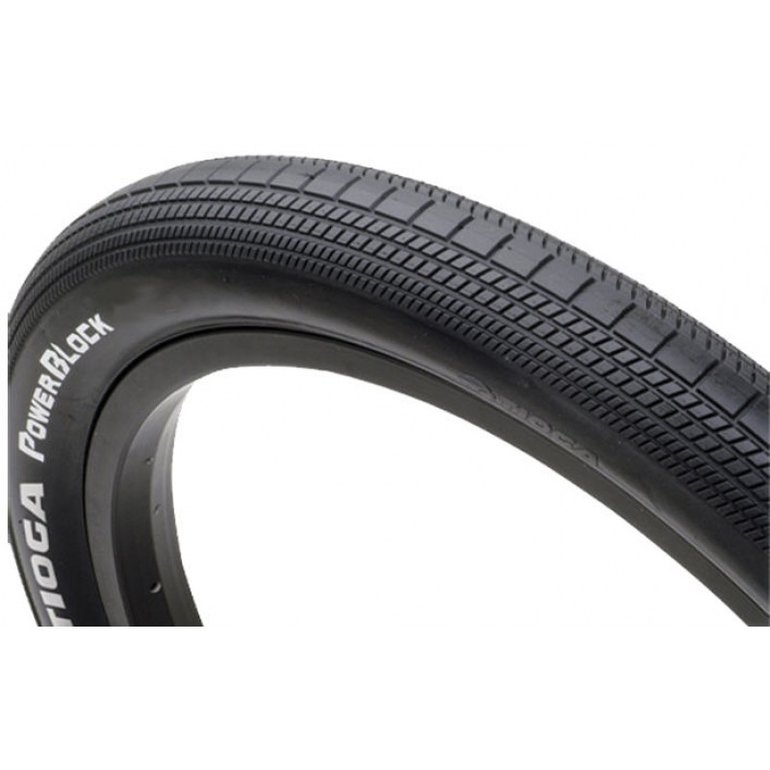 It’ll be a little less forgiving on hard drops but the speed and agility of your bike will be much better.
Bike pumps are developed in various types and sizes. Foot pumps are operated by repeatedly standing on a lever. These can have single or dual cylinders and sometimes pump a large volume of air.
Secondly, there are handheld pumps. Larger pumps are placed on the floor, held in place by your feet and then operated by lifting and lowering a handle with two hands. These pumps are larger and relatively un-portable. People usually buy floor pumps to store in a car or garage.
Finally, there are handheld pumps. Very simple and self-explanatory as you simply hold the pump and slide the plunger with one hand. These are great for taking on a ride and often really help out when you get a puncture far from home.
There are so many different bike pumps out there and the technology in each is so similar to the ‘best’ bike pump is hard to define. I will list a couple of my favourite pumps by way of build quality and aesthetics below.
Micki Kozucheck, an icon in German cycling, created Lezyne after several similar companies in March of 2007. This new company aimed to bring some high quality to the world of cycling parts and accessories.
Instead of creating bike parts, Lezyne has instead focussed on accessories and mechanical products that are used alongside your bike. The market lacked high-quality manufactures that built these parts.
Bike pumps are one of the products the company has put a lot of effort into creating. If you’re looking for the best quality pump possible then Lezyne is probably the place to go. Some of their products sell for hundreds.
I’m including the Micro Floor Drive pump in this post because it’s pushing the boundaries in terms of the current technology and quality of handheld pumps.
After unfolding the super portable pump you’re presented with a small metal stand to place your foot and a one-handed plunger. Similarly to the tall floor pumps, you keep this pump in place via your feet while pushing down on the plunger from above.
Unlike many handheld pumps, Lezyne has added an advanced, digital pressure gauge display. Using this will be much clearer and more accurate when pumping your tires to the pressure you’ve decided to use after reading this post.
Click Here to Check Best PriceHow to Put Air in Bike Tires?Putting air into your bike tire is easy when you know how. It’s very similar to adding air to your car or motorbike tires.
The first step is to remove the valve stem cap from your bike. Your valve cap will easily unscrew from the valve.
Next, connect the pump to the valve. This technique is different depending on your bike pump. Most pumps will have you press the connector onto the valve and then lock it on with a lever. Some pumps will just push onto the valve and some may screw on.
Inflate your tires by using the bike pump. Bike pumps can be done by hand, foot or with an electric pump.
Once your tire pressure feels hard or has reached your desired tire pressure you can stop pumping and remove the pump from the valve.
If you’re happy with the pressure then replace the valve cap and carry on riding.
How Long Do BMX Tires Last?BMX tires will last varying amounts of time depending on how much you use your bike and how hard you ride. Riding on gravel or dirt may wear your tires down faster as there’s a lot more factors affecting the friction. Anyone riding with brakes and skidding a lot may see their tires wear down faster.
I would expect my BMX tires to last at least 4 - 5 months considering the amount of riding I do.
How much does it cost to replace a BMX tire?A BMX tire can be replaced quickly and easily. The tire usually costs between $20 and $50 depending on the brand and type. If you aren’t capable of fitting the tire yourself then some bike shops may charge in the region of $10 to complete the fitting.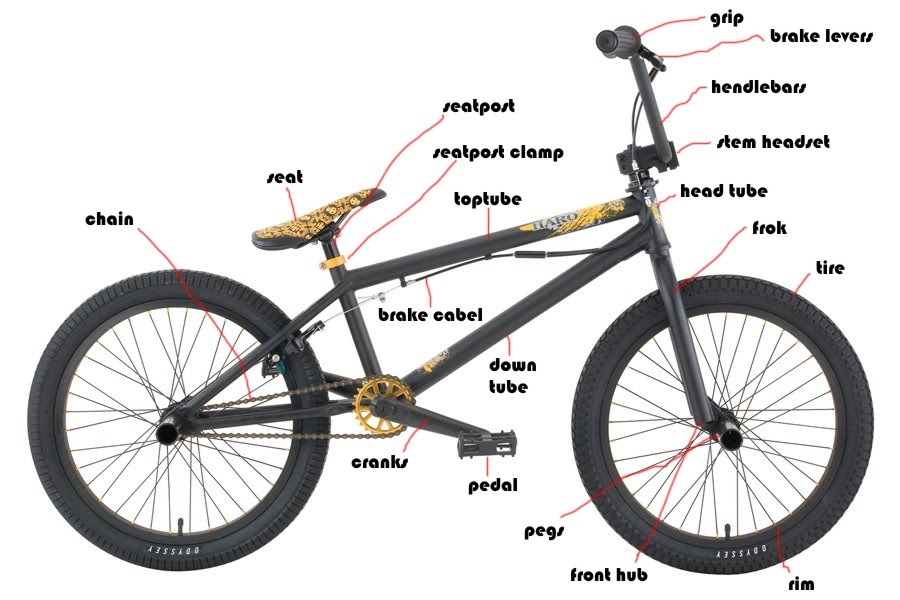
Lowering your tire pressure is easier than inflating them. You need to start by removing your valve cap.
If you have a presta valve you need to unscrew the top of the valve. Once fully unscrewed you can simply press on the top to release some air. Stop pressing the valve when you’re finished deflating the tire.
Schrader valves are the ones you often see on cars. They are ever so slightly more tricky to deflate. Once you’ve removed the valve cap you need a nail, a screwdriver, a valve cap or something else sharp. You need to press this item into the centre of the valve. You’ll see the pin that needs pressing.
How to Check Bicycle Tires Without a Gauge?There’s no way to accurately check your tire pressure without a pressure gauge. There are a couple of tells that will indicate you need to inflate or deflate your tires.
Road bike tires need to be very firm. When you press on them side to side you shouldn’t be able to feel much movement.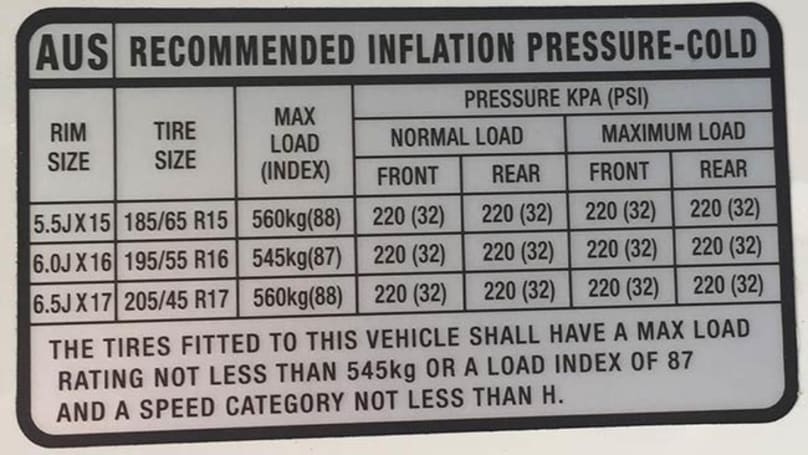 If you can then you need to inflate your road bike tire.
On a mountain bike you should get on your bike and look down. If the bottom of your tire protrudes wider than the top of the tire by more than a few millimetres then it needs some more air. On the other hand, if you squeeze the tire and it’s rock hard then you need to let some air out.
How to Convert between BAR and PSI?To convert from PSI to BAR, divide the PSI by 1.01. BAR is a metric unit of pressure but not bart of the International System of Units. 1 BAR is around the same amount of pressure as the Earth’s atmosphere at sea level.
Previous Article
Best YouTube Channels
Next Article
BMX Websites
Having the right PSI in your bike tires can make a world of difference. However, it would be an oversimplification to say that less air offers a more comfortable ride and more air makes you go faster.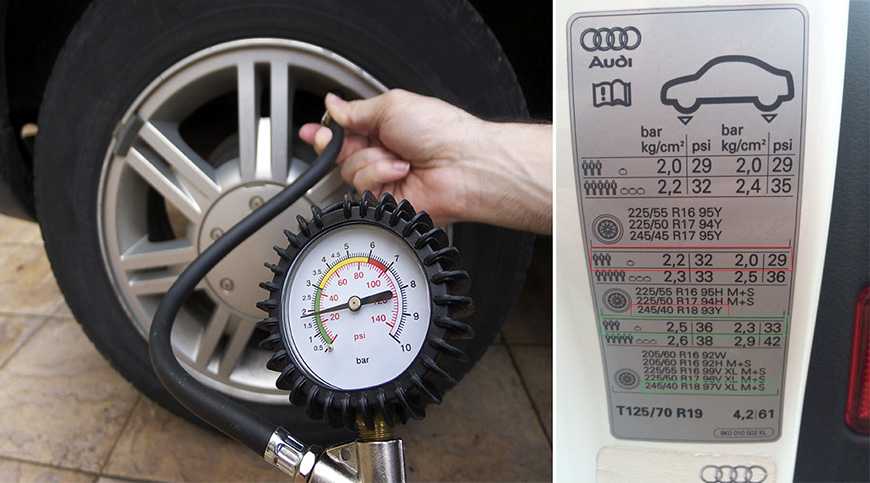 While this is true in many instances, the fact of the matter is that proper inflation for optimal performance depends on the individual rider and his or her bike.
Every tire has a recommended psi printed on its side close to where it touches the rim. This is usually written as a range (for instance, "90 to 115 psi") since there are reasons why you'd want to be on the higher or lower end, which we'll get into shortly.
Basic rule of thumb if your tires happen to not indicate a recommended pressure: pump them up until they're firm but still slightly squeezable. Alternatively, there are generally-accepted ranges based on bike type:
| Bike tire type | PSI range |
| Kids' bike tires | 20–40 PSI |
| Narrow tires / road bikes | 80–130 PSI |
| Medium tires / hybrid bikes | 50–70 PSI |
| Thick tires / mountain bikes | 30 PSI (off-road) 50 PSI (on-road) |
Road bikes and tires are built for speed over smooth surfaces. Higher air pressure lets them roll easier and faster. A typical range for these would be between 80 and 130 psi, although racers can sometimes go as high as 160 psi. Quick tip if you're caught inflating a road tire without a gauge and need to ballpark it: at 100 psi, a tire can barely be compressed with your thumb.
Unlike roadies, mountain bikes are flying over loose, bumpy terrain. Tires with too much air lead to too much bounce, making for a jolty ride. Lower pressure helps with shock absorption while also giving you more traction since more of the tire comes into contact with the ground. MTB manufacturers recommend between 30 and 50 psi on most of their bikes since this is a nice balance between on-road (closer to 50) and off-road (closer to 30) riding.
Hybrid bike tires require pressure levels between those of road and mountain bikes. This is usually in the 50 to 70 psi range. Kids' bikes have the lowest recommended inflation, typically 20 to 40 psi. Keep in mind that these are called "recommendations" for a reason, though. A number of factors go into the inflation process beyond just your style of bike.
Which leads us to…
Because nothing in life is ever as simple as it should be, we've included a few more things to ponder when it comes to making sure everyone's tires are in good shape for their next ride.
As a general guideline, more weight = more pressure. Whether you're competing in the Tour de Whatever or shredding up the backcountry, heavier riders should use a higher psi than lighter ones to see the same performance in their tires. For perspective, someone weighing in at 200lbs will probably want to pump in around 20 more psi than someone who's 160. There's no real slide rule for this, so just play around with the pressure and see what feels best for you. Also keep in mind that rear tires tend to carry more weight than those in front, so adjust accordingly as necessary.
We know through physics that temperature affects air pressure. So, all else being equal, people biking in Miami in August are going to have higher pressure in their tires than people biking in Boston in January. In addition to weather, sustained deceleration using rim brakes generates friction that can increase temperatures inside the tube significantly. Fortunately, they also cool off relatively quickly, but it's something to keep an eye on during long descents. It may also be worth mentioning to your burgeoning roadster as he or she is learning the basics of hand braking.
In short, don't do either. If you overinflate, you run the risk of blowing the tube either while pumping or while riding due to sudden or constant impact. If underinflated, the low pressure could cause pinch flats. This occurs when the tube becomes squeezed between the rim and tire casing by hitting a bump with an underinflated wheel. Not only does this damage the tire, it can also hurt the rim. Plus, flat tires slow you down and make you pedal harder, which is just no fun.
"How often should I inflate my tires?" is a common question among many casual bikers. The answer depends on how often and how hard you ride. Some people break out the pump every few days, others once a week, and still others even less regularly than that. Even if you or your kids have left your wheels in the garage for months, air tends to seep out slowly, anyway. Therefore, as a bike-safety best practice, just like a car it's certainly never a bad idea to check your tires before each ride. Especially if it's been a while.
The pro's choice, floor pumps do a great job. They are easier to pump and attach, and will pump your tires up much quicker than a hand pump will. Some come with gauges, which eliminate 1) the need to switch back and forth between a pump and standalone gauge, or 2) if you're really lazy, outright guesswork.
However, some expert cyclists are cautious of floor pumps with gauges, as the accuracy of the gauge can svary and may be off by as much as 10 PSI. On the plus side, if the gauge is consistent you can calculate the difference and adjust your target PSI to compensate.
It may be tempting to simply use the air compressor at your neighborhood Exxon, but these are less than accurate and can often overinflate your tires (it's a gas station, they're meant for cars). For serious riders whose circuits take them far from home, a small hand pump can help you change a flat on the fly. Carbon dioxide inflators accomplish the same thing if you're an air-in-the-can kind of guy.
Essential for any enthusiastic cyclist, hand pumps are harder work to fill the tire with, and aren't as quick. But they're transportable, so you always have your pump with you. It's simply foolish to embark on any long distance bike ride without your trusty hand pump and puncture repair kit.
So there you go, we hope this quick guide to bike PSI pressure was useful. To recap: figure out what feels most comfortable based on your particular cycling style. Go with that. Keep an eye on your pressure, and check it before every ride. You'll get a feel for it over time. Like, literally.
When buying a bicycle for themselves, many do not even think about the fact that the convenience and comfort when riding it is achieved by properly selected tire pressure. The service life of the bicycle, the speed of riding, the degree of tire wear, safety, control of the two-wheeled friend depends on how the wheels are inflated.
Many cyclists believe that inflating the tires is only necessary for a good bike ride. However, flat tires have a wider area of contact with the road, which means that grip will be better, but it will be very difficult to accelerate to a speed of 30-35 km / h on such tires.
When inflating your tires, you should always consider the type of terrain or surface you will be driving on. If the walk is supposed to be on an asphalt road, the tire pressure of the bicycle should be close to the maximum allowable value. Elastic wheels on a flat surface will provide a smooth rolling and high speed of movement.
For cross-country riding with unpaved paths, it is better to set the tire pressure to medium tolerable, so that you can ride long distances in comfort and convenience. At high pressure, the grip of the wheel with the road will be minimal, respectively, all holes, pebbles, and bumps on the road will be sensitive. And with flat tires, the likelihood of damage to the wheel or puncture of the chamber increases.
In order to protect yourself on the road, as well as to keep the bike or its individual parts intact, you need to know exactly the lower and upper limits of permissible values, to what pressure the bicycle wheels can be pumped.
Information about tire pressure gives you an advantage when cycling:
Forget the old "grandfather" way to check the wheel with finger pressure. No need to rely on tactile sensations, trying to feel with your hand the degree of rubber penetration on the tire. The air leaves the wheel gradually, through the pores in the rubber. Within 2-3 weeks, the pressure decreases by 0.1-0.2 atmospheres, but you cannot determine this with your fingers. The exact value at any time will help determine the pressure gauge that every cyclist should have in his arsenal. With its help, it is simple, with a minimum error, the level of pressure in bicycle tires is measured. A pump with a pressure gauge (floor or manual) will become an indispensable tool for cyclists.
There are three standard values in which bicycle tire pressure is measured.
kPa = 14.504 PSI
All these units are used to some extent - in different countries, by different manufacturers. For residents of Russia and the post-Soviet space, the change in bars is more familiar, since this unit is clearly associated with the pressure of the 1st Earth's atmosphere at ocean level. In America and Western Europe, a popular unit is PSI, as they actively use pounds and inches in measurements. Pascals are the least used unit of measurement, but the most modern. Some bicycle manufacturers write data on the wheels about the allowable pressures in all three systems.
Manufacturers indicate on the sidewall of the tire how many atmospheres to pump the bicycle wheels. Specifies the range within which the owner of the "iron horse" determines the desired values, depending on the specific factors of riding his bike. Values in the range are labeled from min to max, in two or all three dimensions. Numbers up to 10 are atmospheres (or BAR), tens-hundreds are PSI, and six-digit values \u200b\u200band with the prefix “k” / kilo are Pascals.
When inflating a tire, you must strictly follow the manufacturer's recommendations and try not to go beyond both the minimum and maximum pressure levels indicated on the tire. Moreover, it is better to leave a small margin of 0. 2-0.5 BAR, both in one direction and in the other, so that the tire does not burst.
The pressure in the wheel is kept by the tire, not the tube, so there is no single standard for its value. There are several significant factors that determine how much you need to pump the wheels on a bicycle.
Tire type is determined by the surface of the track that the cyclist will predominantly ride on. Accordingly, the level of inflation of the bicycle wheel will be different. There is a direct dependence on the roughness of the tread and the width of the wheel - the more lugs and the wider the wheel, the lower the pressure should be. Empirically, cyclists quickly determine how many atmospheres should be in the tires of their bicycle
Many cyclists do not think about the fact that air temperature affects the pressure level in bicycle tires. From the course of school physics, we recall that when heated, bodies expand.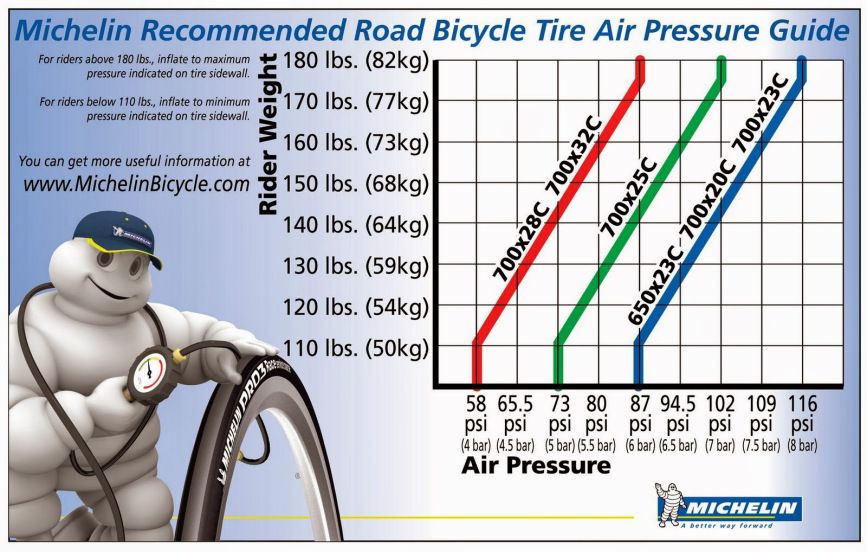 This means that in hot sunny weather, the pressure inside the air chamber will increase without additional pumping. Conversely, on cold winter days, a decrease in tire pressure is quickly felt due to low temperatures. So, when going for a bike ride in the cold season, the pressure indicators need to be adjusted a little higher than usual, and in the summer heat, let the air out a little. It is worth noting that when going on a bike ride, you should always take into account the weather conditions.
It is important to consider the load on the bike created by the weight of the rider, especially the fact that most of it is on the rear wheel. Therefore, the degree of its pumping should be slightly higher than the front, the optimal difference is 10%.
To calculate the optimal tire pressure for a bicycle, given the weight of its rider, you can use the table:
Rider weight (kg) Pressure (atmosphere) Pressure (PSI)
The nature, riding style and type of bicycle also affect tire pressure. Buyers who prefer an active pastime often opt for mountain bikes with 26-inch wheels, which ride well both on city streets and in rough terrain.
To understand to what pressure to inflate the wheels of a bicycle, it is necessary to take into account the features of both the bike itself and other, at first glance, weightless factors. For example, weaving threads on a tire, rim thickness, driving style. The likelihood of a tire coming off a wide rim is much less than a narrow rim, because a wider rim will hold the tire better than a thin one. Mountain biking already by its name suggests the presence of a difficult surface on the track, with possible obstacles and bumps. The driving style is more aggressive than on a smooth, calm trajectory, it obliges you to increase the tire pressure to a level slightly less than the upper limit.
The diameter of the wheel will also affect the selection of the optimal pressure value, since the larger it is, the higher the volume of air pumped will be. However, for mountain bikes it is not so important whether the wheel diameter is 26 or 29 inches, it is much more necessary to pay attention to the parameters of the rider's weight and the type of track.
There are no hard and fast rules about how much you need to inflate the wheels on your bike. There is common sense, experience, practice. Manufacturers can recommend certain values, but only the owner himself will determine exactly which road he will ride, in what weather conditions he will drive, take into account his weight parameters or not. The decision, what pressure in the wheels will be ideal, is sure to be found.
Every cyclist is obliged to monitor the condition of his two-wheeled horse. It is from this that the envy of its service life and convenience when driving will be. When you go on your next trip, do not forget to measure the pressure in your tires. This procedure is mandatory, because it directly affects the comfort while driving.
Oddly enough, first of all, the quality of cycling, especially on asphalt, depends on the pressure in the bicycle wheels. Under-inflated wheels easily break through and extinguish a large percentage of the efforts of the cyclist, while over-inflated ones can damage the tube and lead to its rapid wear. Accurate knowledge and experience of riding will help you find the golden mean.
Many people are accustomed to checking tire pressure using the old-fashioned method with their fingers. However, this method is very inaccurate, and the concept of a “well-inflated wheel” for each cyclist can be very different. That is why it is always better to have a pressure gauge on hand in order to accurately determine tire pressure.
Its cost is quite low, so everyone can afford such an acquisition.
Contents
In fact, the optimal pressure in the tires of a bicycle is a purely individual parameter that each biker varies within certain limits for himself: according to his riding style, according to the planned track and current level of training.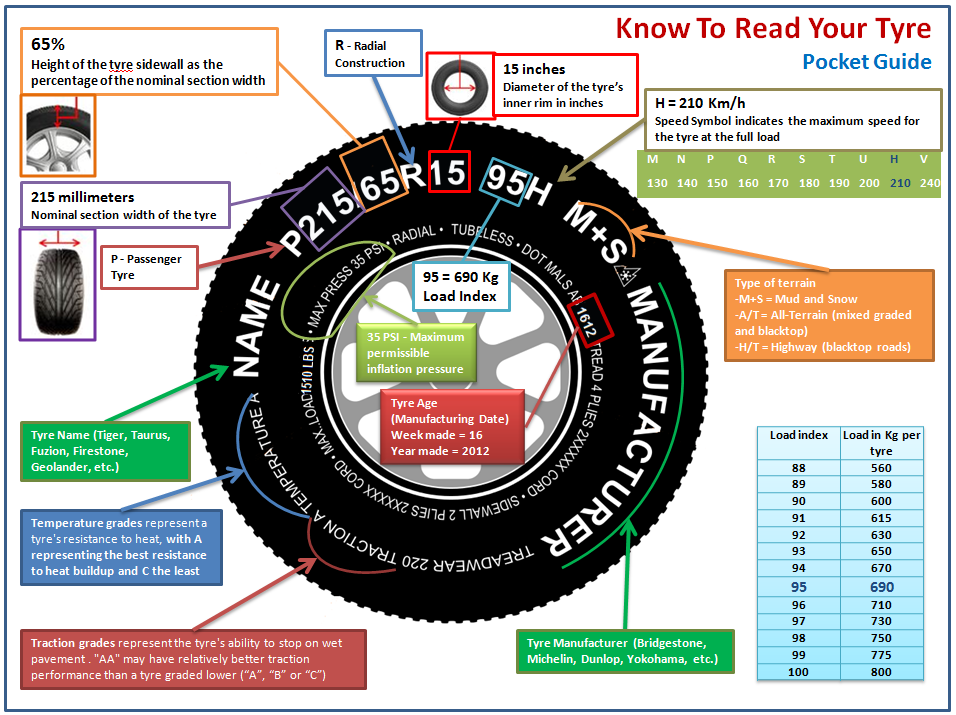 Limits are set by technological restrictions, which we will consider further.
Here are the main factors to consider when choosing the level of inflation:
Considering all the pluses and minuses, one recommendation can be made: the wheels should be inflated enough to provide good traction and not damage the tube. To do this, there are standards for what pressure is considered acceptable. We will consider them further.
If the wheels are overinflated, the bike will have a good roll, but the tire will not absorb at all on uneven surfaces. All difficult sections will be much harder, since the contact patch of the tire with the ground will have a minimum area, and you will be skidded when cornering. Needless to say, when cycling in winter, the situation is aggravated by slippery surfaces. In addition, pumping can cause the wheel to explode. Old Soviet cameras are especially susceptible to this, the material of which is already turning into dust from old age. The tire breaks from excessive pressure not immediately, but for example on a hill, where a pebble falls under the wheel. This situation is dangerous because the tire is sometimes literally torn off the wheel.
The air pressure in the tires of a bicycle also affects the "piercing" of the wheel. Pumped rubber easily collects all the carnations and glass on the road.
If the tires are flat, the situation is no better than if the tires are inflated. The tire does not fit snugly on the rim, may come off the wheel, and when driving onto a curb, a puncture may form (the so-called snake bite). The roll of the bike decreases and pedaling requires an increasing amount of force. However, when choosing between an over-inflated tire and an under-inflated one, it is better to opt for an under-inflated tire. But we must not forget about reasonable limits. If the tire drags like a rag, then you clearly made a mistake with the pressure.
The secret of the right choice is very simple: just look at the tire being inflated. Next to the information about the tire size, there will also be information about the allowable pressure range in the chamber.
Why is this information not printed on the camera itself? Because in it the only point that is subjected to real load is the nipple, and its mechanism is very reliable. Otherwise, the normal pressure, which increases by an order of magnitude with fast skating, is taken by the tire, and how much it will be squeezed is the main limitation.
So, at too low a pressure, the tire will break closer to the rim, bite the chamber, leading to breakdown, and at high pressure, it may simply burst on one of the bumps or when driving on hot asphalt.
Since many tire manufacturers focus on the American market, the most common designation is Psi. In English sources, it is usually simplified to “pound”, or pound, that is, when they say that the pressure is 2 pounds, they mean exactly Psi. This unit of measure is obsolete, used only in the USA, but, as they say, "more alive than all living things."
Intelligent pressure sensor data on smartphone screen
Bars are also obsolete units of measurement, but are actively supported in Russia and many other countries, incl. European. This unit of measurement is actively used, as it echoes the “atmosphere”, which is quite convenient for measurements.
Pascal is the only metrically correct unit from the list, but is rarely used in bicycle notation.
The ratio between all units is as follows: 1 Bar = 100,000 Pa = 14.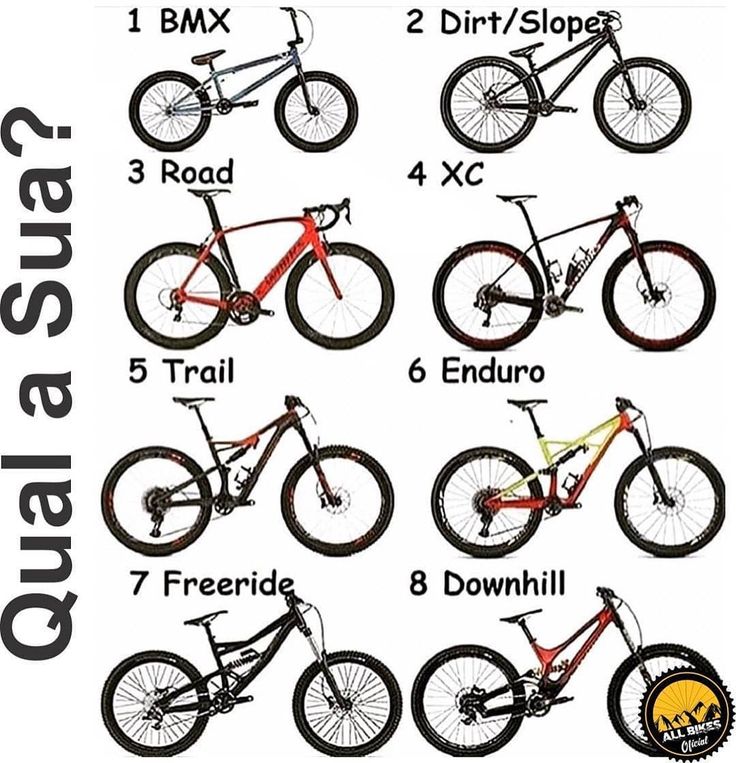 504 Psi.
What do they write on tires? For example, (2.38-4.0) is clearly atmospheres, or BAR, and (95-135) is Psi. If the number has more than 3 digits or the prefix "k" (kilo), we are talking about metric Pascal. Most often, the desired value is located under the size designation and is duplicated in BAR and Psi as a range, clearly indicating to what pressure you can pump.
Actually, the manufacturer indicates the range within which the tire can function, further - the freedom of the cyclist.
Manufacturers indicate the recommended parameters on the side of the tire. Usually they are in the range of 35 - 60 psi (2.38 - 4.08 atmospheres). But still, this is a parameter that is selected purely individually. Therefore, there are a number of recommendations that are considered common to all people.
Important! With poorly inflated bicycle tires, the tire will move towards the rim, wringing the chamber. This will deform the wheel.
When the cyclist is training on relatively smooth asphalt roads, country and forest dirt roads and paths. For this style of riding, I prefer to inflate the wheels to 3.5-4 atmospheres. Such a high value of bar allows you to achieve good speed characteristics, high rolling, but when it hits bumps and stones, the fifth point immediately feels all the bumps in the road surface.
For those who like pleasure riding at low speed on smooth park roads, 2.5-3 atmospheres will be enough. On the Internet, you can often find recommendations to pump 2-2.5 bar into the wheels, this is justified only for tires at least 2 inches wide and when driving on rough terrain or poor coverage.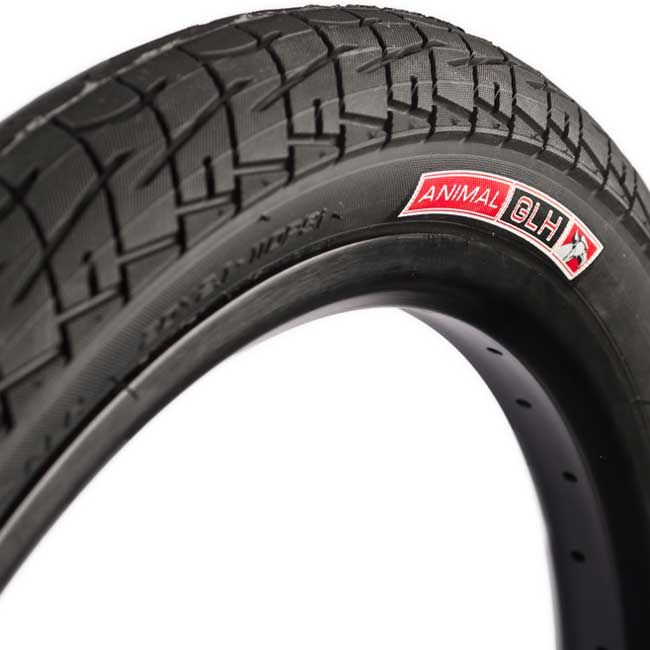 Low pressure increases traction and comfort, but reduces rolling on smooth pavement. Under no circumstances should you ride at a pressure of less than 2 atmospheres.
The choice of terrain on which you prefer to ride obliges you to choose a certain type of tire, but in general, if you have a universal tread, you can make your ride comfortable on a particular type of road surface by changing the amount of wheel atmospheres. The figures below are based on a standard 2-2.1″ tire.
For gravel, mud, grass, sandy surfaces, it is better to inflate up to 2.5 atmospheres, which increases the adhesion of the tread to the ground and allows the wheel to smooth out all the unevenness of the road surface quite well.
For smooth asphalt roads, feel free to use a pressure of 3 bar or more. However, there is one thing here. If you have a fairly bald tread (wheels with a weak relief or slicks), and you drive at high speed on wet or even wet asphalt, then you risk slipping (flying out) on a turn.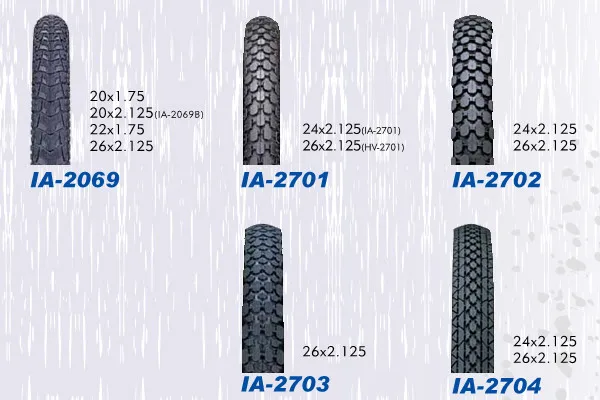 If it rains on the road, just slow down or deflate the tires slightly.
This article describes the most acceptable criteria for choosing tire pressure, but since each person independently selects the most convenient pressure values, I advise you, first of all, to experiment when mastering a bicycle.
The bicycle inner tube requires maintenance and pumping very often. Even on the most “hardy” city and mountain bikes, it is necessary to check and pump up the chamber once every 2-3 weeks, since air leaks not only through the nipple, but simply through the rubber. The high pressure "helps" the air molecules to find their way through the insufficiently dense chamber.
"City" or, simply, budget bikes, it is enough to inflate once every 2-4 weeks, mountain bikes - at least once every two weeks, road bikes - once a week, and road and sports bikes - before each trip.
Therefore, the pump is not only an emergency accessory, which is used only when a punctured tire is changed, but also a necessary part of preparation for departure. Active cyclists should consider purchasing two pumps:
By the way, the place of a stationary pump is perfectly occupied by an ordinary car pump. It is also suitable for bicycles, it shows exactly how many atmospheres are inflated, and does not take up extra space. Some people prefer to pump up on "professional" pumps at gas stations, but not having their own professional tool can play a bad joke in case of an unexpected situation or when deviating from the standard route.
Here are some tables that will help you navigate in difficult situations, namely:
Mountain bike table:
| Rider weight (Kg) | Pressure (BAR) | Pressure (Psi) |
| 50 | 2,38-2,59 | 35-38 |
| 63 | 2,52-2,72 | 37-40 |
| 77 | 2.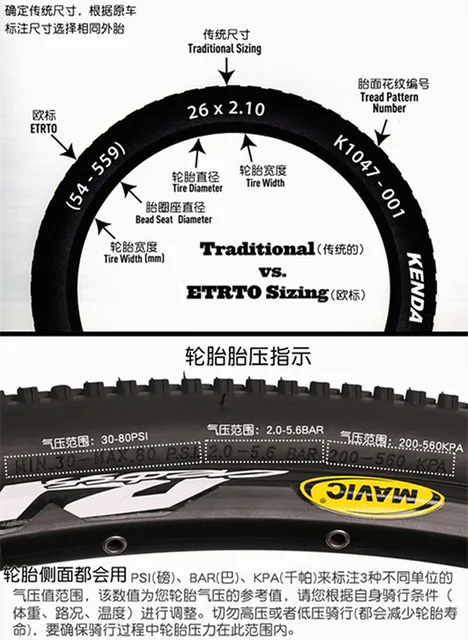 72-2.93 72-2.93 | 40-43 8 |
| 911118 | 2.86-3.06 | 42-45 |
| 105 | 3.06-3.27 | 45-27 95-|
| 118 | 3.2 - 3.4 | 47 - 50atmospheres (up to 130 Psi), up to the maximum specified by the manufacturer. Children's bicyclesFor children it is better to inflate tires to the maximum permitted value. This will make it easier to learn to ride a bike, as well-inflated tires have a smaller contact patch and require less effort for the rider. Seasonal changesSeasonal adjustments are quite serious, mainly for mountain bikes. In the summer, you should slightly underestimate the pumping and not rest on the maximum. Hot asphalt also heats the air inside the chamber, which increases the volume and, consequently, the pressure. Also, the pumped tire wears out very quickly. In winter, sometimes the maximum should be slightly exceeded in order to achieve maximum tread work, especially if the rubber is chosen with studs. Weight ChangesFor heavy riders or heavily loaded bikes, adding pressure is very important, as more weight will compress the bike's wheel and under-inflated problems can come out much sooner. The recommended pressure to add by weight is +1% for every kilogram of rider weight over 50. Approximate values by type of rubberOptimizing the level of inflation of bicycle tires depends on the type of bicycle rubber used, in particular mainly on the type of tires. If the bike is "shod" in slick or semi-slick rubber, then minimizing pressure is only permissible on hot days. As bench tests of slick (low-relief) tires have shown, reducing the level by 25.0% to the optimal level nullifies all their advantages. You can also give advice on how to inflate wheels with different tires. If the bike is "shod" in tires 2.0 ... 2.3 inches wide with cross-country treads, then the optimal pressure range is 3. Extreme riding tires (Downhill/Slalom 24″×2.10 or Kenda K905 20 x 1.95″) with compound tread, best inflated to medium recommended pressure. This will provide the necessary grip on the supporting surface. In the future, its indicator can be adjusted for specific driving conditions. BMX trick models should be moderately inflated, between maximum and minimum, in order to have sufficient traction, and then subtly varied for each trick. For winter skiing, you should choose a pressure slightly higher than normal, since at sub-zero temperatures the air in the tire becomes denser and takes up less space. How to check the pressure after inflation The exact value can only be checked with a pressure gauge. Experienced cyclists can read pressure by eye. You can inflate tires with a pressure gauge, memorize the value and squeeze the tire with your fingers. Remember the feeling, so you will learn to understand how inflated your tires are. DeterminantsDespite manufacturers recommendations, wheel chamber pressure is a matter of personal preference. Each cyclist adjusts this parameter for himself, for the track he is going to ride, for his personal riding style and level of technical training. Therefore, how much should be pumped up, everyone decides for himself. Every experienced rider knows a number of factors and operates with them:
ConclusionBicycle tire pressure is a very important parameter, you need to understand what limitations are imposed by tire manufacturers and what kind of riding style of a particular rider can be improved with just a couple of movements of the pump handle. In any case, how many atmospheres to pump at each moment is a unique decision, and it is made more on the basis of accumulated experience than according to strict rules. VideoQ&AWhat is the pressure in the bicycle tires? At 50 kg (110 lb) - 2. mountain bike tire table bar? The tire pressure of the mountain bike must be between 2.4 and 4.5 bar. What is the tire pressure on a road bike? Expensive quality road bike tires 21-23mm should have a pressure of 10-11 atmospheres. In wider or lower quality pressures are lower, the maximum value is always indicated on the sidewall. It must not be exceeded, it is advisable to maintain it before each ride. What is the optimal tire pressure for a fatbike? 10 psi - Rolled snow, paths 9022 1 psi = 0. |