Many riders experience common problems and frustrations that can be solved by understanding the subtle nuances of their engine systems. This article will take a closer look at the different transmission issues for Chinese ATVs and how to diagnose them properly to fix them correctly. Keep reading to maintain peak performance from your engines!
What Are The Most Common Chinese ATV Transmission Problems?Here are the five most common Chinese ATV transmission problems and how to fix them:
1. Gear-Shifting TroublesThe most common symptom of a transmission problem is difficulty shifting into one or more gears, referred to as “gear-shifting troubles.” Low transmission fluid levels can cause this improper cable adjustment, worn-out synchronizers, and even faulty clutches. Shift motor gears should all be tested for proper function before considering any major transmission work.
Another common Chinese ATV transmission issue is rattling or grinding noises from the clutch area when the vehicle is in a neutral or idle position. This could indicate a problem with the clutch plate or pressure plate, which should be inspected and replaced if necessary. Semi-automatic transmission ATVs may also suffer from “jumping” or jerking when the clutch is engaged.
3. Reverse Gear IssuesSome riders have reported having trouble engaging the reverse gear on their Chinese ATVs; this could be due to a worn-out clutch, a faulty gear selector, or even an incorrect drive chain alignment. Wet clutch systems may cause reverse gear problems and should be checked for proper adjustment and lubrication.
4. Slipping GearsSlipping gears occur when the engine’s power is not being transferred to the wheels, decreasing performance and acceleration. Low transmission fluid levels, worn-out synchronizers, or a faulty clutch can cause this.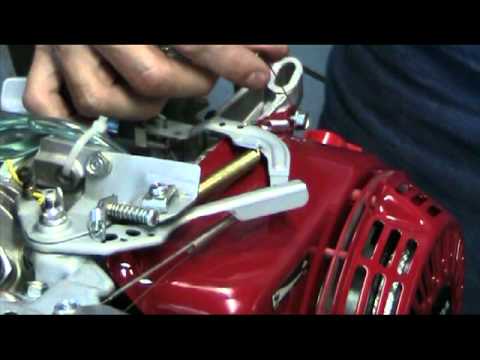
Suppose your Chinese ATV's transmission runs hotter than usual for extended periods. In that case, it may be due to poor lubrication or clogged filters, causing heat to build up inside the unit and eventually causing overheating.
How To Identify Transmission Problems On A Chinese ATV?Identifying transmission problems on a Chinese ATV is not always straightforward, mainly because the system has several components. The three main areas to inspect are the shift selector and linkage, the belt and pulley, and the engine drive shaft. That being said, by checking all of these parts thoroughly and performing regular maintenance, an ATV owner can easily spot any issues before they result in severe damage or costly repairs. Shift motor moving parts should be tested to ensure they are properly lubricated.
Carefully examining these parts for damaged hardware or excessive wear can alert you to any problems that may have arisen with the transmission.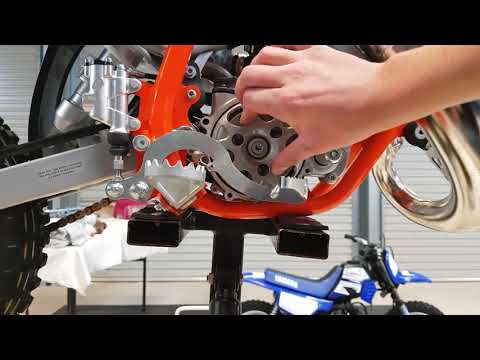 Listen for unusual noises from the area around the belt and pulley, as this may indicate something is off balance; if so, immediate action needs to be taken, as this could pose a safety hazard if left unchecked. Also double, check that all parts are secure and look at their condition for signs of damage, such as fraying plastic or rusty metal.
Several different issues can cause Chinese ATV transmission problems. The most common causes are inadequate lubrication of the gears, a damaged or worn-out drive belt cover, and poor-quality components. Inadequate lubrication of the gears can lead to grinding and slipping as they move against one another. If this is an issue, it is important to ensure that all of the moving parts are well-oiled and adjusted for proper tension. Electric shift ATVs may have a disconnected or faulty wiring harness, which would prevent the shifter from engaging the desired transmission gear.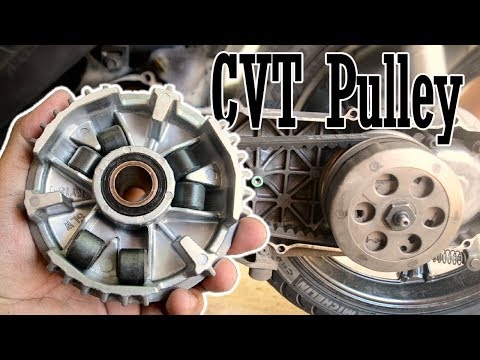 Shifting problems can also arise from worn-out shifter links and poor cable adjustment.
A worn drive belt will cause the engine to work harder than normal to move the vehicle forward, decreasing fuel efficiency and performance. Poorly made components may also cause Chinese ATV transmission issues due to a lack of strength or durability. It is essential to ensure that only high-quality ingredients are used when making or repairing an ATV. Other causes of Chinese ATV transmission problems include improper shifting, lack of maintenance, and incorrect assembly. Improper activity can result in the gears not engaging correctly and can cause grinding and slipping as they move against one another.
How To Fix Chinese ATV Transmission Problems?Chinese ATV transmission problems can be a real headache for the average ATV enthusiast, but luckily there are ways to fix them and get back on the trail. Generally, an ATV transmission problem may come from wearing linkage components, low fluid levels, worn drive belts, or even incomplete shifting.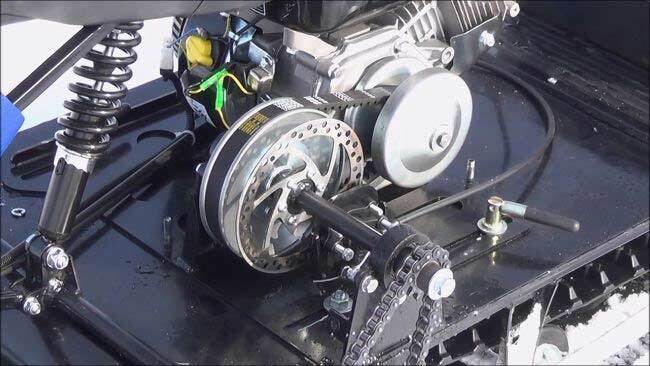 To identify the exact cause, visually inspect all related parts for any signs of wear or damage. Then, check for low fluids using either a dipstick viewer or a special adapter equipped with an oil pressure gauge. You should also inspect the shift lever, clutch, and pulley parts to ensure they are properly working.
Once the cause is determined, it can usually be solved by replacing worn-out parts or adding more transmission fluid. Additionally, full diagnostic services allow mechanics to investigate transmission problems' sources further. All in all, Chinese ATV transmission problems don't have to be daunting; most owners should be able to locate and solve their issues with minimal effort.
Tips For Preventing Transmission Problems On A Chinese ATVOwners of Chinese ATVs should take extra caution when riding, especially when crossing enormous obstacles or on rough terrain. Regular maintenance is also crucial in preventing transmission issues. Changing the transmission fluid at least once a year helps ensure that the vehicle's internals are well-lubricated and free of debris buildup. Additionally, inspecting the drive belt for signs of wear and tear often can help prevent costly repairs down the line. Finally, using only high-quality components during repairs or replacements reduces the chance of unexpected problems arising later on.
Chinese ATV transmission problems can be tricky to diagnose and fix, but with a little knowledge and patience, they can be solved quickly. Regular maintenance will also help minimize the risk of wear and tear that could lead to more severe damage. Always use high-quality replacement parts if needed and ensure all fluids are kept at optimal levels for optimal performance. If you need parts for your ATV, make sure you check out Lion Parts for the highest quality parts and all your outdoor needs!
Troubleshooting an ATV that won’t go into gear or won’t shift gears can be quite complicated, but not always. Whether you can address the issue on your own depends on the severity of the problem and your mechanical skill level.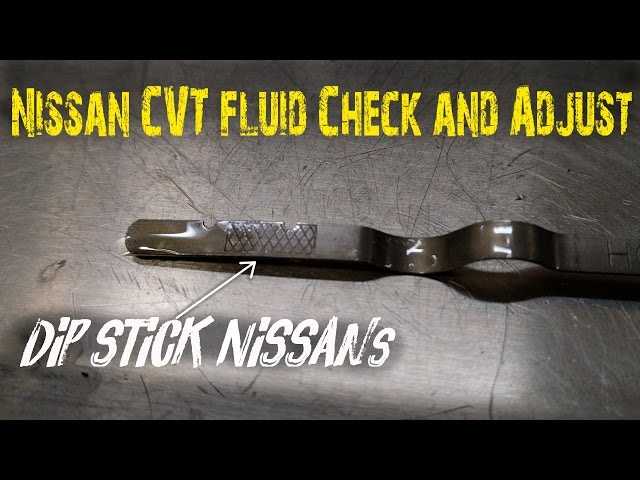
ATVs use different types of transmissions, where belted CVT transmissions are the most common. The possible causes and the steps required to solve the problem depend on the type of transmission your ATV has.
This post covers some of the most common causes if your ATV doesn’t go into gear. It is meant to guide where to begin your troubleshooting, not as a complete repair guide for all ATV transmissions.
The service manual for your specific brand and model will provide more detailed troubleshooting procedures for your transmission issues.
Check out eManual Online to get factory workshop service and repair manuals for your ATV.
Please note that it’s easy to worsen a transmission issue if you don’t know what you are doing.
Some of the repairs require special tools such as a clutch puller or a clutch disassembly tool. If the repair seems intimidating to you or you do not have the right tools, it is recommended that you take the bike to a dealer technician.
Page Contents
We recommend you begin the troubleshooting by testing whether you can shift gears when the engine is not running. This initial test allows you to narrow down the possible culprits of your gear-shifting issue.
If you can shift gears with the engine off, you know that the gear-shifting mechanism and the inside of the gearbox most likely work fine.
Gear shifting problems that are only present when the engine is running are usually clutch- or belt-related (Step 3) or caused by a high idle (Step 2). You may find that the bike wants to creep or move forward when in gear at idle. But even without creep, the problem may be with one of these components.
If you cannot shift gears with the engine off, we recommend you jump straight down to Step 4.
Many ATVs come with an automatic clutch that engages when you apply throttle, and the clutch speeds up. The same principle applies whether you have a wet disc clutch or a dry clutch, as you find on a belted CVT transmission.
If the ATV, for some reason, idles higher than it’s supposed to, it may cause the clutch to engage slightly, putting a small but constant tension to the metal gears inside the gearbox. This pressure on the gears makes the ATV very hard to shift.
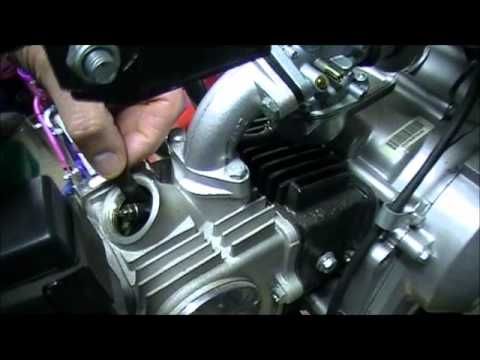
Most ATVs should idle around 1100 to 1200 RPM. If your bike’s idle is higher than this, you must address the cause of your high idle.
There will be an adjustment screw to set the idle for carbureted ATVs. Refer to your owner’s manual for the correct setting for your bike. Adjusting the idle on a fuel-injected ATV is usually a job for a mechanic.
Related: How to Idle a Four-Wheeler: Proper ATV Idle Adjustment
When idling, the primary clutch on a belted CVT transmission is supposed to spin freely without engaging (not pulling on the belt). This relieves the tension on the gearbox and allows you to shift gears.
When you hit the throttle, the primary clutch closes and pulls the belt. The belt makes the secondary (driven) clutch spin, creating tension between the gearbox’s gears.
This is how a CVT transmission works:
However, when the transmission is not tuned correctly or has a mechanical issue, it may engage and spin the secondary clutch even at idle.
To troubleshoot an issue like this, you need to remove the belt cover to inspect the clutches and see how they behave when the engine runs, both at idle and when revving in neutral.
Please note that the clutches will be spinning at high speeds. Keep your hands and all loose objects away from the clutches to avoid severe injury.
If the primary clutch is packed with dirt, it may bind or not open enough to release the belt. Now is a good time to pull the clutches for proper cleaning and service.
The springs inside a CVT transmission clutch may weaken over time, preventing it from functioning as it should. Clutch springs are replaceable, but you may need special tools to pull and disassemble the clutch.
If the motor mount is bad or has come loose, the primary clutch may be out of alignment. Use a pry bar to see if you can lift the whole engine. You should barely be able to see the engine move, if at all.
The drive belt should ride in the clutch assembly center, not touching the primary’s two clutch sheaves. If it does rub against one of the sheaves, it will cause unwanted tension on the belt.
The alignment between the two clutches can be adjusted by adding or removing metal shims/spacers between the sheaves, usually on the driven (secondary) clutch.
Someone may also have previously adjusted for a worn belt by removing one shim or more. When installing a new belt, you may need to add those spacers back to prevent binding, leading to gear-shifting issues.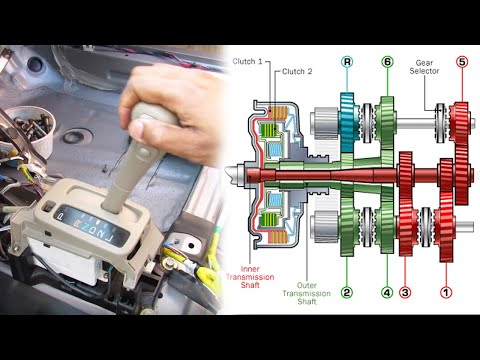
If the drive belt is worn too much, it will ride low on the sheaves, causing a slight creep.
We recommend that you only use OEM belts. There are aftermarket belts available that offer better performance and longevity at a smaller price. But slight variations in production tolerances can cause issues such as the clutch engaging too soon.
Aftermarket belts also use a harder compound to make them last longer, which may wear your clutch sheaves over time.
Remove the belt cover. If the belt is shredded, it may have gotten wrapped around the driven shaft, causing it to bind up.
Polaris ATVs with EBS (engine brake system) have components that may wear out in time. Inspect the EBS fiber washers (one on each side of the EBS bushing) on the primary clutch to see if they are worn out. If the washers are worn, the belt may not ride in the grooves as it should and instead ride one of the sheaves.
Some ATVs with engine brake systems have a primary clutch with a one-way sprag bearing, a so-called one-way clutch. It is supposed to spin freely in one direction and be locked in the other direction.
This bearing may go bad over time, preventing the clutch from turning freely. It may be hard to tell if the bearing is ok; just a slight drag may cause shifting issues.
In this case, the problem is likely with the gear-changing mechanism or the transmission’s internals. Begin by troubleshooting the externals as they are the most accessible.
Some ATVs have adjustable gear linkage. If not adjusted correctly, the bike will not shift as it should.
On ATVs that have manual clutch transmissions, you should make sure that:
To test your gearbox for internal damage without splitting the case, you can try this method:
One of the most common issues one could be facing with a gearbox’s internals is having a worn or bent shift fork.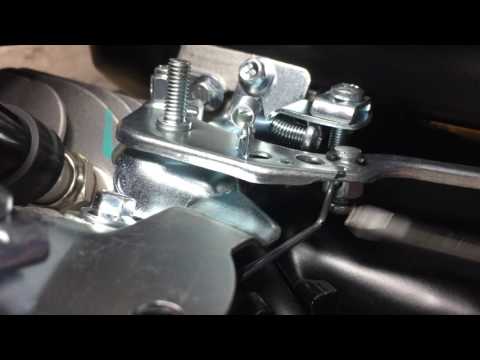
The shift fork is what shifts the gears in place. It can’t push the gears completely in place if it is bent or worn.
Some ATVs use an oil-sump wet clutch combined with the dry clutches on the CVT belt transmission. You also have some Honda ATVs with hydrostatic transmissions that use oil to drive the ATV forward.
Here are a few things to check out whenever any of these types of ATVs won’t go into or shift gears.
Ensure the oil level is correct, or the bike may not shift as it should.
If the oil is old or contaminated, it needs replacing:

Using an oil pressure gauge, it is possible to measure if the oil moves well through the engine. If the pressure is weak, you may have bad seals and need to open the engine.
ATVs with an electric shifter, like the Honda AS models, use an electric motor to shift through the gears. If the motor does not work, the bike will not shift gears.
The only way to make it shift is by using the emergency shifter (a short-shifting shaft sticking out the left lower side of the engine, use the supplied gear change tool). If the bike shifts when using the emergency shifter, you need to address the shifter motor.
If the ATV has been submerged, you must ensure all the water is drained from the shifter motor.![]()
Remove the motor. If the motor does not turn even when hooking it up directly to a battery, it may be burnt out and need replacing.
It is easy to forget that an electric-shift ATV needs electricity to shift. Make sure the battery is properly charged and in good condition.
Related resources:
How to charge an ATV battery
How to troubleshoot an ATV battery that is not charging.
If you try to shift on an electric shift ATV, you may hear the shift motor moving, but it does not shift completely.
You may find that the problem is worse at colder temperatures. Fixing this issue is relatively easy. All you need to do is replace the old gummed-up grease with all-temperature, white lithium grease.
For the complete procedure, go to Hondaatvforums.net
Located on the carburetor, the Honda ES models have an angle sensor that tends to go bad. After replacing the sensor, make sure it is clocked correctly.
When this happens, there is usually no need to worry. In fact, most ATVs are affected by this issue, some more than others.
What happens is that the wheels must be rotated slightly for the gears inside the gearbox to sync (line up).
You may have noticed that this phenomenon worsens when trying to shift in and out of “park” when standing on a hill.
The best way to avoid this is by applying the parking brake before putting the transmission in “park. ” This way, the gears won’t bind up, and you can shift in and out of gear effortlessly.
The ATV clutch is responsible for both gear shifting and vibration reduction during the ride. ATVs for children are no exception.
As a rule, the occurrence of any problems with this component of motor vehicles, the rider feels immediately. It is recommended to service the ATV clutch every 6000-7000 km, but sometimes all kinds of problems can occur earlier. The rate of wear of the functional components of motor vehicles directly depends on the conditions of its operation.
The following points can serve as a signal that something is wrong with the motorbike clutch:
Depending on the severity of the failure, the problems described above can be solved either by repairing the vehicle's clutch or by replacing it completely. As for Chinese models of ATVs, here it is necessary to check whether the nuts on the clutch are securely fastened. Poor assembly of motorcycles can also cause suspicious sounds in the variator area.
To change the clutch on a children's ATV with your own hands, you will need:
In general, this procedure is quite simple and fast. In older models of ATVs, everything is somewhat more complicated. Before proceeding with the dismantling of any components of motor vehicles, be sure to read the instructions from the manufacturer.
Even in Chinese models of ATVs, the clutch boasts an impressive margin of safety, and therefore its breakdown often occurs as a result of improper use of this equipment.
The main causes of premature ATV clutch wear include:
The only way to prolong the life of your ATV clutch is to use it properly and carefully. It is advisable to use good oil, and do not forget about timely maintenance.
The use of high-quality clutch discs in the ATV ensures a smooth start of the vehicle, and also fully ensures reliable grip without slipping even under fairly high loads. The exception is children's electric ATVs, in which there is simply no clutch disc.
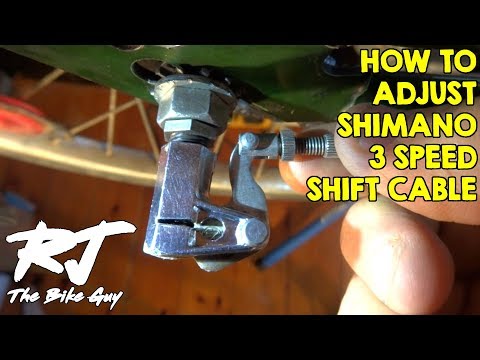
ATV clutch usually needs to be adjusted no more than once a year. Before starting work, place the vehicle on a special footboard.
The process of adjusting the clutch on a motorbike is quite simple, and consists of the following steps:
 If it operates too slowly or too quickly, adjust the screw in the desired direction (tighten or loosen).
 Since adjusting your ATV's clutch is easy, you can repeat this procedure as needed. In the vast majority of motorcycle models, this functional component is adjusted in a similar way. If there are certain nuances in the clutch setting, they are explained in detail in the official vehicle manual.
05/29/2021 4573
Articles
02 Dec
Any wheeled vehicle - from a bicycle to a multi-ton truck - has a transmission in its device: a system that transmits rotation from the engine to the wheels. The operation of the transmission - and therefore the speed of driving - can be controlled by shifting gears.
Gear shifting is organized differently in each mode of transport.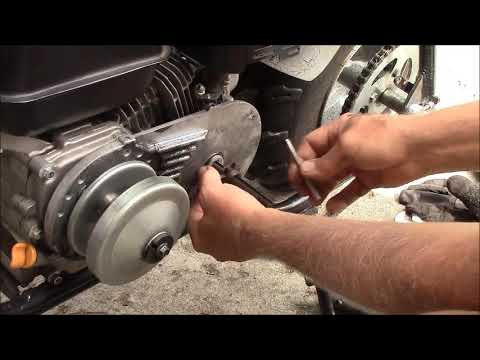 In the article below, we will tell you exactly how to shift gears on ATVs, and what gearboxes are found on such equipment.
Gearboxes for ATVs can be of two types:
Rare and mostly found in older models, but other variations can be found. For example - "automatic" with the ability to manually shift gears.
Manual ATVs are a little more difficult to drive (at least at first, until you get used to it), but you can more accurately select the appropriate mode.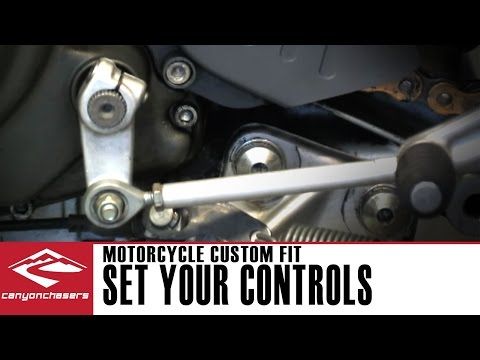 And vice versa: CVT "boxes" are much easier to operate, they are easy to master for a beginner who gets behind the wheel of an ATV for the first time. But on the other hand, with active driving along a route with variable difficulty, riding a CVT will be a little less convenient.
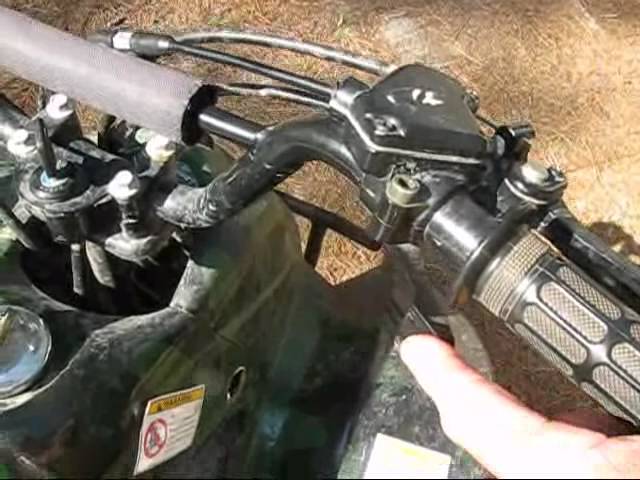
For example: you are driving on a flat packed dirt road on H and you see a large stretch of muddy road ahead with deep mud (or a steep hill, or bumps, or stones). You will have to come to a complete stop and shift to L, drive through mud, and come back to a dry road, come to a complete stop again and shift back to H. , like motorcycles, and a manual clutch lever on the handlebar on the left.
The foot lever device can be of two types:
 The rear lever shifts gears up, the front lever shifts down.
 The shift itself is carried out in the same way as on motorcycles: