Don’t know how to break a tire bead by hand? No problem. We have you covered with all the information you will need in this step-by-step guide.
We break down the procedure from knowing what the tire bead is to successfully breaking it. Read on to save yourself from a trip to the auto shop!
The tire bead is a steel cable covered in rubber that holds the edge of the tire to the wheel. It prevents the tire from shifting out of position when it rolls.
When the wheels are fully inflated, the bead is secured in place within the grooves of the rubber by the air pressure inside.
A couple of reasons you might want to remove the bead yourself are saving money and keeping up the maintenance. Breaking down the bead helps keep the rubber surface clean because it allows you to remove any dirt or debris that would otherwise be locked in the surface.
A mechanic can do the removal but will charge you for a simple task easily done in your driveway. So, let’s learn how you can do it yourself.
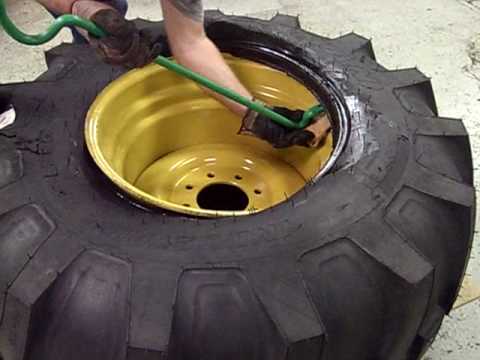
Before you can get started on how to break a tire bead by hand, the first step is to position the tire on the ground.
You want the wheel to lay down flat on a hard surface. Working on concrete will be easier than on grass or dirt, where the surface may be uneven. You will need to release the air evenly before moving onto the following steps that will require you to have a good grip on the tire.
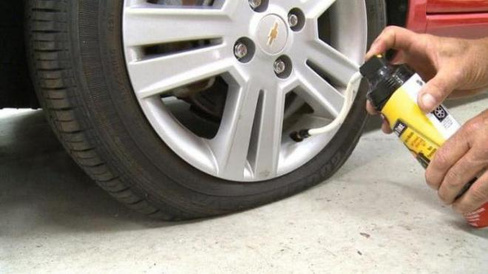
Releasing air from the tire will bring down the PSI or pounds per square inch, so the pressure against the wheel’s rim will decrease. This will make it easier to separate the bead from the rest of the rubber. In any other circumstance, you want to make sure your wheels are properly inflated.
One method is to rotate the cap on the valve stem counterclockwise to expose the metal pin located in the center of the valve. Use a screwdriver, a pair of needle-nose pliers, or a similar small tool to press down on the metal pin.
Once enough air has been released, lift the tool off the pin, and the wheel will stop deflating. Replace the cap when finished.
If you want to deflate the tire entirely, you can also unscrew the metal pin with a pair of needle-nose pliers. Air will escape much quicker.
Whichever method you choose, do not lose the cap for the valve stem or the metal pin. Keep them in a safe place until you are done.
The next step leading to the action of how to break a tire bead by hand is to prepare the area around the inner circle of the wheel. When the PSI is below the necessary level for keeping the bead secure, the rim will be easier to pull off. If the tire bead is stubborn, you may need to either deflate it some more or apply more pressure by standing on the tire as you pull it apart.
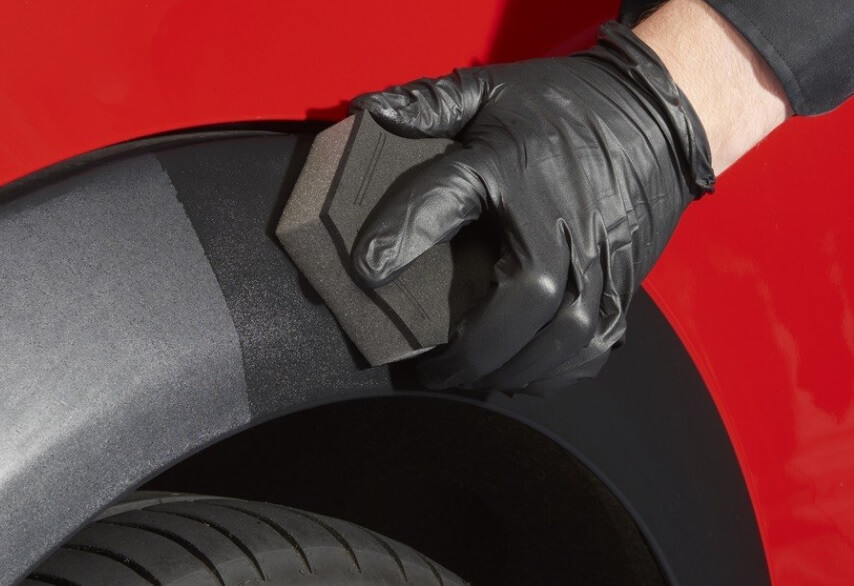
Since the bead is held firmly against the rim by steel cable and glue, you need to use a lot of force to break the connection. Applying an automotive lubricant along the edge of the rim will make it easier to slide the rubber out from around it.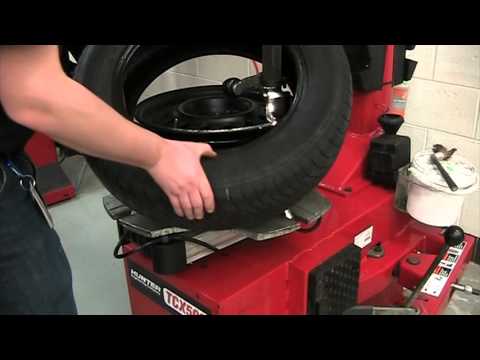 To prevent the metal from being scratched, you can tape it before adding the lubrication.
You want to push the rubber downward as hard as possible so the bead can pop out. Be careful to follow the seam to avoid damaging the metal rim. If you follow the prepping step above, the metal should be well protected.
The lining should be easy to grip and loosen until it can be pulled out from around the rim. The rim can also be removed without requiring additional tools or a machine. When the bead pops out, it will tear away from the rim.
Consider checking: How To Break Bead On ATV Tire
When learning how to break a tire bead by hand, realize that there’s a chance you can cause harm to yourself or the metal rim. Remember to stay safe and follow our step-by-step instructions.
If you ever have doubts, feel free to reach out to a certified mechanic.
Did you find this guide helpful? Then feel free to check out:
How To Set The Bead On A Tire
Getting trash and rubbish inside tires happens quite a lot, especially with vehicle owners having many off-road trips. To be more specific, the trash will make its way onto and into the tire. And this is the reason why we need to break a tire bead.
Tire bead is the innermost diameter of the tire that connects with the wheel rim. Most people think that breaking a tire bead is common knowledge for every driver. However, not that many car owners know how to break a tire bead. As long as the bead stays intact, there is no gap to form between the rim and the outer edge of the tire. Basically, there is no way to fix the tire from the inside, which is another reason to learn how to break a tire bead. In this article, our car experts will tell you what tool you need to break the tire, as well as how to do it.
Bead BreakersBefore getting to know how to break a tire bead, it is essential to acknowledge your best tool. Bead breaker is the car tool with the purpose of separating tires from their rims. Different types of bead breakers have different ways of using. So let’s jump right into answering the question “how to break a bead on a tire“:
This bead breaker uses a plier-type tool in order to apply force between the bead and the rim’s lip. The tool has a spike to perform this task. To be more precise, this spike imposes a force on the bead and the sidewall of the tire to separate them. Therefore, it weakens and removes their connection. This plier type mechanism is amazingly effective and can get the job done very fast. However, it has its disadvantages. The spike is like a double-edge knife that might leave scratches on the surface and on the wheels themselves. Not to mention, this plier type mechanism is very heavy and big, which requires your full body weight in order to get the results.
Shoe and Lever MechanismJust like the name said, the shoe and lever mechanism has a shoe-shaped tool which can apply pressure on the sidewall of the tire. In order to break the connection between the bead and the rim, car owners must push the sidewall. This is, without a doubt, the most popular bead breaker among all, since it works amazingly well on motorcycle tires, new passenger vehicle tires, as well as trailers’ tires. The benefits of this bead breakers are quite a lot: First of all, it is very low cost, so anyone can purchase one for their vehicle. Second of all, the way to use it is quite simple and easy to follow. Last of all, it is made for passenger cars’ tires.
On the other hand, it does not work very well with old and hard-to-change tires. Since the shoe and lever mechanism is also large and bulky, this breaker can only be used on some particular types of tires.
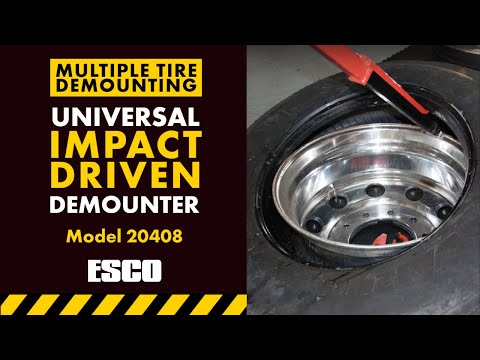
Clamp and Ram MechanismLast but not least, the quickest and most efficient break beads of all time: Clamp and Ram Mechanism. If the first two mechanisms cannot solve the problem with difficult-to-replace tires, this bead breaker can deal with all of them. In order to make it work, this machine uses a pointed foot tool with the purpose of exploiting the space between the bead and the rim’s lip. Not to mention, this bead breaker also has a padded clamp. The part can go inside the sidewall with little effort. Long story short, not only this machine works with all types of tires with minimal human effort, it also causes no harm to the sidewall or to the tires. However, it is quite costly.
Knowing that you are already familiar with all the tools, let’s answer the question of “How to break a Tire Bead?”. In order to perform this task, car owners need to follow these steps:
Step 1: Prepare the ToolNo warrior goes barehand into the war. Here is the tool list that you need:
In order to start breaking tire bead, car owners need to be taken off the valve core to release air pressure out. This step needs to perform before and during the first stages.
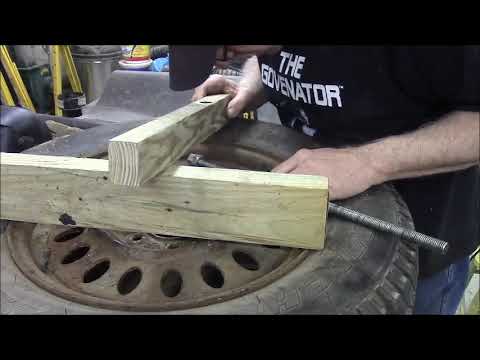
When the valve core is removed, car owners need to put the wheel under the brace. By performing this, the air will be pushed out and we can easily take the wheel off the rim. Just remember to wait until all the air pressure is lost in order to remove the wheel. A little tip to check the tire is to press your hands against the tire’s surface.
Step 3: Place Tire on a SurfaceIn this step, car owners need to lay the tire on a hard surface. After that, you should position the breaker bar between the rim and tire. Before proceeding to the following step, it is suggested to check if the tapered edge of the breaker bar is aimed toward the tire, not the rim.
Also, a solid surface is the necessary factor in this step, since it is capable of handling the pressure you are going to apply on.
SEE MORE
Inner Tire Wear: Causes And Fixes
Must Have Tools For Garage: A Comprehensive List
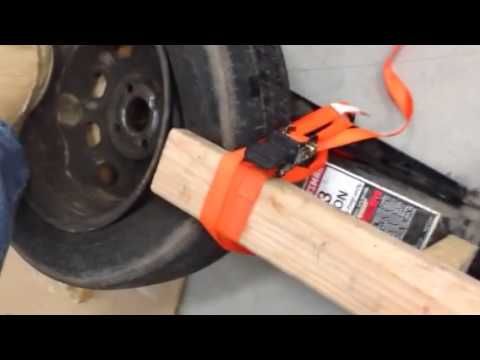
The next step of “How to break a tire bead” is to slide the breaker bar between the rim and the tire.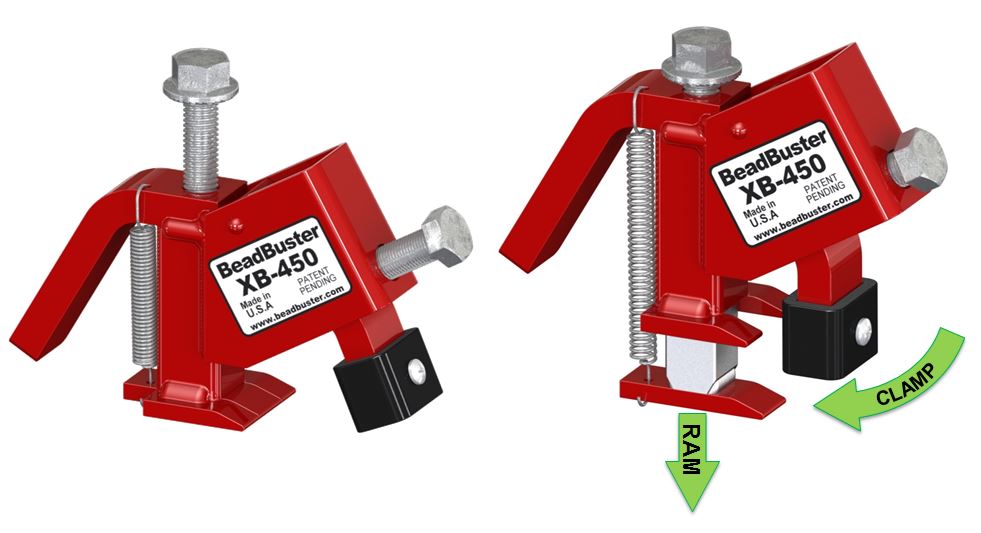 It is essential to check if the pointed edge of the breaker bar points away from the tire’s rim. The reason for this is that the edge is highly sharp and might create scratches inside. For that reason, car owners might want to aim the bar to the tire, not the rim.
When the breaker is already steadying in the distance between the rim and the tire, it is time to hit it with a hammer with the purpose of breaking tire bead. Wait, we are not telling you to destroy the tire! The purpose of doing this is to drive the breaker inside. So keep hitting it and pushing the breaker bar toward the ground until the bead is broken and we can tell by a small pop sound.
Just take time with this, breaking a tire bead is no joke (Photo Source: bendpak)Step 6: Rotate Around the Tire’s InsideLast step of how to break a tire bead is to remove the tire of the rim. Car owners are recommended to rotate the breaker around the tire’s inside while continuing hammering from above.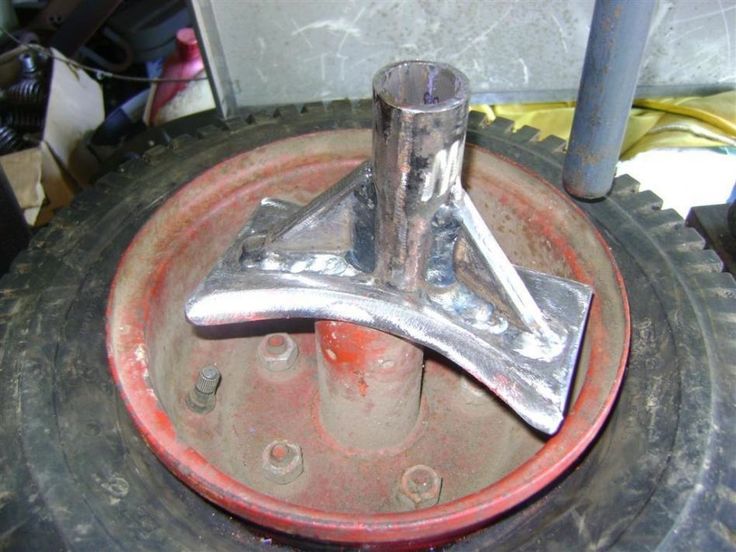 Keep doing that until the tire is off the rim, then turn around and do the same with the opposite side of the tire.
Many people might be wondering, why do drivers need to learn how to break a tire bead? One of the reasons is that the process is simple to follow, even with beginning car owners. All drivers need is thirty minutes and this instruction. Another reason that it provides a great help in cleaning up debris and dirt inside the tire. By breaking the bead, vehicle owners can remove the rubbish inside and reduce the future problems. The last reason is to save the cost of paying a car repairman, since you can remove the tire from its rim by yourself.
home
Articles
Truck tires
Truck tires
Possible defects for truck tires and their description
Truck tires: classification, tire differences, sizes
Type of defect: Manufacturing | ||
| nine0022 Type of defect: Manufacturing | ||
Type of defect: Manufacturing / Operational | nine0039 | |
Type of defect: Operational | nine0039 | |
Type of defect: Operational | ||
Defect type: Operational | ||
Type of defect: Operational | ||
Type of defect: Operational | ||
Type of defect: Manufacturing and/or operational | ||
Type of defect: Manufacturing and/or operational nine0034 | ||
Type of defect: Manufacturing and/or operational |
Return to list
Truck tires are expensive and take 80-100 years to decompose. Therefore, truck tire retreading saves not only your wallet, but also our planet.
If you restore at least one wheel for a special vehicle or a truck, you can save several acres of fertile land from destruction and save irreplaceable natural resources. After all, car tires are made from artificial rubber, the production of which requires oil, electricity and dangerous chemicals. Moreover, even the most complex retreading technology will cost no more than 20% of the price of a new tire for a truck. And if you use trucks in your work, then the practice of retreading winter, summer or all-season tires should become part of your business. nine0003
Unfortunately for environmentalists, not every truck tire can be restored using one technology or another. Safety requirements exclude the possibility of returning to service in case of detection of the following defects on the beads and the tread of the tire:
Technically, such tires can still be returned to service, but their restoration is not justified from the standpoint of the safety of the cargo, car, and road users. If you ignore these recommendations, then the restored tires will "explode" right on the track, provoking an accident with the most sad consequences.
Only tread depth or a shallow cut on the bead of a truck tire can be repaired without compromising safety.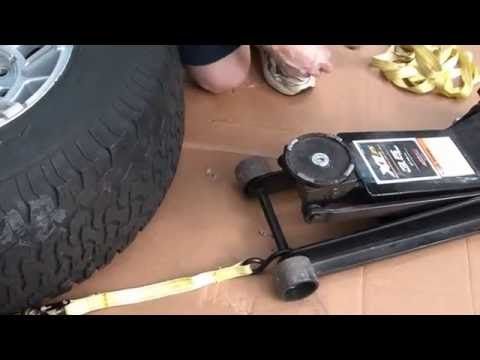 nine0278
The minimum allowable tread height for a truck is 1 mm. If the depth of the drawing is below this mark, the owner and driver of the car will be issued a substantial fine. And exactly the same fine can be issued by the next traffic police post, followed by the next one, and so on. Therefore, even malicious violators do not drive on a millimeter tread. However, not everyone has money for new tires, so truck owners prefer to buy welded tires. nine0003
Welding technology involves the following procedure:
Weld-on retreading technologies make it possible to obtain a truck tire capable of traveling at least 100,000 kilometers.
Even the toughest truck and specialty tire can't withstand a sharp object hitting the tire bead. After all, the bead element in cargo-type tires is not reinforced with a breaker and has a minimum thickness (it is several times less than the tread depth). These design features complicate the repair of the onboard part and force the purchase of special equipment for the restoration of truck wheels. nine0003
The process of restoring boards is as follows:
Hot and cold methods of restoration (vulcanization) of side cuts involve working with perforations up to 30-40 millimeters wide. If the width of the cut is more than 40 mm, the car is changed into new tires. nine0278
Winter Drive protection
Tires Goodyear UltraGrip Arctic 2 SUV
Winter Drive Protection Sound Comfort
Rating:
4.5
Tires Goodyear UltraGrip Ice 2
Winter Drive protection
Tires Goodyear UltraGrip Performance+ SUV
Winter Drive protection
Tires Goodyear UltraGrip Arctic 2
Winter Drive Protection Run On Flat Sound Comfort
nine0002 Tires Goodyear UltraGrip Performance+ If you restore the tread and bead according to the technology, then the repaired truck tires do not differ in appearance from the new models. Simple sanding and painting will remove all traces of tire integrity restoration from the tread surface and sidewall. And if the manufacturer himself undertakes the repair, then the only difference between the restored and the new model for the car will be only a special mark. Therefore, after the restoration of any car wheel, a special mark is applied to the sides of the restored model: nine0003
If the manufacturer ignores this rule and tries to pass off a model with an updated tread as a new one, such a trickster can be caught during a thorough inspection of the side. Even after deep restoration, microcracks and traces of abrasions on the inside of the seating edge will remain on it. nine0278
If your car got a hole in the way, and you don’t have a new spare tire, then the question of the expediency of repair sounds meaningless.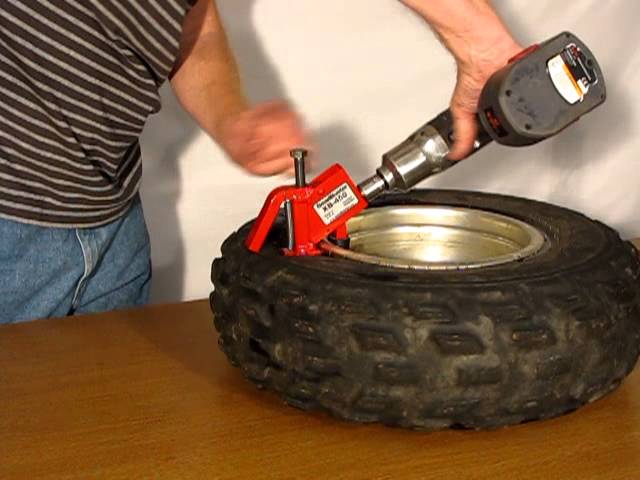

 Also, due to this defect, swellings can form on the outer shoulder zone with a possible subsequent explosion.
 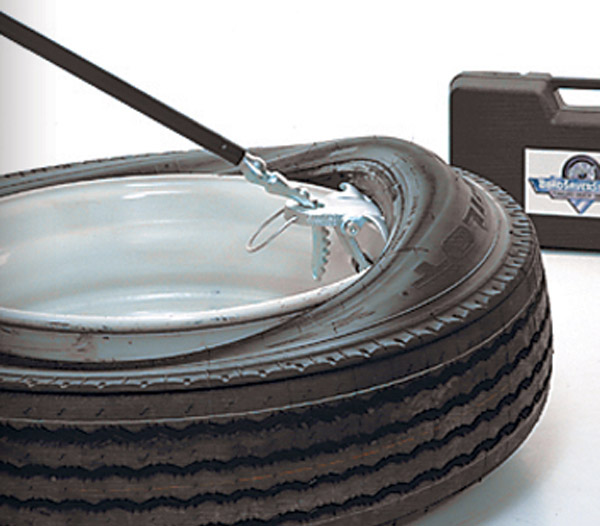 Especially common on the drive axle.
 nine0026