Changing your tire is a simple process that everyone needs to learn. Without knowing this, you could be in a serious situation on the road. But what if you drive a semi truck or a commercial truck?
Is it more complicated? It might seem a bit more daunting because a semi is a larger vehicle. But, most of the process is largely the same!
Here’s how you change your commercial truck or semi truck’s tire.
Even though there are truck stops every 40 miles or so on the interstate, you might be in a situation where you can’t get to one.You might be in a remote place, or you might be driving in an inconvenient spot.You never want to be driving too long with a flat tire. If you’re in a situation where you need a tire change, it might be better to do it yourself.
1. Park the truck on a hard, level surface.You will need to find a stretch of road that is level enough to keep the truck at a straight line.
The road you choose should, ideally, be as free of traffic as possible. If you’re stuck on the interstate, you’ll need to find a safe place to pull over & turn your hazards on.
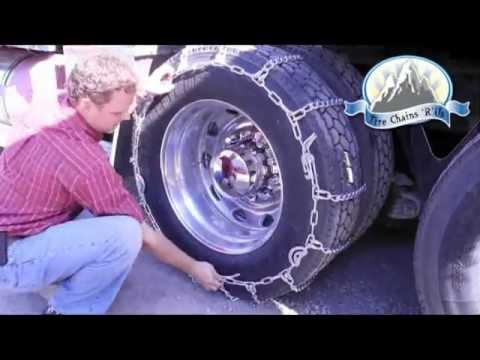
You’re going to want to place chocks in front of and behind each tire that you don’t want to change.
Don’t have chocks? Use whatever you can. Boards and bricks work well.
This process is relatively simple and not too different from removing the hubcap. You’ll need to pry it open at multiple spots to remove it fully.
Your semi truck’s flat tire might not have a hubcap. If not, move onto Step 4.
This might require a bit of elbow grease, as lug nuts can easily rust. If they’re fastened tightly, you might need to put your entire weight into it. Or, if you’re noticing a bit of rust making it harder to remove the lug nut, spray some WD-40 or similar lubricant to help.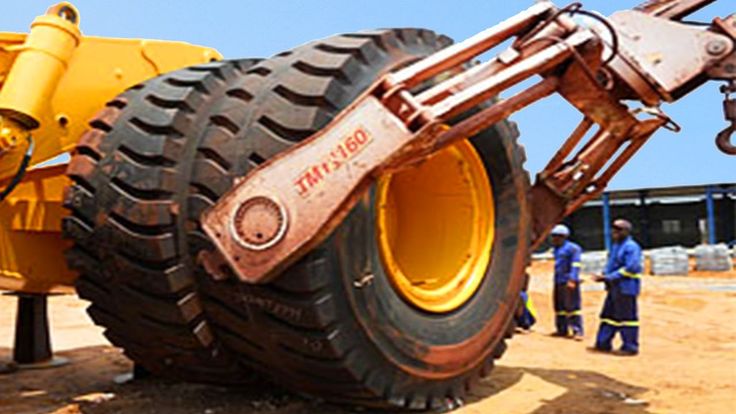
You might need something bigger and stronger than a lug wrench like a breaker bar. That’s okay, too.
You’re going to want a strong enough jack. A hydraulic bottle jack should work well. Look for some notches near the wheel wells that indicate a safe spot for the jack.
You may be able to remove your semi truck’s tire by breaking the bead seal using a tire changing tool. If that’s possible, then you don’t need to lift the truck to remove the tire.
Then, fit the jack stands underneath the truck next to the jack.
Remove the lug nuts entirely after getting the jack stands up. Then, pull the wheel off the truck. You may need some assistance with your semi truck’s tires, as the tires are heavy.
You want to line up the wheel’s holes with the lug bolts, then slide the wheel back onto them. Double wheels should both be fitted onto the log bolts.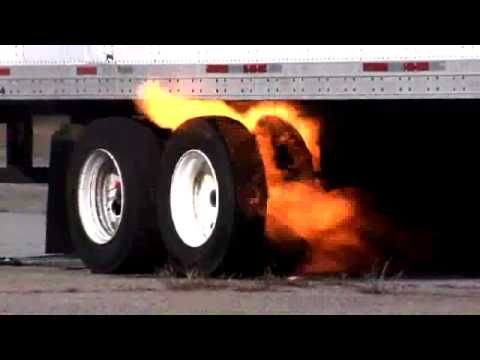
Then, after correctly mounting the tire, reinsert the lug nuts and tighten by hand.
Before lowering the truck, remove the jack stands by raising the truck by about an inch, then take the jack stands out from underneath the truck.
Then, lower the truck down to the ground. Don’t remove the jack.
The lug nuts should be tightened to the point where they can’t be moved clockwise with the wrench or breaker bar. They also should not be able to be moved counterclockwise by hand.
Make sure to get all the lug nuts on.
You should be able to do this without any special tools. Line up the hubcap with the valve stem, then push the hubcap. Start from the bottom, and fasten the top part with a mallet or similar tool.
If you need professional assistance for changing truck tires, then mobile tire service in Gainesville, GA is here for you.Contact us right away!
Knowing how to change a tire is a necessary skill for all drivers. If you rely on a cell phone to save you in a roadside emergency, there’s always that chance you will forget to charge it, be out of range, or leave it at home. Flat tires can happen anywhere, and a cell phone is no substitute for knowing how to change a flat tire.
Thankfully, changing a tire isn’t all that hard! Just adhere to the following guidelines to be prepared in case you have a flat.
These items should have come with your vehicle:
Jack
Lug wrench
Fully inflated spare tire
Vehicle owner’s manual
If you have misplaced any of these items, or if your car did not come with these items, you should purchase new ones right away. And be sure you’re regularly inflating the spare tire to your vehicle manufacturer’s recommended PSI. You should check the spare’s air pressure every time you check your other tires. Remember to check pressure every month and before long trips or carrying extra load.
Here are some items that don’t come with your vehicle but that you should stow in your trunk or glove box in case you have to change a flat tire:
Flashlight with working batteries
Rain poncho
Small cut of 2"x6” wood to secure the jack
Gloves
Wheel wedges
As soon as you realize you have a flat tire, do not abruptly brake or turn. Slowly reduce speed and scan your surroundings for a level, straight stretch of road with a wide shoulder. An empty parking lot would be an ideal place. Level ground is good because it will prevent your vehicle from rolling. Also, straight stretches of road are better than curves because oncoming traffic is more likely to see you.
Never attempt to change your tire on a narrow shoulder near oncoming traffic. Keep moving (slowly) until you find a safer spot. While driving on a flat risks ruining your rim, replacing a rim is better than being hit by an inattentive driver.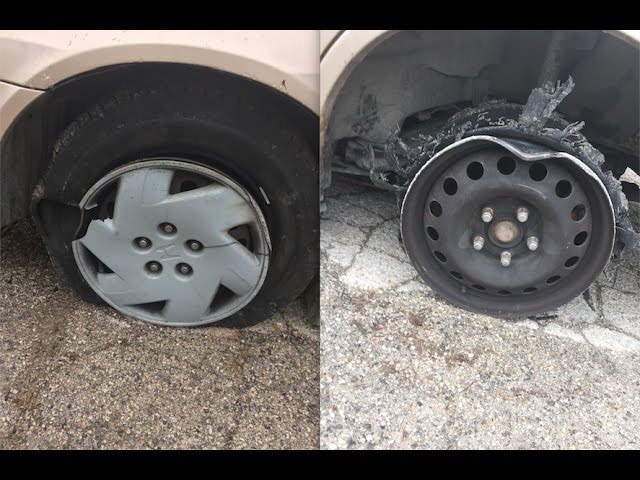
Make sure to consult your owner’s manual and review their specific steps on how to change a flat tire for your vehicle
Your hazard lights or “flashers” will help other drivers see you on the side of the road. To avoid an accident, turn them on as soon as you realize you need to pull over.
Once stopped, always use the parking brake when preparing to replace a flat tire. This will minimize the possibility of your vehicle rolling.
Wheel wedges go in front of or behind the tires to further ensure the vehicle doesn’t roll while you fix the flat tire. If you’re changing a rear tire, place these in front of the front tires. If your flat tire is at the front, put the wheel wedges behind the rear tires.
Bricks or large stones will work just as well as “real” wheel wedges. Just be sure they’re large enough to stop the car from rolling.
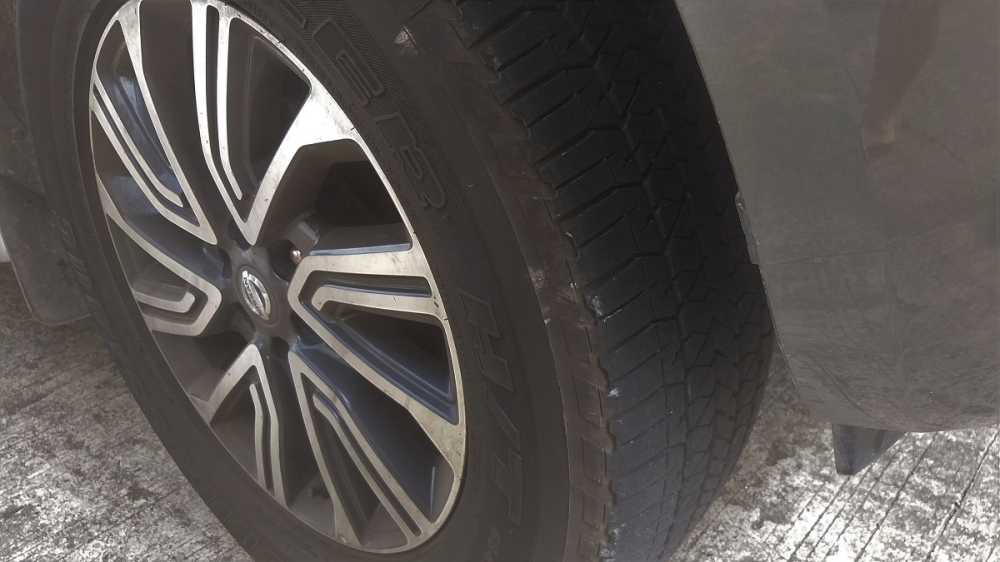
If your vehicle has a hubcap covering the lug nuts, it’s easier to remove the hubcap before lifting the vehicle with the jack.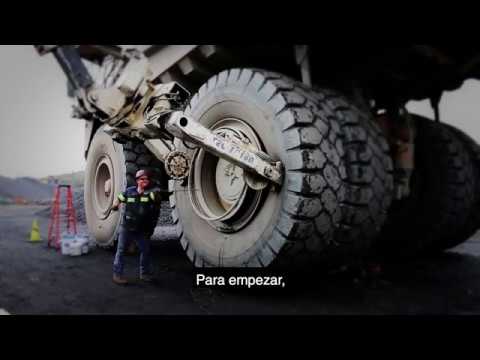 If your lug nuts are exposed, you can skip ahead to Step 6.
Use the flat end of your lug wrench to remove the hubcap. This will work for most vehicles, but some hubcaps need a different tool to come off. Consult your owner’s manual for proper hubcap or wheel cover removal procedures.
Using the lug wrench, turn the lug nuts counterclockwise until you break their resistance. You may have to use force, and that’s ok. Use your foot or all of your body weight if necessary.
Loosen the lug nuts about ¼ to ½ of a turn, but don’t remove them completely yet. Save that for when it’s time to remove your tire/wheel from the vehicle.
The right place for the jack is usually beneath the vehicle frame alongside the tire that’s flat. Many vehicle frames have molded plastic on the bottom with a cleared area of exposed metal specifically for the jack. To safely lift and avoid damage to the vehicle, follow the instructions for jack placement in your vehicle owner’s manual.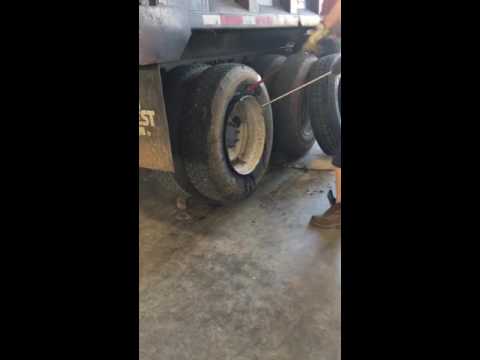
To prevent the jack from settling under the weight of your vehicle and coming off balance, place a small cut of 2x6” wood beneath it before attempting to raise your vehicle. This tactic is especially helpful on asphalt.
With the jack properly positioned, raise the vehicle until the flat tire is about six inches above the ground.
Never put any part of your body under the vehicle during or after raising the vehicle with the jack.
Now it’s time to remove the lug nuts all the way. Since you've already loosened them, you should be able to unscrew them mostly by hand.
Gripping the tire by the treads, pull it gently toward you until it’s completely free from the hub behind it. Set it on its side so that it doesn’t roll away.
Now place the spare on the hub by lining up the rim with the lug bolts. Push gently until the lug bolts show through the rim.
Put the lug nuts back on the lug bolts and tighten them all the way by hand. Once they are all on, check each one again, tightening as much as possible. You will tighten them with the wrench after lowering the vehicle to the ground.
Use the jack to lower the vehicle so that the spare tire is resting on the ground but the full weight of the vehicle isn’t fully on the tire. At this point, you should tighten the lug nuts with the wrench, turning clockwise, as much as you can. Push down on the lug wrench with the full weight of your body.
Bring the vehicle all the way to the ground and remove the jack. Give the lug nuts another pull with the wrench to ensure they’re as tight as possible.
If the hubcap you took from the flat tire will fit your spare, put it in place the same way you removed it initially.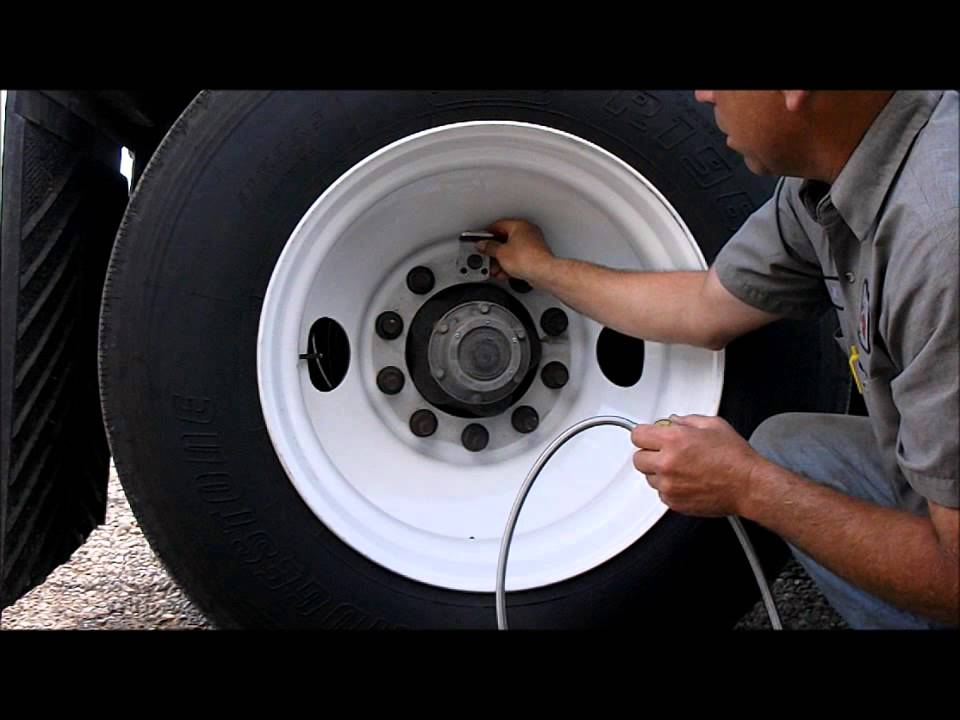 If it doesn’t fit, stow it away with the tire when you stow your equipment.
You have before you a jack, a lug wrench, wheel wedges, your flat tire, and possibly a hubcap. Don’t forget to put all of them in your vehicle before driving away.
You should check the tire pressure of the spare tire to make sure that it is safe to drive on. “T-Type” temporary spares, also called “mini-spares,” require 60 psi (420 kPa). If the tire needs pressure, drive (slowly) to a service station immediately.
Temporary spare tires aren’t made to drive long distances or at high speeds, so drive cautiously until you’re able to visit a tire technician. A professional should be able to determine whether your tire needs a repair or if it’s time to replace it.
Aside from taking your tire to a professional, the above procedure shouldn’t take more than 15 to 30 minutes to change a tire. Just be sure you don’t leave out any steps.
It’s beneficial practice changing a tire in your garage or driveway to ensure you’re ready to handle this situation if it ever happens to you.
Knowing how to fix a flat tire is great, but regular tire maintenance is even more important. In addition to reviewing this guide regularly, remember to do the following:
Keep your tires properly inflated
Rotate your tires according to the manufacturer’s guidelines
Monitor for tread wear
All of these precautions will extend the life of your tires and reduce the likelihood of a flat. While there’s no way to prevent flat tires completely, proper care can improve performance and ensure your tires last as long as possible.
There’s never a good time for a flat. That’s why Bridgestone DriveGuard tires are masterfully engineered to keep you moving for up to 50 miles at speeds up to 50 MPH without disruption.
There’s never a good time for a flat. That’s why Bridgestone DriveGuard tires are masterfully engineered to keep you moving for up to 50 miles at speeds up to 50 MPH without disruption.
See Details Find Your Fit
Experiments show that the degree of patency of special equipment, including tank trucks, can be dramatically improved. For this purpose, twin (double or dual) conventional road-type tires, the size of which is selected based on the maximum load capacity on a solid road, are replaced with special single tires, which have a large profile, and use a pressure adjustment system in them.
For the first time, the installation of single tires from a scientific point of view was explained during the creation of the ZIL-157, the first off-road vehicle (not increased).
The experiments that preceded the appearance of this car led to the conclusion that it is possible to increase the cross-country ability of a wheeled truck (flatbed, tractor, dump truck). ZIL-157 on the sand had a cross-country ability no less than a tracked vehicle, and its cross-country ability on different types of soil and on snow significantly exceeds that of any previous generation vehicle with increased cross-country ability.
The installation of tires, the set of which includes large-diameter discs and load-carrying capacity, solves the problem with the lack of ground clearance for special equipment and increases its cross-country ability. This option is typically needed by trucks and special vehicles that require maximum performance in difficult road conditions, where the traditional two-row rear bogie or axle makes it difficult to travel on a haul road, off-road or snowy road in northern terrain.
| Double busbar |
| Single busbar |
Single row tire with large diameter and considerable width. They also have such an important feature as a change in internal pressure depending on the conditions on the road. This implies the possibility of doubling the load capacity of the tire at a limited speed.
The use of special tires with a large diameter and profile with adjustable internal pressure allows, on weak soil, to significantly reduce the pressure in them to a value at which the operation of the tires is accompanied by significant deformation. As a result, the area of contact between the wheels and the soil increases significantly, the value of the specific pressure that the wheels produce on the ground decreases, and the depth of the track and the degree of resistance to movement also decrease. During the rolling of the wheels on the deformed tires, the compaction of the soil in the rut and the adhesion of the wheel to the soil improved. These are decisive components in improving traction and increasing the cross-country ability of the truck.
Thanks to the installation of a single tire, it is possible to maintain the load capacity with a sharp rise in ground clearance while improving patency, including due to off-road aggressive tread.
The use of high profile tires results in a change in the truck's off-road characteristics:
Please note that the replacement of the tire set also requires the replacement of the rims. Even in the case when the size matches, discs with higher strength and load capacity are installed instead, usually collapsible and composite.
In the case when the rear axle of the truck allows the use of both double and single tires on the rear bogie, with different dimensions between the wheels of the front and rear axles, it is possible to use different tires in different climatic and road conditions on the same vehicle. With the help of such a technical solution, it is possible to independently select and install different wheels, taking into account the season, weather conditions and operating conditions. For example, in winter, when the road has a hard surface, it is advisable to use a dual-tire tire, which allows you to save fuel, while during a thaw it is possible to use a single-tire tire, which increases the vehicle's off-road capability.
Question: What is needed to install single tires instead of double tires?
Answer: We need car rims, bypass tapes and the tires themselves.
Question: Do the front wheel discs need to be replaced?
Answer: Not always, but in most cases required.
Question: Do I need to replace wheel axles on a truck when changing tires?
Answer: No, bridge beams do not need to be replaced.
Question: What is the advantage of single tires, designed strictly for single-row wheels?
Answer: Single-row wheels easily turn into double-row ones (as well as vice versa). However, in some original off-road vehicles, each rim rack is designed for one wheel. The advantages of this option are a higher geometric cross-country ability, the possibility of using a carrier frame with a wider spacing between spars, as well as optimization of the suspension due to its convergence with the wheel.
Author: Yevgeny Balabas
Surprising devices were found in the trunks of Soviet drivers! Give some of them to a modern car owner, and not everyone will even understand what it is and how to use it. "Wheels" try to regularly dig up unusual artifacts in order to preserve the memory of our automotive history. Today we are testing a rare device for repairing wheels on the road - a vulcanizing briquette.
In general, fire as a tire fitter's assistant is known to many today. With its help, it is possible in the field (and not only in the field) to pull a large diameter tubeless tire onto the rim. To do this, it is enough to splash a bit of gasoline under the tire half-mounted on the disk, and after it passes into a state of flammable vapors in a few minutes, bring a stick burning at the end. Flash, pop and the accompanying release of a large amount of gases instantly put the tire on the disk humps.
This "magic" was unfamiliar to our grandfathers due to the lack of tubeless tires in everyday life. However, they also often used burning gasoline to repair the wheel, but in a slightly different way.
A classic of the genre – a chauffeur's trick from the times of the Great Patriotic War, with the help of which the chambers of the wheels of cargo "one and a half" were glued in the field.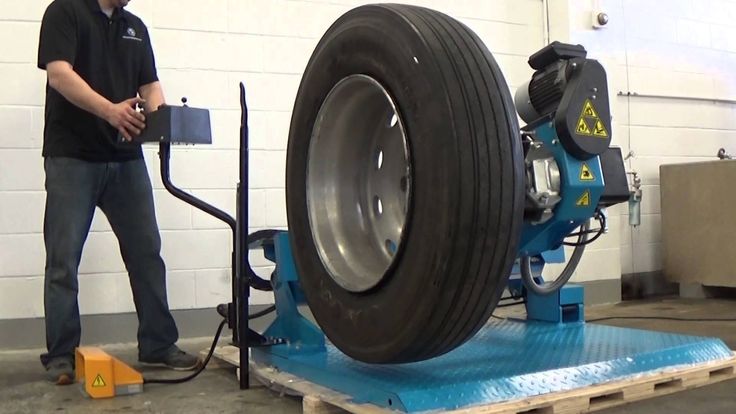 A patch of so-called “raw rubber” (unvulcanized rubber) was applied to the hole, and on top of it, through several layers of newspaper, an old piston from the engine was placed like a glass. Gasoline was poured into the piston and set on fire. Such a simple device warmed up the place of gluing up to 140-150 degrees, due to which the rubber vulcanized, turning into a state of durable and elastic rubber.
In the post-war years, a curious car accessory appeared, designed to replace sealing with a piston on the road. It was called "vulcanization briquette". Actually, in almost any book on the operation of the "victory", "Muscovite", "Zhiguli" or truck in the 50-70s of the twentieth century, one could find a mention of a vulcanization briquette. It was, in fact, a pyro-heater, but it did not require gasoline for operation, and therefore it was much safer to use and more convenient.
From the book "Automotive Tires", Military Publishing House of the Ministry of the Armed Forces of the USSR, 1946:
To ignite the combustible composition in the briquette, it was necessary to slightly loosen it with something sharp (knife or nail), and then set it on fire with a match.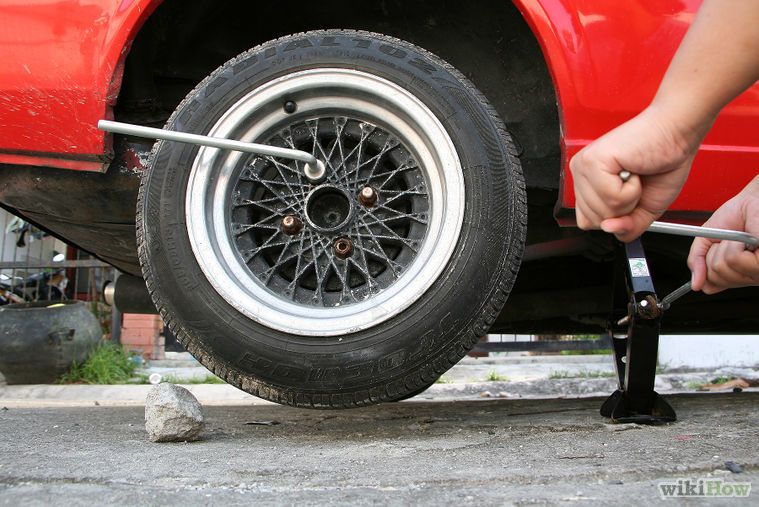 If the combustible mass did not ignite well, it was proposed to inflate it slightly. Actually, the hygroscopicity of the composition was the reason for the unpopularity of vulcanization briquettes in the driver's community ... A puncture of a wheel is not such a frequent misfortune, and the briquettes lay for a long time in tool boxes and trunks, where they inevitably dampened, despite the rather dense packaging. And at the right moment, they often turned out to be useless.
From Motorcycle Maintenance and Repair, 1956:
There were several slightly different subspecies of vulcanization briquettes, but in fact they were all a metal "tray" with low sides filled with a combustible composition - usually something like cellulose-wood chips impregnated with saltpeter. On the bottom of the tray (from the outside, of course, side) was stuck to a patch of raw rubber. It was necessary to tear off the layer of cellophane film protecting it from drying out from the rubber, apply a briquette to the previously cleaned and degreased puncture site on the chamber, press it with a clamp and set it on fire. When the burnt-out briquette cooled down, the patch was glued with guaranteed quality due to the calculated combustion temperature, the amount of fuel in the briquette and its cooling time of about ten minutes.
Despite the fact that vulcanization briquettes were primarily aimed at motorists (although I even met their mention in the book “Field Repair of Aircraft”, Voenizdat publishing house, 1943), they made the most sense for owners of light motorcycles and mopeds without a generator (with only a magneto), as well as for cyclists who have neither a source of electricity nor a supply of gasoline.
Surprisingly, but not something rare and scarce in the past, today it is almost impossible to find a vulcanizing briquette live. For some unknown reason, it has become an incredible rarity - there are practically no live photos of this accessory either in Google or Yandex. There are only numerous references in the old automotive literature. However, nothing is impossible for "Koles" - we, although with great difficulty, got a couple of copies of this really rare driver's device, and conducted an exclusive retro test.
The vulcanization briquettes that fell into our hands were produced by the Barnaul Chemical Plant. It is even strange that this enterprise still exists and is still engaged in the production of materials for repairing tubes and tires.
Our briquettes were made in 1964. Since then, they have been waiting in the wings for 54 years untouched ... And despite the obvious rudiments of the historical and cultural value of these retro accessories, we could not resist trying the aliens from the ancient auto era.
After thorough drying and replacement of a patch of raw rubber that had hardened for half a century with a fresh one, we tried to seal a car chamber with them.
You can see the result in the photo: the old car “artifact” did not fail, worked exactly according to the instructions and vulcanized the patch on the chamber.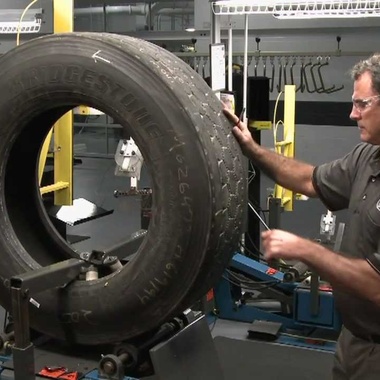
Well, “made in the USSR” sounds proud even half a century later.
compact MPV practice
Test drives / Test drive Haval Dargo vs Mitsubishi Outlander: the dog is barking, the stranger is coming In the Haval dealership in the south of Moscow, life is in full swing: buyers look at cars, communicate with managers and sign some papers. While I was waiting for the test Dargo, the same cross... 16305 7 205 13.09.2022
Test drives / Test drive Motor from Mercedes, emblem from Renault, assembly from Dacia: test drive of the European Logan 1.0 It would seem that what's new can be told about the second generation Renault Logan, known to every Russian taxi driver, as they say, up and down? However, this car has.