Sooner or later, you'll ride over some glass or perhaps hit a rut or hole and get a flat tire. When this happens, don't panic! As long as you carry a few basic tools (which we can help you with), flat repair is easy—even fun! Here's how it's done. Note that these instructions are for standard tires and tubes, and tubeless setups, and for road and mountain bicycles, too. When you get a flat there are usually six easy steps to follow to fix it. 1. Open the brake (you skip this step if your bike has disc brakes because it's unnecessary). Here are complete instructions for each of these simple steps. Note that, while we've tried hard to answer every possible question you could have about flat tire repair, you only need to read as much as you want. And, be sure to click on the many underlined links and the photos for larger photos and additional helpful tips. 1. Open the brake: As soon as you get that "sinking" feeling or hear the hiss of escaping air, let your ride partners know you have a flat (so they won't disappear over the horizon) and stop in a safe spot. If it's a rear flat, shift onto the smallest rear cog. The first step in wheel removal (except for bikes with disc brakes) is opening the brake, which makes it easier to get the wheel out (photo: click to enlarge). Open sidepull brakes by fully rotating the little lever on the brake upwards (a). Open linear-pulls (also called "direct-pulls" or "V-brakes") by lifting the end of the "noodle" out of its holder (b). Some sidepulls are opened by pressing a button on the lever. Look for this if there's no lever on the brake. Open cantilever brakes (these feature a cable that runs over the top of the tire) by lifting the cable end on one side out of its holder. Tips
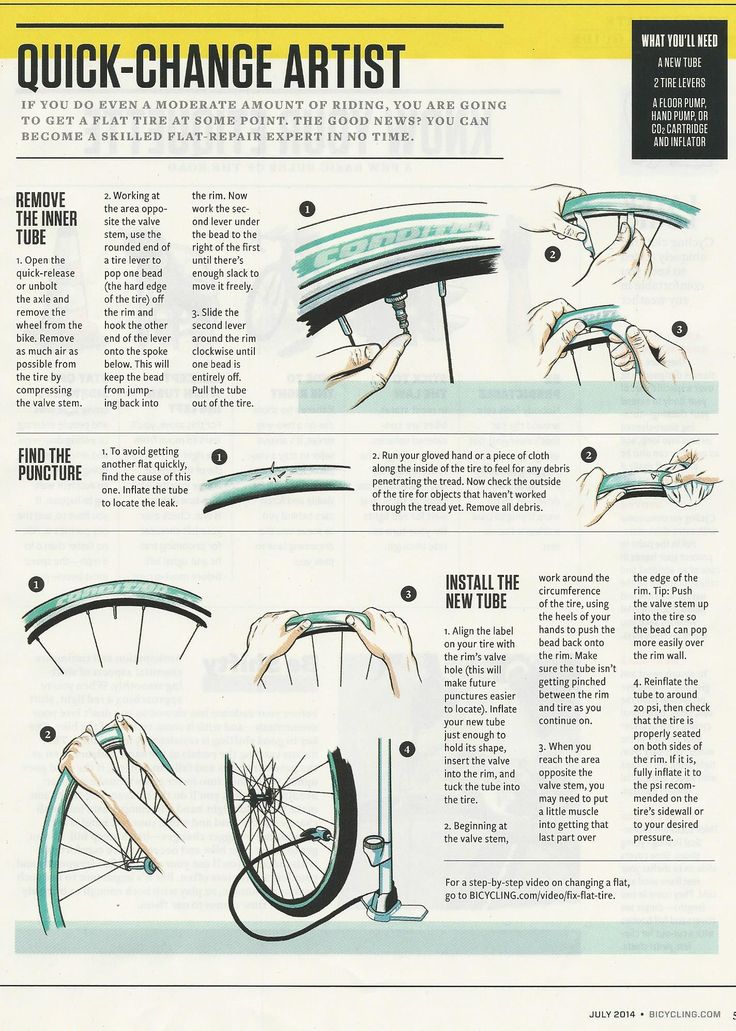
2. Remove the wheel: Open the quick release (or loosen the axle nuts) on the wheel with the flat and lift the bike to remove the wheel. To extract rear wheels, it helps to pull the derailleur back slightly to clear the axle parts as the wheel passes through (main photo: click to enlarge). For fronts, you'll probably need to hold one side of the quick release and turn the other counterclockwise to create clearance to get past the wheel-retention ("safety") tabs on the fork (inset photo: click to enlarge). Tips
3. Remove the tire and tube: Remove the valve cap and nut (sometimes found on Presta valves: inset photo: click to enlarge). For Presta valves, unscrew the tip and press down to let all the air out. For Schraders, poke the end of the tire lever into the valve to release all the air. Starting directly opposite the valve, wiggle a tire lever beneath the tire's edge and pry down to lift. If possible, hook the lever on a spoke (many levers are made to do this), or hold it in place. Place another lever about 4 inches away from the first and pry here (main photo: click to enlarge). Continue with your third lever until you can get one side of the tire off. Then reach inside and fully extract the tube. Pull the other side of the tire off the same side of the wheel or pry it off with the levers. Tips
4. Inspect the tire: It's important to find whatever caused the flat and remove it. If you don't, the culprit might still be in the tire where it'll just pop your new tube! To find it, remove your glove (or use a rag), and run it around inside the tire in both directions (photo: click to enlarge). If something sharp is still stuck in your tire, it'll snag the glove. Remove the nasty. If you can't find anything, it's likely it got knocked out during the disassembly procedure. Tips
5. Install the tube & tire: 4 Easy Steps 2) Place the valve partway into the hole and simultaneously push the top section of the tire edge (called the "bead") that's at the valve and closest to your legs onto the rim. 3) With one bead in place, tuck the tube fully inside the tire and on top of the rim, which will cause the other bead to rest flush against the rim. Work this bead on starting at the valve as you did with the first. To get the bead started, you may have to push the valve into the tire to provide clearance for the bead (photo). Once you've got the bead started, work your hands away from the valve pressing the bead onto the rim around the wheel as you did in step 2 above. 4) With a few inches of bead left to pop onto the rim, the tire will resist. Let all the air out. Crouch and rest the wheel on your knee to have something to push against. Now, hold the bead in place with one hand (we're using our left hand in the photo: click to enlarge) and with your stronger hand, push down to roll the stubborn section onto the rim with the heel of your hand. Tips
6. Inflate and seat the tire and reinstall the wheel: Place your pump on the valve and inflate the tire. If the tube gets trapped beneath a bead (photo, below, left: click to enlarge), inflating further may blow the tire and tube off the rim! There are bead lines on the sides of the tire that should be equidistant from the rim all the way around on both sides of the wheel. If they're not, or if you see a section of tube peeking out from under the tire (photo), let the air out, poke the tube gently back into place with your tire lever (don't even think of using a screwdriver, which will pop the tube), reinflate partway and check the tire again. When it's seated correctly, inflate the tire fully. Tips
From the best pumps, to spare tubes, patch kits and flat-resistant tires and tubes, we have everything you need to ensure that you have a minimum of flat tires and an easy time fixing flats, too. |
Changing a bike tire after getting a flat is a relatively easy fix—as long as you know how to handle it. Whether you ride on smooth pavement, rough gravel, or rocky singletrack trails, it’s bound to happen eventually, so you might as well prepare yourself with both the necessary tools and the bike repair knowledge you need address the problem.
Below, we detail everything you need to know about how to change a bike tire, including the bike tire repair tips you need to succeed.
First things first though—for tools, you should always carry tire levers, a correctly-sized spare tube, and an inflation device, be it a mini pump or CO2 cartridge. You may also want to consider a patch kit or tire plug, which can come in handy for certain riders. And if you run tubeless tires, scroll down to skip to the tubeless section. When you’re ready to go, here’s your step-by-step guide.
Start by removing the wheel. Keep your bike upright, and if it’s a rear-wheel flat, shift your drivetrain into the hardest gear. If your bike has rim brakes, which many bikes still do, you may also need to loosen the brake.
Next, position yourself on the non-drive side of your bike (opposite the chain) and either open the quick release or unthread the thru-axle to remove the wheel.
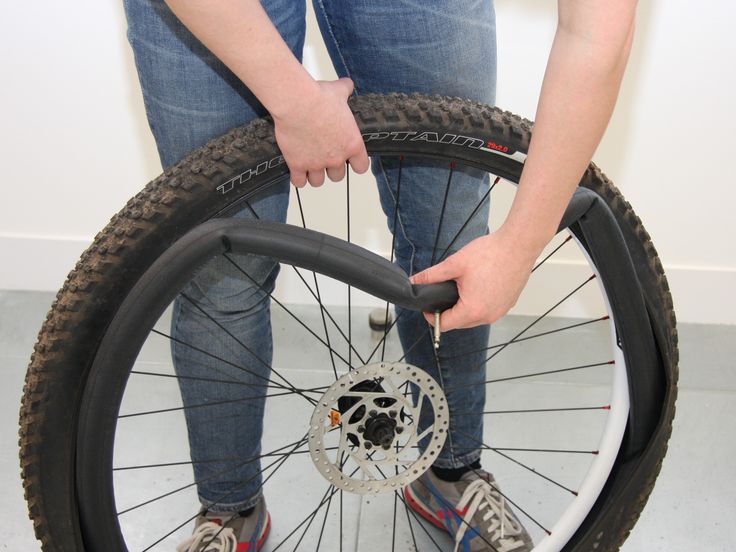
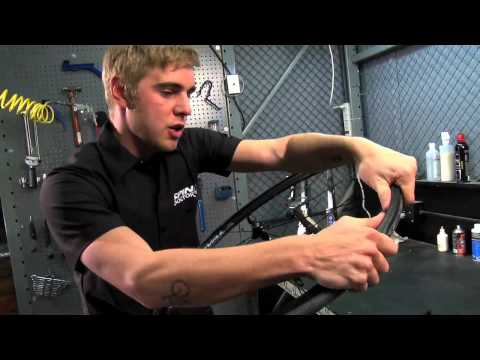
Now you can remove the tire. Hook the rounded end of one tire lever under the bead (the outer edge) of the tire to unseat it. Fix the other end to a spoke to hold the lever in place and keep the unseated tire from popping back into the rim. Then hook the second lever under the bead next to the first, pushing it around the rim clockwise until one side of the tire is off. You don’t need to completely remove the tire.
Once the tire is loose, pull out the old tube (if applicable) and look for the source of the flat, which could be a thorn, piece of glass, or some other sharp object. Carefully run your fingers along the inside of your tire and rim, making sure nothing sharp is left behind; otherwise, you risk getting another flat. Also inspect the outside of the tire, again looking for any foreign object that might still be stuck in the rubber.
If you’re using tubes and want to do a little detective work, pump some air into the old one to find the leak. Two holes side by side indicate a pinch-flat, where the tube gets pinched between the tire and rim. A single hole is a sign that your flat was most likely caused by a sharp object. By lining the tube up with the tire using the valve as a point of reference, you can double check the area where the hole is to ensure the culprit is removed.
If you’re the thrifty type who likes to reuse old tubes, or if you’ve gotten multiple flats on your ride and have no more spares, then you can patch your tube with a patch kit. If you have a new tube, skip to the next section.
Start by cleaning the punctured area and roughing the surface with an emery cloth. For a glueless patch, simply stick it over the hole and press firmly. For a patch that requires glue, add a thin layer of glue to the tube and patch. Wait for the glue to get tacky, then apply the patch and press firmly until it adheres.
If you prefer to reuse old tubes or ran out of spares, you can try to patch the hole with a patch kit.
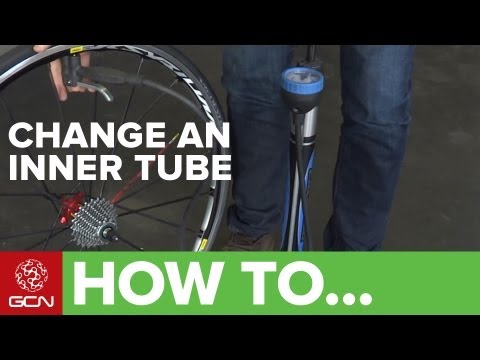
Katja Kircher//Getty ImagesNow inflate your new or patched tube just enough so that it holds its shape. This makes it easier to place inside the tire. Next, with the valve stem installed straight through the rim’s valve hole, position the tube inside the tire. Work the tire back onto the rim with your hands by rolling the bead away from yourself. Try not to use levers to reseat the tire, as you could accidentally puncture your new tube. When you get to the valve stem, tuck both sides of the tire bead low into the rim and push upward on the stem to get the tube inside the tire.
Check to make sure the tire bead isn’t pinching the tube by gently pushing the tire to the side as you work your way around the rim. Then inflate to the appropriate PSI and check that the bead is seated correctly.
$50 at Amazon
Credit: Silca$9 at Amazon
$6 at Amazon
Credit: Park Tool$45 at REI
Credit: REIIf everything looks good, reattach your wheel, making sure the quick release or thru-axle lever is on the opposite side of your drivetrain.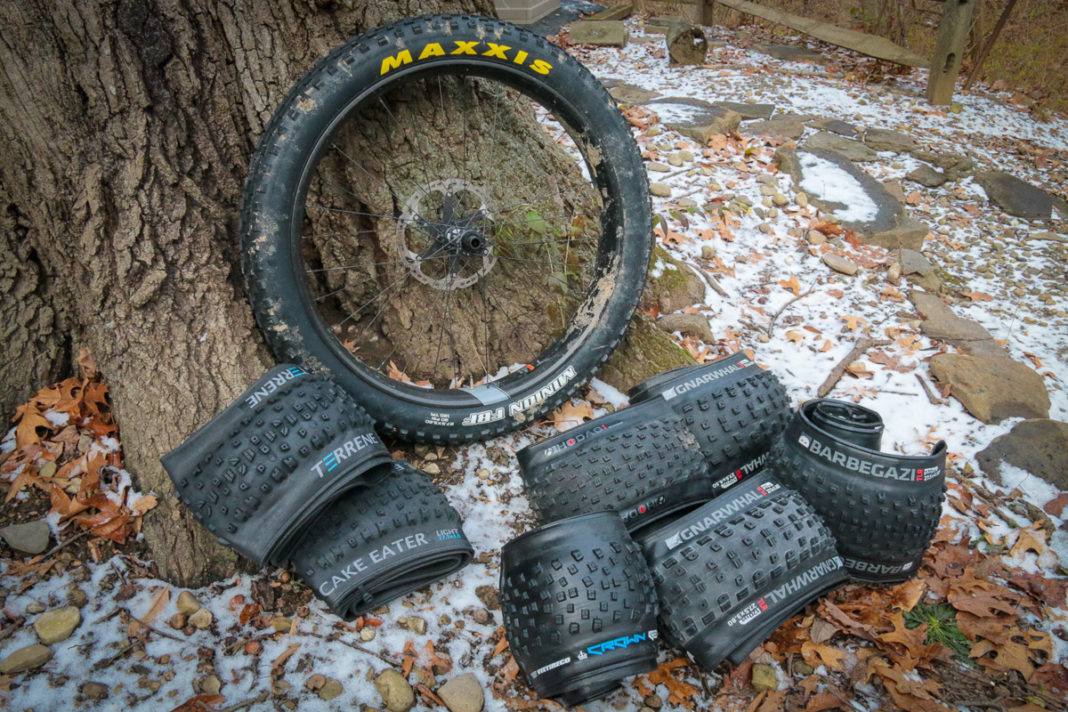
If you had a rear-wheel flat, lay the top of the chain around the smallest cog on your cassette and carefully push the wheel back into the frame. Close your quick release (and rim brakes if applicable) or insert the thru-axle back into the frame and hub and thread it closed.
Finally, lift the rear wheel and spin your cranks once to make sure everything is back in place and operating smoothly. If all is good to go, get back on your bike and enjoy the rest of your ride.
Trevor Raab
For tubeless setups—all but standard in mountain biking and becoming increasingly popular on gravel, cyclocross, and even some road bikes—your sealant should do the trick without you even realizing it. Be sure to check your sealant regularly (about every three to six months) to make sure the tire has enough and that it hasn’t dried out.
But in the event of a bigger puncture or side-wall tear, you may need a tire plug to stop air loss.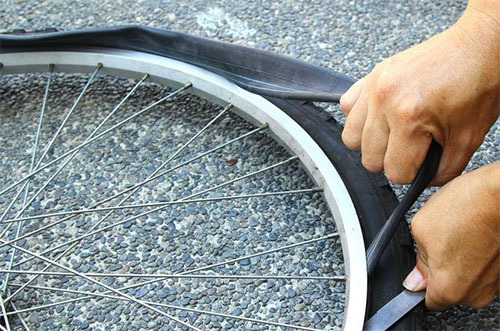 Plug kits come with a small strip of rubber and an insertion device, which allow you to plug the hole without even removing the wheel. Once you find the puncture and insert the rubber plug, re-inflate your tire to the appropriate pressure to see that it’s holding air. If so, start riding again, and check the repair every so often to make sure it’s holding fast. You could also add more sealant, but you’d need to carry a valve core removal tool and a small bottle of sealant.
Trevor Raab
If air loss is coming from a puncture bigger than a plug fix, you could try a patch or a boot on the tire. But fair warning: It’ll likely be difficult to get a patch to adhere to your sealant-coated tire without thoroughly cleaning the area. Adding more sealant or a patch could create another problem, too, by letting all the air out and breaking the seal between the rim and tire. It’ll likely be difficult to reseat the tire bead onto the rim on the spot. The easiest way to ensure your tire holds air at this point is to simply use a spare emergency tube to get through the ride and address it at home or at a bike shop.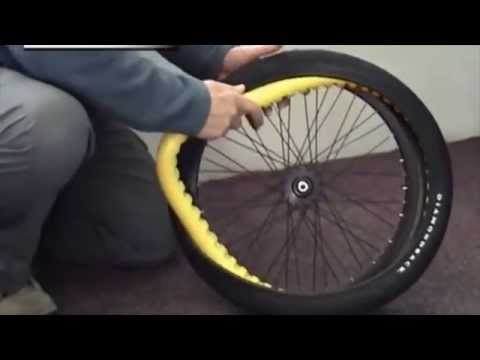
$155 at Trek Bikes
$67 at Amazon
Keep It Clean
$10 at notubes.com
Precisely measure sealant and install with no mess.
Mid-Ride Repair
$60 at dynaplug.com
Brass-tipped plugs make fixing bigger punctures easy.
Jessica Coulon
Service and News Editor
When she’s not out riding her mountain bike, Jessica is an editor for Popular Mechanics. She was previously an editor for Bicycling magazine.
Throughout the life of a bicycle, you will need to clean, lubricate and possibly repair various parts. If you ride often and like to diversify the route, then eventually one or both of your tires will wear out, and the chamber will be blown out more than once due to a puncture. Therefore, it is important to be able to repair the cut, as well as replace the tire and tube.
It won't take you long to learn. The main thing is to carefully and consistently follow the steps below. Trust me, changing tires or tubes is easy.
1. Turn bike upside down with wheels .
You can mount the bike in a dedicated repair stand or hang it with the frame securely fixed. The wheels should turn freely without any resistance.
It can be secured with nuts on an axle that needs to be loosened (usually a cheaper version of the bike).
Depending on the make of your bike, the wheel can also be secured with a quick-release lever (eccentric) that needs to be released. Also, there are mounting options directly on the axle, when the axle parts (hex bolts) are directly tightened and thus fix the wheel in the feathers. As a rule, such axles are quite wide, hollow inside and are installed on more expensive models of bicycles (most often mountain bikes).
If you have V-brakes (rim brakes), open the mechanism by releasing the springs. You can also loosen the cable, but you need to remember to fix it after reinstalling the wheel. This is done so that you can remove the wheel, since (when the brakes are working) the pads will hold the tire.
If you have disc brakes, you can remove the wheel without any additional steps.
3. Remove tire from the wheel rim.
Locate the nipple and select a location on the opposite side of the wheel. Using the bead (a tire removal tool that looks like a spoon, spatula), separate the tire from the wheel rim and fix the bead on the spoke. Repeat the procedure with the second bead at a distance of about 2.5 cm from the first. Continue doing this around the wheel until you can completely remove the tire.
Please note that if you need to seal or replace the inner tube, it is not necessary to completely remove the tire.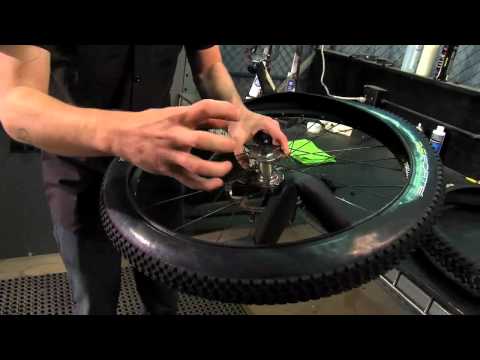 It is enough to disassemble one side to get the camera. This will make the next process easier.
4. Check and clean the inside of the tire for debris.
Look for anything that could cause cuts or punctures. Specifically, spikes, glass shards, and metal shards. After all, often what cut the tire and / or pierced the chamber remains in the tire and can ruin it again.
5. Find holes or cuts in the tire and tube .
To find punctures, you can inflate and submerge the tube in water, watching carefully for air bubbles. You can also do this without water, but only if the puncture is large enough. Otherwise, you simply will not hear where the air is leaking from.
If you clearly see a hole or a wide cut on these parts, then you will most likely need to purchase a new tire and tube. It will be possible to glue only with slight damage to the material.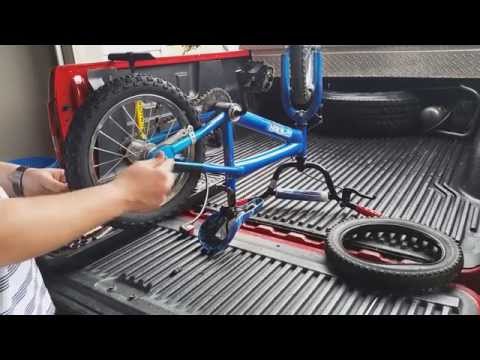 During a puncture, the tire does not need to be sealed at all, since it itself tends to shrink and not expand the hole.
6. For , glue the holes with repair kit .
Take a piece of sandpaper and sand the area around the puncture. It is also desirable to degrease it for better adhesion to the patch. Take a patch and, using glue, patch the puncture. Firmly press the patch and its edges, smooth with your fingers (the back of the screwdriver will work too).
7. Wait a few minutes for the adhesive to set .
Insert the tube into the wheel and inflate to the maximum possible pressure (the value is indicated on the tire). Thus, the tire will press the patch to the chamber, and the patch itself will finally stick to the stretched surface of the chamber, which is what we need. If this is not done, then the patch will dry to the tightened surface of the chamber and may peel off when inflated.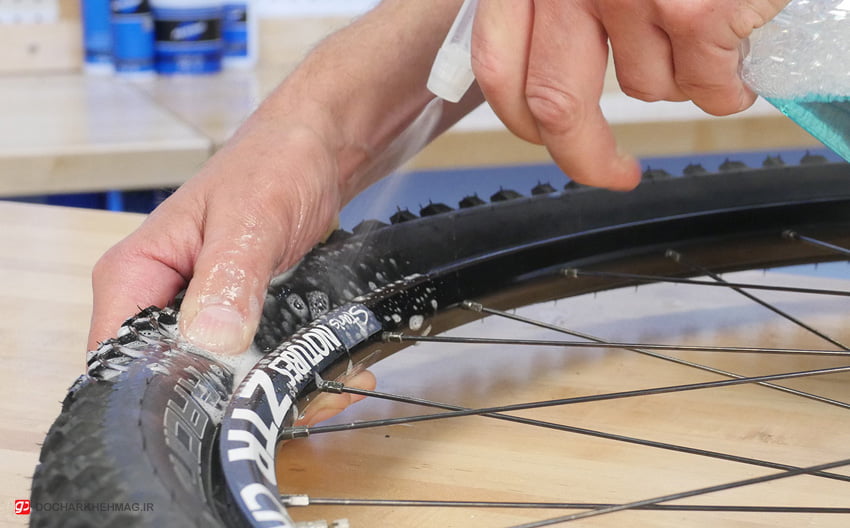 When installing the camera, do not forget that it should “lie down” without kinks and twists.
8. W Replace tire if necessary.
If your goal is to replace a tire, then take apart the old one, remove it and take a new one. Insert one side of the new tire into the rim, and bolster the other side with the beads. Often, when installing a new tire, this action can be easily performed with your fingers, without the help of any tools. Make sure your tire fits into the rim, doesn't come out anywhere, and is evenly distributed. Pump up the wheel.
9. Insert the wheel into the slots on the bike fork or stays.
Fasten the axle. Don't forget to fix the brakes!
That's it. We remind you that you can change tubes and tires in the workshop of the Goldenbike store. Stay with us!
 ru -Recommendations for repair, maintenance and tuning of a bicycle for beginner cyclists|Cycling club
 A flat tire on a bicycle is a fairly common occurrence, especially when riding on rough terrain or using poor quality or worn tires. Such an unpleasant incident happens to a cyclist at least once a season, and some are "lucky" to change the camera two or three times in a short trip.
And if it takes five minutes for an experienced cyclist to change the tube on a bicycle, then for some reason beginners are very afraid to remove the tire on their own and most often drag their bike to a service or to friends. In fact, changing the camera is very simple:
 To do this, you can use special mounts that are sold in almost every bike shop. Of course, it is more convenient to remove the tire with them and there is no risk of damage to the rim. However, there are situations when such a tool is not at hand. In this case, you can use any sufficiently thin and durable objects: various wrenches, a beer opener, or even a camping spoon. The only restriction: your tool should not have sharp ends, otherwise you will pierce the camera in a couple more places. Because of this, it is strongly not recommended to use screwdrivers, knives and other sharp objects to remove tires. It is also worth remembering that if you press too hard on the rim, you can damage it. As an example, in this manual we will use ordinary wrenches as montages, which were the first to come to hand - not the best, hiking option.
 In order to pull the tire out of the rim, you need to pick up its edge with the first "wire" and pull it out of the rim. At the same time, the mount must be held so that the tire does not end up inside the rim again, and the mount itself does not fly into your forehead.
After that, with the second mount, similarly pull out the edge of the tire next to the first mount. Don't forget to hold the first montage while doing this!
If the tire tension is still high after using two mounts, the third mount should be used in the same way.
You should end up with one end of the tire completely out of the rim.
Done. Now you can start sealing the damaged camera or just install a new one.


 The disadvantage is that it's harder to check inside the tire to find whatever popped the tube and also to check inside the rim to see if the rim strip is still covering all the sharp spoke holes (sometimes it gets shifted out of place over time).
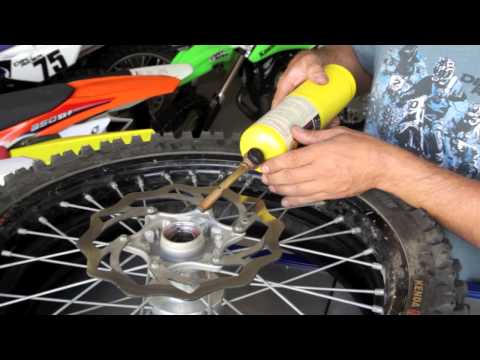
 Then, with both hands moving downward away from the valve using the ground to push against, finish working the bottom tire bead (the one closest to your legs) onto the wheel all the way around the wheel (photo: click to enlarge).
 But don't try to pop it on all at once. Install an inch at a time, moving your hand along until you've fully installed the tire. If it resists, be sure all the air is out of the tire. Got it? Good job!
 To prevent valve damage, brace the valve by wrapping a finger behind a spoke and your thumb over the tire (photo: click to enlarge) so you're pushing against your hand, not the valve. And hold the pump steady, don't wiggle it around as you pump. Inflate the tire until it's just firm (not fully inflated). At this point, inspect the tire to make sure it's "seated," which means that it's sitting correctly on the wheel.
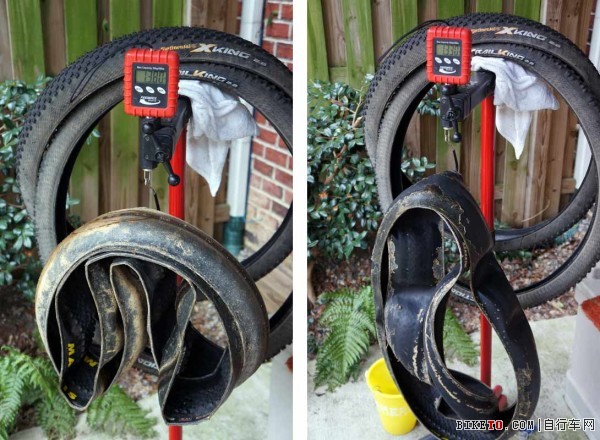 Install the valve nut (if your tube uses one) and cap finger tight (overtightening the valve nut can damage the tube and make it difficult to loosen it when you need to fix a flat). Reinstall the wheel in the frame, close the brake quick release or reattach the noodle or cable and you're ready to ride!
 We can also show you how to fix a flat. Just ask if you need any help at all. Thanks!