At SuperATV we like to hit the trail prepared with a nice assortment of tools, a spare tire and wheel, some spare axles, and plenty of friends around to lend a hand when something goes south.
Flat tires happen, and we want you to be prepared when they do. Even if you find yourself stuck without a jack, we’ve got a few tricks up our sleeves to help you get going again.But we’re not always so well stocked. Sometimes we hit the trail with just ourselves, a buddy, and a toolbox. When we leave the jack at home, how do we take care of a tire when it blows? Or worse, what if the tire bead comes off the wheel?
Here’s how to get the job done.
There are a few ways to get the weight off your wheels without the use of a jack. These techniques utilizes your surroundings and simple physics to get that blown tire off the ground. We’re confident that one of these approaches will come in handy in a sticky situation, no matter where you ride.
The easiest way to do it is to find a rock, log, or mound and park one front tire on it. If you’re at the right angle, you’ll be able to rock your machine back and forth to take weight off one front wheel or one rear wheel.
Get off camber! The “off camber” method involves elevating the tire that needs to be changed by parking the other front tire on a rock, log, a bunch of dirt you just shoveled into a pile—you get the picture.Say you want to change your rear passenger tire. You’d want to get your front passenger tire onto a high point so you can use your front passenger and rear driver tire as the pivot point. Rock your UTV to the left and your rear passenger tire will lift off the ground.
Our favorite way, and the way you’ve probably seen most often on your rides, requires a buddy with a winch. The method to get your tires off the ground is simple enough.
That’s it. Two steps and you’re done. Easy peasy.
If you don’t have a good boulder to roll up on and you don’t have a friend with you, there are other ways to get your tires off the ground. On method is to take your winch line and hook it up to a tree above you somewhere. We will note that this method is a little sketchy, so make sure to only attempt this with a good, strong tree that you trust.
Pull the winch in and you can raise your front end off the ground to whatever height you want. This method has some obvious limitations, though:
 )
)If you get past all those hurdles, you can get away with some impressive lifting action. Check out the video below to witness this technique in action! (As you can see, we had to use a ten-foot ladder to find a good anchor point.)
A slightly more consistent way to get weight off your wheels is to build your own ramp. This technique is easier than it sounds. All you need are two logs, or a log and a rock.
Lay one log on top of the other in a “T” shape, then drive up the ramp so that your skid plate—not your suspension—rests on the inclined log. Throw your brakes on, chock your wheels, and you’re ready to get to changing.
This technique is best suited for changing your front tires. You could back onto a ramp like this, but shifting your weight forward while relying only on your front wheels to push your machine can be pretty hard on your front axles.
When you need to lift your front end and all else fails, you can use a single length of timber to make a bumper jack. This tip comes straight out of the US Army handbook for Recovery and Battle Damage Assessment and Repair. We do like to be Built for Battle, after all.
Here’s how to make a bumper jack:
To use this military method, you need a bumper that’s Built for Battle—otherwise you might end up doing more harm than good to your ride.
I’m going to assume you know how to plug a tire and skip right to the worst-case scenario: your tire comes off the bead and you don’t have a spare. How do you reseat a tire bead without a special compressed air bead seater tool? There are two main methods: ratchet straps (smart) and fire (not smart).
Make sure you’re prepared with a Spare Tire Carrier.
Reseating a bead using ratchet straps is safe and easy. Plus, ratchet straps are a standard tool in just about every rider’s toolbox. The only other tool you need is an air compressor.
Here’s what you do:
Once you remove the ratchet strap and fill your tire to the right PSI, you’re ready to roll.
A ratchet strap can be used to reseat a bead once your tire is back on the wheel. This is definitely something you should keep with you at all times!The fire method involves spraying ether starting fluid on your wheel then lighting it. The small explosion generates enough heat and pressure to seat the bead instantly. Here’s why this easy method is also a bad method:
 Get too much fluid on there and you can say goodbye to your eyebrows.
There you have it. Changing tires on the trail and reseating beads is no big deal, as long as you have the right techniques under your belt. It’s amazing how far a few tools and a little ingenuity will get you. Be sure to check out our Spare Tire Carriers to make sure you’re prepared for the worst.
Most ATV owners will at some time have to repair or change a tire on their bike. Recently, I decided it was time to stop being depended on a tire shop to do this job for me. I set out to find the best way to do this job myself.
I did the research, I did the testing, and have found a method that works quite well. This guide will tell you what you need to know to change an ATV tire by hand.
You can get the job done without breaking the bank on expensive specialist tools. But some basic hand tools are required to be able to do the job safely and efficiently.
Page Contents
Before will get into the actual guide, we’ll have a quick look at what many consider to be the hardest part of changing an ATV tire; breaking the bead.
On the inside of the rim, close to the lip, there is a small bump called the “bead retainer”. This little bump goes all the way around the circumstance of the rim.
Then, on each edge of the tire, you find the so-called tire bead. This part of the tire contains a strong steel cable that goes all the way around the tire as well, creating a strong steel inforced loop.
Close-up of the tire bead section of the tire.The tire is beaded when the tire bead has been pressed over the bead retainer and rests against the inside of the lip of the rim. When in this position, the tire is prevented from sliding sideways on the rim itself.
So the primary purpose of the bead retainer is to keep the tire in place. Aggressive riding would otherwise force the tire sideways and it would lose its seal.
It’s not, however, what makes the tire airtight. That’s mostly achieved by the air pressure inside the tires.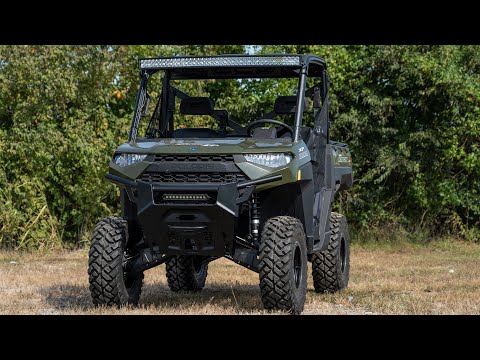 The air makes sure that the tire is always being pushed outwards against the lip of the rim.
Off-road and trail riding will often involve extreme sideways forces and impacts being inflicted to the wheel. Riding steep side-hills, hitting stumps and landing jumps are often when you are most likely to involuntarily break the bead.
On-road tires will not be faced with challenges like these under normal circumstances.
In addition, off-road tires usually run at a much lower tire pressure. As a result, there is a lot smaller force that pushes the tire outwards against the lip of the rim.
This means the wheel on off-road vehicles has to do a better job at keeping the tire beaded so that you don’t end up with a flat all the time.
To achieve this the tire beads on ATV tires, UTV tires and other off-road tires are extra heavy-duty. Also, the bead retainer bump is usually a bit bigger.
This is great for keeping the tire seated when riding. But it’s also that much more challenging when you want to break the bead.
There are many ways to break the bead of a tire.
What most of the methods have in common is that they involve some sort of tool. Some of which are quite expensive, while others are almost free.
At the higher end of the scale, you have the several thousand dollars tire changing machines that the tire shops use. These are very effective, but usually way out of budget for the average home mechanic.
At the other end, you have some more-or-less effective, almost free, and sometimes downright dangerous DIY solutions.
Underneath are the most common options, good and bad.
I’ve included my top 3 recommendations which are the ones I consider to be the most effective and least risky.
That’s “least risky”, not risk-free. You can still mess up. If you want risk free, take the tire to a tire shop.
This may sound brutal, and that’s exactly what it is. The method is completely free, as long as you already own a truck, and don’t break anything in the process.
The idea is that you lay the wheel flat on the ground, and drive your truck over the tire part of the ATV wheel.
While there are several reports of people successfully performing this method, it’s not one that I recommend. There is a great chance of bending or damaging your rim with this method. Its effectiveness is also quite questionable.
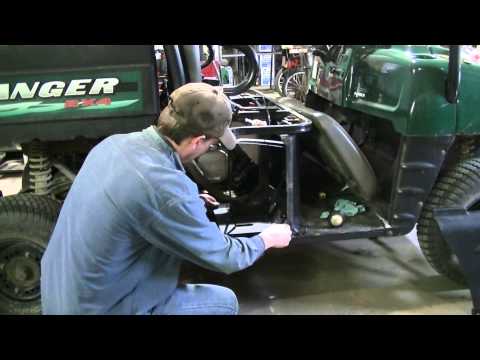
Lay the wheel flat on the ground with a small amount of air (about 3-5PSI) still left in the tire. Then place a piece of 2×6 lumber on top of the tire, as close to the rim as possible.
The idea is you slowly drive a truck up the piece of lumber until the weight of the truck breaks the bead. It may be necessary to reverse, reposition the tire and apply weight several times before the bead will break.
Then back off, refill with 3-5 PSI of air to stiffen the tire and do the other side.
This method is fast and may work fine in most cases. But it’s not something I would suggest for anyone as their go-to method for de-beading a tire.
There is a lot that can go wrong, and no guarantee it will work. If you forget to leave some air there is a great chance of damaging the tire. The piece of lumber fill just slides down the tire sidewall.
And if you leave too much air the tire can blow. Or if you use a car without enough of clearance, you will rip the bumper right off on the way down.
I wanted to find the best, almost free DIY method for breaking the bead on an ATV tire. Not all ATV owners have access to welding machines, so I decided it had to made from wood.
I made 3 different models before I found a design that performed ok. I had good faith in this first design. The idea, found on a motorcycle forum, is really clever. It should work fine with motorcycle tires and such.
But the ATV bead was too strong. The hardware or the wood itself kept breaking on all three versions I built.
I ended up with a really simple design. All you need is a few feet of two by four and a couple of relatively strong hinges. The tool has to be mounted securely to a wall or a post as I did
Two pieces of wood and a couple of strong hinges give you a decent bead breaker in no time. Remember to cut the short piece of wood at about a 15-degree angle.This is the most effective and reliable solutions I have found. That is, for those that do not want to spend a lot of money on tools or don’t want to spend a lot of time on complex fabrication.
You’ve probably seen this tool or a variation of it at some point. You can get them at almost any auto supply or hardware store. They are relatively cheap and works really good on many types of small to medium sized tires.
This portable tire changer is my go-to tool whenever I need to de-bead a tire at home.
The tool needs to be bolted to the floor or some other heavy object to be operated effectively. And, it does require some getting used to.
But many users struggle to successfully break the bead of ATV tires with these things. The bead may be seated so well that the tool instead of breaking the bead just slip and slide down the sidewall of the tire.
When this happens you not only risk damaging your tire but will also build up quite the frustration from each failed attempt.
Despite its flaws, I’ve still listed this tool as recommended. Why? Well first off, they are relatively cheap. And when they do work, they are actually quite effective.
More importantly, there is a little trick you can use to make them work a lot more effective on ATV tires.
To prevent the tool from sliding down the sidewall of the tire, you should leave just a little air in the tire. Do not use more than 3-5 PSI. This will allow you to apply a lot more pressure by the bead before the tool wants to start sliding.
Often this is what makes the difference between a successful and a failed attempt.
It’s also a good idea to spray the bead with some soapy water before you try breaking the bead.
But even when applying these tricks, you may find that this tool will struggle to break the bead on the most stubborn ATV tires. If you are looking to change tires on your 10 years old OEM 400EX wheels, you may have to upgrade to the best tool on the list.
A company called BeadBuster sells a tool that clamps onto the rim and forces a wedge in between the rim and the tire. By rotating a bolt you force the bead down and over the bead retainer.
This tool has one main advantage over the tools we have looked at so far. It does not press down on the thin sidewall of the tire, but directly onto the tire bead.
This reduces any chance of damaging the wheel and tire. The pushing force created by turning the tightening-bolt should be powerful enough to break the bead on almost any ATV tire.
They are the most expensive among the tools I recommend. But if you accept the cost, they are the best option, next to getting a professional tire changing machine.
Another tool that seems to be just as effective as the portable tire changer, are the so-called “Tire Plyers”. These also work by the principle of jamming a wedge in between the rim ant the tire but uses a long handle to lever the wedge down.
It will work on most ATV tires, but some users report breaking the tool because how tight their ATV tire was beaded. This is why I cannot give them a recommended badge by now.
I have not, however, tested these myself. As soon as I get my hands on a pair I will give them a test and consider adding them to the recommended list.
The second most tricky part of changing an ATV tire by hand is mounting it back on the rim again and having it bead properly.
With a couple of tire irons and some soapy water, you should be able to get the tire onto the rim without any big issues. Just take your time and work systematically.
As for beading the tire, this can be a bit tricky on tubeless tires. But in the guide, I’ll show you a simple trick I have learned that should help you succeed.
This guide is for tubeless ATV tires. The procedure for tubed tires is very similar. But then you also need to release the tire-valve and make sure you don’t damage the tube when removing the tire.
 They are very powerful and I’ve seen more than once how quick they can snap a bolt.
I recommend getting a valve stem core removal tool for this part. They are cheap and saves you a lot of time.
While it is possible to deflate the tire just bu pushing the tire valve pin, it will take forever. With a valve stem tool, you can remove the valve stem which will deflate the tire in seconds.
Lefty-loosey, righty-tightly. You know the drill.
Keep two fingers on the valve when unscrewing it so you don’t lose it when the air starts flowing.
Remove the valve stem core, using a valve stem core tool.As soon as the air is out, put the valve stem core back in so you don’t lose it. Do not over tighten, as the threads on these are quite thin.
Choose between one of the recommended procedures for breaking the tire bead;
The DIY de-beading tool.
Portable tire changing tool
Bead buster
If none of these methods breaks the bead, it’s time to take the wheel to a tire shop.
You need two tire irons or a couple of big screwdrivers to perform this step. It’s also recommended that you get some plastic wheel protectors, or use tire irons with protective plastic so that you won’t damage your rims.
Before you can begin installing the new tire, you need to make sure that the bead of the rim is smooth and clean.
Wash off any dirt, sand or other debris. You may need to use a wire brush to get a good result.
If there is any rust, this has to be removed before you install a new tire. Tools you can use to remove the rust:
Ideally, you want to remove all rust. It’s important that the surface is smooth, so you get a proper airtight seal between the tire and the rim.
After removing the rust you will be left with exposed metal that will start rusting immediately if left untreated. I recommend that you paint it with a quality rust inhibiting paint before installing the tire.
By doing so, you will likely be able to maintain an airtight seal for much longer, and the bike will look a bit healthier.
If your rim and tire are completely free of any damage or nicks by the bead, you may skip this step if you want.
But, as you may know, ATV tires are prone to having tire leak issues by the bead. This happens because the way they are used.
When you ride off-road, sand, dirt and other debris will be caught in the little gap between the rim and tire. This will wear down the paint, creating corrosion issues over time.
There’s also a good chance that you will damage the rim at some point by hitting a rock.
Therefore, I recommend that you always apply a coat of bead sealer on the tire bead before installing the tire. Consider it a cheap insurance against problems down the road.
A good alternative for using purpose made bead sealer is using some silicone.
Be aware that both of these products come with the disadvantage of making it a bit harder to break the bead the next time you need to change the tire.
Spray some soapy water on the bead retainer. Again, this is so that the rubber will slide more easily against the metal rim.
An even better alternative is using a light coat of baby powder on the lip of the rim and tire bead. Give it a try if you struggle to get the new tire back on the rim.
Do not use WD-40 as lube as this may deteriorate rubber over time.
Now it’s time to reinstall the tire.
 The tire bead should be placed in the drop-well or you will struggle to get it over the lip of the rim.
Now you’ve got the tire onto the rim, but it’s still not completely mounted. You need to re-bead the tire to the rim, using air pressure.
But if you try putting air into the tire as it sits right now you will likely get no result. This is because you have a gap between the tire and the rim that is too big.
The air compressor alone won’t be able to supply enough airflow to get it to seal. The air just escapes.
If you happen to have a specialist tool like a “shock-filler” or similar standing in the corner of your garage, now would be a good time to get it.
But most of us don’t have tools like this. And for the occasional tire job, there is not really a need for one neither. There is a simple trick you can use to get the job done.
No, it’s not the one where you put starter fluid inside rim and light it on fire. While this may work, there is another way that is safer, and just as fast.
All you need is a ratchet strap. If you don’t have one, now’s the time to get one. Use the strongest strap you can find. If the strap breaks, it does so with great force!
All that is left now is to put air back into the tire until it beads. I recommend using a tire-inflator that has a gauge for this part.
Can you change ATV tires at home?
With a few tools and some basic mechanical skills, it’s very doable to change ATV tires at home. But be aware that air under pressure is potentially very dangerous, so necessary precautions must be taken.
How hard is it to change ATV tires?
ATV tires and other off-road tires have stronger beads than on-road tires. This makes them a bit harder to change. But when you know the steps, changing tires is about as hard as replacing brake pads or installing a new exhaust system.
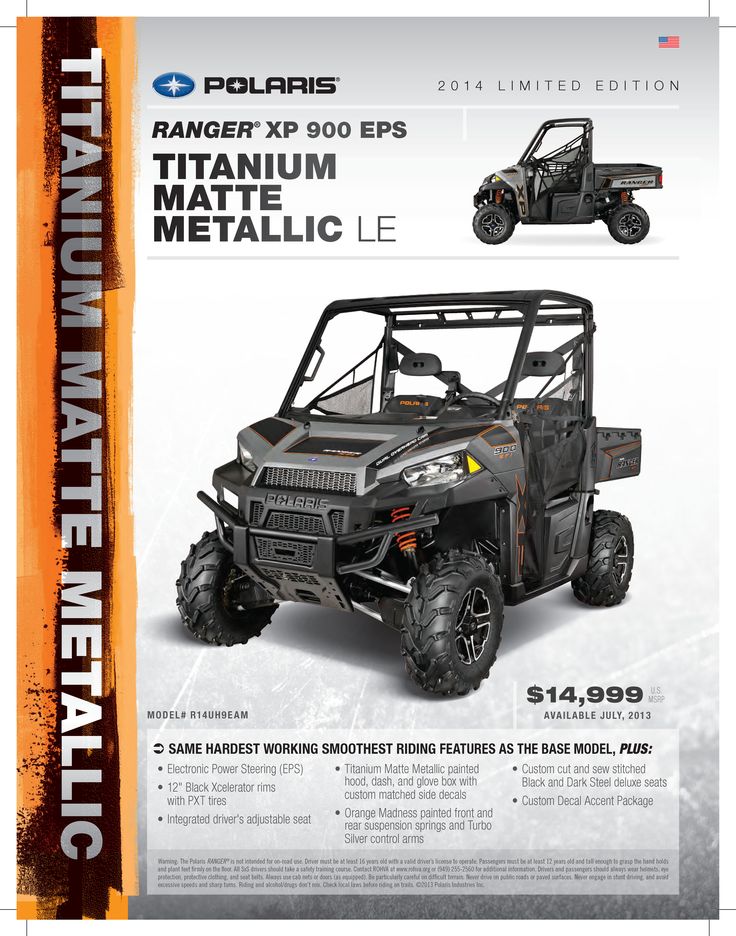
News New Most comfortable ATV: Polaris Ranger XP 1000 surprises with performance
Categories
New 0 24 Jul, 2019 (0 votes)
Many car owners do not believe that an ATV that is many times smaller can be as comfortable and off-road as a huge SUV. No matter how you slice it, it's true. This was confirmed by an ATV, or how to call it an "all-terrain vehicle" - Polaris Ranger XP 1000.
This type of ATVs are divided into sports and utility. The former have nothing to do with comfort. This is a transport for entertainment, extreme trips and competitions. In these ATVs, technical characteristics are more important, namely: ground clearance and engine power.
The Polaris Ranger XP 1000 is part of the Utility ATV category. This means that it is made for long trips and has a special twist - comfortable interior. Its practicality can be compared to a car.
Polaris engineers and marketers studied the needs of their ATV owners and created the Ranger XP 1000 The 82 horsepower quad engine is and . This is a very good characteristic for this type of transport. This helps to transport 681 kilograms in the cabin. ATV towing capacity - about 134 kg.
Polaris ATVs are known as the highest clearance all-terrain vehicles. In the Ranger, it is 330 mm. This makes it easy to get around large rocks, stumps and other obstacles. In addition, a high-quality suspension plays an important role. In quadra power bumper and reinforced bottom. In this version of the ATV, the turning angle was reduced and the steering was made more precise. Tires - Maxxis 27" with six layers of rubber.
The interior of the ATV has a special design. Sturdy seats, space for small items, a system for connecting additional electrical equipment, an information center with a 4-inch display, soundproofing.
Ranger Pro Shield cockpit protects against mud, water and various weather conditions. Manufacturers have provided more than 200 accessories for this model, which will help make the journey comfortable and overcome all difficulties on the way.
For connoisseurs of greater comfort, there is a premium version of the quadra - Ranger Crew XP 1000 EPS. Comfortable and soft seats, climate control, a navigator, the Way Point function, which allows you to listen to your favorite music on the road - these are all additional features of the ATV.
As comfortable as SUVs. Is not it?
Tags:
Articles
04 Mar
The 2020 Polaris lineup includes two true monsters: the Sportsman XP 1000 S and Scrambler XP 1000 S liter utility trucks. In this article, we will look at the main characteristics of these models.
The new Polaris Sportsman and Scrambler ATVs are “square” – the difference between width and height is minimal. For comparison: the width of most ATVs is up to 122-127 cm with approximately the same wheelbase. The increased width between the wheels makes the ATV more stable when cornering, when maneuvering at high speed, and when riding on inclines.
| Sportsman XP 1000S | Scrambler XP 1000S | |
| Length, mm | 2114 | 2095 |
| Width, mm | 1400 | 1400 |
| Wheelbase, mm | 1458 | 1458 |
| Clearance, mm | 368 | 368 |
| Height, mm | 1289 | 1257 |
| Landing height, mm | 940 | 940 |
| Weight, kg | 440 | 400 |
Clearance deserves special attention: almost 37 cm versus 26-30 cm for most models on the market. To increase ground clearance, the chassis arms are curved front and rear.
So the Polaris Sportsman XP 1000 S and Polaris Scrambler XP 1000 S will be able to go where a regular ATV would get caught on the bottom or lever.
The engine for both new products is the same: ProStar SOHC, 2-cylinder 4-stroke, with a volume of 952 cm³, with electronic fuel injection and liquid cooling. For more than 5 years, these engines have been put on the most powerful Polaris ATVs: ProStar are on the RZR, Ranger and ACE. Only the power is slightly different: the Sportsman puts out 90 hp, Scrambler - 89.
Transmission without frills, everything is time-tested: automatic transmission with park gear, neutral, reverse and two forward gears - low and high. Drive - plug-in full (AWD / 2WD).
There is an engine mode switch on the left handlebar:
Tank capacity for both models - 19.9 l. For a heavy ATV with a powerful liter engine, this is not too much.
The suspension of the Polaris Sportsman XP 1000 S and Polaris Scrambler XP 1000 S is the same front and rear: independent, on paired A-arms. Only the shock absorber travel differs:
The shocks are also slightly different, the Sportsman has Walker Evans 2.0 and the Scrambler has 3-way Walker Evans Premium with 2 coil springs. This update: The "old" versions of the Polaris Scrambler had FOX shocks. The travel of shock absorbers can be adjusted depending on the surface. The WE Premium has a larger range of adjustments - you can adjust the rebound, low- and high-speed compression stroke.
As for tires, the Polaris Sportsman XP 1000 S has CST wheels. Earlier generations of Athletes also had such rubber, and it proved to be excellent. The size of the rear wheels is 26x10-14", the front wheels are 26x8-14". Aluminum rims, 14 inches.
The Polaris Scrambler XP 1000 S has Duro PowerGrip II 27×9” tires on all wheels. This is an update: Scramblers used to have CST wheels, just like Sportsmen. The same wheel size improves maintainability: you can carry only one spare tire with you. The tires are fitted with 12" aluminum rims as standard.
Polaris Sportsman XP 1000 S:
Polaris Scrambler XP 1000 S:
Both models are ideal for demanding trails and extreme fun rides.