Contents
There are plenty of tube & tire change guides out there already. So in this guide, I’m going to go into greater detail about each step of the process, techniques, and tools.
A few notes before you even take your wheel off your bike.
You can remove and install a tire without lubricant. In fact, during the removal, this tire was so warm, I forgot to use it.
So remember, the lubricant is not for your benefit. Lubrication is for the rim and tire, so keep that in mind when you get to the tough parts.
(I use rubber grease when I install my tires because I don’t need to change them often. It’s optional, it’s very messy, and you probably don’t need it.)
Tire Change ToolsA full set of tire spoons and a bead holder are ideal, basic tire irons will work, and if you’re in a pinch, I can show you how to make your tools in my “DIY tire tools” article.
I usually only use rim guards for the first part of tire removal. If you have a nice new rim, I would suggest sliding them around the rim as you go to protect it as much as possible. It will take more time, but the rims aren’t cheap.
A set of tire spoons go for about $20, and a bead holder goes for around $14.
Get Some Tire Spoons HERE, and Get A Bead Holder HERE (Amazon).
Work on your wheel with the brake rotor up. You can use it to hook your tire spoons during removal, and when it’s face-up, you avoid accidentally damaging the rotor. Plus, when you work to the rear tire, you won’t have to worry about punching the sprocket (that hurts).
Removing and installing tires can be very clumsy, but if you can mount your tire without ripping up the bead or pinching the tube, you did it right!
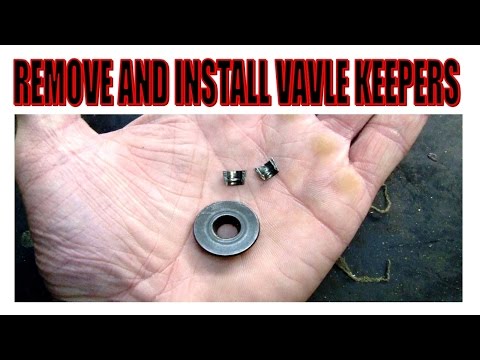
Pre-Service Notes Even if the tube is ripped or punctured, having the valve open is still ideal. If you don’t have a valve stem tool, let as much air out as you can. If you have a valve stem nut, remove it, and save it.
 Work the first spoon between the bead and the rim lip up and push your tire away from the rim. Do your best to pry past the bead seat. If you damage the rim center, you can easily sand it to smooth; the bead seat is a little more work.Make sure you get PAST the bead seat!Take your second spoon, lip down, hook your tire, apply pressure, but do not try to pull the tire over the rim yet.With your free hand, push down on the opposite side of the rim to drop the tire into the rim center.Now pry the tire over the rim.Work your way around the rim in both directions, ending at the rim lock.With the first side removed, pull the old tube out of the tire.Flip your wheel over, and starting the opposite of the rim lock, finish removing the tire from the rim.This time, use your spoons with the lip up and pry the rim up out of the tire.
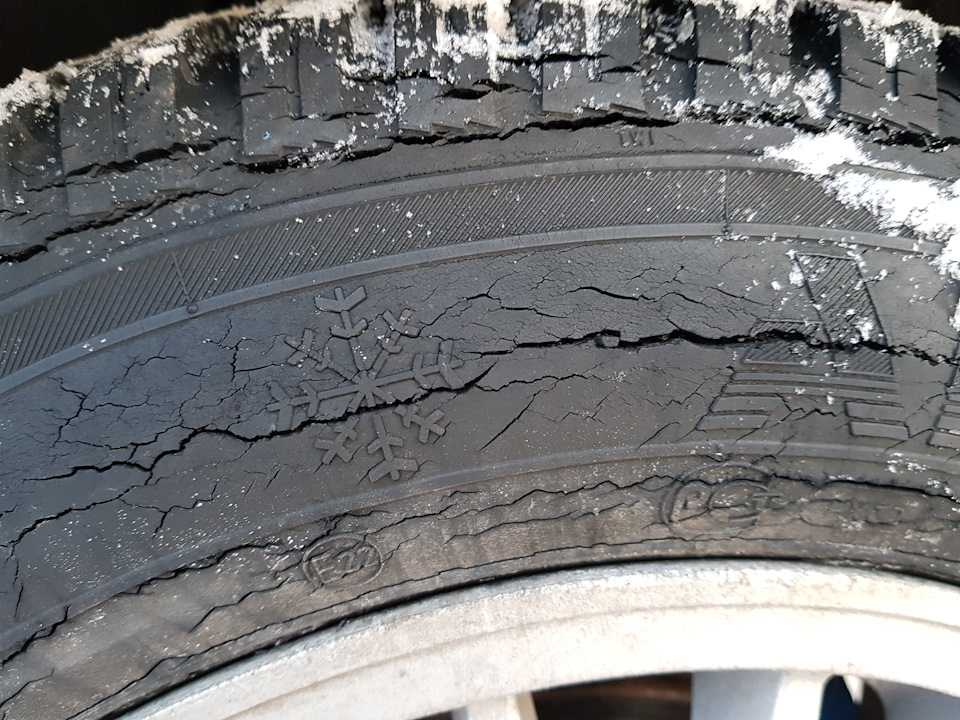
If you’re just changing your tube, check and see how old your tire is before you install it. You may want to look into a new one while it’s mostly off.
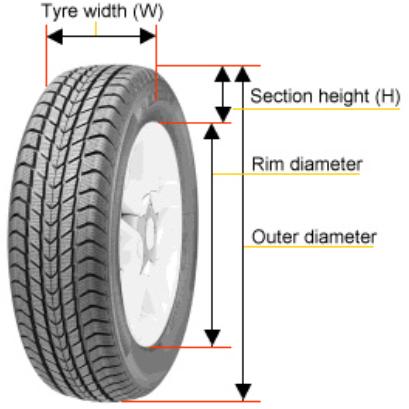
To find the date of manufacture, find the oval stamp on the sidewall. The last four digits will tell you when your tire was manufactured. The first two digits are the week, and the last two digits are the year.
So this tire was made in the 20th week of 2005.
Check your tire to see if it is directional. If it is, there will be an arrow on the sidewall pointing in the direction of rotation. You will need to orient your rim and tire accordingly.
For example, if your front brake is on your left fork, lay your rim down with the rotor facing up.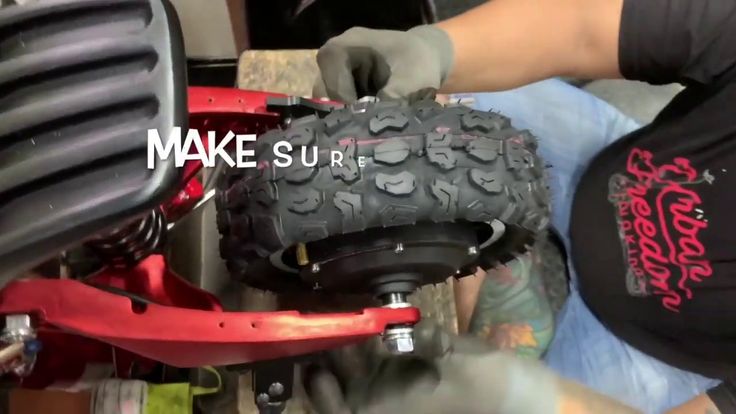 When you look up from the rotor, the arrow on the tire should point left.
If there is no arrow, your tire is bi-directional, and you can install it either way.
If you serviced your rim, make sure you have reinstalled the rim lock!
There are two ways to mount your tire. You can install the first bead then the tube, or the tube and then the first bead I will show you both methods, starting with bead, then the tube
No matter what method you use, the valve stem nut goes on the inside of the rim. I know this seems counter-intuitive, but there’s an excellent reason. The nut supports the valve stem and protects the rubber at the valve stem joint from rubbing against the inside of the rim.
But more importantly, with the nut on the inside, the valve stem has more lateral play if your tube goes out of alignment, helping to avoid damage.
This Damage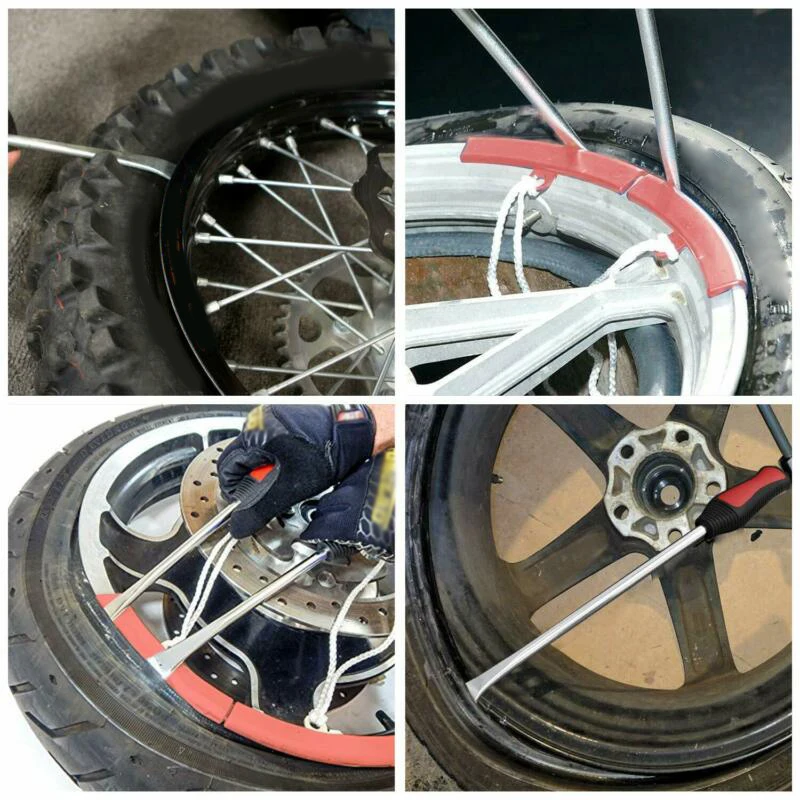
 Lay the wheel rotor side down.With your tire spoons lip down, pry your rim into the tire.Start your tube install by pushing the valve stem through the valve stem hole.When you finally wrestle the valve stem through, install the nut from the old tube to keep it from slipping back into the rim.Work the tube into the tire, taking care not to twist it.
Both methods have their benefits. What it comes down to is whether you want to fight the valve stem or fight the rim lock.
Finish Tire Installation Take small bites and use lube as needed.
 With your tire spoons lip down, start prying your tire into the rim. Take small bites and use lube as needed.Your install will get harder as you get closer to the end, and this is where you need to take your time.When you have about 12 inches of tire left to install, you will get a big overhang.Get your spoons into position on one end of the overhang then push down on the opposite side of your tire. This will drop the tire into the rim center, and give you enough room to finish your install.At the very end of your install, you may encounter a few inches of tire that don’t want to slip over the rim, and you can’t fit your third spoon under the bead.Take both spoon handles in one hand, then give the sidewall a good whack with the handle of your third spoon to finish the job. Try to avoid hitting the bead.My valve got misaligned during install, so I’m going to seat the bead here to make sure it seats properly, then release the air and re-align the valve stem after the wheel is installed on my bike.
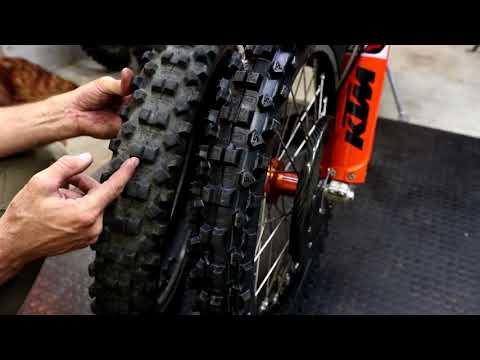 Do not tighten the rim lock until after you have seated the bead. If you tighten it before, you could be locking the bead too far into the rim. Then the rest of the tire won’t seat properly.To finish my installs, I apply a little rubber grease to the valve stem and rim lock hole.Once I have seated the grease on the valve stem with the nut from the old tube, I install the valve stem cap, then tighten the outside nut to the cap, locking it on.
Using the right tools and the proper techniques, you should only take about 10 minutes to change your tire. The only thing you might have trouble with is the valve stem; those rarely do what you want them to!
If you have any questions or want to share some tips of your own, please leave them in the comments or on our FaceBook page!
(1) Proper tools. You’ll want to have a tire-changing stand, tire spoons, tire paste, gloves, Motion Pro Bead Buddy, valve-core remover, 12mm or 13mm wrench, air compressor and baby powder. Dunlop recommends using Hunter Engineering tire paste, but there are several other good brands and even recipes for making your own tire paste on the internet.
(2) Air out. With the wheel on the stand and the sprocket side up, remove the valve cap and nut. Then remove the air-valve core. Set it aside to allow all of the air to come out of the tube. Loosen the rim lock completely without removing the rim-lock nut. Now, with all of the air out of the tube, begin to knock the tire off the bead.
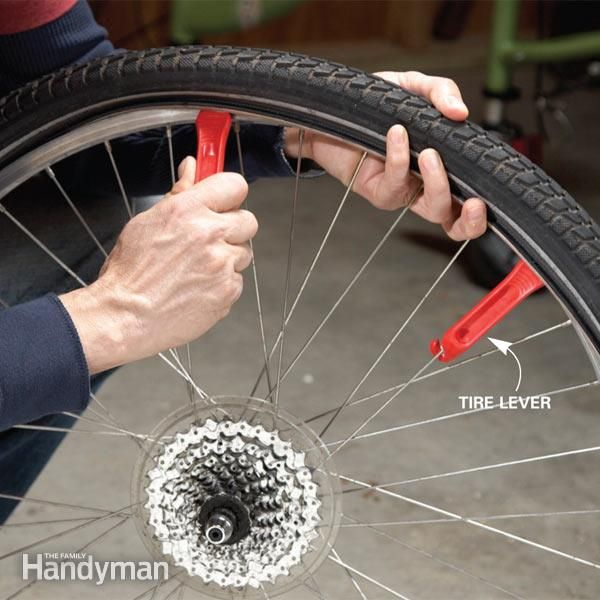
(3) Break the bead. Start a quarter of the way from the rim lock. Grab your tire spoon and lodge the lip side of the spoon underneath the rim and then push down. Without any air in the tire, you should be able to push the tire off the rim. Continue this step around the tire until one side of the tire is completely off the bead. Then flip it over and repeat these steps on the other side.
(4) Get a grip. After the bead is broken, you’ll want to turn over your tire spoon so that the lip is facing towards the rubber to scoop it up and get it over the rim. At this point, you’ll want to be positioned so your arms are reaching across the wheel to have the most leverage. Start about a quarter of the way around the tire from the rim lock and lodge your spoon between the tire and rim. Once you’re set, pull back on the tire spoon until the tire comes up and over the rim. Then slide the handle of your spoon underneath the rear brake rotor and leave it there.
(5) Removing the tire. Grab your second tire spoon and lodge it in between the tire and rim 2 inches away from your first spoon; pull back and put it underneath the rotor next to your first spoon. If you have a third tire spoon, it’s time to use it. Take another 2-inch bite and pull. After using the third spoon, you will only need one spoon to complete the removal process. Repeat these steps all the way around the tire on both sides until the tire is off and you can pull the wheel out of the tire.
(6) Preparing. While the new tire is still on the ground, add baby powder to the inside. The powder keeps the tube from galling up on the tire by allowing it to move freely. This allows the tube to last longer and helps prevent pinch flats. Put the valve core back into the tube. Add a very small amount of air to the tube so that it doesn’t get pinched by the tire irons. The pressure needed to be less than 2 psi. Then place the tube in the tire. Check to see if the tire is directional and adjust accordingly. Also, wipe the tire paste onto the inner lip of both sides of the tire to help it slip on easier.
(7) Valve stem. Set the tire on top of the wheel and stick the valve stem into the rim. Put the nut back onto the stem, but only tighten the nut down halfway. Often times the tube will shift inside the rim if the nut is locked down tightly and the valve stem won’t be able to lean, which can cause the valve stem to tear.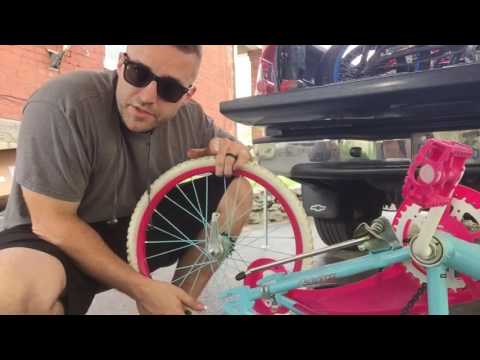
(8) Mounting. Push with your waist and hands to get the bottom lip of the tire on to the rim. It will go on about two thirds of the way with your hands. Then, with your tire spoon, grab the remaining part of the tire and pry it onto the rim. Most of the tire will go smoothly, but a small section of it will be caught by the rim lock. Flip the wheel over and grab the tire with two spoons, one on either side of the rim lock, and walk it over the rim lock. Next, push the rim lock out into the tire to position it before you remove your spoons.
(9) Bead buddy. Flip your wheel over and start with two tire spoons lodged between the tire and the rim to get the bead of the tire engaged in one section. Leave enough room between the spoons to put your Bead Buddy in. The Bead Buddy will sit with one edge in between the rim and tire while the other end latches onto a spoke to keep it in position. The next step is to lodge the spoon under the tire again with the lip facing the rim and pull back to mount it.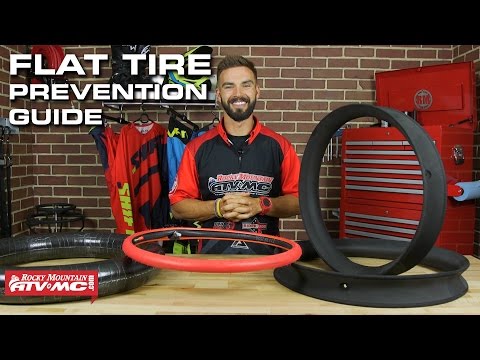 Keep pushing it down with your hands so that the tire remains loose on the rim until the tire is fully on. For the last bite, don’t stick your spoon straight in the remaining gap. Push the spoon in between the tire and rim at an angle, using your hand to pull up on the tire to help get the spoon in. Grab the tire closer to one side. Pull on the spoon and use your other arm to press down on the rest of the tire to mount it completely on. Then push down again with the spoon to allow space for the bead buddy to come out.
(10) Beading the tire. Once the tire is fully mounted, fill up the tube with an air compressor until you see and hear the tire bead snap into place. You may need to put as much as 40 psi into the tube. Check to make sure that the tire bead has popped up on both sides. Check the tire pressure and lower it to your preferred air pressure (typically from 11.5 to 13.5 psi) before you hit the track.
Dunlophow to change a motocross tiremotion pro bead buddymotocrossmxaten thingstire mounting pasttire spoons
03/05/2013
Probably the most common breakdown in a cyclist is a tire puncture, especially if he rides in an aggressive style. Either he hit the glass, then a nail, and sometimes he just ran into the curb at speed. Experienced cyclists can to change the camera in a bicycle with eyes closed, but what about a beginner who can’t even remove the wheel, let alone change the camera. The main thing is not to despair! If you are traveling a long distance (and always better), take a pump with you, a spare tube, or, in extreme cases, a "bike first aid kit" for the wheel. Someday she will save you from the fate of pulling the bike "on yourself".
So, if you punctured the wheel , first you need to get off the bike, in no case continue to move on a flat tire . Firstly, you will tear the tube even more, and secondly, you can ruin the tire, and in the worst case, the rim.
How to change the tube on a bicycle
1) If the wheel has not completely deflated - deflate it to the end, to do this, unscrew the nipple (spool) cap. If you have a nipple (spool) the same as in the car, press something sharp on the small button in the middle and hold until the tire is flat. If you have a cap with a key for the spool, then just unscrew it. If you have a nipple (spool) like in old bicycles, unscrew the lamb and take it out. nine0013
2) Remove the wheel. If the wheel is on an eccentric, removal will not cause difficulties, if not, then keys will be needed (depending on the bike and wheel - 13-17).
3) If you have "pliers", use them to remove the rim from the wheel, if there are no pliers, you can use an improvised tool (wrenches, etc.), but it is advisable not to use objects with a sharp edge - this can lead to damage to the tube or rim. Tear the tire with your tool and, resting it against the rim, press down until the edge of the tire comes out of the rim, then take the second key or mount and do this action again, while NOT removing the first key. When you feel that the keys do not lean back when you release them - just try to move the second key in a circle away from the first key.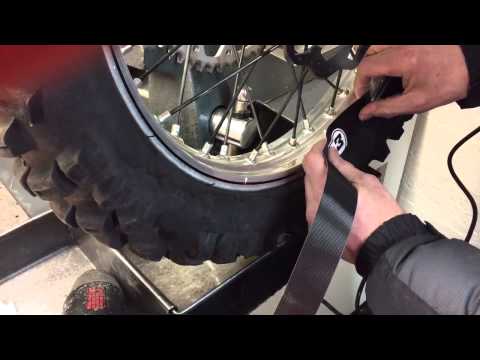 nine0013
4) Remove the camera by simply grasping it with your fingers. Grasp the opposite side of the nipple (spool).
5) In principle, you can insert a new tube, but I recommend removing the tire completely (this can be done by hand or with pliers (wrenches)).
Check the condition of the rim: there are no metal burrs inside, check the condition of the rim tape, look inside the tire. This should be done if you change cameras frequently and don't know where you might have blown a tire. nine0013
How to install a tube in a bicycle wheel
1) Take a new tube or a sealed tube (how to tape a tube), squeeze it with one hand and move it around - this will help to clean it of unwanted foreign objects (rubber pieces, metal chips, etc.) .d.)
2) Lightly inflate it, if you removed the tire completely, put it on one rib (if the rubber is directional - make sure you install it correctly (you can peek at the rear wheel if the treads are the same)).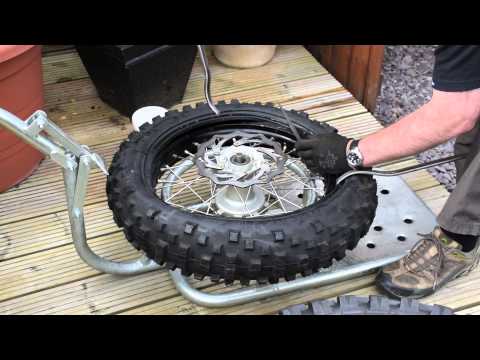 Roughly mark where the hole from the nipple (spool) is, put the chamber into the tire without twisting or breaking it. Insert the spool (nipple) into the hole and screw on the cap. nine0013
3) With your hands (if the tire is soft) or using the same tool, slide the second rib of the tire onto the rim. BE CAREFUL if using the tool, do not tear the chamber.
4) Immediately inflate the wheel lightly and roll it until the tube settles, then inflate the wheel to the desired pressure (how to find out what pressure to inflate the wheel)
5) Put the wheel on the bike and clamp it.
6) MANDATORY! Check the brakes.
Type of valves
There are three main valve types:
1) Velonipel (French)
2) Auto-nipel (American)
3) A nipple like in old bikes (German)
bike shop)
It is not necessary for the average cyclist to have a huge amount of specialized bicycle tools, since complex bike repairs are usually carried out in a workshop.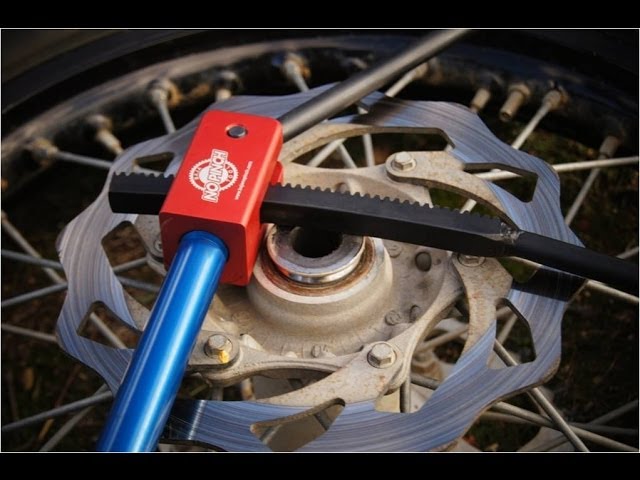 But most adjustments and minor repairs, such as changing and inflating tires, adjusting brakes and gears, changing saddle position and angle, adjusting handlebars, and changing chain, sprockets and cables, are easily done with standard tools and just a few specialized tools. for bicycle. nine0013
You can go to a regular hardware store and buy wrenches, hexagons and other tools, but there is a principle: "buying a quality item, you do not have to pay twice", and this also applies to bicycle tools.
Good specialized bike tools are easier to work with, last longer and are less likely to damage bike parts.
Contains all the most necessary screwdrivers and wrenches. Perhaps this is the first thing that any cyclist acquires to set up his bike. There is a wide choice: from the simplest kits with a minimum set of screwdrivers and keys BBB PrimeFold S to universal ones, equipped even with a chain squeezer - BBB PrimeFold XL. nine0013
Which one to choose? To answer this question, you need to decide where and what kind of repairs you plan to make.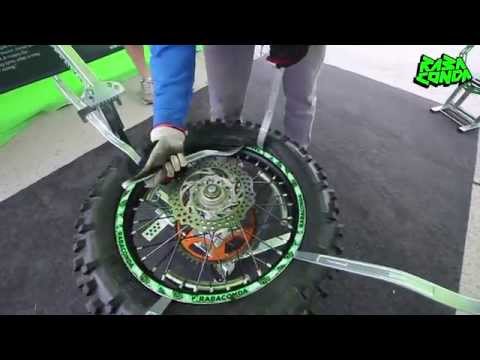 First of all, the multitool is convenient on the road - it is compact, all the tools are at hand, they will not crumble out of the bag and will not be lost. And when you pedal, the less you carry, the faster you roll. It makes no sense to be weighed down by extra grams and kilograms. But how often, for example, might you need to replace a chain somewhere along the road outside your home or workshop, and is it worth carrying a heavier set for that? Athletes who regularly travel to various competitions and training, who service their bike in the field, will need the most versatile multitool. But if you can only make minor adjustments on your own - adjust gears, turn the steering wheel when transporting the bike - then a minimal set is enough - BBB MiniFold S or BBB MaxiFold M, which also includes a knife and a pry bar for disassembling the wheels, which may be required to remove the tire when piercing the camera. nine0013
Recommended models:
Multitool BBB primefold s blue/silver
2490
Buy
Multitool BBB maxifold l black/silver
3 190
Buy
Multitool BBB maxifold s black/silver
2090
Multitool BBB primefold xl blue/silver
3 790
Buy
Multitool BBB microfold s
1090
Buy
nine0012 Multitool BBB primefold l blue/silver3 490
Buy
Multitool BBB primefold m blue/silver
3 090
Buy
Multitool BBB torxfold black/silver
2090
nine0148 Review of BBB
 Don't skimp on hex keys, they are the most commonly used tool. The multitool is compact and ideal as a road repair kit, but with the help of special professional wrenches it is more convenient to work, they can tighten the bolts more tightly. Therefore, at home it is desirable to have a set of high-quality ball-head wrenches, which have a narrower neck in the area of the ball-shaped tip. They can be manipulated at various angles - up to 30 degrees, which makes it possible to tighten screws in hard-to-reach places.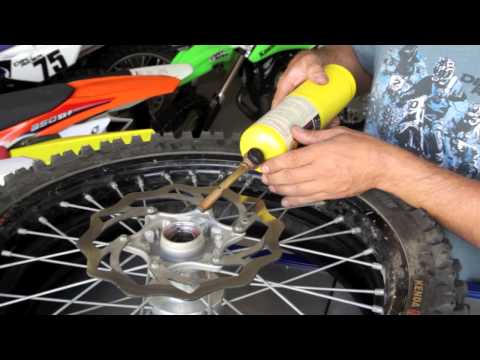 The BBB Hex T wrench is easy to operate with one hand without undue bending of the wrist. The design allows you not to rearrange the key every time after a full turn, which you have to do when working with a classic L-shaped hexagon, in which the long power end at some point begins to rest against the details of the bike. Of course, one hex is not enough, as some bike mounts can use nuts of different diameters, including Torx-type hex slots, which have recently been increasingly used on fasteners. A set of BBB Hex T hexagons in sizes 3, 4, 6 and 8 mm, and torxes - T25 and T30 will allow you to unscrew 90% bicycle parts.
Bicycle key BBB hex t 3mm black/silver
790
Buy
Bicycle key BBB hex t 4mm black/silver
890
Buy
Bicycle key BBB hex t 6mm black/silver
990
Buy
Bicycle key BBB hex t 8mm black/silver
1 290
Buy
Bicycle key BBB torx-t t25 black/silver
1090
nine0012 Bicycle key BBB torx-t t30 black/silver990
Buy
In addition to hex and torx, you will need a pair of flat and Phillips screwdrivers.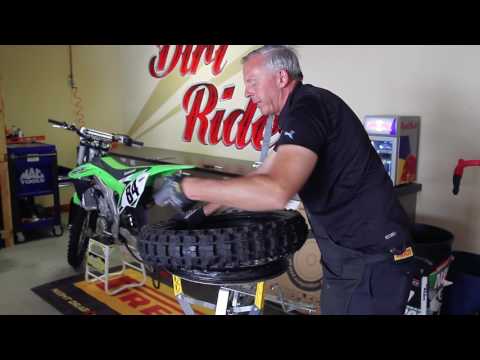 Screwdrivers of different sizes are useful not only for repairing a bicycle. Dakine Torque Driver is a versatile and very convenient set with interchangeable nozzles, an indispensable thing in the household.
Another essential tool in the repair kit. They allow you to conveniently and effortlessly remove the tire from the wheel rim. Of course, this can be done with any tool at hand - a screwdriver, wrenches - at the risk of damaging the rubber or the rim. With proper skill, you can disassemble the wheel even with your bare hands, if you have strong hands. But the need to remove the tire arises quite often when you have to change the chamber in case of a puncture or change tires from summer to winter, from city slicks to mud. It is much more convenient and often safer for the wheel to do this with two plastic pry bars. Insert one under the bead of the tire, hooking it with the opposite end to the spoke, start the second disassembly 10-15 cm further from the first and start moving it along the rim until the bead is completely out. nine0013
BBB EasyLift's wide range of cheerful colors will make this chore easier.
More cutters:
BBB easylift red/white/blue
490
Buy
BBB easylift red/white/green
490
nine0012 BuyCrowbar BBB tire levers easylift 48x 3 pcs (black-blue-red-green) black/blue/red/green
390
Buy
Crowbar Maxxis tire lever
890
Buy
Tip. To tuck the tire back into the rim, do not use mounting spatulas, as is sometimes advised in the articles. The whole process is best done by hand, tucking the rubber into the rim with your fingers.
Otherwise, you run the risk of puncturing the new tube or touching and sliding the protective pad on the rim. nine0013
If you have a bike, you need at least one simple pump. But the ideal is to have two.
Lightweight and small hand pump to carry around. After all, if a camera is accidentally pierced along the road, it is necessary to seal it or replace it right on the spot. Otherwise, you will face the problem of bringing yourself and a bicycle home, which will become impossible to ride. You will have to look for transport, taxis, call family members, friends. Mini pumps such as the BBB NanoRoad Black are only 11cm long and weigh 75g. – super light, ideal for long journeys where every gram of weight matters. But the longer the pump, the more stroke it has, and the easier it is to inflate the tire. The 25 cm BBB WindWave hand pump is a reasonable compromise between weight, size and efficiency. It can be mounted on the bike frame and always carry with you. nine0013
Stationary floor pump. It is much harder and longer to inflate tires with a hand pump, especially small ones, so its use is justified only in the field. It is much easier to achieve the required tire pressure with a floor pump, which is desirable to have at home. BBB AirBoost with a pressure gauge will allow you to control the degree of tire inflation.
Recommended models:
Floor pump SKS air-x-press 8.0 black
3 390
Buy
Bicycle pump SKS injex t-zoom silver
3 790
Buy
Bicycle pump SKS infusion tt black
1 290
Buy
nine0012 Bicycle pump SKS injex lite zoom black2490
Buy
Floor pump BBB 2020 airboost gray
4 490
Buy
Bicycle pump BBB samurai gray
4 390
Buy
nine0012 Bicycle pump BBB windgun s gray2690
Buy
Floor pump BBB floorpump airwave composite dualhead 3.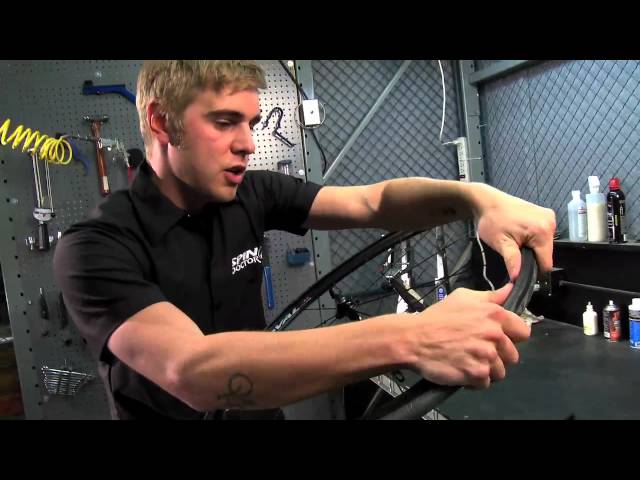 0 black
3 690
Buy
All bike pumps in Kant
Generally, wrenches are not needed for general bike tuning and minor repairs. They are required for servicing bushings or steering columns. The only wrench that every cyclist should have is a “15 wrench”, that is, a 15 mm wrench for removing pedals in order to clean and lubricate them or replace them with new ones. This is a simple task that even a girl who is not very tech savvy can handle, so there is no need to call a bike master. Pedaling is also necessary when transporting a bicycle on an airplane. Even those airlines that allow you to check it in unassembled luggage require you to remove the pedals and attach them to the frame with cable ties or screw them on the other side of the cranks, with the pedal inward to the frame. nine0013
Despite the fact that there is nothing complicated in this process, it happens that the pedal jams, because dust, sand, dirt get inside the threaded connection of the pedal axle with the connecting rod, and all this is tightly compressed with grease. The less often the pedals are removed, the more difficult it is to unscrew them. You can use a regular 15mm wrench bought at a hardware store, but it is more convenient to work with a special bicycle pedal wrench, such as BBB Hi-Torque L.
It has a thinner horn, so it is easier for them to unhook the pedals from the cranks even with small gaps. The long handle (34 cm) lined with a rubber anti-slip coating provides an effective stop, due to which the force on the key is increased. Of course, any large wrench 30-40 cm long will have enough leverage to effectively force, but the tool itself will be heavy. You can use it at home, but on bike trips you hardly want to carry it with you. Professional bicycle keys with the same size have less weight due to a thinner plate of metal from which they are made, but at the same time they are not inferior in strength, as they are made of hardened steel. In other words, a 34 cm long BBB Hi-Torque L wrench will have the same weight and strength as a regular 15-20 cm wrench.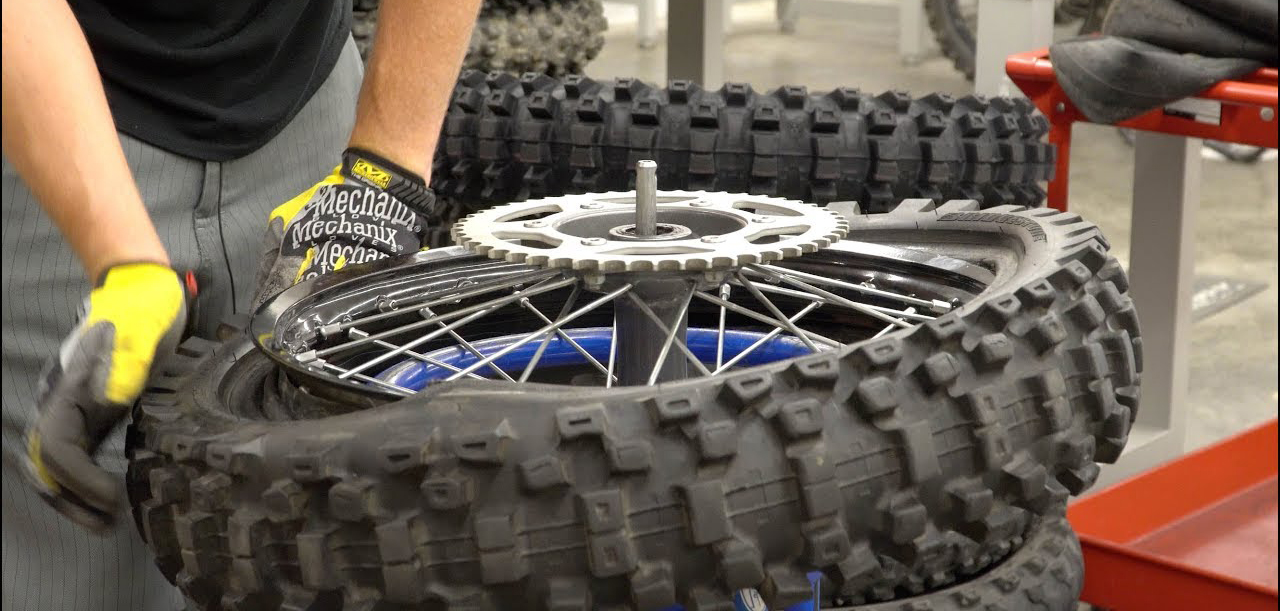
Please note. Most pedals will fit a standard 15mm wrench, but sometimes some bikes have custom nut sizes.
This is another useful tool for making bike maintenance a comfortable and dust-free experience. Cleaning the chain is a regularly necessary, but the dirtiest procedure, so much so that you don’t even want to do it at home, and you have to take the bike somewhere to the stairwell or to the street. Then mess around for a long time, cleaning all the links with solvents or WD-40, rags and a toothbrush. Someone prefers to remove the chain altogether and soak it, for example, in kerosene. In order to remove the chain with a lock yourself, you will need pliers or a BBB LinkFix chain lock tool, and to remove the chain without a lock, you will need a special tool for riveting and riveting the chain links (BBB ProfiConnect chain tool). But if you buy a special machine BBB Bright & Fresh, everything becomes much easier. With this machine, you can easily clean the chain without removing it.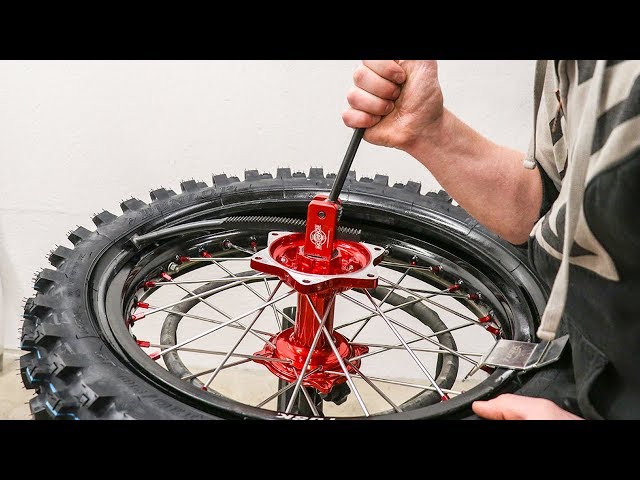 nine0013
Every morning you get up and brush your teeth and wash your face. Your bike's sprocket teeth also need regular cleaning, and you need to not just wipe the top with a rag, but penetrate into all the joints. The main problem is not the external dirt on the bike, but the dust, sand and used grease that accumulate in the rotating mechanisms.
The MUC-OFF Individual Drivetrain Brush with stiff bristles can reach all parts of the transmission, and the special scraper on the MUC-OFF Individual Claw Brush 70, designed to clean the chain and sprockets, can remove old dried grease from the links. nine0013
If you really love your bike and want it to always shine like new, then get the set of five brushes at once: Muc-Off 5 x Brush Set.
We have listed the basic "gentleman's" cyclist's kit, which is necessary during the operation of the bike. More advanced users may need additional tools.
For example, the BBB BleedKit hydraulic brake bleed kit, the BBB Turner II spoke wrench to correct wheel deformations, or the BBB bottom bracket puller. And someone, on the contrary, does not want to mess with his bike on his own, and some of these tools (or even all) can be replaced with one device - a credit card, with which the repair and tuning of the bike at any time is solved with one call to the service center. nine0013
If you live in a city where there are no our stores, then this is not an obstacle to obtaining what you need. Simply, when making a purchase through our online store, please note that we have delivery by couriers and transport companies
You can also use self-delivery, if you prefer
When buying online, we have different payment systems:
- cash to courier
nine0003 bank transfer- on the map
- by installments
- with gift certificate
All details on different forms of payment