Home → Goodson Gazette → Engine Disassembly : Valve Guide Removal
by Goodson Tools & Supplies
Valve guides … every engine has ’em and if you’re refurbishing a cylinder head, you’re going to have to remove them. And that is what we’re talking about today.
We’ve talked a lot in the past about resizing valve guides, replacing valve guides, knurling valve guides, etc., but we’ve rarely touched on how to get the little buggers out of the head.
It’s actually pretty simple. You can ream them out; you can drill them out; you can drive them out. It all depends on what kind of head and guide you’re dealing with.
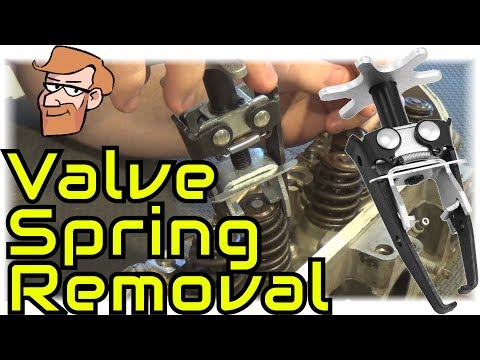
Of course, before you can remove the valve guides, you have to take out the valve seals. There are lots of tools on the market to do this job – everything from picks to pliers. Goodson offers three tools for removing valve seals.
The Valve Seal Puller with Slide Hammer, Seal Puller with Adjustable Head and Universal Seal Pliers.
Each of these seal removers has its pros and cons; it really comes down to which one you’re most comfortable using.
Now that the seals have been removed, it’s time to look at the guides again. Let’s dig in …
You have a few options when removing valve guides from aluminum and cast-iron heads. You can
The choice is pretty much yours.
Goodson, of course, carries tools and supplies for all of your options, including the replacement guides.
As the name implies, these tools are used to push (or drive) the existing guide out of the guide bore. You have the choice of powered or manual drivers in a wide range of sizes, including many diesel applications.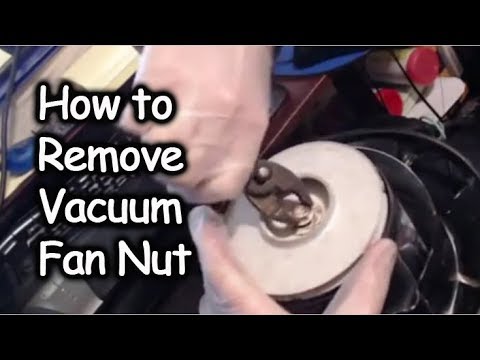 All Goodson guide drivers feature pilots that are slightly smaller than the guide ID for easy removal and have a 1° negative angle to stop the guides from mushrooming and getting jammed in the bore. Powered guide drivers are sized to work with most standard pneumatic tools, including the Goodson Air Hammer (AH-335). For more information about Goodson valve guide drivers, including pricing and sizes, visit the Valve Guide Driver section of the online store.
Diesel Applications
Valve Guide removers are also available for diesel heads. These drivers are sold by application rather than dimension, but as with all tools, if the dimensions are right for a different application you can use it. Goodson offers several sizes for a range of applications.
Adjustable Powered Valve Guide Driver with Replaceable Pilots
The final Valve Guide Driver we’ll talk about today is the Adjustable Powered Guide Driver with Replaceable Pilots (that’s a mouthful!).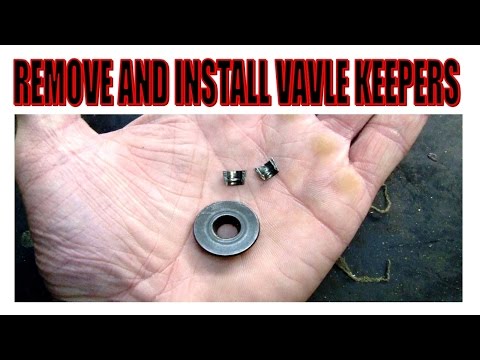 What makes this guide driver unique is the replaceable pilot with 5/16″ – 18 threads. They are available in both SAE and metric diameters from .312″ to 9.0mm. Due to the design of this driver, you can adjust the installation sleeve to accommodate guide heights from 0″ to 1-1/4″. Once you have the correct installed height established, you can move from one guide to the next without having to reset everything.
Piloted core drills and reamers have been around for ages and they still work great! Goodson recommends that you use them dry at 175 to 225 RM for best results and that you use them in matched pairs where available (see chart at right). Piloted Core Drills are designed to center accurately in the guide.
When you have cylinder heads that have integral valve guides (meaning they are part of the base casting) then you will need a core drill and a core reamer.
Tool selection is very straight forward
Find out what the ID is for the valve guide. Find out what the OD of the new valve guide and select according.
Example: valve guide has an 11/32” .343” ID and the replacement valve has a .500” OD, then you would select and core drill with an 11/32” .343” pilot and a drill size of .468”.
You would then select a core reamer that is piloted to the .468” hole you just drilled and will now send the core reamer through the valve guide bore leaving a .500 “ ½”finished hole. When you press in the valve guide you will have achieved the “crush of .002”.
That pretty much covers the basics. As usual, if you have additional questions, contact the Goodson Techxperts™ at 1-800-533-8010.
Previous post Next post
ATV Riders Forum > Sport ATV Model Information > Sport Quads under 350cc Sub-Forum > Honda TRX300EX. 300X & 250X ATV Info > valve guide replace ment
PDA
View Full Version : valve guide replace ment
JIMFROMTEXCO
09-24-2007, 09:32 PM
upon pulling my head off, thinking only a broken valve i realised my valve guide had a 5 hairline craks in it. how hard is it to auctually replace them? i read from doing a search thast you need to heat the head and freeze the new guide. what elses goes along with doing this? should i use a press to put it in place? do i need any machine work, or coud i use valve lapping compound? another thing is should i coat the cam journals with a moly coating or anything? its a 350x engine. also what would the part number be for a 350x valve guide, dont most honda heads use the same ones? i also have some chromoly valve springs for a 250x, 300ex head and they appear to be the same legnth would it be allright to use them? im alsot thinking about cleaning up the ports with a dremal would i benifit to open the ports up some?
2muchquad
09-24-2007, 10:44 PM
I knoiw the head needs to be heated first and driven out with a tool.It looks like a punch that fits in the guide itself.Im sure something else can be used though.The valve seat may need to be "worked" on to make sure the valve is centered in the seat with the new guide. Maybe Dork will see this,he knows more about it.How did you break a intake valve?timing off?You may need both replaced:(
dork
09-24-2007, 10:57 PM
you can use 300ex guides, the 350x guides supercede to those anyways. be sure to replace the o-rings underneath them. when you order the guides, order the remover/installer from honda, or someplace like goodsons. you can use a drift punch to get them out, but when you install them the installer has a special back cut to prevent mushrooming the top of the guide bore. you will also need to order a reamer to finish size the guides after, again either from honda or goodsons. you use a hammer to install/remove; a honda service manual will help you out if you don't know how to do that or use a reamer. then you need to check that the valves seat properly against the seat, since the guides control their placement. you may be able to get away with just lapping, maybe not. you can vacuum test the port or pour solvent in it with the valves and springs on to see if they leak.
coat the cam and rockers with some moly or assembly grease and fill the oil well in the head up with oil.
if the springs are the same length, you should be ok.
for the ports, you can blend the valve seats to the bowls, don't get carried away. you want 85-90% of valve diameter for the throat diameter. thats where most of the improvement is. you want a rough finish on the intake, 60-80 grit works good. you can match the intake manifold to the intake entry, but don't go crazy. its safer to have a slight "step" down from each transition as you go down the port so there's no oncoming edges that the air stream will hit. don't knife edge the port divider wall, you'll lose flow, leave it rounded. exhaust can be smoother finish, not critical, and leave the port exit so it steps down into the header. that will help stop reversion. also check your header flange welds that they don't overhang in the pipe.
JIMFROMTEXCO
09-25-2007, 08:09 AM
Thank you! my step dad works in a tool and die shop and he told me to bring it over and he can get it all with in spec. im hoping the honda shop has them in stock.
also what is exact spec for valves on the 350x engine i was setting them to .04 intake and .06 on exhaust is that correct? i ordered a .20 over 10.5.1 wiseco and a 400ex carb. i would like to get the powerband to change a little to more topend. i dont really have anymore stumps that need uprooted.
dork
09-25-2007, 10:07 AM
stock specs are .003 and .004", aftermarket cams are .004-.006".
to raise the powerband, you'll need to go to a bigger carb and cam. the 400 carb will help, also take off your airbox lid if not already.
TRX-330
09-25-2007, 03:50 PM
since you guys are talking about valves. what are the valve settings for the 300ex are they the same as 400ex, and i have a web cam so would that make the settings diff. How about a 400ex carb how much do those run since i just bored mine out i think want to get a 400 carb also.
dork
09-25-2007, 04:49 PM
megacycle lists . 005/.007 with their larger 300ex cams.
i usually go .004-.006/.005-.007.
TRX-330
09-25-2007, 05:04 PM
we set it at .004 on intake side nd .005 on the exhaust side, is that a good setting i dont wanna mess anything up
dork
09-25-2007, 10:18 PM
thats good.
Powered by vBulletin® Version 4.2.1 Copyright © 2022 vBulletin Solutions, Inc. All rights reserved.
Author Pavel Alexandrovich Belousov Reading 7 min. Views 862
Content
Previously cast iron was used to make the cylinder head. Holes were drilled in it into which valves were inserted. There was no need for guide bushings, since cast iron is resistant to wear. By the end of the 20th century, automakers abandoned cast iron cylinder heads. This was due to the large weight of cast iron and poor heat dissipation. The advantage of aluminum alloys: good thermal conductivity, light weight and easy processing, but they wear out quickly from friction. Therefore, an additional part has been introduced into the design of the cylinder head - a valve guide. nine0003
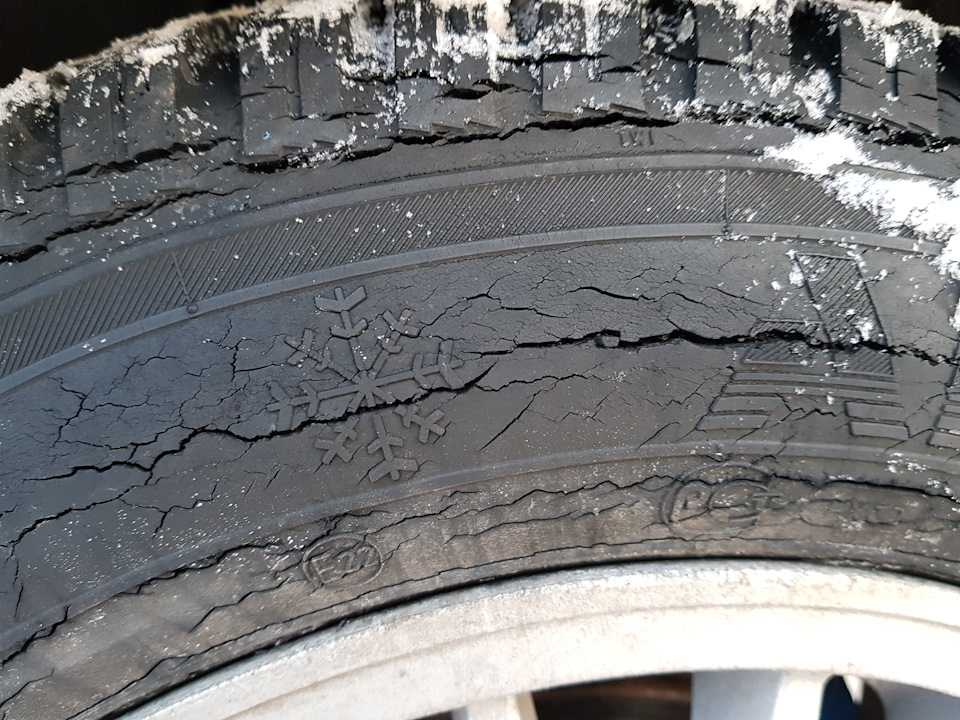
Since the valve guides are installed inside the cylinder head and are made (depending on the engine model) of cast iron, bronze, brass or alloys, not every motorist knows about their existence. This is due to the fact that the resource of the bushings is from 200,000 km.
The only fault is the mechanical wear of the inner surface due to friction. The following factors influence the wear rate:
Wear on the guide causes the valve stem to lose center and move misaligned, which does not provide the necessary seal between the valve seat and the valve disc. As a result, oil enters the combustion chamber, a burning combustible mixture breaks through the intake or exhaust manifold, which leads to premature wear of components and parts. nine0003
The main symptom of worn guide bushings is increased engine oil consumption. This is due to the fact that with a decentered stroke of the valve, the valve stem seals stop working and engine oil enters the cylinders through the increased gap between the valve and the inner part of the sleeve.
Signs of increased oil consumption due to worn bushings are as follows:
Oil gets into the cylinders due to a malfunction of the parts of the cylinder-piston group. To exclude this cause, it is necessary to measure the compression. This will rule out piston ring failure.
Inspect the spark plugs. The most polluted candle indicates problems in this cylinder. nine0069 Next, inspect the motor for wear guides in the following order:
In working condition, the gap between the valve and the guide is minimal and does not allow the valve to move in a horizontal direction (only up or down). Therefore, any lateral swing means bushing wear.
Before buying new guides, it is advisable to remove the valves and bring them to the store with them. And when choosing, be sure to try their fit on the valve stem.
The guide bushing on the valve stem should move easily, but should not wobble. nine0003
This is necessary so that in the future you do not have to go to the store again if the bushings do not fit for some reason.
To replace it is necessary to dismantle the cylinder head and additionally have a special adapter for removal and installation. However, do not be afraid, since the design of the guide is simple, and instead use improvised means that are suitable for the bushings.
As mentioned above, a special tool is required to remove and install the rails. Let's take a look at what it is and how to use it.
The mandrel for removing and installing the guide consists of two parts. nine0069 The first part is a rod of a certain length, machined on a lathe and having different diameters in certain places. The largest stem diameter occupies its main length and is 18 mm. For this part, the stem is held by hand, and it limits the slippage of the stem to the other side when the bushing is removed, which will protect the surface of the block head from being hit by a hammer. The diameter of the second part of the stem is equal to the diameter of the sleeve. The length of this part is equal to the depth of the hole in which the sleeve is placed. The third part of the stem is the shortest - its diameter corresponds to the inner diameter of the valve stem (diameter of the inner surface of the guide). Its purpose is to ensure that when the bushing is knocked out, the direction of the stem strictly corresponds to the direction of the bushing and the stem is not skewed when it is struck with a hammer. nine0003
The second part of the stem looks like a socket. It differs from the end head by the absence of faces inside (a cylindrical hole with a diameter and length equal to the diameter and length of the upper part of the guide). In the upper part of the head there is a hole with a diameter equal to the inner diameter of the sleeve and the outer size of the rod on the working side.
As can be seen from the description of the mandrel, it is not so difficult to find a replacement for it from improvised means. To do this, at least you need a cylindrical rod of a convenient length, the diameter of which on one side is equal to the outer diameter of the sleeve. As a guide, you can use the old oil pump rod from the VAZ, after grinding off the gear. nine0003
Use a socket of the correct diameter or a suitable hollow tube to put the guide in place.
Further in the text, the terms "mandrel", "rod", "head" will be used, meaning both a special mandrel and suitable improvised means.
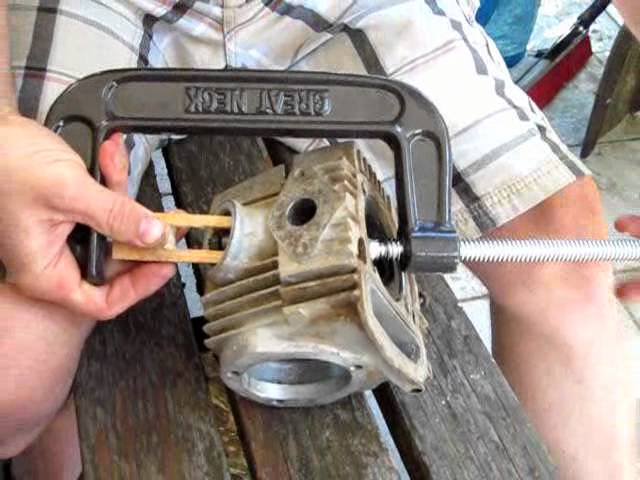
To remove the sleeve, turn the cylinder head over with the working part up. Next, we take the stem, insert it into the valve hole and gently press it out with a hammer. nine0003
Accuracy is important in this process. If you hit the surface of the block head with a hammer, this will lead to a violation of the plane of the cylinder head. To knock out the bushing, the blow must be strong, and for this it is better to use a heavy hammer.
To install a new bushing, place the cylinder head on the surface in the same position as on the engine. Then take a new bushing, lubricate the outer surface with oil and install it in the desired hole.
Next, put the head on it and insert the stem. Gently hitting the top of the stem with a hammer, press the guide bushing into place.
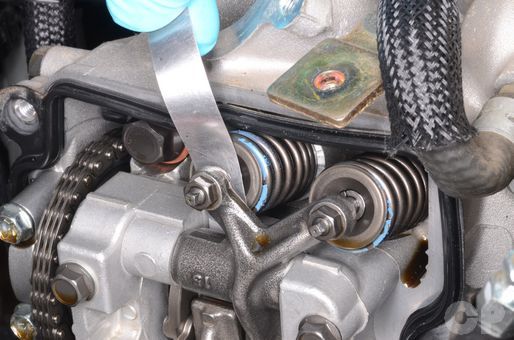
When installing, make sure that the selected improvised means do not touch the top of the gland seat (marked with an arrow 1), as the seat will deform or a piece will break off upon impact. The head must rest against the base of the gland seat (marked with an arrow 2).
Removing and installing the guide bush is no problem. This is a simple procedure that requires certain knowledge, accuracy and precision when working. nine0003
| Plastic and leather restorer 5 minutes and the interior of the car is like new. | $1490 | |||
| Glass repair kit Do-it-yourself car glass repair. | $1690 | |||
| Mirror DVR Vehicle Blackbox DVR dash cam + rear view mirror + rear view camera | 1990 | |||
| Mirror - trip computer nine0002 12in1 - DVR, GPS Navigator,Camera, Internet, Radar, FM, G-sensor.  .. .. | 1990 | |||
| Eco-leather covers Salon will be like new! | RUB 3990 |
You left your ATV in your garage on a trip or out of town, and when you return a few weeks later you can't start it anymore. Familiar situation? Even after adding a spark and fresh fuel, the engine only stops for two to three seconds. What could be the effect? After all, before the ATV, he had no problems: it was enough to pass a periodic thorough inspection. nine0003
Don't panic: in this case, you can say with almost 100% certainty that the problem is only in gasoline, and not in ATVs. Like any hydrocarbon gas, Gasoline mixture is volatile and should not be relied upon for long periods of time.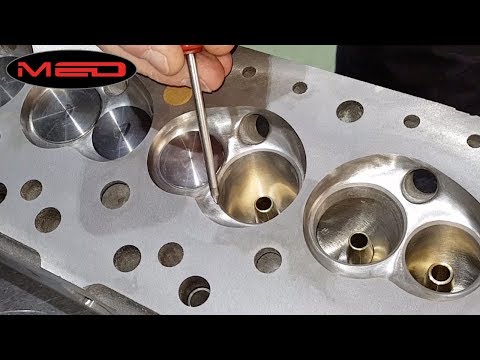 Some of its fractions evaporate, and the remaining gasoline liquid loses its ability to ignite and is no longer a fuel mixture. So your ATV didn't want to ride after a long break. nine0003
No response starter after turning the key
 If not, remove and clean the faucet.
  If it's still too low, check the heads, pistons and cylinders.
Bendix is broken or after inspection the starter turns in the wrong direction in the wrong housing, the latches are connected upside down: have the mechanics check the starter (they will do this without removing it from the motorcycle).
ATV stalls : Starter relay clicks but engine does not start
Loose starter cord or short circuit due to broken wire: check connection, remove rust, check current with multimeter. nine0003
 nine0008
 nine0008