All Terrain Vehicles (ATVs) are designed to be ridden in the wettest, muddiest, and dustiest conditions, and most ATV owners have no difficulty getting their quad bikes dirty. But after the fun ends is when the hard part of owning an ATV starts — cleaning your quad and getting it back to its former shiny glory.
If you want to keep your ATV’s plastic parts looking like new, you need to adopt a cleaning and protection routine from day one. By following these few simple steps, the tedious job of cleaning your quad will be a lot easier. If your ATV is white, some additional steps may be needed to keep its original color and shine.
If your ATV is covered in caked-on mud and dirt, an important first cleaning step is to presoak it. This simply involves using a hose to spray your quad with an intense spray of water and leaving it to soak. Try to get the spray into all the smallest recesses. Use your hands to get rid of any big chunks of stuck-on grass and mud.
The next step is to blast off all the loosened dirt. Using a pressure washer is the simplest and most thorough way to do this. If you don’t have access to a pressure washer, you can use a hose with a nozzle turned to its most powerful setting. Clean off as much dirt and grime as you can, to make the rest of the cleaning easier for yourself.
Use a good automotive cleaner and a sponge to scrub all of your quad’s surfaces, paying particular attention to the plastic parts and the seat. For any rough or difficult-to-clean parts of your ATV, use a stiff brush to remove tough dirt. The detergent will help to get rid of any oily stains.
There are different ways to dry your quad, depending on what you have to hand. If the plastic is still wet, the heat of the sun and a lint-free cloth work really well. If you have access to an air compressor, it not only dries your ATV’s plastic surfaces but can also get into all the nooks and crannies that you can’t reach with a cloth. This helps to prevent rust spots developing in hard-to-reach areas where water can sit in pools.
Many ATV owners think polishing the plastic is a step too far for a vehicle that’s going to get covered in mud next time out. But if you want to keep your quad looking great, or at least try to reduce the faded and scuffed-up appearance of plastic surfaces, you shouldn’t skip polishing.
Once your ATV is dry and free from water spots, use a specially designed plastic polish on all the plastic areas. You simply spray it on and buff it until the surfaces shine. However, don’t use the polish on your seat, as you might find yourself sliding off the slippery surface on your next ride.
If your ATV is white, it might need some extra cleaning because even the smallest bit of dirt will stand out on white plastic surfaces, causing the white to become discolored. Take these additional steps to restore your quad to bright white.
Fill a large bucket or bowl with one part water and one part bleach. Remove small white plastic parts from your quad and soak them in the bleach-water mix. For the larger parts, soak paper towels in the bleach solution and cover the discolored plastic with them. Be sure to wear gloves when using bleach.
Alternatively, you can buy automotive spray-on bleach products. Either way, leave the solution on the plastic for a while. Wipe the surfaces with a soft cloth, then spray them with a pressure washer or hose and nozzle. Afterward, dry the parts and admire your shiny white ATV.
To make your ATV’s plastics easier to clean, you could treat them with a good-quality plastic sealant spray before you go riding in the mud. The protective coating helps to repel water and mud. Instead of sticking to the plastic, muddy water will sit in beads on the surface. Your quad will still get dirty when you hit the muddy trails, but it makes it much lighter work of the cleaning afterward.
Before you use the sealant, your ATV must be thoroughly cleaned and dried to ensure the sealer will stick properly to the surfaces. Also, make sure you read and carefully follow the product’s instructions for use so that you get the lasting finish you want.
After that, it’s a simple job to apply the sealer to all plastic parts components you want to protect. Leave the sealer to sit for a couple of minutes, then buff the treated areas with a dry rag or a micro cloth to remove excess spray and bring your quad’s plastic surfaces to a shine.
The sealant is safe to use on all body surfaces, but you should avoid spraying the product on the engine or electrics. Also, you need to consider that some sealants, especially if they’re silicone-based, can make your handlebar grips and seat slippery, so it’s advisable not to coat those parts with the product.
As we mentioned above, you shouldn’t use polish or sealant on your ATV’s seat. Although these products will make your seat shiny, clean, and protected, they will also leave it slippery, making your next riding adventure potentially dangerous.
For cleaning and protecting your seat, the best product to use is a degreaser. It will remove the mud and water stains to leave it looking like it just left the showroom. Most degreasing products will do the job. You just need to ensure it’s compatible with vinyl and won’t damage the seat.
Following these easy steps will help keep your ATV looking its best. If you have any other tips for cleaning and protecting your quad, please let the team at Rydell Auto Group know, and we’ll pass them on.
Tags: ATV Detailing, Washing ATV
Posted in
Grand Forks Car Wash, Grand Forks Detail Center |
Comments Off on How Do You Get Mud Out of ATV Plastic?
Cleaning your ATV is something that you need to do. It isn’t pretty, but sometimes fun and a long ride out in the sun on your vehicle is going to lead to a bit of mess.
Over time, your ATV can fade and crack and receive some serious scratches. However, a deep and properly clean and dry with some special products and techniques can prevent the damage from lasting long.
If you have some spare time and are looking to make your ATV shine again, here is the best way to do it.
Restores Faded Plastic In 30 SEconds
Plastic Restore - Restores Plastic, Vinyl & Rubber Surfaces (8oz Bottle)
RESTORE PLASTIC
★★★★★ "Liquid gold!!!! We have a 2008 Jeep Commander and have always had an issue with the bumper and all the plastic trimming that would turn like a chalk white overtime. I have used many products trying to restore the finish on the plastic and nothing has worked. I just received my Plastic Restore from Torque and this product is amazing I applied it about a week ago and the jeep looks brand new again!!
RESTORE PLASTIC
The First Step Of Cleaning ATV Plastic - Clean Off The GunkThe first and maybe most important step when cleaning your ATV is getting all that yucky, crummy gunk off it. Now, something you can do before your next ride in an attempt to not even accumulate that gunk is to coat your ride in something like SC1 high gloss coating. That will hopefully prevent some of the mess that can build up on the ATV.
You can do other things to clear off the gunk to use Torque Detail Decon Soap to do away with and eliminate some of the mess. There are other deep cleaners on the market too, they all help wipe out some mess.
You can always use something like X-Team Spray Cleaner or Simple Green to wipe off dirt and grime and keep your ATV looking brand new and shining.
If you are looking to make your ATV appear like it just came off the lot, you can restore oxidized plastic with a 60/40 mix of paint thinner and boiled linseed oil. You can find some videos online of people doing just this, and it does have quite an impressive effect.
190+ Glowing Reviews - Torque Detail Decon Soap
Recommended ATV Soap: Decon Soap
BUY NOW
★★★★★ The Decon Wash Pack will strip previous coats of waxes and sealants, as well as remove surface contaminates.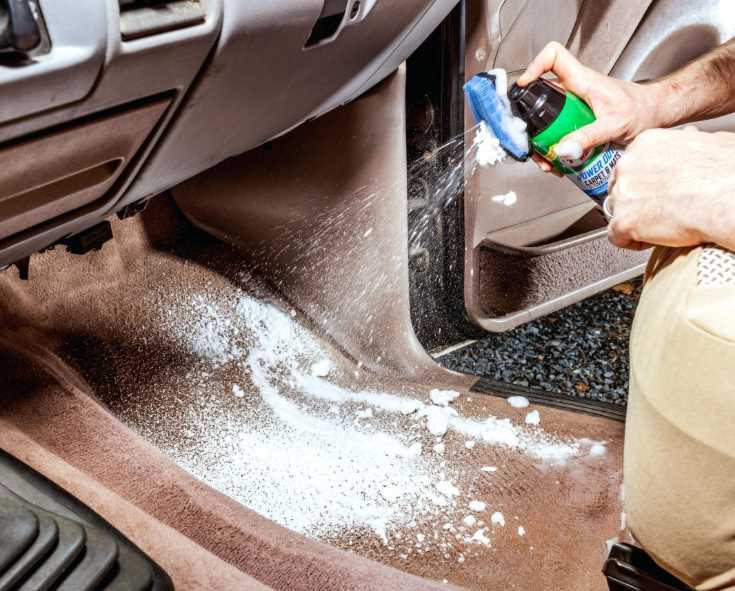 Your vehicle's surface is filled with contaminants. Some of these may be visible, such bug guts, bird droppings, water spots, and tree spots. And some contaminants, such as iron deposits, brake dust, and overspray may not be visible to the naked eye.
BUY NOW
Types of ATV Plastic DamageNo matter how hard you try and the precautions you take, there is a good chance that at some point, the plastic on your ATV is going to be damaged. These things are bound to happen; it is the nature of ATV riding.
That doesn’t mean you shouldn’t educate yourself and do all you can to prevent these sorts of damages, though. Knowledge is power in this case, and knowing the kind of issues your ATV plastic will undergo is vital in avoiding them to the best of your ability.
So, what sort of plastic damage can your ATV experience?
ATV scratches are among the most common complaints you will hear about when it comes to issues related to an all-terrain vehicle. There are different ways to get scratches and also different types of scratches too. You have light scratches and deep scratches.
Branches and brushes and everyday shrubbery often cause light scratches. Those aren’t the real headaches. The serious problems are the deep scratches, which can often be fixed with a plastic bonder or filler. There are numerous products out there that help with deep ATV plastic scratches. Use a putty knife and a plastic bonder product to fill in the blanks and fix the scratches the best way possible.
If you feel adventurous, you can also use sandpaper to work on the plastic scratches, but that will require you to disassemble your ATV’s component, which can be a very long process.
Cracked ATV plastic is a whole other issue that owners have to grow accustomed to. Depending on how well you take care of your automotive vehicle, they can dry and crack over time after being out in the sun.
Thankfully, cracked plastics are fixable without too much hassle. You can use products such as JB Weld to fix cracks or invest in something more heavy-duty like a hot staple gun kit to staple the pieces back together. It is as simple as lining up the pieces and stapling them together. A heated staple can sink into the plastic and create a super-strong bond.
Plastic fading and discoloration with your ATV is, sadly, something that happens far too often. There is nothing worse than seeing a faded and dull ATV.
The truth is that oils in the plastic evaporate over time, leading to a fade that seems inevitable. But it is not. There are solutions to keeping your vehicle looking fresh and new. You can sand down the plastics a bit, carefully use a heat gun to bring the oils inside the plastic to the surface, or apply Torque Plastic Restore to the ATV.
How To Clean ATV Plastic After Washing (Best Method)Now that you have your ATV plastic washed, you are ready to give it a deep clean before putting it back together and enjoying your ride once again.
But what is the best way to get into every nook and cranny of your ATV and give it a deep clean and wash? You will need to follow a few steps if you want to do it right, so pay close attention.
Sadly, this is an important step, one that many people forget, and it will only cause a hassle later. You need to remove as many components from your ATV as possible. That means the skid trays, rack, and any other bulky pieces you can detach need to be taken off to get a real clean and wash on your vehicle.
>> Restore Plastic Now <<
Once you have all the pieces you can detached removed; you can get to the hard work of restoring the plastic on your ATV. Thankfully multiple products on the market can assist you with this.
A particularly popular and effective plastic restorer for your ATV would be Torque Detail Plastic Restore. It is an easy-to-apply creation that is effective on most surfaces and uses nanotechnology to deeply permeate plastic and change the chemical chemistry to bring it back to its original state.
Plus, Plastic Restore is both water and sun-resistant and is safe and eco-friendly too. It is a great choice when you want to get your plastic good as new again.
Some ATV owners use an anti-mud coating when they are cleaning their vehicles. Is it necessary? Not technically. It also costs more too, so that is a drawback for many people.
Yet, a good anti-mud coating will prevent mud, gunk, and grime from building up over time and is an extra step that some people take to ensure their vehicle looks fantastic long into the future.
Restores Faded Plastic In 30 SEconds
Plastic Restore - Restores Plastic, Vinyl & Rubber Surfaces (8oz Bottle)
RESTORE PLASTIC
★★★★★ "Liquid gold!!!! We have a 2008 Jeep Commander and have always had an issue with the bumper and all the plastic trimming that would turn like a chalk white overtime. I have used many products trying to restore the finish on the plastic and nothing has worked.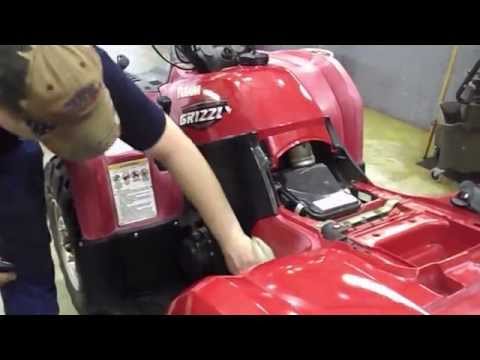 I just received my Plastic Restore from Torque and this product is amazing I applied it about a week ago and the jeep looks brand new again!!
RESTORE PLASTIC
Summary - How To Clean Your ATV Plastic Well and EfficientlyCleaning your ATV plastic is a long process; it certainly isn’t a two-hour affair. You are going to want to set aside some time to do it and do it right.
It is a necessary process, however. And while it may take some time (and money), there are just a few steps you need to follow to ensure your ride looks brand spanking new in no time.
Tend to the scratches and fades in your ATV, then take apart as many components as you can, and use a plastic restorer and maybe an anti-mud coating, and you will be good to go. It isn't many steps; they just take a while. But your ATV is worth it.
Written by Dan Sweeney
COO of Torque Detail & Certified Car Detailer
I help run the day to day for America's Number #1 Car Wax Mirror Shine by Torque Detail.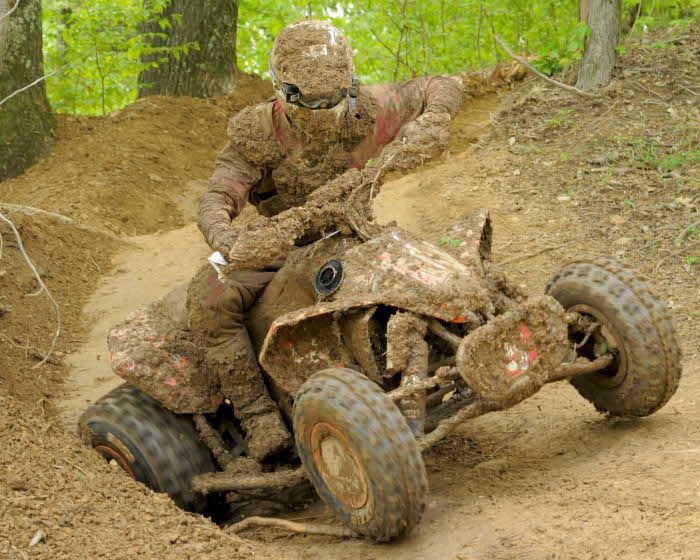 As a Certified Detailer by the International Detailing Association, I use that knowledge to help create products that get professional grade results with super simple application techniques.
We've ridden enough off-road, driven through swamps, but what to do next? Now you are waiting for one of the most unpleasant procedures for the rider - washing the ATV. But when cleaning, you can easily damage parts, so you need to be extremely careful. How to properly clean so as not to harm the equipment? Consider the process algorithm, decide which sink should be used.
An important rule to remember is that the ATV must be washed after every off-road ride. If you do not do this in time, then the frame and components of the equipment will become covered with corrosion, which will eat the ATV, and you will have to repair the damaged elements.
Before any kind of washing, the equipment must be carefully prepared. To do this:
Remember not to use household chemicals to clean the body of your ATV. Buy only special car cleaners. They do not act so aggressively on plastic, rubber parts of equipment.
The effect of a manual wash is much lower than that of a non-contact one. With a sponge, you will not be able to remove all the dirt. You can not rub the body of the ATV hard, because of which the efficiency will be lower.
For appliances with thin plastic, it is better to use a hand wash. We recommend:
Use a jack or trestle to access hard to reach places.
Touchless ATV Washing uses high pressure. Therefore, you should be careful not to damage your own motorcycles. Think in advance about protecting the battery, radiator, optics, filters, electronics. We do not recommend aiming the jet at these elements.
A watering hose is perfect for a touchless car wash. With it, you can get rid of small particles of dirt and do not damage the components of the equipment.
Here are some of the most useful rules for different cleaning methods.
Before washing, cover the battery with the exhaust pipe with foil. Washing in both cases starts from the top. Manually remove dirt stuck in the ATV nodes. Use warm water to remove large dirt. First, dirt is knocked off, then chemistry is applied, which is then washed off.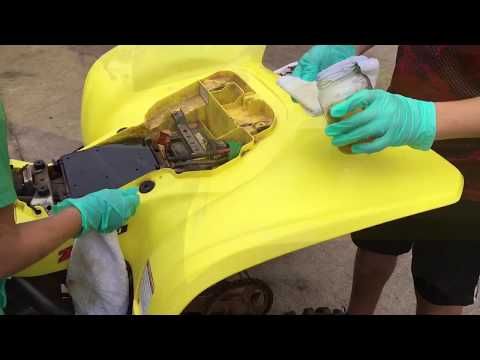 After the process, the equipment must be started so that, while idling, it allows the nodes to dry.
Depending on the expected result, the nature of the process, each method has advantages. Manual is suitable for daily use when the ATV has small dirt or a lot of dust that needs to be quickly disposed of. Use a low pressure garden hose.
If you need a thorough cleaning, or you are not afraid to damage the body, then use household pressure washers.
Photo sovkusom.ru
Reagents, heat and dirt of our roads very quickly turn unpainted plastic body parts from a functional decoration into a disgrace to the owner. But this has never happened before, you say! Of course, it wasn’t, because every car owner knew the simple secret of preserving the appearance of plastic. Details are on the AvtoVzglyad portal.
Eduard Raskin
Many drivers sadly recall the times when plastic bumpers and moldings were not painted: scratches and chips, minor damage and other “traces of use” on such parts were simply not visible. Well, if you can’t see it, you can’t repair it. They laughed, shook hands and parted ways. Today, cars in this configuration cannot be found during the day with fire, and every minor accident automatically means red tape with the insurance company and leads to the paint shop.
This is how memory works: the good remains, the bad is forgotten. But it was also bad: plastic parts made of rough plastic served for decades, but damn quickly lost their appearance. Muddy, faded, stained and spoiled the appearance of the car. In three cases out of four, they were changed only because the element looked too scary.
Naturally, everyone tried to find a way to preserve the appearance of bumpers and moldings: they were painted, varnished, impregnated with shoe polish, inked with all known “inks”, but only one trick gave a lasting effect without serious investment.
Photo from social networks.
Experienced drivers quickly realized that the problem lies not in the plastic itself, but in its relief. Dirt instantly clogs the pores, and it is not always possible to clean it out of there even with pressurized water. And if it doesn’t come out to take it impudently, you need to connect your head. How to get purity - on the one hand, and shine - on the other, and even do it for a penny? Mix the most ordinary vegetable oil with citric acid - the ingredients can be found in any store near the house - and rub the pre-washed elements with the resulting “cocktail”.
"Lemonka" will remove all the dust, and the oil will add shine. Oddly enough, dust and dirt do not stick, and the part itself remains bright black for a whole week. Well, after that you can repeat - the composition is actually worth nothing!
During the times of wholesale shortages, Soviet and then Russian car owners collected hundreds of such recipes that allow for a penny to solve issues that today are subject only to expensive professional car chemistry. Her choice on the shelves is great, come and buy, but the number of free banknotes that can be spent on cars has decreased significantly. It's time to open the old magazines and notebooks, where the best practices and knowledge collected over the years of car operation were carefully entered. Many of them, of course, are outdated, but some are worthy and acceptable for use today.
Manufacturer's photo.
It is clear that with the current abundance of inexpensive consumer auto cosmetics, the above-proposed option for making a “home-made” plastic cleaner should be considered only as a fallback option. Moreover, plastics from different manufacturers can vary greatly in their properties.
And when it comes to modern passenger cars of the middle or premium segment, for some of them quite specific types of cosmetic preparations are recommended. For example, the German Cockpit Glanz aerosol from Liqui Moly. This original product was specially developed as a universal care product for automotive plastics.