Looking for an inexpensive way to transform your car’s appearance? Consider coloring the letters on your tire sidewalls! Not only will it freshen up your car’s appearance, but it’ll also separate your car from the pack with a unique high-performance look.
A Jeep Wrangler Rubicon 10th Anniversary Edition with white lettering on its tires, via Tuner Tom
All this project requires is about $20 and a few hours of your time.
First, let’s talk about the paint. You can paint the lettering on your tires any color you want. The most common color is white, followed by yellow. When painting tires, you have to use oil-based paint. The easiest way to apply it on the tire is with a paint marker. Now, let’s take a look at a comprehensive list of all the supplies you’ll need for this project:
Here’s what you need to do with each tire:
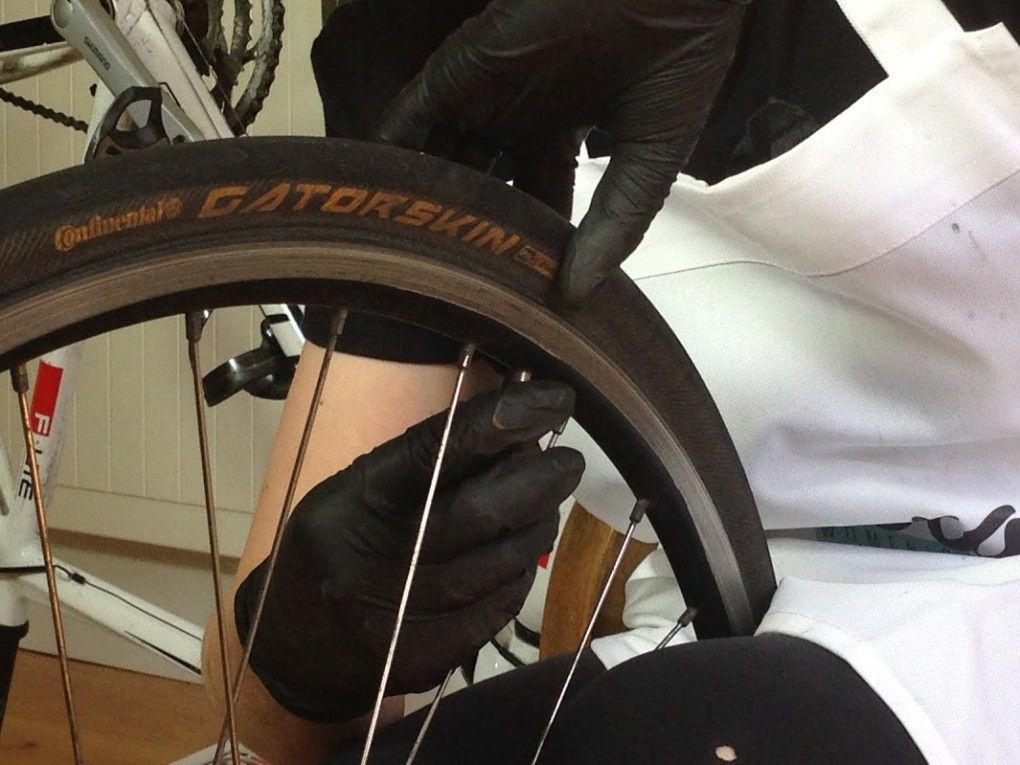
1. Remove the tire from your car.
2. Scrub the dirt and oil from the lettering area or the whole tire with a tire cleaner (or Windex if you don’t have tire cleaner). If you’ve used tire shine in the past, you’ll have to apply some extra elbow grease to get it all out. Once the cleaned area (or the whole tire) starts to look dull, it’s clean and free of any oily residue. Wipe with a clean rag until dry.
Make sure your tire letters are completely clean and dry! Credit: CashedOutCars’s YouTube tutorial
3. Grab your medium tip paint marker and shake it well. Pump the tip against a piece of paper, paper towel, or cardboard repeatedly until the paint starts to come out and the tip is well-saturated.
Saturate the tip of the pen with paint before beginning. Credit: CashedOutCars’s YouTube video
4. Color in the letters with the marker. The easiest thing to do is to fill in the centers first and then outline them carefully with the fine tip paint marker.
Take your time coloring in the letters for a clean look. Credit: CashedOutCars’s YouTube video
5. Touch up any of the spots you may have missed and let the paint dry. If you want your lettering to look brighter and bolder, apply another coat.
The end result. Credit: CashedOutCars’s YouTube video
Last modified by Ian Haynes
For many people, their car is an extension of their personality. That is why we have seen a rise in car customizing techniques that allow enthusiasts to personalize their vehicles.
From changing your vehicle’s color, powder coating rims, to adding high-performance parts – you can modify almost anything. The only thing we weren’t able to customize was the tire’s black sidewalls, till now.
Much like what getting a fresh haircut does for you, decorating and remodeling tires has become an inexpensive way to spruceup a car’s exterior.
Not just car enthusiasts but regular car owners have also begun highlighting their tire letters to give the car a more fresh and accented look. If you’re looking to get your tires painted as well, you are in the right place!
This article will highlight the best practices for preparing your painting area and how to prepare your tire for a satisfying DIY paint job.
The best thing about it is that you don’t need tobreak the bank to do this; in fact, all you need is $20, and that’s it.
Read on to find out all about painting your car’s tire letters:
The good thing is you can use your favorite color and paint on a car’s tire – the rubber won’t mind at all. However, you need to have the right kind of paintto meld onto the rubber.
The kind of paint that you should use on your tire entirely depends upon the complexity of the paint job you are undertaking.
Here are a few options you can go for:
Use removable or temporary rubber coatingif you are uncertain about a look or want a design that you can remove with ease afterward.
This rubber coating paint is readily available online or at any hardware solutions store. It is easy to apply and ensures an elegant finish to the tire.
However, just because it is temporary does not mean that it will peel off without deliberate effort; the paint is highly durable.
If you prefer longevity and durability, choose marine paint for your tire letters. Famous forits commercial quality, marine paint is mainly used for swimming pools of all sizes and boats, especially yachts.
This commercial-grade paint is famous for its strong resistance to any color decay, cracks, and peels – as it is primarily manufactured to withstand erosion.
If you’re looking for a durable and elegant look, you can opt for acrylic paint.
If you go for an enamel version of acrylic paint, you invest in something that will last long while maintaining the same appearance. Enamel acrylic paint has a certain sheen to it that other types don’t have.
To get the best results, use two deep coatings and a pause between each layer to ensureit has dried.
This is a type of nontoxicpaint that is recommended for objects that are exposed to the weather. Therefore, it isvery reliable and long-lasting.
Before you begin your paint job with high-quality exterior paint, make sure to rubber coat your tires first so that it sticks, and don’t forget to dry before applying the second coat.
Before beginning your tire painting session, make sure to tape off the parts of the tire you don’t want paint getting on. This allows you to be precise and minimizes any chance for errors.
One thing you need to take into account is that when you consider painting tire letters, use oil paints. And the simplest way to paint tire letters using oil paints is through paint markers.
Following is a check-list to bring together everything we need to begin painting:
Since you’re now ready and equipped with the essential gear, here are five simple steps that you can follow to paint tire letters:
The primary step involves pulling out the tire. Just jack your vehicle up and remove thetire that you want to paint letters on.
This step is important as it sets the base for painting.
Grab your tire and cleaning liquid –and get to work on loose dirt particles as well as oil (if any) from the surface of the tire.
You can scrub the entire tire if you want or just the area you’ll paint letters on.
If you’ve been applying a tire shine on your car’s tires in the past, you may have to use some additional elbow grease or some other lubricant you see fit to remove any mark of that.
When you see the tire or the scrubbed area appear dull or worn out, only then can you stop cleaning it. Now, grab a piece of rag and wipe the tire until it becomes dry.
Take the medium-point marker from the supplies. Before starting next, make sure to shake well.
After that, pump its tip hard towards a paper towel, scrap paper, or even a piece of cardboard repeatedly – until the paint starts coming out.
Pro tip: Push the tip hard until it’s completely wet with paint.
Use your paint marker to color letters you’ve just made. For best results, fill the center first. Use the fine-point marker from your equipment and carefully outline them.
Doing it the other way around will also do the trick; the key is to have some strategy and not wing it.
Look for any left spots, and if you see any, color them right away. Once you’ve done it, let it dry.
Like we’ve said earlier in this post: if you want long-lasting and bright paint tire letters, then always apply multiple layers.
That’s all! Now you know the basics of painting tire letters – the next time you feel like modifying your tire’s sidewalls, do it the right way using our guide. Happy tire painting!
I somehow caught fire to highlight the brand name on the tire (like on sports cars or on off-road tires), but everything turned out to be not so simple .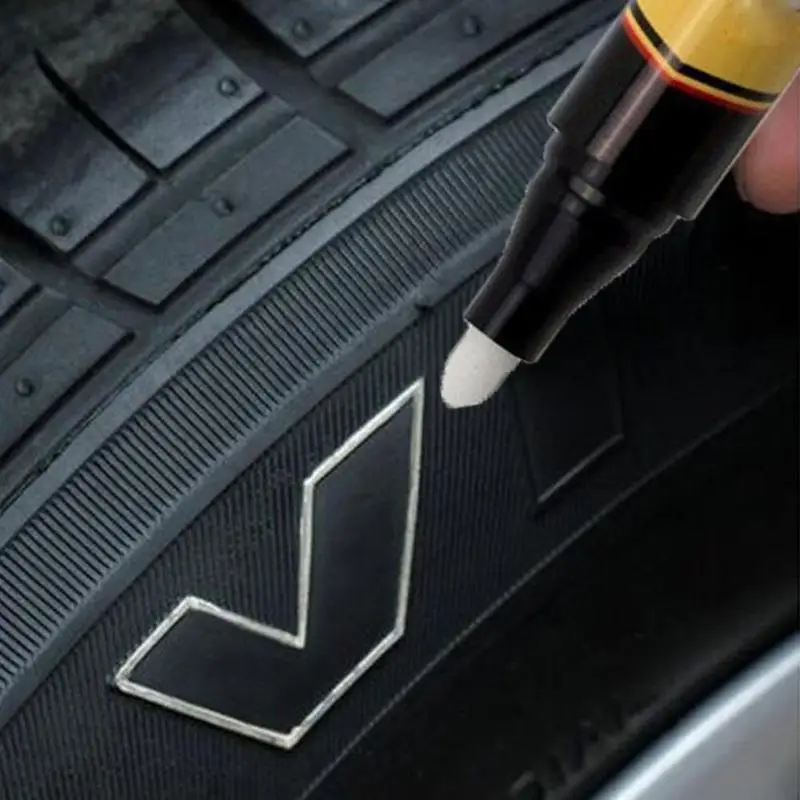 .. It turns out that there is no information on the Internet on how to draw on rubber / tires / wheels correctly.
The first step was to find something to draw with so that everything drawn would not fall off the next day. I started looking on the Internet, there are many options, from paint to marker. But I decided to stop at the marker, because. it will be easier to draw. The car at that moment was under repair and on winter tires, which means I had enough time to implement my Wishlist in the summer. It was very important that the paint with which we paint was elastic and resistant. And this turns out to be not easy. And the most interesting and appropriate (as I thought at the time) was the Edding 8050 tire marker with a 4mm tip.
Marker is specially designed for applying any marks and inscriptions on rubber, BUT this does not mean that it is suitable for applying to tires - as it turned out later. In general, I bought this marker and tried it in the evening. In general, I painted one wheel with this particular marker in 2 layers, but I was not very pleased with the result. They are very uncomfortable to draw. The paint either does not pour out at all, or vice versa, there is a lot at once and spreads. In general, I got along well with him. It cracks and doesn't hold up well. I don't recommend you buy this marker! This is how I tried the marker on the inside of the rubber.
Here the inscription has a border and is easier to draw. The paint will not spill over the edge. But on the outside, the inscription does not have a side and this complicates the process. Because excess paint may spill out of the letter.
Fortunately, my brother had another marker in the garage - the cheapest paint marker with a 4 mm tip. and the next wheel I painted with it. It was already easier with him, but the thick sting / pen / tip does not allow you to draw accurately. So I found exactly the same cheap marker, only with a 2 mm sting.
And now with a thin marker, everything has become much easier and faster. I recommend this marker for painting tires. If for the first time it took me an hour for the first wheel, then it is many times less. As a result, the rest of the wheels were painted in 2 layers with a thin and cheapest marker. It is not necessary to paint in two layers, it also holds and the effect is the same.
As practice has shown, the brand that is specially for tires lasted the least - about 1 week (it soon decreased, possibly due to the fact that it was on the front right wheel), this is of course very little. After 3 not even the slightest trace remained. But the cheap paint marker is still holding up, although it is well worn. Top of the wheel covered with ink for rubber Soft99 (there will be a new post about this) - so the inscriptions look very impressive !!!
After following all the rules and with due care, you will get an excellent result. And if you still don’t shuffle the rubber on the sides, then extend the service life. But do not think that this coverage will last for a long time. The paint is not elastic and cracks. And flies away with time.
Here is the result from a simple paint marker after 2.5 months.
Marker on rubber after 2.5 monthsAs you can see, the marker is almost invisible. But there was no trace of the Edding 8050 marker in a week.
I covered the top of the wheels with Soft99 rubber ink (this will be a separate article) — this way the inscriptions look very impressive!!!
And this is how fresh inscriptions, which are one day old, look like.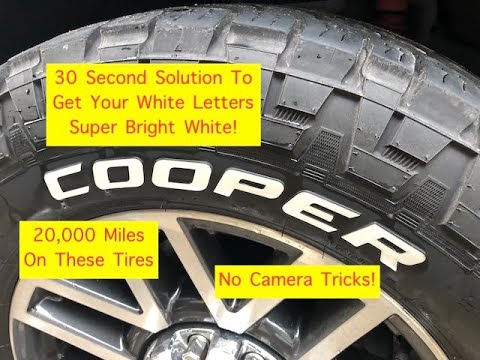 Updated the inscriptions so to speak. There was an ink on the wheels, which, after 2.5 months, was well hydrophobic. On the Internet I did not find information on how to wash off the ink. It turned out to be nothing complicated - I used "Galosh gasoline" and cleaned everything easily.
I hope you liked the review of markers for tires/rubber/tyres/wheels and now it became clear to everyone how to draw on car tires correctly, and if you have any questions, write in the comments.
Whether you're talking about a full-size car or radio control, anyone who loves four-wheel "friends" wants their car to stand out. Traxxas offers some of the most stylish and authentic rims and tires in RC, but we can always do more to add a little extra flavor and custom style. Below we have a few ideas to inspire you and we hope you give them a try and make your own style.
Tires with white lettering have a classic look and will really make your rubber stand out.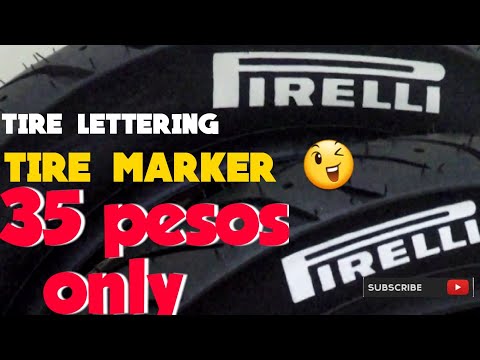 We tried drawing letters with a brush as well as coloring them with pens, and we got better results with pens. The pen's paint was more opaque, and the hard felt pen tip reduced the number of errors that went beyond the lines. Of course, your experience may differ - if you prefer a brush, then this is the best way to do it. If you're wrong or think you don't like the color, soak it in a thinner and the paint will come off easier with your toothbrush. Be aware that tire lettering will quickly crack when the tire is bent and scraped off in off-road conditions. If you want to keep your hard work alive, you can use letter tires to showcase or at least take lots of pictures.
Choose a fine tip pen for maximum drawing precision. We have had good results with both of these brands. To avoid blots, apply the paint in very short strokes or spread it on the tire. A second layer may be required.
This Maxx 2.8 tire has flashy graphics that look fantastic in white.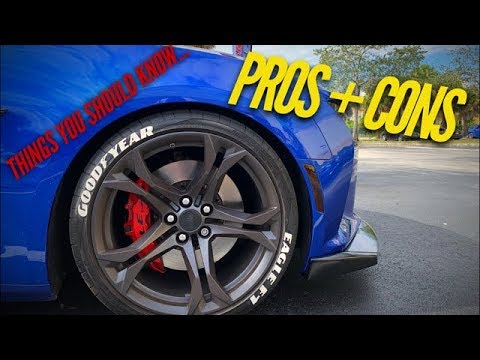 For other colors, first paint over the letters white and let them dry completely. Then apply color.
Highlight nuts and bolts with chrome
"Chrome" paint is a very impressive material - it really does look like a galvanized finish. In pen form, it makes it easy to add realistic, simulated equipment. Just color in whatever you want to be "chrome". The color itself is a little pricey, but the result is worth it.
You can find "chrome" handles at hobby and craft stores. The 1mm tip is best for handling wheels. The paint is very thin and easily soaks into the simulated fastener of this TRX-4 Sport wheel.
This is a pretty major styling update and it only took a minute. If your truck has black axle nuts, you can replace them with chrome plated nuts!
The Mercedes-Benz® G 63 wheels only have a few "chrome" bolt heads, but that adds a bit of elegance to the look.
Parts with real equipment
How about adding real details to your wheels? Check the RC aircraft section of your favorite hobby store for 2mm socket head screws that can be easily attached to some wheels as a solid styling upgrade. All you have to do is drill a 1/16" hole and screw in. Choose stainless steel screws for a corrosion-resistant, high-contrast look on black wheels.
These 2x8mm screws are longer than required, you will only need 2mm of thread. They are easy to cut to size with pliers. The castings on this TRX-4 sports wheel serve as a guide for drilling 1/16" holes for mounting screws. Drill slowly, you only need to go 2mm deeper.
Here is the final look. There is nothing more like real wheel nuts than the wheel nuts themselves! Remember this simple truth!
Parts for Beadlocks
beadlock wheels are a great upgrade for any TRX model. No glue is required, so the discs can be easily reused, and the rings, sold separately, allow you to choose any color you like. You can also purchase Method 105s wheels with rings installed and tires in 1.9" and 2.2" sizes. They look great as is, but you can add even more style by adding stainless steel screws and flipping the rings. Flipping the ring can reduce the tire's stability in extreme situations, but if you're not trying to win the competition, give it a try.
The stainless steel screw kit includes all hardware needed to replace black oxide rims on four Method 105 1.9" or 2.2" wheels. Black back, stainless front. The stainless steel screws will not rust and have good contrast with the rings and wheel nut.
Lock rings are available in red, orange, green, blue, satin and black so you have plenty of options to customize and personalize your model. Traxxas Summit owners can also choose from different colors.
Flip the rings over and screw onto the wheel for more sculpting! If you have free 2 minutes, you can paint over the reliefs with the color you need!
Paint Over Chrome Effects
No one makes chrome wheels quite like Traxxas, and the highly reflective wheels turn into true sparklers as they spin in the sun. They also provide some fun detailing opportunities. You can reduce the sheen with clear paint to create more of a satin or "raw aluminum" finish. Or paint the chrome clear for an anodized or metallic finish, depending on the color you choose.
The wheel on the left is mirror chrome, which is how it comes from the factory. The center right of the wheel is coated with a brushed aluminum finish.
For a colored chrome effect, wrap the tire and apply a clear color to the rim. The disk will retain maximum shine, and if you use pearlescent paints, they will give a more interesting look.
Most Traxxas chrome wheels are black under a shiny finish, and with a degreaser, the chrome can be removed to reveal a glossy black wheel. If you remove a rim from an installed tire, you will find that any chrome under the tire adhesive will be protected from the solvent, leaving a strip of chrome where the wheel meets the tire.
The degreaser will clean the chrome off the wheel in an hour or two.