The store will not work correctly in the case when cookies are disabled.
JavaScript seems to be disabled in your browser. For the best experience on our site, be sure to turn on Javascript in your browser.
Search
Search
Wheel spacers are an excellent way to improve the stability and handling characteristics of your ATV.
Spacers bolt onto the wheel hubs essentially widening your ATV's track. This means the torque forces are spread over a wider area resulting in a more stable platform and more responsive handling.
Of course, there is also the "cool" factor to consider. Spacers typically come in a variety of widths up to 2" meaning your track can potentially be increased by 4". Head on your ATV will take on a wider, more aggressive stance which will amplify its "awesomeness" rating by a factor of five.
The first thing you want to do is determine just how wide you want your track to be and if you want to widen both the front and back, front alone or just the back. It's a matter of personal taste but be aware of the risks to adding spacers to the rear wheels.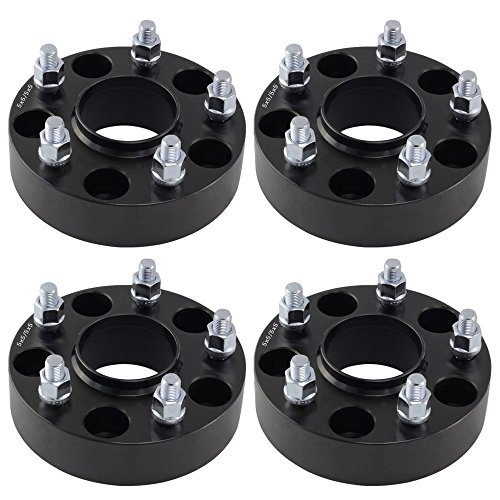 Essentially you have lengthened the axle without adding any stiffening meaning the axle is more susceptible to stress.
The next decision is to purchase universal spacers or spacers designed for your specific make and model. Not surprisingly the "universal" spacers are less expensive but there is a risk of a less than perfect fit. If you go this route it's recommended that you pull the wheels and check for tightness after riding on them for 15 or 20 miles.
Spacers that are made to fit a specific model are more than just metal shims. They are designed to become an integral part of the machine and typically will provide a longer service life than the universal spacers.

That completes the installation for one wheel. Repeat the same process for the opposite wheel and then take it for a test ride to get accustomed to the new ride and handling.
- End of Procedure -
Return to all Repair & Install Guides
If you’re getting bigger tires or installing tire chains on your ATV, you might need wheel spacers to resolve clearance issues. Or maybe you’re just looking to make your ride a bit more stable and are willing to accept the potential downsides that come with wheel spacers.![]()
Related: Are ATV Wheel Spacers Good or Bad (Pros/Cons)? Why Use Them?
Regardless of why you want them, here is a simple 2-part guide that helps you choose which spacers to get and how to install them afterward.
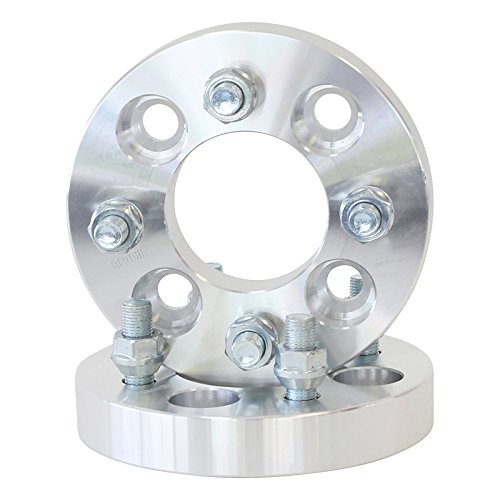
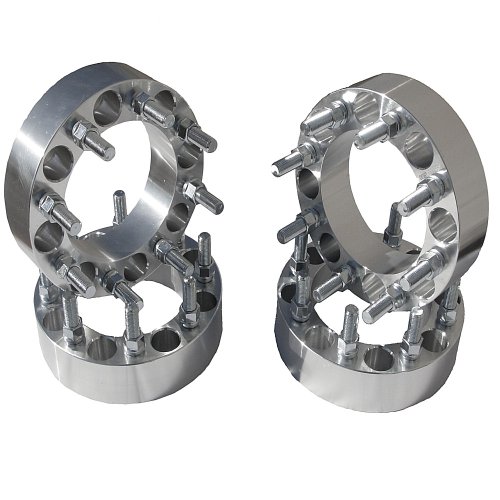
This guide will focus mainly on ring spacers as these are the most common and the best alternative for ATVs. This type of spacer acts as a shim that’s bolted between your wheel hub and rim.
At the end of the post, we’ll be taking a quick look at some alternative ways to increase track width.
There are a few things you should consider when choosing what wheel spacer to get. Some aspects may be more relevant to you than others.
A set of four spacers will set you back anything from $50 to $250 or more. The set I got for my Polaris was about $100, and I have no complaints about the quality, even after a couple of years of rough use.![]()
If the price is not a big issue for you, you should go for the best quality product available, and you can’t go wrong. For all the others, I recommend steering clear of the cheapest alternatives out there.
It pays off to get a decent quality set from a reputable brand or dealer when it comes to wheel spacers.
The bolt pattern of the spacer should match the one that’s on your ATV. It is quite easy to measure if you don’t know it already.
I generally recommend that you avoid any “universal” spacers that are made to fit several different bolt patterns, as the fit will likely not be optimal for your machine with these.
What thickness you should choose depends on how much you want to widen your ATV or how much extra clearance you need to gain.
A set of one-inch spacers will add 2 inches in total width to the ATV. But you will get only one-inch additional clearance at each wheel with the same spacer.
ATV wheel spacer thickness is measured in inches and ranges from 0,5 inch to two inches. Some even offer thicker spacers up to three-inch thickness.You can get spacers from 0.5 inches and up to 2 inches wide. Some even offer three-inch models, but that’s pushing the limit. If you need more than two-inch spacers, I would rather look for a wider aftermarket lift kit.
When it comes to choosing wheel spacers, the best practice is to get the thinnest ones that still will be thick enough to achieve what you want.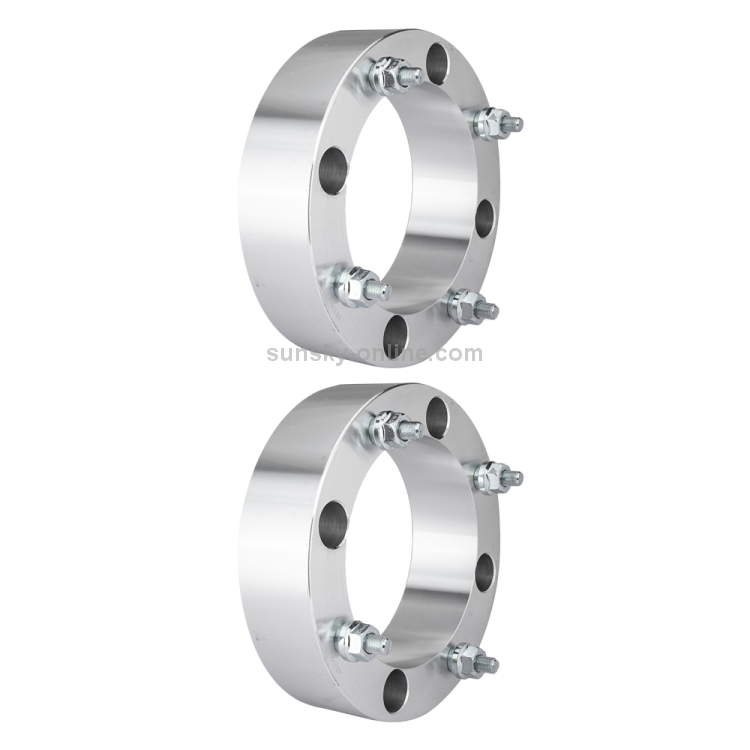
You need to make sure that the diameter of the spacer is sufficient. Ideally, it should be the same diameter or larger than the mounting surface of the wheel hub. More surface in contact means better distribution of the push/pull forces that are involved.
As with most other things, you get what you pay for in-wheel spacers as well. For most ATV applications, you will most likely be just fine with just about any spacer available on the market. But I would still not cheap out and go for the lowest-priced products out there.
Manufacturing tolerances in the cheapest ones may not be as good, and you risk getting vibrations. Billet aluminum spacers are preferred over cast aluminum as the accuracy of the former is generally much better than the latter.
And just as important as the quality of the spacer is the quality of lugs and nuts. The bolt-strength should be listed in the product specifications.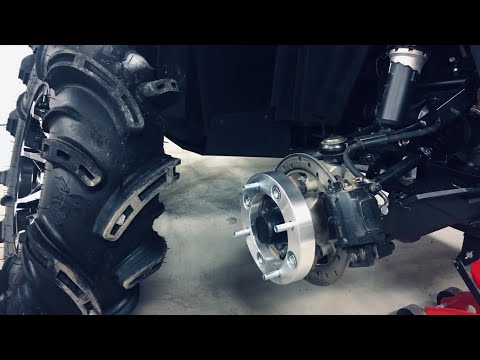 If they are not listed, and if the dealer cannot answer, choose another dealer.
Aluminum is the most common, but other materials as titanium, urethane, and other composite materials are also out there.
If you still don’t feel sure that wheel spacers are the right choice for you, have a look at my post about the pros and cons of wheel spacers and when you need them.
After you’ve made sure you have got the correct spacers for your specific ATV and your specific need, it is time to install them. This is how you do it.
Never jack up or remove wheels from an ATV unless you are doing it on a firm and level surface. It makes the whole process a lot safer, faster, and more comfortable.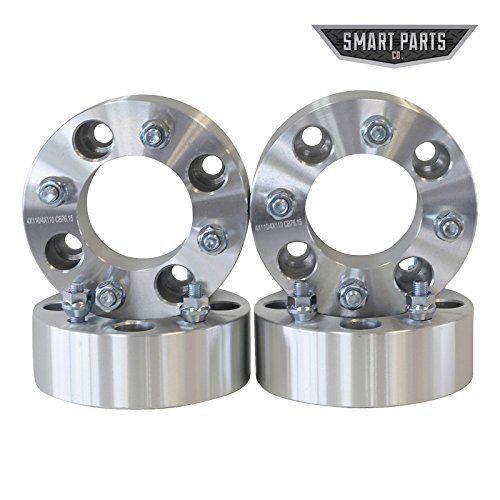
Put the bike’s transmission in “P” or put the park brakes on to prevent it from rolling any time you are working on the ATV.
Before you jack up the bike, loosen the lug nuts on the wheel you are working on. They are harder to loosen when the wheel is up in the air. Please do not remove them entirely yet tho.
Loosen the lug nuts by hand.Place the jack on a flat and stable spot of the bike-frame, directly under the bike center, either at the front or rear.
You will be lifting two of the wheels simultaneously, as that’s considered the most stable method for elevating an ATV. Raise the lift until the wheels you are working on are no longer touching the ground.
After elevating, place two jack stands under the frame, one on each side of the jack, then lower the jack down until the frame rest on the two jack stands.
Make sure you find a stable spot on the frame to place the floor jack pad.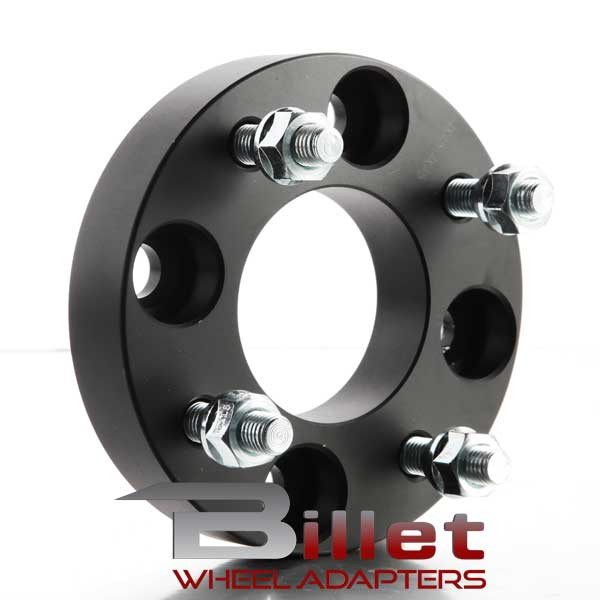
Finish unscrewing the loose lug nuts and remove the wheel from the wheel hub. Put aside the lug nuts; you need them to attach the wheel to the wheel spacer later on.
With the lugs on the spacer facing outwards, mount the spacer to the lugs attached to the wheel hub.
Make sure all lugs are entering the holes in the spacer at the same time, keeping the spacer level to the hub all the way in. Failing to do so may cause binding issues.
If needed, gently tap the spacer with a plastic hammer until it is completely seated. If you get stuck, use a crowbar to gently remove the spacer and start over.
Then use the nuts provided with the spacer kit and thread them on the wheel hub lugs.
Here you can see the spacer fitted to the bikes stock tire studs.The instructions provided with the spacer kit should tell you how much the nuts need to be torqued down. Most accidents involving wheel spacers happen due to not using the right type of bolts or not tightening them down according to spec.
Ask a friend to borrow a torque wrench if you don’t yet own one yourself. If you don’t know any that has one, now is the perfect time to get one yourself (link to a budget-friendly Amazon bestseller). I promise that as a home mechanic and ATV owner, you will need it sooner than later!
Make sure you tighten according to spec.Thread the tire onto the spacer studs. Use your stock lug nuts, but just snug them down for now.
No need to elaborate on this step!
The nuts should be tightened just as tight as you would without the spacers. Always tighten in a crisscross pattern.
Remember that ATV lugs cannot be tightened as much as those on cars before they break. Use the torque wrench now that you have one, and follow these guidelines:
 lbs. (41 – 54 Nm).
If you use anti-seize on the threads, remember to reduce the torque by about 20%. Lubricated bolts are easier to turn and, therefore, won’t need as much torque to get where they need to be.
Note that some user manuals say that cast aluminum should be torqued at as much as 75-90 ft. lbs. (102 – 122 Nm). But both my personal experience and stories from ATV forums show that going this high may result in stripped threads and broken lugs.
You have now successfully installed a wheel spacer. Follow the same procedure on the remaining wheels.
Here is my Polaris Sportsman XP 1000 with two-inch wheel spacers installed. The wheels are stock.Make it a habit to have a look at your spacers after each ride. Bolts may break or come loose, or the spacer may crack, especially if you bought cheap ones.
Every 20-30 miles, you should take out your trusty torque wrench and make sure that no bolts are starting to come loose.
ATV spacer stud bolts are a cheaper alternative to ring wheel spacers. They are, however, not as strong as the ring spacers. For most ATV applications, spacer studs will be strong enough. But for racing applications and any high-speed riding on paved roads, it is recommended that you use ring spacers.
ATV wheel spacers vs offset rimsBoth wheel spacers and offset rims on an ATV will have the same effect on steering and stability. The biggest difference is the cost and installation time. As long as you use a quality set of spacers, they should be just as durable and safe as offset rims.
When balancing without such adapters, the wheel is fixed on the balancing machine using a cone for the central hole of the rim, and when using an adapter, the wheel is fixed on the shaft of the balancing machine by the wheel mounting holes, which greatly improves the quality of balancing in our tire fitting.![]() If your wheels are balanced without adapters, they may not be balanced at all!
If your wheels are balanced without adapters, they may not be balanced at all!
We also balance motorcycle wheels using HAWEKA adapters and special motorcycle weights.
Balancing provides driving comfort and is also responsible for the absence of wheel runout. The lack of balance will lead to a very large shock load on the hubs, bearings, and in general on the entire suspension, and will also create discomfort when driving! So we think you should not ask yourself the question: “To do or not to do balancing?”.
Wheel balancing, in turn, must be carried out regularly. Tire wear, rim warping, loosening of previously installed weights all play a role in wheel balance. In this regard, you need to remember the most necessary points, those in which balancing is required. These are strong impacts with a wheel, replacement of rubber on wheels and annual balancing is a must.
Wheel imbalance can lead to faster and uneven tire wear, indicating uneven rotation of the wheel center relative to its mass.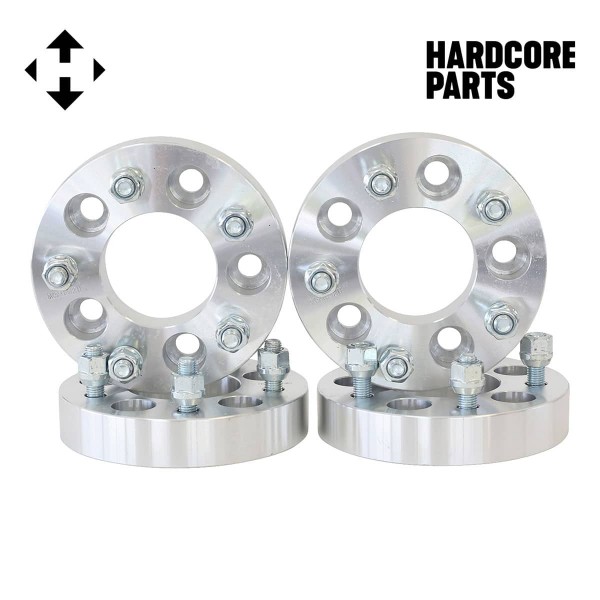 Incorrect tire pressure also causes uneven tire wear. Most likely, you will not even notice this imbalance when driving, but the consequences will definitely not please you. Therefore, all wheels of the car need to be balanced.
How is balancing done?
Wheel balancing is very quick and easy if you do it in a specialized place, such as our AVK tire shop. When the wheel is assembled, it is placed on a balancing stand, then it is centered and rotated. After rotation and receiving results, the computer transmits information about where on the disk and with what weight it is necessary to add weight. All goods are divided by weight, as well as by the method of fastening: stuffed and adhesive. Both types of cargo perfectly cope with their task, and each of them has its own purpose. Stuffed cargo is installed on steel disks, and adhesive weights on cast and forged ones.
So let's draw the same conclusions why balancing is so necessary.
First of all, in the absence of balance, the vibration of the wheels is transmitted to the steering wheel, which creates discomfort for the driver.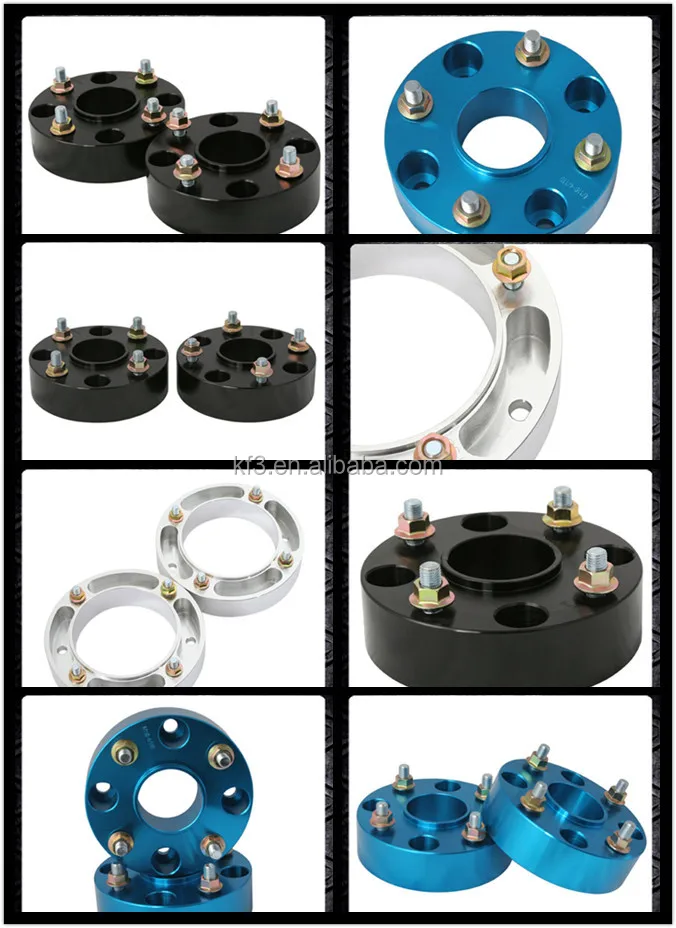 Secondly, the suspension and all its components will wear out, and suffer from the beating of the wheels much more than they should. Thirdly, vibration of the wheels leads to an increase in the braking distance, as well as to a deterioration in the controllability of the car. And fourthly, your tire wear becomes much faster.
In our tire service, we can diagnose your car's wheel absolutely free of charge and determine whether it needs to be balanced or not! We also carry out balancing of motorcycle wheels, from scooters, ATVs, tricycles, etc.
You can find the cost of balancing here.
Electric circuit-a vehicle-unique car, which gives adrenaline and pleasure pleasure. Extreme lovers and country residents especially appreciate such vehicles. Electric ATVs are designed for active pastime, entertainment and trips off public roads: on asphalt, unpaved areas, rough terrain.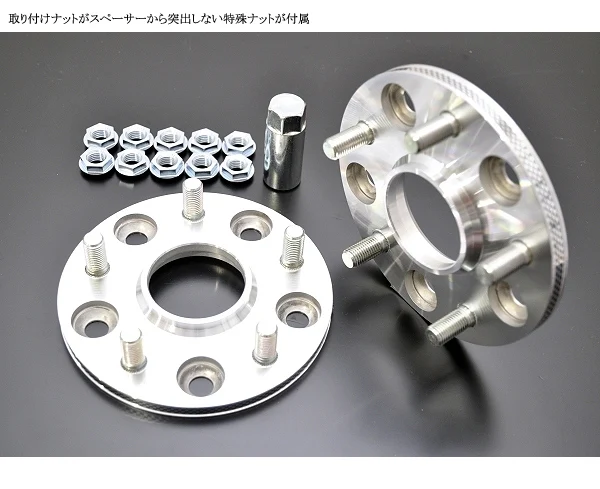
Electric ATVs of different power, design and functionality are on sale. But if you wish, you can assemble a homemade electric ATV with your own hands. This will require skillful hands, free time, the necessary parts and tools:
Assembly in the warm season is recommended under a canopy, and in the cold - in a heated room with good lighting.
Typically, a frame for a homemade ATV is built from scratch from existing material, such as parts of an old motorcycle. To create a spatial welded frame, light and flexible pipes with good strength properties are suitable. The main elements can be made from pipes Ø25 mm with a wall thickness of 3. 2 mm, and crossbars, struts and other auxiliary parts - from pipes with a diameter of 20 mm.
Thick pipes or a massive profile should not be used - they will add excessive weight to the structure, which will negatively affect speed and maneuverability. When assembling a children's electric ATV with your own hands, it is appropriate to use a frame made of durable solid polyethylene. The rear part, where the transmission parts and the motor are attached, is recommended to be made of light and durable aluminum alloys.
Motorcycle shock absorbers with springs are suitable as suspension. The suspension is made A-shaped and movably fixed on the frame. Shock absorbers and springs must be strong so that they can confidently withstand the weight of the assembled structure. They should also provide a smooth ride and good handling when driving through pits, potholes and other bumps. You can make independent wheel suspensions on 2 triangular wishbones using shock absorbers from Oka or another car.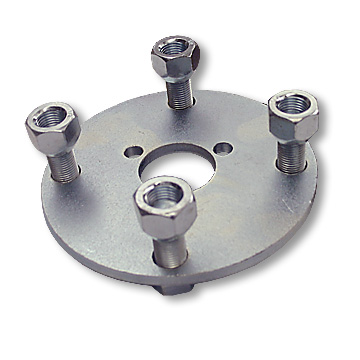 The levers can be welded from round tubes Ø20 mm.
Partially steering elements (lever and shaft) can be taken from the Ural or another motorcycle, supplementing it with 2-wheel drives. To implement the drive, automotive levers and ball joints must be added to the design. The main thing is that the designed steering provides accurate and comfortable control of the machine.
Wheels for a homemade electric ATV can be borrowed from the car, for example, 15-inch off-road tread patterns. They are wide enough, so they will provide the all-terrain vehicle with the necessary cross-country ability. The diameter of the wheels is selected depending on the size of the structure, so that the assembled all-terrain vehicle looks harmonious and can develop the desired speed. Instead of car wheels, you can take motorcycle wheels.
A motorcycle frame is suitable for attaching attachments and controls. It must be structurally connected to the frame of the electric ATV.![]() When designing an all-terrain vehicle, special attention should be paid to ensuring its stability, a comfortable fit for the rider and a harmonious visual appearance of the vehicle.
When designing an all-terrain vehicle, special attention should be paid to ensuring its stability, a comfortable fit for the rider and a harmonious visual appearance of the vehicle.
The braking system of an ATV needs to be reliable, so it is recommended to use manually operated hydraulic disc brakes front and rear.
The BLDC electric motor, which is built into the rear axle, is ideal for equipping a homemade all-terrain vehicle. But other options are also possible, for example, the use of scooter motor wheels. Motor power is selected depending on the weight of the future structure, the features of its use, the desired speed and traction characteristics. Light maneuverable models are usually equipped with motors with a power of 500–800 W, and more powerful motors are installed on heavier machines and to obtain high traction and speed parameters.
A traction battery is required to power the ATV's electric motor.![]() The best option in terms of price, capacity and service life is a Li-ion or LiFePO4 lithium battery. A controller is used to control the operation of the battery and the electric motor.
The best option in terms of price, capacity and service life is a Li-ion or LiFePO4 lithium battery. A controller is used to control the operation of the battery and the electric motor.
The battery voltage must match the voltage of the electric motor and the capacity must be sufficient for the intended travel distance. For example, an electric quad bike weighing 120 kg with a 1000 W motor built into the rear axle and a 60 V, 20 Ah battery can travel up to 40 km on a single charge. The maximum speed of such a machine is up to 45 km / h. The range of an ATV on a single charge depends not only on the capacity of the battery, but also on the weight load on the structure, terrain, weather conditions and other factors.
A self-assembled ATV needs to be equipped with lighting, alarm, mirrors, electronic speedometer with battery level indicator and other useful additions. In this case, you can use headlights, direction indicators, taillights and other elements from a donor motorcycle.