Last Updated October 14, 2022
TireHungry.com is reader-supported. When you buy through links on our site, we may earn an affiliate commission at no added cost to you
One thing is certain: even when larger tires aren’t the most practical choice, they always look cooler than smaller tires. Sure, your vehicle may be more prone to breaking down, getting stuck, and feeling less torque than it was before, but in the universe of mall-crawlers, appearances always win out over functionality.
We believe that you should trim and add the bare minimum of suspension lift to accommodate the widest tires feasible for your rig, and that you should construct your rig for strength and gearing to match. An aggressive stance, wide, and stable 4×4 with strong axles, robust skid plates, and body protection, adequate bump stops, and large tires instills confidence in drivers on and off the road.
Trimming fenders is a critical component of this formula for trail dominance success.
Fenders hold wheels and tires in place by preventing dirt from flying uncontrolled everywhere as the wheels and tires travel over the ground. Really large tires have the disadvantage of being abrasive on your ordinary fenders, resulting in scratches and sometimes dents around the fender region, necessitating the need for fender trimming.
What's In This Guide?
To tighten and loosen bolts
Dremel ToolCarving, engraving, routing, grinding, sharpening, cleaning, polishing, cutting, and sanding are just a handful of good usage.
Angle GrinderGenerally speaking, an angle grinder is a hand-held power tool that may be used for a wide variety of operations such as cutting and grinding as well as deburring and polishing.
Used for tightening and removing bolts, screws, and other fasteners. They’re a common tool in the automotive industry. The most typical application that we all encounter regularly is the removal or tightening of lug nuts while we are changing the tires on our automobiles.
Flat and Sand DiscOn an angle grinder, these discs are used.
Other Materials
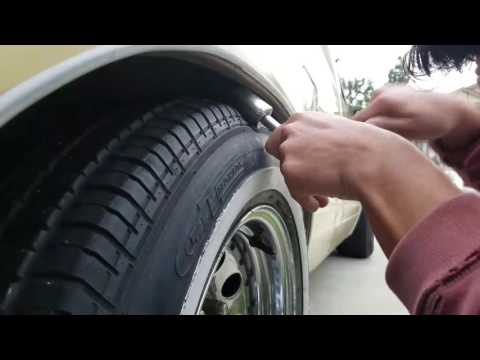
Keep in mind that you must first remove the wheel with a high-lift jack or a floor jack before starting the fender cutting process.
Step 1: Make a trimming templateThe fender trimming template will act as a reference for you when it comes to determining how you want to cut your fenders. Creating one will allow you to easily transfer the design to the remaining fenders since you will just need to mark the same lines and cuts over and over again, saving you time.
You may use an old newspaper page (or any other material of your choice) to trace the design onto and then cut out the pattern. If the old newspaper sheet does not adhere effectively to the surface after you tape it down, you have two options: either clean the car surface with a moist cloth and allow it to dry for at least three to five minutes, or use numerous adhesive tapes to secure the sheet to the vehicle surface.
Step 2: Draw a line across the area that has to be trimmedWrap the old newspaper sheet around the fender’s part and tape the side of the sheet that will be facing the inside of the fender together using electrical tape. This causes the newspaper sheet to mold into the form of your fender, making cutting the sheet much easier later on. However, since you’ll be utilizing the newspaper sheet on both sides of the door, the center of the newspaper sheet should be aligned with the edge of the door for consistency considerations.
Step 3: Trim the fender trimming template that you have just createdThe design on your newspaper page should be cut out so that it may serve as a guide for the cutting procedure. You may leave the pattern exactly as it is on the door’s edge, but be sure to leave a little tolerance on the wheel pattern area so that you can determine whether or not you need to make any more trimming modifications. Inevitably, when you place the fender trimming template over the fender, you’ll discover that it has an extra amount of space, and you’ll have to cut it again until it’s exactly what you want.
When trimming your 4×4, you cannot, of course, leave the fender linked to the vehicle’s body since doing so not only complicates the operation but also increases the chance of an accident. Make sure you are aware of the location of the bolts so that you can correctly remove your fender. Typically, on the bodies of 4x4s and pickup trucks, two bolts are located below them, a lot perpendicular above them, two in the lower portion of the front and one within the door just beyond the door jamb.
It is necessary to use an impact wrench to remove the bolts, but for those in difficult-to-reach regions, a ratchet or socket wrench might come in useful for the laborious but more controlled removal of the bolts.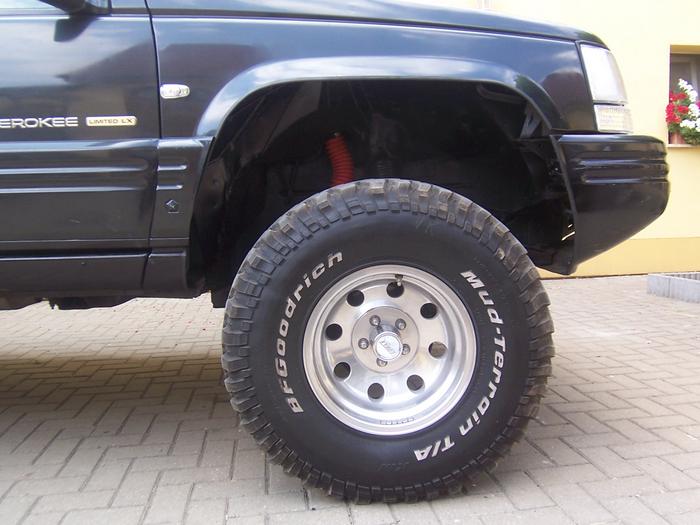
After that, lay the fender down on a clean, level surface and begin cutting it with an angle grinder to create a new shape. Never forget to put on the right protective gear while cutting your fenders. When working with rough and sharp edges that aren’t visible to the human eye, use gloves to protect your hands. Protect your eyes with a face cover to ensure that no dirt gets into them. Using it in conjunction with a face mask can help you avoid accidentally breathing dust that may otherwise pass straight through your face shield.
To the greatest extent feasible, avoid using a Sawzall since it has a propensity to deviate from your primary cutting part, where its blade just punches through the whole fender and flaps continually.
A Dremel tool may be used, but its disadvantage is that it is sluggish to cut, thus an angle grinder is your best option for cutting in general.
Step 5: Check the original location of the fenderIt’s possible that now that your wheel and fender are out of the way, you’ll want to check more closely at the region where your wheel and fender were previously located.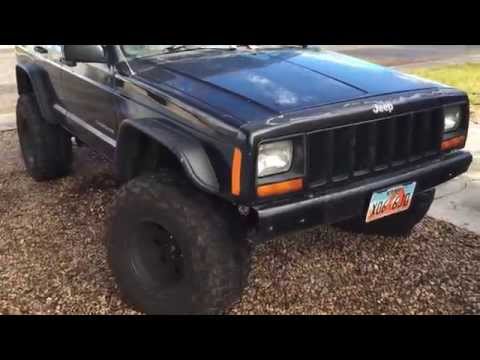 Normally, when your fenders are installed, there are two metal panels that are joined together. These metal sheets absorb the shock of hitting a bump or an obstruction and protrude, creating grooves or humps around the fenders when the vehicle hits them.
It is necessary to hammer each of them in order to flatten their surfaces as a consequence. In the next step, use an angle grinder to cut across the front of the fender approximately half an inch deep. This will allow you to have more room for your springs as well as to smooth off the rough edges of your fender.
Step 6: Attach the trimmed fenderIf necessary, use impact wrenches and ratchets to reattach the chopped fender to its original slot; this will ensure that it is properly reinstalled and in its proper position.
Myths about Fender Trimming That You Might EncounterJust when you think that fender trimming may really do more damage than good to your 4×4, you’ll be shocked to learn that it can actually have the opposite effect, given that you know exactly what you’re doing and that you’re doing it for the proper reasons. As a result, we were able to debunk several common fender trimming fallacies.
The thought of cutting their 4×4 fenders is frightening to many users, who are concerned that they would inadvertently damage their vehicle. If you’re a newbie, this is something that you should be aware of. However, if you have become accustomed to performing basic fender trimming every now and then, you will be able to correct previous mistakes and create a cleaner, more polished appearance for your fenders, even if you are not a hardcore professional at fender trimming, as explained in the following section.
Trimming the fenders increases the likelihood of rustingThe metal portion of the fenders will be exposed to the elements of grease, dirt, and air, and as a result, many people believe that the chance of rusting is quite significant as opposed to just leaving your factory fenders alone. In spite of the fact that they are not damaged, rust may nevertheless collect within due to the presence of dirt and moisture accumulations.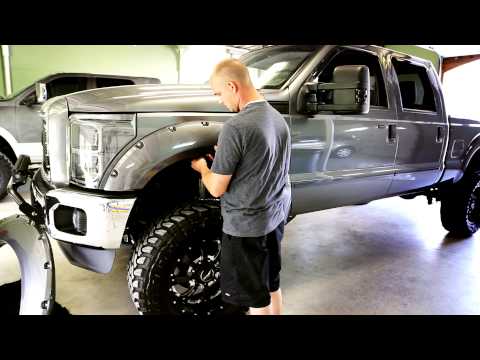
On the contrary, it is preferable to leave plenty of space between the two vehicles since, no matter what you do, the wheels will continue to move, particularly when the vehicle is rounding bends at high speeds. The difficulty with having so little room is that once the tires begin to grind against the fenders, they will ultimately dislodge the latter from their mountings and fall off.
How Far Off Should The Fender And Tire Be?The top of your tire should be no more than 3 inches over the bottom of your fender when your trailer is loaded to its maximum capacity, according to standard practice. Potholes and bumps should be avoided with this much clearance.
If you want to be accurate, you should measure the distance between the bottom of your frame and the top of your axle if you have an underslung trailer (in which the springs are located under the axle). In order to provide proper clearance when your trailer is completely loaded, you need to add two inches to that dimension.
If you look at it from the outside, trimming your fenders is a small detail. Although it is more difficult to prevent, doing it correctly helps you avoid the issue of your fenders aggressively rubbing against your really big tires, which may cause damage to them. It will also improve the overall performance of your 4×4.
Recently Published GuidesTop Tire Retailers
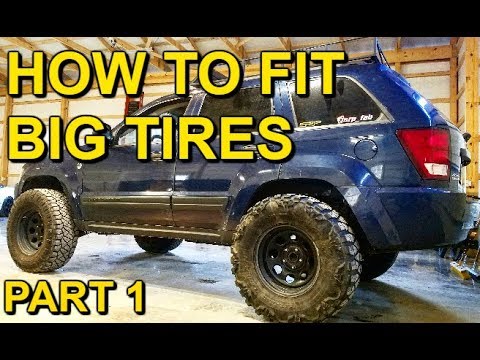
How do you trim your 4×4’s fenders?
In this article, we’ll go through the step-by-step process of carefully cutting them to make room for larger tires.
Fenders are basically how they sound – they fit wheels and tires in place as they prevent any dirt from uncontrollably flying everywhere, the moment the wheels and tires move on the ground.
The problem with really huge tires is they have a tendency to be abrasive on your regular fenders so they create scratches and sometimes dents around the fender area that make fender trimming necessary.
Just don’t forget to remove the wheel with the help of a hi-lift jack or floor jack, before you start with the fender trimming.
Materials Needed:
The fender trimming template will serve as your guide on how you’d want to cut your fenders. Creating one will help you quickly copy the pattern to the other remaining fenders because you just mark the same lines and cuts, again and again.
You may use an old newspaper sheet (or any material of your preference) where you can trace the pattern over. If the old newspaper sheet doesn’t properly stick to the surface once you tape it, you have two options; either you wipe the vehicle surface with a damp cloth and let it dry for at least three to five minutes or you may use multiple adhesive tapes.
Wrap the old newspaper sheet around the fender’s portion and tape its side, the one that’s facing the fender’s interior. This allows the newspaper sheet to mold into the shape of your fender for easy cutting. However, your newspaper sheet’s center should be aligned with the door’s edge for uniformity purposes because you’ll be using it on the other sides as well.
Cut the pattern on your newspaper sheet which indicates your guide on the trimming process. It’s okay to cut the pattern simply as it is along the door’s edge but see to it you leave a little allowance on the wheel pattern portion to help you figure out if there’s a need to make further trimming adjustments.
Obviously, if the fender trimming template reveals an excess space when you put it over the fender, you’ll have to cut it again until it finally matches your preference.
Of course, you can’t keep the fender attached to your 4×4’s body when you trim it because it not only makes the process difficult but also boosts the risk of accidental cutting.
Make sure you know where the bolts are located so you can properly detach your fender. Typically on 4x4s like pickup trucks’ bodies, two bolts are found below them, a bunch perpendicular above them, two in front’s lower part and one inside the door just behind it.
To unscrew the bolts, you have to use an impact wrench but for hard-to-reach areas, a ratchet or socket wrench can be pretty handy for the manual yet more controlled removal.
Afterwards, lay the fender on a clean flat surface and begin the cutting process via an angle grinder. Never forget to wear the proper gear for fender trimming. Use gloves to protect your hands from rough and sharp edges that aren’t clearly seen by naked eyes.
Put on a face shield to completely prevent dirt from entering your eyes. It’s much better if you pair it with a face mask to prevent accidentally inhaling dust that may go right under your face shield.
As much as possible, don’t use a sawzall because it has a tendency to drift away from your main cutting portion, where its blade just punches through the whole fender and flaps continuously.
You may use a dremel tool but its down side is the slow cutting process, so overall your best bet for cutting will be the angle grinder.
Since both wheel and fender are out of the way, you may want to take a closer look at the area where your wheel and fender have been.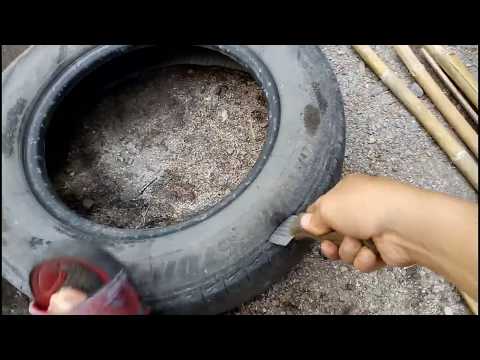
Normally, there are two metal sheets connected together where your fenders are placed. When you hit a bump or an obstacle, these metal sheets absorb the impact and protrude, which make grooves or humps around the fenders. As a result, you have to hammer both of them to flatten their surfaces.
Afterwards, use an angle grinder to create a cut across the fender’s place about half an inch not only for added clearance for your springs but also to smooth out the rough edges of your fender. More on this matter when you go to Spencer Capiola’s channel.
Re-attach the cut fender to its original slot and don’t hesitate to use impact wrenches and ratchets if you have to, just so it’s really back in its appropriate position.
Common Fender Trimming MythsJust when you think that fender trimming can actually do more harm than benefits to your 4×4, you’ll be surprised that it’s actually the opposite provided that you completely know what you’re doing and it’s for the right reasons.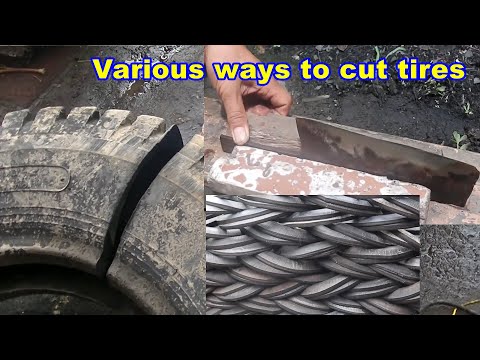 Because of this, we busted some fender trimming myths.
Many people say that trimming their 4×4’s fenders is scary because they don’t want to end up accidentally damaging it. If you’re a beginner, this definitely applies to you. However, if you have grown accustomed with basic fender trimming every now and then, you’ll be able to change previous mistakes and come up with a cleaner, more polished appearance for your fenders, even if you’re not a hardcore professional at fender trimming.
Since the metal area will be exposed with the elements of oil, dirt, and air, people think that the risk of rusting is very high as oppose to just letting your factory fenders stay untouched. Surprisingly, even if you don’t do anything to them, rust still accumulates inside because there’s still dirt and moisture buildups.
On the contrary, it’s better to have a large space between the two because, no matter what you do, the wheels will still move especially when you’re turning corners.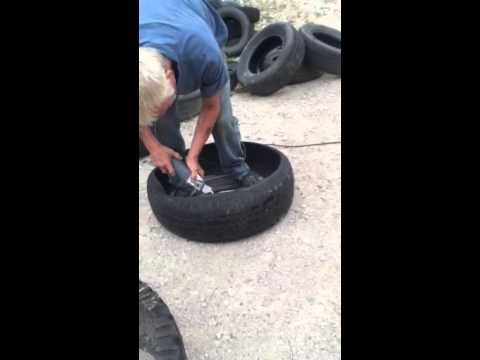 The problem with the very little space is that once tires rub against the fenders, they’ll eventually detach the latter in place.
Check out other fender trimming tips on DPG Off-Road’s channel.
ConclusionTrimming your fenders may appear to be a minor thing. But doing it properly helps you avoid the problem of your fenders violently rubbing against your very large tires which can damage them. It’ll also make your 4×4 run smoothly. Let’s know your thoughts by commenting below.
For a person who has a cute parrot for the first time, the very idea of clipping his pet's wings is likely to be wild. But no matter how strange it may sound, there is a need for this, especially if you plan to keep the bird not only in a cage, but also give it a little freedom. Not every owner is ready to keep his pet in captivity all his life. But not everyone is ready to lose it because of their own short-sightedness.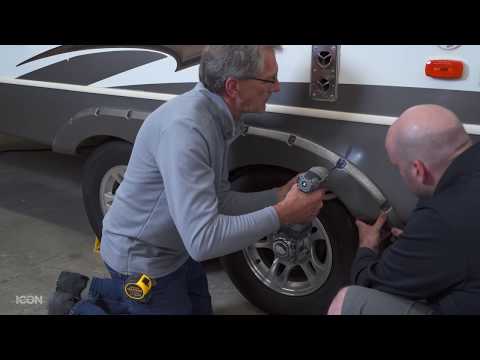 But just give free rein to the parrot - and the very first ajar window will become for him the last jump into the world of freedom. It is for the safety of a feathered friend and your own peace of mind that you have to regularly trim the wings of a parrot. The procedure for beginners is quite complicated, so it is better to entrust it to an experienced grooming specialist. But if one is not nearby, you can try to do it yourself.
Now let's imagine that it's time to cut the pet's wings, and so that he does not experience stress from the presence of an outsider, we take up the matter ourselves. We will need:
Yes, you need to be prepared for the fact that the bird will desperately break out of your hands, so it's good if someone close to you responds to help.
 It may not work the first time, in which case you should throw a towel over the bird and very carefully, but at the same time, securely put your index finger on his head, and pinch the lower part of the beak from the sides with your other fingers. Paws should be wrapped in a towel so that the pet does not scratch.
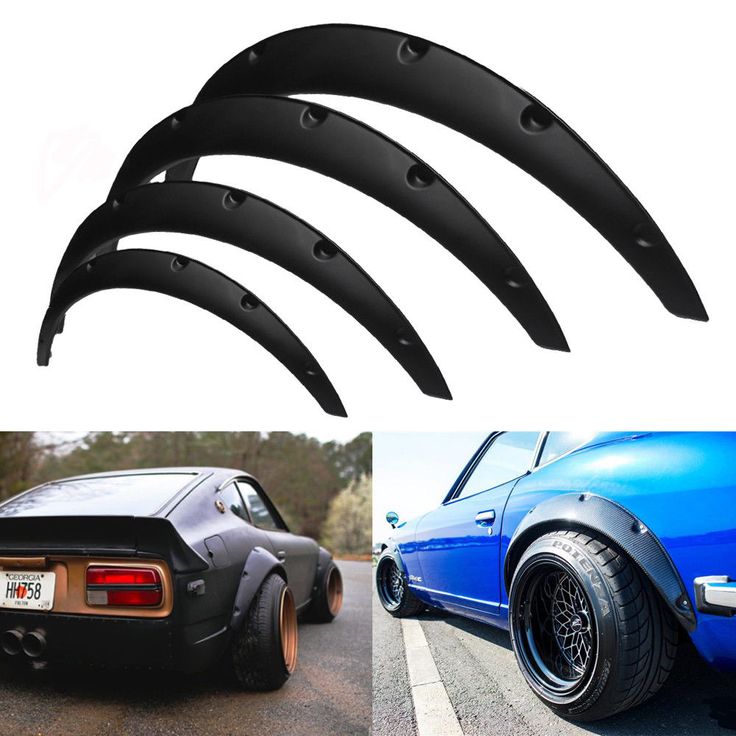
Premium industrial cat food
More
Amadins - Sweet -haired guests from hot edges
Read more
How to choose a feathered friend
Read more
The benefits of herbs and healing herbs in industrial feeds for dogs
Read more
90,000 figures from Miassa Library for us what for us does it mean garden and vegetable garden? First of all, it is a piece of land that requires constant cultivation, weeding and watering. Land that is taken care of always pleases its owners with a bountiful harvest. But how sometimes you want to take a break from all this fuss, sitting down with your favorite book in a cozy corner of the same garden. And everyone arranges such a place for recreation in their own way. Someone plants flowers, someone equips alpine slides and gazebos, but someone makes decorative figures for the garden with their own hands and receives a lot of positive emotions. A floral and sculptural ensemble of old car tires is a line of landscape design.
DIY garden figurines. How to make a fairy tale come true?
Decorative sculptures can be made from the simplest materials: old car tires, Styrofoam, plastic bottles. Even shoes and obsolete bowls and pots can be useful for creativity. Anyone can make figurines for the garden with their own hands, while receiving maximum pleasure and spending a minimum of money.
If you want to create a small floral and sculptural ensemble in your summer cottage or in the garden near the village house to surprise and please your loved ones, try using material such as car tires for this. Their disposal is not cheap, and with imagination and a small set of tools (a shoe knife, a jigsaw, a screwdriver), this almost eternal product can gain a second life.
Tires can be cut neat rose flower beds ; by joining several processed tires and brightly coloring them, you can create a variety of original flowerpots - with flowers planted in them, they will look great framed by a path or add picturesqueness to the green carpet of the garden.
If you cut the tire lengthwise in a circle, and then turn the resulting “ribbons” and fix it with wire or screws, you can make, for example, swans – with a gracefully arched neck, or a funny monkey merrily playing under a “tropical palm tree” that has suddenly grown in your garden – with a trunk trimmed with wooden circles and elastic leaves – “ribbons” made of tires…
A bit of practice and – you will succeed! Turn on your imagination and create your own corner of nature, inhabited by flowers and .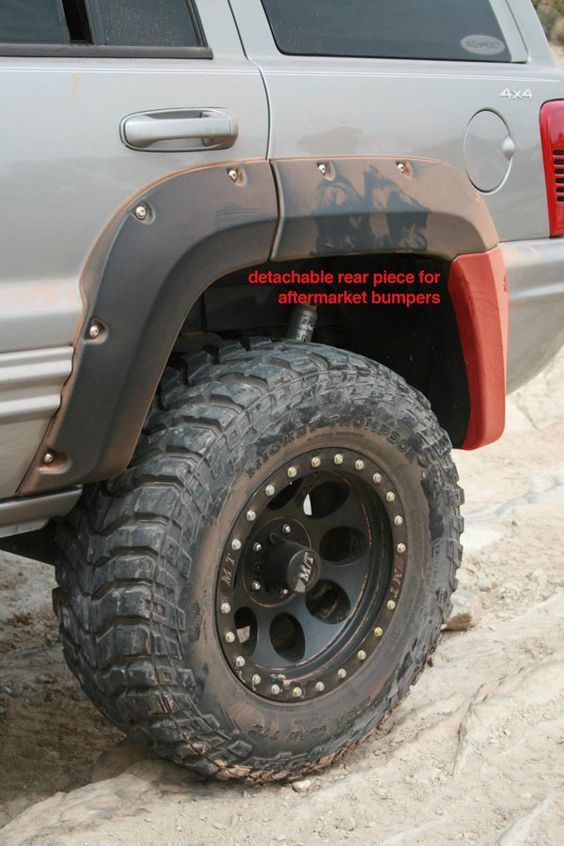 .. fantastic creatures.
Read on the topic:
The time of standard-lying in the form of flower beds or dug into playgrounds, having served their time, tire covers has passed. Tires, thanks to the fantasies and efforts of the summer resident, have moved to a new, more beautiful level of existence and use of them.
It is not difficult to make flowerbeds from tires with your own hands. If you are not yet confident enough in your abilities to make flamingos and swans from tires, you can stop at round flowerpots or build an unusual border from tire flowerpots in the form of a large chain. To do this, it is enough to cut out the inner parts of the tires, lay the resulting flower beds, maintaining an equal distance between them, and dig empty tires vertically between them. The "chain links" are connected by means of transverse cuts in vertically mounted tires, the cut points are fastened with wire. Paint the finished "chain" of tires with silver or a solution of bronze powder to make it more similar - the original border with flowers is ready!
Forms for flower beds: ready-made and man-made.
At present, a huge amount of materials and ready-made forms for ennobling and arranging dachas has been provided to the services of the summer resident. In stores, summer residents buy only the most necessary, and for secondary issues they have enough of their own ingenuity and patience.
Garden paths built with his own hand, fences for flower beds, flower beds and flowerpots for them are not only beautiful, this is the pride of each summer resident. It is this approach in the arrangement that allows you to give the country design uniqueness and exclusivity. A huge variety of flower beds can be built from handy material. But when flowerbeds made of tires are made by hand, in an original carved shape, decorated in an interesting selection of colors, they really impress and decorate the territory very much. It is especially pleasant that from the old tire you can admire the form for the flower bed for one hour already - this is how much time it will take to manually process one tire.
How to make a flower bed from tires with your own hands:
step by step guide
A simple technology that does not require special knowledge, hard work and special equipment in a short period of time will turn an ordinary old tire into an original vase for a flower bed, into a crown-crown (flower-rim) for decorating the outer ground border of a flower garden, and into many other bizarre forms. How are the flowerbeds of tires made by hand?
First step : we select an old tire with a disk. The first step is to find a useless, old and bald car wheel. It is desirable that the wheel be with “winter” tires (it is easier to turn out than a wheel with summer tires) and from an imported car, because the rubber of imported tires is much thinner, softer, and therefore easier to process. By the way, for a high-quality flower bed made of a tire made by oneself, a tire with a disk is needed, if it is not there, it’s not scary, the tire will still come in handy. A tire with a disk, after some manipulations, can serve as a full-fledged flower vase, where the disk will serve as the bottom, and a tire without a disk is useful only as a decorative rim for decorating the outline of the flower bed.
Second step : draw the cut line. In the second step, you need to put the tire on the ground and think about how to make a cut line. The essence of the cut is as follows: you need to cut off the upper part of the rubber of the tire so that the deep lower part and the upper (cut off) smaller part remain - something on the principle of "pot - lid". But it’s not worth cutting out with a simple straight line, it’s so uninteresting and not very beautiful in the end. You need to cut it so that the edge of the cut is uneven - wavy, serrated, fringed. Consider what edge your tire bed should have and draw a patterned line with chalk on the tire rubber around the entire circumference with your own hands.
Step three : cut along the marked line. We cut it out without removing the tire from the disk, that is, we divide it into two parts along the marked line. Now the lower and deeper part that remains of the tire needs to be turned inside out - not an easy task, it will take physical strength and some skill: turn the deep part with the cut down, step on the edge with your foot and pull the edges (as if from under your foot). Having turned out at least one section, then the process will go easier and faster. It will turn out a very nice and original thing in the form of a glass or a vase on a leg. Place it flat on the ground. Really, is it beautiful? If you wish, you can put such a flower bed directly on the ground on a leg - a rather convenient and mobile thing, easy to use, or you can dig a leg into the ground, neither children, nor dogs, nor intoxicated guests will definitely turn over the stationary version.
The top cut part is also useful, it still looks good. If you make 5-7 cuts across it from the side of the inner ring, with a depth of no more than 8-10 cm, and then dig in, deepening it into the ground with cuts, you get a chic outer frame for a flower bed. Plants that create a cushion of greenery are planted on do-it-yourself flowerbeds consisting of only one tier of tires . So you can grow creeping ground cover plants and ordinary nasturtiums. If several tires are installed one on top of the other, then, depending on their number and height, you can grow pelargonium in them with hanging stems and leaves, like ivy or cascading petunias.
After placing the tires on the site, crushed stone with sand is poured on the bottom of each, and only then fertile soil. Then they are watered so that there are no voids in the soil. Flowers and ornamental grasses are also planted between the tires.
Vertical landscaping also looks beautiful on the summer cottage. And you can make flower beds from tires with your own hands in the form of flowerpots with your own hands. For this you need a tire with a rim. It is necessary to draw a line with chalk around the entire circumference of the tire, dividing it in height in a ratio of 1: 3. After cutting, the part with a higher height of the tire turns out onto the rim. So it turns out the bowl of the flowerpot. The bottom of the tire will serve as the base of the vase. Even an urban-style alpine slide can be made from tires. You just need to take tires of different sizes and be sure to use natural stone.
Decorating flowerbeds and flowerpots from tires
Now an equally exciting and significant moment has come - decorating a flower bed from a tire with your own hands. Agree, growing flowers in these black forms is not entirely aesthetically pleasing, although ... this is a matter of taste, some gardeners deliberately leave the rubber as it is, arguing that such rubber attracts more heat and light. But if you still decide to get rid of the blackness of rubber, paint these forms with ordinary oil or enamel paint, with several colors, at the ring - with one color, petals or cloves - with another. You can also paint the petals in different colors, alternating the paint in the desired sequence.
Do not be afraid to experiment in decorating the shape, for example, glue colored aquarium glass pebbles on the petals of a flower bed made of tires, they will look like dew drops, though larger in size. You can come up with any decoration or decoration, everything will look original, unusual and exclusive. Now everything is ready, you can plant seeds, bulbs or seedlings of flowers inside the flower beds, or you can transplant already adult plants and enjoy their appearance. This is how, at a minimum of costs, you can get quite a chic thing for arranging a summer house or a country house.
Do-it-yourself flowerpot is made from an old tire with a disk. It must be cut with a knife or a small grinder. Flowerpots from tires are distinguished by their original shape and the fact that the worn, unattractive tire tread is wrapped inside the tire, and its smooth inner part is turned out. Flowerpots made in this way look very attractive, and it’s not even immediately possible to understand what they are made of. Materials required to make flowerpots from tires: * car tires * cement * sand * pebbles (gravel, crushed stone) * soap solution * paint * primer Tool (main): * Electric linxing * Ploval machine * Knife * trowel * container for preparing concrete (mortar) * brush with hard bristles * brushes for painting and painting flowerpots Technology for making flowerpots from tires: 1. 2. The knife is suitable for simple straight cuts. To get a more complex cut pattern, you need an electric jigsaw. At the same time, it is also necessary to moisten the cutting line with soapy water, and also observe one trick - the cut should come as close as possible to the outer edge of the tire (preferably to the metal cord). 3. Turning the tire inside out is fairly easy. You can make the job of turning the tire even easier by cutting through a part of the steel cord with a manual angle grinder. 4. Having cut the sidewalls, we proceed to turn the tire inside out. We wrap the tire first in one place, and then around the entire circumference. This operation requires some effort and skill. Having turned the tire outward, we bring its curly edge to the desired condition with the help of a grinder. 5. If the tire that was not removed from the rim was turned out, then its lower part became the leg and support of the flowerpot, and the upper part became a container under the ground for planting flower seedlings. If the removed tire is cut off, then its separated parts are then mounted on the disk in the same way as when mounting the wheel. 6. To make flowerpots made of tires lose their resemblance to a car wheel, and the wheel disk does not rust, cover the flowerpot with a primer GF-021, and then paint it. The primer, by the way, fits well on the rubber, which in the future will allow the paint to hold on longer. For less heating of the earth in a flowerpot located in the sun, it is better to paint it with light colors. The concrete base for the flowerpot of the tire could have stopped on this. But if you want to make your site even more beautiful, then install a flowerpot on a concrete base. This base can be covered with a stone mosaic. In order for the concrete mortar to adhere tightly to the disc, the latter must be wrapped with wire or plaster mesh, after which the mortar should be thrown onto the disc with a trowel. The mortar must be thick to avoid "slipping": * 1 part cement; * 3 parts of sand; * 0.5 water. Concreting of the base can be done before or after the flowerpot is in place. You can put a plastic film on the lid of the iron barrel (so that the cement does not stick to the iron) and install a flowerpot on it. Apply the solution to the disk, put pebbles and shells on top. After the mortar has hardened slightly, wash the stones with water using a brush or brush. And so that the concrete does not crack during hardening, it must be moistened with water from the outside during the first two or three days. After a few days, the pot is ready to be filled with soil and planted with flower seedlings. A few words about the advantages of a flowerpot made from car tires in comparison with beautiful plastic flowerpots purchased. Flowerpots made of plastic can break, crack, but nothing like this will happen with a flowerpot made of a car tire, and it will serve for a long time. And most importantly, flowerpots are made from discarded tires, which are lying in large numbers along the roads. By using tires to decorate your garden, you can contribute to a better environment. Read on the topic: Tire Tire Crafts are fun and amazing. How much fiction and fantasy is invested in these creations. who is not here, just a whole zoo! And all of this is made from waste material, which often lies under our feet. Here rubber tires, plastic bottles, old basins and barrels, a hose from a vacuum cleaner, gas cylinders and even a box for gas cylinders have found their use. Of course, to make such a charming bunny, a funny teddy bear or just cut a swan, a crocodile or a flower bed out of a tire, you will need to put in a lot of effort, but when the craft is already assembled and you, taking a brush in your hands, paint your work, you yourself will fascinated by their creation. In order to make decorative sculptures from old tires, you will need the help of a man. Involve your husband in the creativity, because he, too, will be happy to relax in a fairy-tale corner created by himself. Graceful Swan We take an old tire, preferably “bald”, and make markings on it. Now, with a sharp knife, cut the tire along the lines, but not completely. Cut the top of the tire. This place will not succumb to a knife, a grinder is needed here. As a result, you will have a figure that is remotely similar to a bird. Cut along the lines - wings. Upper section - head and tail. Now you need to take a metal plate, bend it in the shape of a bird's neck, and screw it to the rubber base. We paint the swan with water-based white paint, and make the beak red. That's all, a graceful and proud bird has settled in your garden. Caterpillar Everything is very simple here. You will need: 4 tires, green, yellow and blue paint, a metal plate and two paint can lids. We add the tires so that they are close to each other, but at different levels. Color everything green. It is now necessary to fold the antennae-shaped plate and attach it to the top of the front tire. We paint the antennae in yellow. Make eyes out of metal caps. The pupils are highlighted with blue paint. Tire Bear This cute bear is sure to please both children and adults. To create a sculpture, you need: 2 tires of different sizes (one for the bear's body, the other for the head), paints, thick rubber and plywood. First, we connect the body and head with a metal pipe. To do this, you need to cut holes in the tires. You can’t do this job with a knife, so ask your husband to cut holes with a grinder. We fix our bear by placing it vertically. We make round blanks from plywood (also with the help of my husband) and close the tires with them on both sides: both the muzzle and the body. Plywood is attached to the wheel rim with self-tapping screws. We cut out the paws and ears from thick rubber and glue them to the wheels with special glue. We paint the bear with outdoor paints. Here you can let your imagination run wild and paint the figurine as you wish. Boat Any yard, on a playground in a kindergarten, as well as on your own personal plot, if the territory allows it. There is nothing complicated in its creation, all you need is to get more car tires and dig them into the ground in the shape of a ship's deck, then install the helm, masts and pull the sails. Sandbox To create a cozy children's corner in your summer cottage or in your garden, you can make this original sandbox. Turtle Please your children with such an unusual tire craft in the form of a cute and kind Turtle Tartila. To make it, you will need one large tire from a truck or tractor, an old enameled or aluminum basin, a five-liter plastic bottle, an automobile rubber tire, scissors, a knife, self-tapping screws, colored paints. First, decide on the place where your turtle will live, it is better that it be a green lawn, and install a large car tire there. By the way, if you do not cover the hole in the tire with a basin, but pour earth into it and plant flowers, you can get an original turtle flower bed. Rocking chair It is not difficult to make such a children's rocking bench.
Flowerpots from tires 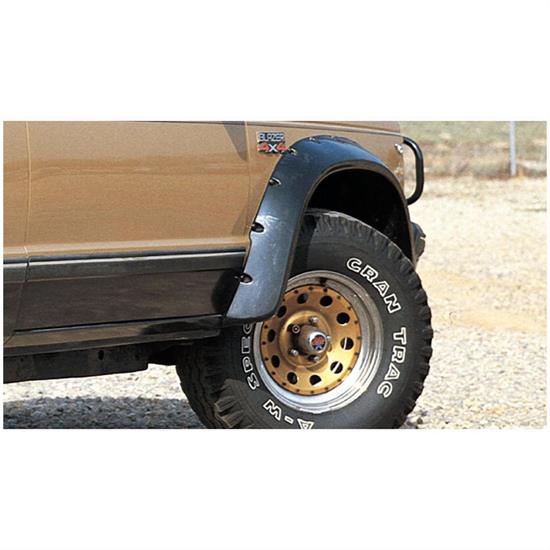 To do this, put the tire on the ground and cut around the entire perimeter on the side of the tread. The tire should be cut without removing it from the disc. Then turn inside out both the bottom and the top. Thus, you have a kind of glass, the sides of which can be cut and various pebbles, shells, etc. can be glued to them. You can also paint it with different colors. Here everything depends on your imagination. Then you can plant flowers in the middle. It will take you no more than two hours to make such a flower bed.
 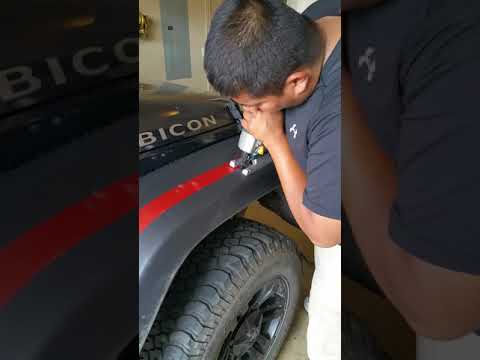 Cut off the sidewalls of the tires: either just in a circle, or, which is much more original, figured. And the more original the cut configuration, the more beautiful the flowerpot will turn out. But in this case, you will have to work a little more. It is necessary to start such work by drawing cut lines on the sidewall of the tire, after which they begin to cut the rubber. Usually a sharp knife is used for this. And to make it easier to cut, the knife must often be moistened with soapy water.
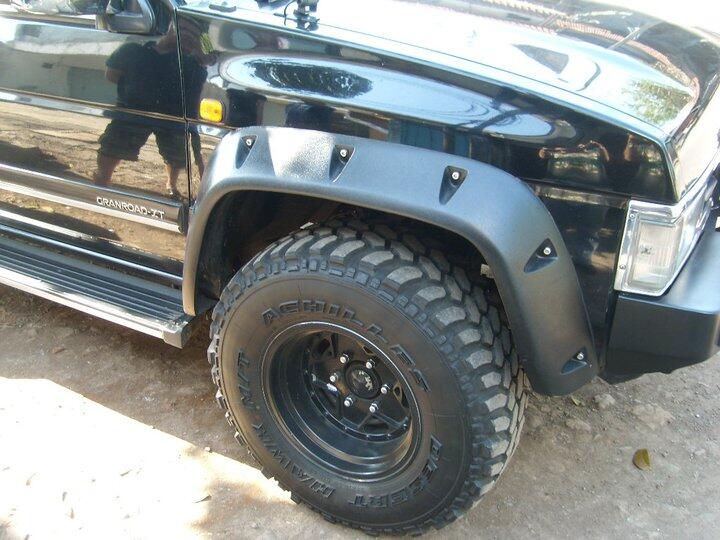
 The foundation stones will retain their natural beauty as they are coated with a colorless pentaphthalic lacquer.
Tire Tire Crafts 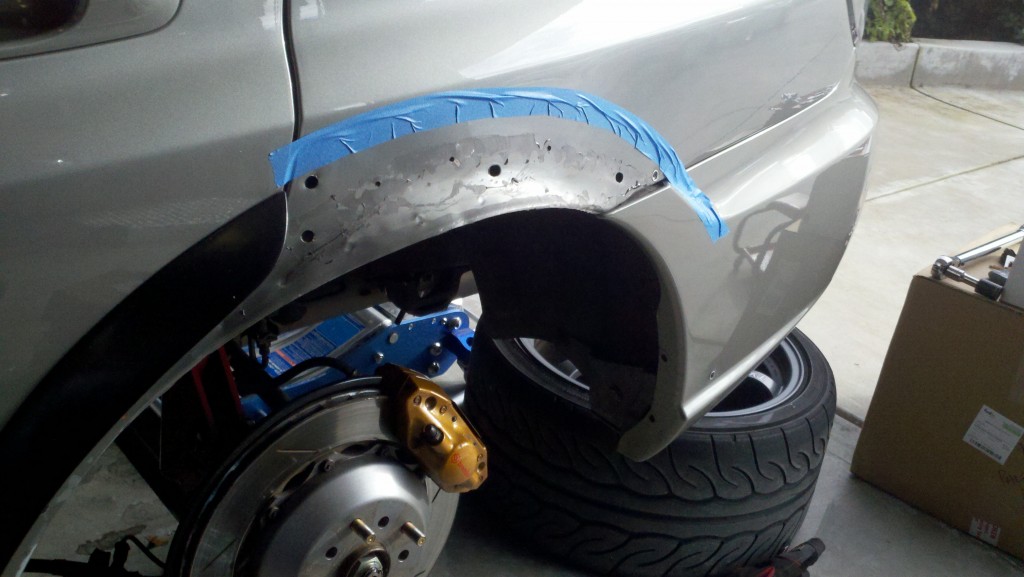 I want to get to work as soon as possible and decorate my garden or playground near the house with such beauty.
 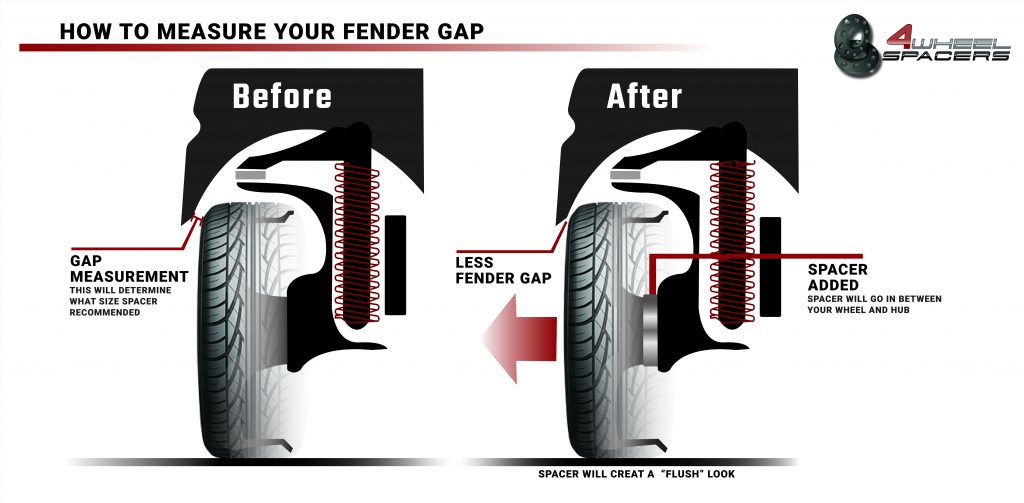 To do this, we draw two lines with a white marker along the contour of the tire: one at the very top, the other at the bottom.
 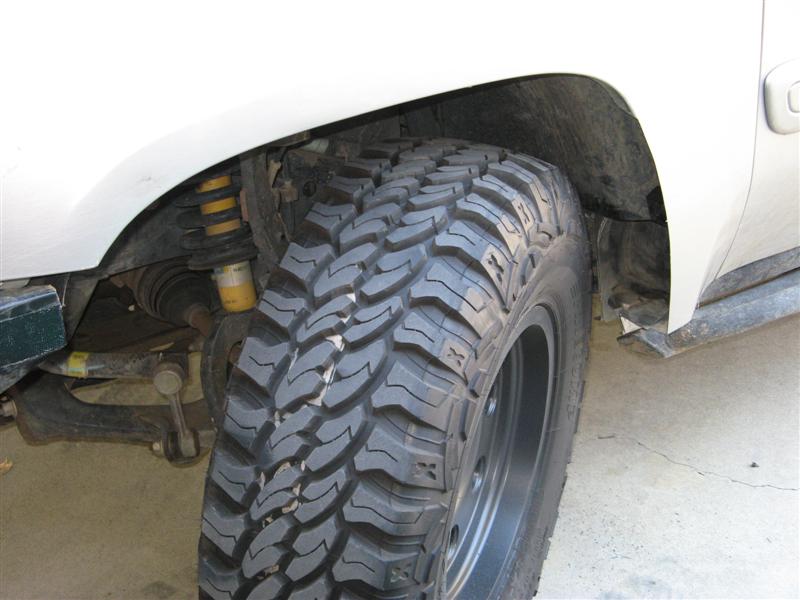 This is the body of a caterpillar.
 For work, you will need three old tires from a car, a hacksaw and paint. First, carefully cut each tire across into two equal parts and paint each in a different color with bright oil paints. You can use paints in cans. After the paint is completely dry, form a sandbox in the shape of a flower consisting of six petals from the halves of the tires. Tires can be fastened together with self-tapping screws or simply dug them into the ground. In the end, it remains only to fill the sandbox with sand and you can call the children.
  Next, cover the round hole in the middle of the tire with an inverted bowl and secure it with four self-tapping screws on all sides. Then take a rubber car tire and cut four identical legs out of it. Attach them with self-tapping screws or a construction stapler to the tire on four sides. The turtle is almost ready, it remains only to make the head, for this, take a plastic bottle, step back ten centimeters from its neck and carefully cut off the upper part in a circle - we will no longer need it. Heat the remaining part a little over the fire so that it becomes elastic, and quickly form an oblong shape out of it, similar to the head of a turtle. Attach the head to the body, and paint the whole figure with the colors of your choice.

.png)