Learn about the GrabCAD Platform
Get to know GrabCAD as an open software platform for Additive Manufacturing
Visit our new homepage
Valentino Les
30 Oct, 2018 08:55 PM
Folow these steps to really quickly create awesome looking car rims for any car . Have on mind these rims won't match 1:1 scale because we will use pictures as references. Also these rims will only look good but won't be functional and usable for real life appliance. Only for renders.
Goal of this tutorial is to create a good looking car rim as fast as possible.
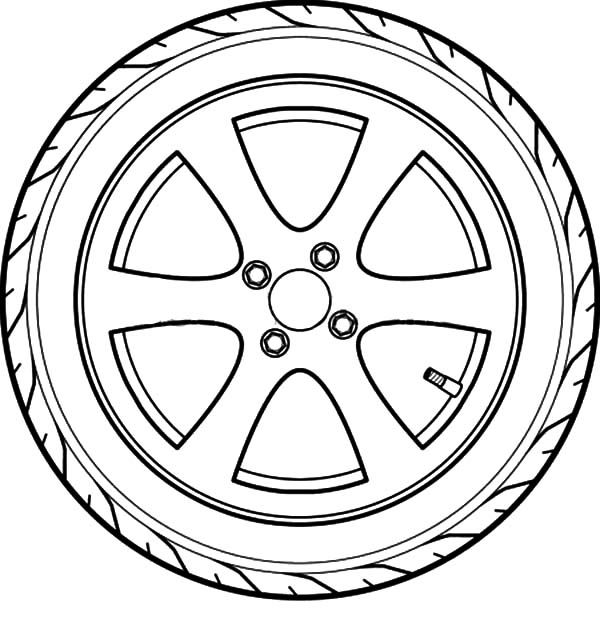
Before you start drawing the rim you'll need 2 things. Section view of the rim (Picture 1) and front view of the rim you want to draw (Picture 2) .
( Picture 1 )
( Picture 2 )
After acquiring pictures insert section view of rim on your right plane by starting a sketch on it and then insert picture by clicking
Tools>Sketch Tools>Sketch Picture
Once you select your picture set it to be in a way that its center is placed in center of your coordinate system (like shown on picture below) . I also recommend to set Transparency>Full image > 0.5
Finish the sketch .
Start another sketch on front plane and repeat steps for inserting the picture.
In many cases pictures you insert wont match up in size so resize them until outside diametars are the same and set its center to center of your coordinate system ( like shown on picture )
Once done , finish the sketch and continue.
Create a sketch on right plane and folow the outlines of the rim . Also draw centerline around which we will do Revolved Boss/Base
Finish the sketch.
Create Revolved Boss/Base of the sketch we drew before.
Once done continue .
Start sketch on right plane and try emulating the curvature ( basicaly the look of the rim ) of the selected rim . Most of the time you just have to imagine it in your head as most of the times rimes you'll be drawing wont't have section views presented .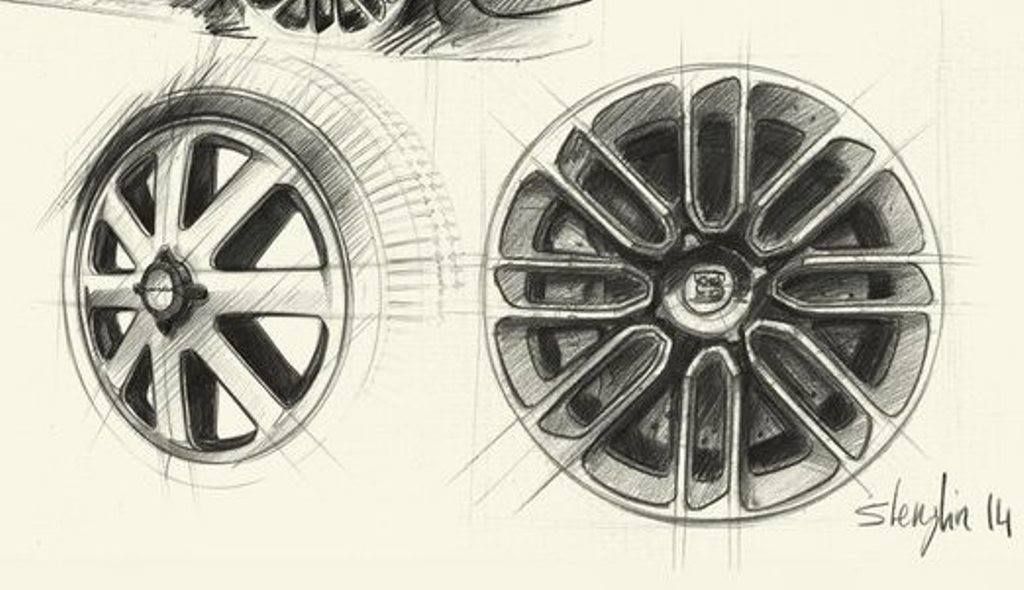
Also draw centerline around which we will do Revolved Boss/Base
Finish the sketch and do Revolved Boss/Base but untick Merge result
Once done hide part one and leave only part 2 visible.
When done , continue to next step.
Now create sketch on front plane and follow the shape of the rim that we will cut out later .
Watch out for the angles .
Once sketch is done Extrude cut it only through part 2
You can repeat step 4 and 5 when you want to create more complex rims. I'll only have to do them once more to create a part on which I'll drill holes for screws ( shown on picture )
When you're finished and have all the parts continue to next step.
In this step show every parts previously drawn and Combine them all togeither to form 1 solid part.
Once done with combine start adding fillets and chamfers to emulate the looks of reference rim picture .
Now you can add holes for bolts , bolts , engravings , etc.
I'm only going to add holes for bolts in this example.
Now you can render your rim . Add a tire to it and then fit them on your car.
During my time here at The Autopian, I’ve been subject to vocal heckling from the cheap seats engaged in robust debates with our esteemed commenters. Namely you perverts. One of the things that keeps coming up everywhere like a bad rash is the subject of wheels. Or more accurately, why do idiot car designers insist on drawing their sketches with huge rims? Jerry Seinfeld might say, “what’s the deal with that?”
In times of national crisis Great Britain always turns to the BBC. Its charter is to “educate, inform and entertain.” Me being British and having just finished my beans on toast, let me try to explain exactly what the deal is, why designers do it and what happens between sketch and showroom.
First of all, big wheels. Customers love them, because they look good. Designers love them for the same reason. Marketing departments love them because they are a profitable additional revenue stream, especially in the USA, the land of optional extras. Engineers are not always so keen on huge wheels because as the overall rolling circumference (including the tire) increases it’s harder to package.
Wheels and tires have something called a ‘max in-service envelope’ that takes into account the limits of suspension travel, maximum steering angles and the expansion of the tire at high speed. If you’ve ever fitted wider (or the incorrect offset) rims to your car and experienced rubbing at full lock or going over bumps, then you’re going outside of these design limits.
But modern cars are heavy. Trucks and SUVs especially have been on the Waffle House diet and as a consequence they need bigger brakes to haul their expansive girth to a stop. Which need bigger wheels to cover them. Performance SUVs have the additional wrinkle that it’s not always possible to rate a high speed tire for their weight, so they have to use low profiles or have their speed limited. If you’re lusting after the new Defender 130 one on those delicious 18” steelies, this is why you can’t have one. Those 19” alloys are the base wheel.
As cars have expanded they need larger wheels to balance out their proportions. Yeah sure back in the malaise era and before there were cars over 200” in length rolling on 15” rims with 70 profile tires. But those cars were designed around that wheel size, and had bigger wheel arch gaps because manufacturing and suspension location tolerances were much slacker in those days. More than that their shallower bodysides and higher ride height compared with today’s cars meant they could get away with smaller wheels.
It’s why a lot of restomod muscle cars look terrible when they have big wide alloys stuffed into the wheel wells – their shape was never designed around that size so they look over wheeled and bottom heavy. Also most custom car builders are not trained car designers (he added, haughtily adjusting his funky glasses). It’s all about nuance and what’s appropriate for the car being designed.
So how come designers draw such huge rims on their sketches? First of all, it’s important to understand exactly what you’re looking at. Are these preliminary development sketches from the early creative stage of a new design? Are they very fancy and detailed renders released as part of a new model release? Or are they internet content fodder from an enthusiastic amateur who has never set foot inside a design studio?
Manufacturers rarely release images from the initial creative phase of the process. Sometimes they’re a bit rough and ready (my old chief designer used to love seeing the quick expressive ballpoint sketches on paper up on the board), but mainly because OEMs don’t want to show you how the sausage is made.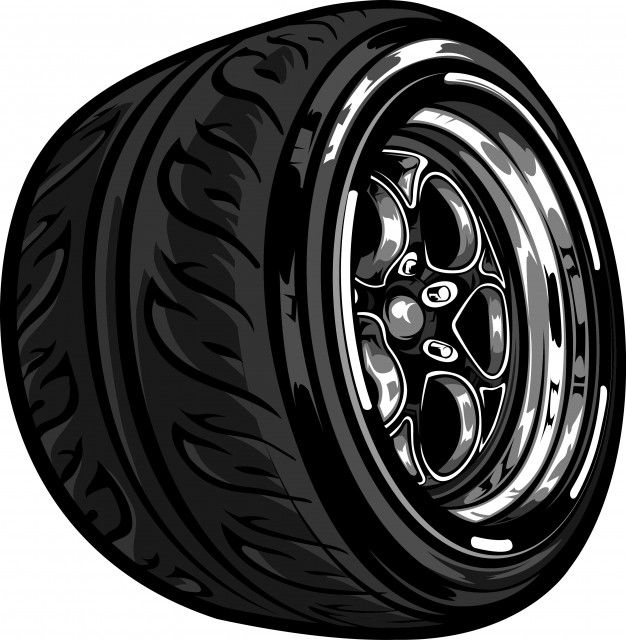 They want to keep those ideas secret in case they want to use them in the future. If something in the development sketches appears better or resonates more with customers than the actual final car does (here’s what you could have won!), they risk a gamergate style backlash.
These images were released as part of the BMW 2 series Coupe media blitz. We should take them with a large pinch of salt, but they are indicative of early ideation sketches. You can tell the proportions are a bit off and there’s not a lot of detail. Generally, the more lush, detailed and accurate an image is, the longer it takes to do and the later in the process it comes. It’s not time efficient to spend a couple of days on a full color super accurate render that might not be selected. These show the designer getting their ideas down on paper – similar to what I have been doing in my articles.
This next image is a lot more detailed and shows color, reflection and shadows. The designer has found a theme they like and are going to put it up for review. And yes, it’s stanced to hell. Why? The short answer is to make it look cool.
You can think of these as caricatures – exaggerated versions of the real thing, because you want to emphasize certain parts of your design. Remember a designer is mostly working freehand – they might use an existing vehicle as an underlay to guide their linework, but this just gets them in the ballpark from a scale point of view. These are the stage my ‘final design’ images are at.
Getting your design picked to go forward to model stage takes a bit of salesmanship (it’s no coincidence the man who can be considered the Godfather of modern car design, Harley Earl, had a Hollywood background). It’s about the drama and the flash because the people signing the big cheques to get your design into production need to be wowed. Pulling the wheels out a bit and making them bigger helps a lot to make a striking image.
If you’re lucky enough to have your theme picked to go forward to the stage (usually a full size clay model) then you’ll be expected to finesse your design onto a given package, or use an existing one if the package hasn’t been decided yet. Studio engineers will provide the data for platform hardpoints and dimensions like wheelbase and track.
So the designer’s over wheeled flight of fancy gets lot more realistic in a real hurry. OEMs are not in the habit of wasting precious time and resources on a model that doesn’t somewhat represent a real car. I was once working on a sketch for a replacement car, and one of the chief designers looking over my shoulder commented “cool sketch, but you’ve over done the stance a bit!” This is why we use Photoshop because it’s a doddle to tweak things.
Once a design is frozen we get into the getting it ready for production part of the design process, which usually takes about 4 years. Part of this will be evaluating different wheels styles and sizes. Full size clay models are built on an underlying armature, which allows the track to be adjusted. Initially wheel designs might just simple mock ups; full size photocopies glued onto a foam tire, but as things move along it gets a bit more sophisticated.
Slave wheels of various diameters and widths can be used with different trims representing wheel designs, held in place by magnets. So you can have say, three different 20” wheel designs, and simply swap them over onto the slave wheels. These will be fitted with real tires.
As production tire profiles and specifications are nailed down, things like susceptibility to curb damage and suitability for the fitment of snow chains (a legal requirement in some places) are taken into account. All the while the design team are constantly evaluating what styles work for the car. They also have to make sure the rolling circumference remains the same whether it’s on 19” or 23” wheels, because otherwise all sorts of tedious engineering things like gearing and that max in service envelope get cocked up. Designers will always endeavor to get the wheels pulled out as far as legislation allows, to avoid the car looking knock-kneed.
This final set of images reflect the final design of the 2 series coupe, but as you can see compared to the actual car they’re extremely well endowed in the wheel department. The way these renders are done is using the final production data, dropped into rendering software (usually Autodesk VRED or Unreal Engine) to get the highlights correct, and then that image is used as an underlay for the designer to Photoshop over.
This allows them to get creative with the colors, lighting, background and stance while ensuring the perspective is accurate and the details correct. It’s basically impossible to create this kind of image any other way. The intention is to make them look like development renders but trust me, they’re not.
They still have some of the slick designer touch but wheels aside are a lot more realistic and they’re used as part of the marketing bullshit build up when a new model is released, and form part of the image package released by media departments.
As a final note, it’s not an accident that the best looking wheels are usually only available on higher trim levels, which forces you spending more than just the cost of the wheels.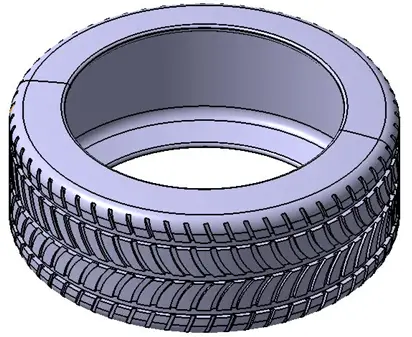 Pictured above is the Range Rover Velar, on standard 19s and optional 23s. The only way to get the bigger wheel is cough up for the R Dynamic trim level, meaning instead of about $62,000 your Velar now costs $75,000. Trim levels and equipment are not decided by the design team. This is purely marketing nonsense, because in the UK you can option the big wheels on the base car for about £3500. But then again, we are a bunch of status-obsessed fashion victims.
(Image credits: NetCarsShow (BMW 2 series), Miro/Medium, Mecum, Land Rover, Range Rover)
Whether you're talking about a full-size car or radio control, anyone who loves four-wheel "friends" wants their car to stand out. Traxxas offers some of the most stylish and authentic rims and tires in RC, but we can always do more to add a little extra flavor and custom style. Below we have a few ideas to inspire you and we hope you give them a try and make your own style.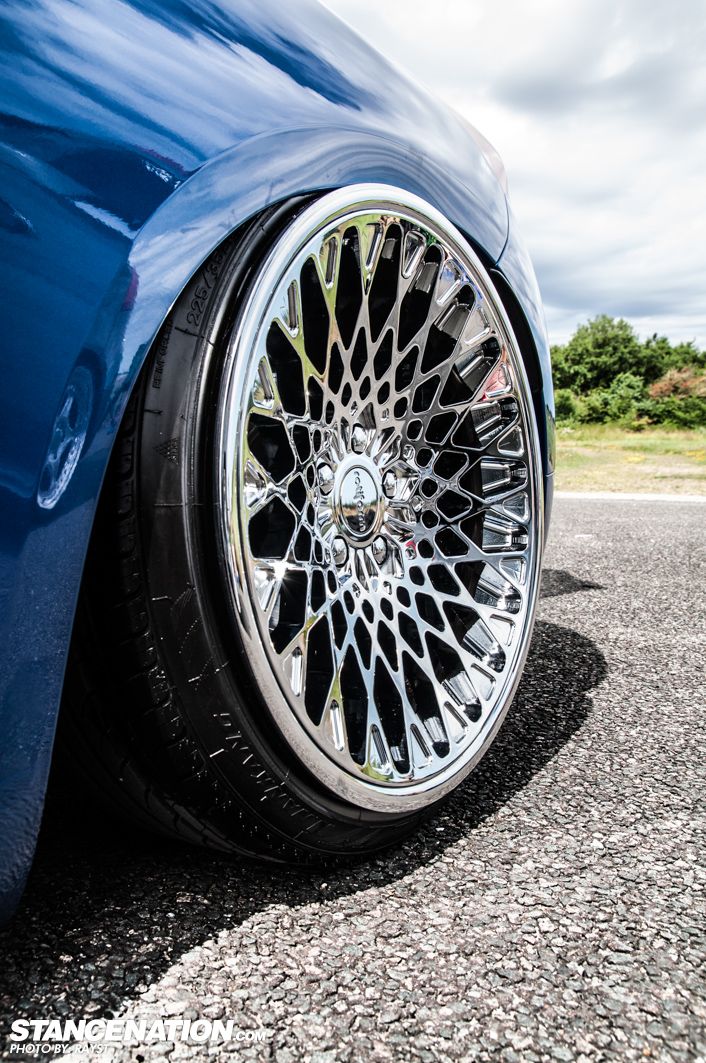
Tires with white lettering have a classic look and will really make your rubber stand out. We tried drawing letters with a brush as well as coloring them with pens, and we got better results with pens. The pen's paint was more opaque, and the hard felt pen tip reduced the number of errors that went beyond the lines. Of course, your experience may differ - if you prefer a brush, then this is the best way to do it. If you're wrong or think you don't like the color, soak it in a thinner and the paint will come off easier with your toothbrush. Be aware that tire lettering will quickly crack when the tire is bent and scraped off in off-road conditions. If you want to keep your hard work alive, you can use letter tires to showcase or at least take lots of pictures.
Choose a fine tip pen for maximum drawing precision. We have had good results with both of these brands. To avoid blots, apply the paint in very short strokes or spread it on the tire. A second layer may be required.
This Maxx 2.8 tire has flashy graphics that look fantastic in white. For other colors, first paint over the letters white and let them dry completely. Then apply color.
Highlight nuts and bolts with chrome
"Chrome" paint is a very impressive material - it really does look like a galvanized finish. In pen form, it makes it easy to add realistic, simulated equipment. Just color in whatever you want to be "chrome". The color itself is a little pricey, but the result is worth it.
You can find "chrome" handles at hobby and craft stores. The 1mm tip is best for handling wheels. The paint is very thin and easily soaks into the simulated fastener of this TRX-4 Sport wheel.
This is a pretty major styling update and it only took a minute. If your truck has black axle nuts, you can replace them with chrome plated nuts!
The Mercedes-Benz® G 63 wheels only have a few "chrome" bolt heads, but that adds a bit of elegance to the look.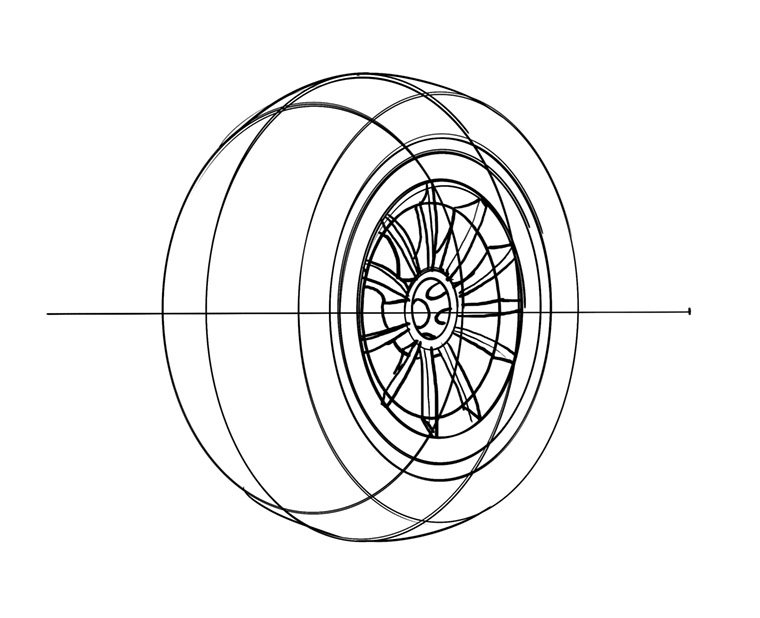
Parts with real equipment
How about adding real details to your wheels? Check the RC aircraft section of your favorite hobby store for 2mm socket head screws that can be easily attached to some wheels as a solid styling upgrade. All you have to do is drill a 1/16" hole and screw in. Choose stainless steel screws for a corrosion-resistant, high-contrast look on black wheels.
These 2x8mm screws are longer than required, you will only need 2mm of thread. They are easy to cut to size with pliers. The castings on this TRX-4 sports wheel serve as a guide for drilling 1/16" holes for mounting screws. Drill slowly, you only need to go 2mm deeper.
Here is the final look. There is nothing more like real wheel nuts than the wheel nuts themselves! Remember this simple truth!
Parts for Beadlocks
beadlock wheels are a great upgrade for any TRX model. No glue is required, so the discs can be easily reused, and the rings, sold separately, allow you to choose any color you like. You can also purchase Method 105s wheels with rings installed and tires in 1.9" and 2.2" sizes. They look great as is, but you can add even more style by adding stainless steel screws and flipping the rings. Flipping the ring can reduce the tire's stability in extreme situations, but if you're not trying to win the competition, give it a try.
The stainless steel screw kit includes all hardware needed to replace black oxide rims on four Method 105 1.9" or 2.2" wheels. Black back, stainless front. The stainless steel screws will not rust and have good contrast with the rings and wheel nut.
Lock rings are available in red, orange, green, blue, satin and black so you have plenty of options to customize and personalize your model. Traxxas Summit owners can also choose from different colors.
Flip the rings over and screw onto the wheel for more sculpting! If you have free 2 minutes, you can paint over the reliefs with the color you need!
Paint Over Chrome Effects
No one makes chrome wheels quite like Traxxas, and the highly reflective wheels turn into true sparklers as they spin in the sun.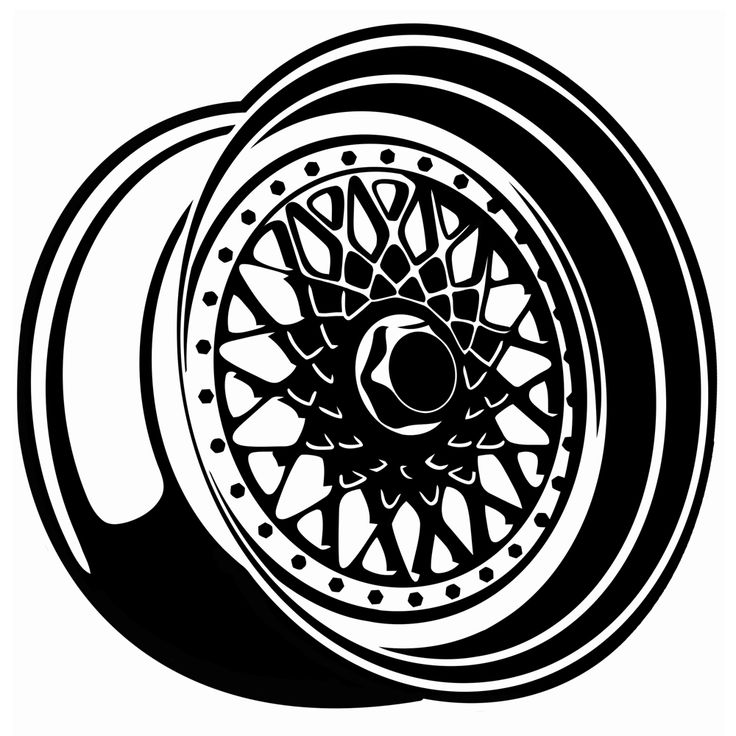 They also provide some fun detailing options. You can reduce the sheen with clear paint to create more of a satin or "raw aluminum" finish. Or paint the chrome clear for an anodized or metallic finish, depending on the color you choose.
The wheel on the left is mirror chrome, which is how it comes from the factory. The center right of the wheel is coated with a brushed aluminum finish.
For a colored chrome effect, wrap the tire and apply a clear color to the rim. The disk will retain maximum shine, and if you use pearlescent paints, they will give a more interesting look.
Most Traxxas chrome wheels are black under a shiny finish, and with a degreaser, the chrome can be removed to reveal a glossy black wheel. If you remove a rim from an installed tire, you will find that any chrome under the tire adhesive will be protected from the solvent, leaving a strip of chrome where the wheel meets the tire.
The degreaser will clean the chrome off the wheel in an hour or two.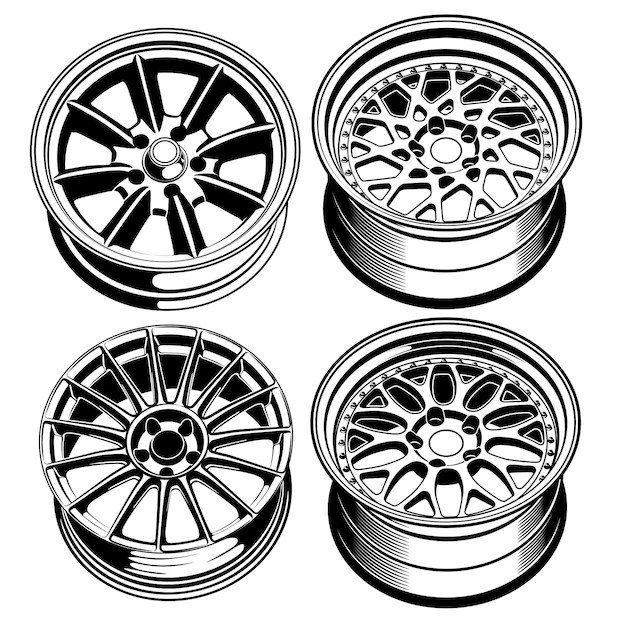 This can irritate the skin, so gloves are recommended. You can see the "before" option on the right. This is a real transformation!
Here is the Blazer wheel and hub cap with black stripe (right). For the wheel on the left, we used a chrome pen to paint the outer rim and highlight the built-in details. Soaking in a degreaser will not remove decals that mimic stop hubs.
Let's look at these wheels!
We'd love to see you transform your wheels and tires. If you have something to show, drop your options to us in the VKontakte group! After all, a hobby is a hobby, and someone will definitely appreciate your work!
I somehow caught fire to highlight the brand name on the tire (like on sports cars or on off-road tires), but everything turned out to be not so simple ... It turns out that there is no information on the Internet on how to draw on rubber / tires / wheels correctly.
The first thing was to find something to draw with so that everything drawn would not fall off the next day. I started looking on the Internet, there are many options, from paint to marker. But I decided to stop at the marker, because. it will be easier to draw. The car at that moment was under repair and on winter tires, which means I had enough time to implement my Wishlist in the summer. It was very important that the paint with which we paint was elastic and resistant. And this turns out to be not easy. And the most interesting and appropriate (as I thought at the time) was the Edding 8050 tire marker with a 4mm tip.
Marker is specially designed for applying any marks and inscriptions on rubber, BUT this does not mean that it is suitable for applying to tires - as it turned out later. In general, I bought this marker and tried it in the evening. In general, I painted one wheel with this particular marker in 2 layers, but I was not very pleased with the result. They are very uncomfortable to draw. The paint either does not pour out at all, or vice versa, there is a lot at once and spreads. In general, I got along well with him. It cracks and doesn't hold up well. I do not recommend you buy this marker! This is how I tried the marker on the inside of the rubber.
Here the inscription has a border and is easier to draw. The paint will not spill over the edge. But on the outside, the inscription does not have a side and this complicates the process. Because excess paint may spill out of the letter.
Fortunately, my brother had another marker in the garage - the cheapest paint marker with a 4 mm tip. and the next wheel I painted with it. It was already easier with him, but the thick sting / pen / tip does not allow you to draw accurately. So I found exactly the same cheap marker, only with a 2 mm sting.
And now with a thin marker, everything has become much easier and faster. I recommend this marker for painting tires. If for the first time it took me an hour for the first wheel, then it is many times less. As a result, the rest of the wheels were painted in 2 layers with a thin and cheapest marker. It is not necessary to paint in two layers, it also holds and the effect is the same.
As practice has shown, the brand that is specially for tires lasted the least - about 1 week (it soon decreased, possibly due to the fact that it was on the front right wheel), this is of course very little. After 3 not even the slightest trace remained. But the cheap paint marker is still holding up, although it is well worn. Top of the wheel covered with ink for rubber Soft99 (there will be a new post about this) - so the inscriptions look very impressive !!!

After following all the rules and with due care, you will get an excellent result. And if you still don’t shuffle the rubber on the sides, then extend the service life. But do not think that this coverage will last for a long time. The paint is not elastic and cracks. And flies away with time.
Here is the result from a simple paint marker after 2.5 months.
Marker on rubber after 2.5 monthsAs you can see, the marker is almost invisible. But there was no trace of the Edding 8050 marker in a week.
I covered the top of the wheels with Soft99 rubber ink (this will be a separate article) — this way the inscriptions look very impressive!!!
And this is how fresh inscriptions, which are one day old, look like.