I finally got around to putting ballast fluid in my rear tractor tires. This project was long over due. In this post, I cover the basics of tractor ballast, the different ballast fluids available, some different methods for fill your tractor tires and how I filled mine.
First, let’s talk about the basics of ballast. At a basic level, tractor tire ballast, whether in the form of fluid in the tires, or steel wheel weights, gives your tractor better rear wheel traction and both lowers the center of gravity as well as shifts it back toward the rear. A lower center of gravity makes your tractor less prone to tipping over on uneven terrain.
Having good rear ballast is especially important when you have a front end loader like I do. Front end loaders are very heavy. My Kubota LA525 loader weighs 805 lbs, and much of that weight hangs off the front of the tractor, making the front axle act as a fulcrum. The weight of the loader on the front subtracts from the effective weight on the back tires, and moves the center of gravity a lot farther forward.
A heavy load in the loader bucket magnifies this effect and in certain situations can cause the tractor to tip forward and possibly roll over leading to chaos, death and destruction.
Ballast in the rear tires helps to offset the weight of the loader and a load and moves the center of gravity back to a safer point. However, liquid ballast alone is not enough for safely carrying heavy loads in your loader. Adding a heavy implement on the 3 point like a ballast box or brush hog is the best way to ensure your tractor is as stable as possible.
Now, which liquid ballast you choose depends on how cold it gets where you live, how much your willing to spend, and what is available where you live. There are several good resources online comparing the different liquid ballasts but one of the best that I have found is on the Orange Tractor Talks website. This chart summarizes the characteristics of the most common types liquid tire ballast. Below the chart, the article covers pros and cons of each type. I’ll just hit the highlights of each.
Water: Of course, water is the cheapest ballast since it is free, but offers no freeze protection and provides 8.3 lbs of weigh per gallon. So, you have to live in a warm climate to use water.
Calcium chloride: Calcium chloride is widely available can be cheap or expensive, depending on if your tires already have tubes installed or not. Mixed with water, it provides great freeze protection down to -50F and weighs a hefty 11.5 lbs per gallon, but it is highly corrosive and needs to be used in tires with tubes to protect your rims from rusting.
Ethylene Glycol: Ethylene Glycol antifreeze is the same kind that goes in your car’s radiator. It is a widely available, medium-priced solution that when mixed 50/50 with water, offers freeze projection down to -40F. And it weighs about the same per gallon as plain water. The main drawback is that it is very toxic to animals and actually attracts animals because it tastes sweet. So, if you get a leak in a tire, it’s not good news for critters.
Propylene Glycol: Propylene Glycol antifreeze has the same properties as ethylene glycol except that it is non-toxic. It is easy to get but expensive per gallon.
Windshield Washer Fluid: Windshield washer fluid is another popular ballast because of its wide availability and low cost per gallon. Used full strength in tires, it provides freeze protection down to -20F and weighs about the same per gallon as water. However, it is toxic to the environment, but at least it doesn’t attract animals.
Methanol: Methanol is medium-priced, but highly flammable and must be mixed with water to minimize risk of explosion or fire. It is also toxic, but it can provide freeze protection down to -15F.
Beet Juice: Beet Juice is very expensive, but very effective, with freeze protection down to -35F and weighs almost 11 lbs per gallon. As a plus, it is completely safe and biodegradable. RimGuard is the most well-known brand however, it’s only available through dealer networks and predominately in the northern parts of the US. I can’t get it in Georgia.
Polyurethane foam: Finally, there is Polyurethane foam, which is very expensive, but is freeze-proof and can provide up to 12 lbs of weight per gallon. As a bonus, it makes your tires flat-proof. It is available through dealer networks. One downside worth mentioning is that it also makes for a rough ride on the tractor since there is no cushion in the tire.
I chose windshield washer fluid because of it lower cost and availability.
In particular, I bought Super Tech Windshield washer and de-icer, available at WalMart. Well, sometimes. It seems to be seasonably available. I paid $2.17 per gallon for 60 gallons, which was the best price I could find at the time.
So how did I know how much fluid I needed? That’s where tire ballast fill charts come in. You can find many of them on line. I like the RimGuard tire fill chart.
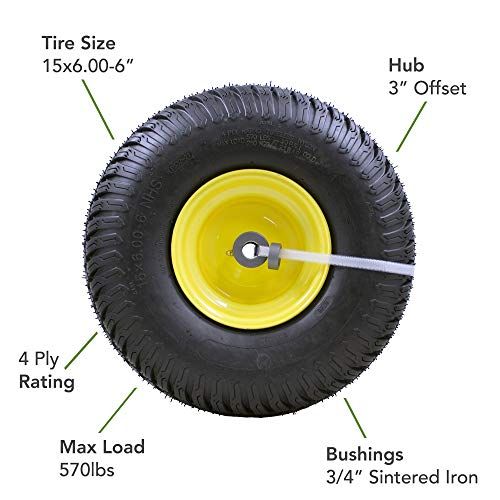
The chart shows the most common sizes of tractor tires, the number of gallons they hold at a 75% fill level, and the number or pounds added when using RimGuard. My rear tires are 15-19.5 R4s, which hold 29 gallons each at a 75% fill level. So, I need 58 gallons total but I bought 60 gallon in case of an oopsy or two. To get the weight per tire for the ballast fluid of your choice, simply multiply the gallons per tire of your size tire by the pounds per gallon of your ballast fluid. So, in my case it is 29 x 8.3 which is about 240 pounds per tire, or a total ballast weight of 481 lbs.
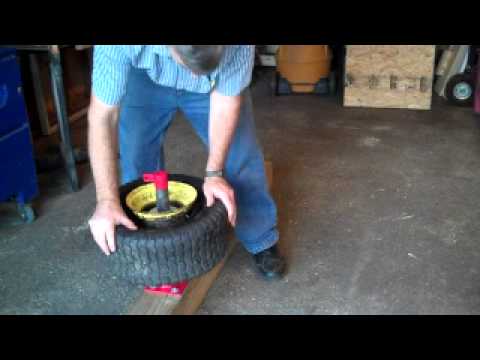
Now let’s get on with filling the tires. Your tractor should be parked on a flat and level surface. The first step is to safely take the weight of the rear tires. Now you can do this one at a time, but I chose to jack both up at the same time and you’ll learn why later in this article. You just need to raise the tires barely off the floor or ground. My jack stands are rated for 6 ton each so no worries about them not holding the weight.
The tire valve stem needs to be at the 12 o’clock position to fill the tire with fluid. You’ll need a tire valve stem tool to remove the valve core – slowly.
To fill the tires, you will need an air/water adapter kit. You can find them on Amazon or stores like Tractor Supply, which is where I got mine. They cost around $10.
There are several methods for loading liquid ballast into tires. I cover the full details in the video, but here are the basics.
Gravity Fill: The simplest is using a short piece of hose and a 5 gallon bucket that you can put in the seat of your tractor. The hose is connected to the air/water adapter which is screwed tightly onto the valve stem. The other end of the hose sits at the bottom of the five gallon bucket and you start filling the bucket with the ballast fluid of your choice. Gravity does the work from here, but it can be slow going. Occasionally, push the air release button on the the air/water adapter to let the air escape and make more room for liquid.
Transfer Pump: Another popular method is using a transfer pump to load the liquid ballast in the tires as shown in the pictures below. Transfer pumps with garden hose connections are available from many retailers such as Amazon, Harbor Freight and Northern Tool. I got mine from Amazon.
The pump speeds the process up and you just have to keep pouring liquid in the bucket and occasionally stopping the pump and releasing excess air from the tire. Note that transfer pumps are not supposed to be operated dry so priming it by filling the hose with liquid before turning it on is important!
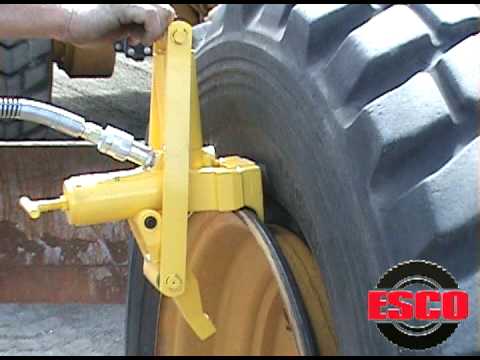
Transfer Pump with Manifold: This method involves building a manifold that attaches to the air/water adapter and allows you to monitor the pressure and release air without wasting any fluid.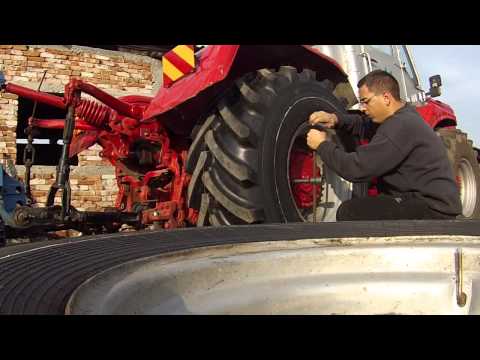 It is made of 3/4″ PVC pipe and common fittings available at hardware store. This idea came from David Dobb on his DaveKnowsHow YouTube channel and I thought it was brilliant, as so many of his contraptions are. I built my version of the manifold so that the hoses hang straight down to minimize stress on the valve stem.
Here’s a closer look at the parts of the manifold. I use three, ¾” threaded PVC to garden hose adapters. Two garden hose valves. And a typical pressure gauge on the inlet side. Since this manifold is hopefully a one-time use device, I chose parts I could reuse elsewhere. In fact, the pressure gauge ended up replacing the one on our pool pump. I’ll keep the manifold body in case I ever have to fill tires again.
The hose connecting the manifold to the pump output side is a washing machine connector hose with female connections on both ends. The other two hoses can be whatever as long as they have a female connection on one end.
Before starting the pump, I fill the 5-gallon bucket with fluid and the prime the inlet hose.
The tire pressure quickly settled out at 20 PSI, which is perfect!
With the pump running, it was just a matter of keeping the 5 gallon bucket filled with fluid.
Note that the tires fill faster if you occasionally stop the pump, close the manifold inlet valve, then fully open the outlet valve to let excess air pressure out. You might want to pull the return hose out from the liquid as you do this so as to avoid blasting ballast fluid everywhere. Go ahead, ask me how I know this. Once the pressure is relieved, open the inlet valve, turn on the pump, and mostly close the outlet valve.
Once all the fluid is in, I can put the valve core back in the stem and pressurize the tire to about 20 psi, which is all that is needed for liquid filled tires.
So now the process needs to be repeated for the other tire. Again, the valve stem needs to be in the 12 o’clock position, but because I jacked up both rear tires, I can easily do this without moving the tractor.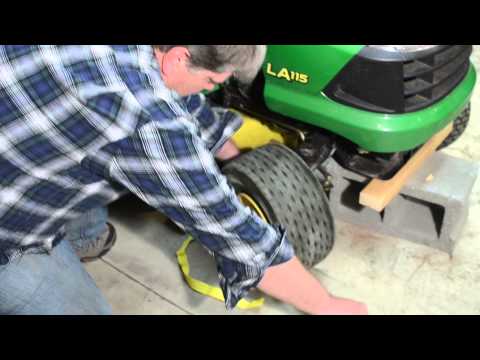 With the clutch locked in the pressed position and the range selector in neutral, I manually rotate the tire so that the valve stem is at 12 o’clock.
After filling the tire, I once again reinstall the valve core and pressurize the tire. Now I can safely take the tractor off the jack stands.
I must admit I put off this project because I was intimidated by it, but it turns out to be pretty easy to do if you are careful and have the right tools on hand. So if I can do it, you can do it!
Note: Links to Amazon products are Amazon Associate links that won’t cost you any extra, but will help support my efforts with a small commission on qualified products. Thanks for your support!
Like Loading...
If you’re looking in the market for a farm tractor and have never had one before (like us), it’s always a good idea to find out the benefits and reasons to filling your tractor tires with water, or other fluids and compounds. And learn about alternative methods, if you prefer not to use fluid.
There are three main reasons to fill tractor tires with fluids, like water. It will increase the traction of the rear tires, lower the center of gravity, and prevent the rear tires from raising off the ground when lifting heavy objects or adding bucket loaders and other accessories to the front-end of the tractor.
All these factors help prolong the life of the tire and increase, overall, productivity. There are many other fluids and compounds, other than water, that are used to fill tractor tires. Therefore, it would be good to know the added weight they provide, potential issues, and freeze resistant thresholds for each.
Putting Liquid in Tractor Tires is Called BallastingThe ballasting of tractor tires is a relatively inexpensive way to increase tire traction. The increased weight in the tires allows the tread of the tire to grip the ground better. Especially, on muddy and loose surfaces. Reducing slippage and providing more friction in the rear wheels. As a result, this will decrease fuel consumption and, also decrease wear and tear on the tires, which will increase the life of your tires.
Lowering the center of gravity and introducing proper counterbalancing will improve the operating safety and stability of the tractor, as well as decrease front axle stresses.
My biggest concern when operating the tractor is that the back wheels will come off the ground when using the front loader, or that I won’t have enough traction when going up steep terrain. The ballast we put in our tires can decrease the chances of either of these happening significantly.
Other Fluids and Compounds Used to Ballast a Tractor TireFarmers are very resourceful and creative folks. I’m sure it was through trial and error, they were able to find these successful and effective compounds and fluids to ballast their tractor tires.
The most common fluids and compounds used by most farmers and hobby farmers are:
In John Deer’s sales manual they provide a chart outlining the liquid weight per tire for a 40% fill and 75% fill. They also recommend that the front tires have the same amount of liquid fill as the rear tires.
After discussing our options with a few different folks, we learnt that it’s common practice to use 75% of tire capacity as a maximum when ballasting our tractor tires.
| FLUID | POUNDS PER GALLON | FREEZE RESISTANT THRESHOLD | POTENTIAL ISSUES | TOXICITY |
| Water | 8.3 | Will cause rims to rust over time. | ||
| Antifreeze | 8.0 | Up to -25F (depending on mixture) | Highly toxic to animals, soil and plants. | |
| Windshield Washer Fluid | 8.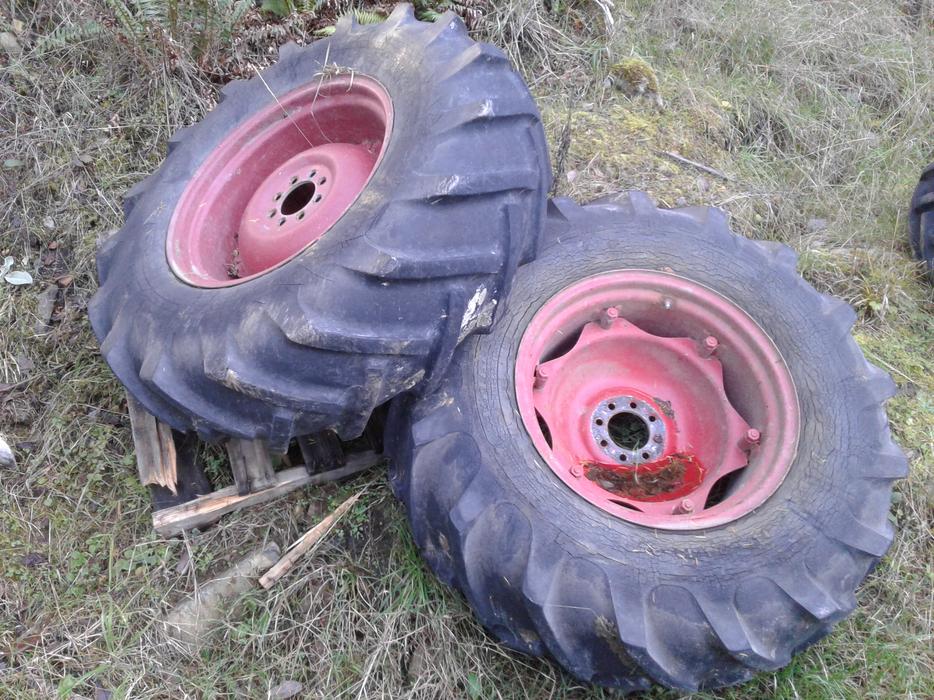 0 0 | Up to -25F (depending on mixture) | Some what toxic and not pet safe. | |
| Beet Juice | 11.0 | Up to -35F | May attack rubber joints in valve stems. (metal stems are recommended) | |
| Polyurethane Foam | 9.96 – 12.45 | It Cannot Freeze | When worn out, you throw out the whole assembly (tire + rim) and start over. No air in tires to absorb the bumps and humps. | |
| Calcium Chloride | 11.5 | Up to -30F And Potentially -40F (depending on mixture) | Method requires tubes. Requires specialized equipment and safety precautions to fill tire. Calcium chloride is classified by most states in the United States as a hazardous waste, requiring special handling and disposal methods. | Highly corrosive and toxic to animals, soil and plants. |
The compounds and fluids listed above are in no particular order of popularity, but each compound has many unique qualities for you to consider. Hopefully, it can help you choose the best option for you and the climate of region you operate your tractor in. We live in a colder climate where it freezes so we couldn’t use water.
Also, it’s worth noting that once your tires are ballast you will require another type of heavy machinery (like a forklift) to move, replace, or adjust your tires.
Other Ballasting MethodsThere are several other methods of adding ballast to your farm tractor that are just as effective, if not, more effective than water. However, we also found that after we ballast our tires we still needed more weight on the back-end to use our rock bucket to move some of the huge boulders around on our property. We were going to use a ballast box but opted to use the box blade on the back-end to counterbalance the workload and weight.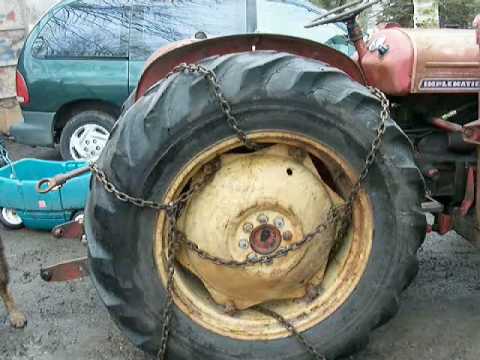
Overall, the amount of ballast you require will always vary depending on the project, task or the implement you are using. Therefore, it might make sense to pick the heaviest task or project you intend to have on your acreage when determining the best ballast options or the best combinations of them.
Below are three other methods to consider if you don’t want to ballast your tractor tires or if you need additional weight, like we did.
1. TRACTOR BALLAST BOX
A tractor ballast box can look like the one below and cost around USD$300 for a used one. The ballast box comes empty so you can be creative when filling it up to get the desired weight you want. We’ve seen compounds such as concrete, cement, rocks, and sand, as well as a combination of these compounds. We’ve also seen steel piping embedded into these compounds, once set, to add more weight.
photo credit: tractorbynet.comAnother creative idea is to do your own “do it yourself” (DIY) project and create your own counterweight, like John Suscovich did. It’s a great way to save some money and have some fun too. Great job John!
This DIY sits on the back of the tractor so we categorized as a second alternative option to a ballast box.
https://www.youtube.com/watch?v=6Ma5xlmo2mkVideo can’t be loaded because JavaScript is disabled: DIY Tractor Counterweight (https://www.youtube.com/watch?v=6Ma5xlmo2mk)
video credit – YouTube Channel of: John Suscovich| PROS | CONS |
| Doesn’t take up much space. | Can decrease maneuverability of tractor. |
| Easy to remove. | Adds length to tractor. |
| You can make one yourself using materials such as: sand, gravel, rocks, dirt, steel, cement or concrete and a ballast box. | Could add stress to tractor frame, axles, and tires if the manufacture’s recommended guidelines aren’t followed. |
| Bolted onto tractor. |
2. SUITCASE WEIGHTS
Suitcase weights are weighted plates mounted on a bracket to the either the front or the back of the tractor; similar to the ones in the photo below.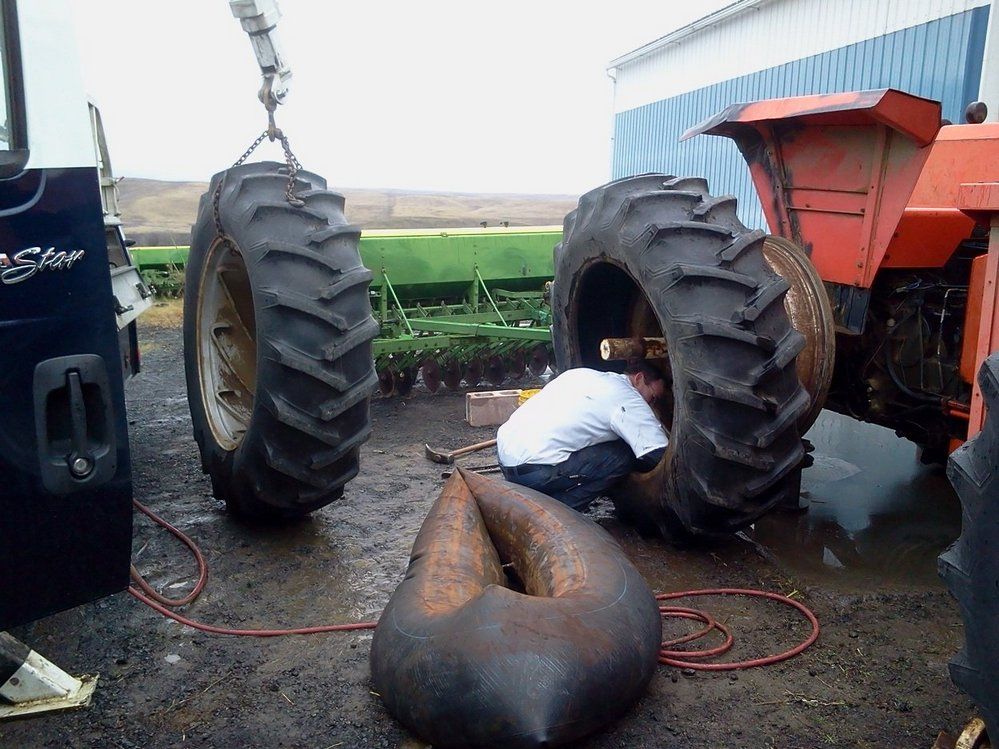 These can get very expensive; depending on how much weight you require, as the bracket and the weights are sold separately. Some dealers sell the weights in sets of 10 or less. Or they sell them individually and each weight option comes in a wide variety of weights. Ranging anywhere from 80 lbs per plate to over a 100 lbs per plate.
| PROS | CONS |
| Not bolted onto tractor. Attached onto front or rear brackets. | Can decrease maneuverability of tractor. |
| Easy to use. | Adds length to tractor. |
| Easy to remove. | Could add stress to tractor frame, axles, and tires if the manufacture’s recommended guidelines aren’t followed. |
3. WHEEL WEIGHTS
Wheel weights are weighted plates mounted on a tractor tire; similar to the grey one in the photo below. Some dealers sell the wheel weights in sets but we’ve found most sell them individually.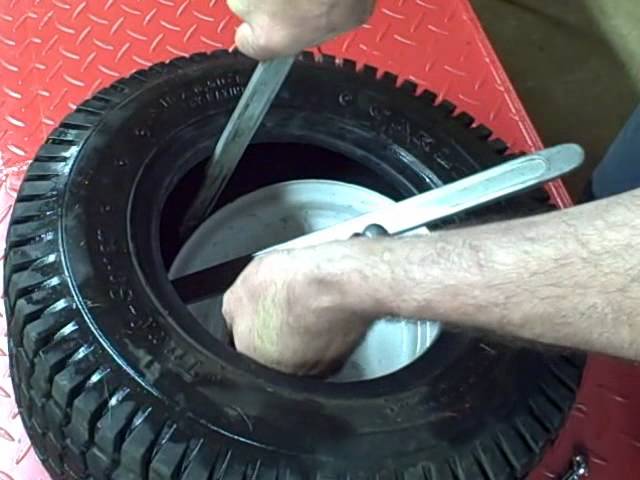 Each wheel weight ranges greatly from around 100 lbs per wheel weight to above 1,000 lbs per wheel weight for utility and larger tractors.
We’ve also seen some creative wheel weight DYI projects for smaller tractors.
Steve, a contributor on a forum, used 25 lb bar bell weights (bought from WalMart for around USD$10 each). He used two per side for a total of 100 lbs. Great job Steve!
photo credit: Simple Tractors| PROS | CONS |
| A more direct approach to adding weight to the axle. | More time consuming to remove and potentially more heavy equipment needed for installation and removal. It is recommended that wheel weights |
| Doesn’t add additional length or width to the tractor. |
To get the best performance from your tractor and to ensure you don’t void specific warranties on either your tractor or tires, it is best to follow the recommended ballast and tire pressure adjustments found in your tractor’s manual.
It is also good to learn how to calculate the desired axle weight and tire pressure to ensure maximum tire traction and prevent the impact of unneeded stresses on the engine that could eventually lead to a costly mechanical bill.
If you drive at or near top tractor speed on roadways. It will negatively affect the ride quality of your tractor, especially if you ballast the rear tires. Ballasting tires reduces the amount of air in the tire, which increases the amount of friction on the road and can make the ride rougher.
How Do You Know if a Tractor Tire is Loaded?If the tire is filled with liquid, move the tire valve positioned to 3 o’clock. Press in the center of the tire air valve stem, like you are going to fill the tire up with air, a small amount of liquid should come out instead of air. If you want more liquid to come out move the valve to 6 o’clock. If the tire is filled with foam, nothing should come out.
Years ago, American farmers discovered that adding weight greatly improved tractor performance.
One of the benefits is improved grip. When a tractor pulls a heavy plow or disc in viscous arable land, the drive wheels usually lack traction and skid.
Additional ballast increases tractor inertia, smooths out jerks and saves expensive equipment.
The load distribution along the axles is as follows: conventional tractors - 25% on the front axle and 75% on the rear. Mechanical front-wheel drive tractors - 40% on the front axle and 60% on the rear. Tractors with four-wheel drive - 55% on the front axle, and 45% on the rear.
By adding extra weight to the rear axle, the tires can pull more weight without losing traction. Usually, the driving tires of the tractor are filled, which improves the traction characteristics, the ribs of the tire are better hooked on hard ground.
To ensure longitudinal stability, additional weights are used and water is poured into the tires of the tractor guide (front) wheels. It is preferable to hang removable cast-iron weights, but water is more economical.
Normal water can be used, but it freezes in the cold. Antifreezes based on ethylene glycols and alcohol are also used, but such liquids are too expensive. Successfully used calcium chloride, obtained in powder and mixed with water (30% by volume) before refueling. Its disadvantage is the likelihood of corrosion, so it is recommended to pour it into the tractor tube tire.
Even inexpensive glass washer fluid is sometimes used. In extreme cases, plain water with salt is poured.
Tractor tire fluid also helps improve heat transfer and more even distribution of excess heat generated in the tire during intensive work.
On older tractors, it was recommended to refuel only the outer tires of the tractor's dual wheel, on modern tractors it is recommended to evenly distribute the mass of liquid on both wheels.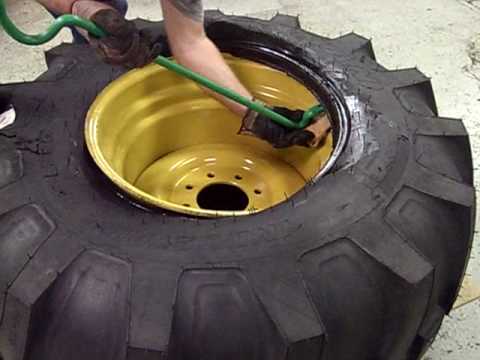 It is not recommended to fill radial tires more than 40%.
For more precise information on axle load distribution, please contact the tractor manufacturer or dealer.
Ballasted anti-freeze liquid usually remains in the tractor wheel for the entire life of the tire. The fluid in the tire has nothing to do with wheel balancing and is used only on tractor equipment.
The weight table is based on the assumption that 75% of the tire volume will be filled with water (by valve level). The use of anti-freeze chemicals can affect the mass of the liquid.
Tires for agricultural tractors (arable land)
| Tire size | Water, liters | Additional weight per tire, kg |
|---|---|---|
| 4.00-12 | 9 | 37.4 |
| 4.00-15 | eleven | 46.2 |
| 4.00-19 | fourteen | 55 |
5. 00-15 00-15 | 15.9 | 63.8 |
| 5.50-16 | 23 | 92.4 |
| 6.00-12 | 20.45 | 81.4 |
| 6.00-14 | 23 | 90.2 |
| 6.00-16 | 27 | 110 |
| 6.50-16 | 32 | 127.6 |
| 7.50-10 | 27 | 110 |
| 7.5L-15 | 36 | 145.2 |
| 7.50-16 | 41 | 165 |
| 7.50-18 | 45 | 182.6 |
| 7.50-20 | fifty | 202.4 |
| 9.00-10 | 41 | 165 |
| 9.5L-15 | fifty | 202.4 |
| 9.50-20 | 82 | 330 |
9. 50-24 50-24 | 91 | 367.4 |
| 10.00-16 | 77 | 312.4 |
| 11.00-12 | 82 | 330 |
| 11L-15 | 59 | 237.6 |
| 11.00-16 | 105 | 422.4 |
| 11L-16 | 68 | 270.6 |
| 14L-16.1 | 123 | 495 |
| 16.5L-16.1 | 191 | 761.2 |
| 7.2-24 | 41 | 165 |
| 7.50-16 | 41 | 165 |
| 8.3-24 | 59 | 237.6 |
| 9.5-16 | 55 | 220 |
| 9.5-24 | 77 | 312.4 |
| 9.5-36 | 114 | 459.8 |
9. 5-42 5-42 | 132 | 532.4 |
| 10-16.5 | 55 | 213.4 |
| 11.2-24 | 109 | 440 |
| 11.2-28 | 123 | 495 |
| 11.2-34 | 150 | 605 |
| 11.2-36 | 159 | 642.4 |
| 11.2-38 | 164 | 660 |
| 12.4-16 | 95 | 385 |
| 12.4-24 | 136 | 550 |
| 12.4-28 | 159 | 642.4 |
| 12.4-36 | 200 | 807.4 |
| 12.4-38 | 209 | 844.8 |
| 12.4-42 | 232 | 935 |
| 13.6-24 | 173 | 697.4 |
13. 6-26 6-26 | 182 | 734.8 |
| 13.6-28 | 195 | 789.8 |
| 13.6-38 | 259 | 1045 |
| 14.9-24 | 214 | 862.4 |
| 14.9-26 | 218 | 880 |
| 14.9-28 | 241 | 972.4 |
| 14.9-30 | 259 | 1045 |
| 14.9-36 | 291 | 1174.8 |
| 14.9-38 | 305 | 1229.8 |
| 15.5-38 | 300 | 1210 |
| 16.9-24 | 277 | 1119.8 |
| 16.9-26 | 295 | 1192.4 |
| 16.9-28 | 314 | 1265 |
| 16.9-30 | 332 | 1339.8 |
16. 9-34 9-34 | 373 | 1504.8 |
| 16.9-38 | 409 | 1652.2 |
| 17.5L-24 | 250 | 1009.8 |
| 18.4-16.1 | 223 | 899.8 |
| 18.4-24 | 341 | 1377.2 |
| 18.4-26 | 359 | 1449.8 |
| 18.4-28 | 382 | 1542.2 |
| 18.4-30 | 405 | 1632.4 |
| 18.4-34 | 455 | 1834.8 |
| 18.4-38 | 500 | 2017.4 |
| 19.5L-24 | 332 | 1339.8 |
| 20.8-34 | 582 | 2349.6 |
| 20.8-38 | 636 | 2569.6 |
Turf tires
| Tire size | Water, liters | Additional weight per tire, kg |
|---|---|---|
23×8. 50-12 50-12 | 27.3 | 110 |
| 23×10.50-12 | 31.8 | 127.6 |
| 26×12.00-12 | 45.5 | 182.6 |
| 25×8.50-14 | 31.8 | 127.6 |
| 25×7.50-15 | 27.3 | 110 |
| 25×10.50-15 | 31.8 | 127.6 |
| 25×12.50-15 | 36.4 | 147.4 |
| 27×8.50-15 | 31.8 | 127.6 |
| 27×9.50-15 | 40.9 | 165 |
| 27×10.50-15 | 45.5 | 182.6 |
| 29×12.50-15 | 63.6 | 255.2 |
| 31×12.50-15 | 81.8 | 327.8 |
| 31×13.50-15 | 86.4 | 347.6 |
31×15.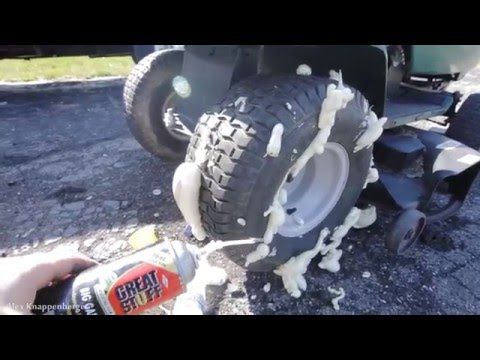 50-15 50-15 | 90.9 | 365.2 |
| 33×12.50-15 | 100 | 402.6 |
| 44×18.00-20 | 254.5 | 1047.2 |
© Text: Vladimir Sinkov, Starko St. Petersburg
Photo: Deere & Company
Return to list
Another season of changing shoes is approaching. And you may remember that on one of the tires after the last winter/summer there is a jamb - a small bump. I don’t want to run to the store for the sake of one new tire. We understand. Or maybe it looks even better if repaired?
Yes, not every wheel that has met with a nail, rebar sticking out of the ground or a sharp stone on the road is considered damaged. Everything, of course, depends on the scale of the damage and its location on the tire itself. Some are easily repaired, while others are simply impossible to do - the tire can only be sent to the trash.
A bulge on a wheel, referred to by drivers as a bump or bulge, is the most common tire sidewall defect. It appears due to a collision with an obstacle or after falling into a pit, more often at high speed. The threads of the sidewall carcass are easily damaged by impact, and the tire at this point can no longer hold the load and air pressure - swelling appears. A small bump sooner or later turns into a big one, and driving with such a defect is dangerous - the wheel can shoot at any moment. At high speed, this is fraught with loss of control, departure from the road and a rollover.
The quality of roads in Kazakhstan contributes to the appearance of bulges on tires
Some types of bulges are repairable, although this is a temporary measure. Not a single patch can restore the factory rigidity. Ideally, change the tire.
Special cord patches can extend the life of a tire with a herniation, even if the swelling has appeared on the tread. The sidewall is a different story. If the swelling appeared at a distance of more than 40 mm from the side, it can be repaired. If not, the wheel is definitely for replacement. Blisters on low profile tires are most often non-repairable.
For maximum safety when riding with a repaired bump, insert the tube. This is an inexpensive and reliable solution. On our market, you can find cameras made in China and Russia, the latter are slightly more expensive, but also of better quality.
The elimination of a side cut is a serious operation, therefore, as in the case of a bump, you will have to go to the professionals. We need cord patches, fortunately in our time they are of different sizes and with a different number of layers. And if you do it wisely, then you can't do without special tools and vulcanization.
A cut, by the way, cannot be healed in all cases. If the gap is in the shoulder area of the tire, it is unlikely that anyone will undertake to repair it, since no guarantees can be given here. However, our Kulibins take on even the most difficult cases, cutting out parts of the sidewalls from the tires and even weaving the cord on their own.
Tire overhaul. We would not put such a wheel on ourselves
Low profile tires can be repaired, but more difficult. A tear in the sidewall is easier to seal on tires with a medium or high profile.
Sometimes a cut is confused with a pluck. This is when the outer layer of the sidewall caught on something sharp, a tear formed, but the frame itself remained intact. There is nothing wrong with that, although the drivers at the tire fitting company successfully repair the cut, for which they take it accordingly.
If a piece of rubber remains on the sidewall, then glue it with ordinary superglue (101st). If it came off, then it is better to cover it with raw rubber and vulcanize. Leaving the pluck bare is not recommended, because the tire carcass, often consisting of a metal cord, will quickly corrode.
In Europe, defective or used tires are perforated before being sent for scrap to prevent their resale and possible operation. But they don’t know that we have such holes on the sidewall patched once or twice
Cuts and hernias are not the only possible damage to the side of the tire. You can also spoil the side ring, in the process of changing shoes, for example. If it’s for garlic, then such a tire is already dangerous. Sooner or later, the tire pressure and the load in motion will start to squeeze the rubber off the rim - a wheel explosion can occur.
This ailment is repaired if the wire ring - the base - is intact. There are no special technologies and materials to correct this particular problem, but most often craftsmen use a two-component composition for chemical (also called cold) vulcanization. After mixing, the mass is pressed into a fat-free damage. Compound manufacturers recommend waiting 72 hours before mounting a tire.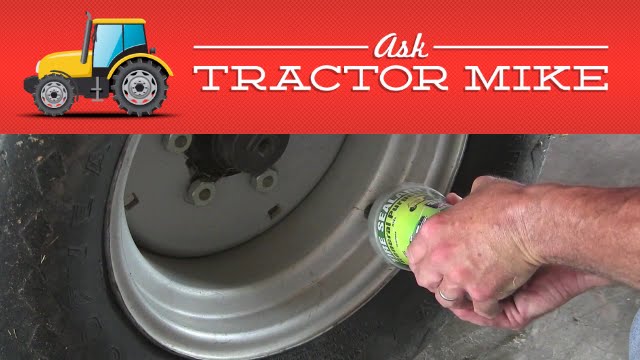 Of course, our masters do not pay attention to this condition - they put the tire right away. And it’s good if the wheel is flat because of this at night in the parking lot, and not on the road.
If the side ring tears are barely noticeable, but the wheel still deflates, then you can use a special liquid - a bead seal designed to seal a tubeless tire.
These seals have been used in motorsport for some time. In particular, in the American Formula D Drift Series, drivers used compounds to keep the tire on the rim even with minimal tire pressure. Now they are banned.
Pay attention to the left rear wheel of the Nissan Silvia S13. Due to too low pressure, it was literally taken off the disk under load
Every schoolchild has faced this problem when patching the tube of his bike after hitting something sharp. Repairing a car tire puncture with your own hands will also not be difficult even on the road. But for this you will need a pump (or compressor) and a universal tire repair kit with harnesses. All this is sold at any car market or gas station.
Repairing a tire on the side of the road with harnesses
The process is simple. If we are talking about the front wheels, then in most cases the wheel can not even be removed, it is enough to turn the steering wheel in the right direction, find the puncture site and carry out repairs. First, the hole is cleaned with a helical awl from the set. The tourniquet itself is smeared with glue and tucked into the eye of the awl, after which it is inserted into the tire hole. With a sharp movement, the tool is removed, and the tourniquet remains in place and clogs the hole. The tails are cut with a knife, but not at the root, it is recommended to leave about 20 mm. The tire is inflated and checked.
Sometimes a nail or self-tapping screw clogs the hole by itself, remaining in it. If you see a hat in a tread, do not rush to pull it out. While the pressure is holding, move to vulcanize. And sometimes they drive with a screw in a tire for weeks.
Repair of a puncture at a tire shop
Punctures are also repaired with harnesses at a specialized service, although among professionals such repairs are not considered long-term. After a few months, the flagella dry out and can let air through. There are more advanced methods like cold and hot vulcanization. The latter is more reliable. In this case, the hole is sealed with an elastic patch, and the funnel from a foreign object is filled with a special compound. After that, a vulcanizer is put on the tire, it heats up the rubber and solders it.
In addition to the plaster, the puncture is also repaired with special cord fungi. Craftsmen process the puncture site: drill it and treat the surface with a tool to roughen it. Then the repair area is lubricated with glue (it is also called cement) and a fungus is introduced. This is done from the inside of the tire. The cap of the fungus is rolled, and the excess legs are simply cut off from the outside.
Repairing a puncture with sealant
With the advent of tubeless wheels and later run flat tires, many automakers began to abandon spare wheels. Instead, repair kits with compressors are supplied with the machines. A repair kit is essentially a bottle of pressurized sealant. Later, such spray cans began to appear on the shelves of ordinary car dealerships.
This method has not taken root in the CIS, because the condition of the roads makes it necessary to have at least a stowaway in the kit, but it can also be considered as a method of repair on the road.
The car must be jacked up and sealant must be pumped into the damaged wheel through the nipple. Next, you should spin the wheel, then pump it up, lower the car and drive a few hundred meters. If the tire tightness has not been restored, repeat the procedure.
For commercial vehicles, cutting the tread with a special device (regrower) is a common thing. Moreover, such tire retreading is provided by the factory (marked REGROOVABLE on the sidewall) to increase the service life. But there are entrepreneurs who undertake to deepen the grooves in tires for passenger cars. But they are not intended for such an operation. Often used tires for sale are “refreshed” in this way. Be careful!
What is the threat?
The worst option is that the retreaded tire will shoot out on the road, as the master can damage the undertread layer when deepening the grooves. Such a tire will not be able to hold pressure at some point. There will be a boom! At best, the tire will indeed last a little longer, but is the game worth the candle? We think it's not worth it.
How is cutting done?
A regrower is used to cut the tread. Roughly speaking, this is a large soldering iron with interchangeable tips of various shapes.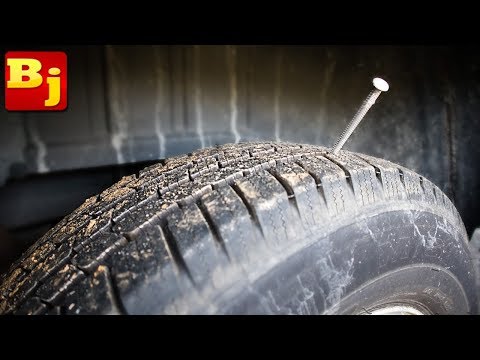 It goes through rubber like a knife through butter.
If the tire is for passenger cars, then it is worth taking on a regrower only in one case - when part of the tread pattern was welded with "new" rubber during repair. This is where threading comes in handy in order to restore the grooves and symmetry of the tread.
Vehicle operation is prohibited if:
- tires have a residual tread height of less than 1.6 mm;
- tires have punctures, cuts, ruptures that expose the cord, as well as delamination of the carcass, delamination of the tread and sidewall;
- tires in size or load capacity do not match the car model;
- tires of various sizes, designs (radial, diagonal, chamber, tubeless), models, with different tread patterns, winter and summer, studded and non-studded, new and restored, are installed on one axle of the car;
- Tires retreaded according to the second repair class are installed on the front axle.