Every editorial product is independently selected, though we may be compensated or receive an affiliate commission if you buy something through our links. Ratings and prices are accurate and items are in stock as of time of publication.
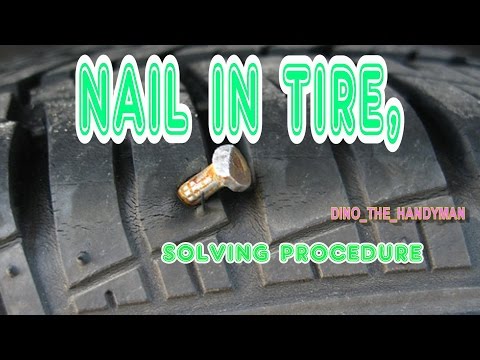
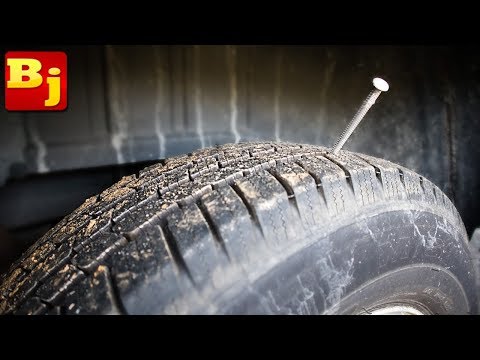
Modern vehicle tires are tough, standing up well to rough terrain and thousands of miles of driving. Trouble is, tires are not invincible. Every so often car tires spring leaks. Air can start leaking from anywhere on a tire, and the location of the leak determines whether or not you can fix it yourself. And if you can't fix it yourself, the location of the leak will also tell you if you need a professional repair or a new tire.
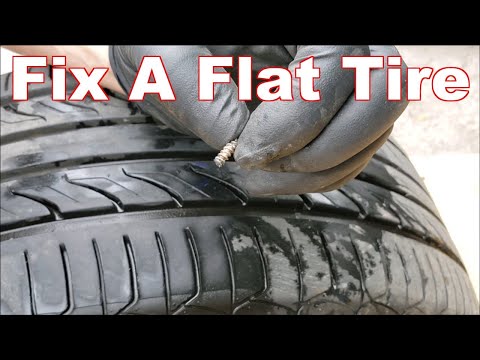
Whether or not your tire is tubed or tubeless affects things, too, because only tubeless tires can be repaired using the technique of plugging that we'll show you here. The good news is that modern vehicles always have tubeless tires, and this means that repairing with a rubber plug is often an option.
Plugging a tubeless tire is only a possibility when your puncture is in the tread area. If the air leak is where the sidewall of the tire meets the rim — this is called a "bead leak" — you'll need to visit a mechanic with a tire machine to dismount the tire from the rim and remount it with sealing liquid applied to the bead. If your sidewall has been punctured, you need a new tire, because damage there can lead to a blowout at highway speeds, even after repair.
Learn exactly how to plug a tire so next time you spring a leak between your treads, you'll be able to get up and running again in record time.
Total time completing the repair is about 15 minutes. Doing the work yourself will save you about $20 and the time spent driving to the garage and waiting.
Steve Maxwell for Family Handyman
Complete DIY projects like a pro! Sign up for our newsletter!
Do It Right, Do It Yourself!
Originally Published: August 27, 2020
| Tire Forge
The tires are one of the most essential parts of a vehicle – they are the artificial legs you need to get somewhere or anywhere.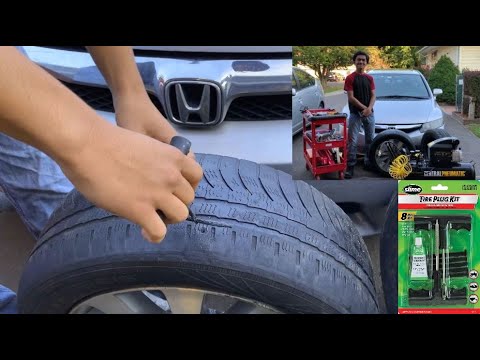
While tires are tough and come in different types for various vehicles, they are not entirely free from hazards – they are likely to experience leaks.
One of the most vital parts, however, that needs to be paid close attention to is the tire plugs.
You need to know what to do when they are leaking and what happens if you don’t pay attention to them immediately. Find out in this article.
Page Contents
 2 When Do You Need Professional Repair?
When this rubber plug starts to leak, it can be annoying. The reason is that: it often comes with a slow tire effect (or slow leak).
This slow tire effect is a result of low tire pressure and running on it for a long time can be dangerous to the car and the driver – a serious blowout leading to an accident.
The signs of a leaking plugged tire is not any different from a slow leak or a flat tire. They include:
If you already plugged a tire because you had a tire leak and then it starts to leak again, you could fix the problem the same way you fix a flat tire.
The only thing you should bear in mind, however, is that: you shouldn’t take too long before visiting a mechanic or tire shop for a permanent fix or replacement.
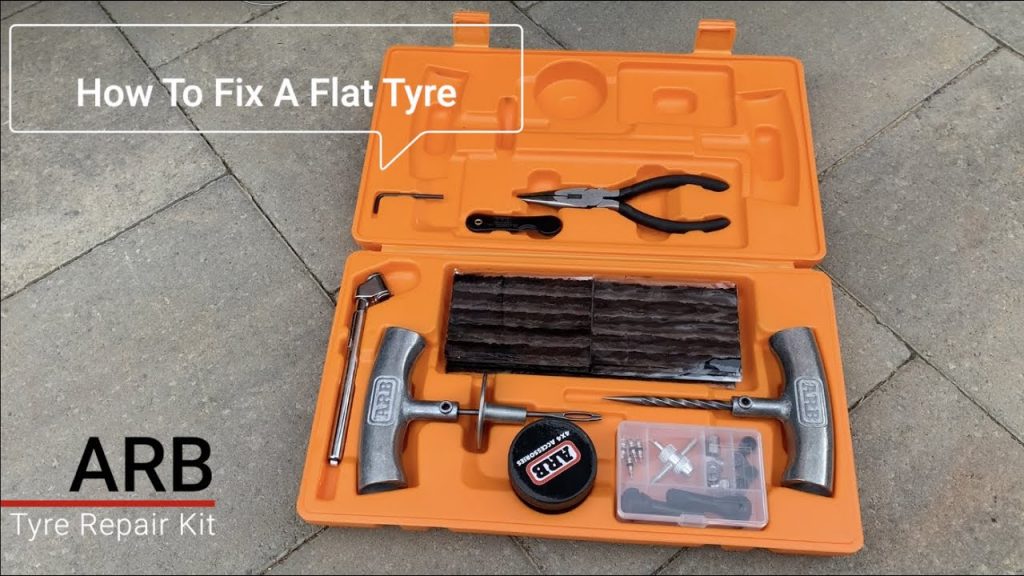
If you have an old plug that needs to be removed because your tire has had a longer leaking period and want to replace with another one, here are the things you need:
Here is a step-by-step guide on how to proceed:
Apart from the site where the rubber plug is inserted, examine other parts of the tire. It is important that you do this to know the various leak sites and know how to repair each one of them.
Pump air into the tire and make sure it is finger-pressure firm.
Afterward, you can spray soapy water on the tire to know the various sites that need repair. By spraying this soapy water on the tread area, air leaks will create bubbles on the tire surface, indicating a leak.
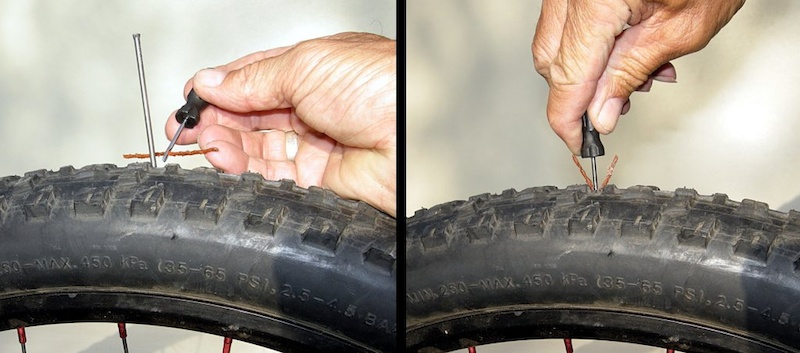
With your t handle reaming tool, you can create a hole in the tire on the leak site.
The purpose of this hole is so that you plug the tire successfully; however, you should be careful not to ream too much. If you have a small puncture, a hand drill is good enough to create a tiny hole in the tire.
Get your plug strip set up into the eyelet of your plug insertion tool using your pliers if necessary. The next thing is to have the plug strip well-coated in the rubber cement, as well as the hole on the tire surface.
Using the plug insertion tool, insert the plug strip into the hole. Make sure it is deep enough. When the plug strip is in the hole, quickly pull the insertion tool out and ensure the plug is already in the tire.
When you finish installing the plug into the tire, the next thing is to fill it with air. The reason for doing this is to check if the tire repair procedure was successful or not.
If you’ve done a good plugging, the final thing you need to do is trim the plug and continue driving.
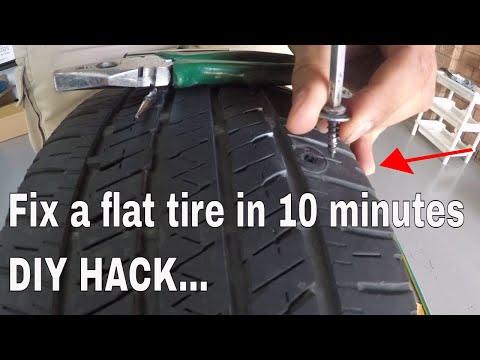
If your tire was punctured by a nail, screw, or any sharp object, you might end up plugging or patching it since they are the best quick fixes.
However, you should know that if your tire is plugged properly on the sidewall, it can last up to 10 years but plugging should be done once.
If you set a proper patch or plug on your tire, you should know they are only temporary until you have the resources to repair leaks.
If you do this more than once, speed rating reduces and you run a risk of a serious blowout.
In a situation where there is a small leak where the rim of a wheel meets the sidewall of a tire, it is called a bead leak.
This situation cannot be repaired as DIY because there are several mechanical components involved – you will need the help of a mechanic.
What the mechanic does in most cases is to dismount the tire, apply a sealing liquid to the bead, and install or remount.
You should only call in for professional repair if you don’t know your way around your tyre.
For instance, you will need to calculate the thread diameter before you proceed with tire repair. Another thing is figuring where the leaks are coming from so you can deploy the right fix.
Finally, you also need the assistance of a professional if it isn’t just any leak, i.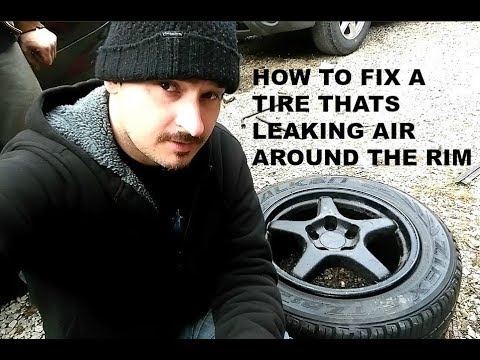 e., if it is from the beads.
Diagnosing your tire is very important but not everyone can or will do that, especially if it is a new tire.
However, if you are ready to be invested in tire maintenance, here are some important things to look out for:
One of the things you should look out for on your tire is if it has been punctured by a nail or any sharp object. You can tell by the little amount of air coming out from the tire until it becomes obviously flat.
Another thing is if your tire starts making unusual sounds or thumps, it may be because the radial belt has been detached or there is a tire puncture.
One of the effects of a bad tire is that it comes with unnecessary pulling. Your vehicle could be pulled to a side because there is a good chance your flat tire caused an odd wheel alignment.
If you are stuck on a highway with tire leaks or flat tires, you don’t have anything to worry about as long as you have your rubber plug.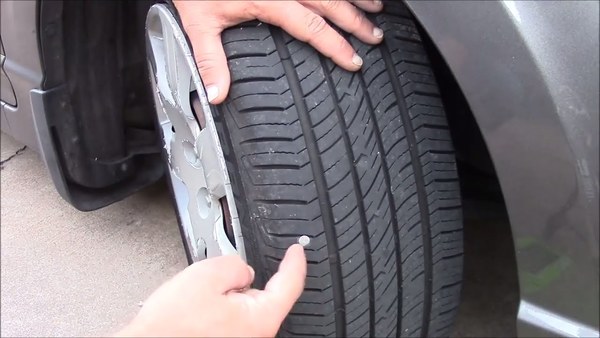
You can temporarily have your tyres repaired in no time and drive safely on the road.
However, you shouldn’t take too long before visiting a repair shop for a permanent fix.
Thanks for reading our article! We've written this article with a lot of thought and care. If you're interested in seeing more of our content, please check out our Tires section and find an answer to your questions!
A loose, leaking, or damaged oil drain plug can result in unsightly stains on your driveway, as well as low oil in your engine. The leak must be repaired immediately. The last thing you want is for the fork to completely fail and suddenly spill all the oil. This can cause irreparable damage to your car's engine, costing you a lot more than fixing a fork.
Contents
Apply the emergency brake, turn on the vehicle and engage the chassis to block the wheels in front of and behind the tires to prevent the car from rolling.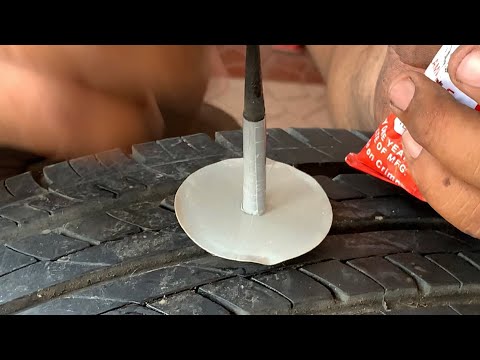 If there is not enough room to access the oil drain plug, you may also need to raise the front of the vehicle. In this case, chock the rear wheels and place sturdy jack stands under the stands as recommended in your vehicle manual.
Align the oil pan under the drain plug to prevent leakage.
Turn the oil drain plug counterclockwise with an adjustable wrench. If it turns easily, the fork may be loose and just needs to be tightened. If it takes effort to unscrew the plug, then the plug was tight, but the washer failed.
Remove the drain plug and replace the washer. Keep in mind that when the plug is removed, the oil in the car will drain completely, so make sure the oil pan is properly aligned under the hole. Replacing a washer should be a simple task: remove one and slide the other. In some cases, it may be necessary to replace the entire oil drain plug to replace the washer.
Screw in the oil drain plug and secure it to the oil pan. Be careful not to over tighten; you just have to snuggle up. The oil pan is probably made of thin aluminum and is very easy to clean. If you cannot tighten the plug, the threads of the plug or oil pan may be damaged.
Remove the oil drain plug and check the threads. If the thread is flattened, smooth or missing, the drain plug is damaged and must be replaced with a new one. If the thread looks good, the problem is in the oil pan. You can replace the oil pan or purchase a slightly larger self tapping oil drain plug.
Screw a self-tapping oil drain plug into the hole. You may need to screw it in a few times, pull it back out and clean the threads to remove the extruded aluminum that was turned out by the crane. Depending on the plug and oil pan, you may need to drill a drain hole first to allow the self tapping drain plug to install and insert into the hole.
Press the plug against the oil pan and wipe off any remaining oil.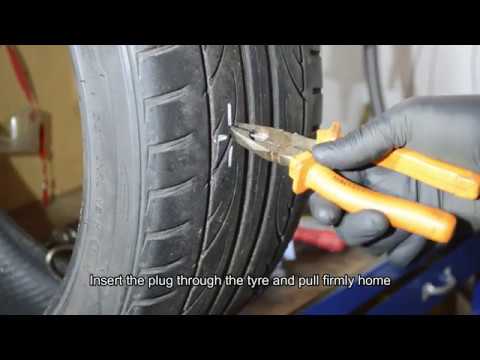 Since the oil is already drained, you can also change the filter and fill the engine with fresh oil to avoid oil change problems later. Carefully inspect the oil plug and make sure there are no leaks.
What to do if the heating battery leaks during the cold season? The main thing is not to delay! The flow of water can intensify at any time, ruin floor coverings, walls, furniture and flood neighbors. It is necessary to repair the damage immediately, at the first sign of a leak.
Contents of the article
Batteries and adjacent pipes are constantly exposed to pressure, high temperatures and impurities contained in the heat transfer fluids.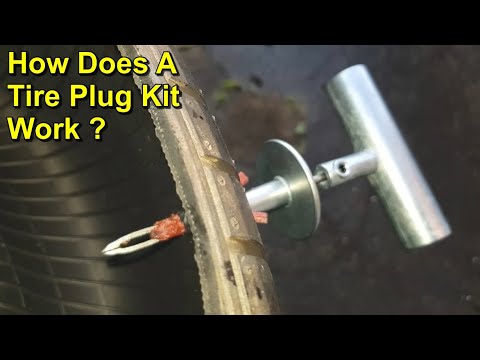 Therefore, over time, materials break down and leaks occur. The longer a radiator is used, the more likely it is to leak.
What causes leaks:
 Too hot water in the pipes mainly affects old radiators and cheap Chinese aluminum and bimetallic models. Modern, high-quality radiators are not afraid of overheating. An example of such heating devices is the batteries of the Teplopribor company, which operate at a coolant temperature of up to 110 degrees.
 There is an opinion among residents that a small radiator leak is not worth attention. They are sure that over time this place will “boil” and the heater will stop flowing.
But often the situation ends badly - at some point the leak increases sharply, the water floods the room and apartments downstairs.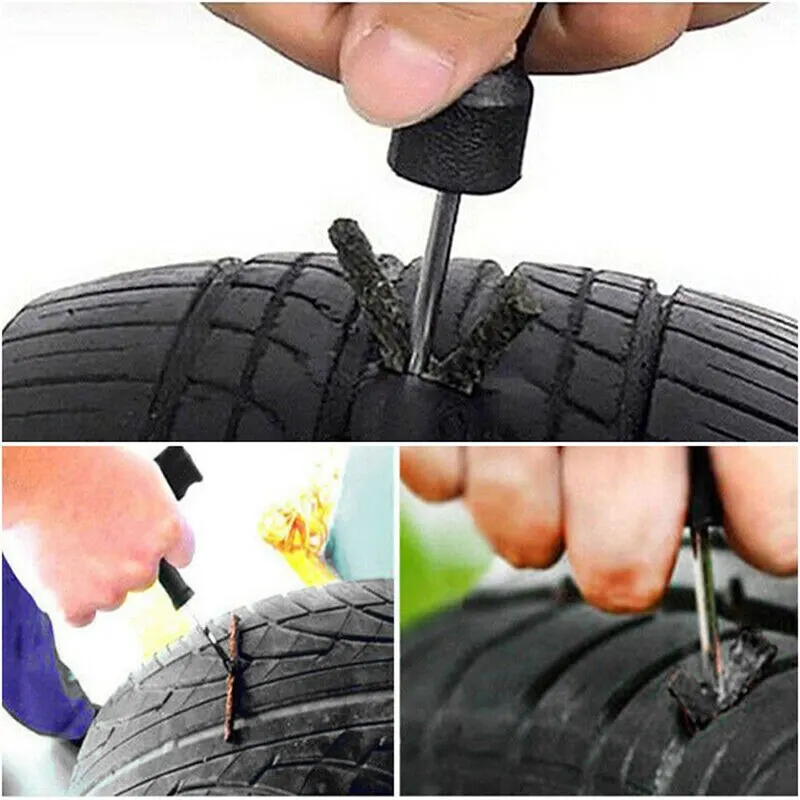 Therefore, if the radiator digs even a little, it needs to be urgently repaired.
It is important to take immediate action:
 This is explicitly stated in clause 6 of the Rules for the maintenance of common house property, approved by Decree of the Government of the Russian Federation of August 13, 2006 No. 491, as amended. dated 06/29/2020. This position is confirmed in the letter of the Ministry of Regional Development of Russia dated 09/04/07 No. 16273-SK / 07, and in 2020 it was repeatedly supported by the Supreme Court.
 However, the Criminal Codes do not always comply with the laws, and the arrived repairmen often simply block the line, and the owners themselves have to deal with the repair of radiators. It is not always possible to quickly hire specialists, so it is advisable to have an idea of \u200b\u200bhow to fix leaks in batteries yourself. These skills will also be useful to the owners of private houses and summer cottages, who themselves monitor the state of the heating system.
Meet the radiators teplopribor
Watch video
Benefits of TEPLOPRIBOR
radiators Reliable and durable
- operate at pressures of 16–20 atm.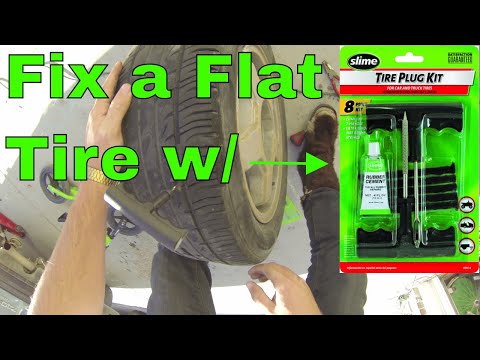 and withstand surges up to 30 atm. Their service life is from 25 years.
Have a long warranty
- 10 years for aluminum models,
for bimetal models - 15 years.
Composed of 90% Russian materials
- We work with raw materials obtained directly from leading Russian smelters and domestic components.
Suitable for various heating systems
- can be installed in one-pipe, two-pipe, independent heating systems with top and bottom connection.
Light and compact
– the company produces
radiators with a mass of one section from 1.06 to 1.94 kg. Their size ranges from 400x80x90 to 567x80x90 mm.
Powerful
- heat dissipation of 500mm products is 185W - 191W,
and 350mm products are 134-138W. According to this indicator, they are not inferior to world brands.
You can fix defects in the radiator housing in different ways:
All these measures have only a temporary effect. A battery that has already dripped is likely to depressurize again. Therefore, it is better to replace the radiator, especially if it has worked for more than a dozen years.
Various sealants can be used to repair batteries:
There are special sealants for the heating system, which can be used to repair even damp radiators and pipes. This is convenient because you do not have to wait for the leak to dry out.
Clean the area around the defect to remove paint and rust before applying an airtight filling.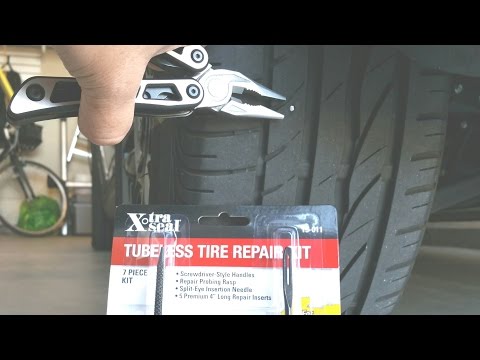 It is convenient to do this with a stone for sharpening knives (whetstone). Degrease the surface and apply a sealant to it so that it completely closes the leak and protrudes slightly beyond it.
Wait until the adhesive, sealant or cold weld is completely cured. Previously, it was impossible to supply water to the pipes - the liquid would destroy the seal and the radiator would again begin to dig and leak.
This is how pipes that fit into the radiator are repaired. Take a rubber gasket, wrap it around the damaged area and put an aluminum clamp on top.
If no clamp and spacer are available, cut a patch of the correct size from a bicycle tire, wrap it around the pipe and secure it tightly with wire.
This method is also used to seal pipes leading to the battery. Dilute a small amount of cement with room temperature water to make a mixture that looks like thick sour cream. Soak a bandage with the solution and wrap the damaged area with such a bandage.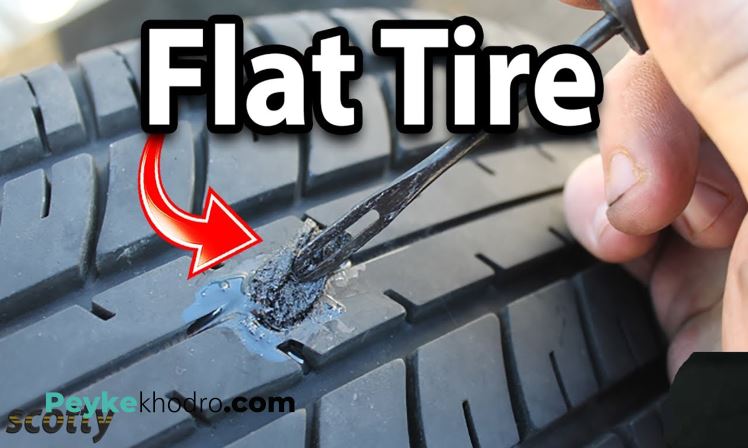 The battery can be used after the solution has hardened.
To speed up the work, you can replace the cement with alabaster, diluted with water to a creamy state. The alabaster solution sets instantly, so you need to close the leak quickly.
Seal leaking joints between battery sections. Take a moisture-resistant glue that is resistant to high temperatures, saturate the fabric with it and place the patch on the defect. Wait until the glue dries, and only then open the supply valve.
The surest way to get rid of a leak is to weld it up. To do this, you need to turn to professional welders who have the tool and the necessary skills. An attempt to do this on your own will end badly - the weld will quickly begin to leak and become unusable.
All proposed measures are temporary. At the first opportunity, you need to invite a craftsman who will weld the defect, or better, replace the heater or a rusted pipe.
First you need to determine where the coolant is leaking from. These can be sections, connections between them, joints between radiators and a pipe, and the pipes themselves. Then repair using one of the methods described below.
Remove paint and rust from damaged area. To do this, you can use tools for grinding, solvents and liquids such as "anti-rust". Be sure to make a small allowance, capturing neighboring areas. Clean the cleaned metal surface with sandpaper or a stiff brush.
Repair the defect with metal epoxy, which cures in five minutes. Cold welding is also suitable - but then you will have to wait 2-3 hours for drying.
Plug small defects with a wooden wedge. Drill the fistula a little into sections and drive a plug into the resulting hole. The wood will swell from the liquid, and the battery will become airtight.
Remove paint and rust from the metal in the damaged area. Prepare the epoxy as instructed and apply it to the defect. You can cover up the leak with cold welding or wrap it with a cloth moistened with moisture-resistant heat-resistant glue. Turn on the batteries only after the patch has completely dried.
Inside such a connection there is a seal - linen tow or fum-tape, which lose their properties over time. To restore the tightness of the joint, the sealing material must be replaced.
Take a wrench and use it to unscrew the connection. Remove the old seal and replace it with a new one. You can use linen tow, lubricated with plumbing sealant, or fum tape. Then screw everything back.
If the failure is caused by corrosion at the joint, the situation cannot be corrected on its own. It is necessary to call a master who will weld the defect or replace rusted elements.
A leak can be sealed with plumbing rubber and a clamp.