By Justin
Justin is a cofounder of ESG and has a degree in engineering. He writes about the science and technology of electric scooters.
FacebookTweetLinkedInPin
Protecting your electric scooter’s tires with slime (also called tire sealant) is one of the easiest ways to prevent flats. Electric scooter slime is a also a quick way to easily repair a flat tire. This guide teaches you how to do it.
Electric scooter flats are the most common type of repair needed for electric scooters, according to our survey data.
Whether you have inner tube or tubeless tires, tire slime is one of the best ways to prevent flat tires. For tubeless tires, make sure you buy tire slime designed for tubeless tires (though most scooters have inner tube tires).
What we like about this tire sealant is that it is cheap, easy, and fast. The procedure to install the tire slime is the same on all electric scooters.
Tire slime or tire sealant is an inexpensive and often brightly-colored mixture of glue, binders, and synthetic fibers that are injected into your electric scooter’s tire. When the tire spins around, the electric scooter slime will coat the inside wall of tire. If a sharp object punctures your tire, the air pressure will force the tire slime out of the tire and into the puncture. Once the slime has filled the puncture and contacted outside air, the slime will cure through the process of polymerization, sealing the hole.
The tire slime will also work to fix electric scooter flat tires that have already developed. In this case, the tire is injected with tire slime and manually rotated to coated the inside of the tire. The tire is then reinflated with a pump. Pressure from the pump will force the slime into the puncture where it will polymerize and seal the tire.
Note: tire slime will not repair large tears or punctures.
Pneumatic tires have huge benefits compared to solid tires, however they require a little extra care to prevent flats. You can read about the benefits of pneumatic tires in our tire guide.
Slime is one of the easiest ways to prevent flat tires and is quite effective. For more ways, check out our guide to preventing flat tires.
To find electric scooters with pneumatic tires (or with airless solid ones), try our electric scooter comparison list. It lets you sort and filter electric scooters by specifications like tire type.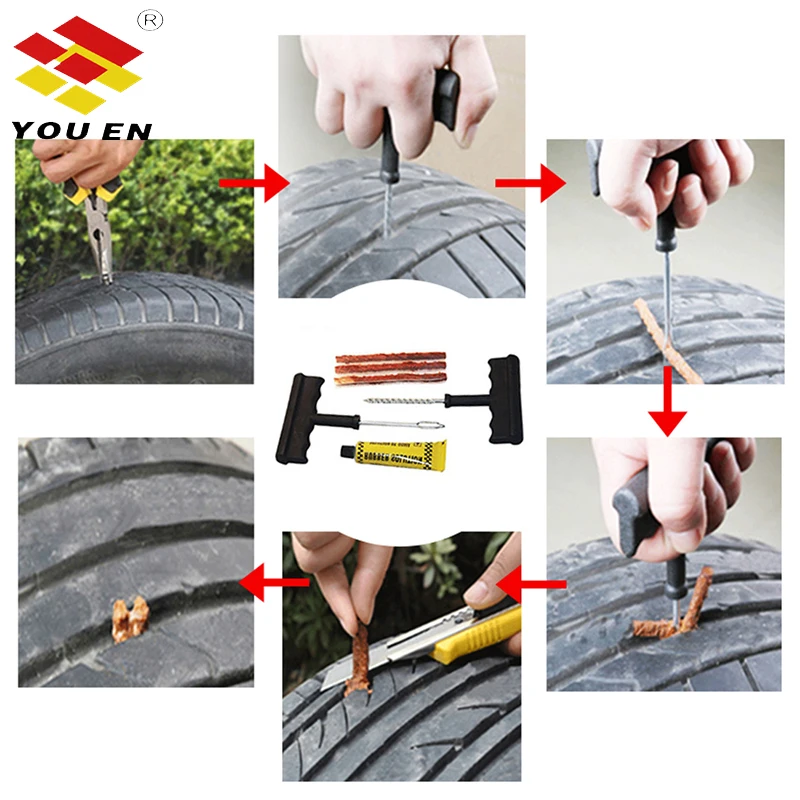
Share
Comment
Discuss in Our Forums
About the Author
Justin
Justin is a cofounder of ESG and has a degree in engineering. He writes about the science and technology of electric scooters.
Learn more about the author
It’s never fun when it happens, but it’s a fact of life – pneumatic-tire electric scooters get flat tires. The risk of a flat tire will always be present, but after years of using my Xiaomi M365 Pro (notorious for flats), I’ve developed a checklist of a few simple steps that go a long way to prevent flat tires in electric scooters.
And luckily, even if a flat happens to your scooter, you can fix or mitigate it rather easily.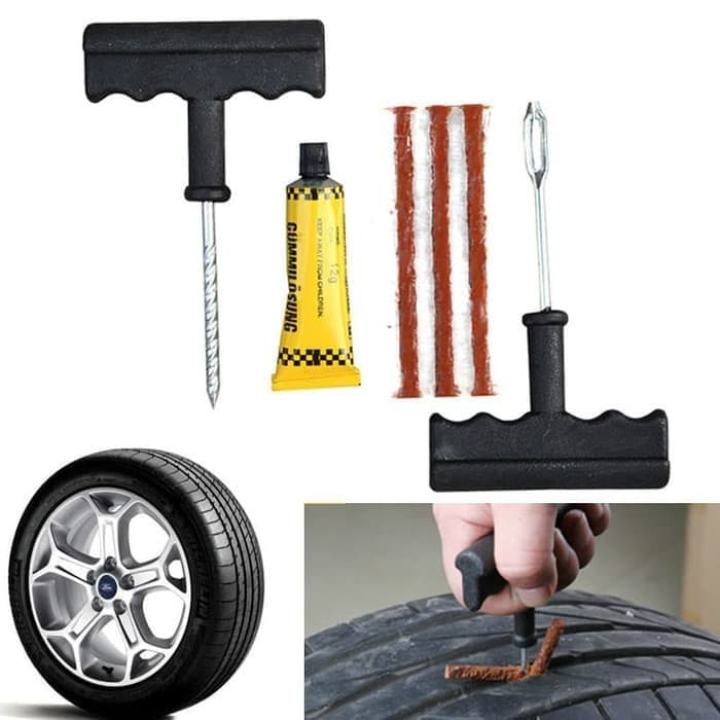
If you get a flat tire on your scooter, stop riding immediately. Riding with a flat tire will irreversibly damage your rims. Get your scooter to a repair shop, or use one of several methods to fix the flat yourself.
Let’s take a deeper look into the reasons why flats happen, how common are they, and exactly how to prevent, and possibly eliminate them.
There are several reasons why a flat tire can happen to your scooter.
The first one is a sharp piece of debris puncturing your tire. This can be any object that penetrates the inner tube, including glass, nails, wood, anything that’s sharp and hard.
The second reason why flats happen is because of a strong impact. This can happen, for example, if you hit a sidewalk while riding fast, or ride fast over rough terrain.
The third one is more pressure applied on the tire than it can handle. Usually, this happens to older, worn-out tires, that have taken some abuse over time.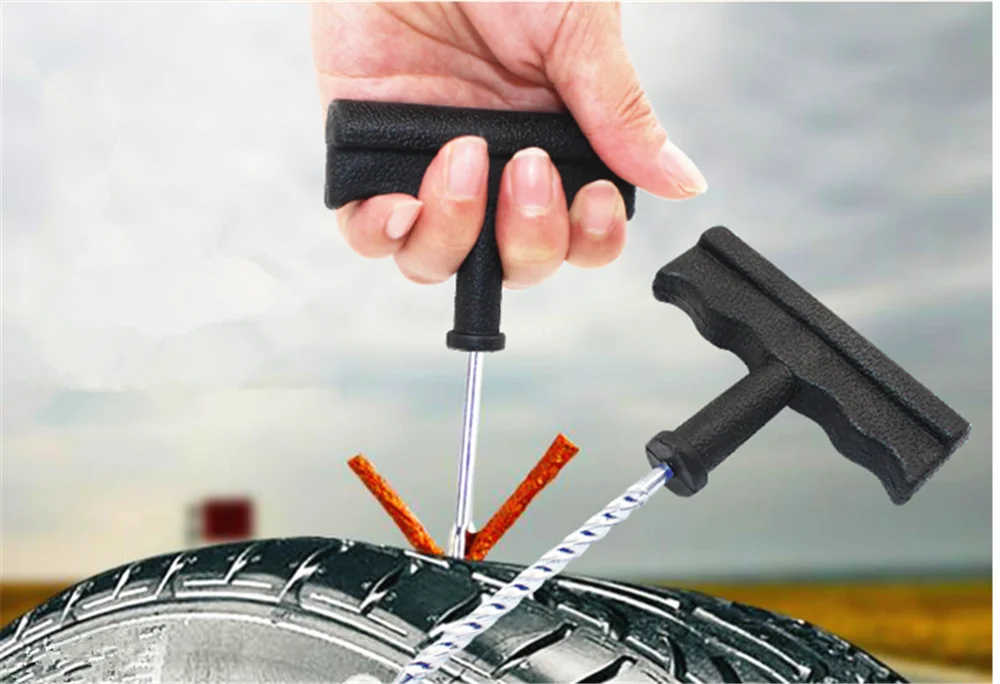 Often, they are under-inflated as well, which greatly increases the odds of getting a flat.
Also, related to the above, you must ensure that your tires are inflated at the correct tire pressure. Both over-inflated and under-inflated tires can easily result in flats.
The final and least frequent reason is improper installation of the tire. Your scooter will arrive with the correct installation 99.99% of the time. You only need to make sure that if you or a mechanic replace a tire, it is properly installed.
Flat tires in electric scooters with air-filled tires are still pretty common, and are one of the most frequent scooter defect types. This is especially true for inner-tube tires. With any popular scooter, on average, you may get one flat every six months.
Further, there are two different types of air-filled tires :
If your scooter has inner-tube tires, the chances of a flat are bigger.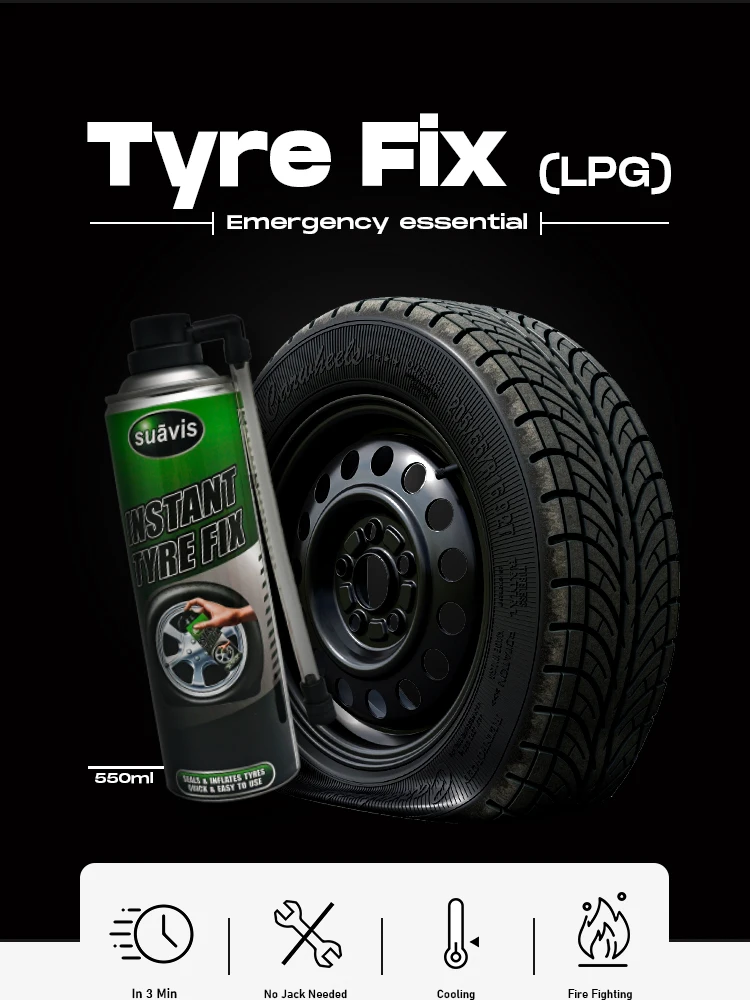 Inner-tube tires are more common than tubeless tires.
In scooters with bigger, patterned tires, or scooters designed for off-road experiences, flats are less common. These models are built to take more punishment on rough terrains, so you won’t get a flat because of a small piece of glass on the street.
Flats don’t happen to models with solid tires. However, solid tire scooters come with many tradeoffs, and may not always be a good solution. We will examine these tradeoffs below, and see whether a solid-tire model would make more sense.
Flats are somewhat common, and you shouldn’t panic if they happen. Let’s see how to address them.
There are three main ways to fix a flat tire.
The basic method to fix a flat involves:
However, this process can be very complicated for some models. Sometimes, removing the tire means you need to remove a lot of the parts around the wheel. Or maybe, installing/uninstalling the tire is very complex or requires tools you don’t have.
In that case, consider the second method, which is fixing the tire without removing it.
The third method is taking your scooter to a mechanic.
Let’s examine the first two methods further.
You will need the following tools:
Before you start:
 If you lose a screw or some important part, you will have to order a new one and wait for it to arrive (not fun!). I just get a plastic box and put everything in there when I’m doing something like this.
Start by releasing all the air that may have remained in the tire. Unscrew the valve and press inside it with the Allen key to deflate it.
On many models, you will have to continue by removing the plastic covers around the wheels. Use the appropriate Allen wrench key for this, it should have arrived together with your scooter when you first bought it.
After that, you will have to loosen the nuts around the wheel from both sides, so that you can remove them. Use a wrench for this.
Remove the wheel of the fork. Be careful not to scratch or damage any parts.
Then, using tire levers, remove half the tire from the rim. Don’t remove it entirely, just have half of the wheel “protruding” through the tire, like concentric circles. You can use a solution of water with dish-washing soap to make the removal process easier.
Now, here’s the tricky part. You will have to dig with your fingers between the wheel and the tire, and find the inner tube. Remove it.
Only then proceed to remove the wheel from the tire completelly.
We are standing at a crossroad now. You can decide to replace the tube, or repair it. This will depend on how badly was it was damaged – if the holes are too big, use a new tube.
If you want to try and repair the tube itself:
After you have the tube, either the repaired or the new one, clean both the inside of the tire, and the wheel itself. You don’t want any debris there – it will puncture your tire again in no time!
Now, you have to put the tire back on the wheel. Make sure the tire direction is the same as when you started. Usually, the arrows in the pattern point down.
Then insert the tube between the wheel and the tire. A small but very effective trick here – start with the valve first.
Use the tire levers again, to put the tire back around the wheel.
Inflate the tire using the tire inflator. Make sure it doesn’t leak any air. If your inflator has a gauge, make sure you pump the tires to the pressure that your scooter’s manual recommends.
When it doesn’t, put all the parts back into place. Make sure you tighten everything nice and strong, but not so strong that the wheel has trouble spinning. The wheel must be able to spin freely after you put it back on.
Congratulations, you repaired your flat!
I know this entire process is difficult to understand through text only. Here’s a great video demonstrating how to install a new tube on a Xiaomi M365.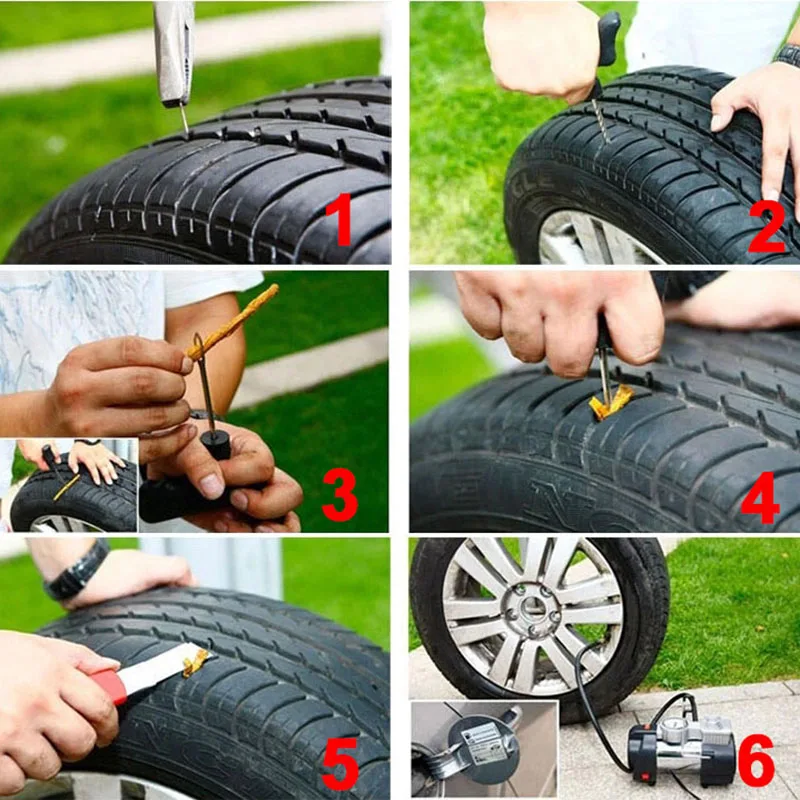
And another great video, this time showing how to install the tire but also repair the tube itself, also on a Xiaomi M365.
With some scooter models, you have to basically disassemble half the scooter just to remove a wheel.
If you don’t feel like doing that, or you don’t have the necessary tools, you can consider a simple, cheap, quick way to repair a flat. However, it will only work for small punctures – big damage and blowouts will not be fixed with this method.
What you will need:
With this method, you just:
The best thing about Green Slime is that not only you can use it to fix flats, but you can also use it before a flat happens to prevent flats!
You can find Green Slime on Amazon here, the 32-ounce bottle is much better value than the 8-ounce one.
Here’s a great video of repairing a flat tire with Green Slime.
Even though fixing a flat can be easy (and even fun if you enjoy tinkering with your scooter), it’s still a headache.
To avoid flats as much as possible, you need to follow a healthy maintenance routine, but also apply a few extra tricks.
Regularly inspect your tires for damage. Remove and clean any debris or junk stuck in or around the wheels.
Before every ride, an old-school kick in the tire will suffice. I recommend measuring the tire air pressure and making sure it’s sufficiently inflated at least once a week.
Further, you should ride as safely and responsibly as possible. You may be surprised, but sharp objects are actually less common reasons for flats. More often than not, the rider carelessly riding at great speed and hitting something is a bigger risk. Follow these steps to prolong your tire life when riding:
Before we go on with the more advanced tips, a recommendation – don’t fix what’s not broken. These methods all require tinkering with the tires.
If you’ve never had issues with your tires, you can skip this section. Unless you’ve had a flat, these methods may be more trouble than they’re worth.
But if you’ve already had a flat, they are very easy to apply.
Still, it is recommended to only choose one of them, as it hasn’t really been tested if they work well together.
We already mentioned that Green Slime or another sealant is a great way to prevent further flats. You can definitely use it as a preventive matter in any case, but I’d consider it only if I’m fixing a flat already. From all the advanced methods, this is the one I would recommend.
Another great tip in case you’re already replacing your inner tubes would be to get heavy-duty, thorn-resistant inner tubes. These will be a bit more expensive, but they will definitely last longer. I would recommend this solution if you live in a city with lots of debris on the streets.
Further, you can consider anti-puncture tape, or tire liners, to make your inner tube more resistant to flats.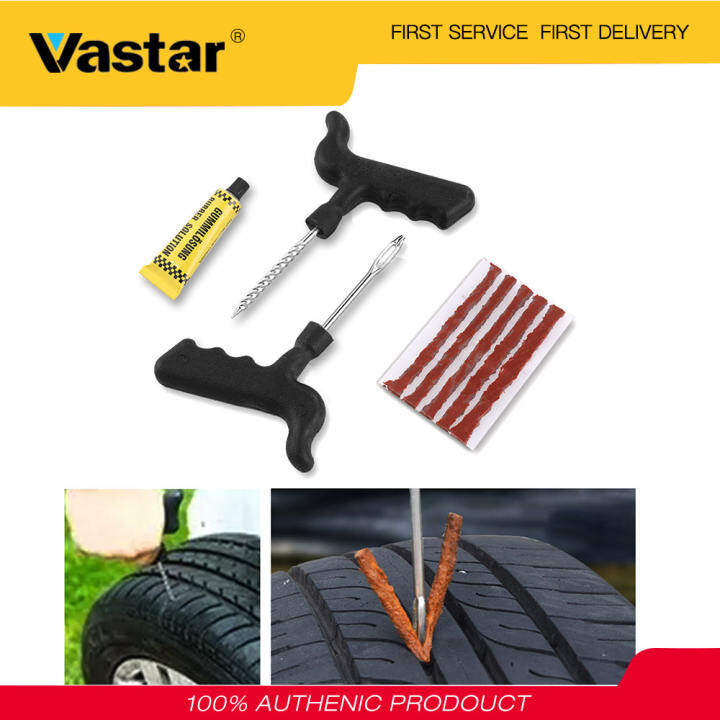 It is a hard, rubbery tape that you tuck between the tube and the tire. You will need to deflate the tire first.
You can find the best anti-puncture tape, Mr. Tuffy on Amazon.
Here’s a great video demonstrating the process on bike tires.
Finally, one drastic preventive measure is to replace the tire, the tube, or both, if they are worn out. This is the most expensive, most complex step you can take to make sure you don’t get a flat, but I would only recommend it if you’ve had your tires at least for 5 years and you’re starting to notice they’re wearing out.
If you’re constantly getting flats, even after you’ve tried some methods to reinforce your air-filled tires, then you should seriously consider getting a scooter with solid tires.
Some places and environments are simply too much for the average air-filled tires. Many cities are full of small pieces of junk and debris that are unforgiving to the typical 8. 5-inch tire.
But the downsides of solid tires are numerous. Besides your rides being very shaky and uncomfortable, you will also get poor traction, fewer options for adjustments, and in some cases worse performance overall.
Plus, it’s not like you’ll buy one pair of solid tires and you’re set for life. Solid tires wear out as well, oftentimes even faster than pneumatic ones.
To learn more about the different types of tires, and how they compare to each other, check out our full solid vs pneumatic tire guide.
This is a great rule of thumb: if you’ve had more than 3 flats in a year, only then consider getting a solid-tire scooter, or replacing your air-filled tires with solid ones.
Want to get cool tips, exclusive discounts and promotions, and unseen scooter hacks? Join Scooter Secrets.
Join Now
Matt Trajkovski
I love electric scooters, so I decided to make a blog about them. I like doing a lot of research on various models and brands, looking for great value and performance, both through data and experience.
Miscellaneous
Author: Admin
From my own experience, I know that our scooter brother is not very favored by tire fitting workers. Until you find someone who wants to take your own money from you, you will knock down all your legs, but how much time will you lose? Therefore, in order not to cause unnecessary fuss, I glue the tires myself, it turns out much faster and cheaper.
There are two ways to seal a tubeless tire: fast (lacing) and good (patch). On the advice of his friend (tire fitter), lacing is a pure "collective farm". In normal tire fitting shops, lacing is not done. Although, somewhere on the road, lacing the tire can help out, but this is only in an emergency.
For repairing a tire, this not very expensive kit, which is sold in any car shop, is quite suitable. I also bought smaller patches in addition to it.
First, remove the tire from the disk, as it is written in the article: How to disassemble the wheel of a scooter We look for a puncture site and on the inside of the tire with ordinary sandpaper we clean the area a little larger than the patch itself.
We remove dust from the place where the adhesive was applied and thoroughly degrease the surface. We apply a thin layer of glue from the kit to the place of gluing, let it dry a little, remove the protective foil from the patch and apply it in place, then carefully roll the patch with a roller.
The camera can be sealed in the same way.
LabelsTires
Find: Scooter is not gaining speed
 acceleration biker Ducati honda Honda dio Kawasaki motorcycle suzuki yamaha Yamaha R1 Variable speed drive Evgeny Matveev Workshop Pit_Stop Scooter New format piston scooter Adjustment and maintenance of scooters Removing components and mechanisms of the scooter Scooter fuel system buggy bmw choice kawasaki how to do buy best moto compilation 2019 mokik moped moto motorbike setting does not start review preparation repair moped repair scooter repair scooter repair Roman Buyanov scooter scooterpro sportbike tuning scooter tuning acceleration
The motorcycle gives a feeling of freedom, allowing you to discover new routes.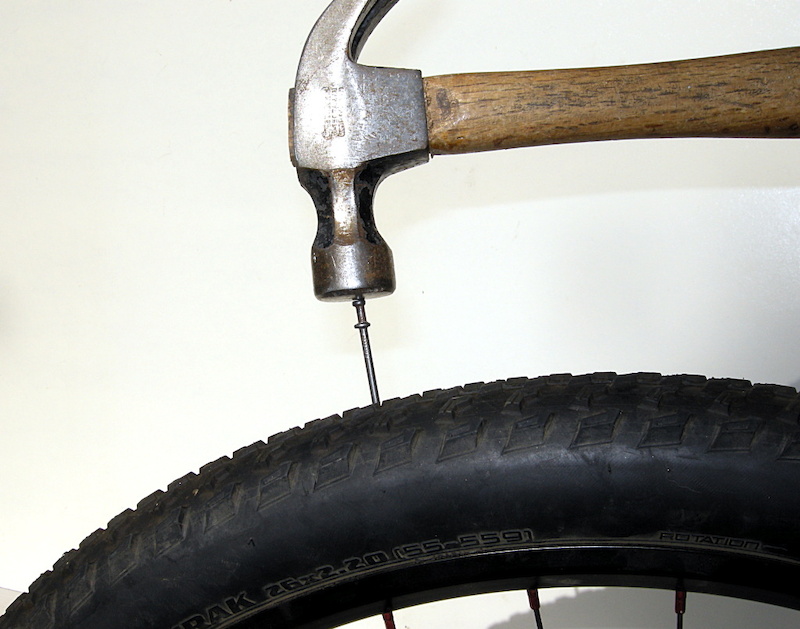 However, in reality, this freedom can turn into a trap in an instant if you are unlucky enough to puncture a tire somewhere in the middle of the road. The feeling of annoyance will be ten times stronger if there is no way to fix a punctured wheel. At this point, it remains only to hope for cellular communication and help from other drivers on the road. Therefore, consider the basic recommendations for repairing a motorcycle tire on the road.
Always keep a rubber band or tire repair insert in the trunk. This simple tool will add peace of mind on the road. It will be much better if you learn how to use it in advance. You don't want to be the guy who has the right tool but lacks the skills to fix a problem, even something as simple as fixing a tire, do you?
The repair technology for tube and tubeless tires is different, but both types are subject to restoration (at least to such a state as to get home). Repairing a tubeless tire is easier. Repairing a tubed tire requires removing the wheel, removing the tire, and removing the tube to install the patch.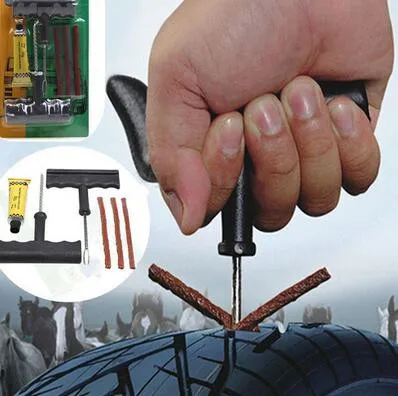
So you run over a nail, screw, glass, or that damned sharp stone and punctured a motorcycle tire. If the object that caused the damage is still in the rubber, the first step is to remove it. Pliers are great for this. Therefore, you should always keep this tool in the trunk: with it, you need to grab an object sticking out of the tire. Try to pull it out along the same path that it entered the tire so that the puncture does not increase and become torn.
After removing the object, clean the edges of the pierced hole. To do this, the repair kit must have a special tool - a tool for cleaning holes. All debris and rough edges must be removed to create a surface for patching.
Then you need to install a patch. Different kits offer different types of patches, so you should read the kit's manual to complete this step correctly. However, there are two main types of patches: long cord patches and fungus patches. Some kits may include adhesive to bond the patch to the tire rubber.
Patches or cord inserts are supplied with an awl for installation. It is necessary to bend the cord in half, and thread one half into the tool. This is necessary for a tight fit of the material. Next, bring the cord into the hole until it protrudes about 1 centimeter above the tire. Then you can pull it out of the awl and put the tool aside. Take a knife and cut off the excess patch material by about 0.5 centimeter.
Fungus patches (plug and play type) require the use of a special tool for installation. Again, you must follow the instructions for the specific repair kit. Then stretch the patch material with pliers. When the puncture is closed, you can cut the patch over the tire.
After installing the patch, the tire needs to be inflated. For repairs on the road, you will need either a 12V electric compressor that can be connected to the motorcycle's electrical system, or a CO bottle 2 . Carrying a compressor with you is not always convenient. A more compact and more portable option is to use the small CO bottles 2 in combination with the tire inflator. This is the fastest way to inflate tires on the road.
If possible, apply some soapy water to the patch to make sure it is airtight. If there is a leak, you will see tiny air bubbles around the repaired area.
On-road retreading of tube tires is a more labor-intensive process. If your motorcycle is equipped with such tires, then you will need a few more tools to repair them. In most models, you will have to remove and disassemble the wheel in order to get to the camera. The vehicle owner's manual should describe how to do this and what tools to pack in your luggage. In addition, you will need a tire removal tool. It makes the job easier.
Once the inner tube has been removed from the wheel, the remaining air must be completely bled out. The next step is to prepare the camera for patching. The repair kit should include a special scraper to roughen the surface around the punctured hole. This treatment is necessary to ensure adhesion of the patch to the chamber material.
After completing the preparation, you can start installing the patch. Follow the instructions in the repair kit manual. Some patches come pre-applied with adhesive, while others require the use of the included adhesive. It is necessary to place the patch on the damaged area of the tire and lap it firmly, moving from the center to the edge, to ensure a snug fit without air bubbles.
Now that the tube has been repaired, the tire needs to be checked to make sure the object that caused the puncture has been removed from the tire. Then you can install the camera and tire in place, after which it remains only to pump it up. If possible, the tire should be checked for leaks.
So, after retreading a tire yourself, the best solution is to immediately go to the nearest tire repair shop. Specialists will perform a much more efficient repair, guaranteeing driving safety.