Having those ugly black tire marks on your car can be annoying, especially if they won’t come off when you hit it with a power washer.
So, how do you get those black marks off your vehicle without ruining the paint? It’s tricky, doing it wrong can ruin your paint, so keep reading to learn the proper method!
With the right rubbing compound and some smooth crafty hand or wheel polishing, you can remove tire marks without leaving any paint damage behind. With a quick trip to the parts store for some common inexpensive items, you will be able to remove tire marks, bird droppings, and other problematic paint scares.
If you’d like to learn how to remove tire marks from your car as well as other related facts, keep reading for more tips and information!
Whether from a bike tire, bike handlebars, a basketball, or anything else that might leave some nasty scuff marks, getting them out can be a little challenging.
Most of the time, WD-40 and a lint-free cloth with some texture to it can do the trick.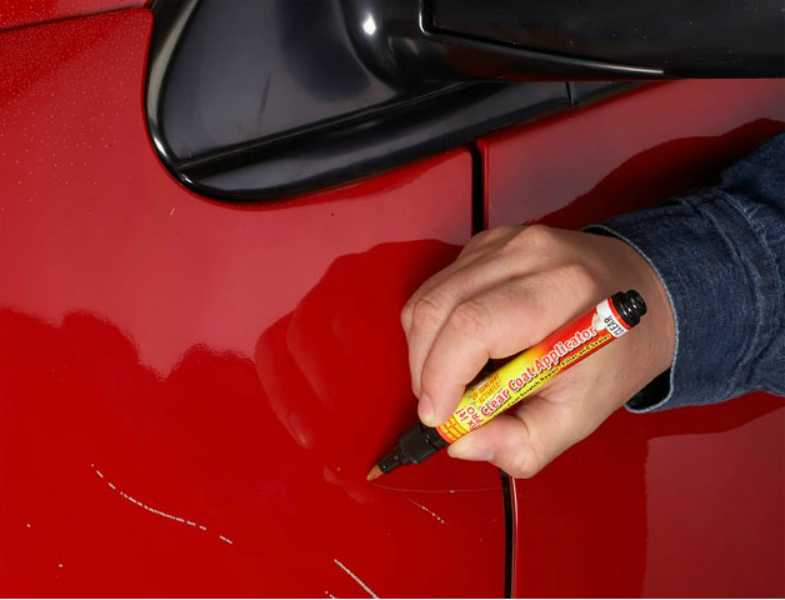 However, remember to use a circular motion when rubbing against the vehicle.
WD-40 could be a temporary fix for very particular events, but they don’t remove scratches. Rather, WD-40 can hide scratches as long as it’s not wiped off.
In fact, with one good wash or rain, all the scratches that seemed to disappear from WD-40 will reappear when it’s washed off.
Rubber marks and rubber scratches are different, and therefore must be removed differently.
Rubber marks are left on top of the paint, meaning you need to get rid of the mark and clean the area.
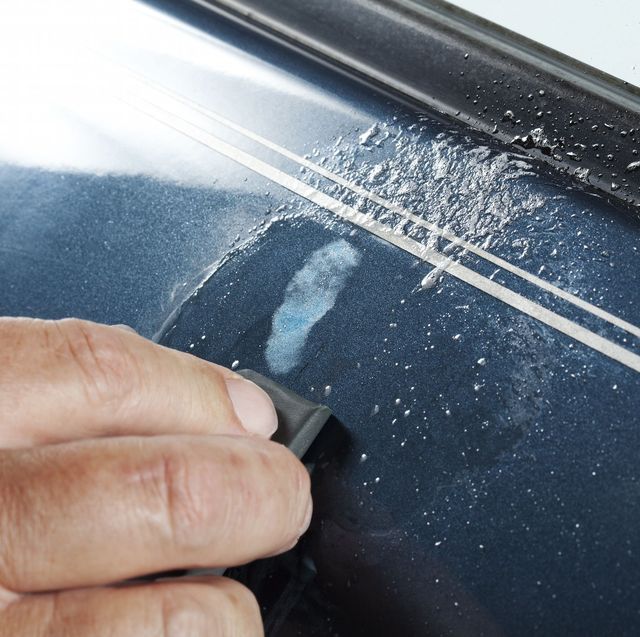
Rubber scratchers, however, are underneath the rubber mark. To cover these scratches, drivers can use WD-40, but will have to use some type of waxed compound to get underneath the clear coat and rub out the scratch.
After you have compounded the area and removed the scratches, you’ll need to wax in some protected polish over the compounded area to bring back the shine.
While Magic Erasers do a good job on car interior goo and grime, do not use one on the exterior of your vehicle.
The Magic Eraser’s coarse abrasiveness will ruin your vehicle’s paint job, which will add additional repairs to your vehicle.
Goo Gone will work for removing tire marks, road grime, and other nasty car problems. However, this is a heavy solution, so make sure you use it with soap and water.
Rubbing alcohol is far too potent to use alone, and must be diluted between 10-percent and 15-percent before it can be applied to a vehicle’s paint.
Without this dilution, the full potency of rubber alcohol will surely ruin, if not remove, the paint on your vehicle. Also, rubbing alcohol should never be used on freshly painted vehicles (which goes for all other heavy cleaning agents).
To learn more, you can also read our posts on how to clean whitewall tires, if you can spray paint hubcaps, and homemade tire shine.
There are a lot of cleaning agents out there that work hard at helping you get tire marks and other rubber, gooey substances off your car’s paint. If done the right way, you will not only get the substances off the paint, but you won’t leave any permanent damage behind.
However, Make sure you read the directions and know what the best practices are for getting rid of the marks on your car without ruining the paint.
social
My husband got hit on the interstate by a piece of tire in the road. It left tire marks on the hood and fender of my car. How do I get it off without ruining the finish of the car?
Advertisement
By Linda Shaffer from Norfolk, VA
Deanj
March 3, 20112 found this helpful
Best Answer
Today's cars have a clear urethane coating over the paint to make the finish more durable. If the tire did not abrade the clear finish you may be able to fix it your self.
First, I would wash the area to see if that removes any of the tire marks. If not, I would purchase a can of adhesive cleaner or tar remover at the auto parts store and rub that on the tire marks. The cleaner will not harm the finish.
If the tire marks are still there then the area should be compounded. You can do that yourself or an auto detailer can do the job. Every car dealer should have a detailer on staff or you can find one in the yellow pages.
Reply Was this helpful? 2
Barbara
March 4, 20112 found this helpful
Best Answer
Take a soft cloth and pour a little cooking oil and apply it to the tire mark. This will not harm the paint of your car.
Advertisement
It worked for me. Then wash spot where tire mark was with a little water and Dawn dish soap. Hope this works for you!
Reply Was this helpful? 2
Beth
Silver Feedback Medal for All Time! 407 Feedbacks
March 5, 20110 found this helpful
Best Answer
An item sold for campers is called Black Streak Remover. I think you can even get it at Wal-Mart near their automotive department where they sell camping related products. I used it on my white car when something got streaked along the side. I think it was a bicycle handle. Whatever it was, this stuff took it off without ruining the finish.
Reply Was this helpful? Yes
Jackie
April 5, 20110 found this helpful
Best Answer
WD-40 will remove tire marks from paint, just spray it on and wipe it off. I have been a mechanic for 34 years and have used that on near everything.
Reply Was this helpful? Yes
Mark J L.
July 3, 20121 found this helpful
Best Answer
Here's an easy and cheap way I removed my problem. I used a paper towel and rubbing alcohol, and it came right off!
Reply Was this helpful? 1
Ask a QuestionHere are the questions asked by community members. Read on to see the answers provided by the ThriftyFun community or ask a new question.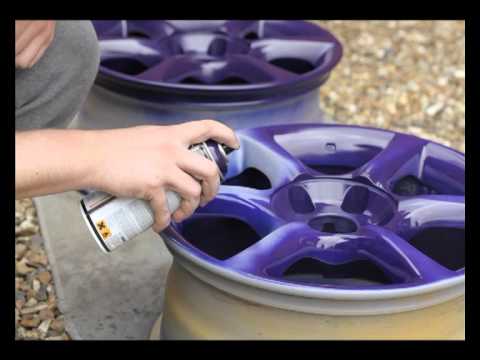
I was hit while traveling on the highway. My car was left with a big tire mark on the passenger side. My car insurance is not going to pay, so I would like to remove the ugly black mark.
Please help me.
Thank you.
poehere
Bronze Post Medal for All Time! 105 Posts
January 11, 20201 found this helpful
Best Answer
Here on Thrifty Fun they have a post that waswritten just for this. They tell you how to remove the tire marks from the car paint.
Advertisement
I think this should help you out and get your car fixed for you. www.thriftyfun.com/
Reply Was this helpful? 1
cybergrannie
Gold Feedback Medal for All Time! 949 Feedbacks
January 13, 20200 found this helpful
Best Answer
It's nice to hear that you will have your problem fixed by professionals.
Should you have similar problems in the future try cooking oil or WD-40 and I think it will work without doing damage to the paint.
Reply Was this helpful? Yes
A bicyclist scraped the fender of my new black VW with his rubber handlebar. It is not scratched, but there is a streak of rubber about 5" long on the side of my fender.
How can I remove it without damaging the paint?
Mary Lou
September 2, 20150 found this helpful
My husband says just wash it off without using anything abrasive, rub it with your thumb and a little water and mild soap or even just water.
Reply Was this helpful? Yes
Try some WD-40.
Reply Was this helpful? Yes
Louise B.
Silver Feedback Medal for All Time! 337 Feedbacks
September 7, 20150 found this helpful
I agree with other posters. I think it would rub right off with a soft cloth.![]()
Reply Was this helpful? Yes
Harlean
Bronze Post Medal for All Time! 148 Posts
January 15, 20160 found this helpful
Try some Awesome cleaner on a paper towel.
Reply Was this helpful? Yes
Anonymous
April 11, 20160 found this helpful
use wd40 and paper towel
Reply Was this helpful? Yes
msjelo99
July 21, 20160 found this helpful
I had two small nail polish marks near the door handle on my 2016 Toyota. I am sure I scuffed it with my nail when getting in my car. I wet the end of a cotton swab and dipped it in baking soda.
Advertisement
I rubbed it gently on the surface and then rubbed with a little more pressure with my thumb. Then I just wiped with a damp soft paper towel. It took the polish right off.
Reply Was this helpful? Yes
kishor0369
August 26, 20160 found this helpful
I have a issue related to wooden polish felt on my car exterior (on main screen mirror & left side body). How can I remove it without damaging the paint? Please arrange to create the solution on urgent basis.
Reply Was this helpful? Yes
ThriftyFun is one of the longest running frugal living communities on the Internet. These are archives of older discussions.
Published by ThriftyFun.
Desktop Page | View Mobile
Disclaimer | Privacy Policy | Contact Us
Generated 2022-10-24 10:24:44 in 3 secs. ⛅️️
© 1997-2022 by Cumuli, Inc. All Rights Reserved.
https://www.thriftyfun.com/tf92408695.tip.html
When the idea arises to remove liquid rubber from a car, the question immediately arises "How to remove plastidip from the car? In what sequence is it better to do this and what to pay attention to? Therefore, today we will show a full video on removing liquid rubber from a car body, we will go through all the steps from start to finish. All videos have Russian subtitles and comments, so no one should have any questions or difficulty understanding the material. Watch, enjoy and subscribe to our youtube channel about PLASTI DIP.
I would like to believe that the video was able to clarify or provide answers to some questions about questions about how to remove liquid rubber from a car. Be kind, go to our YouTube channel, subscribe to the channel and press your thumbs up, it will help us. And below we will give a short text from the video of instructions for removing the plastidip from the car.
Hello friends, this is Fonzie DipYourCar. Today we'll be working with a matte red S4 that has some metallic chips on it, but next the color for this car is prepared glossy white plasti dip.
And to your question "How to remove liquid rubber from a car?" I have only one answer "Hands!" and show the whole process of removing liquid rubber from a car.
We don't want to paint glossy white over metallic red so we need to remove the Plastidip from machine and return to factory black.
So this is Fonzie DipYourCar we're filming PLASTI DIP with an Audi S4 let's go.
The first thing we will do is to remove liquid rubber from one part in turn. The whole withdrawal process liquid rubber plastidip depends on how correctly it was applied: whether you painted it with the right distance, whether you applied enough layers of plastidip on the car, for example.
If you paint from a long enough distance, the liquid rubber will have poor grip. She will be removed from the car, but not in very large pieces.
If the car is painted with thin layers, not enough layers, the plastidip will be removed anyway, but again or in small pieces.
This particular car has 3 layers of purple plastidip, 2 or 3 layers of red liquid rubber. Total 6 layers and a metallizer is also spray-painted on top. Anyway, let's summarize that there are 6 layers of Rubber Dip S.
The first thing to do is just pry off the corner. Right here, we'll start from this corner of this detail.
When we start to lift up the corner, for the place to pull to the middle of the part, you need to carefully lift it along the entire area of the corner of the part. Then I'll go to the other side of the corner.
When a large enough piece of plastidip has appeared, I can pull it to the center of the part gently down.
If there are turn signals, like this one, the liquid rubber, when removed, should gently bend it along the contour. There may be a small amount of dust left in the corner, it is easy to clean.
Just pull straight down. Now we go back to the other corner.
Pay attention to the angle around the headlights. Here you need to carefully clean so as not to leave the remains of the plastidip in the corner of the headlight.
Pull straight down. And so we removed the first detail.
After removing the plastidip from the car body, native paint is visible. As you can see, she's fine like before painting. Meanwhile, the plastidip protected her from harm. This is a plastidip from the first detail. Now let's go around the circle and do the same.
In places like this, when there's a rubber band, the plastidip goes into the corner a little bit, so gently pull it out. Well, again, if you shoot quickly and inaccurately, it will remain a small strip of plastidip in the corner of the seal.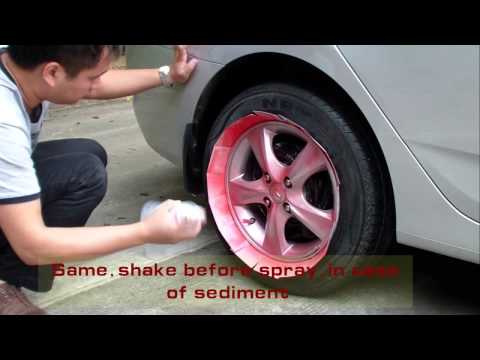 It will be easy to remove with a rag.
Now I try to shoot everything in one piece. About the doorknob. A large piece may break on top of the handle, and it is also sometimes difficult to immediately remove it from under the handle. But that's not a problem, since we'll take a rag and just remove the plastidip from under the handle later.
In this corner, you need to open the door a little to get extra space and carefully pull out the plastidip from there. In places where there is plastic, we usually have an even layer of plastidip. So gently with your finger we pry the rubber from the corner. This should be enough. When there is a gap, like here, try to pull the film in the other side of the gap.
When you remove the plastidip from the rear trunk lid, you need to open it slightly to gain access to all corners.
Carefully lift up any edge.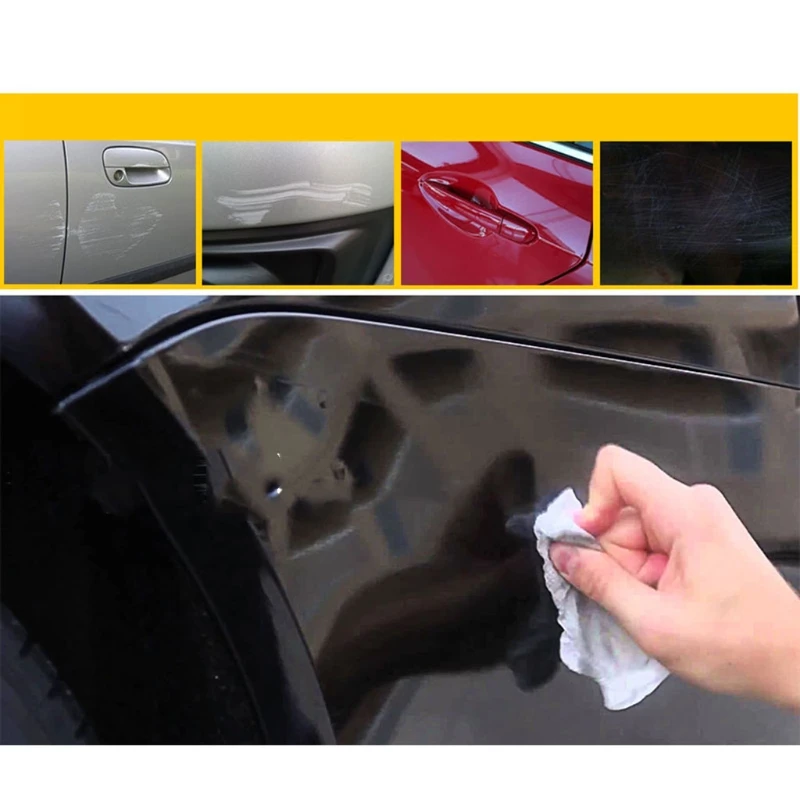 When there is a gap, as here on the spoiler, again we pull the film to the other side of the gap.
So, on this door, to show that anyone can remove a plastidip, we asked Brent from USP Motorsport, this is his first plastidip removal experience.
Now we are at the hood. This is the largest element. And very often when they paint the hood, on some models cars are hard to reach the middle. Therefore, in the middle of the hood we will shoot a little slower, because layer may be thin.
Let's start from one corner. And like before I move along one side. That's the whole hood in my hands.
Here we have removed the liquid rubber from all the details, but this is not the end. I'll show you how to remove plastidip dust, which could remain in the corners. We go through all the lines of the junction of parts, seals, all corners.
We use microfiber, do not rub to a shine, just drive back and forth along the line. Without any chemistry, with a simple rag we will remove the remnants of plastidip. About doors and openings. We have a gap on the body, where the spray remained. It can be removed by hand, but its layer is not very thick. So you can take a rag and just rub.
Well, we removed all liquid rubber from the car. There is only one thing worth doing. Because when we remove the plastidip, we slam the whole machine with our fingers. So we'll go outside and wash it.
Well, that's all, this is our S4, which is ready for the next projects. Ease of removal of plastidip from the car depends on how well it's applied. If the liquid rubber was painted from too far away, or few layers were applied, it will come off, but not as easily as it was for me today.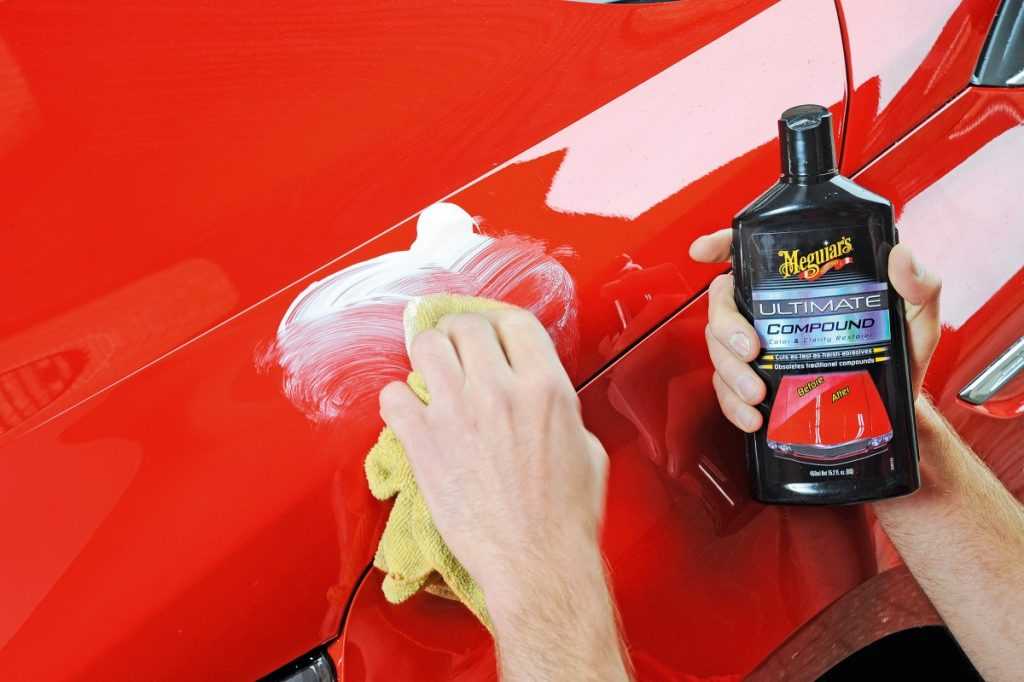
Therefore, a key factor for success when removing a plastidip from a car is following the instructions. Apply liquid rubber correctly, paint enough layers of PLASTI DIP. And that's all it takes.
0071
Elegant Taliban started repairs in the yard.
Painted the curbstone psychedelic. ? because narrowly - I thrashed the wheels. Now, on the one hand, I am cheerful, yellow-green, making everyone happy.
Is there any normal means to remove paint from ?in?
You can try a fresh one with a solvent, in theory, we should have oil and petrol resistant rubber, it should not corrode. Try to rub a little kusrchek
I was advised to just paint over the rubber with a blackening agent.
I'll go to the car wash today, maybe they'll do something.
Can Cap park on the other side? For symmetry, so to speak.

Thought about it. If they don't help at the sink, I'll do it.
I don’t think they will help, the composition for blackening the wheels is essentially oil with some additives and it won’t paint over anything
but the idea about the solvent is sound, but I think it will be necessary to dilute it so that it is not very caustic.
Cap, old marine facility - Solvent, wipes everything.
Absolutely no stress for the quality of the rubber, it is washed off with white spirit, turpentine or a solvent for the corresponding paint, there is no harm to the rubber, you can wash the wheel with car shampoo afterwards for peace of mind. The only unpleasant thing is that paint particles are badly removed from the perforation and inscriptions applied on the sidewall of the cover? You will have to sweat.
In general, it’s better not to grind, because the pleasure in terms of labor costs is doubtful.)))
yes, it seems like ordinary gasoline should go away, just rub with a stiff brush
windshield seal. The gum is in good condition, but the previous owner of the car painted it like that. A new sealant for Svyatogor is not cheap.
The photo is not mine, but the condition is similar.
Answers in the comments.
washes very quickly.
also removes dried paint?
Easy! Just be careful not to hit the car!
thank you. I will know
I think there is no point! Under the paint, the gum always comes to hell, and the point is to go through with the cleaning and then see that it does not fulfill its function and throw it away ?!
does the gum dry out and become dull under paint?
You can say so, but rather the paint eats it up, it starts to crumble and loses its elasticity.
Removes well with a knife checked
If just painted over with a base, then a rag and a bit of thinner! If acrylic, or varnish is on top, then soak it in a solvent, but the gum will come to hell! As an option, a paint remover, but first try on a small area! You can use scotchbrite or fine sandpaper P1500-2000. The risks are not visible, the only thing is matting, but this is also being solved. Well, in principle, sooner or later everything will fly off the rubber bands! It only takes time!
Acrylic thinner (thinner for acrylic). As an option - Vika.
I wash it all the time with a paint remover, the result is excellent and fast. The solvent will not take it, you scratch the rubber with a blade for a long time.
thanks for the advice
Cleaned with a cloth and solvent. Wet the rag. I put it on an elastic band and waited for it to soak. After 5 minutes, he scraped and rubbed with a rag again in a solvent. If the gum has dried out (dry) it will be a little more difficult to remove the paint.
Purely from personal experience:
If you use 646m, you can then see that the elastic has become too soft and has lost its shape. I got on the seal at 126. And I cleaned the remaining seals with the help of a freezer. Put the seals in the freezer, and then slowly tore off the rubber breaks (the main thing is not to overdo it)
Source www.drive2.com
A colleague is interested.
Successfully painted the borders in a variety of colors. Well, luckily and managed to grind the whole thing with rubber. Multi-colored such a wheel now.
The question is what can be removed.
thinner. Paint something most likely the cheapest oil.
Was:
VAZ 2107 '03|Kia Rio 1.5 '05|Legacy B4 RSK 2.0 '00|Caldina 2.0 '03
Is:
Mazda 6 2.0'08
.
646th solvent to help you.

Source forums.drom.ru
Automotive Paint Removal Tools and Procedures
paints, primers and everything else on the body panels. There are as many different ways to remove paint as there are types of paint to apply. Many times, especially on older projects, there can be multiple layers of primer, urethane, varnish, and enamels between the bare metal and the outside. Knowing how to strip automotive paint is essential if you want to completely remove each old layer without damaging the metal underneath. .
Matt took the extra hood from the Chevrolet Monte Carlo, which was a great example of this, and used it to show the various mechanical, chemical, and abrasive methods Eastwood suggests for removing old paints and primers. We hope this guide to car paint removal tools and methods will be useful for those who want to make repairs to repaint a project car or a daily commuter route.
Paint removers and safety equipment
Here on the table you can see various sanding, sanding and other mechanical methods to remove paint from a surface.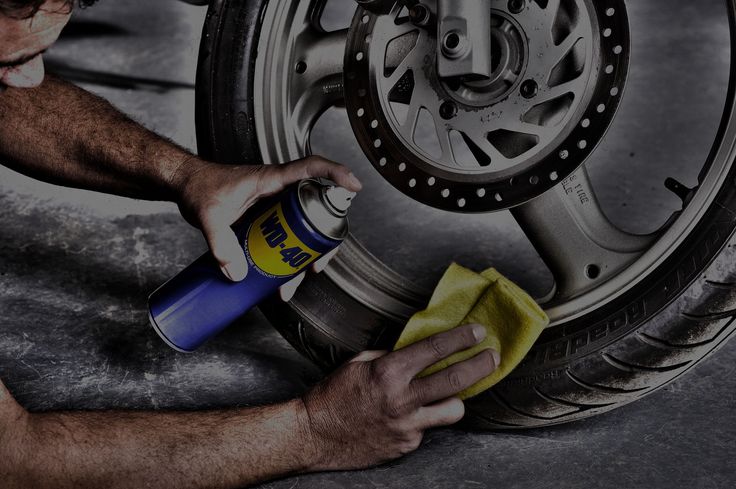 Just behind Matt's elbow, you can see several sizes of chemical paint and Eastwood Gel remover. To the right of the picture, behind Matt, you can see a large blue Eastwood Abrasive Media Blaster for spraying various particles of material onto the panel, which will absorb the paint.
Of course, you always want to wear proper protective gear no matter what you're doing. In addition to the usual hazards when you sand and grind, working on older cars can expose you to lead paint and solder, as well as rust and tetanus. You should at least wear safety goggles and a nose and mouth filter to keep dust out. A pair of durable leather gloves gives you something else to cut or burn before you get to your real skin. When the particles really start to fly, a transparent foldable face shield is also a good idea.
Hand sanding with block
This is the cheapest and easiest method of car paint removal, but only if you don't value your time or are just looking for an upper body workout.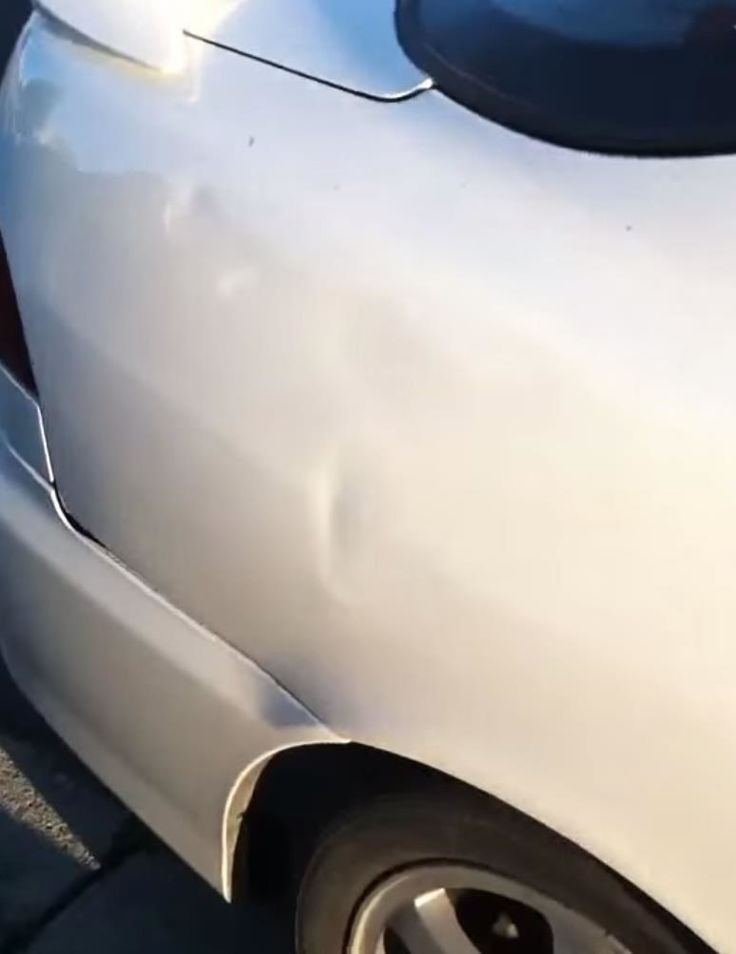 Mr. Miyagi is lucky to have he deceived local teenagers by promising to teach them karate.
The advantages of the paper and sanding block method are that there is very little to buy before you start, it is soft on metal and can get into really narrow, irregularly shaped areas. The main downside is that it will take a year to sand the old paint off the whole car. After 30 seconds of work, Matt was barely able to get through the top layer of black paint and down to white.
Double Action Sanding Disc
Next up is the same 80 grit sandpaper, but this time swirled with a double action sander, sometimes referred to as DA or Random Orbital. This is the best automatic paint removal sander we have found. It works in much the same way as grinding the arms, only air or electricity provides more work instead of the muscles of the arms, shoulders and back.
As you can see, in the same 30 seconds the DA under was able to strip off all the black paint, and in one place Matt focused on three other layers to expose the base metal.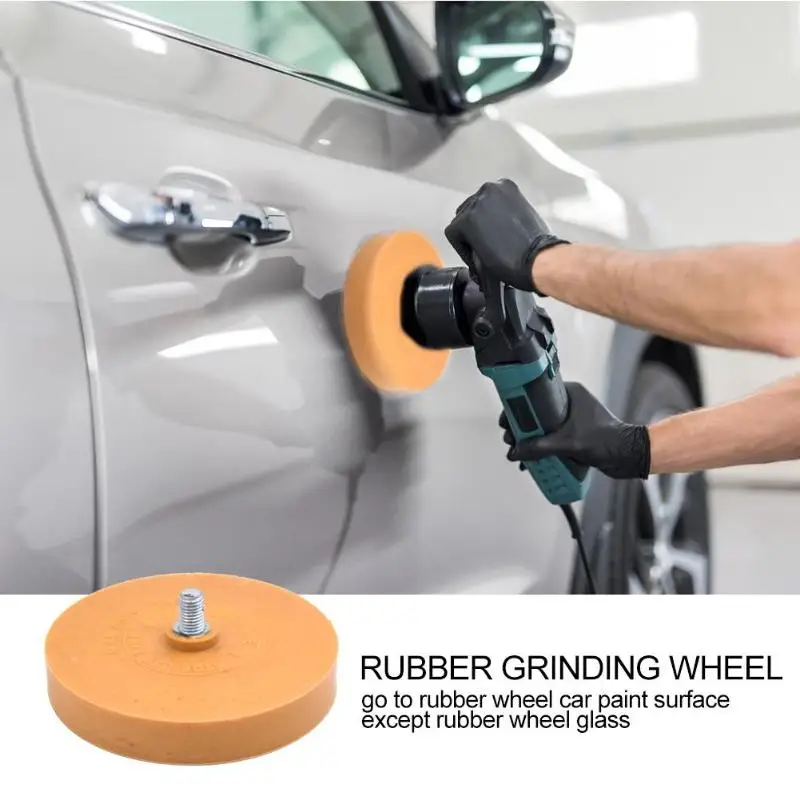 Disadvantages of the DA method: 1) you will burn through a lot of sandpaper 2) you need a good air source or an electric DA to keep up and handle the whole car, and 3) it's really only good for large flat panels. The advantages over doing this by hand are obvious, but it's not the best way to remove paint from a whole car.
4.5" Flap Discs
Another item often used to remove old paint is the flap disc that attaches to a conventional angle grinder. It's basically a flat disc with small pieces of sandpaper glued to it as overlays. All the edges of the paper give it a much more aggressive character than just a flat disc like the one on the DA.
The problem is that this is usually too aggressive. Sure, this tool will take care of all the old paint, but if you're not careful, it will leave a ton of gouges in the metal. Use too much pressure and it will even rub the grooves in it. All of this means that after sanding down with putty or high strength primer, more work is needed to undo the damage you just did while stripping the paint. They work great though for sanding and smoothing welds and surface rust.
Hook and loop cleaning disc
The next step is the Eastwood cleaning disc, which is like a heavy duty version of the green brush you use to clean pots and pans when washing dishes. It is available in a form similar to a valve glued to a fiberglass backing for use with an angle grinder, but for larger jobs it is much easier to use the Eastwood hook and loop version. The hook and loop kit comes with a special disc that screws onto your angle grinder. car, and cleaning discs that stick to it, in a reinforced version of Velcro. The discs are available in 80 and 320 grit and are easy to change.
The woven material of these discs is great because it doesn't fall apart when you use it and throw pieces all over the place. The flexible nature of the disc and backing makes them much less damaging to edges and body lines, and they don't crack if you push too hard. As you can see, they do a short job of blowing all that old paint off.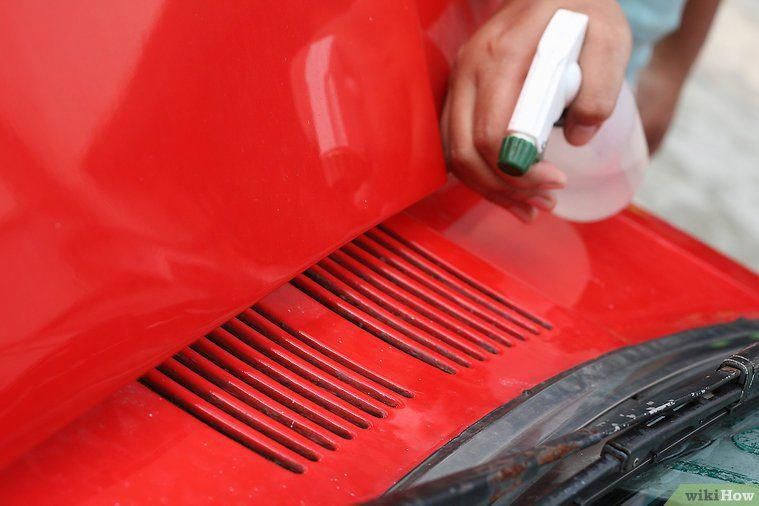 But if you use the disc in one place for too long, the panel may be too hot and deformed, so keep moving.
Hook and loop disc
Next is a less aggressive 320 grain hook and loop. This one does the same job - it just takes longer. It is less aggressive and better suited for removing clearcoat and prepping a recent car with a single coat of paint.
As you can see it leaves a smoother finish but takes longer to cut through the paint. Eastwood sells a set with both discs and a hook and loop for your angle grinder. It's great to start with a more aggressive 80 grit disc, cut through old layers of paint, and then smooth it all out with a 320 grit disc.0003
Here's a before and after on the same spot on the hood where we originally used the scraping disc, demonstrating how you can use the scraping disc to finish the job and get down to smooth bare metal. Here's before.
And that's after.
3M Plastic disc with bristles
Next comes the 3M plastic bristles.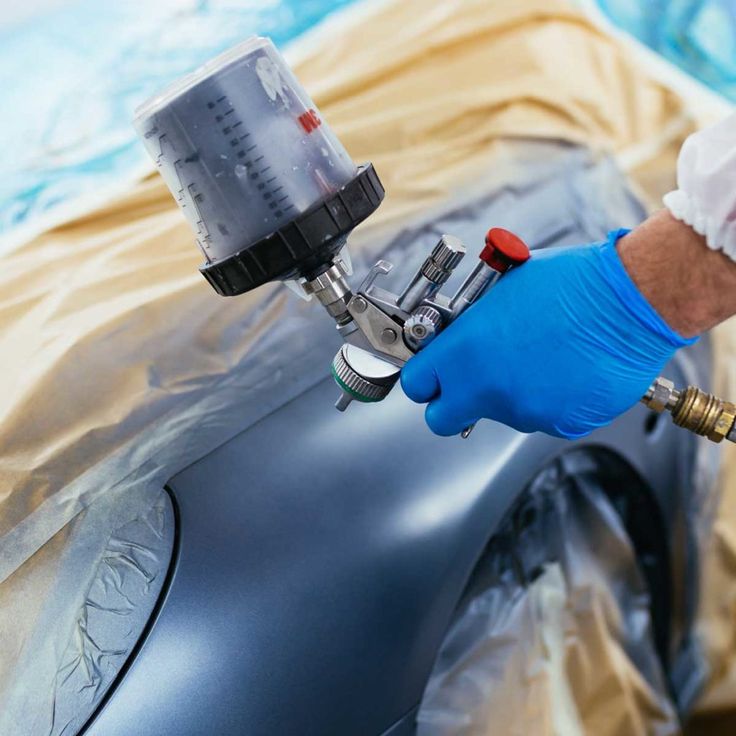 These bristles are very strong and attach to a disc that screws onto a regular 4.5" angle grinder. It works exactly like a wire wheel, only the rims don't fall apart as easily as wire wheels and are softer on metal.
As you can see, it's a bit more aggressive than the red wire strip, but not as harsh as a hook and loop sponge. And look how smoothly it removes metal after the paint is gone! These bristle discs are very durable and long lasting so great for big jobs like a whole machine. However, be careful around the edges because the bristles can catch on the edge and break, and they will hurt if they get on bare skin, so wear long sleeves and a face shield.
Roloc Quick Change Discs
These small discs are very similar to grinding discs and look like grinding discs, only they attach differently and are more flexible for sanding uneven surfaces. On the back of these discs there is a small a threaded stud that screws into a flexible rubber mandrel that can be attached to any drill.
The softer, more flexible nature of the mandrel allows it to be used for areas that are not flat. Also, because they are so small, they are great for working in hard-to-reach places like window frames and the like. They are available in 2- and 3-inch sizes and are commonly referred to as "cookies".
This is for mechanical methods of removing old paint, but there are other methods for stripping paint that do not involve spinning discs.
Eastwood Paint & Powder Stripper
Guys often wonder about removing paint from chemicals. How well does it work? Is it safe for the panel? It's safe and works great, especially in places with curved bends or anything that might prevent you from getting a cleaning disc or bristle disc.
You really need to wear rubber gloves because if you put this on bare skin it will burn.
Then it's just a matter of cleaning. Use these acid brushes, which are made of plastic that won't melt in chemicals.
Wait 30 minutes or so and start peeling it off (Matt cheated and applied the puller before the cameras started rolling so it was ready now).
As you can see, the first application removed almost all layers of paint. You can use mechanical means to strip the rest down to metal, or use a sanding tool and you should have a completely clean bare metal surface. To make it even more effective, especially with a modern clear coat, use a sander first DA to scratch the surface and then apply the remover.
Media Blasting
Finally, the last and best method for removing car paint - and the most expensive to set up - is blasting. In blasting, high-pressure air jets atomize various fine particles such as frosted glass, aluminum oxide, silicon carbide, and walnut shells. For softer surfaces such as fiberglass and urethane, blasting does the same with softer media, like baking soda. However, you must be careful because blasting can still warp the panel if you stay in one place for too long and it gets hot.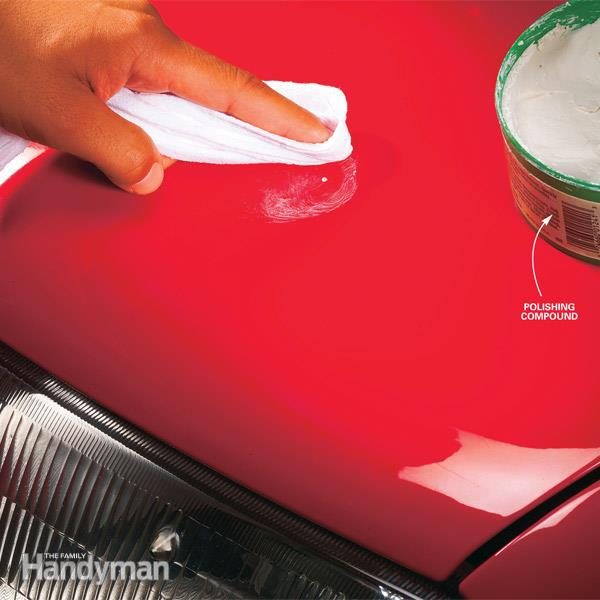 You also have to adapt the media to what you are undressing. Use too rough material to print on soft metal like aluminum or metal pot and you will be left with a rough surface that will take a ton of work to fix.
Eastwood offers large pressurized blast tanks that are great for working on entire vehicles or for frame and chassis blasting if you are rebuilding without a frame.
If you don't want to spend the money and commit yourself to such a big staging, Eastwood also offers the Small Blast Kit, which is very affordable and great for tackling just problem areas of body panels.
The best place to use the latest s mall b kit, or any other blasting material, is in problem areas, like these intricately shaped hood edges. There's no way to get a cleaning disc or wheel, which means you could be there for hours with a piece of sandpaper scraping off paint by hand. A media blaster can handle it.
Eastwood Fast Etch
When you get to bare metal, you need to make sure you protect it so it doesn't rust right away.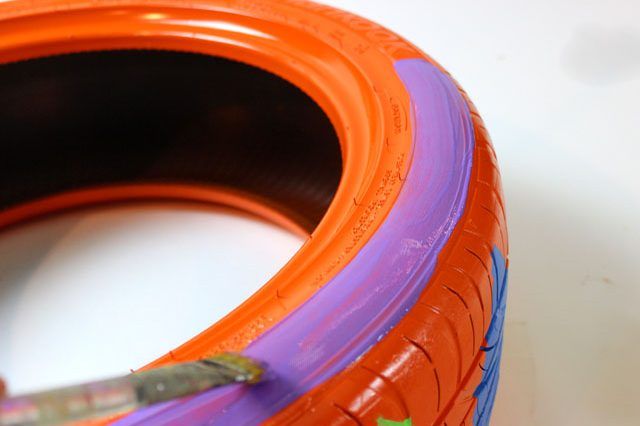 Eastwood Fast Etch not only helps remove minor surface rust and prepare bare metal for paint, but also leaves a protective phosphor coating. The coating will protect it for a long time and can be easily wiped off with PRE™ by pre-applying with a rag before painting.
If you have surface rust on bare metal, you can spray Fast Etch, wait a few minutes, and then just wipe off. Here it is.
And that's after. Obviously, this could take a few more minutes.
To use Fast Etch as a protective coat, simply apply and leave on. It will absorb the metal and then react to create a protective phosphor coating.
So, these are the most popular methods for removing paint and working on metal. Of course, if you don't want to do it all yourself, you can always send the whole body to the media, fucked by a pro. There are also places with stripping tanks so big you can submerge the whole car to wipe off the paint and rust, but you won't be able to do something similar at home.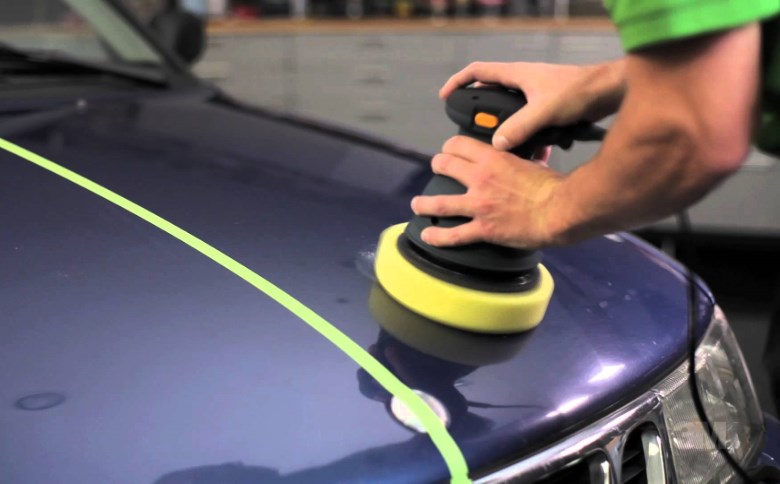 However, sending a car to a paint stripping shop is often much more expensive. With so many options for different part sizes and restoration budgets, we're confident you can find the best paint removal method for your car that makes sense for your specific project.
How to remove spray paint from car interior
by Justin Aubrian
http://www.fixmystreet.com/photo?id=9190
Removing spray paint is not an easy task, especially when it's on the inside your car. Interior spray paint stains can't be washed off with a power tool, and you don't want to use a strong cleaner because the smell can be unbearable. Here are some easy ways to remove spray paint from your car interior.
Put on safety goggles and rubber gloves.
Mix a bowl of hot water and soap. Use a microfiber towel to scrub the spray paint stain in a circular motion.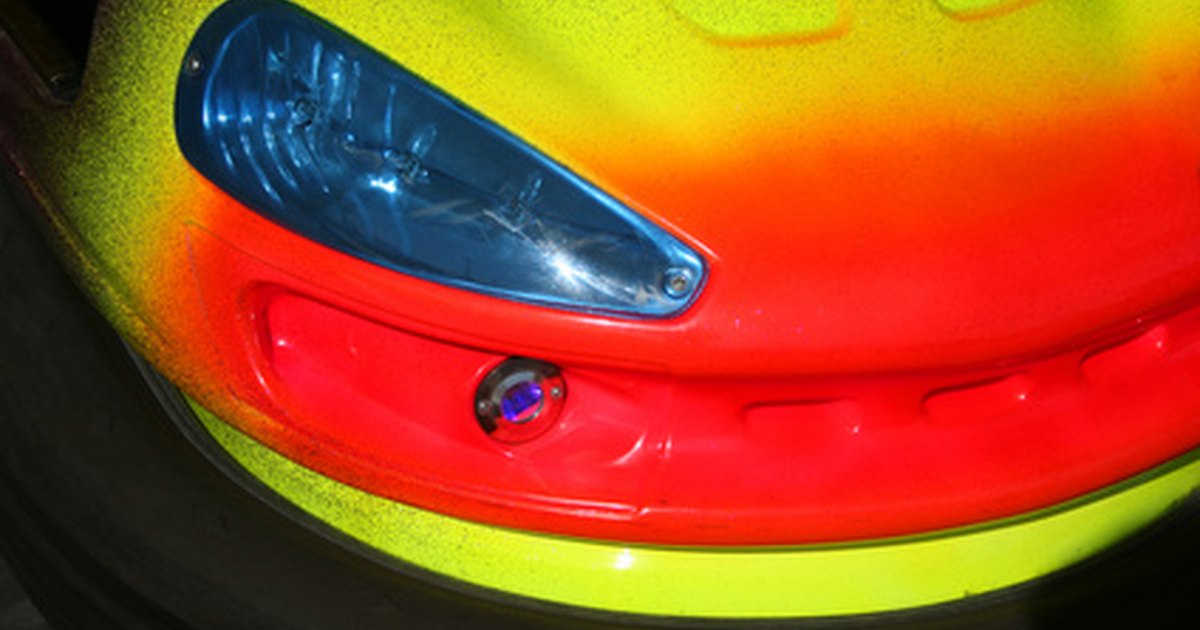 Dry the surface with a towel.
If soapy water doesn't remove the stain, try removing nail polish remover from spray paint using a Q-tip and cotton balls. Wipe it with a damp towel. Dry the surface with a towel.
If nail polish remover doesn't remove the stain, try rubbing alcohol in spray paint with a Q-tip and cotton balls. Wipe it off with a damp towel. Dry the surface with a towel.
If alcohol doesn't remove the stain, try removing spray paint from eucalyptus oil with a Q-tip and cotton balls. Wipe it with a damp towel. Dry the surface with a towel.
If eucalyptus oil doesn't remove the stain, try cleaning your oven cleaner of spray paint with a Q-tip and cotton balls. Wipe it with a damp towel. Dry the surface with a towel.
If the oven cleaner does not remove the stains, try using a Q-tip and cotton balls to remove the paint thinner from the spray paint. Wipe it with a damp towel.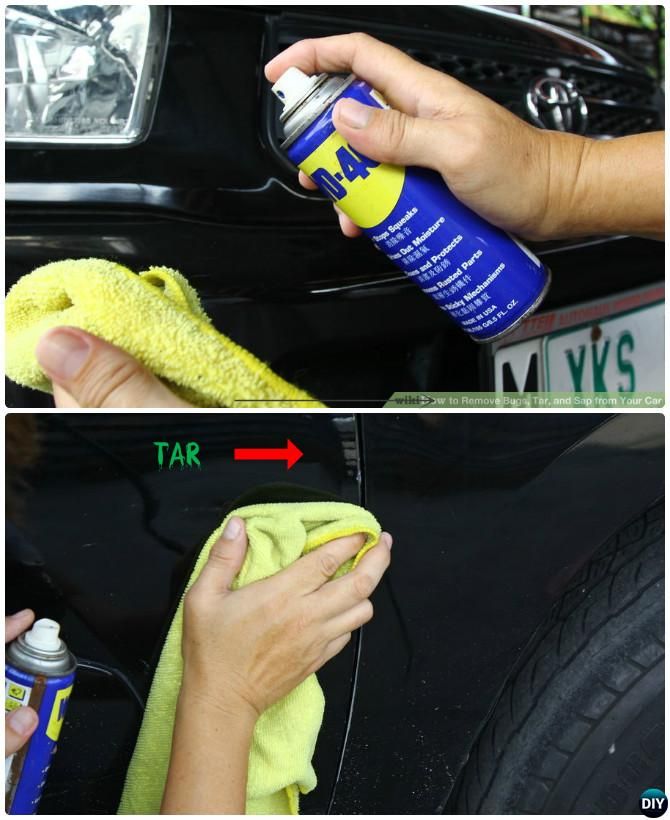 Dry the surface with a towel.
9
9.
Paint is the enemy of chrome. Maybe some of the paint splatter ended up on your chrome wheels. Or maybe you purchased a used set of wheels that someone spray-painted and you want to show off the chrome underneath. There's even a chance that you painted over the chrome yourself and then realized that you prefer to return the wheels to their original state. Either way, you need to remove the paint from the wheels without damaging the chrome.
There are several different ways to remove paint. Each includes the same basic steps:
When removing paint from chrome wheels, you can use acetone, paint thinner or remover, chrome polish, rubbing alcohol, or even oven cleaner. occupation if the entire rim is covered with paint.
When removing or thinning paint, you must follow the manufacturer's instructions for removing paint. Essentially you will coat the surface of the rims and then cover them with plastic wrap and leave them overnight. The next day, you can use a paint scraper, a nylon scraper, and a soft cloth to remove the paint and then buff the chrome.