in: Featured, How To, Skills
Brett & Kate McKay • May 26, 2022 • Last updated: December 15, 2022
The bicycle is one of the greatest tools of self-reliance.
Without any need for electricity or gas, it can carry you far distances.
But bikes only work towards your self-sufficiency if you know how to maintain them. They may have fewer complications than an automobile, but they’re still machines that can break down and need to be repaired.
Several years ago Kate and I bought some bikes for ourselves (our kids already had them) so we could take family rides on Tulsa’s many pleasant bike paths. But I realized that I didn’t know beans about how to maintain our new purchases. If one of us got a flat tire, I wouldn’t know how to patch it. If my brakes were acting wonky, I’d be hosed.
So I set out to learn some basic bike maintenance and repair. It’s been fun. I thought I’d share what I’ve learned with you all in a new series: Bike Maintenance 101.
In today’s inaugural class, we’re kicking things off with how to patch a hole in your inner tube. I remember watching my dad patch a hole on one of my bike tires as a kid. It looked like a huge pain in the butt. But I learned that it’s surprisingly easy. Here’s how to do it.
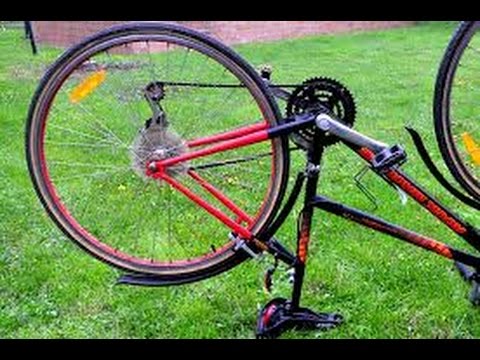
Let’s get that wheel off so we can get to our flat inner tube.
I like to flip my bike upside down. It makes it easier to work with your wheel. I don’t have one of those fancy bike holders you use to work on your bike.
Getting wheels off a bike is a breeze with today’s quick-release systems. It’s pretty much the same for all bikes. The only difference you’ll encounter is how you’ll disconnect your brakes. That will depend on what type of brakes you have on your bike. Here’s how I removed the wheel on my bike with v-brakes.
It’s really easy to disconnect a v-brake. You squeeze the two brake arms together and unlatch the cradle from the noodle (that’s the thing with the rubber tip on it).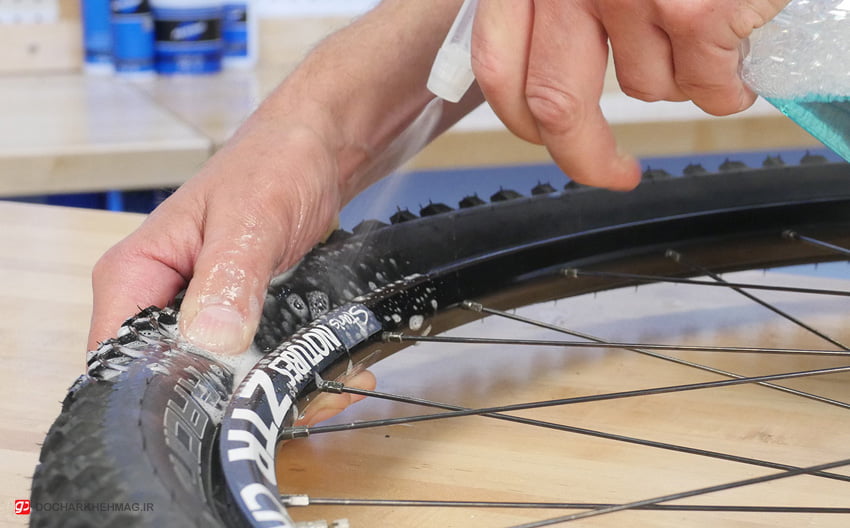
Flip the quick-release lever open and unscrew it until you have enough space to remove the wheel.
You don’t have to take the quick-release rod out of the hub, but if you want to, that’s fine. I think it’s easier to work with the tire without the quick-release rod still in the hub, so I take it out.
Wheel removed!
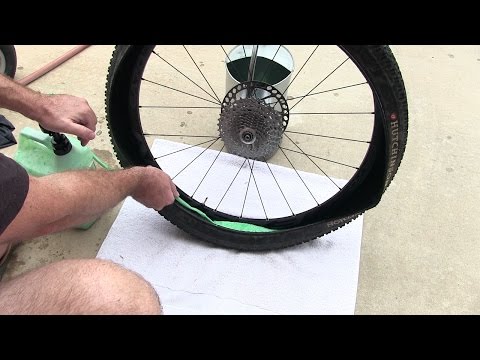
Time to get the tire off the wheel so we can get to the inner tube. Tire levers will make this job much easier. You can buy them on Amazon. They’re cheap.
Place your first tire lever between the wheel and the tire. You want to get the lever underneath the lip of the tire so you can pry it away from the wheel.
To keep the lip of the tire from going back into the wheel, hook the tire lever into one of the spokes. This will keep your tire and wheel separated, making it much easier to get the rest of the tire off of your wheel.
Place the second tire lever next to your first tire lever. Get it under the lip of the tire. You’ll slide this lever around your wheel to separate the rest of the tire from the wheel.
Here’s what your tire will start looking like as you slide that second tire lever around your wheel. It’s hard at first, but gets easier as you progress. As you can see, more and more of the tire lip is over the rim of the wheel.
Tire successfully removed from wheel. Now it’s time to remove the inner tube from the tire.
Inner tube will be tucked inside your tire. Just pull it out.
There’s the hole.
Get your patch kit.
Inside my patch kit is a metal square that has a bunch of little bumps on it. It’s almost like a cheese grater. Use it to lightly scuff up the area on and around the hole. If you don’t have a little metal cheese grater in your patch kit, you can use sandpaper to prep your patch area. The scuffing will give greater adhesion to the patch.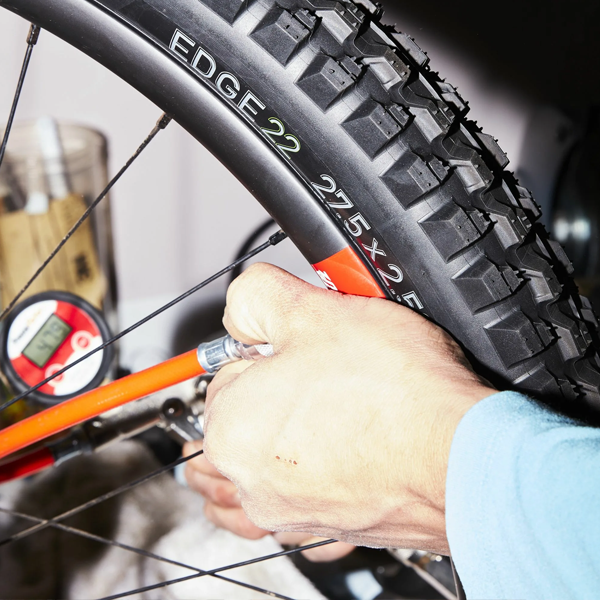
Use a moderate amount of rubber cement. Spread it evenly around an area 1/2″ around your hole.
Pick an appropriate sized patch for your hole. Since mine is so small, I used the smallest patch. Remove the foil backing and stick patch onto the hole.
Peel away the plastic film on top of the patch. Press edges down firmly. Bam! Hole is patched.
Inner tube back in tire.
Tire back on wheel. Getting the tire back on the wheel can be a bit tricky. You may need to use your tire levers to help you get the lip of the tire inside the wheel’s rim. Just make sure you don’t pinch your inner tube between the tire and the wheel. You’ll risk creating a puncture in your inner tube. Once you get your tire back on the wheel, inflate your inner tube and then put your wheel back on your bike.
You can patch your inner tube a few times and not have a problem. If you have more than three patches, you might start noticing that your tire goes flat overnight and you have to pump it up if you want to use it. After your third patch, chuck your old inner tube and replace it with a new one.
Want to start taking action on the content you read on AoM?
Join the Strenuous Life
Learn More
Removing an inner tube for repair or replacement is a lot easier if you know a few helpful tricks and don’t try and rush things. Let our experts talk you through the easiest way to fit a fresh tube and get rolling again as soon as possible.
If you are looking for more helpful maintenance advice, Cyclingnews is bringing you a series of guides so that you can learn how to perform basic bike maintenance tasks yourself. Check out the other guides that are available.
A couple of good quality tyre levers. Cheap ones will snap or bend and metal ones will ruin your rims.
Pump with the correct valve head. A track pump will speed things up but a hand pump is fine.
A puncture repair kit or instant patches.
Today's best deals
Lezyne Power Lever XL
$11.99
$9.86
View
See all prices
Lezyne Alloy Floor Drive pump
$89.99
View
See all prices
Lezyne Smart Puncture Repair Kit
$7.22
View
See all prices
 Remove the wheel
First, you need to remove the wheel from the bike, now if the tyre isn’t already fully deflated let the air out of the inner tube. On Presta valves (the pointy ones) loosen the small barrel at the top of the valve slightly so you can press it down into the body of the valve to release the air. Now loosen and remove the valve collar that tightens it into the rim.
If you’re working on a kids bike or MTB with car type Schraeder valves then depress the pin in the centre of the valve to let the air out.
To remove the inner tube you will need to unhook the tyre from the rim. If you are unsure of how to do this follow our guide on how to remove a bike tyre for the best methods. When repairing a puncture you only need to take the tyre off the rim on one side, the other side can be left in place for a faster refit.
With the inner tube removed it’s a good time to check the tyre for any damage or splits in the tread. Be very careful to check for thorns, nails etc. that are sticking through into the inside otherwise they’ll puncture the fresh inner tube as soon as you put it in.
Be careful if you’re running your finger around the inside the tyre without looking first as you don’t want to puncture yourself! Its also worth checking the rim of the wheel for cracks, dents or sharp edges too, especially if the puncture was caused by the rim impacting a square edge.
First you need to find the hole (or holes). Pump the inner tube up and listen or feel for the escaping air. If that doesn’t work, submerge the tube in water (a wash basin at home or a puddle if you’re out on the road). Don’t just assume there’s one hole either. If the puncture has been caused but the tube getting pinched between a rock or pothole and the rim (a pinch puncture) then you’ll often find two punctures close together. That’s why it’s sometimes called a ‘Snakebite’ puncture.
Once you’ve found the hole(s), clean the area around them as best you can and dry it if it’s wet. Use the little grater (some puncture kits use a piece of sandpaper or have a rough section on the box) to roughen the area around the hole. If you haven’t got an ‘official’ roughening tool then you can always improvise with a bit of stone or brick, just anything that will scrape off the glossy vulcanised surface of the inner tube around the hole in the tube.
Apply glue around the punctured area. (Image credit: Mick Kirkmann)Once the area is roughened, coat it with a thin layer of glue/vulcanising solution. Let it dry on the surface while you peel the protective backing off a patch large enough to fully cover the puncture. If the patch also has a plastic outer sheet then we’d suggest pre-splitting it in the centre so it’s easy to peel off once the patch is fitted.
If your patches are self-adhesive you can skip this step as you don't need to pre-apply glue to the inner tube.
Image 1 of 4
Remove the foil backing from your regular patch (Image credit: Mick Kirkmann)Place on to your tacky glued area and press to assure a solid adhesion (Image credit: Mick Kirkmann)Peel off the backing of the self-adhesive patches and stick straight onto the tube (Image credit: Mick Kirkmann)Apply even pressure to make sure it's completely stuck down (Image credit: Mick Kirkmann)When the glue/vulcanising solution has dried, press the patch firmly over the hole and hold it there while the glue, patch and innertube fuse together and then ‘cure’ to form a lasting bond. Leave it five minutes and once it’s fixed carefully peel off the backing film. If the edges of the patch lift up then you can use a bit more glue/vulcanising solution smeared over the edges to stick them down.
Some kits come with a block of chalk to shave down to stop the patch sticking to the inside of the hole. If you’re repairing at home baby powder will work too. Once you’re happy the patch is well fixed then inflate the tube gently to check for any other holes you might have missed the first time around. Repeat the fixing process on any extra leaks and then it’s time to tuck it back into the tire and get back on the road.
Add a little air into the tube so it holds its shape a little, Insert the inner tube valve through the valve hole in the rim and tuck the tube into the tyre. You can then refit the tyre and inflate to your prefered pressure. Again if you are unsure on this process, we have a guide to help you fit a bike tyre.
Today's best road bike tyre deals
Schwalbe Pro One tubeless tyres
$60. 89
89
View
See all prices
Continental GP5000 Clincher Road Tyre
$48.99
View
See all prices
Vittoria Corsa G2.0 TLR Road Tyre
$87.99
$44
View
See all prices
Specialized S-Works Turbo RapidAir tyres
$79.99
View
See all prices
Vittoria Rubino Pro Graphene 2.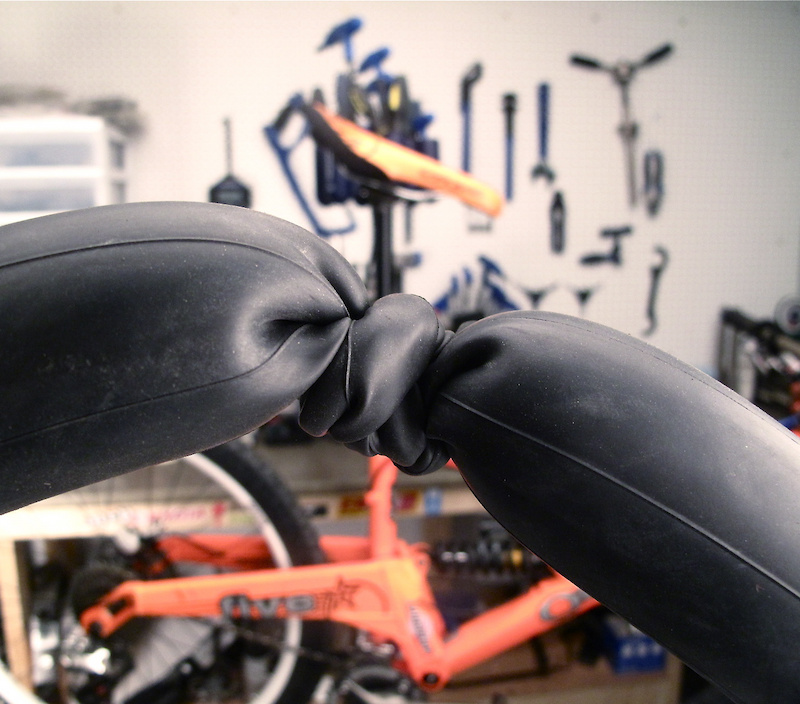 0 Road
$64.97
View
See all prices
Pirelli PZero Velo Road Tyre
$63.05
View
See all prices
Individuals carrying out the instructions in this guide do so at their own risk and must exercise their independent judgement. There is a risk to safety if the operation described in the instructions is not carried out with the appropriate equipment, skill and diligence and therefore you may wish to consult a bike mechanic. Future Publishing Limited provides the information for this project in good faith and makes no representations as to its completeness or accuracy. To the fullest extent permitted by law, neither Future Publishing Limited, its supplier or any of their employees, agents or subcontractors shall have any liability in connection with the use of this information, provided that nothing shall exclude or limit the liability of any party for personal injury or death caused by negligence or for anything else which cannot be excluded or limited by law.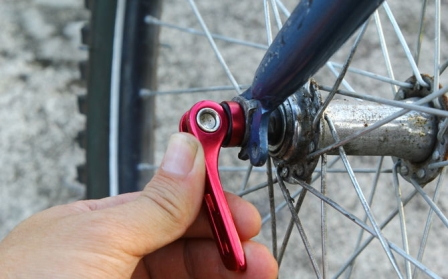
Thank you for reading 5 articles in the past 30 days*
Join now for unlimited access
Enjoy your first month for just £1 / $1 / €1
Already have an account ? Sign in here
*Read any 5 articles for free in each 30-day period, this automatically resets
After your trial you will be billed £4.99 $7.99 €5.99 per month, cancel anytime. Or sign up for one year for just £49 $79 €59
Join now for unlimited access
Try your first month for just £1 / $1 / €1
Already have an account ? Sign in here
The latest race content, interviews, features, reviews and expert buying guides, direct to your inbox!
Contact me with news and offers from other Future brandsReceive email from us on behalf of our trusted partners or sponsors Sooner or later, every cyclist has such an unpleasant situation as a bicycle inner tube puncture. Finding a flat tire at home is one thing (although it also requires some knowledge of camera repair), but what if you blew it during a multi-kilometer ride, for example, somewhere in a field? How to determine the puncture site in such a situation, correctly change and seal the bicycle chamber, what kind of glue and patches are best suited for this purpose. In addition, in this article we will consider some of the nuances of repair and proper operation of bicycle chambers, for example, we will talk about what pressure they should have and much more. 9Ol000 Related video
During long trips, it is advisable to carry not only a bicycle tool, but also a spare tube, with which you can quickly replace the failed one and go further. After all, this is much faster than waiting for the glue to dry on a freshly sealed one. Therefore, in this section we will consider such a question as how to remove a bicycle tire and replace the camera when it is punctured.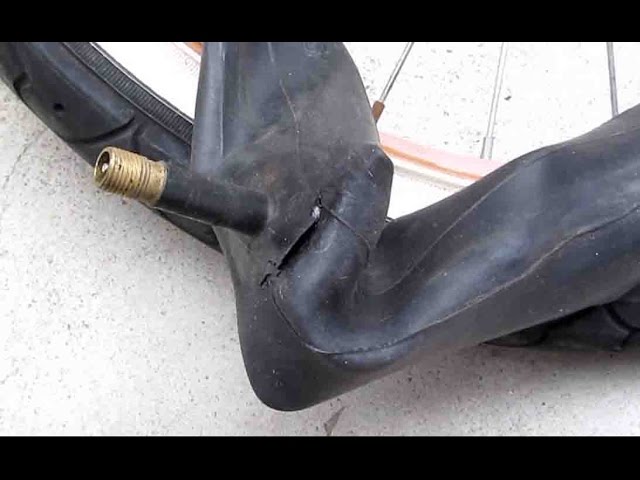
Be careful not to get a tube between the mount and the rim. This may lead to its rupture. If you do not have a magazine spatula, then you can use any non-sharp, preferably plastic object of a similar shape. It is not necessary to use wooden products for these purposes (they may be with burrs) or metal products that damage the paintwork of the bicycle rim. Sharp objects (screwdrivers, knives, etc.) are strictly not recommended for use. They can damage both the tube and the tire.
It is important not to turn it over to the other side until we find the puncture site and find it on the tire (by attaching a tube to it).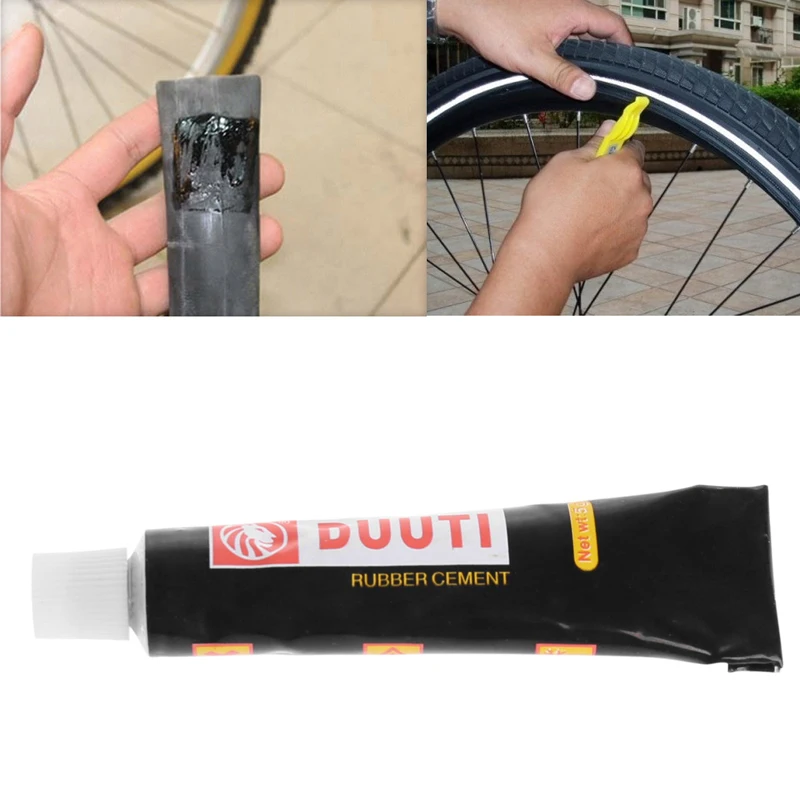
The punctured chamber should then be repaired, for example after you have returned home from a bike ride or during a break.
At first glance, a very simple procedure for locating a puncture can become much more complicated depending on where you find a flat tire (at home or during a trip). To simplify the search procedure, it should be taken into account that in 90% of cases it is located on the so-called "contact spot" of the wheel with the road, usually no higher than 2/3 of the chamber height.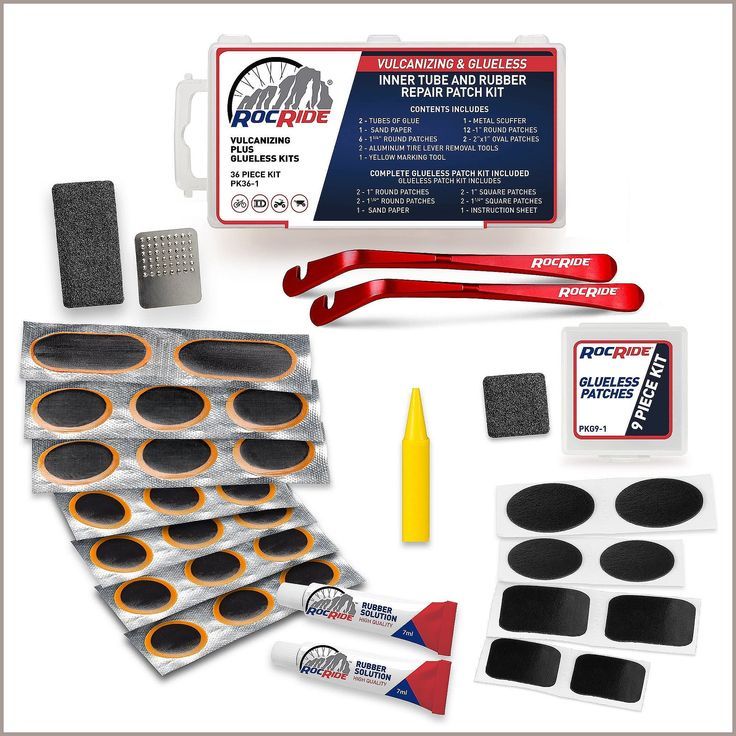 An exception may be damage from the rim (if the rim tape failed on the latter) or the iron threads of the tire cord that came out. Therefore, we will consider several options for how to find a hole in the bicycle chamber through which air is bled.
 The skin should be wet to make the search as easy as possible. For this method it is also desirable to increase the pressure.
 Not all adhesives and patches are suitable for repairing a punctured bicycle wheel. Therefore, it is worth dwelling in more detail on the topic of what is possible and what should not be sealed with a bike camera. There are several options, which we will discuss below.
 Fortunately, in most of these repair kits, the amount of glue is clearly calculated for the number of patches.
  As an adhesive, you can use almost any plastic adhesive for rubber. But in this case, the reliability of the patch turns out to be very low. It says so, "at your own peril and risk." When using homemade patches, you can not use glue, which, when solidified, can burst at the bends.
 After we have found and marked the place of the bicycle inner tube puncture, it is necessary to start its repair, namely, to seal this hole. To do this, you must perform the following operations.
 The sanding area should be 1 centimeter larger than the size of the bike patch in diameter. After this procedure, we try not to touch this place with our hands or other objects.
If, after you have sealed a puncture on the bike tube, it still deflates over time, you should check: To do this, the place with the patch should be lowered into the water and make sure there are no air bubbles. If they are, then you will have to tear off the old and glue a new patch.
 If such a problem is found, the tire should be replaced as soon as possible. A temporary solution is to pull out the protruding cord wire and seal this place with a patch for the camera. But I repeat that in this case, a tire replacement is required, because. this will be repeated regularly.
 If the tube is damaged at the base of the nipple (for example, it was rubbed by the rim), it is better to replace it immediately. As a rule, such defects cannot be repaired.
To reduce the chance of unexpected tire and tube damage while riding, there are a few simple rules to follow.
 It looks like this. If the pressure is too low, this greatly increases the risk of puncture. It is worth remembering that when driving in winter or in the autumn-spring period, the temperature outside is lower than in the apartment. Therefore, on cold days, the chamber should be inflated a little more (because as the temperature of the air in the closed volume decreases, its pressure decreases). Therefore, if you pump up to 3 bar in summer, then in winter you can increase the pressure by about 1 bar (but not higher than the maximum allowable).
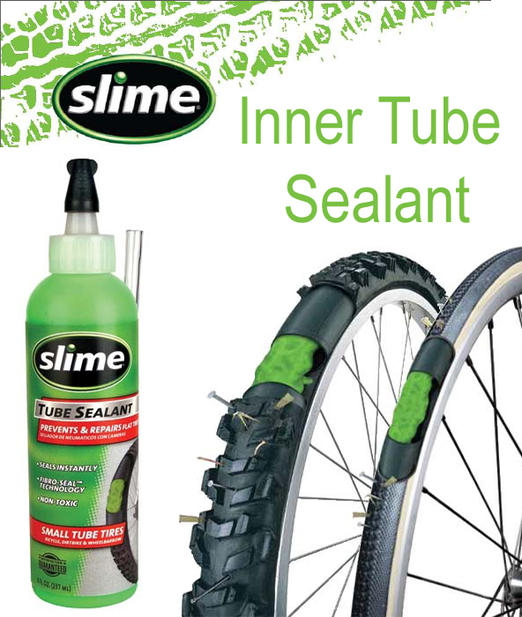
 There are two other devices on the bike parts market that are designed to make life easier (at least they position themselves that way) when riding a bike. This is an anti-puncture tape and sealant, which is poured in a small amount into the chamber and is designed to “tighten” punctures while driving.
Anti-puncture tape is a strip of soft, rubberized plastic or, in more expensive products, Kevlar, that can be glued or simply inserted between the tire and the bicycle tube to protect against punctures. But there are pitfalls here. Cheap anti-puncture, firstly, does not always protect against punctures, and secondly, it can fall apart inside the tire and rub the chamber into dust with its fragments, thereby dooming the latter to ejection. Plus, it's extra weight. In general, after sitting on the forums, I agreed that they are more blamed than praised.
As far as the sealant is concerned, things are not so good either. As a temporary solution, when you don’t want to bother with replacing the camera, you can, of course, use it. But the sealant does not seal the puncture completely, but only reduces air leakage. Plus, there were complaints after use, when they wanted to stick a patch on the puncture site.
In general, according to the editors, it is better to use better quality bicycle tires with built-in puncture protection, carry a spare tube with you and not bother with the above accessories.
After reading this article, we can conclude that replacing and repairing a bicycle inner tube is not such a difficult task, and sealing it during a trip is not much more difficult than doing it at home. The most important thing on long trips is to have another spare tube and a puncture repair kit with you. Also, do not forget to pump up the chamber to the required pressure in time and change worn-out bicycle tires in a timely manner.
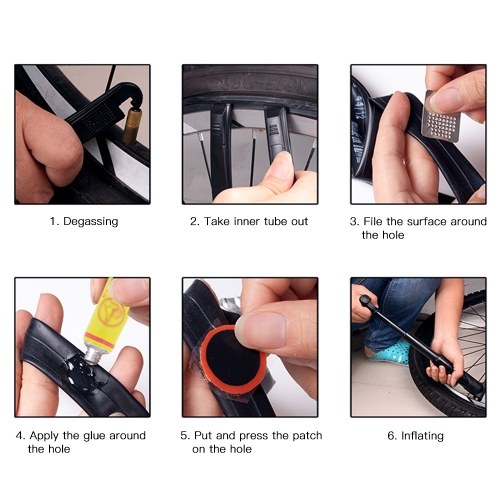
Here are some simple, clear instructions on how to repair a bicycle inner tube quickly and correctly.
1.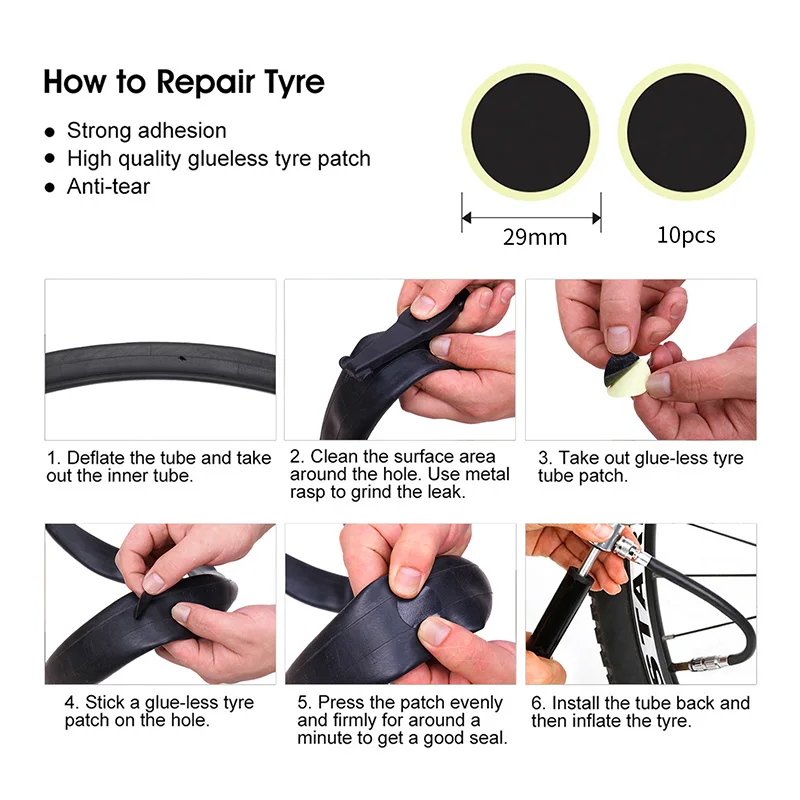 Locate tire puncture
Starting at the valve, check all sides of the bicycle tire to find the cause of the puncture. Remove any shards of glass or sand that you notice. Even if you find one of the possible causes, keep checking the tire until you get back to the nipple.
2. Remove the tire
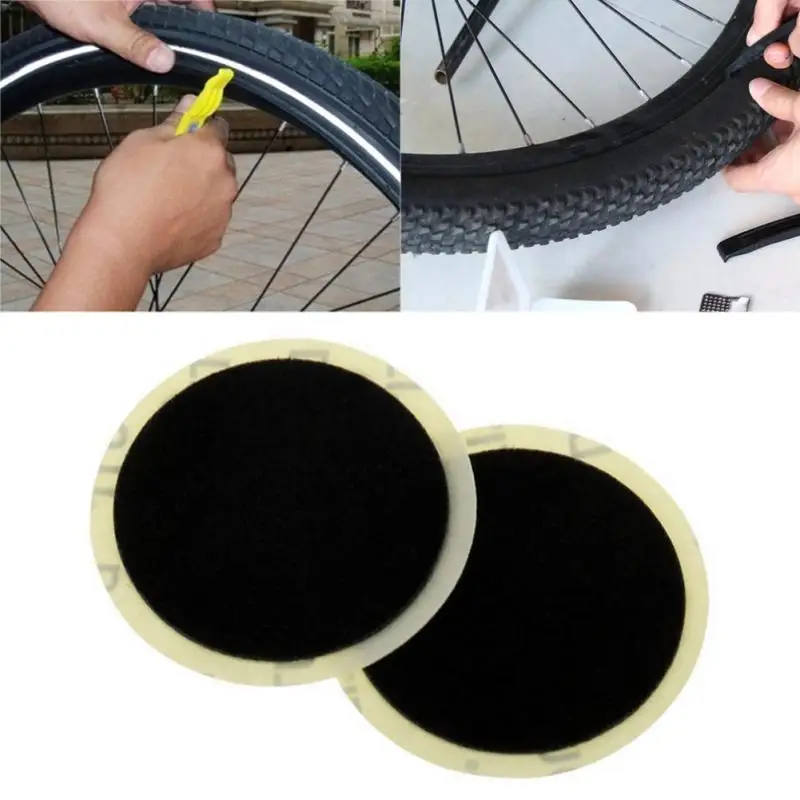
Vent the chamber. On the side of the wheel opposite the nipple, using a special tool (available at all good bike shops) or a similar handy tool, loosen about 5 cm of the tire as shown in the picture. Alternately rearranging the special tool along the entire diameter of the wheel, remove one side of the tire from the rim.
Pull out the chamber. Remove the tire completely, this can be done by manually moving the entire tire in one place from the wheel rim.
3. Inflate the punctured chamber
Inflate the chamber and listen for air to pass through.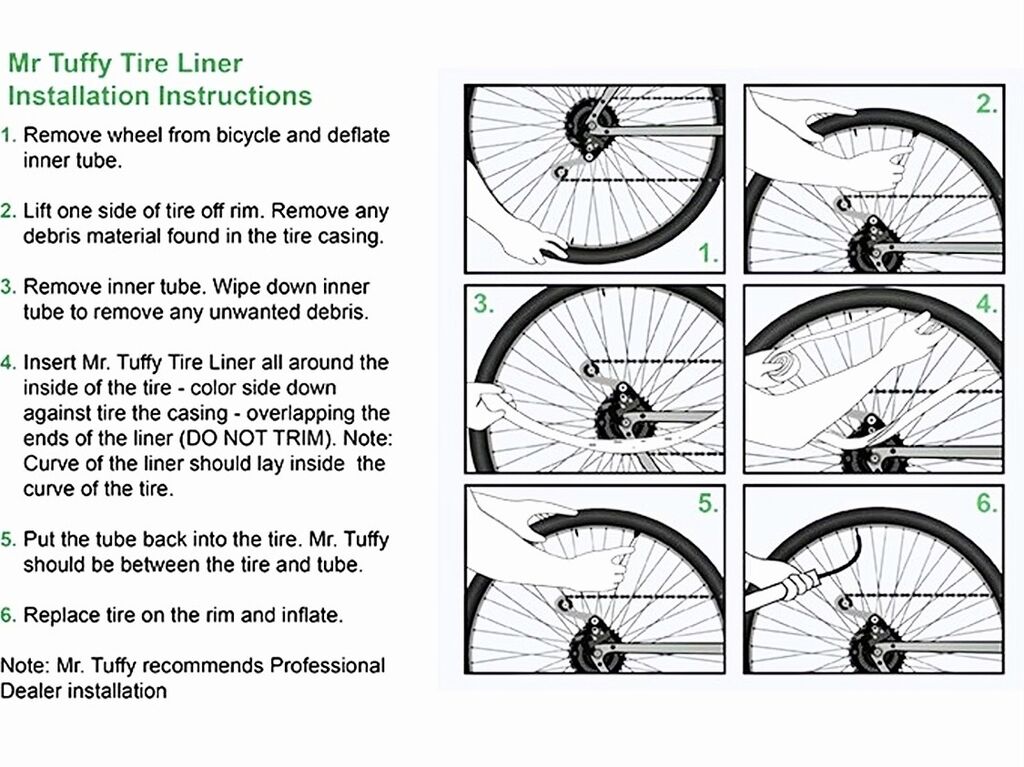 Examine the camera from all sides. If the hole cannot be found, re-inflate the camera and place it in a container of water. After finding the puncture site, dry the chamber before moving on to the next step.
Be careful: When inflating the chamber, do not twist the pump so as not to pull the nipple out of the chamber.
4. Prepare chamber
Select the correct rubber patch size - use a larger rather than a smaller patch size if in doubt. Roughen the surface of the camera around the hole with sandpaper. Make sure all mold marks on the chamber are completely erased and the surface is flat.
Apply one drop of rubber adhesive and spread around the puncture 2 cm larger in circumference than . Let dry - the rubber adhesive will change from glossy to matte. Apply a second thin layer in the same way as
5 Tape the puncture site
Inflate the bladder a little to help highlight the position of the hole. Press the patch firmly onto the puncture site after removing the foil. If there is a thin cellophane on top of the patch, then it can be left.
Sprinkle chalk, talcum powder, or road dust around the patch to prevent the camera from sticking to the tire.
6. Check tire
Before installing the tube, check the inside of the tire to find the cause of your puncture. The location of the puncture on the camera will help you find the cause of the puncture. Run your fingers into the tire and carefully feel around the inside to find the source of the puncture and remove it.
7. Install tire
After repairing the tube and checking the tire for glass, spikes, or any other sharp debris, reinstall one tire bead on the rim. Inflate the tube a little and install it on the rim, first by inserting the nipple into the hole in the rim.
Start installing the second side of the tire from the opposite side of the rim to the nipple, use your fingers to lift the tire beads (the part of the tire that connects the wheel rim) over the edge. Install the entire tire on the rim in this way.
8. Make a final check
Check that the tube is not pinched between the rim and tire bead. Inflate the tube until the tire is still soft, but has already taken its shape. Make sure that the tire beads are evenly placed in the rim around the entire perimeter. If not, bleed some air out of the chamber and evenly position the tire against the rim.
Pressurize the chamber to the recommended pressure and check again that the tire beads are still sitting flat and that the chamber is not visible anywhere from under the tire. Finally, make sure the tire tread is placed fairly evenly by spinning the wheel. If not, then lower the camera and start again from the beginning of this step.
Puncture Repair Tips
When removing the inner tube from the tire, pay attention to which way the inner tube has been installed in the wheel. This will help determine the position of the hole in the chamber and the position of the target in the rim.
Mark the puncture site with a ballpoint pen so you don't lose it.
If you do not have sandpaper with you, you can roughen the chamber around the puncture by rubbing the chamber against a rock or pavement.
Carefully remove and replace the inner tube with the rim. To prevent repeated puncture, do not use sharp tools such as screwdrivers, etc. when installing or removing. Use special if necessary. rim removal tool or other tool with blunt edges
Identification of a puncture
Two small holes in the chamber placed fairly close together indicate a double puncture. This is because the puncture object can get stuck between the tire and the rim when driving over a sharp object. Make sure the sidewall of the tire is not cut. A hole on the inside of the chamber indicates that the puncture was caused by a pin. Check the inside of the rim to make sure the edges of the tape are properly covering the spoke holes and that there are no protruding spoke ends protruding above the inside of the rim. If this happens, you will have to cut off the protruding part of the spoke with a file.
A less common cause of puncture is the rough edges of the hole in the nipple rim. The puncture in this case will be near the nipple and such a chamber can no longer be restored.
Make your own Puncture Repair Kit:
Weekly inspection
Check your tires by inspecting the tread for damage or severe wear. Tires with slits that show abrasions through which the camera is visible should be replaced. Remove any sand or glass stuck in the tread.