Discover tips and tricks for growing your roofing business efficiently and professionally.
Remember that moment when you realized you just ruined a part of your customer’s yard by using heavy equipment that left ruts in their lawn?
Lawn and landscape damage, unfortunately, isn’t uncommon during roof replacements and construction projects. However, it’s something that a professional contractor will want to learn to avoid for several reasons.
For one, using large equipment associated with construction and roofing that leaves ruts might mean frustrated homeowners who end up giving your company bad reviews. It also costs you time and money to make the repairs necessary to fix the relationship between you and your customer.
Nevertheless, ruts happen. In this article, we’ll cover how to fix ruts in a yard and how you can avoid leaving ruts in the future.
Ruts are basically soil that’s been compacted and needs to be loosened. They need to be fixed differently depending on their size–ruts 1-2 inches deep should be handled differently than ruts of 3-4 inches or deeper.
Following are two easy steps for best fixing shallow ruts:
To loosen the soil of a shallow rut, find the edge of the rut and push a spade fork into the soil at a 45-degree angle. Since it’s 1-2 inches deep, you shouldn’t need to dig far.
From there, put pressure on the fork handle to lift the soil until it is an inch or two above the turf around it. Eventually, the soil will settle until it’s even with the rest of the grass. This should fix a shallow rut most of the time.
If this does not fix the problem or if the grass in the rut is damaged, you may need to treat it as a deep rut and follow the next set of instructions.
Because there’s more damage than a shallow rut, deep ruts (3-4 inches deep or more) are harder to deal with and take more time to fix.
Here are the basics for how to fix deep ruts in your customer’s yard:
If some grass is still intact on the surface of the rut, use a shovel to cut around the edges of the rut and remove the grass. Make sure to include the roots when you remove the grass, so you can easily return the patch of grass after fixing the rut.
Take a shovel fork and loosen the soil that’s been compacted under the spot the grass was. This can be done in the same way as it’s done for a shallow rut (see instructions above). Loosening the soil allows the grass to take root well after being replaced or sown.
Since the rut is deep, filling it in with soil will most likely be necessary. For this, you’ll want to mix soil with equal amounts of sand or compost. This mixture makes it easier for grass to take root and thrive.
After filling in the rut with the soil mixture, replant the grass you dug out if it is still intact. If the grass has been damaged, you’ll need to sow new grass seeds. Make sure to use the same seed as what’s already been sown in the lawn to ensure there’s not a patch of strange-looking grass in your customer’s lawn.
What if you didn't have to worry about how to fix ruts in your customer's yard on every other job site? Here are some clean-cut tips for avoiding ruts and a damaged reputation.
Over time and use, a roll-off dumpster may sink into a yard. Removing a full roll-off dumpster from a customer’s lawn will most likely create deep ruts, not just from the dumpster but from the equipment pulling it out as well. This can damage your relationship with a customer, potentially leading to a negative online review for your business and extending the amount of time you’re stuck on the job.
The solution? Don’t place a dumpster on the lawn. Instead, encourage your customer to reserve a space on the driveway or the curbside. Always communicate with your customer before the job begins to determine what works best.
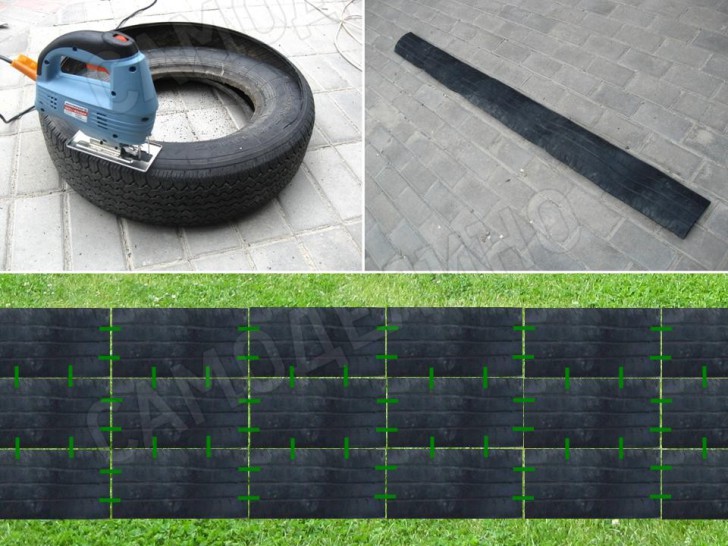
Using lightweight equipment ensures that you won’t need to spend time worrying about whether or not you’ll need to stay after a job to fix ruts in the yard. It’ll also improve customer satisfaction, reduce out-of-pocket expenses, and get the job done faster.
The Equipter RB4000 does exactly that. This self-propelled dump trailer is lightweight with extra-wide tires that help better distribute the weight in the container, preventing tire ruts in your customers’ lawns.
The RB4000 streamlines debris management and lifts supplies to where you need them. This saves your workers from the physical stress of double- and triple-handling debris and carrying heavy materials up a ladder.
Click the button below to see how else the RB4000 can help your company grow.
Always be sure to do your research when investing in or renting equipment. Check out this comparison chart of roofing and construction equipment to choose which type is best for your everyday jobs.
Still have questions? Give us a call at 717-661-3591 to connect with an Equipter representative today.
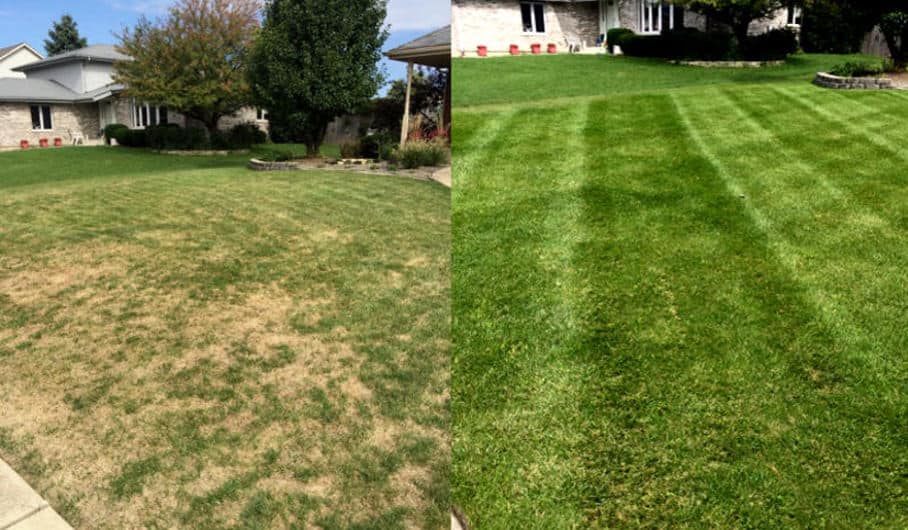
There are a million reasons why you might find yourself with a tire track (or multiple if you’re unlucky) on your lawn. It may be your fault (did you mow when it was wet?) or someone else may have done the damage (neighbor or delivery guy pull their vehicle onto it?). But there certainly isn’t any point in crying over spilled milk. What’s done is done.
The good news is that we’re here to talk you through how to fix tire ruts in your lawn. We’ll go through the items you’ll need, when to do it and even give you some advice on how to avoid ever finding yourself in this situation again.
What You’ll NeedBefore we explain the “how” let’s first outline what you’ll need to carry out this repair:
Thinking of heading out to the yard to get this done RIGHT NOW? Hold your horses! When you complete this job is also important. The time of year when you repair these ruts and tire tracks can have a big impact upon the chances of the grass prospering afterward. To have the absolute best chance of restoring your lawn’s beautiful appearance, you want to carry out this work when the grass is in what we call its “growth phase”. The timing of this phase can vary depending on the grass type you have:
If your lawn is damaged during the winter period, it’s not a good idea to try and fix the ruts until the weather warms up, as most grasses grow extremely slowly during this cold period and won’t take a foothold. Wait until spring at the earliest. If the damage occurs during summer, while not ideal, you can treat the area at this time of the year.
Now you know what you need and when to do this job, let’s talk about how to fix ruts in a lawn. We’re going to put these ruts into two different categories, as what you’ll need to do will differ depending on which type of ruts you have on your lawn.
Most of the time shallow ruts are fairly simple to fix. Here’s how to do it:
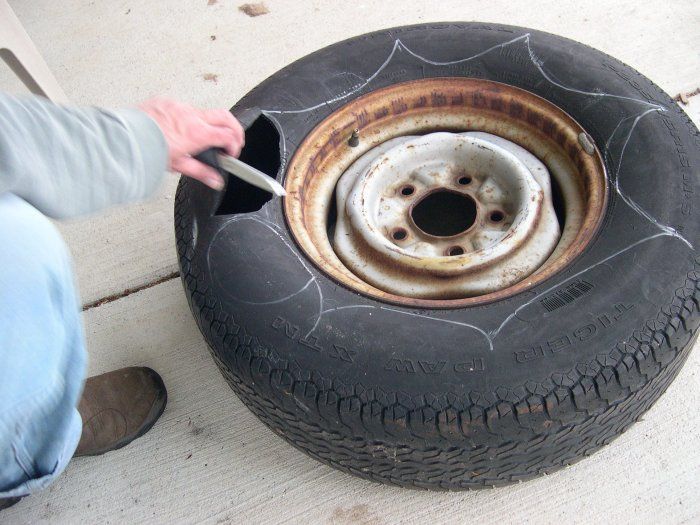
If a heavy vehicle went over your lawn, particularly if it was wet, and you’re faced with the issue of fixing deeper ruts, the process is slightly more involved, but it’s definitely still possible to return the lawn to its former glory. Follow these steps:
 Make sure you cut through the thatch into the soil. Then use your fork to prize the grass up and fold it over onto the lawn. Now you’re ready to fill the rut in.
 The most important thing to do after this is to water the area regularly to give the grass the best chance of taking root and flourishing.
And that’s really all there is to it. You’ll need to keep an eye on this area for a while to make sure it doesn’t sink below the rest of the lawn. If it does, you may need to follow the steps we’ve outlined for shallow ruts above to bring it back level. Or in the worst-case scenario, you may need to cut the sod up again and add some more of the soil moisture.
More Reasons to Fix Ruts When They AppearApart from the fact that a lawn full of tire tracks and ruts looks absolutely terrible, there are a number of other reasons to take action and fix them sooner rather than later. Such as…
This article is obviously about how to fix ruts in a lawn, but the best thing would be to prevent them from ever happening in the first place! Here are a few tips:
 The weight will cause these items to sink into the ground and create nasty marks all over the place. Don’t do it – wait until it’s dry!
I've always had a keen interest in lawn care as long as I can remember. Friends used to call me the "lawn mower guru" (hence the site name), but I'm anything but. I just enjoy cutting my lawn and spending time outdoors. I also love the well-deserved doughnuts and coffee afterward!
AlbaniaAustriaBelarusBelgium (fr)Belgium (nl)Bosnia and HerzegovinaBulgariaCyprusCroatiaCzech RepublicDenmarkEstoniaFinland (fi)Finland (sv)FranceGeorgiaGermanyGreeceHungaryIcelandIrelandItalyLatviaLithuaniaLuxembourg (de)Luxembourg (fr)MoldovaMontenegroNetherlandsNorth MacedoniaNorwayPolandPortugalRomaniaRussiaSerbiaSlovakiaSloveniaSpainSwedenSwitzerland (de)Switzerland (fr)Switzerland (it)TurkeyUkraineUnited Kingdom
ArgentinaBoliviaBrazilChileColombiaCosta RicaDominican RepublicEcuadorGuatemalaMexicoNicaraguaRepublic of PanamaParaguayPeruUruguay
Canada (en)Canada (fr)MexicoUSA
 Prepare the soil
 Practice Notes
If the weed killer doesn't work and brown patches grow on the lawn, it may seem like it's irreparable. However, there is always hope. You can always try updating your lawn.
| Before you start |
|---|
| Sowing seeds or new grass cover? Select the type of lawn renewal depending on the degree of damage: with new seeds or new grass cover. If less than 40% of the grass has died, it will be enough to sow new seeds. nine0002 Why renovate the lawn? Try to find out why the lawn is dry. It depends on which seeds to choose and how to carry out the procedure for updating the lawn. Estimate the amount of work ahead. Before you start, try to estimate how much work you have to do. Will |
There are two ways to renovate the lawn: by adding new seeds and from scratch using new grass cover.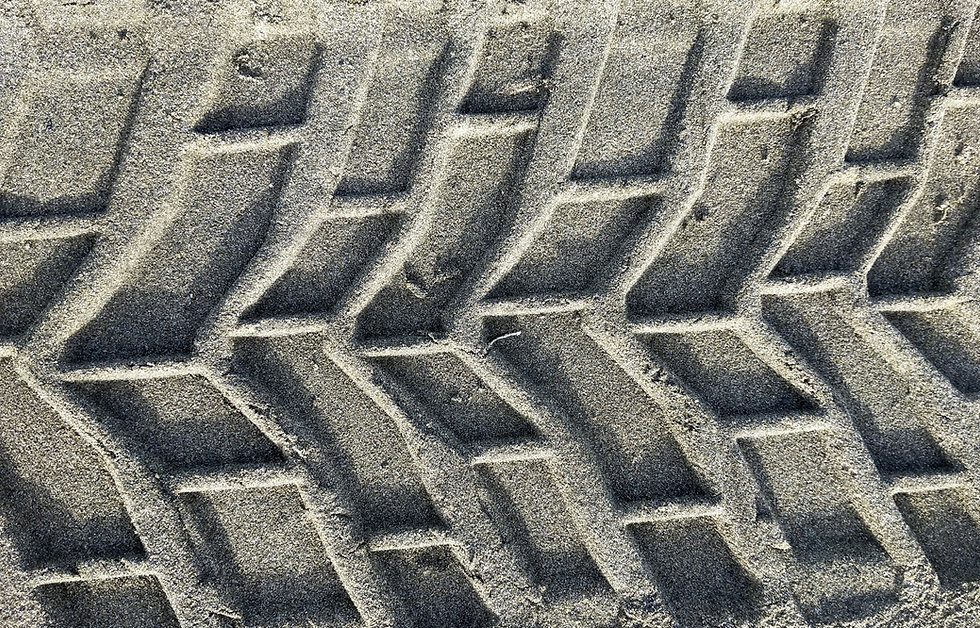 If more than 40% of the grass is damaged on the lawn, the second method should be used. If less than 40% of the lawn is damaged or infested with weeds, reseeding can be resorted to, i.e. add new seeds to existing grass. This will be enough. In this article, we'll show you how to update your lawn with reseeding. nine0003
Jan Karlsson, Commercial Garden and Lawn Specialist at Husqvarna, shares his advice. His most important recommendation is to test the soil. To do this, you need to take a small amount of land and give it to the laboratory. Many landowners skip this step simply because they don't know about it. Others refuse to conduct testing because of its cost. In fact, starting your lawn renewal with soil testing is the smartest investment you can make. nine0003
"If you don't analyze the soil, you'll never know what's missing to improve it. You can fertilize over and over and still get no results. Soil testing will show you what to do and what to avoid. You will have an action plan at your fingertips at the lowest possible cost,” Karlsson explains.
Testing methods may vary around the world. As a rule, it is carried out in commercial laboratories. The lab will develop a detailed action plan for you to help you upgrade. nine0003
The right time to renew your lawn usually depends on the climate in your area. The main thing is to make sure that the earth has warmed up enough for the seeds to germinate and the shoots to grow. For this, the soil temperature must be at least 10°C. “There is one rule: wait until the first mowing of the season. When the lawn turns green, you will know for sure that the grass has begun to grow,” Karlsson recommends.
If you understand why the lawn dried up, you will not repeat your mistakes when updating it. So, if the vegetation cover has become sparse due to the growth of trees that block the lawn from the sun and compete with it for water and nutrients, shade-loving grass varieties should be used in the future. You may need to cut some limbs to open your lawn to rain and sun.
"Some things can be learned just by looking at the lawn. Still, I recommend doing a soil test," Carlsson insists. nine0003
Start the renovation by weeding (especially evergreens) or removing them with herbicides. Now the new grass will not have to fight for light, water and nutrients. When using herbicides, read the label carefully and follow the instructions. Most products can be sown after seven days, but some herbicides will prevent seeds from germinating for another three to six weeks.
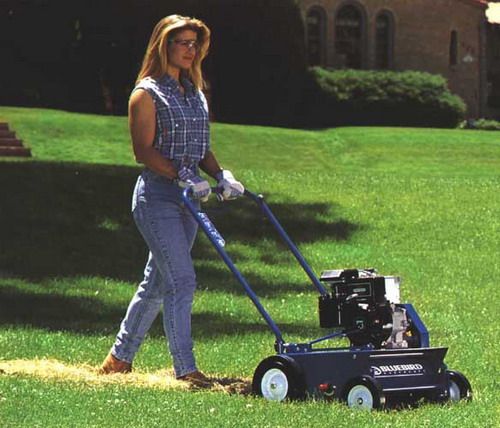
Check the amount of straw by shoveling up a small piece of canopy several inches deep. If the spongy layer reaches a thickness of more than three-quarters of an inch (2 cm) when compressed, the excess straw should be removed. If your lawn is over 300 square meters, you may need an electric rake or scarifier. For small lawns, you can use a rake to remove thatch by hand. nine0003
In addition to removing the straw, the vertical lawnmower with scarifier can be used during seeding to prepare seed holes. Work the entire area of the lawn by plunging the cultivator tines to a depth of approximately 3-12 mm (1/8-1/2 inch). Then collect debris from the surface with a rake. Another way to prepare the soil for planting is to conduct intensive aeration. In this case, treat the entire lawn 3-5 times to ensure proper aeration.
However, the best results are achieved by combining both methods: aeration and straw removal with a vertical lawn mower. Due to this, the circulation of water that feeds the seeds and shoots is significantly improved. nine0054
"A typical problem in lawn care is soil that is too dense or hard. As a result, water and oxygen cannot reach the roots of plants, resulting in slower growth. An aerator creates channels in the soil for air and water, and an upright lawn mower with a scarifier thins out the vegetation cover, resulting in more grass and a better looking lawn. "
"
Proper watering of the lawn is very important. Grass seeds and seedlings require water to actively grow and establish. The soil should not be a firebox, but sufficiently moist. If the lawn feels dry to the touch and no rain is expected anytime soon, start building up water reserves in the soil a few days before planting. To do this, turn on the sprinkler daily for a couple of hours. nine0003
"It's very important to water the lawn evenly. With even watering and sufficient soil temperature, the right effect is achieved," stresses Karlsson.
Fertilizer helps new seeds and seedlings to grow and strengthen. They should be applied immediately before sowing. Use slow acting nitrogen fertilizers. By testing the soil, you will find out if you need to add additional phosphorus and potassium.
If your lawn is in relatively good condition, you can use the same grass seed mix as before. Soil testing will show which other seeds are best to use.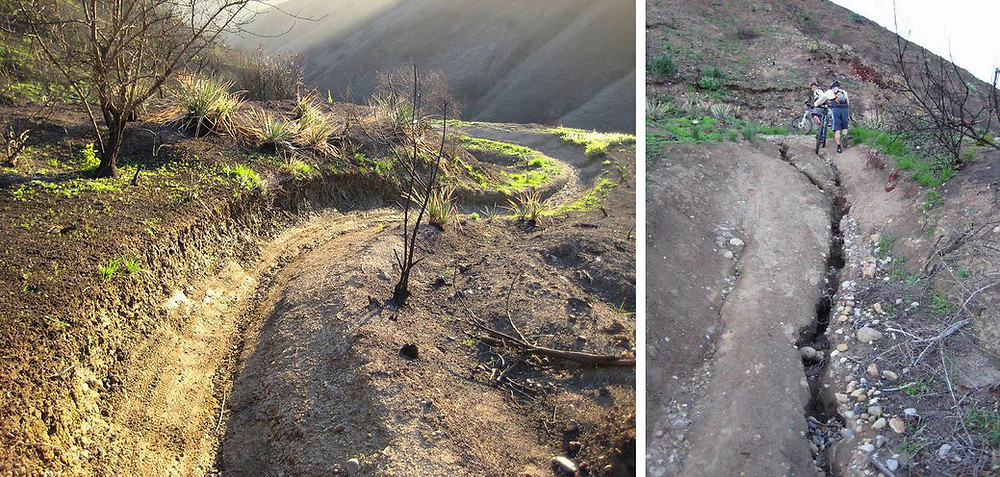
Seeding can be done by hand, but if you want the seeds to be evenly distributed, it is better to use a seeder.
"Some seeders can be connected to a scarifier. I recommend using a rotary seed drill," Karlsson adds.
“After renovating the lawn, you don't have to wait long. After reseeding, you can immediately start using the lawn and mow it in the usual way,” Karlsson explains.
(2)
Practical Tips
Products and Innovations
Practical Tips
Practical tips
Testimonials
How-To
How-to
How-to
How-To
How-To
Showing {current} of {max}
Roll grass cover - the most effective way that
allows for high-quality landscaping without special time costs. Therefore, if you want to quickly turn a unkempt, overgrown area into a neat lawn that pleases the eye, order turnkey lawn laying from our company. Real professionals will take up the work, which guarantees an excellent result.
Unfortunately, you can't just take and roll out the grass cover. To qualitatively lay a turnkey lawn, the allotted area must be carefully prepared:
Then carry out the vertical planning. They make the necessary slope
from the middle of the plot to the edges so that the water does not stagnate and the grass does not rot. If you do not pay due attention to this stage, the turnkey turf will have to be redone - the price of such work and the replacement of the lawn will significantly increase your costs.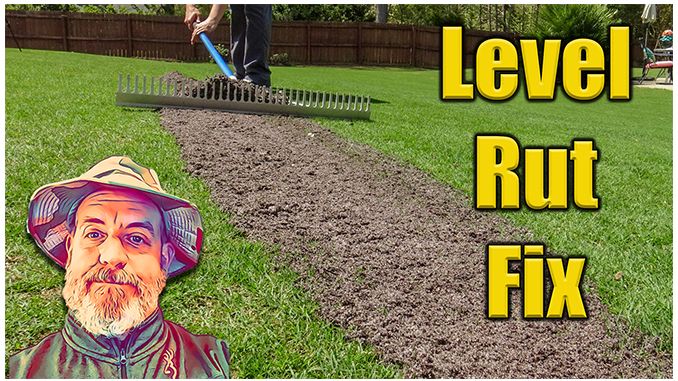 nine0003
If the soil on the site is fertile, it is plowed and leveled. If the quality leaves much to be desired, they bring in special soil, on which they lay the lawn on a turnkey basis - in Moscow, the Moscow region, and many other regions, they most often do just that. At the end of the work, rolling is carried out.
Each stage is important in preliminary preparation. If you do not perform one of the operations, you will probably have to remove the roll cover, correct errors, lay the grass again. nine0003
Here, for example, soil compaction. It is the completion of the preparatory work and is necessary in order to maximally compact the dug up soil or imported soil. If you skip it, the earth itself will settle over time, but it will do it unevenly, holes and bumps will appear.
To remedy the situation when the turf has already been laid on a turnkey basis, most likely, everything will have to be redone - the price of such manipulations will be appropriate. You can try to gradually pour earth into the lowlands, but this process is long and very tedious. After all, in order for the grass to grow to a new level and adapt, you can add no more than 1 cm in 2-3 weeks.
By the way, rolling is done not only before laying. This procedure is included in the cost of turnkey maintenance of the finished lawn. It is very useful to do this in the spring, when the soil is raised by "frost heaving" and after rains several times a season. Also, this procedure is carried out when growing a roll coating in the fields.
It is important to choose the right time to perform the operation
in a quality manner. Do not roll the soil in drought or heat. You do not need to do this with excess moisture, as well as with the onset of autumn - you can "seal" the water in the ground, and the roots will suffocate. At the same time, no signs may be observed before the onset of cold weather, and in spring the plants will not recover well. nine0003
The earth needs to dry out, but still be wet. Determining the right balance is not easy, so it is better if professionals will maintain and lay the turnkey lawn - it's inexpensive compared to the cost of rework.
In the fields, rolling is carried out by special rollers. They are 3 m wide and weigh about four tons. On a personal plot, you can use a unit weighing up to 100 kg. The rink can be filled with water or sand. The latter option turns out to be harder, and it is not necessary to drain for the winter. nine0003
For the cheapest option, use two cooler bottles. Their bottoms need to be connected, and a rope should be wound around the necks. This must be done so that it cannot fly off, but at the same time rotate freely. It remains to fill the containers, and the homemade ice rink is ready.
In addition to the choice of tool, attention must also be paid to the rolling technique. Any roller, pressing down the soil, drags a certain amount of earth in front of it.