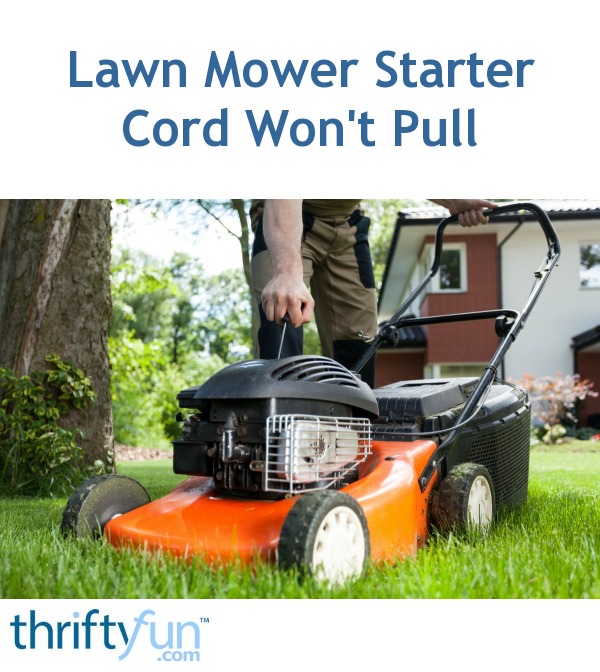
If you’ve had a lawn mower for more than a couple of seasons, chances are you’ve had a flat tire. In this article, we’re going to tell you how to get a flat tire back on the rim and how to change a tire if you need to.
With our step-by-step guide—lawn mower tire flat & off the rim? Here’s how to fix it, you’ll be back to cutting your lawn in no time.
A tire that’s slipped off the rim is never a wanted sight!Using simple tools and a few helpful tricks, you can get your tire back on the rim or replaced. With a little effort and minimal cost, your mower will be ready to go again.
Want to know how to get your lawn mower tire back in working order? Let’s get stuck in.
For this repair, you’ll need a few tools. And if you need to replace the tire, a few more. For both repairs, don’t forget your safety gear. Here, we’ve listed what each job requires:
Not all flat tires are created equal. Sometimes a flat caused by a very slow leak or just time can simply be reflated. And it will last a good while until next time. But sometimes a flat causes the tire to come off the rim of the wheel, and this requires a more complicated fix. And in the worst case, with a damaged or worn-out tire, you’ll need to replace it.
No matter if your tire is just off the rim, or needs replacing, we’ve got you covered. Here is our step-by-step guide to fixing a flat on your lawn mower. Steps 1, 2 and 3 are required for both fixes. After that we’ve split the instructions depending on whether you’re putting it back on the rim (steps 4a to 7a) or changing the tire (steps 4b to 10b).
I know it’s obvious, but we’re nothing if not complete. Make sure your mower is on a flat surface. Then turn off the mower and remove the ignition key. It’s a good idea to chock the wheels as well.
What might not be so obvious, is that we highly recommend you remove the spark plug cable as well. Removing the cable means there is no chance of the blades moving while you’re fixing your flat. It’s never wasted time to do things safely.
In order to get to your tire, you’re going to need to jack up the mower. Any jack will do as long as it’s rated for more than the weight of the mower. We would recommend fixing your flat on a hard surface, driveway, garage or shed. But, if your mower is still on grass, and you’re using a bottle jack, you’re going to need to put wood under the jack to stop it from sinking into the grass.
Jak up the mower so your tire spins freely. You want enough height to make it easy to get your hand underneath the tire. Once you’ve reached the required height, support the mower with a jack stand.
You need to check the tire for obvious damage, holes or sharp objects. If it helps, put a little chalk mark on the tire. Carefully roll the wheel round, inspecting both side walls and the surface for damage. When your chalk mark comes back around, you know you’ve covered the whole tire.
If you can’t find any obvious holes or damage, and the tire is not completely worn out, you can try putting it back on the rim, inflating it and seeing if it holds. If the tire is punctured, ripped, or completely worn out, you’re going to need a replacement.
These days most mower tires are tubeless. That means there is no inner tube inside the tire that holds the air. Instead, the air is held inside the tire by a seal formed between the tire bead and the rim.
In order to refill a tire where the bead has come off the rim, you first have to create a seal between the bead and the rim.
The easiest way to do this is to apply pressure to the surface of the tire. This pushes the bead outwards and helps create the seal you need. On used tires, it’s usually not possible to do this by hand. So instead, we can wrap a ratchet strap or a rope around the tire and use that to help.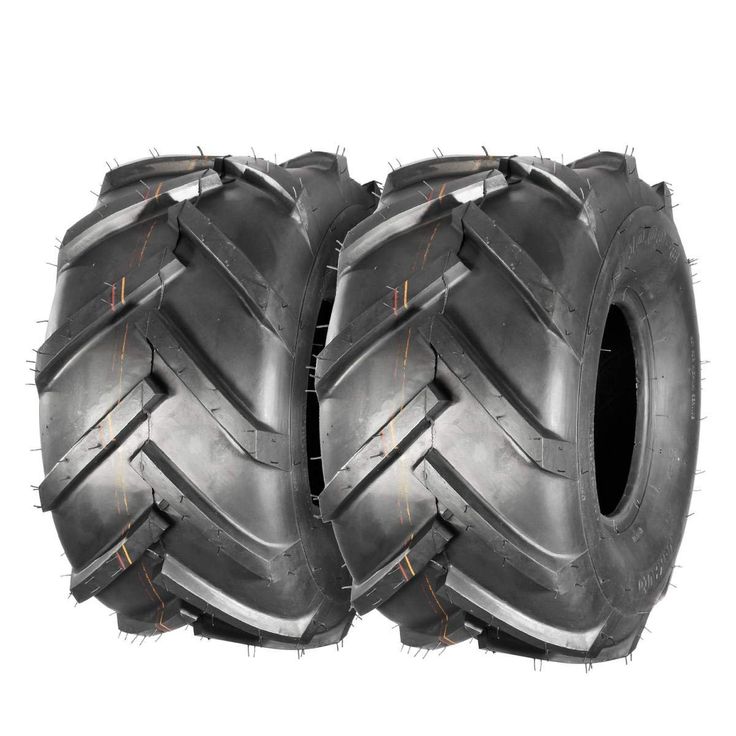
Get your ratchet strap around the tire and ratchet it a few times to apply pressure. This pushes the middle of the tire down and the sides outwards.
Once you’ve applied a bit of pressure, try pushing the sidewalls near the rim. If the bead seems solid against the rim, you can start adding some air and seeing if you have a seal.
If air still escapes from the sides and the tire won’t inflate, ratchet a couple of times on your strap and see if that helps. Once you have a seal, inflate the tire enough to keep the pressure on the bead so that you can remove the strap.
After removing the strap, you can continue to inflate the tire. The optimum tire pressure will be on the tire wall. And that is the number to aim for. Usually it’s between 15-40psi and often around 20psi.
Make your to check the tire and inflate to the right pressure.
Make sure you check your tire and inflate to that pressure. Under or over inflating can increase tire wear, decrease grip, and increase the chance of a puncture or blowout.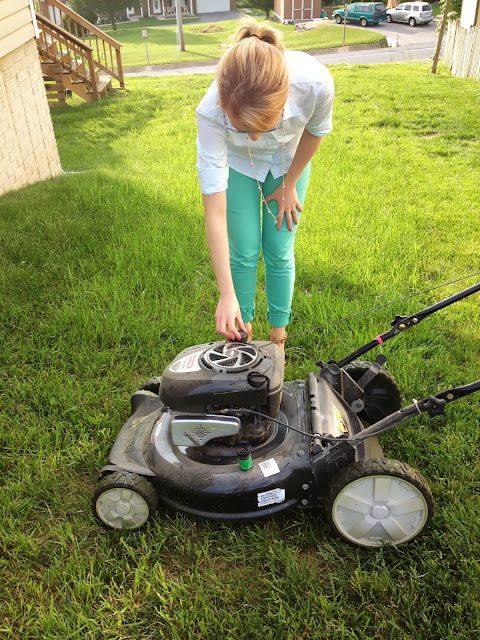
That’s it, your tire is back on the rim and fully inflated. Re-insert your jack and raise the mower enough to remove the jack stand.
Lower the mower back onto all its wheels. We recommend letting it stand for a few minutes before moving it. This way you can wait and see if your tire will keep pressure.
Once your happy everything is working, don’t forget to reconnect the spark plug wire and remove any chocks on the other wheels.
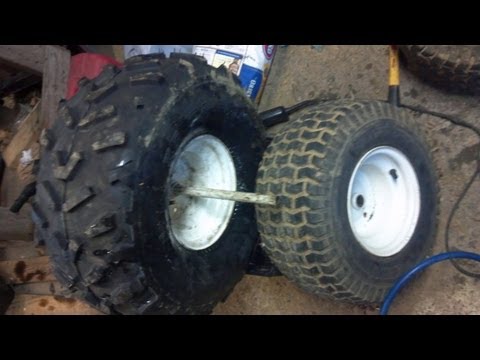
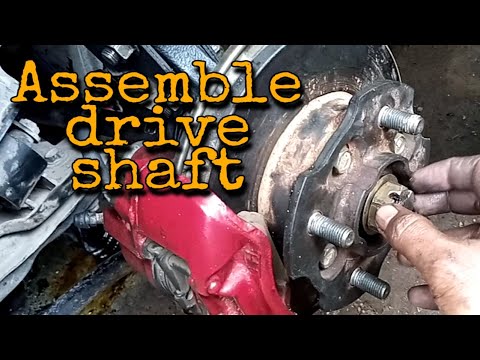
So, you’ve inspected the tire and decided to replace it. Now you need to remove the wheel. Take off the axle cover if there is one. Underneath will be a retaining ring. Use a slot screwdriver or pliers to pull it off.
Now you can remove the washer and pull off the tire. Beyond the tire is an inner washer. It’s best to pull that off as well. Make sure you put your two washers and the retaining ring somewhere safe. It’s really annoying to find you lost one when it’s time to put the tire back on.
Take the tire and lie it flat with the valve facing upwards. Remove the stem cap and use the stem core removal tool to unscrew and pull out the core.
Push down on the tire to dislodge the bead. Using a couple of slot screwdrivers, pry the tire up and off the rim on one side. Take your time. Pry a little of the bead up, slide another screwdriver next to the first and pry a bit more. Continue around the rim until the whole side is free. Flip the tire over and do the same again so that you can pry the tire completely off the rim.
While you’ve got the rim separate, give it a clean. Removing any dirt and grime will give a better seal between the new tire bead and rim.
Now it’s the reverse procedure from removing the tire. Using your slot screwdrivers (and make sure there are no sharp edges that could damage the tire) pry one side of the tire onto the rim. Flip it over and pry the other side on.
Flip your tire vertical again and find your compressed air. With a new tire, and not attached to the mower, it shouldn’t be necessary to use a ratchet strap or rope to get the bead to seal.
Push down a little on the tire and start to inflate. The bead should seal. Once you’re happy you have a seal, re-insert the valve stem core.
With the valve stem in, you can continue inflating the tire to the optimum tire pressure. Remember to check the optimum pressure on the tire wall and only fill to this value. As we said above (step 6a), over or under inflating a tire is not a good idea.
Using the reverse procedure from taking off the wheel, you can now re-install it. Find your washers and the retaining ring.
Put the back washer on first and then slide on the wheel. Add the front washer. Using pliers, put the retaining ring back on the axle and then replace the axle cover.
That’s it, you have a new tire. Re-insert your jack and raise the mower enough to remove the jack stand. Lower the mower back onto all its wheels.
Once your happy everything is working, don’t forget to reconnect the spark plug wire and remove any chocks on the other wheels.
Well done! You have fixed your mower tire and are ready to get back to your lawn.
I hope this guide has been useful to you. Whether you’ve put your tire back on the rim or replaced it completely, following our step-by-step guide should get your mower back on the grass in no time. Happy mowing!
It’s a fine sunny day of the spring season, and you are busy with some work in your garden. You use your trusted lawnmower that has not failed you. But suddenly, you feel that the lawnmower is not running as smoothly as it should. It feels like it’s being dragged on the ground forcefully. So, you turn off the lawnmower engine and get off your riding lawnmower. But what you see now is not pleasant at all. Your lawnmower has a flat tire, and you know you need to fix it with a new tire or tube.
As the lawnmower tire gets old, it is more likely that a nail can easily pinch into the tire and make it flat. A hard bump to the lawnmower can also cause this issue. This article shall be a step-by-step guide on removing a lawnmower tire, fitting a new tube or tire, and putting the tire back on the rim.
How to put a lawnmower tire back on the rim, step by step:
Contents
 1.2 – Step 1.2. Remove the C clip from the rim:
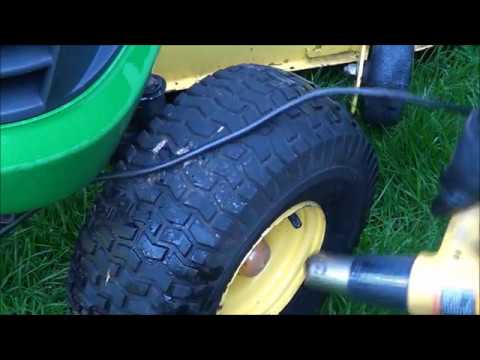 2 2. How much air pressure should I maintain in lawnmower tires?
The detailed procedure of removing and replacing your lawnmower tire has been broken down into several small steps.
The first step to fix the flat tire or replace it with a new one is to remove the old tire and the rim from the lawnmower. You shall follow the following steps to complete this procedure:
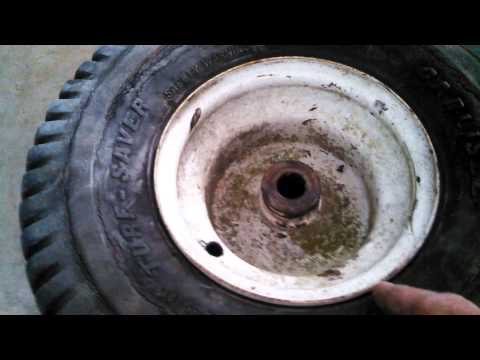
There is a plastic boot (or a cap) at the center of the tire’s rim. Grab it using a pair of pliers and remove it from the rim. Try not to break it as it holds some grease and is a little brittle because of that.
Behind the plastic boot lies a c-clip. Grab the tab of the c-clip using a pair of pliers and pull it out of the rim.
 Remove the washer:
Once you have removed the c-clip, you shall see a washer. Draw this washer out of the rim.
After you’re done with the steps mentioned above, you can now pull out the rim along with the tire from the lawnmower.
As you have removed the rim and the tire from the lawnmower, it’s time to remove the tire from the rim.
To remove the old tube’s nozzle (if your tire has a tube), you first need to peel the tire off from at least one side of the rim.
To do that, hammer a flat head screwdriver at the junction of the tire and the tube. Once the screwdriver gets inside this junction, please give it a push and try peeling the tire off the tube. Repeat the same step on the opposite side of the tire as well.
Every tire and tube has a nozzle that is fitted into the tire’s rim. It would be best if you pulled out this nozzle from the rim to proceed further.
This is where things get exciting and is the most technical step of the entire process. You may need a couple of screwdrivers for this step. Although there are special tools to take the tire off the rim, we shall use screwdrivers to save some bucks.
Insert screwdrivers at different positions: Insert a screwdriver inside the junction of the tire and the rim, and pull the screwdriver upwards so that the tire starts coming up off the rim.
Do the same step using another screwdriver, which shall be inserted at some distance from the first one. Keep working around the tire doing the same step.
Remove the tire off the rim: The tire is now completely free from the rim’s grip. Remove this tire off the rim.
Grab a torchlight and check if there are any nails or a sharp object pinched into the tire’s inside or on the outside surface. If you find any, remove it from the tire’s surface using pliers.
Phew, that must have been a tiring job. You are now halfway there, and all you need to do now is install the new tire back on the rim.
Some tires might be tubeless, while some may have a tube. You need to install a new tube if the previous one had completely weathered or has had various punctures.
Please insert the new tube inside the tire and stuff it in. The tube’s fill valve must be in line with the fill valve hole inside the rim, where it is to be fitted in. Insert the fill valve into the fill valve hole located on the rim.
If you are installing a new tire or putting the old tire back on the rim, this step is applicable for both of these cases. Screwdrivers and some hand force are all you need for this step.
Once the tire has been put back on the rim, it shall now be installed back on the lawnmower.
Place the tire back on the lawnmower’s axil, just like the way you pulled it out earlier.
Insert the washers back into the tire’s rim.
Re-install the c clip back into the rim with the aid of pliers.
Re-install the plastic boot back on the tire’s rim.
Related Questions:1. What size of lawnmower tires should I get?Like other tires, a lawnmower tire has a series of numbers imprinted on one of its sides. These numbers indicate certain specific details about the tire. Only two parameters are enough to indicate the tire’s full size, i.e., the tire width and the rim diameter. There are two different systems for tire’s sizing:
Two-number sizing:
Most of the lawnmower tires use a two-number sizing system to indicate the tire size. For example, in two number sizing, numbers are displayed as 5-9. This number indicates that the tire width is 5 inches and the rim diameter is 9 inches. These two numbers are all that you need to get a fresh piece of a lawnmower tire.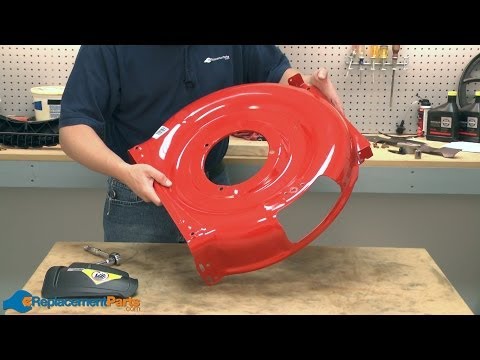
Three-number sizing:
This sizing system indicates the tire’s size with the help of three digits. For example, if the number 15×6.00-6 is imprinted on your tire, the number before ‘x’ indicates the tire’s diameter when it is fully inflated. The tire width is indicated by the number between the ‘x’ and ‘- ‘. The last number indicates the rim’s width.
2. How much air pressure should I maintain in lawnmower tires?Like other lawnmower parts such as the engine, fuel, and filters, they must be maintained for the lawnmower’s ideal performance. Similarly, maintaining an adequate and specific amount of air pressure in the tires is equally essential.
 A lawnmower that has a 15-inch front tire along with a 20-inch rear tire should have ten psi and 14 psi, respectively.
A flat lawnmower tire can ruin a garden lover’s mood. But removing and replacing a tire is not very complicated and can be done easily by most. Do not forget to take some precautionary measures before you start. Wear safety glasses and protective gloves to protect yourself from unnecessary injuries. And when you finish fixing your tire, also think about other maintenance tasks like the carburetor, air and fuel filters, and do not let gas get too old. This will prolong your lawnmower’s life, and you can continue to maintain your lovely garden!
Baby strollers, if treated with care, serve for a long time and are repeatedly transferred from one family to another. A small child has to be walked regularly at all times of the year in any weather, overcoming bumps on the roads and obstacles. Periodically lubricate the bearings in the wheels of young parents, the hands do not always reach, therefore, due to the wear of the wheel bushings, they break over time.
Stroller becomes stiff and pulls to the side when rolling. And if the retaining ring that holds the wheel is broken, then it constantly falls off the axle while driving and it becomes impossible to walk the child. Wheels and lock washers, as spare parts, can be bought new, but saving the family budget, you can repair it yourself.
Two types of bearings are used for landing wheels on axles in wheelchairs: sliding and rolling. Plain bearings are cheap, so they are often used. In rolling bearings, sliding occurs due to the rolling of balls in the cage. These are expensive bearings and therefore are used only in high-quality branded stroller models.
Rolling bearings with timely lubrication serve almost until the entire structure of the stroller is completely worn out. In the event of a breakdown of such a bearing, it is easy to replace it with a new one. A worn plain bearing cannot be replaced, usually the entire wheel is replaced. But if you wish, you can restore the plain bearing with your own hands, which is demonstrated in the article using the example of restoring the wheels of the Korean baby stroller COZY.
Wheels on baby stroller axles are usually secured with starlock washers or equivalent.
The lock washer and the bearing are usually covered with a decorative cover, which, in addition to the aesthetic appearance, serves to protect the bearing from dirt and water.
In order to remove the cover from the wheel, you need to press the latches one by one with the blade of a screwdriver on the inside of it, as shown in the photo. There are two wheels in this cover.
The stopper on the axle turned out to be plastic, consisting of two parts. One fixing, and the second for fixing the latch. As the operation of the stroller has shown, plastic latches often break, before that they had to be replaced with metal ones on three wheels.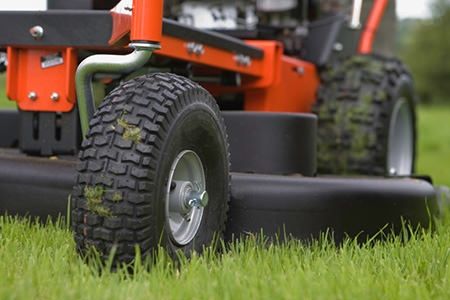
Before repairing the wheels, they must be thoroughly washed from dirt and grease residues with a brush and detergent. Laundry soap or laundry detergent will do.
To completely remove the dirt from the hole in the wheel and give it a rough surface, it is necessary to walk along its entire circumference with a round file. If there is no such file, then you can wrap a rod of a suitable diameter made of wood or other material with sandpaper, and thus treat the surface.
Next, from the tube, the inner diameter of which will be freely put on the axles of the stroller, it is necessary to cut bushings with a length equal to the length of the hole in the wheel. A brass tube is best, but if there is none, you can make it from steel. I made the bushings from the knee of a broken brass telescopic radio antenna, sawing it with a jigsaw with a metal file installed in it.
Manufactured bushings put on the axles of the stroller rotated easily.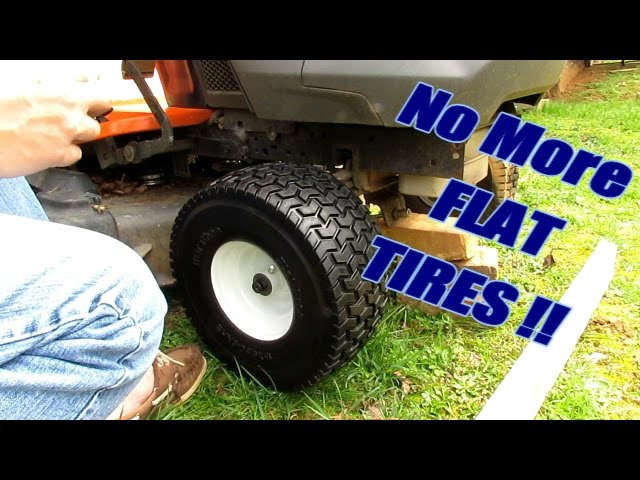 The gap did not exceed one millimeter.
For good surface adhesion of the epoxy bushings, their surface was processed with a coarse file. To fix the bushings during processing, they were held with round-nose pliers.
Bearing holes in the wheels had a lot of conical wear. Therefore, bushings made of a thin-walled tube were not fixed when installed in them. If it is impossible to insert the bushing into the wheel hole due to the large thickness of its walls, the hole must be bored out. If there is a soldering iron of sufficient power, then the hole can not be bored, but the bushing can be pressed in by heating it to the melting temperature of the wheel plastic.
The fixation of the bushings in the wheel holes was made with thermoplastic silicone, which also prevented the leakage of epoxy resin during pouring. Silicone was applied by melting with a soldering iron from the side of the hole with a minimum diameter.
The gap between the hub and the hole in the wheel is best filled with epoxy using a medical syringe. It is necessary to apply the resin slowly so that it has time to displace the air from the gap and penetrate to its entire depth.
This photo shows what the wheel looks like after filling the gap between the hub and the wheel hole with epoxy. If, during application, a little glue gets into the inside of the sleeve, then it can be removed after curing with a file or sandpaper.
To increase the strength of the restored bearing, after pouring epoxy resin, an additional flat metal washer was installed in each wheel. All wheels have been repaired and in a day, when the resin is completely hardened, they can be installed on a baby stroller.
During the repair of the wheels, it was discovered that one of them had a rubber tire that rotated freely around its base. Obviously, due to the tight rotation of the bearing, the rubber ring turned and, as a result, was worn out from the inside. This defect was eliminated by filling the resulting gap with silicone. It is worth noting that silicone hardens in depth at a rate of about 2 mm per day. Therefore, with a large gap depth, it is necessary not to operate the stroller for a couple of days after the repair.
Since three of the four plastic wheel locks broke and were lost, it was necessary to think in advance how to fix the wheels on the axles. It was decided to fix the dual wheels with studs, and the single one with a self-made split washer.
One axle was missing, while the other was barely visible. Therefore, holes with a diameter of about 1.5 mm were drilled in the place where the groove passed in the axles.
Before putting each wheel on the axle, its inner bore and axle surface were liberally coated with graphite grease. Slow-speed plain bearings are usually lubricated with thick lubricants. Among them are Litol-24, Philol-3, LSC-15 and the like. Motorists are well aware of these lubricants.
Metal flat washers have been installed on all sides of the wheels to reduce wear on the side surfaces of the bearings and prevent dirt from penetrating them.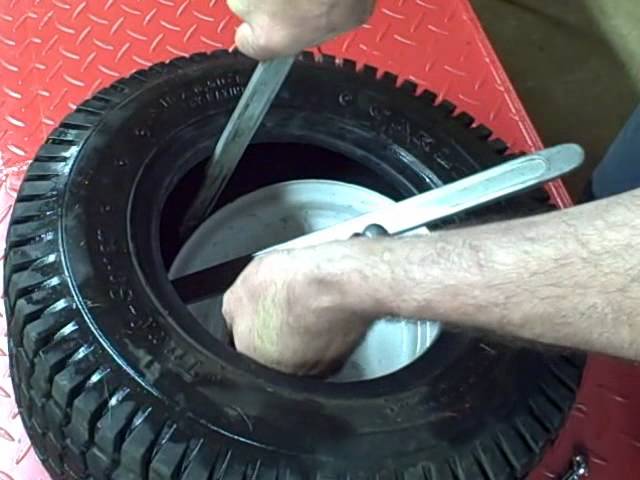 If there is no suitable size of washers available, then you can mount the wheels without them.
After installing the wheel on the axle, it must be secured with a pin. A postal carnation was used as a hairpin. To be able to insert a nail into the hole in the axis of the stroller, it had to be slightly bent in an arc.
Since the length of the nail was longer than required, a part of it from the side of the head was cut off with the help of side cutters. This operation can be performed before installing the nail on the axis. Instead of a nail, you can use steel wire or a piece from a large paper clip.
Next, the protruding ends of the nail from the axis must be bent with pliers at a right angle in different directions. One of the bends can also be done in advance. It remains only to install the decorative cover in place. If the cover is lost, the bearings will need to be lubricated more frequently.
The axles of the single wheels of the stroller had deep grooves and drilling holes in them could lead to the weakening of the axles.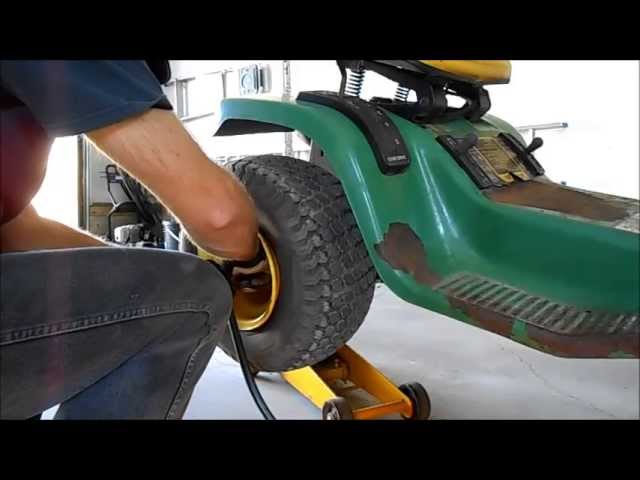 Therefore, it was decided to make the clamps from an ordinary flat metal washer.
The washer was bored from the inside so that it was about 2 mm wide and the diameter was equal to the diameter of the axle. To enable the washer to fit into the axle groove, a part a couple of millimeters wide was removed in it, as shown in the photo.
After applying lubricant to the axle and seating the wheel, the washer was put on to the level of the groove. Next, the washer was compressed with pliers until the ends closed, as in the photo.
Do-it-yourself repair of the wheels of a baby stroller has been successfully completed and you can go for a walk with your child. The installation of metal bushings in the bearings greatly increased the life of the wheels. The fact that it is time to lubricate them will be announced by an unpleasant creak that appears when rolling the stroller.
According to the young mother, after the wheels were repaired, the stroller began to roll easily, straight and even better than when it was new.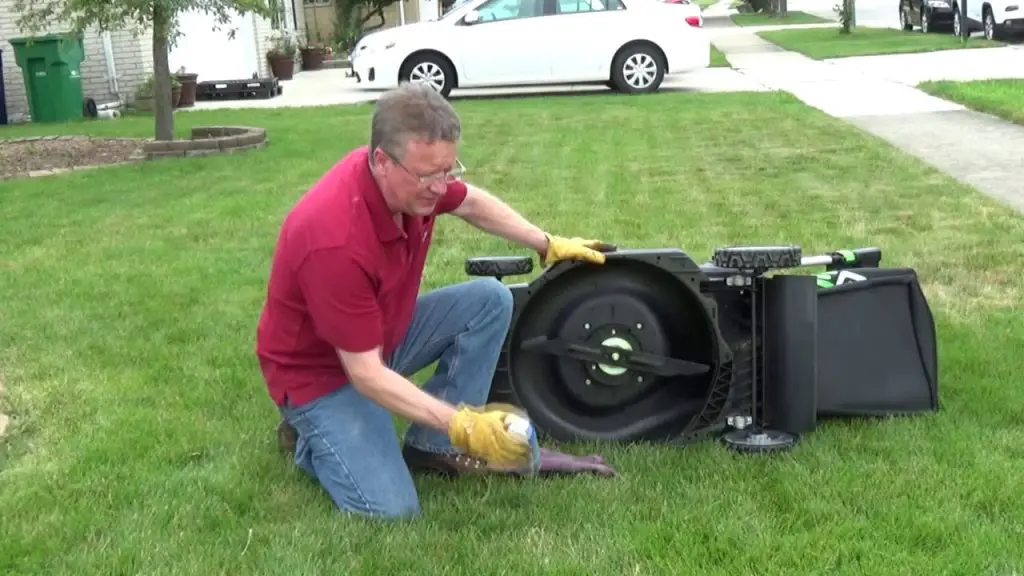
Contents
The pulley is a wheel with a groove running along the rim. The wheel is attached to the shaft and plays an important role in the design of the engine, being responsible for transmitting torque from the shaft to the drive belt. The idea of how to remove the pulley from the electric motor is necessary when it is necessary to repair or rearrange the part to a new engine.
In this article you will find a description of the existing pulley removal methods and a number of tips on their application.
The universal technique, the application of which justifies itself most often, is a simple mechanical action - light blows from opposite sides of the pulley, alternately. Thus, the pulley gradually shifts from its seat on the shaft and can be removed.
In more complex cases, the list of necessary actions is planned based on the following factors:
On low power motors, the pulleys are securely fixed by means of a spline fit, threaded connections or locking elements (rings, washers). To separate the pulley from the engine in such cases, it is enough to unscrew the nuts (or remove the rings). The situation is more complicated if a ring with serrated edges is used at the attachment point.
Before unscrewing the connectors, it is recommended to secure the pulley carefully with a vise. To avoid deformation of the pulley, wooden spacers are installed between the vise plates and the surface of the clamped part.
If a thermal method was used to mount the pulley, based on the expansion of materials, metals in particular, when heated, then the thermal effect on the pulley will also be required for its dismantling:
What should be paid attention to when using this method:
Depending on the material of the pulley and shaft, a different strategy can be chosen, in which, on the contrary, the shaft is subjected to cooling.
Before removing the pulley from the motor shaft, you can install a special tool - a puller, the device of which is simple. The design includes:
The disadvantage of the method is the need for a slight violation of the integrity of the pulley, in the surface of which for fastening the puller:
The puller works as follows:
There is a chance that the bolt stroke will not be enough to move the part. In this case, try placing additional nuts under the side bolts.
Thus, knowledge of basic dismantling methods and skills in working with simple tools will help you choose the optimal sequence of actions and quickly separate the pulley from the shaft.
Source
How to remove the pulley from the motor
How to remove the pulley often depends on the type of fit and type of mechanical interface. In the bulk, it’s enough to tap with a hammer at the diametrically opposite ends of the pulley to get it off the landing site, but time and corrosion can play a cruel joke.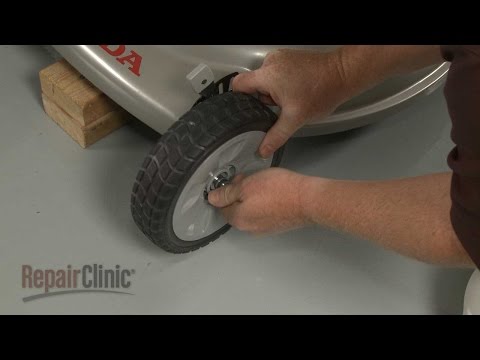 In this case, it will not do without the appropriate techniques and devices.
Low power motors often have a splined pulley fit without pressing. In these cases, the pulley is held from displacement by means of a retaining ring or washer, or a threaded connection. In these cases, it is sufficient to loosen the fixing nuts and remove the circlip . Reusable rings with a serrated edge should also be used, which will either have to be cut down or smoothed for a long time at the installation site with an awl and a screwdriver.
From time to time, to remove the pulley, heat it up rather slightly. As the temperature increases, the metal expands, which causes the degree of pressing to weaken. If the pulley was mounted on the shaft by the preheating method, then it is impossible to do without the indicated removal procedure: the shaft diameter is not just a hole in the pulley for a fraction of a mm, which is why the degree of pressing is very high.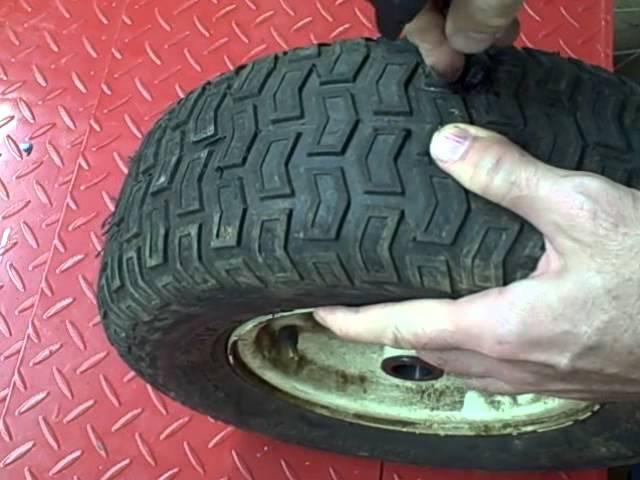
Help with repairs!
It is often possible to remove the pulley using a simple puller. It is a thick iron plate, there is a hole in the center. A large nut is welded coaxially to the hole to one of the planes of the plate. On one strip passing through the central hole, cuts of small thickness are made in the plate. To use the puller, a bolt the size of the nut welded to the puller and two smaller bolts with large washers will also come in handy.
Two holes must be drilled into the pulley, located on the strip passing through its center. In many holes, a thread is cut with a single-pass tap, along the diameter of which the bolts for the puller are selected. The motor shafts have a centering groove in which it is necessary to fix the ball from a bearing of a suitable size using a thick lubricant.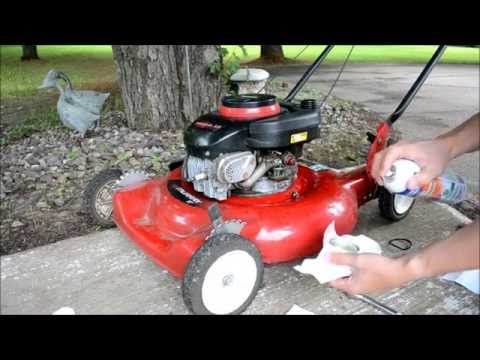 The central bolt of the puller will also have to be processed: a spherical recess must be made in its end face.
The puller is attached to the pulley with bolts passing through the slots and screwed into the threaded holes. The central bolt rests against a ball fixed in the centering groove of the shaft. During screwing, the bolt will unlock the puller from the shaft, so the pulley will be displaced from its seat. If there is not enough bolt travel to completely displace the pulley, several large nuts must be slipped under the side bolts.
Source
Home » How to Remove a Pulley on a Trimmer
One of the key parts of the brushcutter is the starter, designed to make it easier to start the machine's engine. Like other parts, it breaks periodically. In this case, there are two solutions to the problem: repair the starter trimmer or replace it completely. The second option is easier, but more expensive.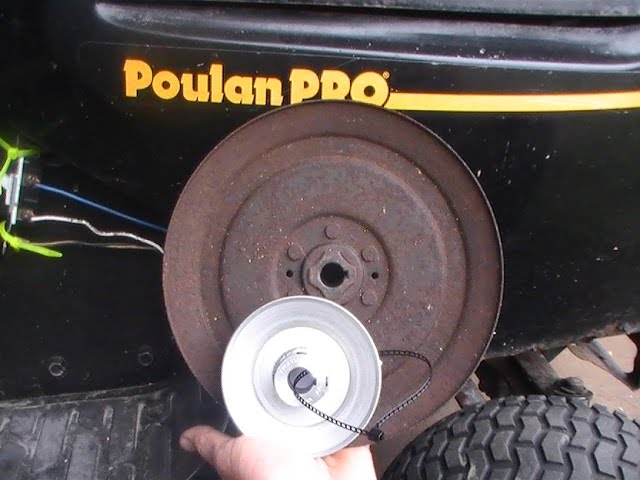 In addition, you must first find the necessary part in the sale, since different models of lawn mowers use different starters. If you have free time and a screwdriver with the appropriate tip, you can restore the functionality of this device if you know how it works, what defects are typical for it and how to fix it. All this is in this material.
In order to repair the starter brush yourself, you need to understand how it works and know its structure. To date, trimmers have manual and automatic starters, and the first. the most common. .
The part is a plastic housing that contains a pulley with a cord wound around it to start the engine. To ensure that the cord is wound independently after winding the tool, an alloy steel belt is located inside the pulley. A ratchet is mounted on the front of the pulley that locks the starter on the tool's motor drive shaft.
Note! Depending on the model and brand from which the trimmer is made (Huter, Husqvarna and others), the ratchet pulley may consist of one or two separate components.
The principle of operation of the manual starter is the same for Chinese, European and domestic gas trimmer, whether Hitachi, Patriot or other manufacturer. To start the engine, the owner of the device pulls sharply on the cord. From this movement, the pulley rotates, and the protrusions located on it engage with the dogs located on the flywheel. Then the flywheel and crankshaft begin to rotate the pulley. After starting the engine, under the action of centrifugal force, the combs and dogs diverge in different directions. And after the user releases it, the starter cord is wound around the pulley using a return spring.
Important! With heavy use, the drive cord breaks over time and the spring wears out. These parts are easy to replace with your own hands.
There are two failures in the starting mechanism.
In rare cases, the actuator breaks when the tool is inaccurate. The consequences can be unpleasant: a deformed cord is wound around the flywheel of a running engine, a pulley breaks and a spring breaks. . But these are isolated cases, a complete replacement of the starter is rarely required.
The assembly must be disassembled to diagnose the starter mechanism for repair. It's not hard to do, you just need a screwdriver. But during this operation you need to be careful. careless movements of may cause the spring to fly off and injure the user of .
The procedure for disassembling the starter is to perform a certain sequence of actions:
Spring winding is not an easy procedure. Not everyone can attend this event for the first time, so don't worry if you can't. Attempts must be repeated until the actions are successful. If you wish, you can watch a video on the Internet, where the wizards will talk in detail about how to easily and quickly perform the operation.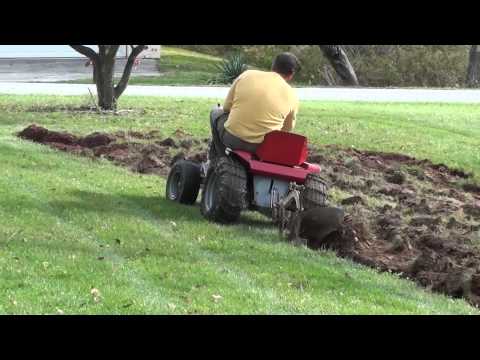
Important! When winding and installing the spring, be aware that it is hot, which means that it can burst if you apply too much force. The new part is inexpensive, but you will have to spend time looking for it, which means that the mowing job will move indefinitely.
To wind the spring, place the bend in the groove and then rotate the spool to carefully place the part along the inside diameter of the spool. In this case, the spring must be constantly held by hand. if it is not fixed, the part slides and pops out, then it is necessary to rewind. When properly executed, the spring fits snugly into its seat.
To replace the element in the spool, find the hole through which the cord passes and then tie a knot. Next, you will need to wind the coil in a few turns.
Note! You can find out the exact RPM by reading the trimmer instructions or by hand. To do this, measure the length of the rope and calculate how many times it can be wrapped around the coil.
For example, if the cord is rotated six times in a circle, then to tighten the spring, it is necessary to turn the spool counterclockwise six times. After that, you just need to pass the rope through the hole and fasten the handle to the cord.
Sometimes the spring still flies after repairs. There are two solutions to this problem:
To assemble the starter and install it in its original place, it is necessary:
When assembling, be sure to install both washers, otherwise after a while the plastic cup will be damaged by the spring, and when pulling the cord, the user will notice that he jammed . Looks like spring has come. To fix such a breakdown, you must install a larger screw or other washer. If you can't find the parts you need, just loosen the screw slightly and the starter will no longer jam. However, you should understand that these are temporary measures and that you should fix the problem as soon as possible.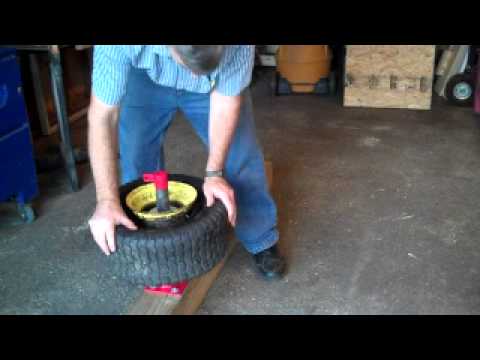
Sooner or later problems with the starter occur on any trimmer. Stihl FS 55, MTD 790 or other brand. This fault can be delayed, but the instrument must be handled with care. In particular, don't jerk too hard, as this will break the cord or spring. It is not recommended to expose the brush to blows or other physical influences. In the event of a breakage of the starter housing and a break in the cord, it can be wound around the engine flywheel. This will break the pulley and break the spring.
Therefore, having discovered that the actuator has broken down on the uterus, you should not immediately rush with the help of specialists. By knowing how to troubleshoot and/or replace parts, you can carry out repairs yourself. It does not require a special tool. The procedure may seem complicated and tedious at first, but numerous online starter repair videos can help you fix the problem as quickly and easily as possible.
Husqvarna 128R trimmer on the Yandex market
Trimmer Makita EBh441U on the Yandex market
Hammer trimmer GGT-2500S on the Yandex market
Source
Those who own land are very familiar with weed control.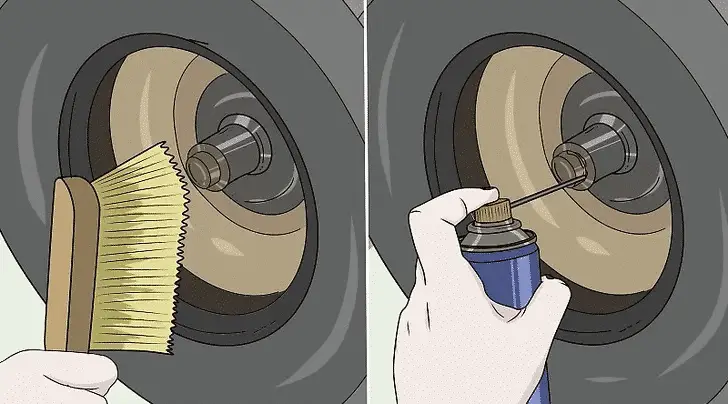
Especially when it often rains and the grass grows by leaps and bounds. Previously, and sometimes now, this issue was solved with the help of the good old braid.
But technology does not stand still, and now such assistants as electric and gasoline lawn mowers help in this matter.
A petrol mower has several significant advantages over an electric mower, such as mobility and no risk of electric shock. But there are also many disadvantages, for example: high price, a lot of noise, expensive fuel and significant weight.
Fig. 1. Repairable Lawn Mower
Electric mowers are cheaper, lighter, run on inexpensive energy, and are easy to maintain and repair. These advantages become the main reason for their great popularity among buyers of this type of equipment.
But despite the rather good quality, improper operation and heavy load can damage the device. In such cases, you should not immediately carry the device to the repair shop, but try to find and eliminate the cause of the breakdown yourself.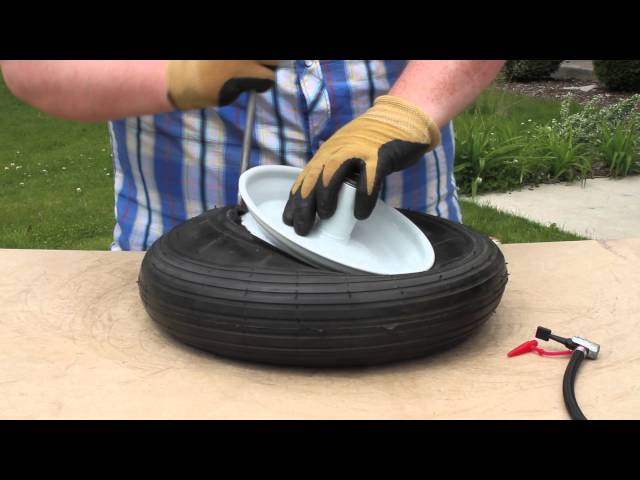 Moreover, as mentioned above, electric lawn mowers do not have as many components and parts as gasoline ones.
The main thing is to have some tools and faith in yourself. In this article, I will just show you how I did the repair of a lawn mower with my own hands.
Fig. 2. AL-KO lawn mower
The example is taken from AL-KO lawn mower, which had serious problems in operation, namely: the engine stopped without load and its strong overheating. The motor stops, buzzes and starts it again, only pressing the "START" button again helps. You have to restart the button almost every 30 seconds, and more often with further work.
Of course, it is possible to work this way, but it is very annoying and gives the feeling that there is a problem somewhere.
So I wanted to figure out where?
After running the mower for an hour, the engine temperature was measured. It was impossible to touch it with a finger. He radiated heat directly.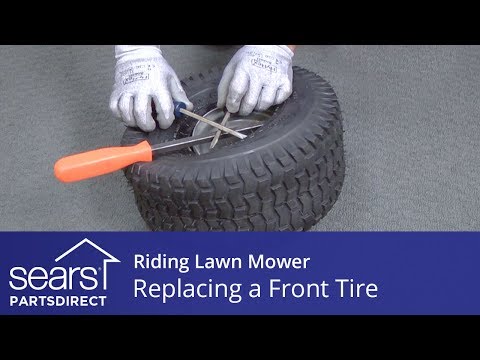 If you continue to pay no attention and continue to work on such a mower, the electric motor will inevitably fail.
Determine the cause of the motor overheating. To do this, remove the top cover of the housing, under which the engine and its power circuits are located.
The cover is held on by six Phillips head screws.
Unscrew these screws and remove the cover - upwards.
Fig. 4. Removing the cover
Removing the cover reveals the impeller, condenser, two connectors and the motor itself.
At first glance, there are no particular problems. The temperature has slightly darkened the motor winding, but so far this is not critical.
Fig. 5. Impeller, condenser, two connectors and the motor itself
To inspect the condenser more carefully, it is necessary to unscrew the mount and pull it out.
Fig.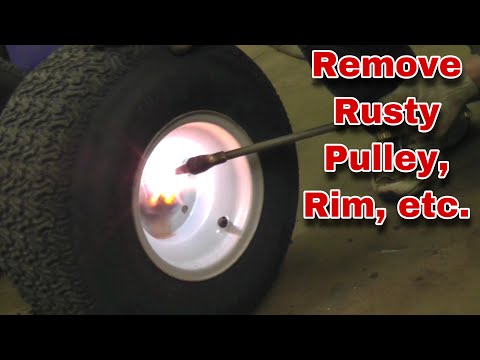 6. We take out the capacitor
The capacitor did not show any external damage.
Fig. 6.1. Capacitor in the lawn mower
To test it, disconnect the capacitor and briefly energize the motor. If it did not start and started to buzz, then the capacitor is intact, because the engine started with it. Turn off the power and connect the capacitance connector back to the motor circuit.
Next, try to spin the impeller. It is mounted on the axis of the rotor and rotates rather tightly.
Fig. 7. Turning the impeller
And the reason for such a heavy rotation is a mechanical brake, which, for safety, stops the rotation of the motor when the power is turned off.
It looks like a sleeve that moves freely from top to bottom, along the axis of the rotor.
When the motor is not energized, this bushing is pressed with its upper part against the cover, on which two rubber strips are glued. Thus, the knife fixed on the rotor shaft is braked.
When energized, the brake sleeve is magnetically retracted towards the center of the rotor and provides free play.
Fig. 8. Mechanical brake
Upon closer inspection of this hub with a brake, it was noticed that at the moment the engine is turned on, the brake is retracted and gives the shaft free rotation, but after 2-3 seconds it is released again and starts to slow down the motor. This should not be. Hence the stop of the knife during operation and overheating of the engine.
To find out what is the reason for such work, it is necessary to remove and disassemble the engine.
To remove it, you must first unscrew the bolt securing the blade (see figure below).
Fig. 9. Unscrew the knife fastening bolt
This is done with a nineteen key.
Direction of rotation as normal bolt, not left-handed. That is, it should be unscrewed counterclockwise, and twisted clockwise.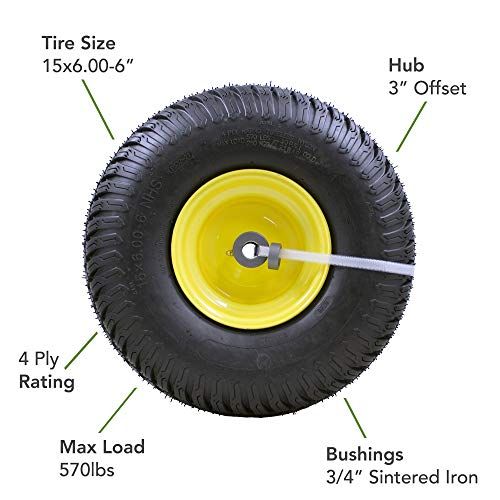
The head of the bolt is plastic, so when using a wrench, it must be well inserted so as not to “lick off” the edges.
Adjustment is made with washers under the bushing (see illustrations below).
Fig. 12 Fig. 13 Fig. 14
We remove everything, only the motor shaft and the hexagon screws for its fastening remain.
The wrench for these bolts has a face spacing of 6 mm. Unscrew them counterclockwise. Removing the last screw, with one hand, hold the engine.
Fig. 15. Motor shaft. We unscrew the bolts
Next, we put the mower on the wheels, and clasping the engine with our hands, we raise it.
Fig. 16. Fig. 16 Lawn mower engine 17. Lawn mower engine
To disassemble the motor, the tie-down pins must be released. We unscrew them all.
Fig. 18. Disassemble the lawnmower motor
Remove the impeller with two screwdrivers.
Fig. 19. Removed the impeller
Proceed to the removal of the rear cover. A wooden block and a hammer will help with this.
But first you need something sharp to mark the position of the covers in relation to the motor housing.
Fig. 20. Marking the position of the covers
Put the engine on its side and hit with a hammer, through a wooden gasket, on the rear shaft.
Fig. 21. We hit the rear shaft
The motor at this moment should be held by another person.
We strike until the moment when the axle completely comes out of the bearing.
Fig. 22 Fig. 23 Fig. 24
You can also lift the motor vertically and hit the shaft against a piece of wood. This method can also remove the shaft from the bearing.
If the shaft is out, remove the cover, brake bushing and two brackets on it with a screwdriver.
Fig. 25. Remove 2 brackets with a screwdriver Fig. 26. Brake bushing
Now that the brake parts have been removed, put the rear cover back on. We are looking for previously set marks, and combines them.
Fig. 27. Brake elements removed. 28. Install the back cover back
Thread the connector with wires into the cutout of the cover.
Next, we put the cover with the bearing on the shaft and tapping on it from all sides, we achieve a complete installation.
Don't hit the lid too hard to avoid cracking the brittle aluminum. Therefore, blows must be applied through wood or rubber.
Fig. 29. put on the cover with the bearing
When the cover with the bearing is tightly “sat down”, we twist the tightening pins. They should be clamped gradually diagonally. At the same time, we achieve maximum ease of rotation of the motor shaft.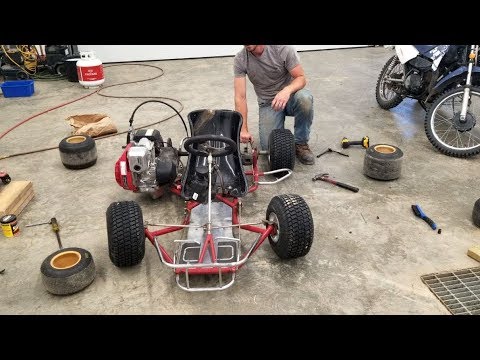
Fig. 30. We twist the tightening pins
Next, we put the impeller on the rotor. With its help, the engine is cooled during operation.
Fig. 31. We put the impeller on the rotor
First, we put the impeller on with our hands, and then, with light taps on the center with a hammer. The part should not be “set too deep” either, otherwise it will cling to the engine cover.
Now we lower the engine into the seat.
Fig. 32. Lowered the engine into the seat
We connect the motor and capacitor connectors. It is very important not to confuse which plug goes where. Otherwise, the engine will not work correctly. Therefore, when disassembling, everything must be signed and photographed.
Fig. 33. Connect plugs
Next, you need to fix the motor. To do this, we put the mower on its side, and holding the engine by the impeller, we combine the holes for the bolts.
After tightening all four bolts, tighten them with a hex wrench. This must also be done diagonally.
Fig. 34. We tighten the bolts
After that, we put the next part on the shaft.
Fig. 35. Mounting part
The knife must be installed with the curves upwards. They are needed in order to push the cut grass back into the container.
Fig. 37. We clamp the bolt
Now we put the machine on the wheels, and install the protective cover. We fix it with screws.
Fig. 38. Install the protective cover
Turn on the engine and listen to its work. In this case, there should be no extraneous sounds, but only a slight rustling of the knife.
Final check of the mower on a patch of grass.
Fig. 39. The lawn mower is working!
As you can see, the machine copes with its task without shutdowns and braking.