Whether you’re going on a road trip or making a quick stop at the community center, it’s crucial that your car has a functional spare tire at all times.
It’s equally important that you’re able to get the tire down from under the vehicle when you need it. Some cars come with specialized tools to lower the spare tire and quickly make the change.
However, if the tool is unavailable for some reason, you can still bring down the tire and be back on the road in no time. Let’s take a look at how to get a spare tire down without the tool.
Removing a spare tire without the factory tool is easy when you follow these steps:
Removing a spare tire without a tool might appear daunting at first. However, with the right equipment and process, it’s not too difficult a task.
There are two methods to lowering a spare tire on a Ford truck. Each method uses different tools. As such, your choice will depend on the equipment you have to hand.
This method involves pulling out the key from the spare tire drop assembly and using stock spare tire tools to lower the tire.
To make up for the lack of the factory key, you will need some standard tools like joint pliers, small pieces of wood and an optional helping hand.
After you’ve collected the tools, follow the steps below to remove the spare tire.
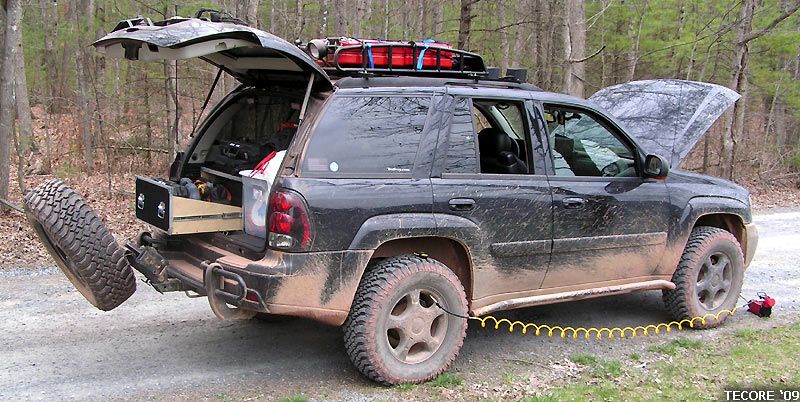
As you already know, the tire hangs from the truck’s underside toward the vehicle’s rear. As such, you will need to go under to gain access.
Before you get under the truck, remember that safety comes first. Therefore, ensure that you park the vehicle properly, on a surface that’s as flat as possible, with all brakes engaged.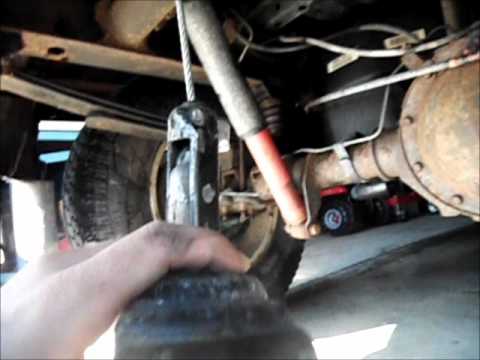 These precautions are to prevent the vehicle from moving while you work under it.
Locate the guide tube under the vehicle. This is a long, black, plastic pipe near the tire. Twist the tube back and forth while pulling it in the direction of the vehicle’s rear to reveal the drop mechanism for the spare tire.
Still under the truck, move to the passenger side and pull down the tire on this side, putting the wood in the gap between the top of the tire and the truck bed frame.
At this point, you may need that optional helping hand to put in the wood while you hold the tire down.
The reason for putting in the wood is to give you easy access to the drop mechanism without having to move the tire away from the truck bed continually.
Put your hand through the space created by the wood and feel for the key to the spare tire drop mechanism. The key roughly resembles a wheel lug nut, and when you find it, pull it out using the jack or working pliers.
Sometimes, just pulling the key may not be enough, and you may need to wriggle the pliers as you pull.
With the key out, the hole left behind is almost identical to the jack crank. Thus you can use the stock tire tools to lower and remove the spare tire. Insert the jack crank into the hole and turn counterclockwise to lower the tire.
The second method differs considerably from the first. Accordingly, you need a different set of tools, including:
With the tools above, you can bring down the spare tire by following the steps below.
Attach the 14mm socket to the extender. You don’t need to use a high-quality socket, as any low-end one will do. It’s also best to use an extender long enough to reach from the bumper to the spare tire. Aim for an extender that’s around 60–70cm long.
Insert the socket into the hole located on the left (or right, in some trucks) of the license plate. The hole leads directly to the key.
Use a hammer to strike the extender when you feel the socket touching the key. Hitting the extender pushes the socket over the key, providing a better grip.
Four to five blows from the hammer should be enough. Additionally, do not apply too much force to the hammer to prevent damage to the drop assembly. You don’t necessarily have to use a hammer; any object large and tough enough can serve.
With the socket firmly in place, use a wrench to turn the extender counterclockwise. The drop assembly key is similar to the one used on wheel lug nuts./photo/gridoto/2018/06/06/3338056839.jpg) Thus, it will turn as the socket turns.
Thus, it will turn as the socket turns.
It may be hard to turn the wrench at first, but it becomes easier as you continue turning, and the tire gets closer to the ground.
By the time the tire hits the ground, the key will be loose and you can remove it. Withdraw the extender from the hole, and use a flathead screwdriver to pry the nut out of the socket.
While the tire is now on the ground, you can’t use it until you detach it from the hoist. To disconnect the tire, reach into the large opening in the middle of the wheel. Next, locate the metal flange connected to the cable and turn it from a horizontal to a vertical position, pulling it out of the rim vertically.
Finally, the hole left behind by the key can fit a jack crank. Put the crank through the opening near the license plate till it gets to the hole vacated by the key. Turn the crank clockwise to raise the hoist back up
While Chevys store spare tires under the truck bed like other trucks, the removal process differs. So, if you’re wondering how to lower spare tire on Silverado without tool, follow the steps below.
You will need a couple of tools, including an ignition key and a jack kit to make a chevy spare tire removal tool.
Like other trucks, the access hole is on the rear license plate’s right side and covered with a rectangular shaped plastic.
Newer models may have a lock over the hole as a security measure. In such cases, use the ignition key to remove the lock assembly covering the hole.
Open the jack kit and select the rod with the broader end and flanges on all sides. This rod is the “female” rod and the one you’ll insert into the now open keyhole.
Get another rod from the tool kit, and attach it to the end of the female rod to make it long enough to reach the spare tire from the bumper. Ensure that the press locks enter properly to prevent the rods from disconnecting while you’re turning it.
Insert the composite rod into the spare tire hole. Press and turn the rod simultaneously until the end locks into the cable crank.
Put a wrench on the other end of the extension rod and turn counterclockwise. The tire will begin to drop as you turn. Continue turning until the tire touches the ground when you can remove the cable flange from the rim.
Furthermore, you can use the procedure above on different models of Chevrolet trucks. As such, you can follow the steps if you’re wondering how to remove spare tire from Chevy suburban.
It’s always an unpleasant experience when you get a flat tire. It’s even worse when you can’t get the spare down for lack of the specialized factory tool.
However, there are other ways to bring down the spare tire even without the tool. These methods are straightforward and use common tools like extenders, flathead screwdrivers, sockets, ignition keys, chunks of wood, pliers and hammers.
Thus, with or without a factory tool, you can get the spare tire out in minutes and be back on the road quickly.
Chevrolet Trailblazer owners have reported 8 problems related to spare tire (under the tire category). The most recently reported issues are listed below.
Failure Date: 07/11/2013
The indicated vehicle is my wife's. We bought it brand new on 09/26/2001. She has never towed anything and has city and highway miles. We have had numerous problems: instrument cluster, rear tailgate strap, right rear brake light, (3) solenoids, spare tire dropdown and deteriorated transmission lines. I have repaired all of the previous out of pocket (except for the strap and the spare tire dropdown). Now, my wife was on the way to the bicycle store in her truck, with the bicycle on the back. She was making a turn onto the main road when she heard grinding and squealing, and the speed dropped drastically.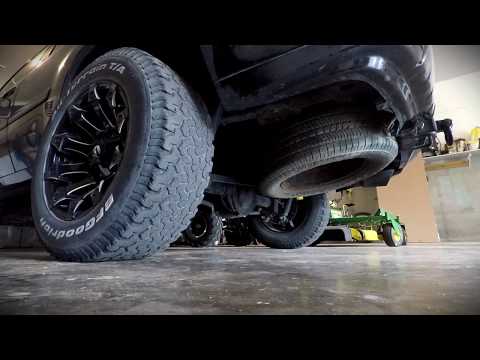 Luckily, it was around 10am when there is not much traffic on the road. Reading numerous posts on this website, it is the same problem everyone has had, the transmission sun shell, and no reverse. With 98911 miles, I was about to spend the weekend changing the fluid in the transmission to keep it to spec. Now, I'm looking at a very expensive bill of which I cannot afford. $30 is easier than $1200. And, I'm a manufacturing engineer, so I check fluids regularly, even though the oil change stations check them. Seeing that there are problems with these components, I think that general motors should produce a recall. I'm very disappointed that with all of the complaints, nothing has been done to remedy the situation. We will be calling the dealer that we bought the vehicle from first thing Monday morning.
See all problems of the 2002 Chevrolet Trailblazer 🔎.
Failure Date: 09/15/2009
Got a flat tire on the road.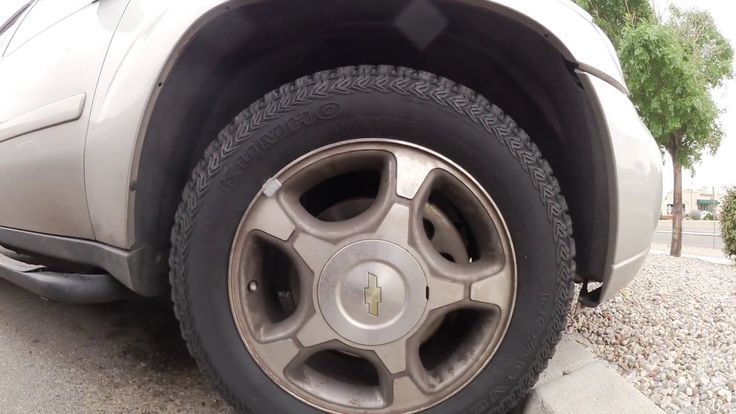 When I attempted to drop the spare from the back bottom of the vehicle it was frozen in place. Cable holding spare was frozen with rust. This part failure is dangerous to people of similar vehicle makes because it must be happening to others. I was under the vehicle trying to break the tire free in traffic that could easily have led to me being killed trying to break spare tire loose and it caused me longer delay and exposure to dangerous traffic due to part failure. I could not get it loose and had to have the dealer replace the whole cable. Dealer from Chevrolet said cable was frozen. 2003 chevy Trailblazer.
See all problems of the 2003 Chevrolet Trailblazer 🔎.
Failure Date: 09/02/2009
Due to corrosion of the spare tire component the spare tire will not release from the car, the problem is not easily fixed it is a problem and a safty issue. With out a spare tire a person can possible be stranded with no help and possibly harmed or in worse events envoled in a crash if in high traffic area. The main use of a spare is to get the car back on the road in a timely manner and with this persistant problem with the spare tire component risk of injury or death is increased greatly.
See all problems of the 2004 Chevrolet Trailblazer 🔎.
Failure Date: 03/27/2009
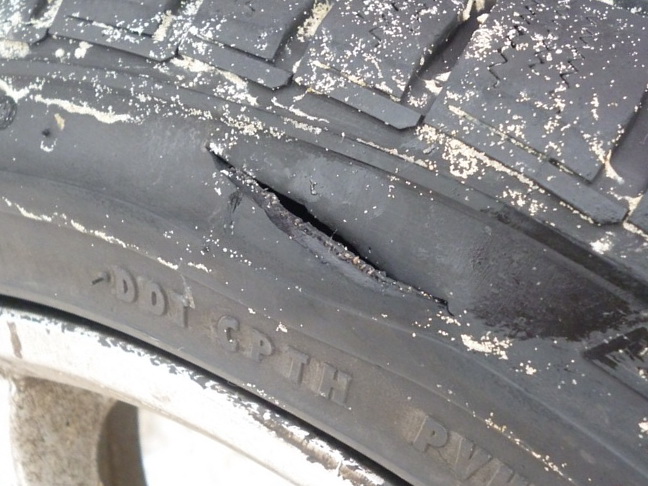
The contact owns a 2003 Chevrolet Trailblazer. The vehicle has kelly safari trex tires, size p245/70/r16 (na). While driving approximately 50 mph on a snow covered road, the vehicle began to fishtail into a spinout unexpectedly. The driver pulled over to the shoulder of the road and inspected the vehicle. She noticed that the tire exploded on the rear driver's side of the vehicle. The tire tread debris exploded in all directions in the road due to the massive force. The tire was changed and replaced with a spare tire. The vehicle was able to resume normal operation and then taken to an independent tire shop. Two replacement tires were ordered for the vehicle. The failure and current mileages were 12,000.
Failure Date: 03/10/2009
The contact owns a 2007 Chevrolet Trailblazer. The vehicle has four continental tires, size 25/65/17. The contact noticed that the original spare tire located in the trunk of the vehicle was a different size from the original four tires mounted on the vehicle. The spare tire was a goodyear wrangler, size lt235/75r16 (na). The authorized dealer was notified and they stated that the spare was designed for the vehicle by the manufacturer. The spare tire exhibited no defects. There had been no failure to date. The current mileage, VIN, and dot number were unknown.
See all problems of the 2007 Chevrolet Trailblazer 🔎.
Failure Date: 08/16/2008
My family & I were on our way back from chicago on I-55 near pontiac IL when we had a tire blow-out on our '03 chevy Trailblazer. I tried to remove the spare tire from underneath the vehicle, but it would not lower. (chevys have a winch system for the spare tires) the tire would lower about 2 inches, but would not lower completely. I tried several times to lower the spare w/ no results!! if this system would have worked properly I would have had the flat changed in a matter of minutes. The spare tire storage is a good system, if it works! there was no rust on the cable, or anything hindering it from working the way that it is suppose to. I followed the instructions in the owners' manual to no avail! it just didn't work! because of this faulty system, I had to call a towing service to get our vehicle hauled back to bloomington from outside of pontiac. The bill for said tow, wound up costing my family $255. 00. What good does it do to have a spare tire on a vehicle, if you can't retrieve it from it's storage spot? there was absolutely nothing I could do to get my family off the side of the interstate, so we had to wait for a little over an hour on the shoulder until the tow-truck arrived.
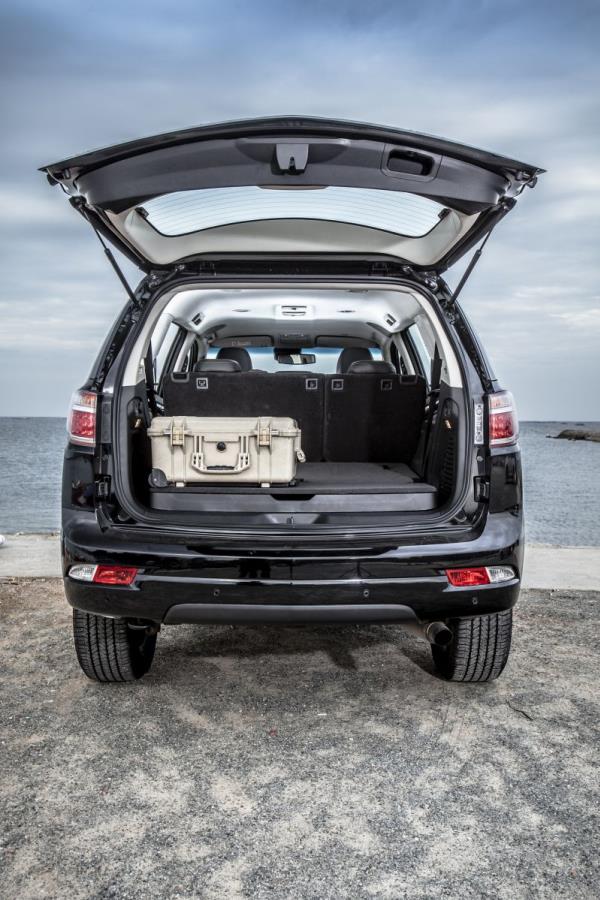 Like I stated, if this system had worked properly, I would have had the spare switched in a matter of minutes & saved my family alot of stress not to mention $255. 00!.
Failure Date: 09/25/2005
The spare tire hoist cable system tangled or jammed and would not allow the spare to lower further or raise. I had to use rope to tie the spare tire to the frame to make sure it would not fall down while I was driving which clearly could have thrown the back of the vehicle upward. The dealer had to cut the cable and replace the entire hoist assembly: $176. 54. The hoist had been used successfully on three other occasions.
Failure Date: 08/20/2004
From first attempt to use the spare tire lowering device it has not worked. Goes down about three inches and stops. Tire cannot be removed. This is a problem when stuck on the highway and is a real safety concern. Chevy has told me that nothing covers this. I am reporting this so that if other people are experiencing the same problem it will be rectified.
| Switch Make: AcuraAudiBMWBuickCadillacChevroletChryslerDodgeFerrariFordGEOGMCHondaHyundaiInfinitiInternationalJaguarJeepKia MotorLand RoverLexusLincolnLotusMazdaMercedes BenzMercuryMiniMitsubishiNissanOldsmobilePlymouthPorscheSAABSaturnSmartSubaruSuzukiTeslaToyotaVolkswagenVolvo |
| Switch Model: 150025003500AstroAvalancheAveoBerettaBlazerBolt EvC/k 2500C/k 3500C/k PickupsC10C15C1500C2500C3500C4500C5500CamaroCapriceCavalierCheyenneClassicCobaltColoradoCorsicaCorvetteCruzeEquinoxExpressExpress 1500Express 2500Express 3500HHRImpalaK1500K2500K3500KodiakLuminaMalibuMalibu HybridMonte CarloP30PrizmS10SilveradoSilverado 1500Silverado 2500Silverado 3500SonicSparkSSRSuburbanTahoeTahoe HybridTrackerTrailblazerTraverseTraxUplanderVentureVolt |
| ✿ Fuel Economy of Trailblazer Vehicles |
| ☘ Trailblazer Service Bulletins |
| ⚑ Trailblazer Safety Recalls |
| ☤ Trailblazer Defect Investigations |
©2022, CarProblemZoo. com All rights reserved.
Contact •Privacy • Reference
Fuel Economy Safety Ratings Crash Report Recalls Bulletins
sharp objects may damage the tire and rim. When parking, do not "grind" tires to the curb.
Check the wheels regularly for damage. If damaged or excessive wear occurs, contact your Chevrolet dealer for assistance.
Spare wheel
Depending on the size of the spare wheel compared to other wheels fitted to the vehicle and the regulations in force in the country, it may be classified as a temporary spare wheel.
The spare wheel has a steel rim.
The spare wheel must not be smaller than the other wheels. Otherwise, and also if winter tires are installed on other wheels, this may impair the vehicle's handling. Replace the defective tire as soon as possible.
The spare wheel is stored under the bottom of the luggage compartment of the car.
Only one temporary spare wheel may be fitted. Do not exceed the speed of 80 km/h. Take turns slowly. Do not use this wheel for a long time.
Removing the spare wheel
1. Open the cover.
2. Use a screwdriver to assemble the wheel wrench, jack handle extensions and handle.
3. Insert the flat end of the jack handle at an angle into the hole in the center of the luggage compartment floor trim and then into the guide groove.
4. Turn the wheel wrench counterclockwise to lower the spare wheel to the ground. Continue turning the key until the wheel is down enough to be removed from under the vehicle.
5. With the wheel lowered slightly, fold the retainer along the first cable so that it can be pulled through the hole in the rim.
6. Unscrew the nut on the disc using the wheel wrench to disconnect the second cable. Remove the safety cable.
7. Carefully set aside the replaced wheel and tools.
Changing a wheel
Carry out the following preparations and observe the following instructions.
1. Park the vehicle in a safe place on a level, firm and non-slip surface.
2. Press the alarm button
3. Install the wheel chock.
| Tire puncture | Location of wheel chock | |
| Front | Left side | at the right front wheel |
| Right side | behind the left front wheel | |
| rear | 9007in front of the front wheel | |
The peculiarity of the power plant was that the motor had an in-line arrangement of cylinders. At that time, this was a revolutionary solution for the entire American auto industry, but all the pros and cons of this unit came to light a little later.
With intense “shoots” along the highway, at speeds above 6,000 rpm, there were cases when the power steering pump pulley was torn off.
Causes of motor failure Trailblazer 4.2:
• “Twisting” of the motor
Prolonged operation of the engine at maximum speed. If you twist this motor, the piston group may burst. Despite the sporty spirit of the power unit, this car is not a sports car and you should not race it from traffic lights.
• Oil starvation
Any high speed engine is prone to oil consumption. Between service runs, between 10.000 km, it is necessary to monitor the oil level. If you just tighten it with an oil change, it starts to clog the oil channels, after which the upper camshafts and crankshaft journals begin to jam and repair of the Chevrolet Trailblazer engine becomes inevitable, and in most cases the unit must be completely replaced.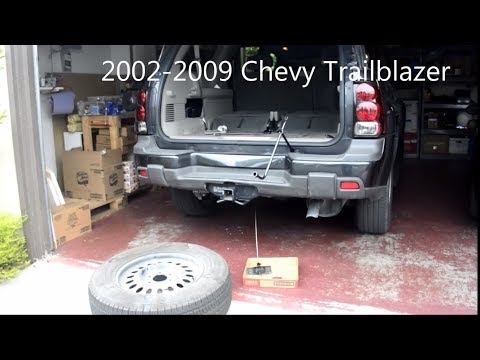
• Overheating
1) In terms of design, the engine radiator is not optimally located. Even with slight pollution, the motor begins to experience difficulties with cooling and gets instant overheating.
2) On the first generation units, a viscous coupling was used as the basis for cooling the radiator, which was used according to the thermocouple principle. But on the updated motors, an electronic viscous coupling powered by a switch-on sensor began to be used. In the event of a sensor malfunction, cooling occurred with a slight delay, which ended with an engine overhaul.
3) A pump leak is also a common problem. On average, its resource ends at 150,000 km., Or after the first overheating. The fall of antifreeze also leads to tragic consequences.
• Engine Overhaul Challenges
The six-cylinder in-line unit is complex with 80% aluminum components making it difficult to overhaul.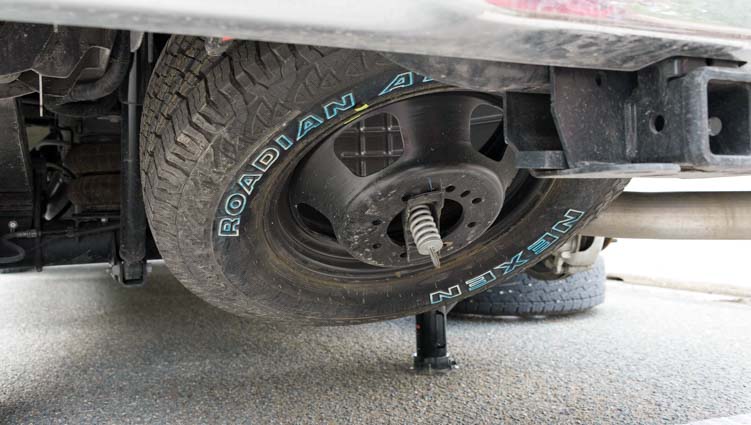 When disassembling the cylinder block, 5-8 cylinder head bolts almost always break. In our service, the repair of a Chevrolet Tahoe engine begins with drilling out broken bolts and then replacing them with "screws". Without removing the broken bolts, it is impossible to assemble the motor.
When repairing the motor, the plane of the piston group is checked. It is mandatory to pressurize the cylinder head and check its plane.
After the engine is completely disassembled, the camshafts and cylinder head are diagnosed.
The standard set of works on the engine overhaul on the Trailblazer includes repair of the cylinder head, wiping the valves, replacing the main and connecting rod bearings, if necessary, we bore the piston group.
pallet and checking the condition of the crankshaft and liners.

 1 cm thick) under the jack. WARNING
  To avoid injury and damage to the car, the jack foot must be installed strictly in the places provided for it.
  The wheel can come off and cause a serious accident.
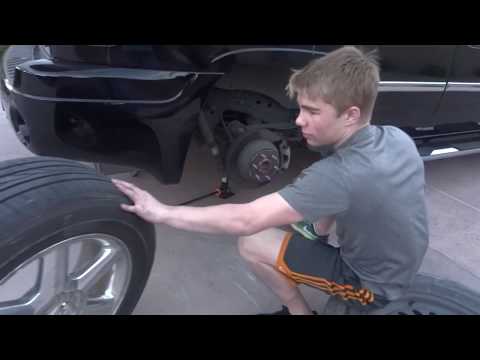
 This video shows where the spare tire, jack and jack kit are located in your Trailblazer, how to assemble the components of the jack kit, how to replace a flat tire with the spare tire, and the safety precautions to follow when using the jack. Most Chevrolet jack kits include a jack, handle jack and an eye wrench.
  Most Chevrolet jack kits include a jack, a jack handle, and an eye wrench.