A lot of cyclists would not give a second thought on whether the bike is using tubeless or tube tires till something goes wrong. Tubeless tires are becoming popular mainly because they are lighter and they have fewer flats and give better performance. How to inflate tubeless bike tires?
To pump tubeless tires on a mountain bike you can use a tubeless tire booster, compressor, or foot pump for tubeless tires. When you connect the pump to the tire, you can now proceed to inflate your tire. The tightening of your tire will enable it to build enough pressure and thereafter form a seal between the tire and the rim.
In this post, we will go through how to inflate tubeless bike tires. Let’s get started!
Tubeless tires have been around for a good few years for mountain bikes and road bikes. The biggest benefit is tubeless tires are self-healing but the biggest benefit is that it helps to prevent pinch flats which happen when the tube is pinched between the ground and the rim.
To inflate a tubeless tire is a fairly straightforward process. The steps are as follows.
Clean The Rim That The Tire Sits OnThe first step when you need to inflate a tubeless tire is to clean the rim that the tire sits on to make the contact between the rim and the tire strong. This ensures no air loss as there is no tube.
This can be done using a dry, clean rag without necessarily having to use water and soap. And you need to add the sealant if there is none.
Ensure That The Valve Is At A 3 Or 9 O’Clock PostionYou need to ensure that the valve is in a 3 or 9 o’clock position as if it is a 6o’clock position you will get fluid build-up. And from the12o’clock position, it will also affect the valve. Open and remove the valve.
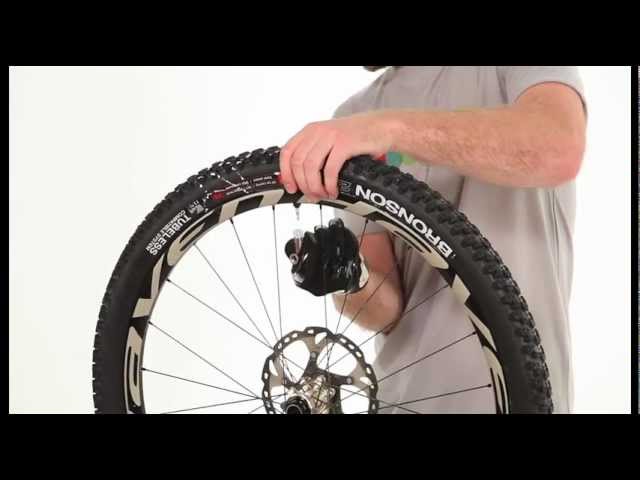
Use Straps Or Ties To Secure The TireStraps or ties can be used to secure your flat tire.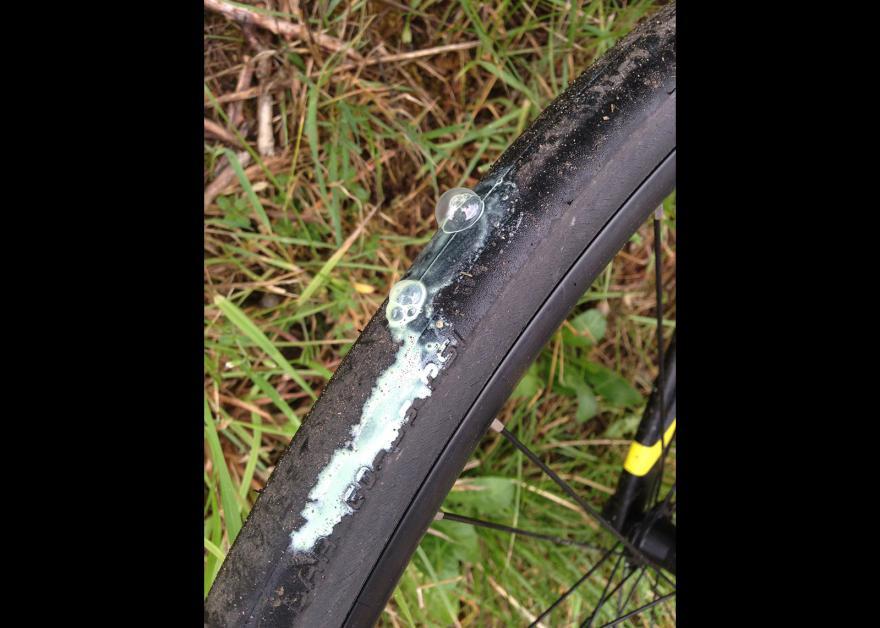 You can hold and tighten your tire by wrapping whatever you are using around the length of your tire. The straps help to hold the tire in place when starting to fill with air.
By using a compressor or tubeless foot pump, you can now proceed to inflate your tire. The tightening of your tire will enable it to build enough pressure and thereafter form a seal between the tire and the rim.
As the tire inflates it shall form its own seal due to the pressure build inside it. The straps or ties shall have been overturned by the pressure thus requiring you to remove them.
Finishing UpYou can finish off inflating the tire and put the valve back and close.
Do You Need A Special Pump For Tubeless Tires?There are special pumps for tubeless tires available like a tubeless tire booster and foot pumps for tubeless. You can use air compressors to inflate your tubeless tires.
Some additional advantages of using it such as fastness, ease, and better performance may make you go for the special pump. Special pumps also enable the tire to form a perfect seal with the rim.
Good tire pressure for tubeless mountain bike tires is around 26 psi on the front and 28 psi on the rear tire. For road bikes, the tire pressure is around 80 psi on the front and 83 psi on the rear tire. Also on the sidewalls of your tire, the recommended pressure level is stamped.
There are many factors to consider such as the overall weight of the bike including the rider, and also the conditions of the road. The range of the pressure level should lie between the maximum and the minimum of that on the sidewall of your tire.
How Long Do Tubeless Tires Last?The lifespan of a tubeless tire depends on several factors especially the way it is going to be used and how often. Tubeless tires are technically self-healing which sounds too good to be true but the sealant needs to be replaced.
A lot depends on the sealant that is used. There are 2 main sealants which are fiber-based and latex-based. You can expect the latex-based sealant to last 8000 miles and fiber-based sealants can last a lot longer.
If your tire develops cracks, gets cut, or bulges, it is better to change it for safety reasons regardless of the time it has lasted since you buy it.
Why Won’t My Tubeless Tire Inflate?There are several reasons that can make your tire not inflate. Firstly, before inflating especially a new tire, you need to check whether.
If by any chance your tire isn’t inflating and it meets all these conditions, it means that there might be an opening existing in it. This might be the cause of it not inflating.
Wrapping UpFinally, to pump tubeless tires on a mountain bike you can use a tubeless tire booster, compressor, or hand pumps for tubeless. The tubeless tires do have the benefit of helping to prevent pinch flats and offer better performance.
And that’s it for now! I’d love it if this post on how to inflate tubeless bike tires was helpful to you. Let me know if you have any questions and let me know if there is more to add.
Did you enjoy this post? Then don’t forget to pin it!May it be tube tires or tubeless tires, the performance that users will experience is still going to be great. Many cyclists can’t even tell the performance-based differences between the two types of tires, the only time they see a difference is when one of them gets a flat or becomes unusable somehow.
That brings us back to the topic at hand- Tubeless tires! They have become very popular since their advent, from installing tubeless tires to using them, they are just a joy and you should definitely try them out. Although like other tires, they can also get a flat sometimes and when that happens you need to inflate them. There could be a problem with the tire pressure or air compressor, there could even be problems that you have not heard of.
That is one of the most common questions we get asked about tubeless tires, and the answer to that is both yes and no. Here are some of the few tools that you need to inflate tubeless tires (Not all of them are needed though).
These tools will be very helpful when taking care of tubeless tires. Let’s take the hand pump, for example, the only thing that you need to do is attach the pump to the tire and then start inflating. These tubeless tires are very tight from the start and this allows them to build the recommended amount of pressure. When this happens a seal between the rim and tire is formed.
Upon installing tubeless tires, here are some of the benefits that you will be able to enjoy.
Tube tires are known for having a flat every now and then and that is what has reduced their popularity. Believe me, when I say this, flat tires can be a cyclist’s enemy number one. When you install tubeless tires, the chances of getting a flat tire are reduced significantly.
It is not like a flat tire won’t even occur, when it does it will be healed automatically by the sealant inside it. This scenario also depends on the sealant and the hole. If the hole is too big for the sealant to close then you will be needing a tube to fix the tire again.
Pinch flats (AKA Snake Bites) are also very common with tube tires, with tubeless tires it is never something to worry about.
Having enough pressure was always a problem to deal with tube tires, this is not the case with tubeless tires. Tubeless tires always have a lower pressure than tube tires, this makes them give a very comfortable and relaxing experience.
There will not be pinch flats to worry about, and a cushioned ride will add to the comfort levels. The enhanced traction and grip will make sure that the user has an amazing ride experience.
Tubeless tires, off-road experiences, and lowered rolling resistance are all connected. When you hit a bump on the road, the tires get displaced due to higher rolling resistance. With tubeless tires, even if you get hit, you will never lose your momentum because of lower rolling resistance. High pressures ruin tube tires and that is what the tubeless tires ignore.
Off-road terrains have a lot of rocks and jumps, and the lowered rolling resistance reacts very well to that. Tubeless tires will absorb all the shock there is and that will balance the experience. Users will be able to enjoy and feel their tires on a much more realistic level.
Inflating tubeless tires is not a very hard job, you just need to have the right tools and the right techniques to follow. Tubeless tires have been around for a while now and their popularity has only increased drastically since then, they are very resistant against flats.
These tires are self-healing but the main advantage is them being strong against pinch flats. Follow these steps to ensure successful tubeless tire inflation.
The first step here is to clean the rims first, the rims that the tire is attached to should be very clean. This makes the contact between the rim and tire strong enough to withstand anything. When this happens, you will notice that there is no air loss, this is great because there is no tube to worry about.
Use a clean and dry rag for this process, some people go for water and soap but we don’t recommend that. In most cases, sealant will already be there, but if there isn’t then you need to add the sealant.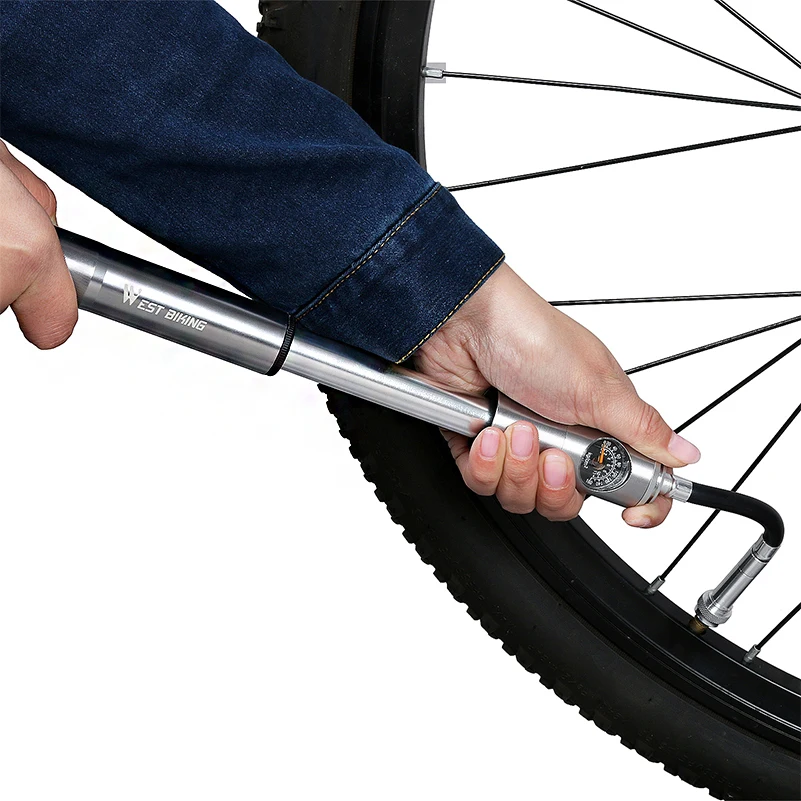
Now you need to make sure that the valve is in the correct position. It needs to be at the 3 or 9 o’clock position, only when this happens will there be the perfect build-up. Make sure that you look after the valve core and the valve stem, if they get damaged, you won’t be able to complete the process.
It is time to open and remove the valve now so that the flat tire can be repaired and inflated.
Before we start inflating the flat tire, we need to secure it so the air does not leak. My personal preference here would be to use straps to secure the flat tire. Tighten the tire with whatever material you want, it should be around the length of the tire. Whichever material you use to hold the tire in place will be useful when filling it with air.
Now it is finally the time to inflate the tire, you can use a foot pump or compressor for that. Make sure the tire is tight before you start to inflate it, with enough pressure a seal will be formed within the tire and rim.
Once the tire is inflated properly, a new seal will be formed on its own. You will also see that because of the air pressure the straps that you used to secure the flat have been overturned, now it will be time to remove them.
You are now done, it is time to put the valve back on and close it.
Different bike types have different recommended levels of PSI. Make sure that you follow them when using the bike pump:
Also, keep in mind that sometimes high pressures completely destroy tires, so keep the air pressure levels balanced. Going road tubeless might also be a good idea.
Read also: How To Check Tire Pressure Without A Gauge
We often get this question asked- How Log Do Tubeless Tires Last? Tubeless Tires are one of the best kinds of tires because they self- heal but there are still some limitations that have to be taken care of.
A lifespan of a tubeless tire is going to depend on many factors, how you use them and how you take care of them. Tubeless tires self-heal, this is indeed amazing but their sealant needs to be replaced every now and then. The sealants are also of two types.
The recommendation here would be to go with the Fiber-based sealants if you will be traveling longer and farther. Although if your tires are damaged, then it is always the best idea to replace them rather than just repairing them. Putting on rim tape also helps a lot in these cases, especially when the tires are damaged. Keep an eye on the spoke holes if you are planning on repairing the tires.
Inflating tubeless tires is easy but the process is also filled with technicalities, that is why our guide is here.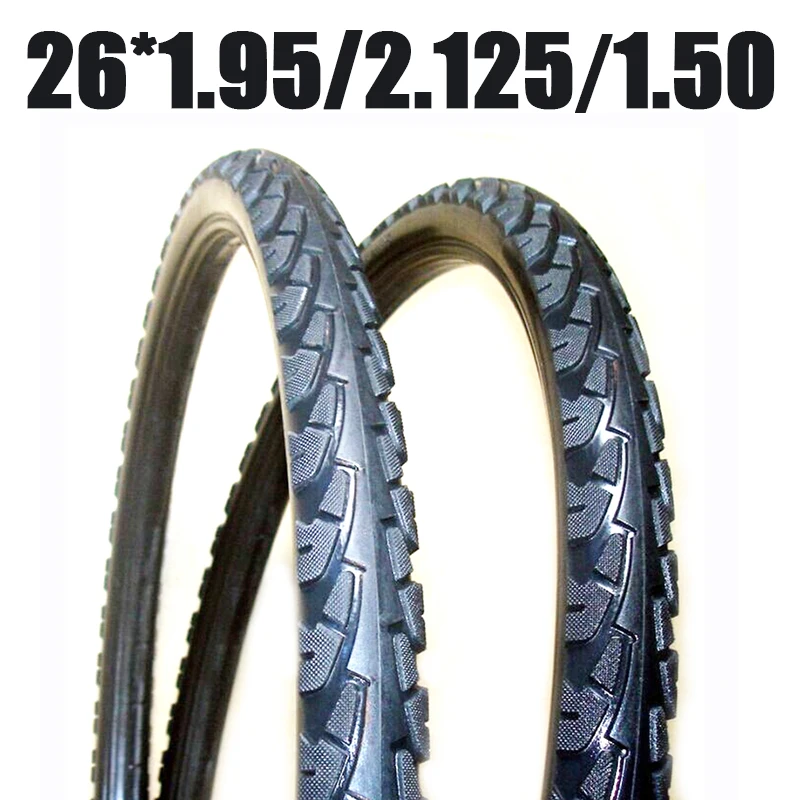 You need to have the right tools and knowledge to inflate tubeless tires, also be sure to stock up on the sealants. In this guide we covered how tubeless tires can be inflated in rich detail, we also covered how you should be taking care of them. If there are any more questions then be sure to leave a comment below!
We buy and also receive free products to review, When you buy through links on our site, we may earn an affiliate commission. See our disclosure page for details.
Contents
 Fireturger
 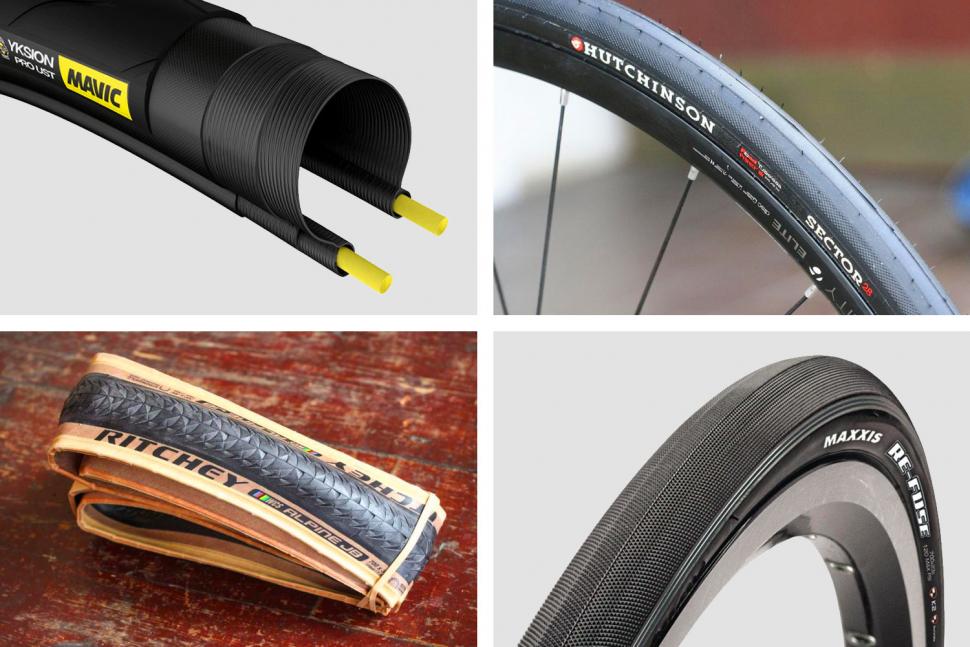 Several ways to inflate a tubeless tire
Once a tubeless tire is mounted on a rim, it is not so easy to inflate it. Tire fitting and service stations do not count. We are interested in how to inflate a tubeless tire yourself.
The problem is that usually after mounting the wheel between the tire and the rim there is a gap of 5 millimeters to 5 centimeters, or, as the professionals say, the tire “did not sit in place”. There is simply no point in inflating such a tire with a foot, and even more so with a hand pump - all the air pumped by the pump will exit through the aforementioned slot.
At the tire shop, this issue is solved simply: using pneumatic impact devices, powerful compressors, boosters or inflators, a large amount of air is supplied to the gap between the rim and the tire in a short period of time. After the tire "slams" and sits on the mounting site, air is pumped in the usual way - through the tire nipple with a regular hose with a pressure gauge.
What if there is simply no equipment for pneumatic impact? Over the years of operation, motorists have invented several ways to inflate tubeless tires. From safe to risky, from labor-intensive to effortless. Which method is more acceptable, you choose.
Put the fully assembled and mounted wheel on the ground. The spool from the nipple must be unscrewed without fail. Apply a small amount (from 10 to 20 ml) of gasoline, WD-40 fluid or carbcleaner carburetor cleaner in a circle into the gap between the tire and the rim of the rim.
Next, it is necessary in a safe way (using a torch from a newspaper or throwing a match from afar) to set fire to the vapors of flammable liquid formed inside the tire, which, when ignited, will increase the volume of air and after a noticeable pop, the tire will sit tightly on its seat.
It is possible that the wheel can bounce to a height of up to half a meter above the ground. Therefore, be prepared for such effects and be careful.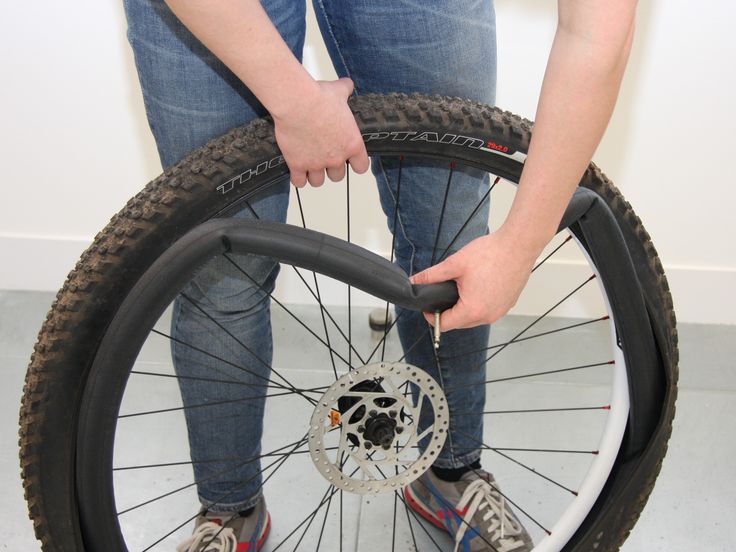
We screw the spool into the nipple and inflate the tire in the usual way using a pump.
We inflate a spare wheel or a wheel on a car with a pump to a pressure of about 4 atmospheres. We remove the hose from the pump and put the side that was removed from the pump tube onto the nipple of the tubeless tire that needs to be pumped up. We remind you: the spool must be unscrewed from the tire.
Put the other end of the hose with a lock onto the overpressure tire fitting and fix it. The air from the “pumped” tire through the hose will begin to flow under pressure into the empty tire and it will “sit down” quite quickly. It remains to disconnect the hose first from the donor wheel, and then from the recipient tire, screw the spool into the nipple and pump up both wheels to the required pressure.
If a piece of sling or rope is wrapped around the tire in a circle, along the line. Next
Source
Inflating a tire in the city is not a problem.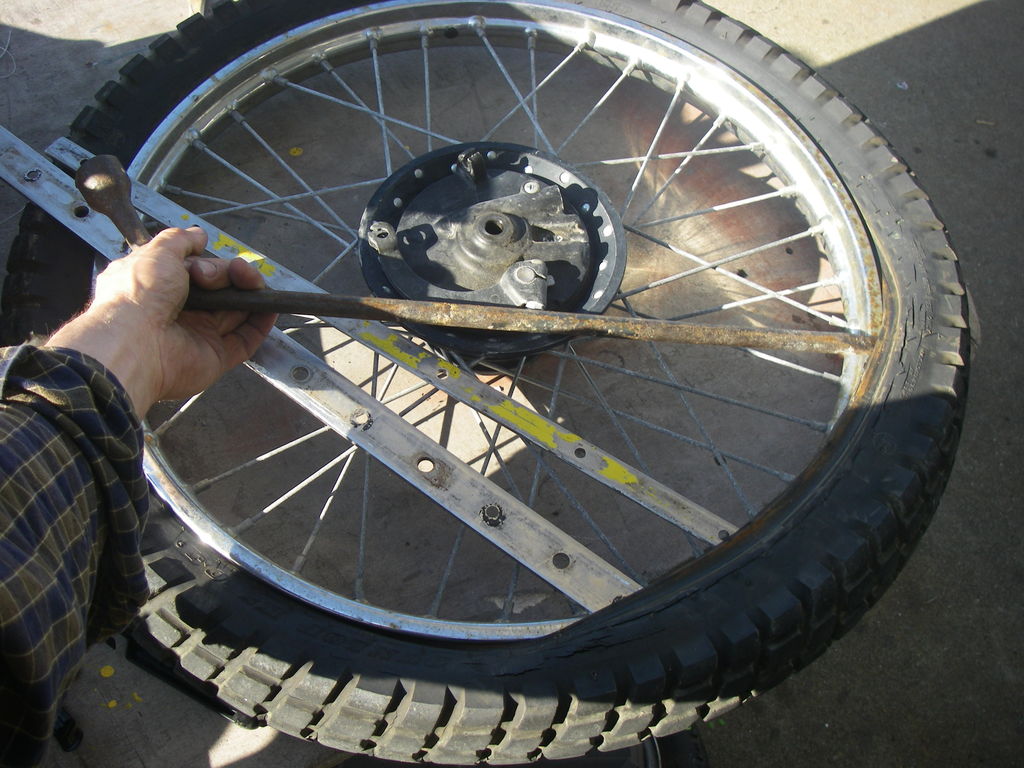 There will always be a thrifty car enthusiast nearby who will lend a compressor. In extreme cases, you can drive to the nearest auto parts store and buy this useful device. But if the need to pump up the wheel caught on a long journey, on a deserted track, you will have to use your ingenuity.
A very banal way is to turn to professionals, that is, truck drivers. The fact is that any truck with pneumatic brakes can supply dried and purified air with high pressure through a hose that a thrifty truck driver always has with him.
Many gas stations now have tire inflators, and perhaps the easiest way is to hitchhike a tire to it and return to your car the same way. If all of the above did not work, then read about the tricks that we personally tested for effectiveness:
Attaching a can (any) to the nipple is not so difficult. The pressure inside the cylinder is 1.8-2.8 bar. It is important that the content does not dissolve the rubber and does not harden, such as building foam.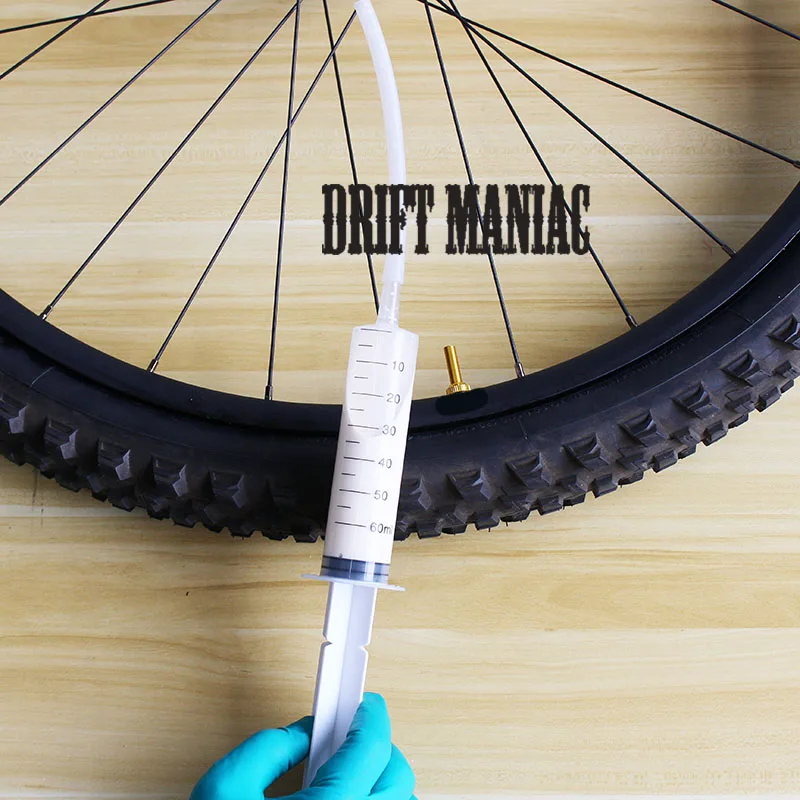
Here, of course, canisters with compressed air are good, designed for blowing, for example, office equipment. But the internal volume of the wheel of a small class car is about 20-25 liters. For pumping, you will need several boxes of spray cans. Unacceptably!
It is possible to connect the tire valve to the brake master cylinder connection after draining the reservoir. After that, we begin to press the brake pedal as is usually done when bleeding the brakes when replacing the brake fluid. To inflate the wheel, it will take a gigantic number of clicks. Unacceptably!
Connect the hose to the air path after the turbocharger. The boost pressure in the line between the compressor and the intake valves of conventional (non-sport) engines is not enough to inflate the wheel. No matter how hard you go, it's unacceptable!
Advanced car enthusiasts know the method of transferring the bead ring over the hump of the rim using an explosion of fuel vapor. The Internet is full of videos on this topic.
It is usually advised to unscrew the spool from the valve. I wonder what will happen if this is not done? We need to keep up the pressure. We conducted an experiment and got an unsatisfactory result. With this method, it is possible to provide not much pressure in the wheel - about 0.2 bar. The method really allows you to brilliantly cope with the task of transferring the sidewall through the hump, but it is not suitable for pumping!
And this is perhaps the most unusual way to inflate a tire. Having carried out an experiment with a large 6-kilogram fire extinguisher, it was possible to raise the pressure by a completely ridiculous amount of a couple of tenths of a bar. And this despite the inverted spool. Everything around was covered with a rather nasty powder. Unacceptably!
If you can fit the hose to the exhaust pipe, you can inflate the tire in this way.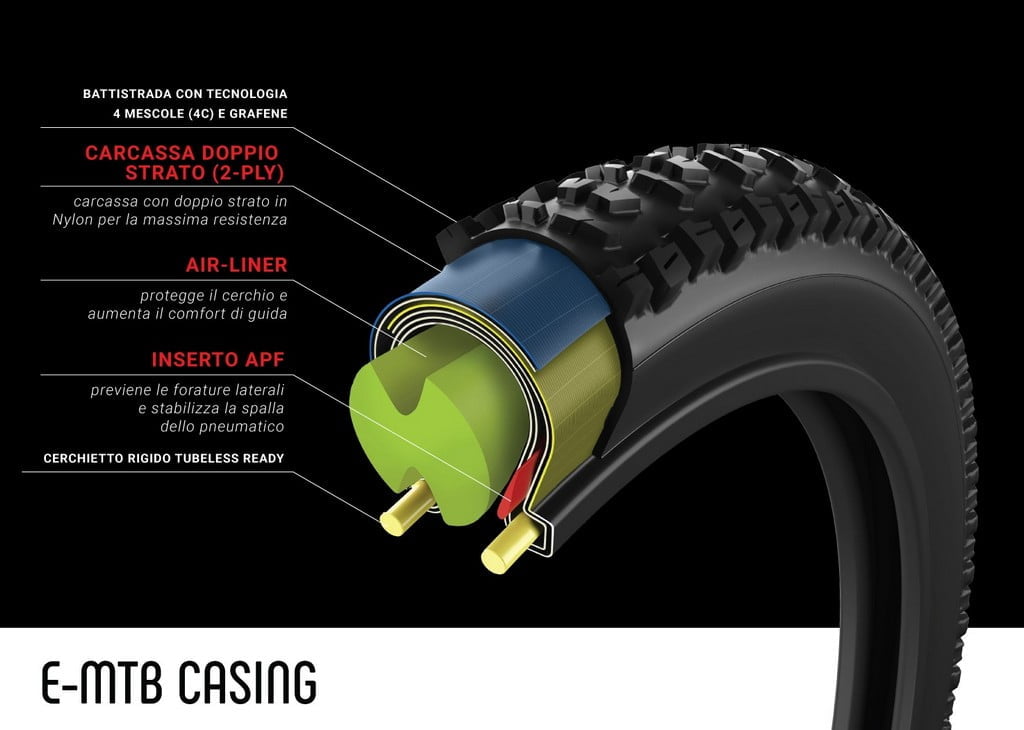 The engine is able to provide a pressure of two or more bar with a sealed exhaust system and if you “give it a gas”. The method is acceptable, but only as a last resort. The fact is that with this method, the catalytic converter, and even the corrugation of the exhaust system, may suffer.
Using a hose, you can transfer some of the air from other wheels to the one we need to pump. The method is complicated, because the valve mechanism will interfere with such a procedure. If we turn out the spools, we risk leaving several wheels without air. But even if you manage to get by with minimal losses, the pressure in all the wheels will turn out to be insufficient. In the best case, 75% of the pressure will remain in the wheels. Without preliminary preparation, which consists in assembling a hose with two tips like those installed on the compressor, we do not recommend trying this method!
Alternative ways to inflate tires are complicated, inconvenient, require prior training and can damage the vehicle. Therefore, we advise you to always have a serviceable and inflated spare tire. And just in case, you should carry a portable electric compressor with you. Useful not for yourself, but for a less thrifty motorist.
Did you like the note? Subscribe and stay up to date!
Source
Any of the motorists will confirm that it is very problematic to inflate an empty tubeless tire on your own, unless there is a high-pressure compressor in the garage, which is used at tire shops and service stations. In order for the tire to fit snugly against the rim of the disc without a gap, it is necessary to supply a large amount of air into it in a short period of time, which is unrealistic to do with a conventional pump. How to be in a situation when there is no service station nearby, and the wheel is empty?
There are several ways to inflate a tubeless tire using handy tools. The main task is to install the tire on the mounting site.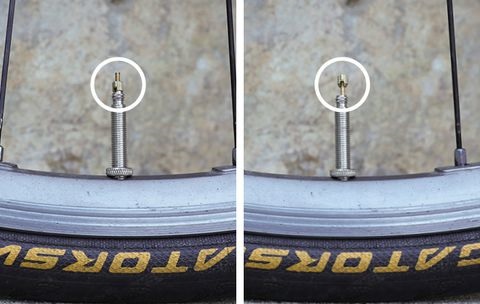 When it closes tightly, it can be pumped up using a conventional pump.
Drivers know that it will not be possible to inflate a tubeless tire with a conventional pump after it is installed on the rim - the air will simply escape from the gap between the rim and the tire rim. In order for the tire to “sit down” tightly in its place on the disk, it is necessary to supply a large portion of air in a short time, for example, from the compressor receiver, as is done at the service station. But, far from everyone in the garage has such compressors, how can you get out of the situation and pump up the "tubeless" with the help of what is called "improvised means"?
It's actually not that hard to do.
This will require some gasoline, carburetor cleaner, WD-40, or any other flammable liquid. Lay the fully assembled wheel on the ground, spray a very small amount of flammable liquid in a circle into the gap between the tire and the rim. Do not pour a lot of gasoline, about 10 grams is enough.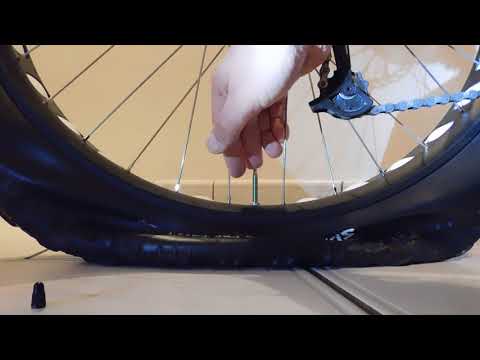 After that, quickly ignite the resulting vapors of flammable liquid in the tire (just throw a lit match into the gap between the tire and the disk).
There will be a pop and the tire will snap into place. Now the tire can be inflated with a conventional pump to the required pressure.
If this method seems too extreme to you (after all, with fire and gasoline you need to be careful not to burn the whole car), you can use another method. Inflate any wheel on the car or "spare tire" to a pressure of about 4 atm. Remove the hose from the pump and connect its free end (the one without the fitting) to the nipple of the tubeless tire you want to inflate (the spool must be removed from the nipple). Now connect the other end of the hose, on which the fitting is located, to the “pumped” wheel. As a result, the air from the inflated wheel will be distributed very quickly into the tubeless tire, and it will fall into place on the rim. Now you can remove the hose, screw the spool into the tubeless nipple, and pump it up in the usual way to the required pressure.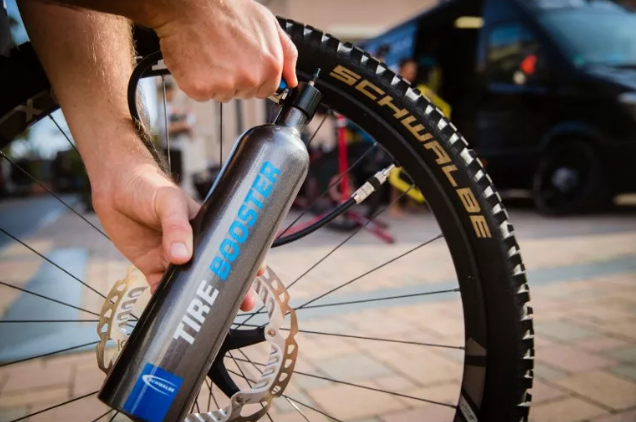
Any motorist will confirm that it is very problematic to inflate an empty tubeless tire on your own, unless the garage has a high-pressure compressor, which is used at tire shops and service stations. In order for the tire to fit snugly against the rim of the disc without a gap, it is necessary to supply a large amount of air into it in a short period of time, which is unrealistic to do with a conventional pump. How to be in a situation when there is no service station nearby, and the wheel is empty?
There are several ways to inflate a tubeless tire using handy tools. The main task is to install the tire on the mounting site. When it closes tightly, it can be pumped up using a conventional pump.
Absolutely any driver should know how to seal a wheel when it is punctured, because anything can happen on the road:
If this situation happened on the road, then there are several ways to glue the wheel .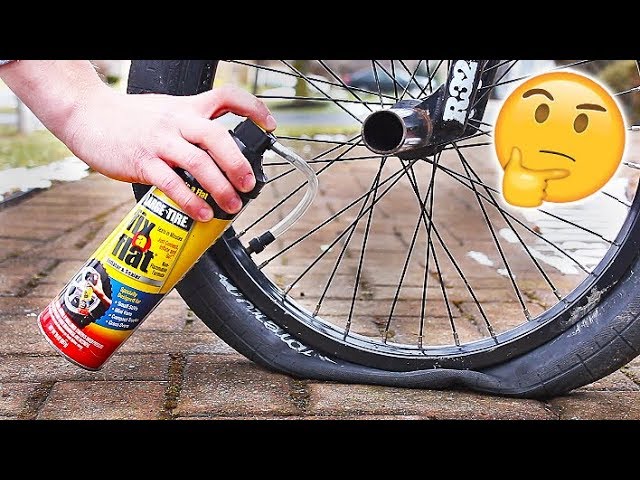 Nothing complicated and supernatural needs to be done - even the weak half of humanity can carry out this procedure.
You must have the necessary tools to save the wheel until you get to the tire shop. The first, most necessary tool is a car pump, without which it is impossible to inflate a tire.
If you have a punctured wheel and there is no car repair shop nearby, this method will allow you to quickly and efficiently seal the damaged surface.
The following materials and tools are required for work:
The remaining “tail” from the harness will become invisible after 50-70 km. Some motorists and repairmen like to cut it off.
RELATED VIDEO Third.
If you have already encountered a similar problem and know exactly how to seal a tubeless wheel, then be sure to carry universal patches in your transport. They allow you to quickly seal a puncture in the wheel, not exceeding 7-8 mm.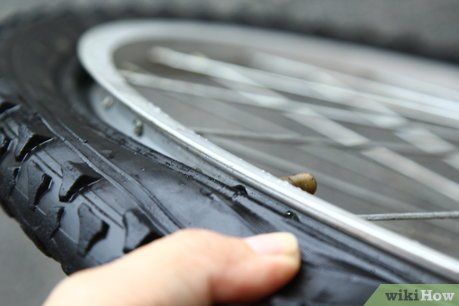
Also, this type of quick repair of a tubeless tire is very convenient in cases where other methods are not possible - for example, with a side cut.
How to seal a puncture in a wheel on a scooter? Almost exactly the same as on a car - you just need to take into account some features, for example, the diameter of the wheels and its "cubic capacity" (the larger it is, the longer it will take to tinker).
After sealing the puncture in the scooter tire, be sure to inflate it to 1.5-1.9bar. Such pressure in the wheel will allow you to easily reach your destination - do not fall, crash, the scooter will not “wag” much from side to side.
VIDEO By the way, such a sealed tire can live for quite a long time, but it's not worth the risk - you only need to drive in transport that is in good working order in all respects.
May you have smooth and endless roads leading home!
Absolutely any driver should know how to seal a wheel with a puncture, because anything can happen on the road:
If this situation happened on the road, there are several ways to seal the wheel. Nothing complicated and supernatural needs to be done - even the weak half of humanity can carry out this procedure.
You must have the necessary tools to save the wheel until you get to the tire shop. The first, most necessary tool is a car pump, without which it is impossible to inflate a tire.
The wheel must be placed on the ground and the spool removed from it. Inject a small amount of flammable liquid (5-10 ml) into the gap between the disk and the tire and set it on fire. The vapors will ignite and create pressure in the air, which will help the tire to snap into place. Then it can be easily pumped up with a conventional pump, after screwing in the spool.
Gasoline, carburetor cleaner, WD-40 and other flammable liquids can be used as fuel. The main thing is not to overdo it with the quantity and have time to move to a safe distance, since the wheel from the cotton can bounce above the ground.
Let's start removing the mountain bike wheel: we take two keys for 15, loosen the nuts, disengage the brakes, remove the chain from the sprocket and remove the wheel, board it and do all the work that is described in the case of a wheel with a camera.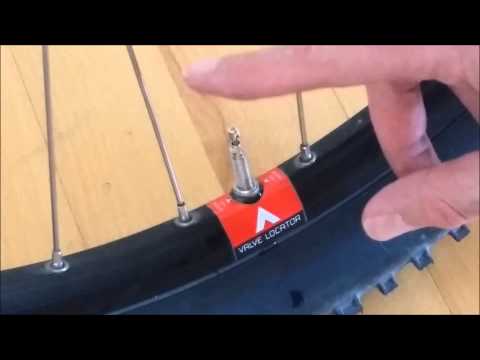 I hope the article “how to seal a wheel on a scooter, motorcycle, bicycle” was useful to you, I would be grateful if you share this article with your friends.
Author of the article: Roma Fedchenko.
Fitting the rigid sidewall of a tubeless tire onto the rim requires a rapid increase in air pressure so that it (air) does not have time to crawl out through the slots. In other words, the question is to invent a powerful compressor from improvised means.
There is a car with a dead Chinese compressor in it, or even a hand pump - it doesn't matter. There are also wheels, including a spare wheel.
1. Inflate the spare tire to the point of stupefaction, 4-5-6 atmospheres.
2. Remove the hose from the pump/compressor.
3. Unscrew the spool from the wheel to be inflated and push the free end of the hose onto the valve.
4. Unscrew the spool from the inflated wheel, holding the air with your finger, put the hose tip on the valve and observe the process.
5. Adjust the pressure in all wheels.
From the Site Administrator: this is how you can pump up a tire with gasoline:
A few more articles from the section "You and the car"
On the page "Books - for free" you can download some of the materials of the section "Bonus" for FREE immediately.
Modern tubeless wheels, although very reliable, are very afraid of sharp lateral pressure.
For example, if you successfully drive near a concrete curb, you can easily take off your shoes.
Needless to say, this most often happens with under-inflated tires, but tubeless tires with normal pressure also have a chance to take off their shoes on the road.
How to shoe the car now I think it became clear, but now how to put it back on?
You can't simply inflate a wheel.
Until recently, even domestic car owners did not really know what a tubeless tire was.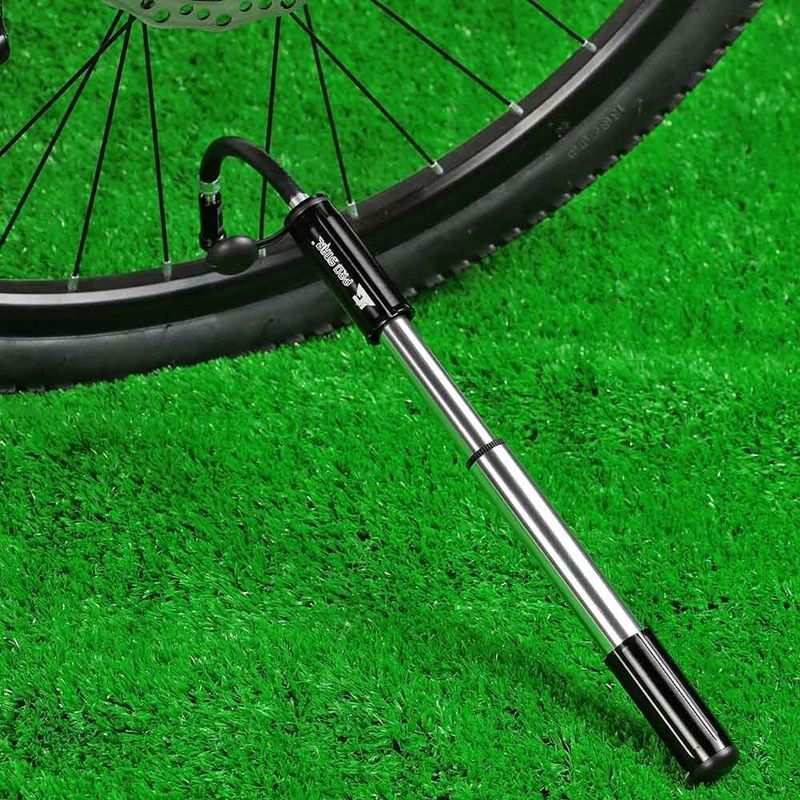 Unlike four-wheeled friends, scooters, in most cases, are equipped with such tires from the factory.
Let me ask you a question: “What will you do if you blow such a tubeless tire?” First you need to purchase a special repair kit, which is shown in the photo. It contains: a round file for treating the puncture site, a device for pushing the repair material into the hole, a number of repair material strips and a tube of glue.
Inflate the tire to locate the damaged area. Then by any known method: by ear, lowering the wheel into water or using a soapy emulsion, determine the puncture site.
File the damaged area with a round file to the required diameter.
Apply glue to the inside of the hole using the special tool.
Remove the protective covers from the repair material, insert it into the fixture and coat with adhesive.
Insert a tool with a repair agent into the hole.
Leave the repair plug in place of the puncture, remove the tool from the tire. The remaining antennae must be cut off flush.
Need a powerful compressor.
The first thing that happens during inflation is that a powerful air flow inflates the tire and puts its beads on the rim.
And then the tubeless wheel is inflated to the desired pressure.
How to press the loose tires back to the sides of the rim while on the road? After all, without this it is useless to download it.
There is a way, and as usual it is simple.
Unscrew the cap and valve from the wheel.
Pour a teaspoon (no more.) of gasoline into the wheel, leaving a few drops on the outside of the rubber.
Shake the wheel a little, step back a couple of meters, light it and throw a lit match on the wheel where you left some gasoline.
Gasoline will ignite and after a few seconds the gasoline vapors inside the wheel will ignite.
And not just ignite, but inside the wheel there will be a sharp expansion of gases, similar to what constantly occurs in the engine.
The tubeless tires are in place and now, by screwing the nipple in place, you can inflate the wheel with a conventional pump.
Nowadays, it is impossible to live without a car, but few people know how to pump up a tubeless wheel. Now we will talk about how this procedure takes place. Let's take a truck as an example. It should be said right away that it is not easy to do this work on your own, but if the service station is far away, you will have to do it.
First of all, I would like to note the ease of use of modern tubeless tires - in the event of a puncture, the descent of the wheel does not occur immediately. This implies the conclusion that in the event of an unforeseen malfunction, the car owner can always get to the car service. This outcome is more preferable, since in any case the help of a qualified specialist is more effective than doing the repair yourself.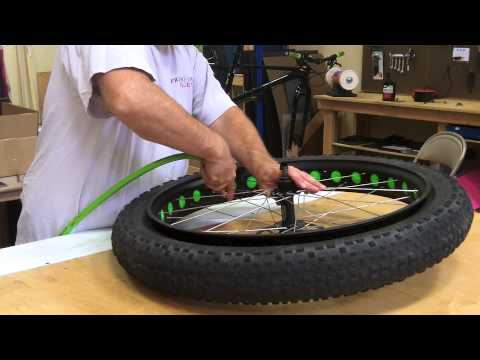
Before proceeding with the repair of a tubeless tire, I would recommend making sure that the malfunction really exists. To do this, you need to raise the car with a jack, and then inflate the wheel. Inspect the tire - look, twist it, try to find a puncture. If you could not find a puncture, and inside the tire the pressure is at a normal level, you should turn on the valve and continue driving the vehicle. If possible, visit a tire shop.
If you find a puncture or a screw stuck in the tread, do not be upset. If there is a tire shop near your home or the place where you are, you have the opportunity to get to it without any problems. It is worth recognizing that such a transition will negatively affect the wheel, but this option is more optimal for solving the problem.
The tire did not fit, there was a gap between five millimeters and five centimeters. Here, pumps will not help fill the cargo wheels with air.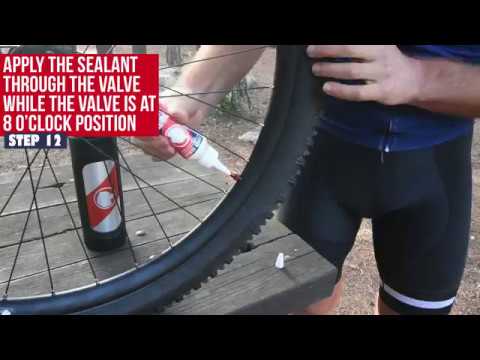 It will exit through the gap. In specialized points, pneumatic impact is used. Of course, it is best for you to contact a tire service, and if there is none, then how to pump up a tubeless wheel of a truck?
Drivers are resourceful people and were able to come up with several ways to deal with this problem.
A spare wheel is taken, inflated with pressure up to four atmospheres. The hose is removed from the pump, the tube is put on the nipple of the tire to be inflated. Remember, be sure to remove the spool. The second end of the hose is put on the tire with pressure, we fix it. Under high pressure, air from a filled tire passes into an empty one, and it falls into place. After the work has been done, the hose is disconnected, both wheels are pumped up to the desired pressure.
Another way to inflate a tubeless truck wheel.
The wheel rests on the ground. The spool must be unscrewed. A small amount of gasoline or carburetor cleaner is applied to the gap between the rim and the tire.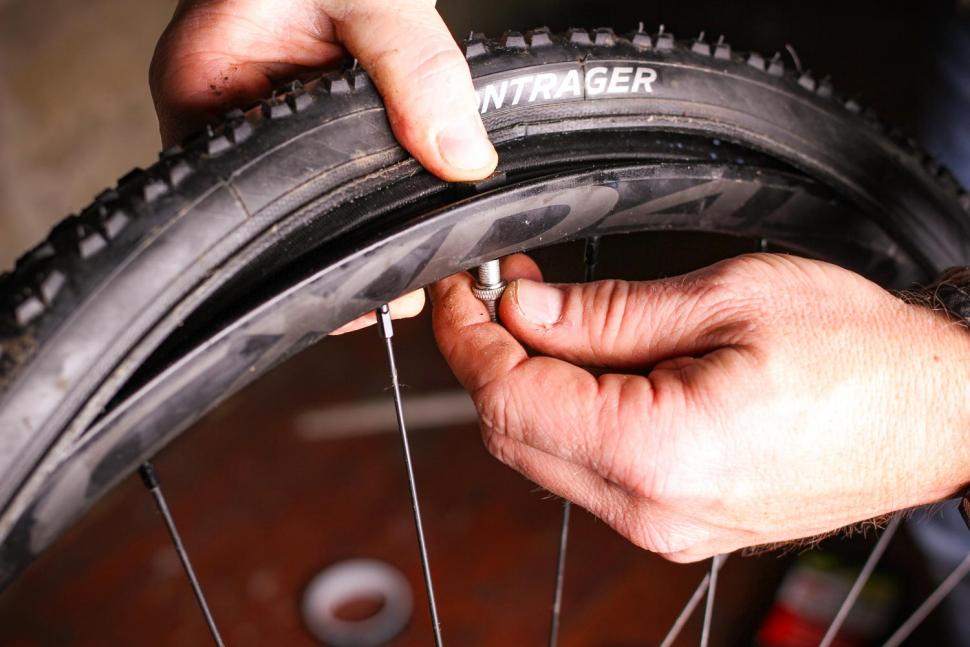
The second step - carefully throwing a match from afar, set fire to the vapors. Having ignited, they increase the volume of air, after cotton, the tire will return to its place.
Sometimes the unexpected happens, the wheel can bounce high. So be careful.
After the operation, the spool is screwed in and the tire is inflated with air.
Wrap her tire along the tread line. Then you tighten it and fix it. The edges of the tire are pressed against the rim. After that, you can remove the spool and start inflating the tire. As it fills with air, the rope will fly off by itself.
As you can see, the methods are simple and will help to cope with the problem. Of course, everyone should do their job and it is best if a specialist helps inflate the tires. All your opinions and comments will be welcome.
If you decide to seal a tubeless tire yourself, or just from where you are, it is very far to get to a tire service, then here is an instruction on how to seal a tubeless tire at home and on the road.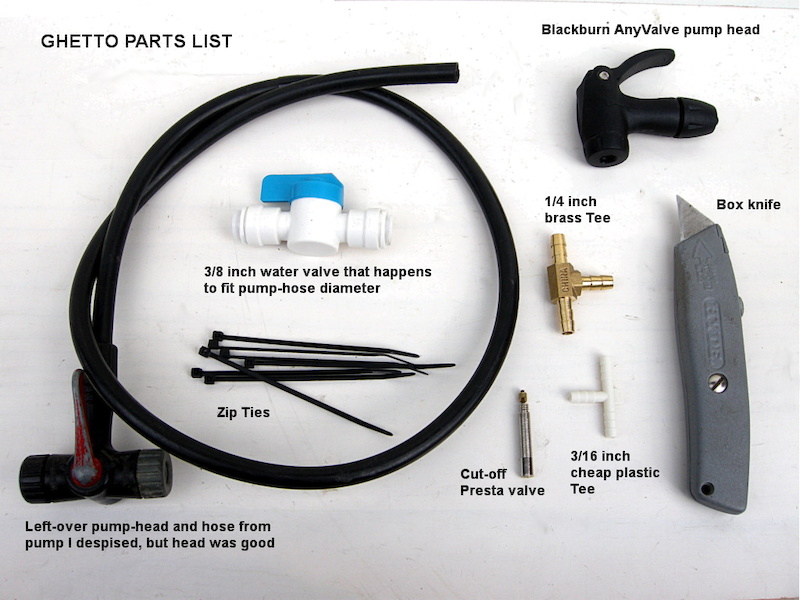
First of all, you should make sure that you have a simple kit, which is a kind of first aid for tires. The simplest such set includes:
- A special needle with an eye;
Do not forget that the repair of tubeless wheels should be carried out carefully and reverently. First look at the direction of the screw, then try to understand and set the angle of the hole in the tire. After completing this action, pull out the screw and insert the awl into the hole formed at the same angle. Do each action as carefully as possible. Steel threads that stick out of the hole should be pulled out.
Take a tourniquet that has a special impregnation and anoint it with glue. Using an awl, insert this tourniquet into the hole, and at the same time turn the awl itself by 90%, then pull it out sharply. The tourniquet should remain inside the hole, where it should form a loop. It’s worth noting right away that you shouldn’t save on a tourniquet, follow the rules. Using scissors, cut off the end of the bundle, keeping the ends 2-3 mm in advance.
Wait for the glue to dry. After waiting for this, inflate the tire with air to the required pressure level.
That's all the instructions on how to seal the tubeless at home or on the road.
Damage to the side hole
Do not forget about such damage to the tires as the side hole. Such malfunctions also exist, and usually they are of a rather large size. With such a problem , it will no longer be possible to seal the tubeless tire on your own, you can only contact the tire service, and if the hole width exceeds 5 mm, then there is a high probability that even specialists will not be able to repair the tire. Therefore, it is always worth having a spare tire with you.
When sealing a tubeless tube, you can also use a lingering spray. Such a spray is quite effective in case of minor damage, which allows it to be used for tire repair.
In order to repair with this spray, pour it inside the tire, in the place where there is damage, and then pump up the wheel. The spray will stretch all over the wheel, and at the same time fill the punctured hole. We should not forget about the removal of objects that caused a tire puncture.
In general, this spray is quite convenient, but at the same time it has one drawback - in case of further tire repair in the tire shop, you will also have to pay for the removal of the applied compound.
After mounting a tubeless tire on a rim, it is not so easy to inflate it. If the tire fitting point or service station is far away, you have to perform this procedure yourself.
The problem is that usually after mounting the wheel between the tire and the rim there is a gap of 5 millimeters to 5 centimeters, or, as the professionals say, the tire “did not sit in place”.
There is simply no point in inflating such a tire with a foot pump, and even more so with a hand pump - all the air pumped by the pump will exit through the above slot.
At the tire shop, this issue is solved simply: using pneumatic impact devices, powerful compressors, boosters or inflators, a large amount of air is supplied to the gap between the rim and the tire in a short period of time.
After the tire “slams” and sits on the installation site, air is pumped in the usual way - through the tire nipple with a standard hose with a pressure gauge.
What if there is simply no equipment for pneumatic impact?
Over the years, motorists have invented several ways to inflate tubeless tires. From safe to risky, from labor-intensive to effortless. Which method is more acceptable, you choose.
Place the fully assembled and mounted wheel on the ground. Be sure to unscrew the teat from the nipple.
Apply a small amount (10 to 20 ml) of gasoline, WD-40, or Carbcleaner carburetor cleaner in a circle around the gap between the tire and rim.
Next, in a safe way (using a torch from a newspaper or throwing a match from afar), set fire to the vapors of flammable liquid formed inside the tire. They will ignite, increase the volume of air, and after a noticeable pop, the tire will sit tightly in its seat.
It is possible that the wheel can bounce to a height of up to half a meter above the ground. Therefore, be prepared for such surprises and be careful.
After screwing the valve into the nipple, inflate the tire in the usual way using the pump.
Inflate the spare tire or wheel on the car to a pressure of about 4 atmospheres. Remove the hose from the pump and put the side that was removed from the pump tube onto the nipple of the tubeless tire you want to inflate. The spool must be unscrewed from the tire.
Place the other end of the hose with a lock onto the fitting of the pressurized tire and secure. The air from the “pumped” tire through the hose will begin to flow under pressure into the empty tire and it will “sit down” quite quickly.
It remains to disconnect the hose first from the donor wheel, and then from the recipient tire, screw the valve into the nipple and pump up both wheels to the required pressure.
If a piece of sling or rope is wrapped around the tire in a circle, along the tread line, and then the rope is pulled and fixed, its working surface is slightly deformed, but the edges of the tire will be pressed against the rim of the disc.
After that, you can screw in the valve stem and inflate the wheel without worrying about the rope - it will slide off the wheel as it fills with air.
These methods, simple and not very, will always help in a difficult situation, away from service points, and inflating a tubeless tire will no longer be a difficult and overwhelming task for you.
Source
We download a tubeless camera without a pump in 5 seconds.
HOW TO INFLATE A TUBELESS TIRE WITH A SIMPLE PUMP
How to inflate a tubeless tire without a pump? Gasoline!
How to inflate a tubeless tube with a regular pump on a Viper Active
Inflate the wheel with an explosion, set the wheel on fire, inflate without a compressor, explosion of the wheel, explosive inflation
Mounting the wheel with an explosion | Budget tire fitting
How to inflate a wheel on a truck DALNOBOY 5708 RENAULT MAGNUM
How to inflate a tubeless wheel
how to inflate a tubeless wheel of a gyro scooter
How to inflate a wheel on a scooter.
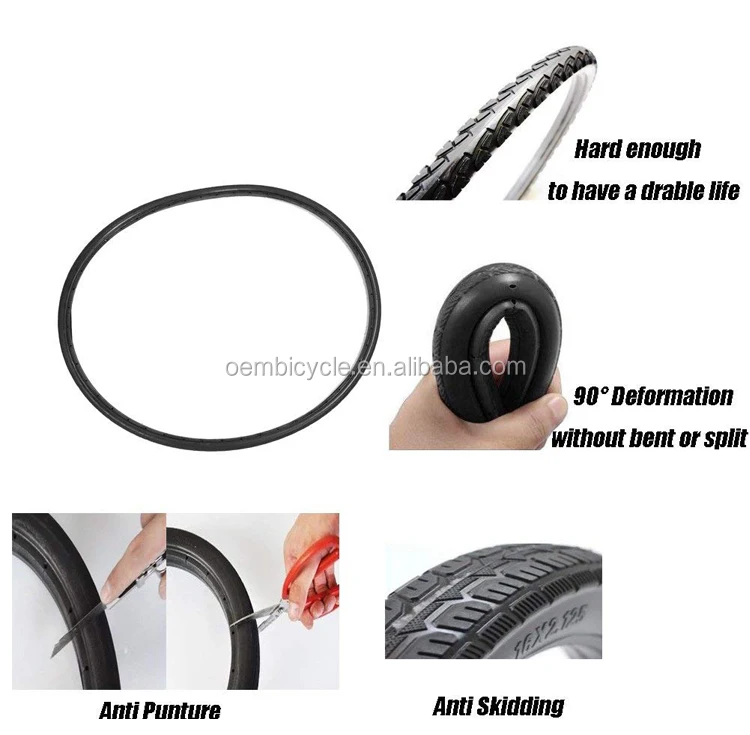
Tubeless tires can hardly be called the know-how of the bicycle industry, however, they still raise questions for many. The topic itself, as a rule, is surrounded by a lot of skepticism and distrust, which are more often explained by a lack of understanding of basic things and a lack of experience in riding such wheels. To dispel all these doubts, we answer the main questions related to tubeless technologies.
These are bicycle tires that do not have a tube. At the same time, tubeless technology is not only about tires. We are talking about a whole wheel system, which also includes a special rim and a sealant that gives the wheel anti-puncture properties. The tubeless concept makes the bike more comfortable to use and improves its riding performance, which will be discussed in order.
How long ago did this technology appear and can it be trusted?
Those who hear about bicycle tubeless for the first time usually tend to be suspicious of them. You can dislike this technology for subjective reasons, but you definitely shouldn’t distrust it. Tubeless tubes have been massively used for cars and motorcycles for several decades, and during this time they have not given reason to doubt their reliability.
The first tubeless systems for bicycles appeared in 1999, when the French rim brand MAVIC collaborated with tire manufacturer Hutchinson to present their concept of a simple and effective tubeless wheel. In the 2000s, this technology remained the prerogative of mainly professional athletes, who quickly appreciated its main advantages: lighter weight, more air in the wheel, good "traction" and durability.
In recent years, tubeless has finally ceased to be perceived as something exotic. For example, today a significant part of the MTB and almost all touring cars come with such wheels as standard. A wide variety of sealants are also available on the market, and the number of those who are discovering the benefits of tubeless technology is steadily increasing.
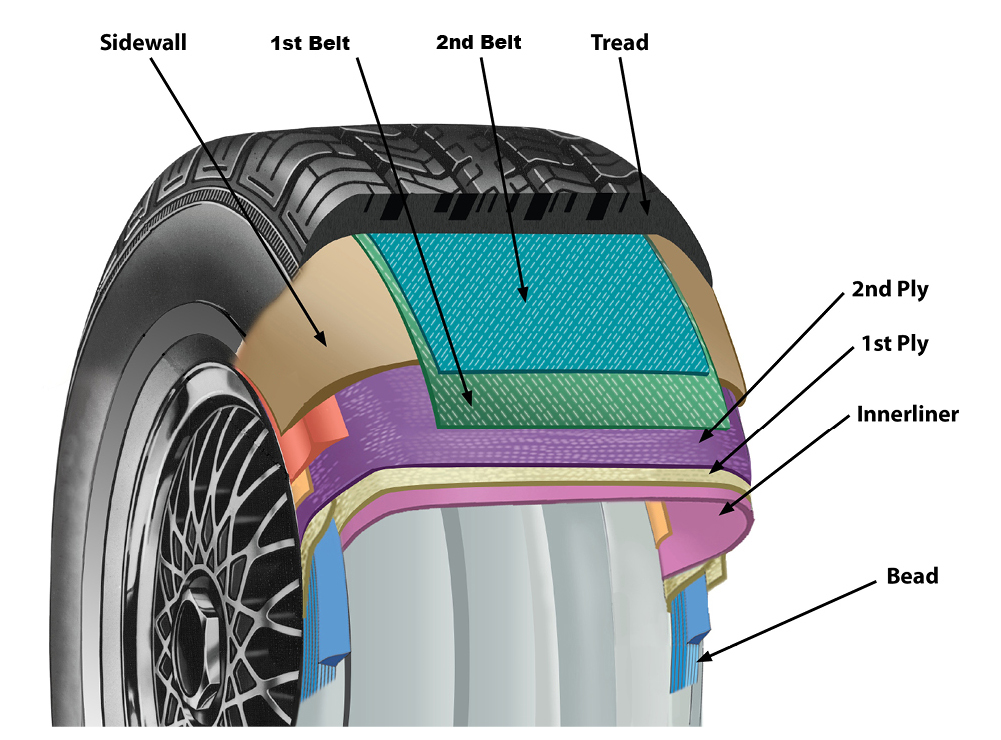
The tubeless system provides a special rim and tires that are labeled tubeless ready or TR. However, the rims themselves are easy to distinguish visually - they have a low side and characteristic walls with recesses, forming a kind of lock in which the tire cord is wedged when air is injected. Due to this, in the inflated state, the rubber reliably and hermetically “sits” on the rim, without breaking off the wheel even at low pressure. The rim itself is additionally glued with a sealing tape, after which the nipples are installed separately.
The benefits of tubeless wheels are revealed no matter how often and what kind of bike you ride: whether it's weekend trips, extreme downhill or long-distance touring. Nevertheless, for certain categories of cyclists tubeless still open up more opportunities: first of all, we are talking about those who are seriously passionate about off-road.
When actively driving off-road with tubeless tubes, you can ride on lowered wheels and at the same time not be afraid of such an unpleasant type of puncture as a snake bite. Low tire pressure, in turn, gives better handling, dampens vibrations more effectively and generally provides more comfort on difficult tracks. If we are talking about cyclists, then they appreciate tubeless for their anti-puncture qualities.
Road bikes also use tubeless wheels. Moreover, they are the pioneers of this technology. But road tubeless tubes are a different story: they are designed for different operating pressures and have tangible design differences. Therefore, further we will talk mainly about those tires that are put on mountain, touring and city bikes.
These are the two rim formats that define the features of a tubeless wheel assembly. BST is a standard that involves the installation of a special sealing tape that prevents air from leaking through the holes in the spokes.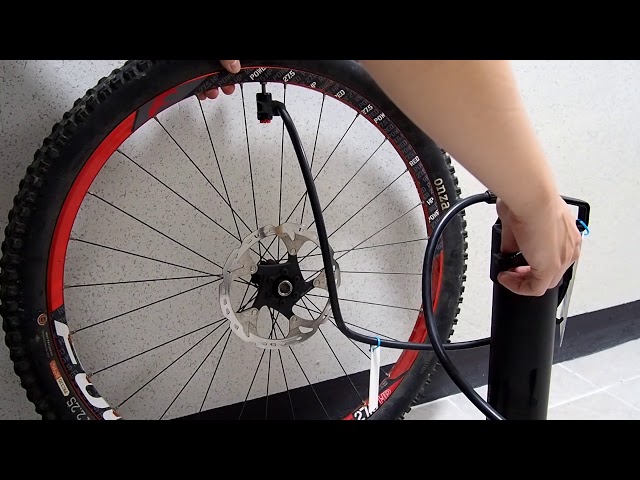 This is the most common version of tubeless systems.
UST is a blind rim in which an additional bridge isolates the spoke holes. Thus, there is no need for laying a sealing tape. In practice, this greatly simplifies life, because when installing a tire (especially without proper experience), the tape tends to crush, which is why you have to reassemble the wheel. It is easy to guess that such rims also have a drawback - their price.
The tubeless system in the form in which we wrote it above is already a full-fledged wheel, it can be installed on a bicycle and hit the road. But there is an important nuance. First of all, tubeless tubes are valued for their anti-puncture qualities: for this, a small amount of a special liquid, a sealant, is poured inside the tire.
Yes, you can. But you should not do this. Firstly, this is illogical: for no reason you are depriving yourself of the main advantage of tubeless - the anti-puncture effect. But more importantly, it is very difficult (or even impossible) to inflate such a tire in a completely flat state with a portable pump: to do this, you need either a strong floor pump or a booster. Naturally, no one will take such bulky things with them on the road. Filled with sealant 95% of punctures "seal" without a critical loss of pressure, and in most cases there is no need for even light pumping. Thus, the probability of being with a flat tire is very low.
So, if you put tubeless, sealant is still needed. Such fluids are easy to find in any bike shop, they are inexpensive and require replacement on average once every three to four months, so there is no need to talk about any inconvenience. Yes, in order to cope with the fill, you need to acquire a certain skill, but this is much easier than constantly changing broken cameras. In addition, sealant can be replaced once a season in a specialized service.
Bicycle sealants are based on fine particles (rubber or polymer fibers) suspended in a liquid carrier. Inside the wheel, the sealant does not polymerize: it is in a liquid state and is distributed along the inside of the tire during movement. When a puncture occurs, the air flow begins to push the solution out. A fine suspension clogs the hole, and the sealant dries quickly. Thus, there is a reliable "sealing" of the puncture.
If we talk about typical punctures - collisions with thorns, wires, small glasses - such damage is self-healing without a noticeable loss of pressure. Usually, a puncture can only be guessed from a small spot on the surface of the tire. Naturally, the sealant works with more complex damage. You can count on it even if you pierce the wheel with a thick nail, 4-5 mm in diameter. If you don't understand how a liquid can seal such holes, you can watch numerous crash tests on YouTube that demonstrate the miraculous properties of sealants.
The consumption per tire is from 50 to 100 ml. If we are talking about standard MTV tires, the golden mean is about 60 ml per wheel.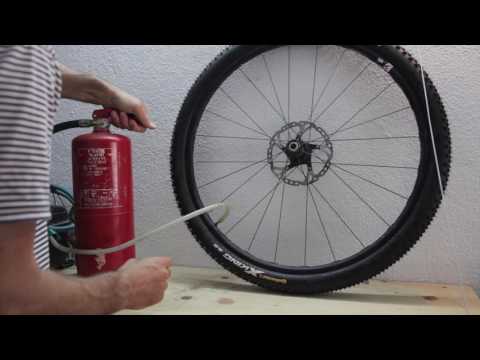 The exact dosage will always be written on the bottle. It is difficult to get confused even for those who do not like to read instructions: most sealants have measuring containers or a dosage scale on the bottle itself.
Here, too, everything is conditional and depends on the characteristics of the specific composition and intensity of punctures. In the absence of serious damage that entails the leakage of a large volume of sealant, you can easily skate a whole season on one fill. Some cyclists prefer to do an incomplete start-up gas station and gradually add 20-30 ml of fluid every two to three months. You can also navigate by how effectively the sealant works: if you see that small punctures are sealed with a strong deflation of the wheel, it may be that the composition is no longer enough and it needs to be added. Be that as it may, sealant is a very economical thing that lasts for a long time.
The sealant inside the tubeless tends to dry out, forming a characteristic film.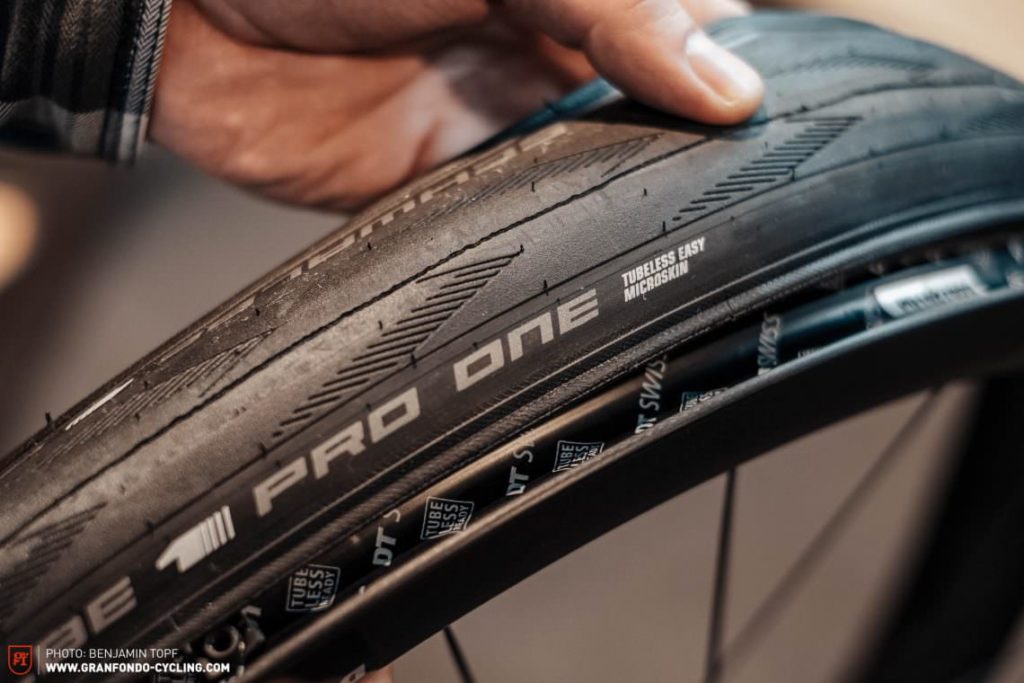 Whether or not to clean the tire cavity is up to you. This is a purely aesthetic moment, which does not affect the operation of the anti-puncture fluid. The sealant can simply be added as it dries and not bother with unnecessary worries. It is more likely that the tire will completely wear out than it will have time to completely clog with dried filler.
Serious damage - large diameter punctures, small cuts, run over nails with subsequent tire rupture - are repaired using special repair worms. These are rubber or fibrous bands that are inserted into the hole to reduce its area and allow the sealant to seal the puncture.
With long longitudinal cuts it is more difficult. Here you need to either sew up the dissection with nylon threads, or stick a patch on the inside of the tire. You don’t have to worry about the tightness of the repair site - the sealant will do this work, of course, if it does not have time to leak out.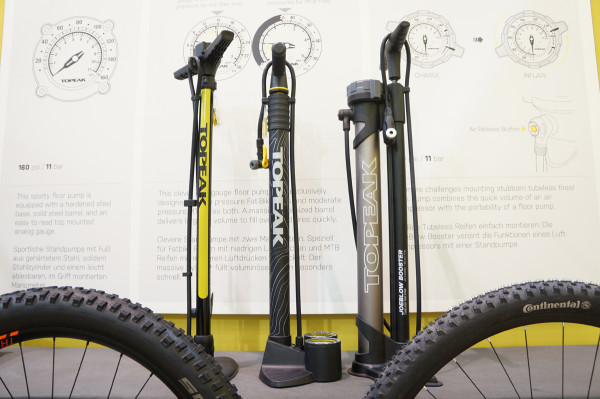 But being able to inflate a completely flat tire with only a portable pump will require skill.
In fairness, we note that such complex injuries are rare for most cyclists. But for those who are seriously passionate about off-road, it is better to play it safe with a spare camera. In this case, having caught a cut, you can always drain the sealant, unscrew the nipple from the rim and install a regular camera. And in order not to drive with a “hernia” protruding outward, we recommend placing, for example, a bill folded in half under the cut on the tire.
Tubeless allows you to forget about such an unpleasant form of damage as a "snake bite" forever. It usually happens when at full speed you catch a pothole in the pavement, unsuccessfully jump onto a curb or run into a stone on a downhill. Hitting the edge of a hard object, the tire is crushed, and the rim walls work like incisors, damaging the chamber in two places.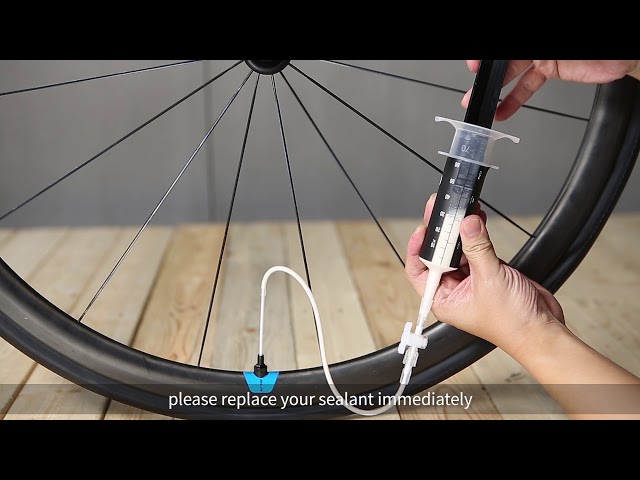 In tubeless wheels, this scenario is excluded, because. there is nothing to break through here. Of course, it can be assumed that the rim will cut the tire itself, but this should be a blow of enormous force, which is almost never encountered in practice.
Rejection of the chamber increases the volume of air in the wheel. This changes the contact patch (it becomes flatter) and allows the wheels to better absorb off-road bumps. Add here the ability to ride at low pressure, without being afraid of a snake bite, and it becomes completely clear why tubeless lovers of hard off-road riding so idolize. Soft tires with a large contact patch "fit" all the bumps in the road, giving excellent traction on rocks, forest primers and other off-road.
In addition to traction, tubeless tires improve shock absorption, dampen vibrations better, and generally provide more off-road comfort. At the same time, to get the most out of this rubber, you need to experiment a lot with tire pressure, trying to find the indicators that will best suit your individual riding style.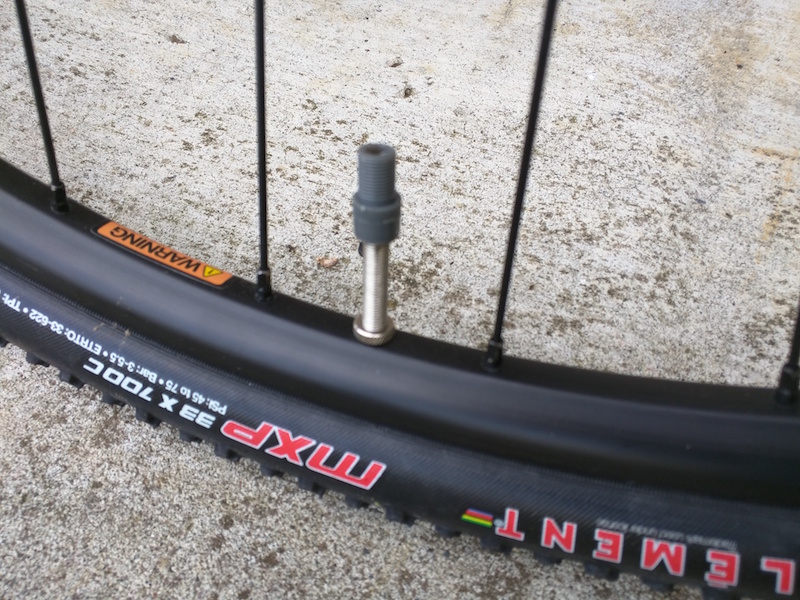
Finally, the camera is extra grams. By refusing them, you can save an average of 70-100 g of weight on each wheel. For some, this may seem like a formality, but it is worth considering the fact that extra grams on the periphery of the wheel have a stronger effect on driving performance. This difference is especially felt on road bikes: road bikes, gravel, touring.
They also exist. Moreover, it is far from formal. First, it's the price. The difference becomes especially noticeable when you buy tubeless systems separately: rims, tires + small things (tape, removable nipples, sealant). For tubeless you will have to pay an average of one and a half times more than for ordinary wheels, plus or minus the same class. And if we are talking about more advanced UST rims, then this means another + 30-40% to the cost.
With tubeless by default, everything is more difficult in terms of installation (here we are talking about conventional BST systems).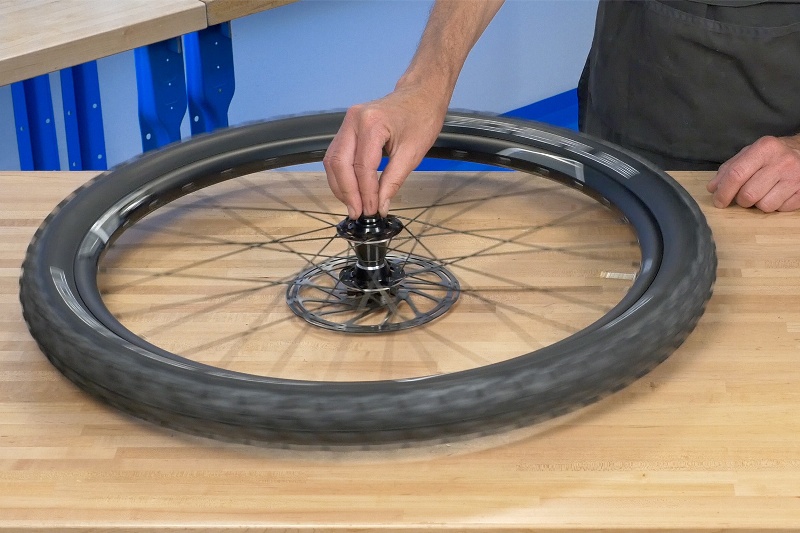 You need to learn how to properly glue the tape, accurately insert the nipples, carefully install tight rubber, making sure not to displace the tape and not fill everything with sealant. On the other hand, all this comes with experience, but what you will always have to put up with is the difficulty with pumping a completely flat tire.
A tubeless tube cannot be inflated until its landing board snaps into place on the rim. To do this, you need to sharply introduce air into the tire. The tire should straighten up and fall into the grooves with a characteristic click - then it can be safely pumped further. This all sounds simple if there is a compressor in the garage. Putting a tubeless tube into the grooves by pumping air with an ordinary floor pump is quite difficult, and almost impossible with a portable bicycle pump.
All this makes life much more difficult. But there are solutions. In the field, a compact can of compressed air can help out. At home, installing tubeless tubes greatly simplifies the booster.