Running a dual battery system on your UTV is the smartest way to ensure you always have enough juice to power your machine and accessories at the same time.
Here We Talk How To Install A UTV Dual Battery Isolator And What It Does
If you want to add a killer sound system, extra lights, or any other aftermarket add-ons, the best way to do it is by installing a second battery specifically dedicated to your non-essential electronics.
But a second battery can be a headache in UTVs. If any of your devices pull juice when they’re powered off, you could come back after a couple days of rest and find that your second battery is dead.
Before you know it, you’re buying new batteries regularly.
A better option is to use an isolator to keep your second battery working right—and make sure your machine never runs out of power.
What an Isolator Does
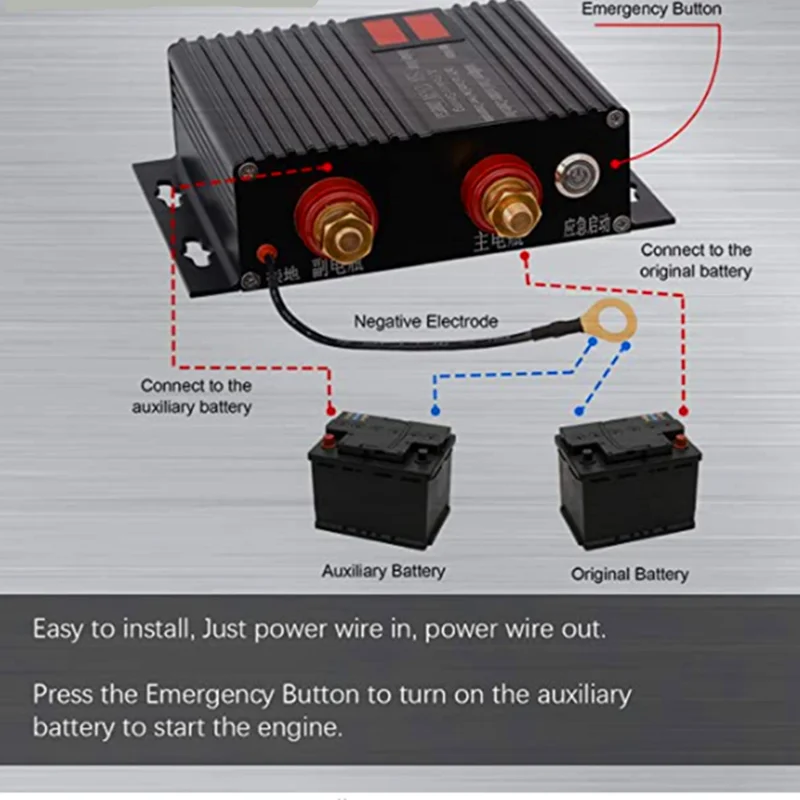
The True Am UTV Dual Battery Isolator connects easily to your primary and secondary batteries.
Once installed, it keeps your second battery powered up by using the “overflow” charge from your first battery. Once your primary batter reaches a specific threshold of charge, the isolator sends the extra juice to your second battery.
If the primary battery’s charge dips ever too low, the isolator automatically flips back and works to recharge your main battery before it runs out of juice.
As an added benefit, the isolator won’t let your extra accessories zap your primary battery. If you’re hanging out and playing the radio while your UTV is off, you might run the secondary battery dead. But if you do, the isolator won’t let it draw power from the primary battery to keep going.
This way, you’re never in danger of getting stuck somewhere without the power to drive home.
Easy to Use and Install
The True Am isolator is designed for machines already running two batteries. Thanks to its two-way design, which ensures it can’t be installed backwards, the isolator only takes about 30 minutes to add it onto your kit.
It works with dual battery setups on the RZR, Honda Talon, and X3 models.
The isolator connects directly to your batteries, so you don’t need to fiddle with your ignition or charging source. Not only does this keep the job simple, it also means that installing an isolator won’t void most UTV warranties.
The isolator also offers protection against electrical surges that can happen when your machine starts up or unexpected voltage spikes that can result in electrical system failure.
Now Offering A Kit For Users With Lithium Batteries, See This UTV Lithium Dual Battery Wiring Kit
Two Options
We offer two different True Am isolator kits. Both come with the isolator switch and the wiring you need to install it.
For more technically minded drivers, one kit comes with a voltmeter that displays the readings for both batteries on your dash.
Shop UTV Dual Battery Options| How-To - Interior and Electrical
Painless Performance's battery disconnect switch is an easy way to protect your hot rod from battery drains and even theft.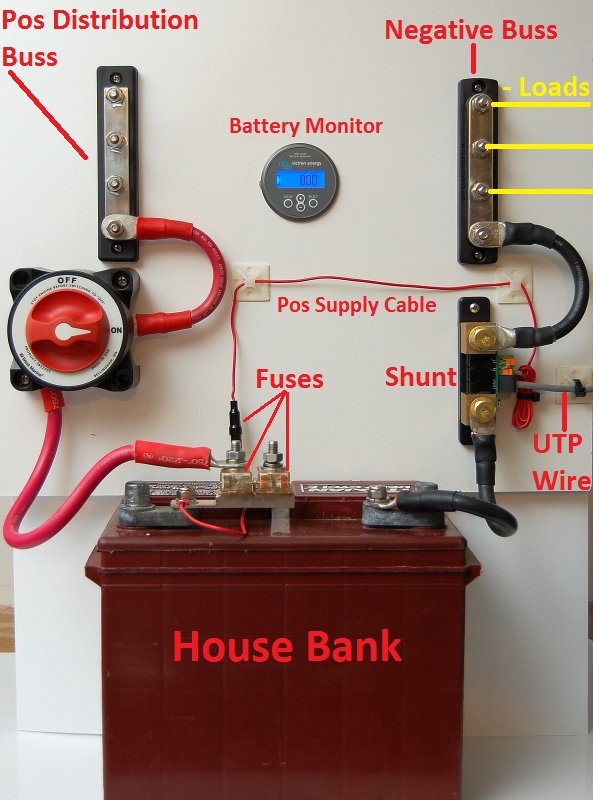
With our hot rods, gasoline gets all the glory, but t hey also need electricity to run, and as we add more and more bells, whistles, gadgets, and accessories to the mix the electrical side of the equation becomes even more critical. In some cases these electrical items consume a little power even when the ignition is off. Now, if you drive your car or truck daily, that's not an issue; but if it sits between events, you might have a surprise next time you try to go for a drive: a dead battery. Installing a battery disconnect switch to kill the car's power is an easy solution to the battery draining while the ignition is off. The good news is that it's a pretty easy project to knock out.
Like with everything, there are choices to make. If you want the disconnect switch to be near you, for use in an emergency, then you could opt for something like this remote disconnect with emergency switch (PN 30205) from Painless. The kit comes with a 250-amp solenoid, push button, and hardware. It's not NHRA approved, but it's a good safety item if you track your car. Keep in mind this isn't a good option for storing your car since the solenoid draws 2.5 amps when engaged, so if left engaged it will drain your battery over time. Doing some research will keep you from wasting cash on the wrong type of master disconnect switch.
If you want to use the disconnect as hidden kill switch that can also isolate the battery for storage, then Painless offers a remote disconnect with a latching solenoid (PN 30206). With this type of solenoid there is no risk of accidentally draining your battery, so it's great for everyday use. The kit uses a 100-amp continuous-duty solenoid that is activated by an easy-to-hide switch. The solenoid is weatherproof so it can be mounted anywhere.
The simplest to install and least expensive option is this master disconnect switch from Painless (PN 50710). It has a continuous rating of 175 amps and a surge rating of 1,000 amps and is sold with and without the mounting plate. These are spliced into the battery cable, and flipping the mechanical switch "cuts" the cable. They can be mounted in the positive or negative side of the battery run. The switch isn't waterproof, so it needs to be out of the weather. This is what we'll be using for our install.
The internet loves to argue over whether it's better to hook up a master disconnect switch to the negative or positive side of the battery. Many stock-car rule books call for the switch to be on the negative side, while the NHRA demands it be on the positive side. So if you're putting in the switch to pass tech, you're going to want to do some reading of the rules before you start.
Some prefer to put the switch on the negative side for a safety reason. The theory is that the exposed terminals on the back of the disconnect switch could contact metal in a crash causing a short (and possible fire).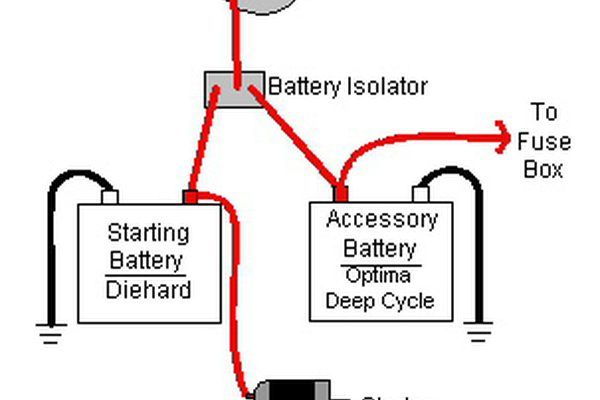 This isn't a concern with the negative side since it's already grounded to metal. Of course, you can mitigate the risk of using the positive side by doing the install right.
No matter which side you choose, you'll need battery cables. Oh, don't cheap out here. We've seen a "bargain" battery cable that, when you cut it open, was junk with a really thick outer casing to make it look heavy gauge. This kit from Painless (PN 40105) came with 16 feet of positive and negative 1-gauge insulated copper cable. If your battery is going in the engine bay, they have an 8-foot kit, as well.
As you may have guessed by our cable selection, our battery is being mounted in the trunk, and that's also where we'll be putting our master disconnect switch. First up is getting our battery cable from the starter to the trunk, and for that we need a hole.
OK, safety talk time. It should be obvious, but when dealing with wires through metal it's imperative that you always protect those wires with a grommet.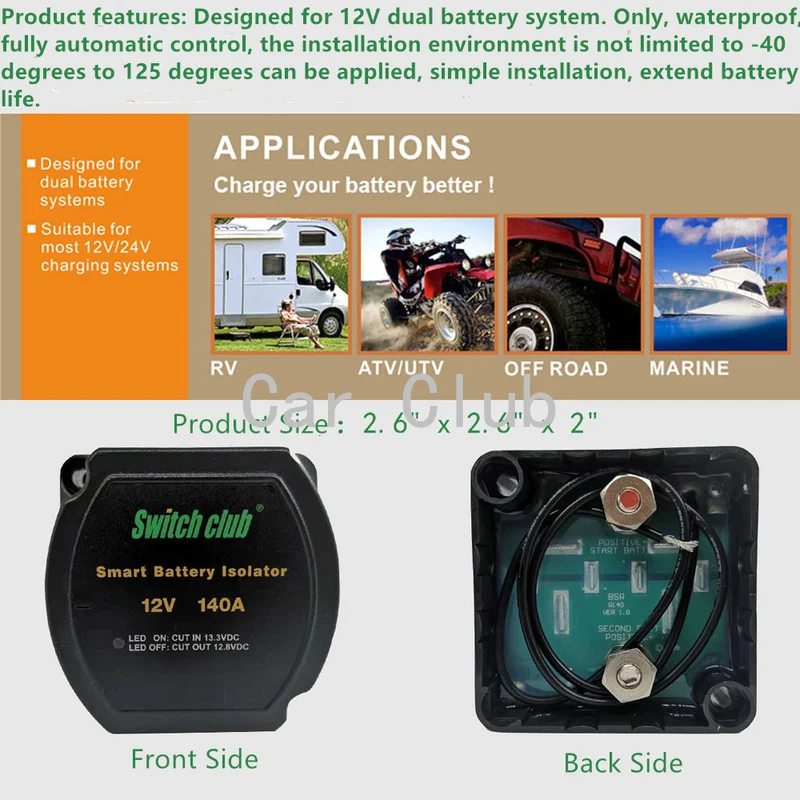 We've seen wires and even battery cables through bare holes, and it's just a few good rubs from a short and possibly a fire.
How and even where you mount your disconnect switch is up to you. We chose to fabricate a small L bracket and mount it in the trunk of our 1957 Chevy project, near the battery.
The positive cable was fed through the grommeted hole (to the starter), and we figured out where to make the cut. Measure twice since if you cut the end too short you're not going to be all that happy.
They make really cool battery cable snips, but a cutoff wheel works just as well.
After trimming back the insulation and sliding on a piece of heat shrink, we could put the copper lug in place. On short cables like this, it's important that the lug be clocked correctly since the cable is too stiff to twist very much.
Some people solder their lugs, some use pneumatic tools, but we love our hammer crimpers.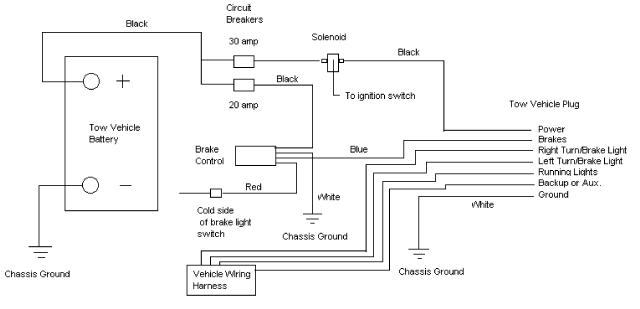 There are a ton of different ones on the market, but they are inexpensive and do a great job securing the lugs to copper cable.
We've had ours so long in the MotorTrend Tech Center that we don't even remember where we got them. But they work great and even leave a positive or negative mark embossed in the crimp.
We could then slide up the heat shrink and hit it with our heat gun.
As you can see, we nailed the length and the clocking for our battery-to-switch positive cable. Now we just had to install copper lugs on the other cables.
For the negative side of the battery, our plan was to ground to the frame under the car. Like the positive side, we drilled a hole in the trunk floor, installed a grommet, measured how long a cable we needed, made a cut, and hammered on a lug with some shrink wrap.
We then passed the negative cable through the floor to where we had drilled a hole in the frame.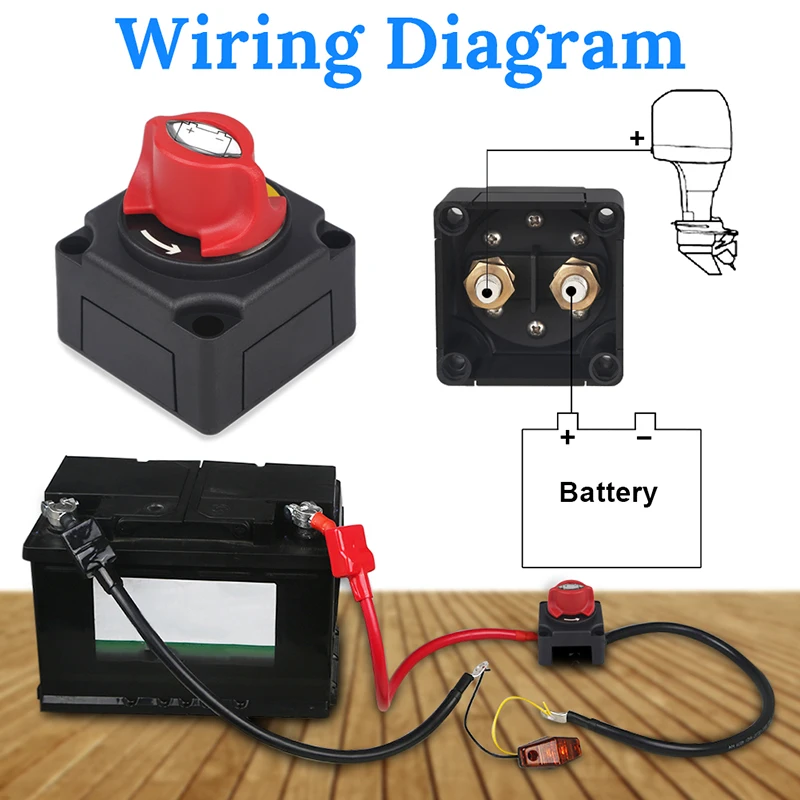
Yeah, we could have used a large-tapping screw, but a nicer method is to tap the hole and use a bolt.
According to Painless, the number one problem with electrical projects is bad grounds. So make sure there's bare metal under the lug and that you have the best possible metal-to-metal contact. If you want to protect the bare steel on the frame from rust, then use a dab of dielectric grease between the frame and the copper lug.
To secure our Optima yellow-top battery in the trunk of our 1957 Chevy, we grabbed this billet hold-down from Eddie Motorsports. Remember, if you are doing this to pass tech, then you need to read your specific rule book on trunk-mounted batteries since some sanctioning bodies require sealed battery boxes and might have other installation requirements.
We finished off our project by covering the positive battery cable to the starter with some of Painless' Powerbraid black covering. And just like that, we're done. With this system we'll be able to easily isolate the battery when the car is in storage to prevent any battery drain. Since the trunk locks, it's also a decent theft deterrent.
Remember, there are lots of ways to skin this proverbial feline, so figure out the best place for you to mount your master disconnect switch. It could be to the side of the trunk like in our '57, or you could figure out a bracket that lets you mount it to the battery like we did on this 1969 Camaro project. The important thing is to pick the master disconnect switch type that's best suited to your needs and to make sure all the crimps and connections are as rock-solid as possible.
SOURCES:
Eddie Motorsports
888.813.1293
eddiemotorsports.com
Painless Performance
800.423.9696|
painlessperformance.com
Optima Batteries
888. 867.8462
optimabatteries.com
ATV is a rather specific technique, which is mainly used rarely and for entertainment.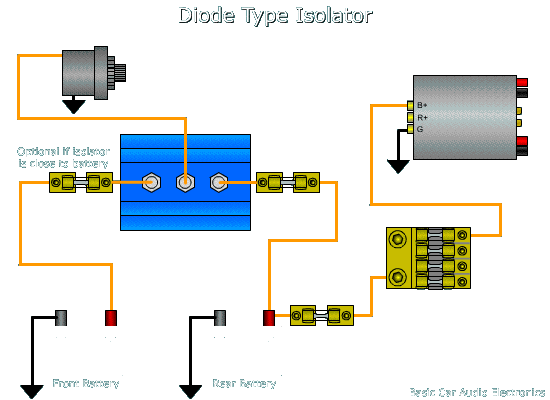 In addition, ATV, like most other types of motor vehicles, is practically not used in winter. And this means that the equipment costs a lot of idle time, which can lead to a complete discharge of the battery.
And all the fault may be some energy consumer who takes the current when the ignition is off. Often the cause of a discharged battery is poor-quality wiring. How to deal with it? That's just for such cases, and need a mass switch. nine0003
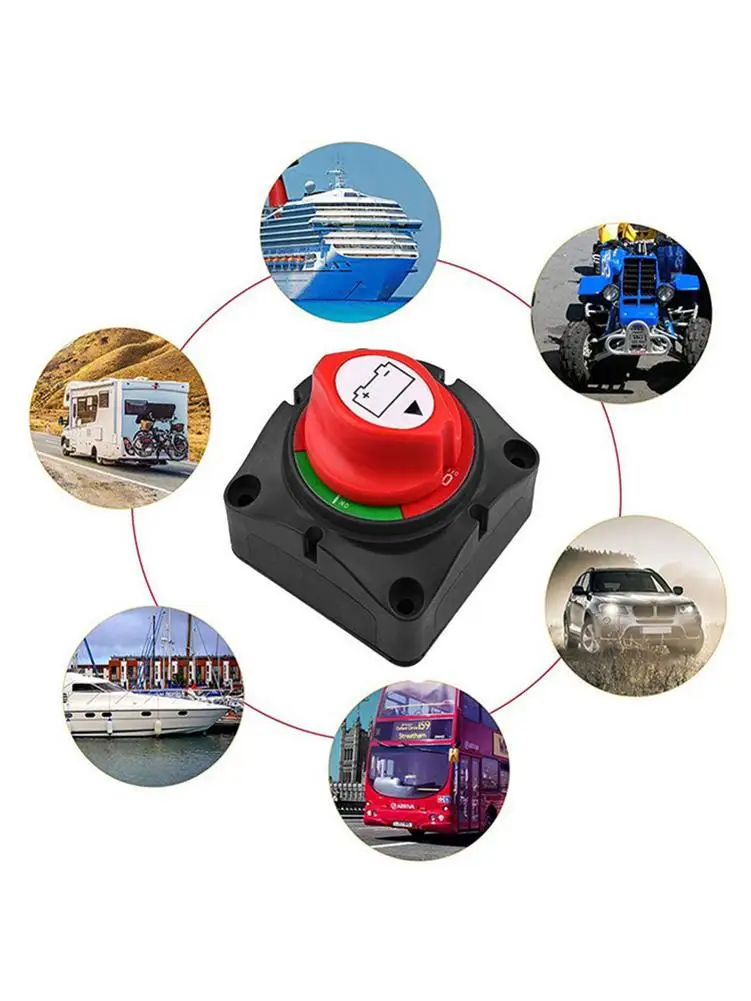
So, the mass switch completely de-energizes all consumers of energy and saves battery charge. Essentially, the effect is the same as if you disconnected the battery terminals. Only with a mass switch, you do not need to climb into the technical units of the ATV, just turn the switch.
Let's list the main functions of the mass switch:
 ) allows you to quickly turn off the power to the ATV.
 There are a lot of options for mass switches. We will not get hung up on any particular manufacturer and type. Just remember that the main criteria when choosing a disconnect switch for an ATV should be:
A) build quality;
B) degree of protection against moisture;
The most common switches are screw . The design is simple and clear: turned the handle - de-energized the ATV. Such switches are very convenient to use in an emergency. To protect the quadric from thieves, you can hide the switch in a secluded place.
There are also mass switches with special key . Their main advantage is protection against hijackers. An attacker will not be able to start the ATV without this key. On the other hand, there is a big downside. In an emergency, every second will be important, and you are unlikely to be able to quickly get the key, insert it into the socket and turn it.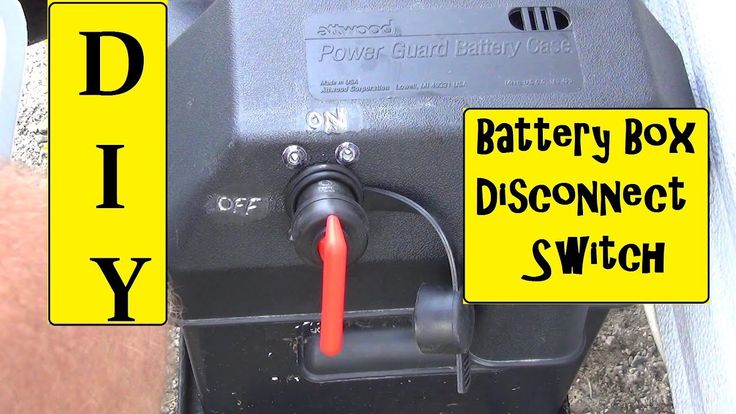
The installation of the is simple in principle. It is usually mounted to open the negative wire as close to the battery as possible. In this case, it is worth using only high-quality power wire and no less high-quality terminals. nine0003
If you have dealt with electrics, then you can handle the installation of a mass switch on an ATV yourself. But still, it is better to contact qualified specialists who have experience working with such equipment.
This entry was posted in Quads. Bookmark the permalink. The car's battery runs out even when the car is idle in the garage. When the ignition is off, the on-board system continues to operate, still powered by electricity. Especially noticeable outflow of energy after a few days of inactivity. To avoid complete discharge, it is necessary to install a battery mass switch. How car owners can independently mount the mass disconnect switch, we'll talk today.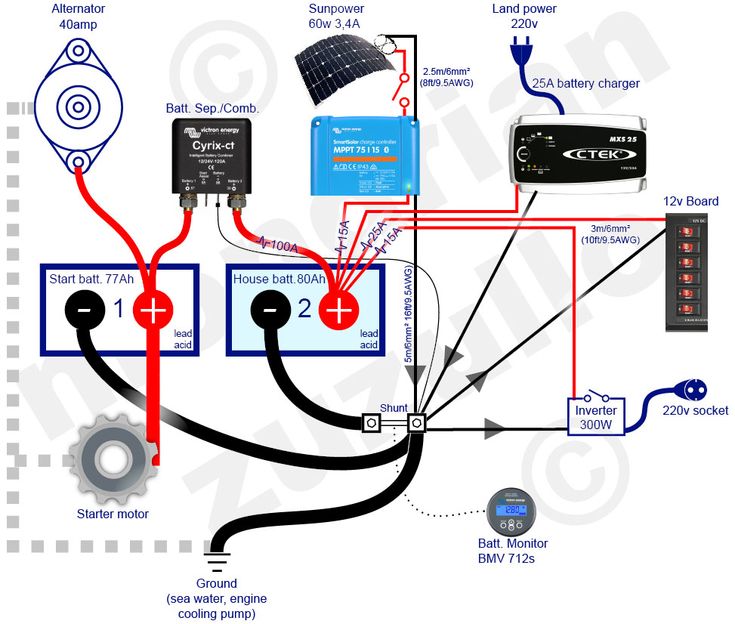 nine0003
Mass switch - a toggle switch made of polymer material, with metal inserts around the perimeter to increase strength and fixation with bolts to the body part. Simple modifications are equipped with only two terminals and a fuse. Upgraded versions have a separate contact for the alarm cable, on-board computer, navigation. The mass switch is needed in order to
According to the activation method, they are divided into:
The main difference between the first and the second is that the mass switch with remote control is installed inside the car. The driver does not need to systematically open, close the hood to supply current. In addition to spending time, the integrity of the castle is violated. And this is an additional cost for repairing the core. Direct installed directly on the battery or near it, at a distance of 15 - 20 cm.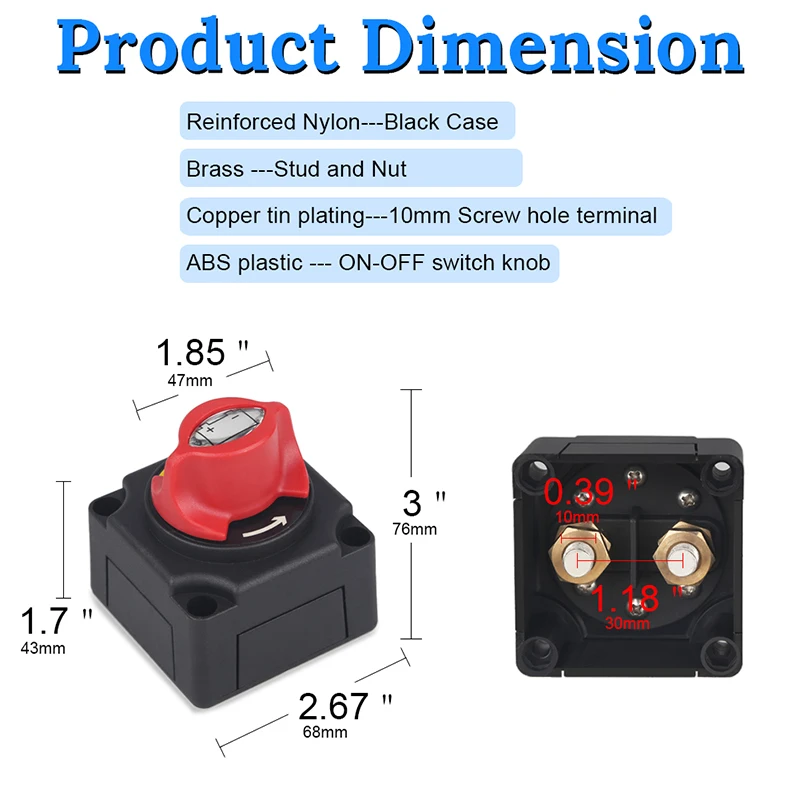
The mass switch is needed to save charge, money, safety. Service station motorists recommend purchasing products in specialized car dealerships, car markets, and the Internet. To a lesser extent, use the services of intermediaries, do not buy parts at an unreasonably high or low price. Require the provision of documents, certificates of quality. nine0003
Let's consider the installation of a do-it-yourself battery mass switch. We carry out the work without the help of third-party specialists. The design of the switch is simple and the operation principle is intuitive. We prepare a set of automotive tools, a new terminal for good contact, a metal brush, rags, and a WD-40 liquid to remove deposits.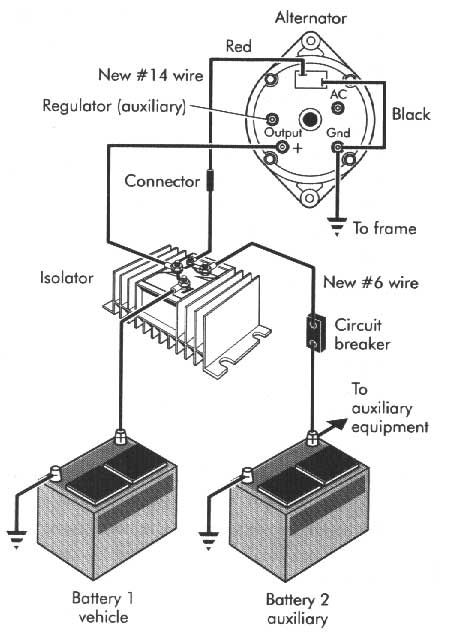
Note to the driver!!! It is strictly forbidden to start the engine in the off position of the relay. Cause: risk of damage to fuses, malfunction of electrical appliances. nine0135
 7 - 1.2 cm from the battery to the passenger compartment, to the toggle switch; nine0018
 The problem of resetting the electronic control unit does exist, which brings inconvenience. The driver needs to reconfigure the gadgets, the radio tape recorder for “himself” every time. This can be avoided by purchasing a switch with an additional fuse and contact. Against the background of a general shutdown of the power system, the “necessary” devices remain fully functional.