ATVs can pretty much go anywhere. I’ve gotten plenty stuck in mucky ditches. But water always makes me shiver because I’m a mechanic, and I know what water can do to an engine.
ATVs can go in the water, but they must have a special snorkel kit fitted. The snorkel allows the engine to breathe while submerged. Without the snorkel kit, the engine would likely be damaged beyond repair.
In this post, you’ll learn what an ATV snorkel kit is, where it’s fitted and how it’s tested. You’ll also learn about the devastating damage water can do to an ATV engine in 2 seconds flat.
Page Contents
An ATV engine, as you know, needs air and gas to run. The air is forcefully sucked into the engine through the airbox (positioned under the driver’s seat) by the piston as it moves down the cylinder on the intake stroke. Any water in the air or fuel system will shut the engine down immediately. A rider must not allow water to get anywhere, even close to the airbox. To do so risks some expensive repairs. (more on that later)
But deeper water equals more fun, right. So the solution is a snorkel kit. The concept is, as you guessed, the same as a divers snorkel. An extended duct is added to the airbox and positioned as high as possible on the bike. The hood is the usual location for the intake opening. This allows the rider to keep a close eye on the water level in relation to the intake opening.
Before buying a snorkel kit, do your research really well. See what your bike needs and only buy a quality brand from a retailer that will stand over the kit. A cheap poor quality snorkel kit can cost you your engine. You can fit a snorkel kit yourself, but do test it before hitting the drink. The safest method for testing is compressed air and soapy water.
I use a leak-down tester to compress the intake system, and you can use soapy water at connectors to check for escaping air. Even the smallest leak will shut down the engine.
We’re not quite water-ready yet. If your ATV’s transmission runs a CVT system (Belt driven), it will also need to be protected from the water and crap in the water. If the belt gets wet, you’ll lose traction and likely damage the belt and clutches, all expensive repairs.
Your CVT housing has an inlet and outlet to allow for airflow around the components. Snorkeling ducts need to attach to them also and be extended as high as possible. So too for the engine crankcase and a host of other breathers, including front and rear diff, carb vent, gas tank vent, and possibly others, that’s why it’s important to do all the research for your model ATV first.
The electrics on your ATV are pretty durable, and they need to be because they have everything thrown at them. Water, however, is your ATV’s electrical system’s greatest challenge. Mission-critical electrical connectors are engineered to be water-tight.
Rubber seals inside the connectors and on individual pins help keep moisture and dirt out, but problems arise in older bikes. The seals are often missing, perished, or misaligned.
The result is electrical gremlins either as you enter the water or soon afterward.
Water that enters a stalled engine won’t destroy it, but the water that enters a running engine is in serious trouble. Riding an ATV hard into deep water without a proper functioning snorkel will allow water into the air intake box.
From there, the water is sucked on into the engine and fills the cylinder bore. It’s a condition known as hydro-locking.
So what’s the problem with hydro-locking? Water isn’t compressible, and when the piston comes back up the cylinder under force and tries to squeeze the water, something has to give.
The piston con-rod is the usual loser, and repairing this kind of damage isn’t cheap.
You may find the following posts helpful:
The bike won’t start no click
ATV dies when given it gas
ATV only runs on the throttle
ATV makes a popping noise
ATV hard to steer
John Cunningham
John Cunningham is a technical writer here at ATVfixed. com. He’s a Red Seal Qualified Service Technician with over twenty-five years experience. He’s worked on all types of mechanical equipment, from cars and trucks to ATVs and Dirt bikes.
There are plenty of great things that you love in ATV off-roading. And there is one thing that may turn an awesome ride into a nightmare. It's drowning your quad.
It’s absolutely thrilling to race across hills and valleys, enjoy spectacular views, and explore new muddy trails. Usually, it means you have to drive through deep mud holes, ponds, lakes, or even streams. However, getting water in your quad’s engine is one of the easiest ways to totally ruin your four-wheeler. It’s more common trouble than you might think, and it may happen not only when you contrive to sink your quad to the bottom of the deep blue sea.
When you drive fast through deep puddles, the water may get into the air intake, and then enter the engine system. Experienced riders who are used to challenge waist-deep mud usually install snorkels which allow them to ride through the deeper holes, but you are not a hundred percent safe even then.
So, what’s the problem? When water enters one or more cylinders, your engine becomes hydrolocked.
Attention! The key thing you should keep in mind – if you get stuck in the middle of puddle and the water is seeping in your engine, DO NOT TRY TO START IT!
It's better to get wet by falling into the water than to kill the motor. Take a deep breath, and cool down. You have a lot of work to do and not let your ATV die. Follow these steps.
When you drown your quad, hit the kill switch. Get your ATV out of the water as soon as possible. At this point your main goal is to prevent more water from leaking in everywhere.
Hook your drowned vehicle to your buddy’s ATV or use a winch to tow it on the bank.
Ask your buddy for assistance and tip your quad 90 degrees backward. It should allow water to flow out of the exhaust, cylinders, and CVT.
Once it stops, set the quad down on the ground.
These are “first-aid” steps you need to make on the spot. From this point it’s better to tow the vehicle to your garage or service where all the tools are at hand.
And speaking of safety, when you're going into deeper waters it is vital to find a pair of waders with adjustable cinching top.
Image from: kvadromanual.com
If you can’t get evacuated, continue your ATV recovery. Take off the seat, inspect the air box and remove the air filter.
Look carefully at your air intake and clean everything. Make sure that there is no water and mud left in the air box so that your ATV’s engine will be safe when you start it.
If you have a carbureted vehicle, open your carb drain and let it drain for about a minute, then close it.
Loosen your engine oil drain bolt, open it carefully until water starts to flow. Once you see oil comes out reinstall the bolt. Let it sit for 10 minutes, then repeat as many times as needed until you no longer see any water coming out.
This is how milky oil looks like // Image from www.hondaforeman.com
Now it’s time to inspect your engine. Remove the spark plugs. Start the engine to force out any water from the cylinders.
How to be sure that remaining water is completely out? Refill oil to the engine and turn it over again, with no plugs in it. Wait for a few minutes, and check the oil color.
If there is any water left, the oil will look like a milky substance. In this case drain and change the oil, and start the engine over. Do it again and again until the oil is clean. Depending on how much water is in the engine, it may take up to 8-9 reps.
Clean and reinstall the spark plugs. Try to start your ATV. If it starts, let it run at idle speed for a few minutes. Then, shut it off, refill it with your normal oil and oil filter. Run it again for a couple of minutes, shut it off, and check for milky colored oil again. If you have none, your ATV is ready to go.
Off-road are the core piece of riding gear for ATV & UTV riders
Find out the best look for you
This guide will help you start the submerged ATV again and ride back to where you’ve started. Don’t forget to carry out the complete revision procedures afterwards.
You should check the fuel system, and transmission, flush the brakes, and look for any water droplets left on electric connections. Of course, in some cases, you will need to order a few spare parts. Your quad deserves your care. And you deserve well-functioning vehicle and more exciting ride next time.
However, this how-to guide is not a magic wand that will prevent any swamped ATV from being broken down. So, if you have completed all the steps above, and the engine still doesn’t run, or runs uneven, the best decision is to call your experienced mechanic.
We do hope that none of these things will ever happen to you. In case you have any doubts that the ford is too deep for passing, remember, you wear waders not just for fun. They will keep you dry while you are wading and measuring the water with your feet, instead of risking your quad.
Also think about adding a snorkel kit, if you still don’t have it. It will allow you to go through deeper water with no crucial damage to the engine.
-28%
AQUAMASTER-ZIP LIGHT Camogrey
with central zipper
598 EUR
430.40 EUR
-12%
AQUAMASTER LIGHT Red
reliability & comfort
438 EUR
386.20 EUR
AQUAMASTER Blue
reliability & comfort
647 EUR
-20%
HIT
AQUAMASTER Red
reliability & comfort
259 EUR
207.20 EUR
AQUAMASTER Red
reliability & comfort
677 EUR
AQUAMASTER LIGHT Blue
reliability & comfort
478 EUR
HIT
AQUAMASTER Blue
reliability & comfort
299 EUR
AQUAMASTER LIGHT Red
reliability & comfort
478 EUR
HIT
AQUAMASTER Red
reliability & comfort
299 EUR
-8%
HIT
AQUAMASTER RED
reliability & comfort
637 EUR
585./cdn.vox-cdn.com/uploads/chorus_asset/file/9738139/Screen_Shot_2017_11_22_at_3.40.31_PM.png) 20 EUR
20 EUR
Explore all
You won’t scare ATV owners with a water barrier – after all, we have an all-terrain vehicle under us, and not an urban “passenger car”.
But it also happens that the ATV cannot cope with deep mud or ford, and gets stuck. This situation is not rare, so everyone who gets behind the wheel of such equipment should know how to act.
Fortunately, all ATVs have a reliable and simple device, including drowning. Therefore, even if your all-terrain vehicle is completely submerged, this does not mean that it has died. If you act quickly and correctly, very soon you will be able to drive again.
Consider two situations:
In the first case, the most important thing is not to try to start: you can only complicate the problem.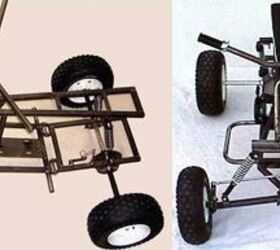
In the second case, our actions depend on how deep the ATV has sunk. If the snorkels or the inlet are hidden under water, turn off the engine. If they remain above the surface, you can try to get ashore. To do this, you can either turn back along your trajectory, or choose another route if it is shorter. Just be sure to check the depth and hardness of the bottom so as not to drown the ATV completely.
If you didn’t manage to leave, and the engine eventually stalled (by itself or you turned it off) - the following options remain:
If none of the methods helped, you will have to look for a more powerful technique that will pull out the “drowned man”. If you have to leave the place of events for this, do not forget to mark it. The easiest way is to tie something bright on the nearest tree.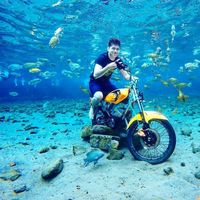
Important: ideally, the ATV should be evacuated to a place where there are conditions for normal inspection, drying and replacement of consumables. All steps listed below should be taken only if it is not possible to call a tow truck.
 We mix, pour it into the engine, start it and let it work for a few seconds. Repeat washing 2-3 times, then completely drain the mixture.
 When you get (whether on your own, in tow or by tow truck) to the garage, the ATV will have to be serviced more thoroughly.
If you haven't done something from the list above, do it.
If you have carried out the whole range of rescue operations while still on the shore, upon returning to the garage (or service station):
 It doesn't have to be if it's in good condition.
 Important: These steps are worth doing even if you started the ATV after drowning and rode it back normally. It may be that the water has remained somewhere - in the future this can lead to bad consequences.
Community environmentalists in Naberezhnye Chelny are anxiously awaiting spring. Experience tells us: when the snow melts in the Shilninsky forest, they will see traces of the winter bacchanalia - rubbish, destroyed young trees, earth wounded by car tires
Rosprirodnadzor Public Inspector for Environmental Protection Artem Leonov said that a big problem is that in winter the residents of nearby cottages ride snowmobiles and ATVs in the Shilninskoye forest. These scorchers, of course, do not drive on roads. They wind circles over rough terrain. As a result, young seedlings fall under their wheels, they frighten the animals - some die under the wheels. Serious damage is also inflicted on the ground cover: in the Shilnin forest, sandy soil is soft - under the influence of tires and melt water, the top layer is destroyed.
The Shilninsky forest also suffers from the garbage that the residents of the city bring there.
"As soon as the repair season begins, bags with pieces of walls, broken bricks and scraps of linoleum immediately appear. Some builders-shabashniki take all this garbage after repairs to the forest," says the public inspector.
True, then he adds: “The only thing that pleases me is that there has been much less construction waste in the forest lately. Probably because there is only one entrance to the Shilninsky forest - from the village of Bolshaya Shilna. In other places, the owners of cottages built fences and dug trenches."
And the houses appeared here, among other things, due to the seizure of the territory of the Shilninsky forest, reminds Leonov. However, he does not rule out that land encroachments will continue.
"We don't have any leverage to influence violators of the forest order. Because at the moment the status of the Shilninskoe forest is not clearly defined," says the public figure.
In order to preserve the unique man-made forest that was planted over a hundred years ago, Artem Leonov and his associates tried to push through the idea of including the Shilninskiy Forest in the Nizhnyaya Kama National Park.
With this proposal, the Chelny citizen turned to the Minister of Natural Resources and Ecology of the Russian Federation Alexander Kozlov.
The letter said that the staff of the Nizhnyaya Kama National Park conducted a survey of the vegetation of the Shilninskiy forest four years ago and found five species listed in the Red Book. Specialists of the Committee on Bioresources of the Republic of Tatarstan drew attention to the reservoirs near the Shilninsky forest, which become a haven for many birds, including Red Book birds, during flights. Part of the Shilna River is used by animals from the Nizhnyaya Kama park for watering.
"Soon this access may be blocked due to active residential development," the environmentalist complains.
Recently, the activist received a letter from the Ministry of Natural Resources and Ecology of the Russian Federation. It says that joining the Shilninskoye Forest to the Nizhnyaya Kama National Park is not possible, since these forests do not have adjacent borders.