As ATV owners know, there is no shortage of parts, accessories, and gear to spend additional money on. When it comes to drivetrains, winches, and suspension systems, there are hundreds of knowledgeable resources to provide guidance.
Unfortunately, there is a shortage of accurate, reliable information about ATV speakers and waterproof ATV speakers. Most of the guides you can find are written by people that haven’t ever sat on an ATV – and don’t know much about sound systems, either.
On this topic, we have you covered!
Keep reading for a discussion of waterproof ATV speakers, DIY ATV speaker audio tubes, and ATV soundbars . In other words, we will provide a summary of every option available for listening to tunes while riding a four wheeler.
Quick Overview: Waterproof ATV SpeakersUnless you somehow managed to find a four wheeler with a ready-made sound system, you will need to find an aftermarket solution if you want to listen to music while riding.
The first question you need to answer, really, is whether or not you have a need for a sound system on your ATV.
Depending on the trails you ride, etiquette may dictate that you should avoid blasting music that is loud enough for others to hear. On the other hand, some of us ride on private trails and land, and we can crank the volume without another soul hearing our music.
Next, you need to decide between three options, each of which has its own advantages and disadvantages (which we will cover in detail):
Best Portable Option | Top ATV Soundbar | Top Audio Tube |
JBL Xtreme 3 | Wet Sounds Stealth-6 | Planet Audio PATV85 |
$279.95 | $499.99 | $289.99 |
Check Price | Check Price | Check Price |
Best Portable Option
JBL Xtreme 3
$279. 95
95
Check Price
Top ATV Soundbar
Wet Sounds Stealth-6
$499.99
Check Price
Top Audio Tube
Planet Audio PATV85
$289.99
Check Price
12/25/2022 10:36 am GMT
Top Choices: Waterproof ATV SpeakersThese speakers are our specialty here at Swift Moves, so we could talk about them for days. For ATV riders, the key here is that you need a speaker with sufficient power to be audible when you are riding.
We recommend something like a high-end JBL portable (the Xtreme series and Boombox series are a safe choice).
The upsides to this option are obvious. Without any customization or installation, you can just click the buy button and have a portable speaker to use when you are out riding. No complicated installation, wiring, or custom-fitting is necessary – just plug and play.
More importantly, for the outdoor-minded person there are a thousand uses for a portable bluetooth speaker. You can take it with you on the boat or kayak, play tunes in the shop or garage, and sit it next to you when you are grilling.
For almost 100% of four wheeler riders, you spend plenty of time outdoors besides the time you spend riding an ATV. For many of these times, a JBL Xtreme or JBL Boombox would be a handy product to own.
Because these speakers have a built-in battery, you don’t need to wire them into your ATV or use your ATV’s battery. So you can have the speaker running all day without any concerns of a dead battery on your four wheeler.
The obvious downside is the lack of volume output. Simply put, budget bluetooth speakers aren’t going to be audible over engine noise. And even the high-quality options are going to be drowned out at high speeds.
JBL Xtreme 3For anyone on a budget, choosing the older-model Xtreme 2 can save you $100+. You lose the dust-proof rating, USB-C charging, and a little bit of sound quality. Otherwise, the speakers are nearly identical except for cosmetic improvements. (For a full side-by-side comparison between the two, and to help you decide whether it is worth saving the money, click here).
The JBL Xtreme 3 is an excellent portable bluetooth speaker for anybody that is willing to spend some money for sound quality and volume output.
There are some phenomenal bluetooth speakers under $150, but our top picks such as the JBL Flip 6 and Bose SoundLink Flex just won’t bring enough volume for use as an ATV speaker. This is why we put the Xtreme 3 on the list instead.
Xtreme 3 provides a number of features that make it ideal for ATV use — great sound quality, excellent durability (including an IP67 waterproof rating), and ~15 hours of battery life from a single charge.
If that’s not enough, you also get the power bank feature, which allows you to use the speaker’s built-in battery to charge your cell phone or other portable device. So instead of a stereo which could run your ATV’s battery empty, the Xtreme 3 has a built-in battery that can actually help you recharge your phone.
In addition to bluetooth capability, the Xtreme 3 has the trusty 3.5 mm aux input to connect to an audio source. And the speaker has built-in hooks and comes with an included carrying strap — features which could be very useful when riding a four wheeler.
Having said all of the above, there is still a clear downside with the Xtreme 3. Although sound quality is excellent and maximum volume is great for a portable speaker, it is nonetheless a portable speaker. This means that the volume is still going to be overpowered by engine noise when you are riding at high speeds.
Still, for a quick and easy ATV speaker solution, you can’t do much better than the JBL Xtreme 3.
JBL Boombox 2If you want to spend big money on one of the best portable speakers that money can buy, consider the Boombox 2.
With an MSRP of just under $500, it isn’t what I would consider budget-friendly. But if you want a plug and play sound system without any wiring or complex installation, the Boombox 2 is a great choice. At 13 pounds and 80 watts RMS output, this is large and heavy for a “portable” speaker — making it a wise choice for ATV use.
The battery is rated for 24 hours of use, and it has the power bank function like the above-mentioned Xtreme 3. Also similar to the Xtreme 3, you can connect via bluetooth or a 3.5 mm aux cable. The Boombox 2 doesn’t have a carrying strap, but it has a large “boombox” style handle which should help you mount or affix it to your ATV.
The IPX7 rating of Boombox 2 means that it isn’t officially considered “dust-proof.” However, we haven’t had any trouble when exposing this speaker to sand, dirt, or dust. But it is nonetheless something to be mindful of.
For a full write-up of the Boombox 2, and how it compares to the original JBL Boombox, see here.
These are the products that pop up whenever you search for an “ATV speaker.”
The benefit of these products is that they are built specifically for durability, waterproofing, and maximum volume. All of these are conducive to ATV use.
A big downside is that you need to do plenty of due diligence before purchasing. First, there are a lot of garbage, overpriced products in this category. Just like ATV accessories, you can spend a few hundred dollars on something that is only worth twenty.
Often these systems are marketed as one-size-fits-all, so there is no guarantee it has the size or specs to be useful to you. Installing a speaker on a jet ski is different than installing a speaker on an ATV – but these products try to market themselves as both. For that matter, installing a speaker on a side by side is different from installing a speaker on a quad.
If you purchase one of these products, be sure to do plenty of research. Make sure the size and output are acceptable for your ATV. And also consider the battery drain that will occur if the speaker is being powered by your ATV’s battery.
These sound systems are available as an audio tube or soundbar. Minimal wiring is required with these products, and they are designed to provide sufficient volume. However, sound quality is usually unspectacular. Some of the big players in this space (like Boss Audio) have poor sound quality.
Installation can be a challenge, since these products are marketed as one-size-fits-all systems to be used with ATVs, UTVs, jet skis, etc. Be sure that you check the dimensions of the product before ordering. Additionally, try to find real reviews from people that have installed the product on their ATV.
Wet Sounds Stealth 6 Ultra HDFor larger budgets, the Wet Sounds Stealth 6 is certainly worthy of consideration. It has a soundbar design and brings 400 watts RMS of total output.
The soundbar is just under 21″ in length and includes a remote. The design is simple but sleek, and Wet Sounds provides a 2 year warranty.
With an IP67 rating, waterproofing and dustproofing shouldn’t be a concern. And the product includes a mounting kit.
Because this soundbar doesn’t include a built-in battery, you will need to use your ATV’s battery as a power source.
The Wet Sounds Stealth-10 provides even higher output for a similar price, so it might belong on this list as well. But at nearly 3 feet in length, it may be too large for some setups.
ECOXGEAR SoundExtreme SE26This speaker has an MSRP under $500 and provides quite a bit of volume (500 watts RMS max output) and solid sound quality. It can be connected via bluetooth or aux input, so you have the versatility that you need in an ATV speaker.
The soundbar is pretty well-sized for an ATV at 26″. This is a popular soundbar for installation on side-by-sides (UTVs), but the mounting options and size make it a solid choice for ATVs as well.
SoundExtreme SE26 has some features which sound good in the marketing material yet are largely unnecessary.
The party mode gives you the ability to pair up to 50 compatible speakers. While I would love to see 50 ATVs blasting music in unison from soundbars paired in party mode, I doubt this feature gets used too often.
It also has four RGB party lights, which look cool but are a great way to drain battery quickly for no reason.
The speaker system is powered by your ATV’s battery, so again you run the risk of draining your battery when the engine is off but music is on.
With an IP66 rating, this soundbar is less waterproof than many of the speakers on our list. However, we really don’t anticipate device failure due to an IP66 (rather than an IP67) rating.
The SoundExtreme SE26 isn’t the perfect product. But if you want to find the right balance between budget-friendly and high-performance, this is a good option with a sub-$500 price tag.
Rockville XBAR-24If the above Wet Sounds and ECOXGEAR soundbars are beyond your budget, the Rockville XBAR-24 is worthy of consideration.
Like the other soundbars on our list, it requires a power source from your ATV’s battery.
With an IPX6 rating, it is less waterproof than some of the other options, and isn’t rated for dustproofing at all.
But the price makes it a good choice, since it occupies a “sweet spot” between the $500+ premium products and the low quality sub-$150 products that dominate the market.
The 24″ soundbar is a great size for an ATV speaker, and it also provides LED lighting for anybody that wants that feature. The mounting hardware isn’t perfect, but it is pretty versatile and it comes included with the soundbar.
Planet Audio PATV85With an MSRP below $300, this is a competitor of the Rockville product above. But instead of being a soundbar like the previously-mentioned speakers, the PATV85 features the “audio tube” design.
Basically, the audio tube is just a self-contained speaker system that is well-suited for mounting and also able to direct the sound towards the rider.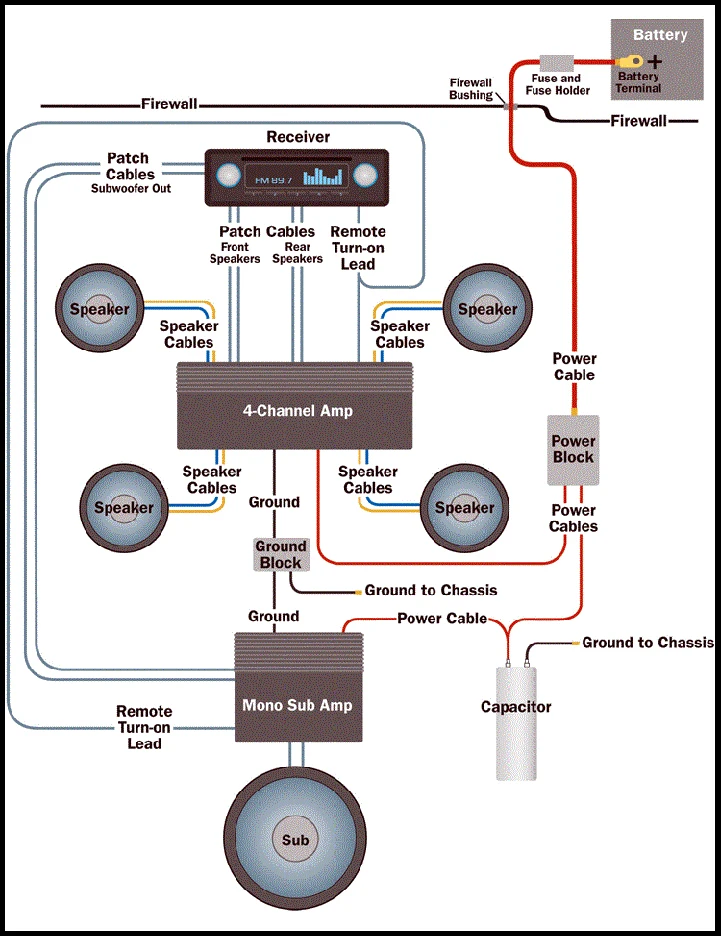 This design makes it perfect for ATVs, UTVs, and jet skis.
This Planet Audio system can’t compete with premium products, but there is a lot to love about it, especially considering the price.
The device has a storage compartment built in, which also allows for USB charging of another device. This works similarly to the “power bank” function on the JBL products that were discussed above.
It also has a control panel with a wired connection to the speaker, rather than being built into the speaker like most other products. For rear speakers, it is incredibly inconvenient to have controls built into your speaker. So, if you are planning on a rear-mounted speaker system, this is a worthwhile option to consider.
The PATV85 has an LED light, but it isn’t color-changing or customizable like some other products.
The IPX5 rating leaves a bit to be desired, so this speaker is less waterproof than other options on the list. But the 3 year manufacturer warranty is tops among any of the products we have discussed.
With a sub-$200 price tag, these aren’t premium speakers. The IP44 waterproof rating is the lowest rating of any product that made our list. And sound quality is decent but not exactly impressive.
However, for anyone shopping in this price range, you get a lot better quality with the Pyle speakers than some of the budget-friendly products that populate “Best Of” lists.
The included controller is a nice touch for the price range, as is the ability to use a cigarette outlet for power rather than just a 12V battery. 4 fastening straps are included, which should make installation simple. However, we still recommend finding a more permanent installation solution.
Multicolored lighting is also included, which again is a nice touch considering the budget price tag.
Overall, we recommend looking at other options if your budget allows. But if you can’t exceed $200, this Pyle system (or perhaps the above-mentioned JBL Xtreme 2) may be your best option.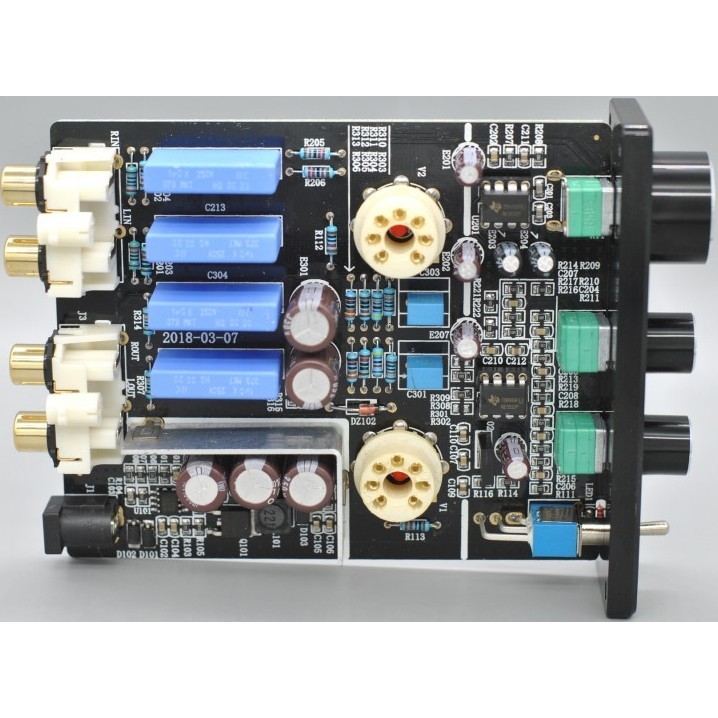
In vehicle sound systems, you can get as elaborate and high-powered as your budget allows. There are installers and companies that can design a system to meet your exact specifications and the specifications of your ATV – but it will cost you.
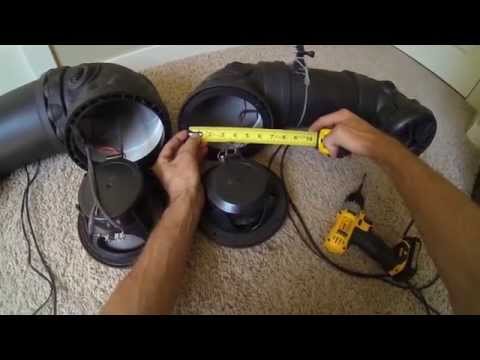
For the DIY minded, keep in mind that “marine-grade ATV sound system” usually just means “waterproof speaker inside of a PVC pipe.” There are guides and videos online, and anyone with DIY skills can save some money, gain some performance, and design a custom sound system for their ATV.
If you are interested in going the DIY audio tube route, see here for a great video guide to get you started.
If you want a little bit of customization without going fully DIY, you can also “build” a speaker system individually. Whereas the options that have been discussed above (portable speakers and marine grade audio tubes/soundbars) are all-in-one solutions that allow for plug and play usage, you can also buy “wakeboard speakers” and connect them to an amplifier.
If you choose wakeboard speakers, the most important thing is to know what components are needed for your system to function. Don’t get a set of speakers without an amp or head unit, since the speakers won’t do you any good. This seems obvious, but it is probably the #1 reason that these products get returned.
For a decent set of wakeboard speakers, we like the Pyle 5.25″ Off-Road Speakers since they include the amplifier. This means you can make one purchase and have everything you need to add music to your ATV.
Rockville 8″ Wakeboard Tower Speakers are a decent budget-friendly option, as well, but you need to find an amp to run it. So even though these will look “cheaper” from the price tag, the cost of the system probably won’t be less than the above-mentioned Pyle system.
Detailed Buying Guide & Features that MatterAs discussed above, you can choose a marine-grade speaker that will require a moderate amount of installation or a portable bluetooth speaker that will require no installation. On the other hand, you can spend a good chunk of change on a custom sound system or build a DIY sound system.
With a portable bluetooth speaker, you can take it with you on the boat or in the shop, so the versatility of this option can’t be beat. However, the maximum volume will be limited, and it probably won’t be good enough at high speeds.
With a ready-made marine-grade speaker system, you should get plenty of volume. But there will be some installation required, and this may require some creativity since these are “one-size-fits-all” systems that are also used on jet skis and side by sides. You also need to choose between the audio tube design and the soundbar design.
And you run the risk of draining your ATV battery with these systems, also. High wattage is good – until it runs your battery empty.
Going the custom route will require some DIY skills or else a large budget. But obviously you can design these to your exact specs while also ensuring a good fit, user-friendly design, and high performance.
Audio tubes can be installed on the front of your ATV near your handlebars or near the back of your ATV on the rack. Depending on the model of ATV you ride, and the add-ons that you already have, one orientation may be better than the other.
Because every ATV model is different, installation never goes as smoothly as you would hope. Be sure to plan for this ahead of time. And remember to consider the position of the buttons/control panel when you are planning your install.
Most speakers that are marketed for ATV use are waterproof. But you still want to be sure that the speakers you are considering have an IP waterproof rating.
We like the IP67 (or higher) rating, which means that the speaker has enough waterproofing and dustproofing to withstand muds and trail rides.
There isn’t much to say here, other than the obvious. A custom installation is going to give you better functionality, higher performance, and a sturdier fit than using a prefabricated setup. It also gives you more options – like higher output speakers and placement of controls in a usable spot.
However, a custom install will cost you, either in time or money.
A pre-fabricated stereo system will be easier to install. But it can be challenging to research these products and know whether they are a good fit for your ATV. And sometimes the straps and mounting brackets don’t fit as well as you would hope. But the upside is that it is easier to purchase, and usually cheaper to get started.
If you want to choose the easiest route possible, just purchase a waterproof bluetooth speaker and hook it or strap it to your ATV. Engine noise will probably overpower your audio at high speeds, but it is hard to beat the convenience of a bluetooth speaker.
Unfortunately, most of the products that you find on “Best Of” lists actually have poor sound quality.
Brands like Boss Audio are always among the first ATV speakers to show up, despite the fact that they are lacking both in durability and sound quality. And brands like Bose and JBL largely avoid the marine-grade audio category, since the market is much smaller.
The best advice here is to avoid low-quality, budget brands, and choose a product from a mid-range manufacturer such as Pyle.
Generally, decent ATV speakers will start at $150+ and increase quickly from there. For a few hundred dollars, you can get a decent bluetooth speaker or a mid-range marine-grade audio tube setup.
Anything cheaper than this will mean compromising on build quality, volume output, or both.
A custom install is likely to cost significantly more, unless you can DIY the whole setup. For anybody with DIY skills, a speaker system and some PVC pipe can be modified into a pretty nice ATV speaker setup.
Many waterproof ATV speakers also incorporate LED lights. Honestly, these lights look pretty cool.
However, lights are going to drain the battery quicker. And most riding gets done during daylight hours, anyway. Ultimately, this is just a personal preference. But bypassing this feature might be a good way to save a few bucks and reduce the risk of a dead battery.
As mentioned previously, some purists argue that adding a speaker to your ATV is improper. Admittedly, part of the outdoor experience gets lost when we have a device plugged in. But again, this is just personal preference.
The biggest consideration here is that you should be aware of proper etiquette while on the trails. On public trails, nobody wants to hear your loud music blasting (especially if you have a cheap, rattling speaker). Remember to be considerate of other riders.
One final point to mention is the topic of bluetooth headsets and earbuds. We won’t get too deep into this discussion, since it could be an entirely separate article.
If you want to consider a helmet communication device or headset, there are many guides available. For further reading, search for bluetooth headsets for motorcycles – since these headsets will be made to fit inside a helmet.
And if you prefer earbuds, there are many slimline earbuds that could fit under a helmet.
With the headset and earbud option, the noise of your ATV will likely drown out your audio. Some helmet comms will be sufficiently loud to allow for music and talking while riding.
With all of these devices, you need to keep safety in mind.
My personal feeling is that a headset or earbud is too sound-isolating, which can be dangerous while riding.
When you are operating a high-powered ATV, this detachment from your surroundings isn’t safe for yourself or other riders. For this reason, I would recommend steering clear of any in-ear audio system or headset.
Final ThoughtsUnfortunately, most of the guides about waterproof ATV speakers are not useful.
Because we write about speakers full-time, we feel uniquely qualified to discuss this topic.
Depending on your budget, DIY skills, and priorities, you can choose between a soundbar, audio tube, custom install, or bluetooth speaker. Each ATV speaker setup has its own advantages and disadvantages.
But no matter what you do, spend some time researching before you buy, and be sure that the speaker you choose is a good fit with your four wheeler.
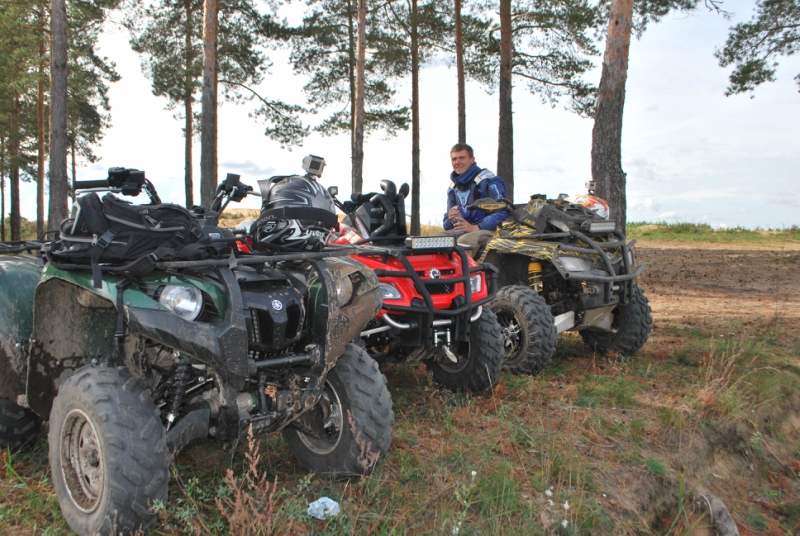
Upgrading and customizing your ATV or UTV can be a huge part of the fun of owning a four-wheeler. There are so many components you can improve, tweak, and set to your personal liking. One of the most interesting upgrades is the sound system. Stock ATVs typically don’t come with great sound, and if you like listening to tunes when you’re out on the trail, a new audio system is just the ticket. It’s great for when you’re just relaxing with your buddies between rides, too.
Image from www.utvsportsmag.com
Every good four-wheeler sound system has several components:
Receiver – Also known as the head unit, the receiver is the brains of the operation. It takes the audio source you supply and converts it to a signal that can be sent to the speakers. Receivers on an ATV need to be compact and perform multiple duties, so it’s typical to find receivers with USB inputs, radio, built-in equalizers, and Bluetooth support. We also highly recommend receivers that can function as a two-way radio so you can easily keep in touch with home base.
Amplifier – The electrical signal in a receiver lacks enough power to drive speakers, so it needs to be amplified by this unit. In many four-wheeler audio systems, the amplifier will be built into the receiver to save space. But if you plan on adding extra speakers, then you may need a separate amp to power high-output speakers.
Speakers – The sound must come out from somewhere, and that’s where speakers come in. ATV speakers are different from home theater speakers as they need to be rugged, weatherproof, and resistant to dirt, water, salt, and impact. ATV speakers also need to be mounted somewhere convenient on the vehicle, so there’s a whole range of different adjustable mounts and physical configurations.
Cabling – Every ATV sound system must have cables to connect power and to send signals between the components. Ensure you have waterproof cabling. Wireless sound systems can reduce the amount of wiring you need.
Off-road are the core piece of riding gear for ATV & UTV riders
Find out the best look for you
ATV and UTV sound systems don’t need to be complex. The simplest system is an ATV/UTV soundbar or audio tube. This includes everything you need in a single soundbar—amp, woofers, mid-range drivers, and tweeters, and typically connects to your gadgets via Bluetooth or AUX. All you have to do is connect it up to power.
If you’re looking for the cheapest multi-speaker setup, you can pair a marine speaker with a set of marine stereo speakers for a simple stereo system. Additional sound isn’t difficult to add, either, as you only need to hook up a couple of extra speakers and a subwoofer, but you’ll probably need a secondary amp if you upgrade your sound system after the initial purchase.
If you have a popular model of ATV or UTV, you’ll be able to find custom audio kits designed particularly for your vehicle. These range from two-speaker + amp systems all the way to multi-woofer systems with four speakers.
Whichever system you choose, you need to consider how it will fit on your vehicle and how you can protect it from damage. Your ATV gets bombarded with water, salt, wind, and rain. Your ATV audio system should be corrosion resistant, include UV resistance, and be rugged enough to take a few knocks from time to time. Check the IP rating of the speaker system, which will tell you whether it’s only rated to take a few splashes from time to time or whether it can be completely submerged in water without issue.
Most audio kits are easily installed in your home garage. Audio tubes are the simplest, as they only require power. Wireless ATV audio systems are easy, too, as the speakers only need to be plugged into power. A wired speaker system with an amp and separate subwoofers is more complicated because there are more wires you need to hook up and hide on the body. But as long as you plan installation in advance and know exactly where you’ll mount all the speakers, there’s nothing particularly difficult about installing an ATV sound system yourself.
SPORTSMAN Black
36 EUR
28.80 EUR
-20%
HIT
ENDURO LIGHT Graphite
the most durable
458 EUR
366.40 EUR
-20%
HIT
ENDURO Camogrey
the most durable
657 EUR
525.60 EUR
-20%
HIT
ENDURO Graphite
the most durable
279 EUR
223.20 EUR
-20%
HIT
ENDURO Graphite
the most durable
657 EUR
525.60 EUR
AQUAMASTER-ZIP LIGHT Camogrey
with central zipper
598 EUR
352. 70 EUR
-20%
HIT
ENDURO LIGHT Camogrey
the most durable
458 EUR
366.40 EUR
AQUAMASTER LIGHT Red
reliability & comfort
438 EUR
306.60 EUR
NEODRY Black
17 EUR
10.20 EUR
-20%
HIT
ENDURO Camogrey
the most durable
279 EUR
223.20 EUR
AQUAMASTER Blue
reliability & comfort
647 EUR
517.60 EUR
-30%
HIT
AQUAMASTER Red
reliability & comfort
259 EUR
181.30 EUR
-50%
HIT
AQUAMASTER Orange
reliability & comfort
259 EUR
129.50 EUR
AQUAMASTER Red
reliability & comfort
677 EUR
523. 70 EUR
-50%
HIT
AQUAMASTER Camogreen
reliability & comfort
259 EUR
129.50 EUR
BELT
9 EUR
7.20 EUR
ENDURO BF Camogrey
bootfoot waders
528 EUR
422.40 EUR
ALL SEASON Black
62 EUR
49.60 EUR
ENDURO BF Camogrey
bootfoot waders
329 EUR
263.20 EUR
ENDURO Grey
29 EUR
23.20 EUR
Explore all
In the category "A" we regularly acquaint readers with new products from the world of ATVs ... But this time we will not talk about another four-wheeled creation but about the eternal. About snorkels for ATV. Who does not know, such a refinement can turn any all-terrain vehicle into a submarine.
Dmitry Zlenko
Farewell, guarantee!
For all its seeming simplicity at first glance (a kind of complexity: put a pipe on the air filter housing and pull it up), installing snorkels on ATVs is fraught with a lot of nuances. And before deciding on this, we recommend that the ATV owner think hard about whether he needs it? Firstly, if the ATV is freshly bought, then the withdrawal of "breathing tubes" promises to remove it from the warranty. From the point of view of a dealer who provides technical support for an all-terrain vehicle, such a refinement is nothing more than interference with the design and violation of the factory specification of the product. Here it can be objected that, they say, such tuning does not harm, but quite the opposite - it helps to improve the parameters of the technique, because when fording fords, water ingress into the engine and variator is excluded, and air filter pollution is also reduced. nine0007
Fair. But only in part. If, when installing an external air intake, the docking seams were not perfectly sealed, then during the first immersion, water will be in the system, wet the air filter, it, in turn, will become limp, tear and dust will begin to be sucked into the combustion chamber without hindrance. A few kilometers - and thick smoke will pour out of the exhaust pipe of the ATV, which will become an unequivocal indication of the piston bulkhead.
But even if the stem is soldered properly, the motor can be killed due to the wrong diameter of the snorkel. A pipe that is too small in diameter results in the fact that the right amount of air is not supplied to prepare the correct combustible mixture, as a result of which the mixture is too rich. The fuel does not burn completely, soot forms on the spark plug and on the valve seats, and this eventually leads to the fact that, due to soot, the valves will not close tightly and burn out completely. It is believed that for ATVs with an engine capacity of 300 to 500 "cubes" the diameter of the snorkel pipe should be approximately 50 mm, for all-terrain vehicles with an engine capacity of 600 to 800 "cubes" the diameter should be at least 63 mm. nine0007
I don't have enough air...
However, even a perfectly matched snorkel diameter is not a guarantee of good ATV performance after tuning. The fact is that when removing the air intake, it is necessary to install a so-called air receiver near the air filter, the volume of which is calculated by the formula: engine cubic capacity multiplied by five. Say, if the engine displacement is 500 cc, then the volume of the installed receiver should be 2.5 liters. This air reservoir is necessary so that when the throttle is pressed sharply, the ATV does not stall due to lack of air, as well as for the stable operation of the “fiery heart” at high speeds. The fact is that at a crankshaft rotation speed of 4000-5000 rpm, the air flow speed in the intake manifold reaches as much as 500-600 km/h. Provided that the length of the "breathing tube" has grown at least 30-40 times compared to the standard dimensions of the air intake, it is not possible to quickly pump the required amount of "oxygen" at such a speed through a narrow tube. nine0007
CVT in danger
Another subtlety of ATV snorkeling is that the air intake is needed not only for the motor, but also for the CVT. Unlike most automotive transmissions (manual and automatic), CVTs are 99 percent of the time on ATVs. And this type of transmission needs good forced cooling, for which manufacturers install cooling inlet and outlet pipes. If you do not snorkel the variator, then water will get into this knot when storming a deep ford, the variator belt slips and the quadric will not go anywhere else. The air intakes of the variator must be made quite large in diameter. The minimum diameter of the snorkel tube must be 55 mm. Ideally - 63 mm. If you make a pipe of a smaller diameter, then on an average 500cc ATV, overheating of the variator with the melting of the variator weights and tearing the belt into flaps will happen after about an hour and a half of active driving. The inlet and outlet snorkel of the CVT cooling system must be of the same diameter - this will provide the unit with the best possible ventilation.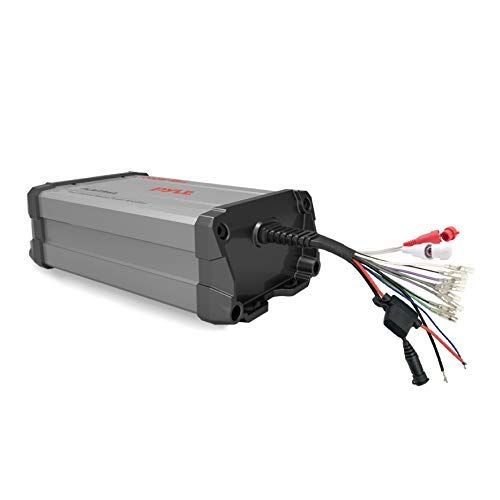 nine0007
Off-road psychoanalysis
But not only for the above reasons, sellers remove snorkel quads from the warranty. The presence of an external air intake is like a litmus test, by which you can accurately determine how frostbitten the owner of the ATV is in terms of operation. If there is a snorkel, then the owner of the ATV regularly and with pleasure lets the equipment go all out, almost not sparing it. Under such a rider, not only will the ATV break down, the Soviet tank will beg for mercy! So what's the guarantee? nine0007
Do not dive from the hot
After all, what is the logic: if you have a snorkel, then you can dive into any ford with acceleration. However, do not forget that the quadric is full of oil seals. When the vehicle travels on a dry surface, all the rubber seals of the motor and gearboxes get quite hot. And when the ATV is dipped into cold water at full speed, the seals instantly compress and let the h3O through.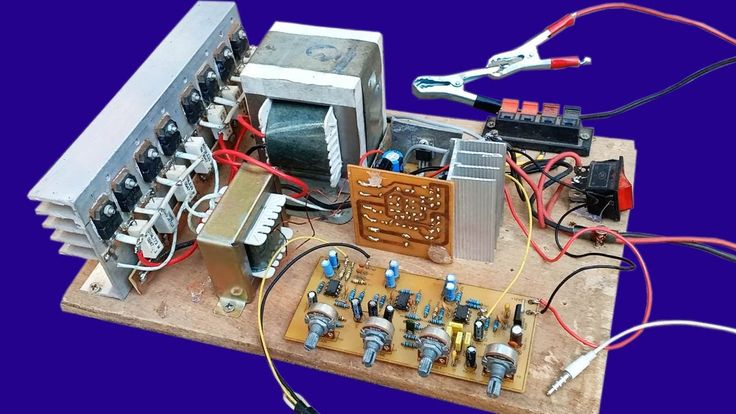 An emulsion is formed, the parts of the gearboxes and the motor will soon become unusable. nine0007
In addition, snorkeling without taking the radiator to the top does not make much sense, since diving into the swamp slurry, we will clog the radiator cells with dirt, which in turn will inevitably lead to overheating of the power unit. So it turns out that seemingly harmless “improvement” entails a bunch of problems.
In connection with all of the above, many have probably uttered the rhetorical question: "to snorkel or not to snorkel - that's the question." If you have a new ATV and you are counting on a warranty, then remote air intakes are definitely not for you. If you don’t believe in a used garage or a free repair under warranty, then snorkels can be quite a useful thing. The only thing is that they need to be installed by competent specialists, coupled with the removal of the radiator. Naturally, it should be remembered that water procedures must be taken measuredly, avoiding sudden cooling of the seals (as we already know, this leads to water getting inside the motor and gearboxes). nine0007
Subscribe to the Avtovzglyad channel:
How to adjust the carburetor on an ATV? What to pay attention to? What are the signs of misuse of the device? About this today in our article. Using the proposed instructions, you will be able to set up the carburetor step by step without the help of specialists.
For stable operation of the ATV, it is necessary that the engine receives the optimal amount of combustible mixture corresponding to its rev range. Otherwise, the following problems may occur:
What should be applied in this case:
Important! Carry out tuning only when the carburetor is cleaned outside and inside, as well as when the engine is warmed up to operating temperature.
 2 until it stops. The engine will shut down at this point. If this does not happen, most likely, the tightness of the pipes of the air supply system is broken. Check. Then turn bolt #2 one turn. The enrichment of the mixture occurs in a clockwise direction, depletion - against.
 Note. The location of the bolts on each carburetor model may vary, so read the instructions that came with your machine.
nine0007
1. Start the ATV and test ride. Wait until the engine has completely cooled down.
2. Check the condition of the spark plug. To do this, unscrew the cap and inspect the candle.
What to look for:

3. Unscrew the needle cover at the top of the carburetor. Pull the needle. This is the main element that regulates the supply of fuel to the combustion chamber, since the needle is connected to the gas trigger. When the trigger is pressed, the needle rises, slightly opening the hole for supplying the fuel mixture. This directly affects the growth of power and speed of the ATV. nine0007
4. Remove the cable, then press the needle to pull it out. The needle has 5 grooves and a retaining ring. By default, it is set to medium. The lower the retaining ring is located, the higher the needle is raised, which means that a lot of gasoline and little air is supplied. Accordingly, the higher the ring - the less gasoline and more air.
5. Reposition the circlip in the desired direction to optimize carburetor performance. Insert the needle into place. nine0007
6. Start the engine and press the throttle trigger. With proper adjustment, the engine should not stall from a sharp pressure.
And remember, you should resort to adjusting the needle only as a last resort, when adjusting the quality and quantity screw does not bring results.
The performance of a four-wheeler depends on the correct level of gasoline in the carburetor. An excessive amount will flood the candles, spill onto the ground and lead to unnecessary expenses. If there is too little fuel, the engine simply will not start.