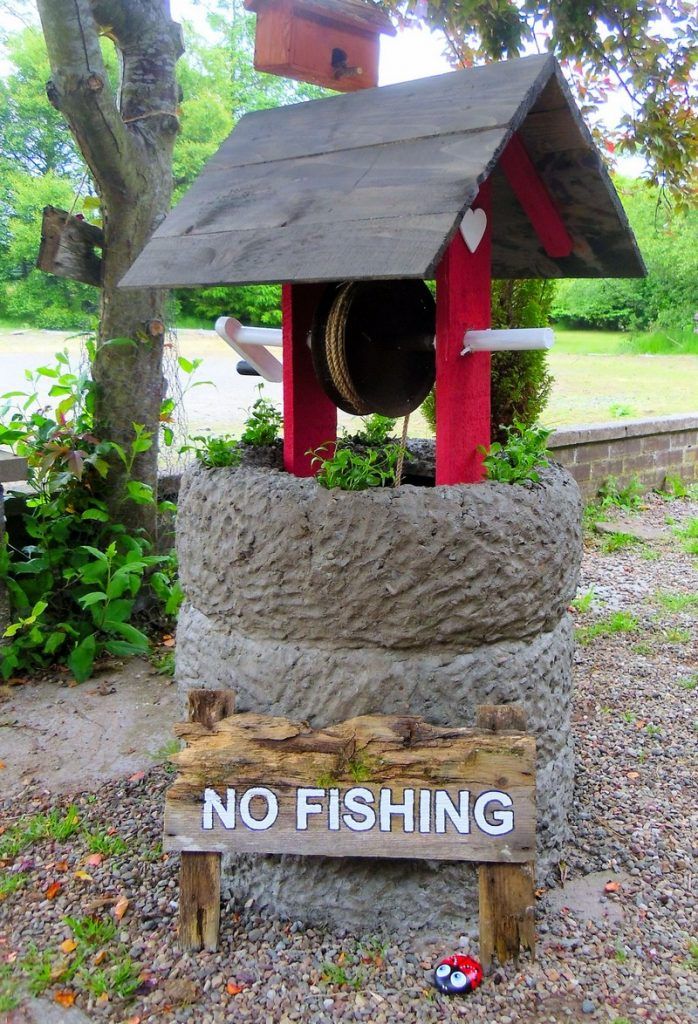
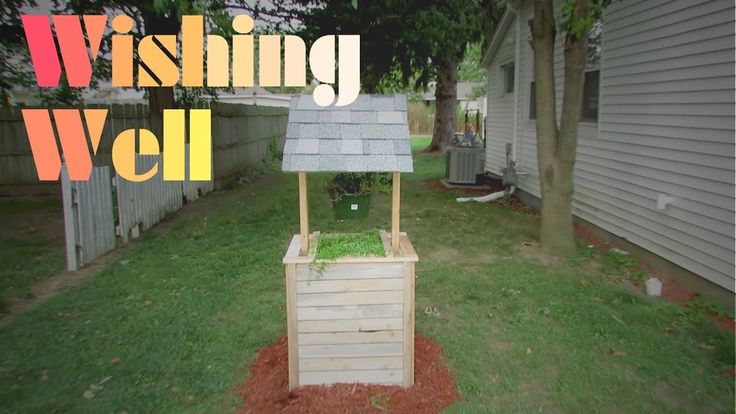
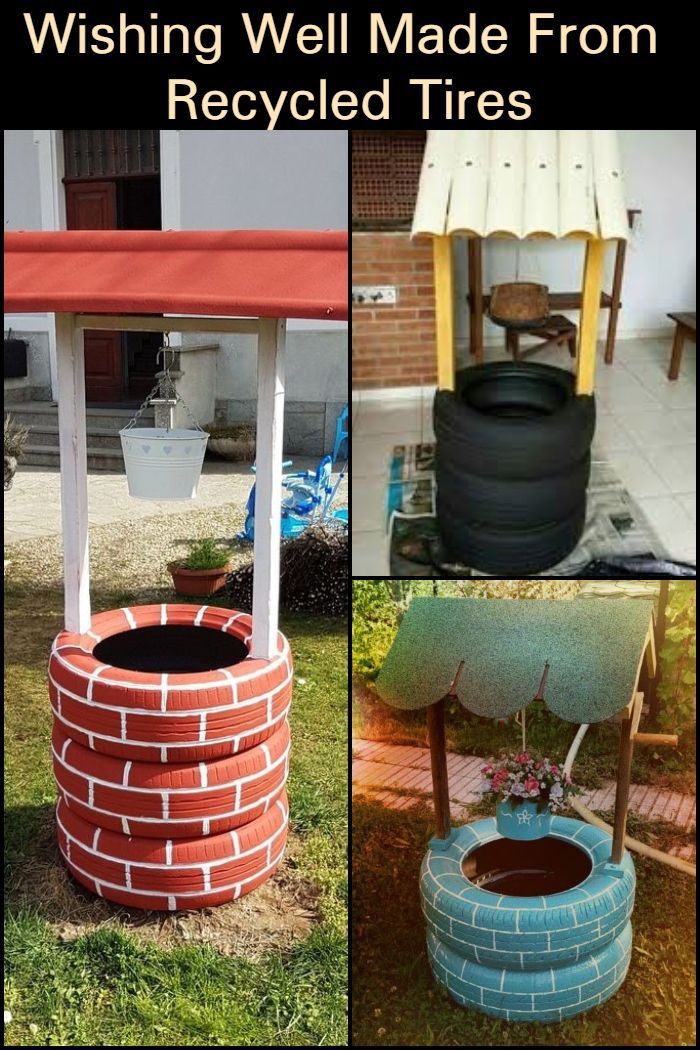
Put some magic in your garden with this great décor idea – a wishing well planter made from recycled tires! It’s the perfect addition to your garden and it’s so easy to make.
A wishing well planter is an excellent way to display your love of nature and the environment. It is made from a recycled tire that will beautify your home landscape and provide an opportunity to enjoy watching a plant grow.
A wishing well planter made from a recycled tire can be created in less than an hour and can last for years. Recycled tire planters can add life to your yard or garden with little effort or cost.
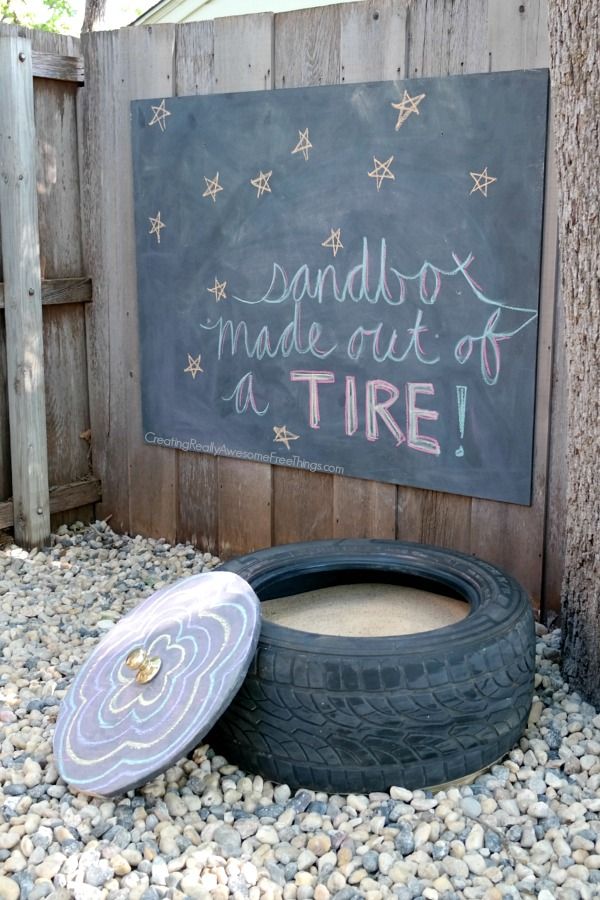
A discarded tire can be easily transformed into a colorful, durable planter for your small plants or hardy outdoor plants. Tire planters are inexpensive. They can add a touch of color to the dullest of yards. They last for years and can be recycled for other projects.
Our Pick
Decorative Wishing Well
$134. 13
Perfect for a whimsical garden display.
Buy on Amazon
We earn a commission if you make a purchase, at no additional cost to you.
11/27/2022 03:48 pm GMT
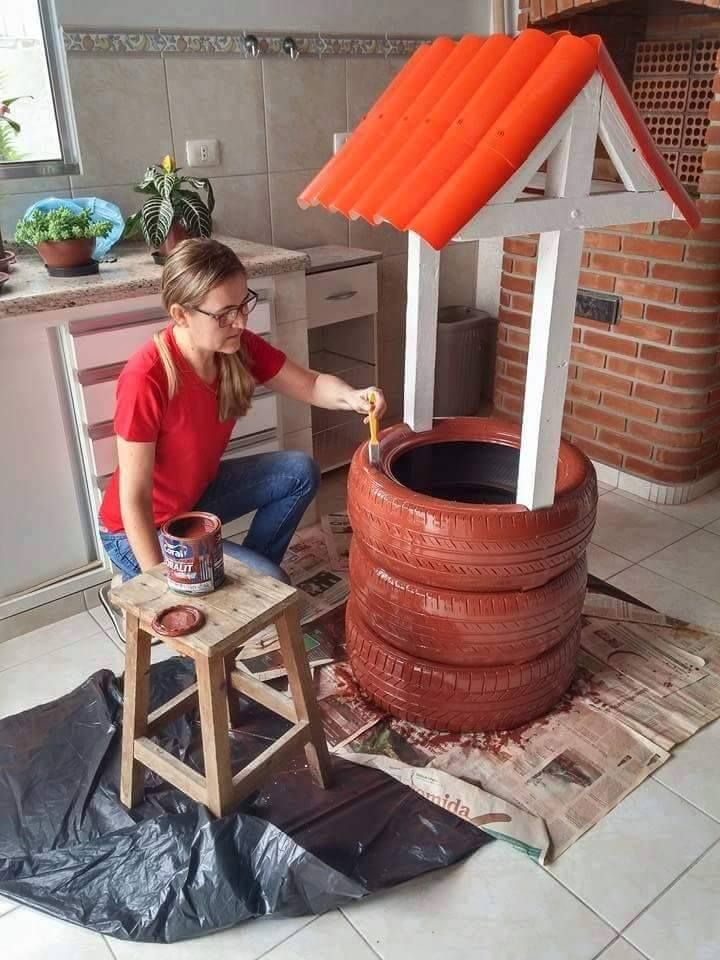
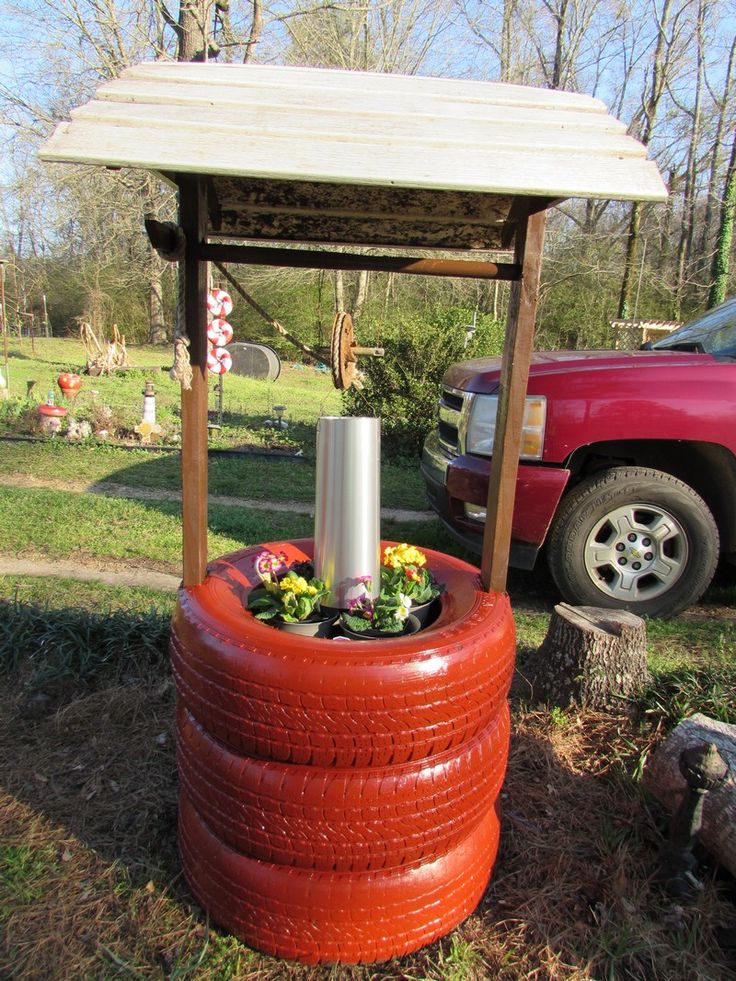
First, you will have to cut two square holes on each of the three tires. These holes are where you would insert the roof supports, so their dimensions would depend on the size of your timber.
Then Stack the tires on top of each other, securing them with landscaping adhesive. Make sure that the holes you cut are aligned!
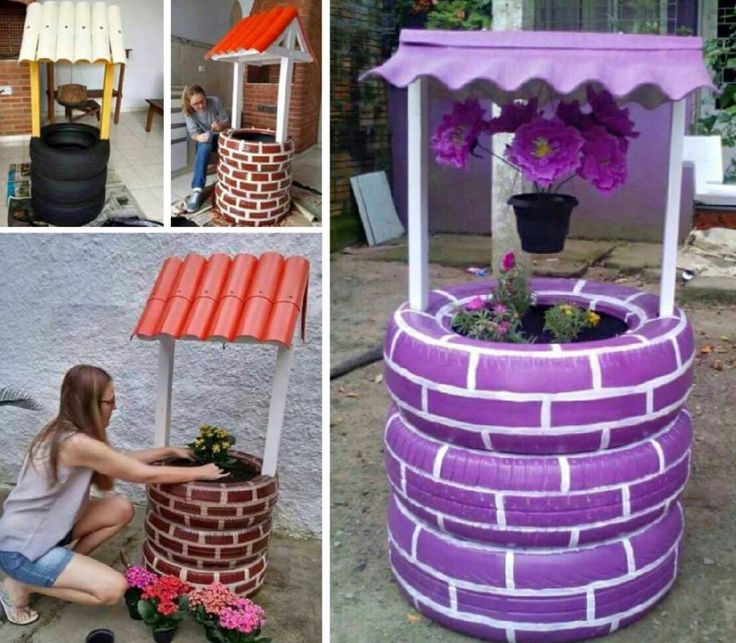
Next, paint the tires so that it looks like a real wishing well. Spray paint the tires with any color that you desire and then add white lines to get the illusion of a brick wall.
The shape and size of a wishing well planter are important because they will influence the style of your garden. The planter also determines how much space you have to play with when designing your garden.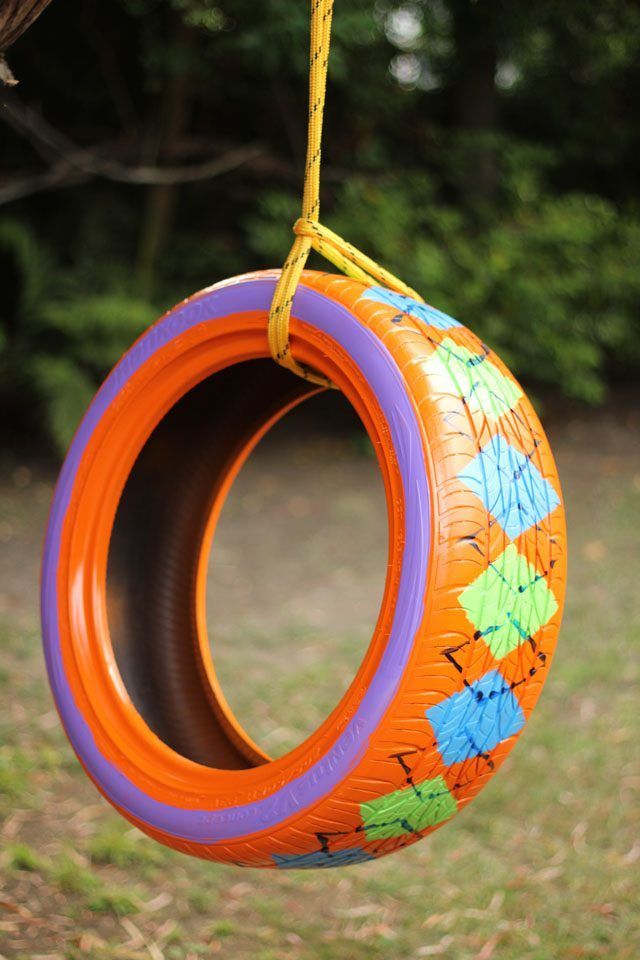
Now building the roof for your tire wishing well would depend on the materials available and your idea for its design. There are several options for a wishing well roof, but a lot depends on your budget.
You can tack on a wishing well to just about any style of roof, but it is most common to see them on cedar shake roofs. Ultimately, you can use a variety of materials for your wishing well roof.
You may use real roof shingles, timber slats, plywood, PVC pipes, or tire cutouts if you have an extra tire. Paint the roof structure, if you want, before attaching it to the tires.
If you need inspiration, you can choose from several ideas shown in our gallery below.
Don’t forget to add a hanging basket planter using a bucket! This will complete your tire wishing well planter and a rustic water bucket is perfect for this! This wishing well planter is convenient to move around as well, so you can put it anywhere in your yard.
Note: You also have the option to do away with the hole-cutting step.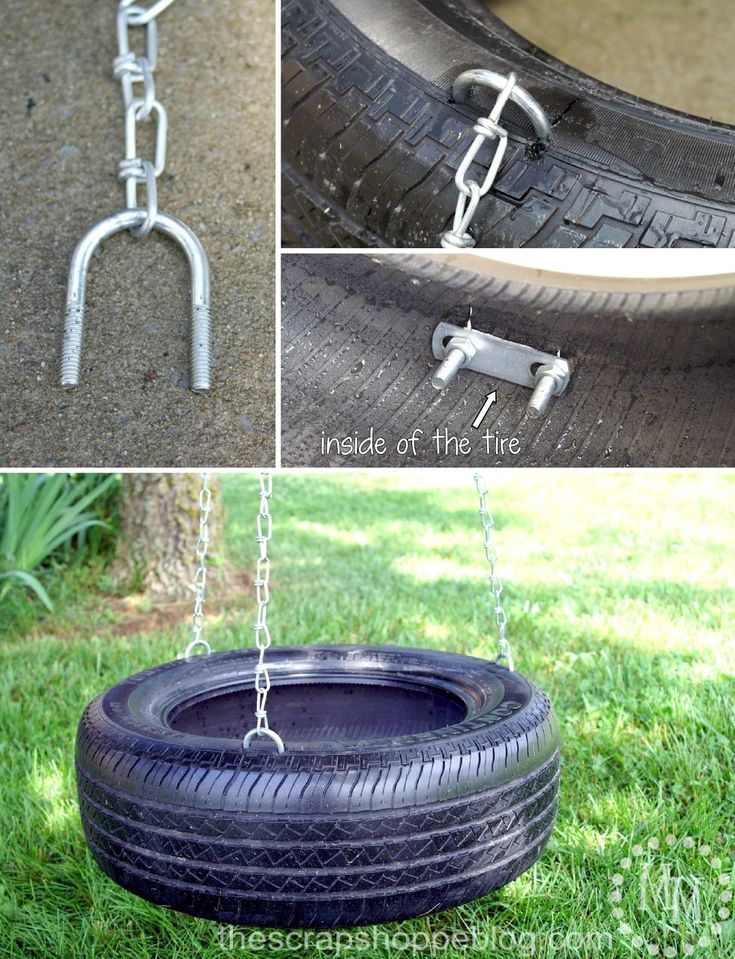 You can simply attach your roof supports after painting by screwing them along the outside of the tires. Use adhesive as well for a more secure structure.
Materials:
Tools:
Click on any image to start the lightbox display. Use your Esc key to close the lightbox. You can also view the images as a slideshow if you prefer
You can get the step-by-step instructions here…
If you liked this, you might also like these gardening ideas and DIY garden art ideas.
Raise your garden decor to the next level by adding a DIY wishing well, will bring a little mystery too. Build the best looking wishing well inexpensively with these 15 free DIY wishing well plans that involve mostly building with the wood and other recycled items. First, you have to build the base that may be of any shape from hexagonal to a round shape to a square box-like. Next, you can install the extended palings that will hold the roof on them.
For building a roof, there can be too many options that you can see all by browsing this collection of 15 FREE wishing well plans that involve lots of enchanting designs that will make you say a big wow at a very first look. Feel free to check out all these wishing well ideas and pick the one that impresses you the most.
There are wishing well plans for every skill level and budget. You can use a wishing well in a number of different ways in your garden for functional and decorative uses. Fill the base of the wishing well with potting soil and start using it as an accent planter in your garden. It will create a big focal point in your garden if used so.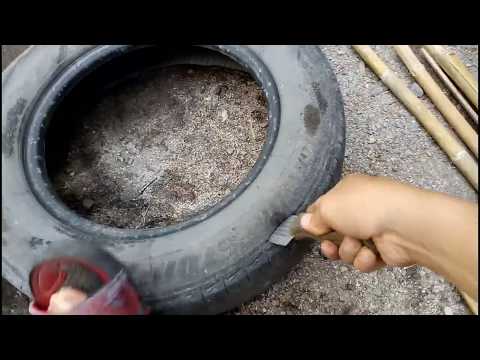 DIY wishing well is highly famous around the globe due to its magical properties and has often been a part of storybooks and movies. So, it will be a big center of attention for the kids, and you browse these all
DIY wishing well plans to get yourself inspired.
DIY wishing well is highly famous around the globe due to its magical properties and has often been a part of storybooks and movies. So, it will be a big center of attention for the kids, and you browse these all
DIY wishing well plans to get yourself inspired.
Update your garden decor by adding this DIY wishing well decor or centerpiece. It can be there a gorgeous planter and use it to create a big focal point too in your garden. You need 2×6, 2×4, 1×4, 1×6, and 4×4 to build this wishing well that is looking amazingly beautiful. Details here pinspiredtodiy
Bring great visual details to your garden by adding this DIY wishing well featuring a square base and a red-painted chevron roof. Construct it using 1×6, 2×4, 2×3, 2×2, 1×4, and around lumber spindle. It comes with shingled chevron shelter that also makes a cool like of this wishing well. A perfect garden decor centerpiece. myoutdoorplans
A fantastic backyard decoration and a cute wooden planter, this homemade wishing well is both. Make it with lumber, pine, or cedarwood that are highly resistant to outdoor weather. Build first the hollow square frames and stack them to build a box-like base of wishing well. Next, install the vertical roof stakes and install the lid frame, including rafters. Finish the lid solid using two recycled old table wood panels. howtospecialist
The washing machine drums are a great choice to make the burn barrels and outdoor fire pits. So, give extra wings to your creativity and make lighted or fired wishing wells too out of them, will make an outstanding outdoor decor. Use the perforated steel for building the chevron roof of this wishing well. instructables
A one of the most outstanding decor to get for your garden or backyard, a well-wishing planter made out of recycled tires. Stack the tires to build the whole base of the wishing well. Next, build the roof using roofing materials and get it on the timber roof supports. Finish with a hanging bucket planter with exterior paint. theownerbuilder
You will give ten out of ten to this wishing well that is 6ft tall. It has the whole bottom made of weather-resistant lumber and comes with a cedar-shingled roof. Finish it up with wooden bucket rope and with a crank handle. Give it a nice wood finish or paint for a totally new look. chesapeakecra
Give your green land a prehistoric touch by adding this wishing well, will create a big focal point in your green space. Build this wishing well using mostly the 2x3s and 1x4s, and it comes with a round bottom and with chevron shelter, the gorgeous features of the design. Details here dreamlandsdesign
Get your garden look a little mysterious by adding this DIY garden wishing well.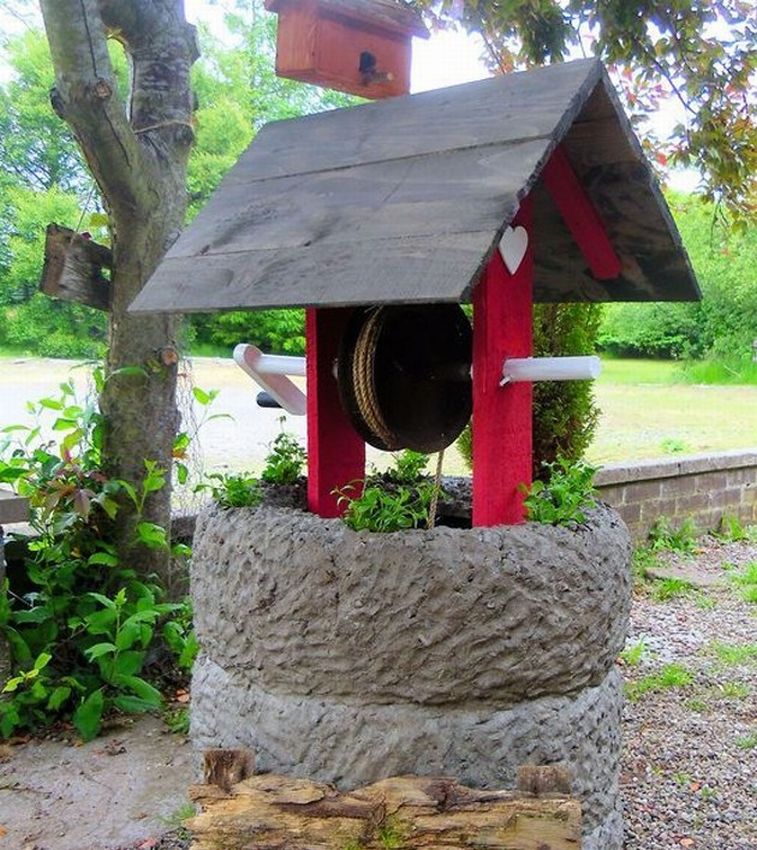 This garden wishing well comes painted to matching the exterior of the house and looks great with the shingled roof. A little touch of red in the dominant white appeal of this wishing well just looks extra beautiful. hometalk
You will surely fall in love with this wishing well that is to make with a plastic bucket. Wrap the bucket in some wood style doormats and next put together the wooden dowels to create the roof frame. Use the leftover meat to cover the roof frame. Support the roof with tree branches that can be fixed in the lid of the base bucket. weddingbee
Get here free plans, diagrams, and step-by-step instructions to build a wishing well like a pro. Build it with 2×6, 2×4, 1×4, and 1×1 round lumber. For roof use the 20sqft of asphalt roofing shingles. Build with these woods from base to extended palings to rafters. Details here howtospecialist
Get crafty with the 1×4 and 1” lumber dowel to build this wooden wishing well. It will be the perfect planter to add to your backyard and will be a big show-stopper there. Build all with the 1x4s from the base to extended palings to roof and even the roof rafters. Full tutorial here myoutdoorplans
Style up your garden by adding this unique decor, the superb handmade garden wishing well. Use it as a handsome wooden planter there or let it be a mysterious type of decor there. Go with the 1x4s wood slats to build this garden wishing well, having superb design, and a well-built roof and overall structure. howtospecialist
Put together the 2×6 and 1×4 to build this wishing well. You just no need to puzzle at the construction, the free provided plan is already there to help you at every single step. Adorn this wishing well more by adding decorative braces to between the extended palings and roof rafters. Details here construct101
Grab the free video instructions here about how to build a wooden wishing well for a garden like a pro.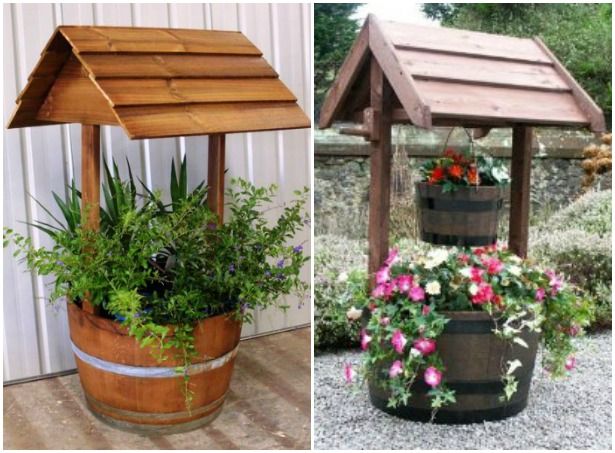 It comes with a hexagonal base and will impress with the bigger shingled roof too. Use it as a big wooden planter, will make a great focal point in your garden. Full how-to guides here youtube
Here is what you can do amazing with the leftover, recycled, and old woods when having garden decor always on the brain. Just build this great looking wishing well that impresses with a superior wood structure and is looking just damn lovely. Fill it up with potting soil and use it as a gorgeous planter in your garden. instructables
Are you on a mission to boost the beauty and decor of your garden? Want to do it by adding one-of-a-kind and unique types of garden decor? Then you must go with this DIY wishing well plans that have a great mysterious history and will be amazing to feature in your garden. At the same time, they can be used there as a lovely planter hence adding a lot in the beauty of your garden. These DIY wishing well ideas will show you how to cheaply build a wishing well that will unbeatable in beauty.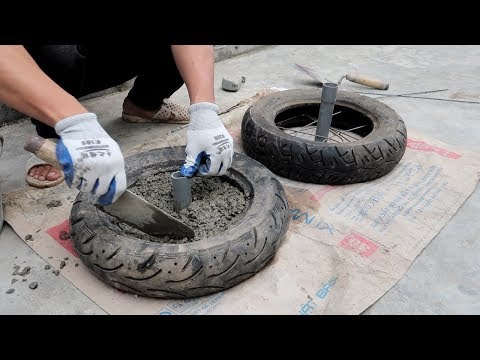 From using plastic buckets to recycled wood to washing machine drums, you can use all to build a lovely looking wishing well in no time.
Gardening: No time for a traditional, in-ground vegetable garden? A DIY raised garden bed is a shortcut to a plentiful harvest, using the square foot gardening concept.
Woodworking: Follow these Free woodworking plans to build racks, cabinets, patios, picnic tables, outdoor furniture, toys, and thousands of more DIY projects for beginners and all skill levels.
90,000 well from tires with your own handsContent
dacha or a private house of objects and things that would simply please the eye and create a good mood. Sometimes hands simply don’t reach, or there is no way to spend on the purchase of materials an already not very large family budget. Meanwhile, there is a whole culture and direction of landscape design associated with the design of the garden and courtyard of a private house. If there are no free resources, but there is a desire to make your yard more beautiful, you can simply build a well from tires with your own hands as an experiment.
Our practical mind tries to find the rational grain in any decisions and actions. But the human psyche requires relaxation and rest, so the construction of a decorative well:
A cool version of a decorative well can be found on numerous personal pages of amateur landscape designers or on forums where you can see real miracles of fakes created by yourself from old tires and rubber.
Making these wonders takes good practice and skill with old tires. For a decorative well of this level of skill, in fact, even a schoolboy or teenager can make it.
Tip! Invite the younger members of the family to show imagination and ingenuity as entertainment, to build a well better than the one shown in the photo.
Even if they refuse, they will still be happy to take part in the most interesting stage of construction - painting and decorating the building from tires.
For the construction of a decorative well from tires, the following materials will be needed:
Tires larger than 17 inches will look better in the construction of the well, but such rubber weighs 15-20 kg, so the construction may be too heavy an undertaking. From the tools you will need a sharp knife, a shovel, a saw for wood, a couple of dozen carpentry screws and a screwdriver.
First of all, you need to choose a place for building from tires. Traditionally, in villages, a well was installed near the entrance to the house, so that water flowing from the roof and snowdrifts would not damage the building during the autumn-winter period. In addition, the design of the well should not interfere and create obstacles for the movement of vehicles and people in the yard.
At the first stage, you will need to prepare a site for the well. To do this, we cut the sod to a depth of 5-7 cm and fill the area with sand. After completion of work, the space around the lower tire will need to be additionally covered with a layer of gravel.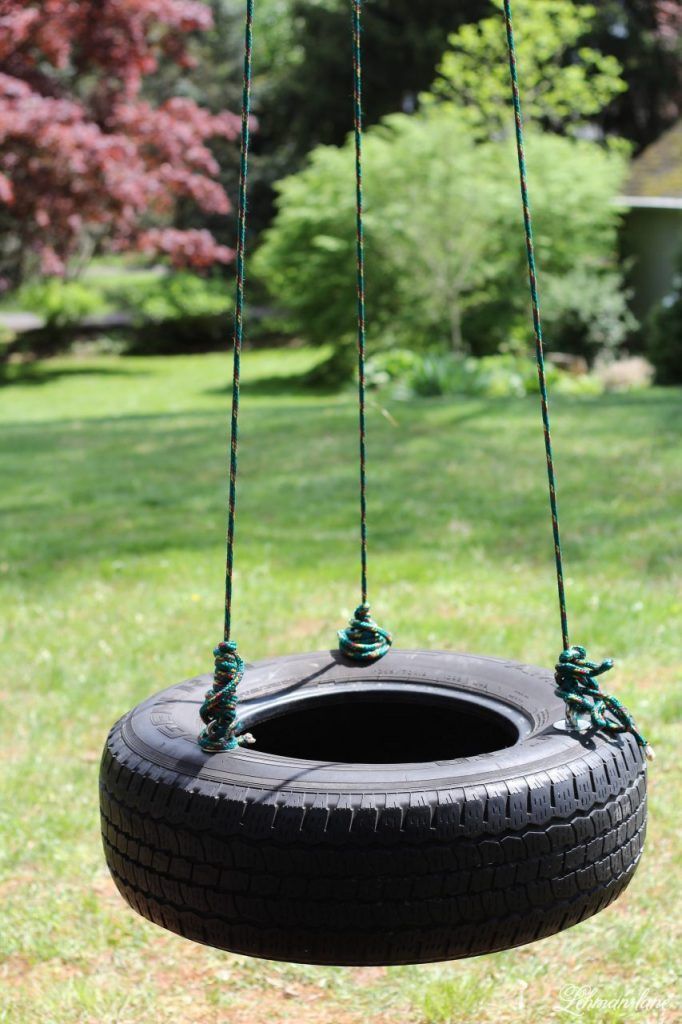
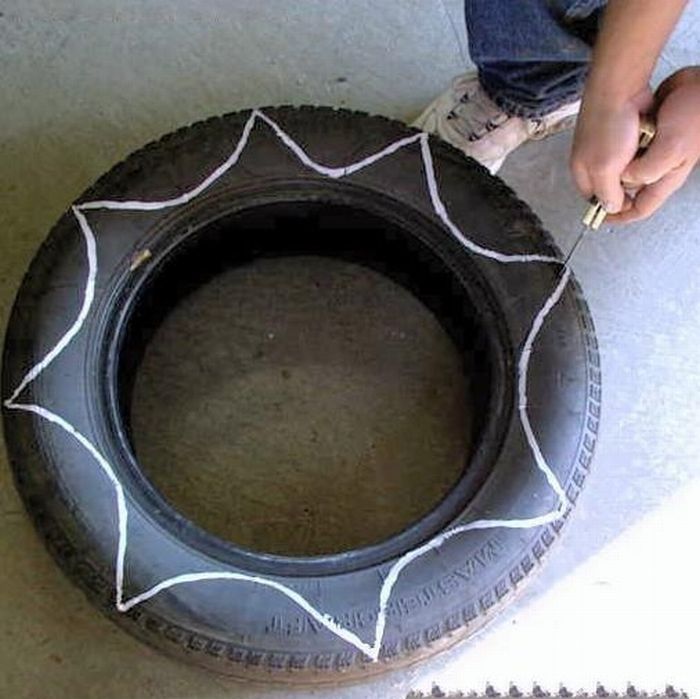
Tires selected for construction will need to be washed thoroughly to remove dirt and grime, otherwise the paint will not adhere properly to the rubber surface. From a set of tires, you will need to choose one, the most complete and beautiful, for the upper part of the building. Using a knife, cut out one of the sides, as shown in the photo.
Install the prepared tires in a column and align them vertically using a spirit level. After the tires have been aligned inside the well, three pegs are hammered in so that they support the inner bead of the tires and fix the tires from shifting. To make the building heavier and make it immovable, we fill the improvised well trunk from tires with a mixture of sand, soil and gravel.
Next, you need to install the side posts from the timber. Tires can be preliminarily connected using two wooden planks fixed with self-tapping screws on the sidewalls of the tires.
In order to install the vertical posts of the well, it will be necessary to first drive the pieces of reinforcement into the ground by 15 cm.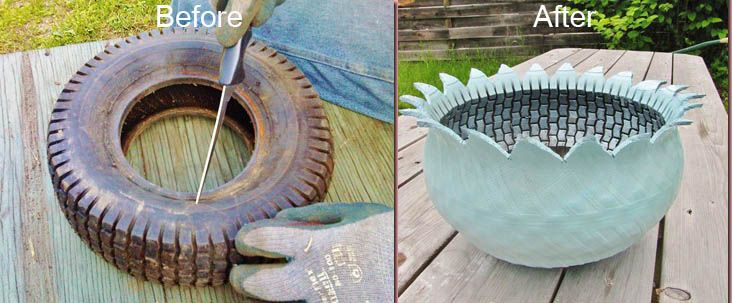 Each vertical post will be attached - in the lower part - with a wire to the clogged reinforcement, in the upper part of the well - directly with self-tapping screws to the planks and side surfaces of tires.
For the manhole uprights to be truly stable, mounting to tires and reinforcement alone will not be enough, you will need to connect the upper parts of the timber with a short jumper. It can be made from reinforcement or trimming the same timber.
The last step is to come up with a roof structure. The most realistic option would be a gable roof, knocked down from two pieces of plywood. The side gables of such a roof can be reinforced from the inside by installing a spacer from a short bar. We install the assembled roof on the upper horizontal jumper and fix it with self-tapping screws.
There is little left to do. It will be necessary to treat the wooden parts of the well with an antiseptic and preservative, and you can start coloring.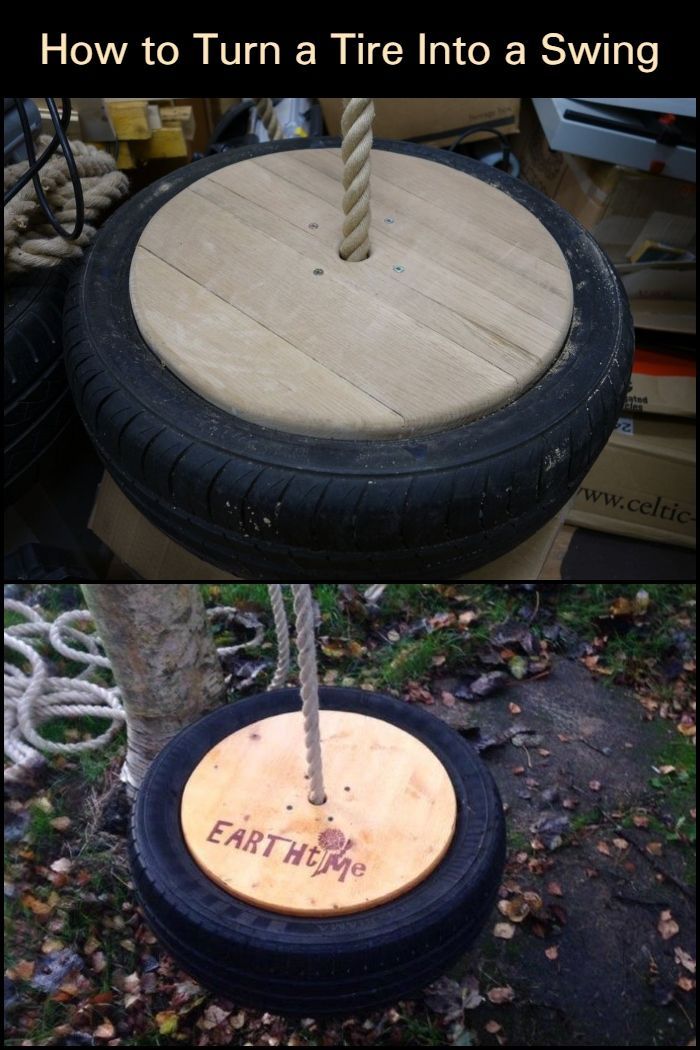 Tires and a canopy must be designed to match the main building of the cottage or house. It can be brick or wood coloring, the main thing is that the coloring should be bright and at the same time individual. Acrylic paints do not always adhere well to the rubber surface due to the presence of fatty traces, so it is recommended to rub the tire with sandpaper or a brush with bronze bristles before painting.
To enhance the naturalness of the building in the central part of the canopy above the well, you can fix a short piece of log, which plays the role of a lifting gate. Usually racks and gates are not painted, but covered with drying oil or weather-resistant varnish. The entire building with the design and painting of the well will take no more than two to three hours of work. One evening of a good summer day can be devoted to this. Well decoration can be entrusted to the most talented artist in the family. It will be possible to judge how successful the design of the well turned out to be no earlier than in a month. If the neighbors have the same one, then the time spent on building a well from tires was not in vain.
Furnishing your home with all the benefits of civilization is the main task of a good owner. Fortunately, now there is every opportunity to bring electricity to a residential building and organize water supply. But centralized sewerage is not everywhere. If there are enough funds, then you can purchase a ready-made factory septic tank or build it, for example, from concrete rings. In the case when things are not very good with finances, folk craftsmen help out, who came up with the idea of making a septic tank from tires with their own hands. This is a very good idea, but only suitable for a house with a small number of residents.
To people who are not particularly knowledgeable, it may seem that a cesspool and a septic tank are different names for the same sewer facility. This is fundamentally wrong. A septic tank, unlike a cesspool, is a more modern and modernized type of sewerage.
It consists of two interconnected tanks. Waste water through the sewer pipe enters the first - accumulative. Primary cleaning takes place in it: large particles settle to the bottom and cleansing bacteria begin their processing. The second tank, which is usually somewhat smaller than the first, receives already partially treated effluents, where bacteria continue to work. Approximately 95% of the total volume that enters the septic tank is ultimately excreted as clean water.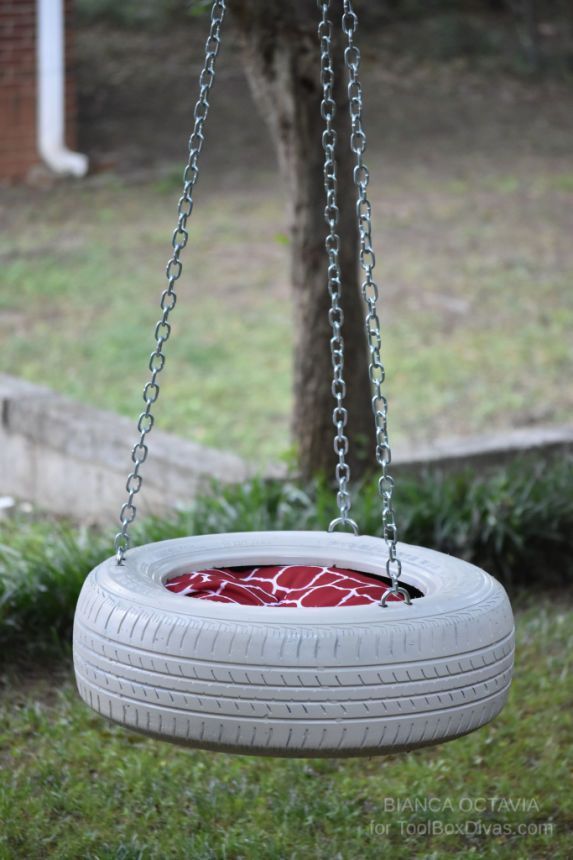
If we compare all the characteristics of a cesspool and a septic tank, then the indisputable advantage of a septic sewer will become clear and obvious. It shows much more efficiency.
If all the "pros" and "cons" are weighed and a decision is made in favor of building a sewerage system from tires, you can get to work.
You can find out about storm sewers from. What are its functions and what types it is.
We also have material on how to make .
In this section you can watch a video on the topic of our article.
Decorative well - a traditional decoration of a garden, courtyard of a private house or cottage. They build such wells of various types, there are simply magnificent ones, decorated with mosaics and carvings, lined with tiles, stone, etc.
In the decor, the owners usually show their abilities. But if there are no special artistic talents for the owners of the farmstead, there is not much time for crafts for the garden, but do you want a beautiful decorative well? Here are three options for very simple wells, which, moreover, can be made very quickly, and the funds for investing in them are minimal.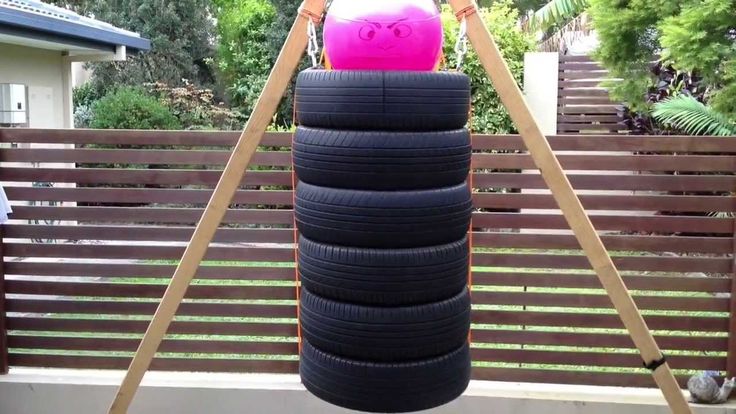 Perhaps, in general, it will be possible to get by with improvised materials.
You will need:
If all the materials are prepared, this simple but interesting decorative well is built in a couple of hours.
We make cuts in each of the 3 rails with a sharp knife or hand saw - support posts will be inserted into them to support the roof.
Lay the tires one on top of each other so that the slots line up.
We insert beams/beams into the slots. We hammer them into the ground so that they do not stagger. We measure their length - they must be the same, otherwise the roof over the well will turn out to be a curve.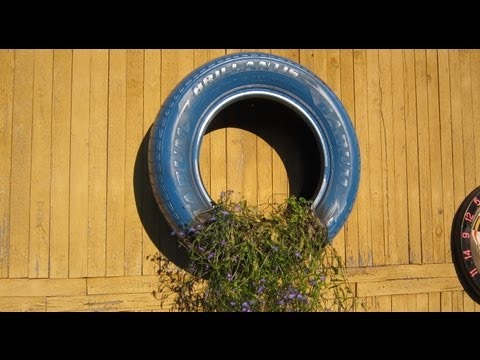
But you can do it differently - install the support posts outside the tires.
We paint the tires brown (brick color). After the background has dried, we apply an additional pattern with paint. For example, stripes imitating brick laying.
Decorative tire wells are made using almost the same technology. There are differences, but not cardinal. It is worth talking about how to paint tires - the main component of such wells.
We select paint. This can be an oil-based paint that adheres well to rubber, although the coating will not last long. Most likely, a well that has stood in the sun / rain for a year will need to be updated.
Enamel paint, bituminous paint, acrylic paint are all paint options. Rubber paint is very good in this regard. There is no rubber in it (as you might think, focusing on the name), but there is the ability of the coating to stretch and shrink a little depending on the temperature of the object, which, heating up and cooling down, also changes its parameters, albeit minimally.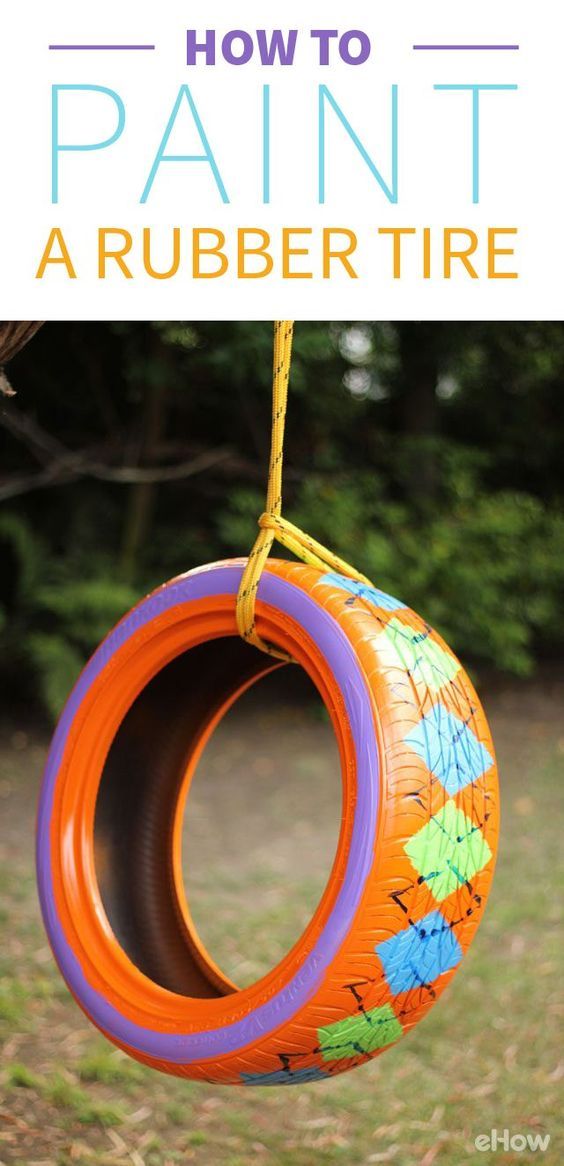 The rubber of tires under the sun heats up strongly, but the plastic coating does not crack.
There can be quite a lot of oil residue on a car tire, and it must be removed, otherwise the paint will not take well.
It is better to make a roof for a decorative structure from roofing material, even if not new. Especially since you need his minuscule. With a roof resembling a real one, the well will look more natural.
First, at the upper ends of the pillars, we make a support for the roof - something like a lattice or a strong crossbar.
The simplest thing is to fix slate, other sheet material, boards, etc. on the support. You can make the roof flat or gable.
If plywood is used as the base of the roof, metal tiles, ceramic tiles, roofing material, bituminous tiles, etc. can be fixed on it.
Such an interesting and simple option is also possible.
The container for flowers does not have to be the full depth of the decorative well. You can install some kind of stand inside the structure, and place a wide container on top (for example, an old basin).
| Leave your review | |
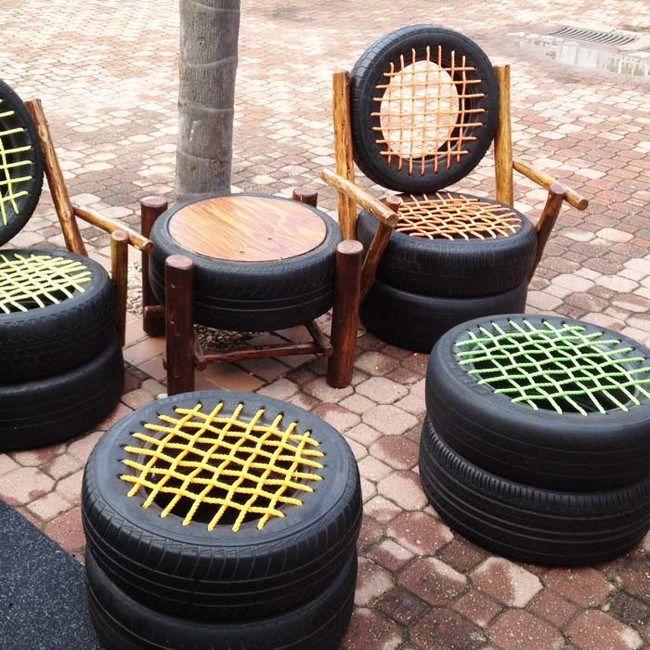
A tire well can be made quickly and beautifully with available materials. And if you try, then create a masterpiece. Do not rush to throw away old unnecessary wheels, you can make interesting ideas for your garden or plot out of them. These can be flower beds, various fairy-tale characters, swings, etc. For example, they turn out amazingly beautiful.
Tire well will be a great decoration for your garden and take its rightful place in the garden. It can serve not only as a flower bed, but also thanks to it you can mask, for example, a drainage pit or something else. If you are masking a hole, then it is best for you to make a cover and then the well will be closed.
If suddenly you do not have old tires, you can always find them at the tire shop.
It is most convenient to paint tires with an airbrush or from a can of paint. Then the paint is evenly distributed over the wheel and also paints inaccessible places. When the paint dries, only then do you take a brush and apply the drawings you need. If you are going to make a well of tires more interesting, then you can use decorative plaster or ordinary cement. The roof at the well can be made in different shapes and different materials. The easiest way is to cover with boards or a piece of slate. And if you show your imagination, then you will get something unusually beautiful.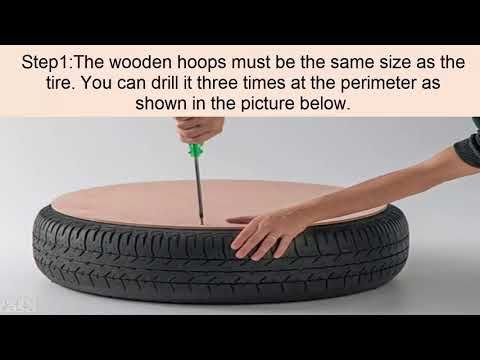 Also, an interesting roof can be made from CD disks.
When the well is completely ready, then you can start planting flowers. This point also needs to be well thought out. Since if you have a well made of several wheels, it will be high and a lot of land will be required. You can fill the well with leaves, grass, etc. and from above already pour earth and plant flowers.
To inspire you, we've rounded up some of our favorite tire wells. Perhaps you will like some of these ideas and you will create such beauty on your site. Don't forget to share with us. 9All rights reserved.
There are not so many objects and things in the yard of a dacha or a private house that would simply please the eye and create a good mood. Sometimes hands simply don’t reach, or there is no way to spend on the purchase of materials an already not very large family budget. Meanwhile, there is a whole culture and direction of landscape design associated with the design of the garden and courtyard of a private house. If there are no free resources, but there is a desire to make your yard more beautiful, you can simply build a well from tires with your own hands as an experiment.
Our practical mind tries to find a rational grain in any decisions and actions. But the human psyche requires relaxation and rest, so the construction of a decorative well:
Note! Building a well from car tires will finally free the garage from old rubber, which should have been disposed of long ago.
A cool version of a decorative well can be found on numerous personal pages of amateur landscape designers or on forums where you can see real miracles of fakes created by yourself from old tires and rubber.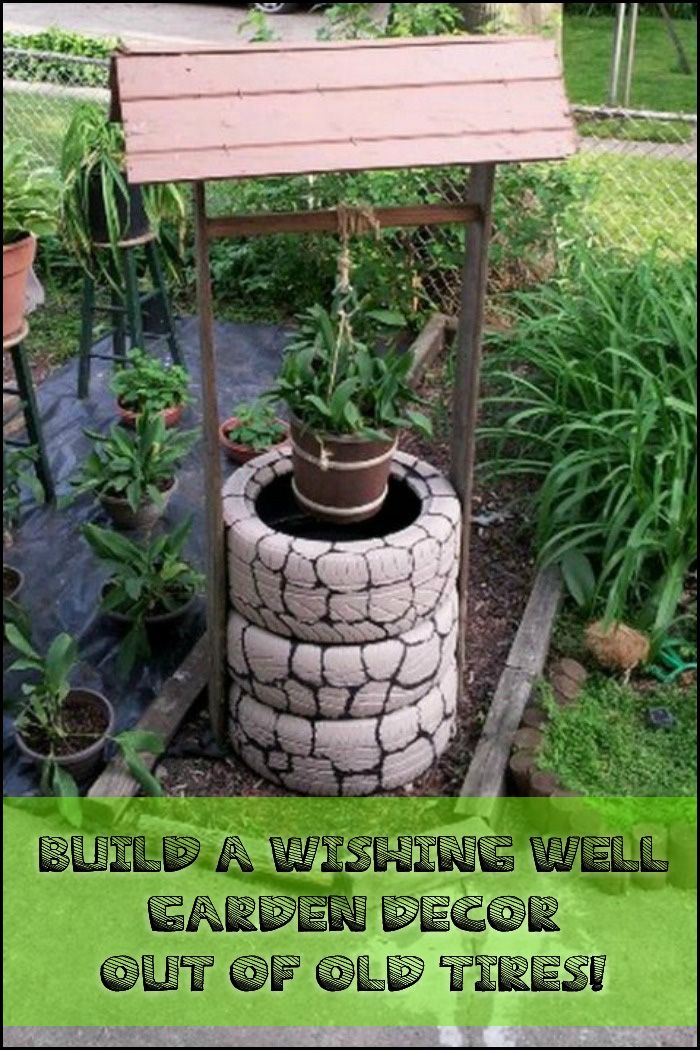
Making these wonders requires good practice and skill with old tires. For a decorative well of this level of skill, in fact, even a schoolboy or teenager can make it.
Tip! Invite the younger members of the family to show imagination and ingenuity as entertainment, to build a well better than the one shown in the photo.
Even if they refuse, they will still be happy to take part in the most interesting stage of construction - painting and decorating the building from tires.
For the construction of a decorative well from tires, the following materials will be needed:
Tires larger than 17 inches will look better in the construction of the well, but such rubber weighs 15-20 kg, so the construction may be too heavy an undertaking. From the tools you will need a sharp knife, a shovel, a saw for wood, a couple of dozen carpentry screws and a screwdriver.
First of all, you need to choose a place to build from tires. Traditionally, in villages, a well was installed near the entrance to the house, so that water flowing from the roof and snowdrifts would not damage the building during the autumn-winter period. In addition, the design of the well should not interfere and create obstacles for the movement of vehicles and people in the yard.
At the first stage, you will need to prepare a site for the well. To do this, we cut the sod to a depth of 5-7 cm and fill the area with sand. After completion of work, the space around the lower tire will need to be additionally covered with a layer of gravel.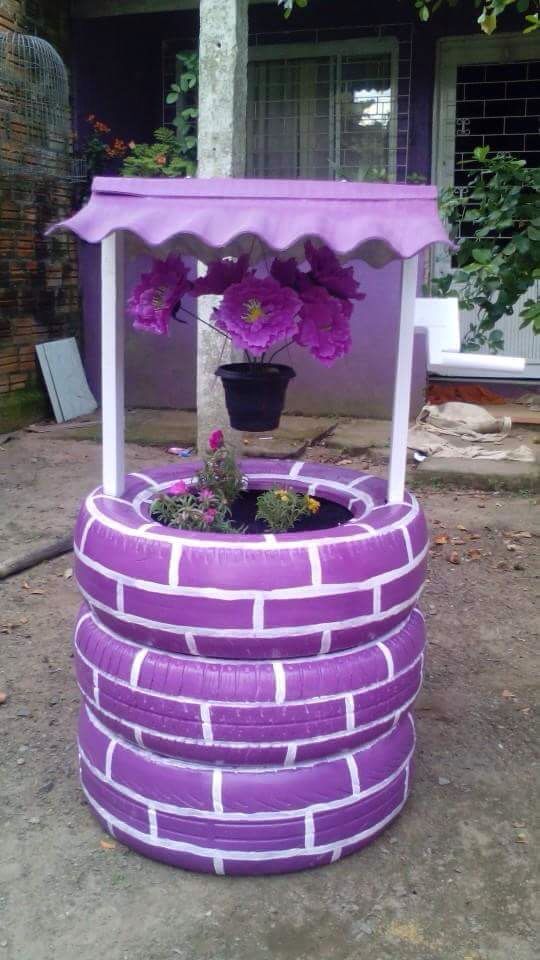
Tires selected for construction will need to be washed thoroughly to remove dirt and grime, otherwise the paint will not adhere properly to the rubber surface. From a set of tires, you will need to choose one, the most complete and beautiful, for the upper part of the building. Using a knife, cut out one of the sides, as shown in the photo.
Install the prepared tires in a column and align them vertically using a spirit level. After the tires have been aligned inside the well, three pegs are hammered in so that they support the inner bead of the tires and fix the tires from shifting. To make the building heavier and make it immovable, we fill the improvised well trunk from tires with a mixture of sand, soil and gravel.
In order to install the vertical posts of the well, it will be necessary to first drive the pieces of reinforcement into the ground by 15 cm. Each vertical post will be attached - in the lower part - with a wire to the clogged reinforcement, in the upper part of the well - directly with self-tapping screws to the boards and side surfaces of tires.
In order for the vertical posts of the well to be truly stable, one fastening to tires and fittings will not be enough, it will be necessary to connect the upper parts of the beam with a short jumper. It can be made from reinforcement or trimming the same timber.
The last step is to come up with a roof structure. The most realistic option would be a gable roof, knocked down from two pieces of plywood. The side gables of such a roof can be reinforced from the inside by installing a spacer from a short bar. We install the assembled roof on the upper horizontal jumper and fix it with self-tapping screws.
There is little left to do. It will be necessary to treat the wooden parts of the well with an antiseptic and preservative, and you can start coloring. Tires and a canopy must be designed to match the main building of the cottage or house. It can be brick or wood coloring, the main thing is that the coloring should be bright and at the same time individual.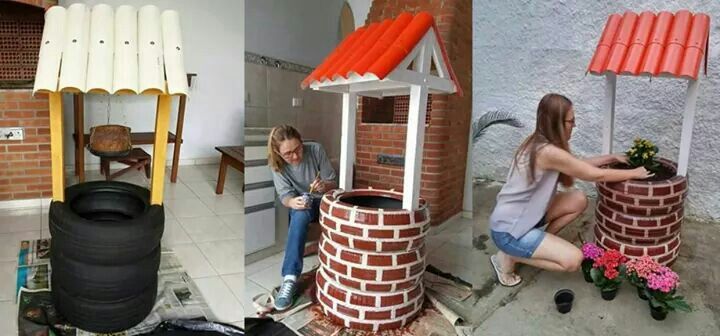 Acrylic paints do not always adhere well to the rubber surface due to the presence of fatty traces, so it is recommended to rub the tire with sandpaper or a brush with bronze bristles before painting the tire.
In any country house or cottage, a sewerage system is a necessary element of life support. Due to the fact that not everyone can afford to equip a rather expensive modern sewerage system, this article will describe tire sewerage as one of the options for an autonomous sewer network with a much lower cost.
Before proceeding with the equipment, you should carefully plan everything and prepare in advance all the tools and materials that will be required during the work.
It is also important to study the soil in which the drainage well will be located before digging the sewer.
To test the soil, it is enough to dig a small hole 1.5 meters deep at a distance of 50 cm from the house and study the occurrence of groundwater in it. If they are poorly absorbed, then it is advisable to dig a pit that collects the water taken out of the house.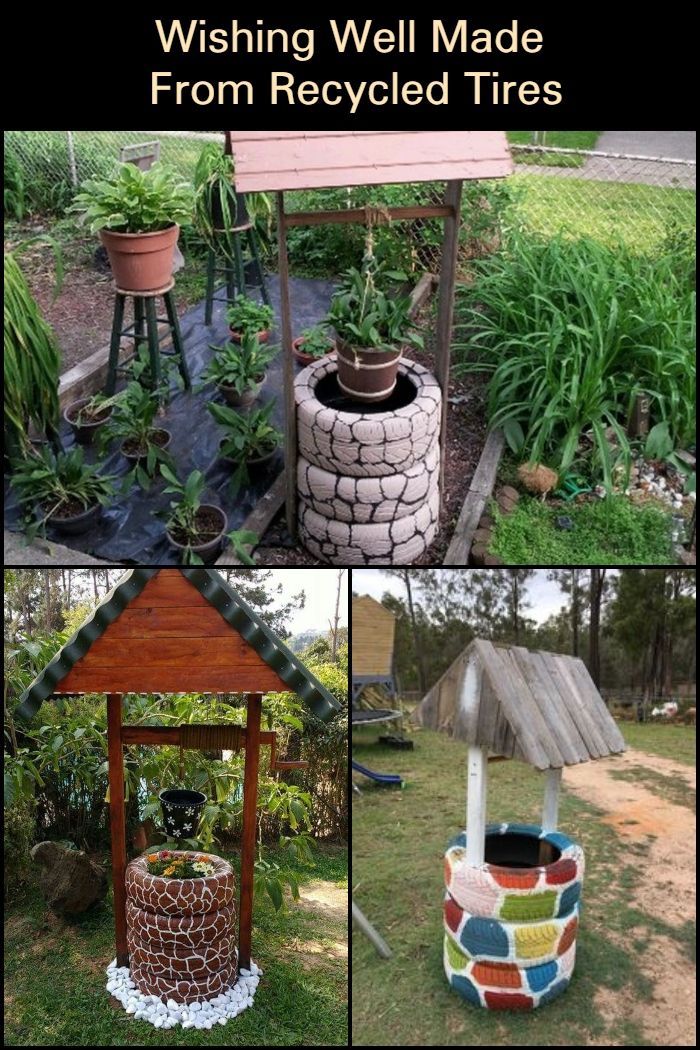
Hermetic outflow, having a slight slope in the direction of the pit, must ensure the correct outflow of water and its discharge into the sewer, and a pipe for draining water is mounted at a level of 10-12 centimeters from the bottom of this pit.
If the absorption of groundwater is good enough, then you can immediately proceed directly to the construction of a drainage well.
When dealing with tires, it should be understood that the septic tank is designed primarily for the fastest and most efficient reception of wastewater, and only then - for their distribution into the ground for the purpose of environmentally friendly disposal.
Old car tires can be found in any car workshop, where car enthusiasts often take them in order to save money on disposal.
For arranging a drainage well, you can use tires from trucks and cars, as well as various special equipment, that is, almost any tires that you can get, as long as they at least approximately match in size and thickness.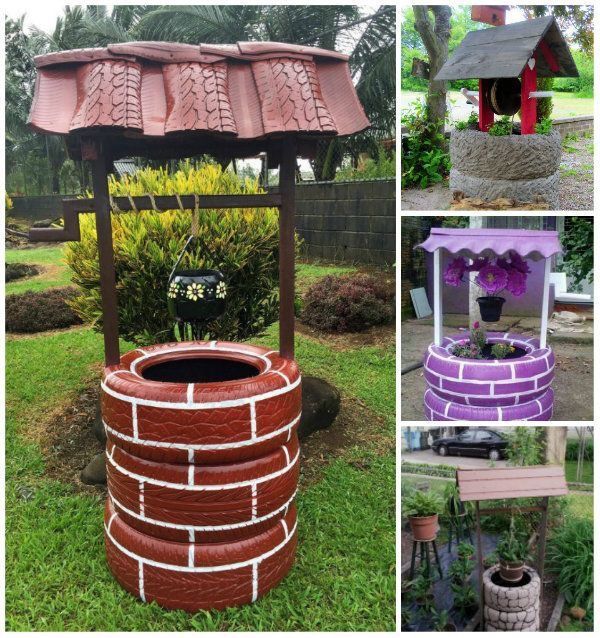
At its core, a tire septic tank is a tank made up of tires.
It is very important: when installing sewerage from car tires, keep a distance: the septic tank must be 25-30 meters away from the inspection and drainage wells and wells for water intake, and at least five meters must be a distance from the buried foundation.
In order to subsequently serve the sewer for a long time and during its operation there were no various failures, you should talk about how to dig the sewer correctly and reliably.
The most important thing is to take your time when working and try to follow all the recommendations.
The first step is to dig a hole from one and a half to two meters deep.
The diameter of the hole should be slightly larger than the diameter of the tire.
This will require two shovels, the handles of which must be long enough:
 5 m. This spade must also have a cross-shaped handle, it is used for loosening the earth.
 Helpful Hint: To prevent soil from spilling, you can make small edges around the edge of the spade bayonet, which will make digging noticeably more efficient.
The procedure for preparing the pit itself consists of several stages:
The result should be a hole at least two meters deep, since it is recommended to use 5-7 tires in it, and the depth of the hole should be at least 5 meters so that the hole goes through all the layers of soil that could interfere with drainage.
After a well has been drilled to the required depth, a drainage pipe is lowered into it.
The simplest solution in this case is two sewer pipes made of polypropylene with a total length of four meters.
These pipes are placed above the bottom of the sewage pit at a level of one meter.
This arrangement was chosen to prevent clogging of the pipe: water enters the pipe through the holes on the sides and falls down the pipe to a depth of 4 meters, where it drains into the sandy soil.