No matter how well your car or truck is dialed in or how perfectly you’ve matched your tires’ tread and compound to the track conditions, you’re not going to have any fun or win any races if the tires don’t stay on the wheels. An RC car’s wheel-tire connection must withstand huge amounts of force as it powers your machine, especially when you combine a heavy, high-power brushless model with rough terrain. Here’s how to glue tires the right way, and we’ll talk beadlocks for you trail guys and gals too.
What is the best way to glue RC tires?A strong and secure glue bond is key, and thankfully it’s easy to achieve. The secret is high-quality tire glue, careful preparation, and just enough patience to not rush the job.
High-quality tire glue is the essential thing for professional results. We’re using ProTek RC Medium
Some drivers skip this step, but ensuring the tire and wheel is free of any mold-release compounds from the manufacturing process will ensure nothing is on the mounting surfaces that might interfere with the glue bond. Be sure to wipe down the wheel’s mounting channels and the tire’s “bead” (the flange that fits into the channel) with denatured or isopropyl alcohol or motor spray. Avoid any cleaner that will leave a residue or film behind.
Motor spray or alcohol can clean the mounting surfaces, and a microfiber cloth won’t leave lint behind. Ensure the surfaces where the tire and wheel fit together are completely clean.
Step 2: Install the RC tires onto the wheels.Push the rim into the center of the tire and align the tire’s bead with the mounting channels in the wheel. If your tires have directional treads, be sure to note their orientation, so you have a left wheel and a right wheel.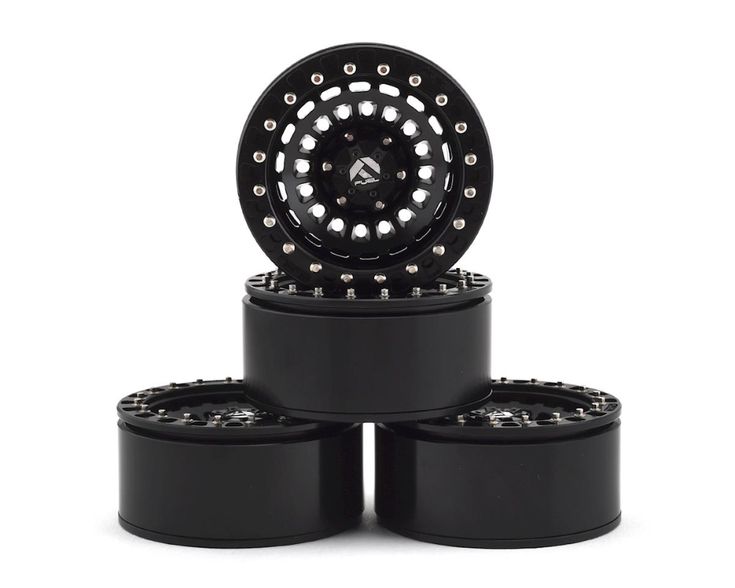 Push and pull on the tires as needed until they’re fully seated. Assemble all four wheels and tires.
Push the rim into the tire and work it until it’s fully seated.
The JConcepts Ellipse tread is directional, so be careful to assemble the tires and wheels as a left and a right.
Thick, Medium, or Thin Tire Glue?
Depending on the brand you choose, you may see tire glue offered in different viscosities. There’s no difference in holding power, only the ease with which the glue flows. “Thin” is like water and flows most easily. Medium is more oil-like. It still flows easily but is easier to control than Thin. Thick glue is more gel-like and doesn’t run easily. It’s easiest to get good results with Thin or Medium glue.
Use your thumb to pull the tire back slightly and open a gap between the tire and wheel.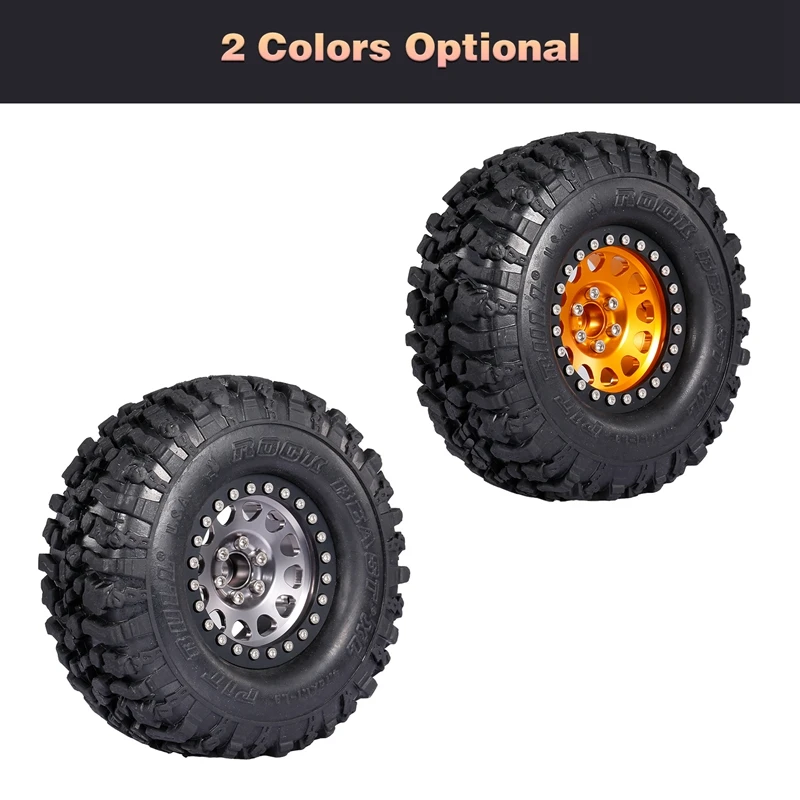 Apply a drop of tire glue into the opening, lower the bead back into the wheel and make sure it seats fully. Avoid letting the tire snap back into the wheel like a rubber band, as this can cause the glue to splash—repeat the process all the way around the wheel. If you think of the wheel as a clock face, you’ll apply glue at each other hour or so. The thin glue will wick around the wheel by capillary action, so if you find the spot where you’re applying glue is already stuck down, move a little farther along. Keep going until the entire perimeter of the wheel has been glued.
Pull the tire back and apply a drop of glue. Work your way around the wheel until you’re back where you started. The wheel’s spokes make it easy to glue at evenly spaced intervals.
Pro Tip: It’s best to glue the front side of each wheel and tire, allow them to dry, then go back and glue the back sides. If you glue the front side then immediately flip the wheel over to glue the back, glue may run out of the joint and make a mess of your tire’s sidewall.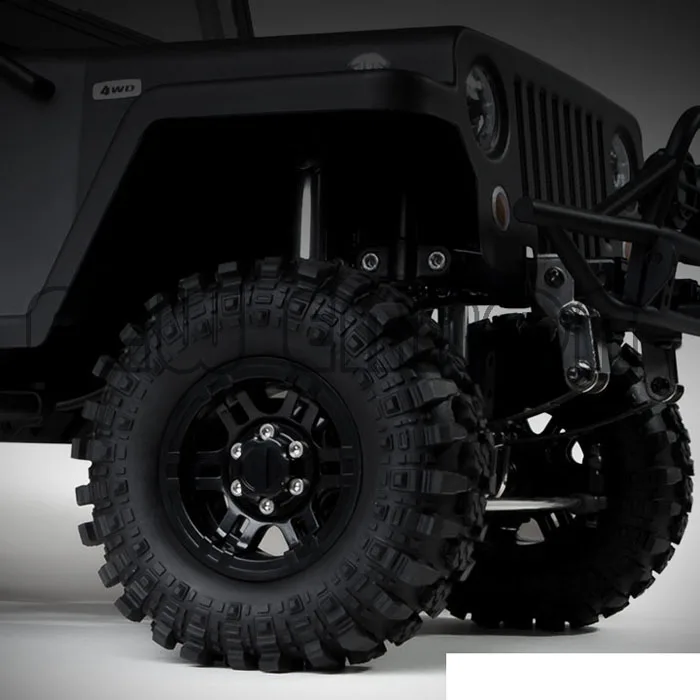 Worse, you might glue yourself to the tire and/or your work surface, which is a drag.
Use a tire band to hold the tire’s bead tightly in the wheel channel as the glue dries. The band doesn’t need to be super tight. It just needs to apply even pressure around the tire. Then, as the glue dries, you can go to work gluing the other tires.
ProTek RC tire bands are extra wide for superior tire-squeezing ability. The premium style with handles comes in three sizes to suit sedan tires, 1/10 and 1/8 scale off-road rubber and monster trucks/truggies.
Step 5: Inspect, flip, and repeat.After you’ve glued one side of all four wheels and tires and allowed the final wheel at least a few minutes to dry (more time is better), remove the glue bands and check your work. Try to pull the tire away from the wheel; if gaps form, reapply glue and re-band the tire.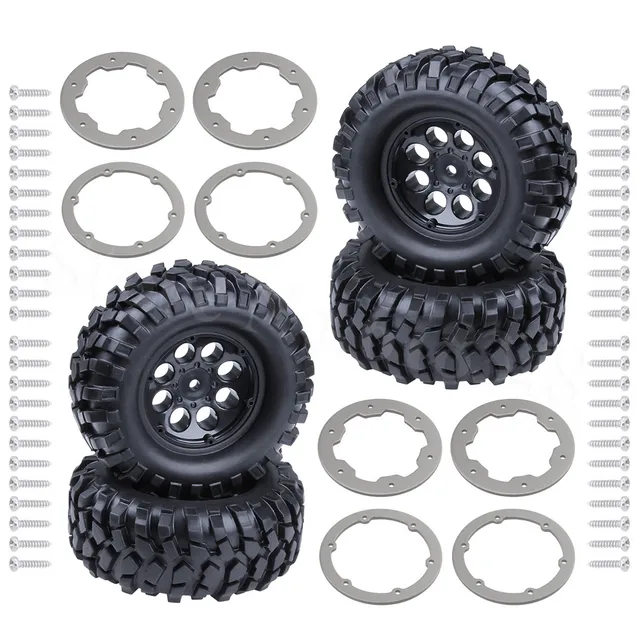 When you’re satisfied that all the tires are well glued to their wheels, flip them over and repeat the process for the other side of the tire and wheel.
After both sides are dry, put a drop of glue on the wheel/tire joint and gently tilt the tire to help the glue roll around the rim. Add glue as needed until you’ve made it all the way around, then set the tire aside to dry. This extra coat of CA will seal the joint to make it even stronger and resistant to dirt packing where the tire and wheel meet.
Apply a drop of glue and tilt the wheel to follow along the joint.
Mission accomplished—your tires are glued up and ready to race.
Should you vent your RC tires?
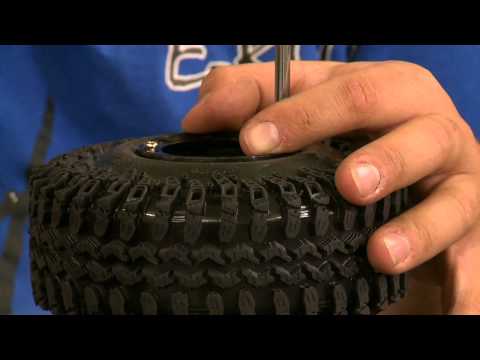
Most wheels have vent holes in them from the factory, which allows air to flow out of the tire when compressed and flow back in when the tire rebounds. This is a benefit on the racetrack, where a fully sealed tire would have unwanted rebound because of the air trapped inside. Some drivers make additional holes in the tire for improved venting, and to allow trapped dirt or sand to exit the tire.
The best tool for this job is a ProTek RC tire punch, which allows you to punch a perfectly round, clean-edged 1.5 – 4.0mm hole with just a squeeze. The “perfectly round, clean-edged” part is important, as a ragged hole cut with a hobby knife would be prone to tearing.
The ProTek RC tire punch makes it easy to vent tires with just a squeeze. It makes a clean, round hole that won’t weaken the tire.
If the wheel and tire combo you’re interested in is available premounted, you can save yourself the time and trouble of gluing and go right from package to track as quickly as removing your car’s wheel nuts.
JConcepts, Pro-Line, AKA, Duratrax, Schumacher, and other tire brands offer ready-to-install options.
Shown: JConcepts Subcultures on Hazard wheels and Pro-Line Pyramids on Velocity wheels.
Beadlock wheels use mechanical clamping force to hold the tires in place and are favored by trail truckers not only for their scale realism but because they allow wheels and tires to be swapped anytime, and there’s no need to throw away perfectly good wheels when the tires wear out. So why don’t all RC cars and trucks use them? Beadlocks are significantly heavier, which is not good for racing. And while they have plenty of holding strength for the low-RPM action trail trucks see, beadlock systems aren’t up to the much greater centrifugal forces of high-speed RC driving. If you’re going fast, glued tires are a must. But on the trail, beadlocks rule.
Most beadlock designs, like this Pro-Line Impulse wheel, capture the tire’s beads with an inner ring. The rim is split into front and rear halves that fit inside the ring to clamp the tire.
The other common beadlock configuration, as seen with this Traxxas Method 105 wheel, is a one-piece wheel with channels for the tire’s beads. Rings are installed on the front and back of the rim to hold the tire.
Once again, make sure you assemble the tires and wheels as lefts and rights if the treads are directional. If you do install a tire backward, no worries—it’s not glued on forever. You can just take it apart for a do-over. But better to get it right before you start firing the screws.
This Pro-Line Interco Bogger tire has a directional tread.This Pro-Line Interco Bogger tire has a directional tread.
Soap a Stubborn TireIf you’re building a channel-style wheel and having trouble getting the tire bead to slip into the wheel channel, rub a drop of dish soap onto the bead to lubricate it. Don’t worry if the bead doesn’t quite fit completely into the channel; when you tighten up the beadlock ring, it will push the bead the rest of the way.
Crisscross TighteningWhen installing a beadlock ring, start with four screws evenly spaced around the wheel and thread them in a few turns at a time in a crisscross pattern until the ring has pushed the bead into the channel. Now install and tighten the remaining screws, working your way around the rim in the same alternating pattern. This will ensure even tightness and maximum holding power.
Tighten beadlock screws a little at a time in a criss-cross pattern to ensure even tightness.
12/2/2020
Not long ago, I wrote a post about changing the wheels on my son's Gen8 V2 and showed a quick look at my Injora 1.9 beadlocks. I'm slowly getting these wheels ready to install on my Gen8 AXE and thought I'd show you how they are assembled.
This assembly / mounting process should be the same for most 1.9 beadlock wheels such as SSD, Injora, RCLion etc that you'll find on Amazon. It's easy once you know how to do it but if you've never assembled a beadlock wheel, this might help you.
Here's how I do it....
Step 1: Start by cleaning and organizing your work area. Get your tools and supplies ready, throw on some music and grab something to drink...this is going to take a little while
Here's what you'll need:
Step 2: Assembly starts with mounting the beadlock ring to the face of the wheel. There's a lot of little screws to install but don't worry, you'll likely never have to remove any of these screws again in the future
A little dab will do ya. Don't use too much threadlock. Put a small amount on a piece of plastic then dip the tip of the screw into the threadlock. Using too much threadlock or using too strong of a threadlock will just lead to stripped screws and frustration if you ever try to remove them later
Use a star pattern to gently install the screws. Remember, you are working with small screws threading into aluminum. ..two fingers on the driver are enough. Work your way back and forth installing the screws in that star pattern then finish up with a couple of rounds of snugging up each screw. Go easy...the threadlock will hold them in place. Snug is good enough.
Step 3: Once you've secured the beadlock ring, grab your 2.5mm hex driver and use the same process to secure the hub to the wheel. The same tips apply, use a small amount of threadlock and go easy on the screws
Step 4: Next, install the metal ring inside the tire. Double check that it sits evenly inside the tire and that the beads are even. Some rings may have an inside and an outside. Look closely at yours when you install them to ensure you put them in correctly. My Injora wheels don't have an inside/outside so I just stuffed them in there
STOP: This is where you'll also have to decide whether or not to punch vent holes in your tires to let the air escape. If your wheels have holes in them, you do not have to punch your tires but, if you plan to run in water, you may want to in order to let the water drain out. There's lots of info/debate online about whether or not to vent crawler tires, I'll let you Google that and decide on your own. I vent mine with three holes spread equally around the center line of the tire's tread - sorry, I forgot to take a picture
Step 5: Now it's time to drop the face of the wheel into place. Pay close attention to the bead and make sure everything is seated evenly. If you have any trouble getting the wheel face in place, a little water or saliva (if no one is looking) works well as a lubricant. I don't recommend using any oil or grease
Tip: if your tires are directional, now's the time to double check that you have the face installed on the correct side of the wheel/tire
Step 6: Flip your wheel over and drop the back plate into place being careful to line up the screw holes and also to get the bead seated evenly.
This is where it gets a little tricky. When you try to install the screws that attach the back plate, you'll likely have to use one hand to squeeze the pieces together while using the other hand to attempt to thread in the screws. It's not too difficult but it will take a little effort.
Get the first screw started but don't thread it in all of the way. Use a star pattern to get all of the screws started. Note the gap between the wheel center and the back plate in the image above.
Finish up by carefully tightening these screws and you are all done with your first wheel.
I'd show you a nice picture of my wheels installed on my Gen8 AXE here but I still have three more wheels to build and I want to go crawling now so I'll create that post later
'till next time, have fun
Rob
By the way, if you found this post helpful, please help me out and use one of the links to Amazon within the post the next time you buy something (it doesn't have to be the item I link to. ..heck, go buy some toilet paper). If you use the link, Amazon will pay me a small commission and it won't cost you anything extra.
If, like me, you're fed up with the stock Flux wheels with soft, thin rubber glued to big rims with long-lost chrome and stripped hexes, and you need a normal rubber for bashing with 3.2" Maximizers on 17mm hex is a good choice.0003 +1cm in thickness and hell knows what other weight gain compared to stock.
I myself was quite skeptical about beadlocks on only 8 screws (after all, the owners of Proline beadlocks with 40 (!) screws per wheel Weld Commando did not speak flatteringly about their investment), but after my tests, you can safely say after behind Maximizer authors: "Because glue sucks!"© - maximizerproducts. com
com
First we need to buy this whole thing. Where, it doesn't matter, I, as always, used ebay.
Well, here is the subject on our table.
You can shake out the contents of the bags and figure out how it will all come together.
And at first it will certainly seem that you made a specific mistake with the dimensions, but this is not so. Everything fits together wonderfully, it just sits tight, which is in our hands.
Having turned everything in his hands and marveling at the thematic video on assembling beadlocks, which is on the Maximizer website, how easy and simple they do it there, turn tires inside out . Of course, it is most convenient to do such dirty and rough work with the hands of some of your 100/150 kilogram friend who works as a bouncer in the club, as I did. x) And you once again do not strain, and it's entertainment.
Having unscrewed the tire, we have the following picture.
I don’t know what fans of gluing and other methods of rubber damage, together with its manufacturers, think about the discovered side, but this side will in every possible way prevent us from tightening our beadlocks, so ruthlessly, but very carefully, like a rapist who is afraid to frighten off his victim, we cut him to hell with small sharp scissors.
(I don’t recommend using a razor or other cutting tools, because it’s inconvenient, but if you’re interested, you can take a chance if there is a spare rubber 😉)
It’s done like this.
The result of your efforts should be such an even (although not smooth, and we don’t need it) inner rim. (if you wish, you can sand the resulting edge, but personally, such urges quickly disappeared due to natural laziness and the transience of life =) )
Having done this delicate operation for today (I doubt that you have already managed to thread a needle without releasing your hands from the levers of your working excavator, but why my guide is such a person, I don’t know at all), call your heavyweight weightlifter- friend-bouncer to turn the tire back. The process is trivial, I do not give pictures. Unless you follow your already almost professional twister, bringing a shovel over his head, it’s not even an hour, it will tear, you’ll do a lot, otherwise you’ll have time to press the stopcock somehow.
Next, we take the internal thrust cups (whoever bought Maximizers has seen the manual and knows what I'm talking about) looking at the O-rings along the way. (in the photo, the left one lies with a sloping edge outward, the right one - vice versa)
We need them. We put them tightly and correctly: with a sloping edge inward. The edge with a right angle and technological marks should be facing you. And smile. Like on a picture. Plug it in crookedly or not completely, you will rake problems. But you don't need to glue anything! The rings, if properly installed, will stay there anyway, you’ll get the hell out of it.
Now we push the assembled cup right into the tire, so that its cord lies just inside the ring you just installed.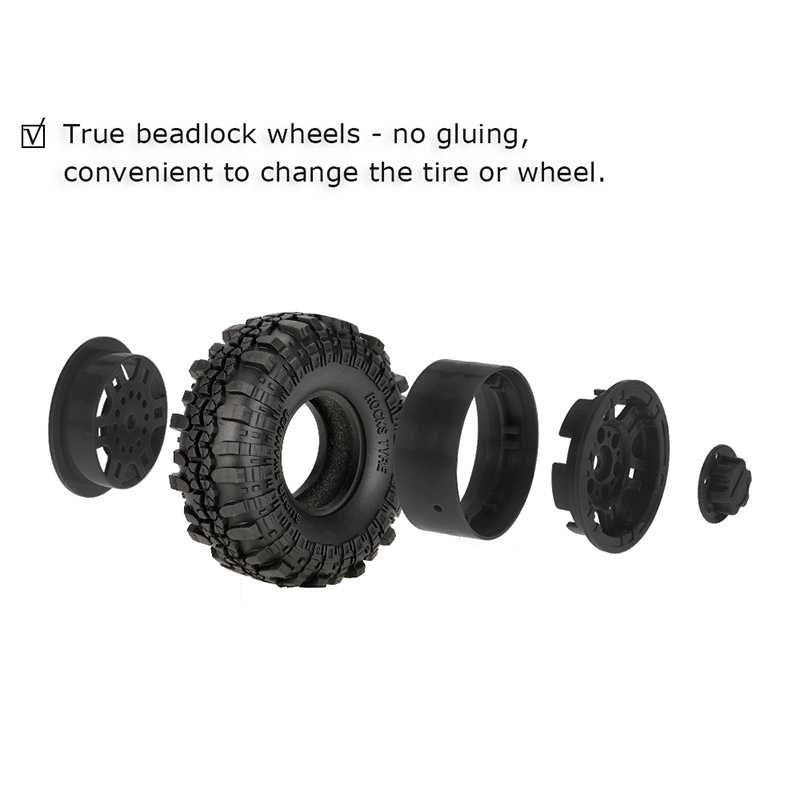
(the view is given from the opposite side of the wheel, the tire cord is visible inside the cup, the inner part of the cup fits into the foam insert, as it should)
We do the same from the opposite side, managing not to screw up the already installed cup. But yes, even if something has shifted, then everything can be easily corrected. It won't be easy anymore.
It is “not easy” to install the main tube-wheel housing on the inside of the tire (do not mix up the sides! The tread on the wheels is not symmetrical), which oh how tight it fits into the rubber, moving the just installed cups in FIG. But yes, having shaken your dexterity, you still have to manage to stick this tube inside, something like this.
Now the most important operation. Smooth installation of the cord between the cavity of the inner cup and the edge of the inserted tube-body. If you did everything according to the instructions, and everything fell really smoothly, then it will be easy to put the cord in the right place correctly with the movements shown in the picture below. Do not overdo it with the pulling force (and with the rest of the efforts, too). If you pull the cord out - assembly on a new one. In the process, not much, but persistently we press on top of the tube.
If this worked out, then installing the outer cover with spokes and hexes in the same way will not be a problem, because. from the inside you will see how successful your actions are. The only difficulty is to follow the coincidence of the holes in the lid and the tube. Combine them immediately as accurately as possible. A discrepancy of 1mm is allowed, anything more must be redone, otherwise you will have a skewed tire.
Having installed everything, gently but firmly press the lid to the tube. It’s better to press ... yes, at least from both sides, as long as it doesn’t move.
(inside view)
Now the last delicate, in fact the most important, final operation remains - tightening the screws. Because you should have at least 3 more free Maximizers, then we put the lower part of the wheel to be assembled on a free disk, we get such a machine for tightening.
Before screwing anything. It is necessary to press the wheel cover as hard as possible so that the rubber and everything painstakingly installed by us, the insides sit down and press against each other. I didn’t try to step into the very center of the wheel and jump, I already excommunicated my friend of the heavyweight from the process, but I still pressed hard, nothing cracked or crunched, which means that the manufacturer of the brooms imposed very high quality ones, and, perhaps, the wheels will even remain on hexes after you press the slipper into the floor and send the car tumbling down the rocky slope, as I usually do. x)
After the first press, you can call someone to save this press while you make the first uniform pull all 8 screws.
Because the thread is small metric, something can break somewhere. This can happen if, firstly, you tighten the screws inconsistently, secondly, you don’t make the first powerful clamp and don’t call someone to hold it, thirdly, you didn’t screw the lid to the tube before the start of assembly in order to find out the tightening limits and cut threads in the holes. Although it still remains possible to tear everything to hell, but if you are not an imbecile, by a tragic coincidence, endowed with excessive physical abilities to the detriment of mental and tactile, then everything will work out.
!Remember! Your goal is to assemble the wheels from the first times on native screws with the maximum degree of assembly strength, which is achieved by the maximum allowable degree of tightening of these screws! Instead of tearing it all down, grunting, what kind of “G” are these Maximizers, and replacing everything with self-tapping screws, which are not yet a fact that they will hold something.
At the moment, your task is to screw in all the screws until they only touch the cap pressed by your assistant with their heads. You don't need to pull as hard as you want.
We tighten the screws according to this scheme.
Having screwed all screws, just put (metaphorically) their heads over the holes in the cover. You again do not tighten anything ! And instead, again seat the entire wheel with powerful pressures of the cover. The cover should sit even deeper, and the screw heads should rise above it. Again, evenly lower the hats down onto the lid, the pressure can be maintained. Repeat the operation (3 or 4 times) until the lid stops shrinking under your pressure.
Once you have reached this point in the assembly stage, NOT rush with trembling hands to pull anything. We act slowly , patiently , gently and consecutively , as when rimming with your girlfriend. x) Tighten the screws by half a turn according to the above scheme until they rest against the impossibly clamped rubber.
If you did everything right, then you can tighten them so much that the head of the screw will push through the plastic of the cover.
Voila! As a result, we have a solid, self-assembled wheel without glue and enjoy the result of our efforts. =)
Cute, right? 😉 You have to do everything written above 3 more (!) times, but the result, as you can see from the comparative pictures, is worth it.
Bash till Death!
Clueless demonstration video of rides on assembled wheels.
Created by BaNZ 03/22/2011
Maverick Scout is the perfect machine to overcome the most extreme obstacles that you you can find.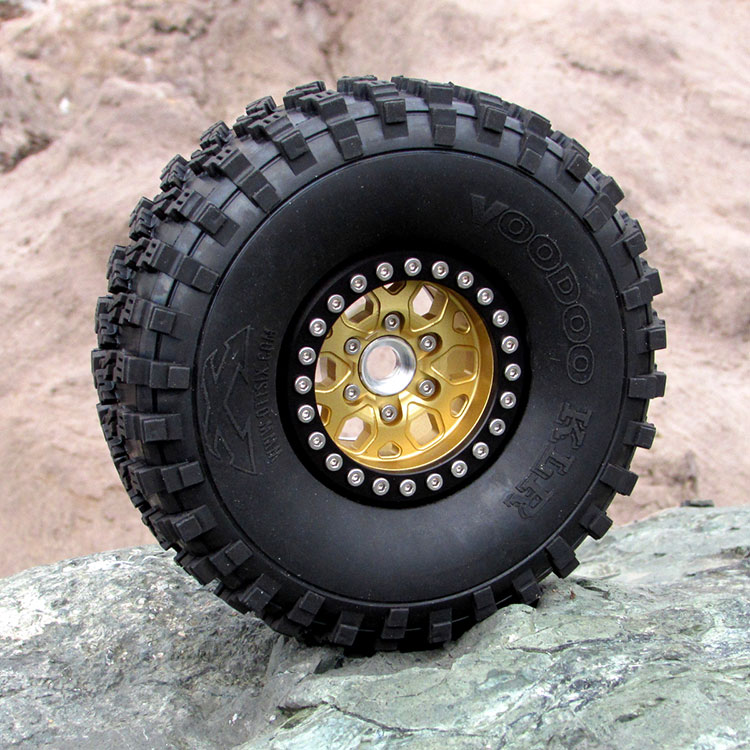 scout rock Crawler is able to drive almost everywhere! Surprisingly flexible suspension, soft grippy tires and perfect matched Scout RC weight turn this car into a perfect SUV capable of ride wherever you want.
Scout RC is equipped with a waterproof electronics and is the perfect solution for off-road adventures in any weather. Powerful steering servo mounts directly on front axle, and a special speed controller MSC-30BR-SCOUT-WP controls the speed of the collector motor MM-25 which provides torque on all four wheels. 2.4GHz remote control with comfortable steering wheel wheel has a lot of functions and adjustments that you can needed, and a waterproof 3-channel receiver guarantees perfect control.
Fully functional off-road chassis Scout RC is the perfect base for the first radio-controlled "rogue" in your garage. This is a fairly reliable machine, it can easily cope with inevitable falls and somersaults that are inevitable when trying lay a new route, with incredible slopes and boulders, which you can overcome again and again! Soft multipurpose 2.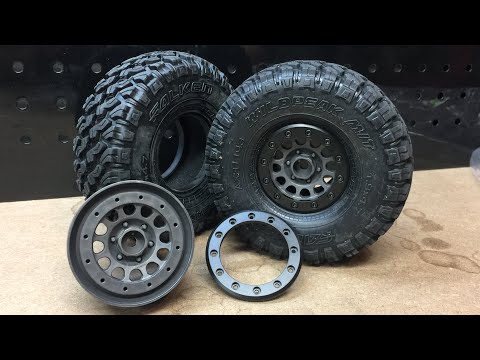 2" wide tires and extended spring dampers on solid axles with lockable differentials guarantee unrivaled climbing ability and all sorts of off-road.
1. Metal rods hangers
For increase strength and durability
2. Manifold motor MM -25
Provides the power you need to overcome steepest hills
3. Extended spring shock absorbers
Provide maximum suspension damping on any plots
4. 4WD cardan transmission
equipped with universal joints
5. rods
Simple and effective
6. Tenacious rubber tires
Aggressive tread allows you to overcome lifts
7. Waterproof speed controller
Has special mode Crawler
8. Waterproof 3-way channel receiver 2.4GHz
Splash and rain proof for driving in any
9. Waterproof servo
Power steering servo mounted directly
on the front axle
TheScout RC has a molded chassis tub that housed the electronics and the battery. The bath is located between a pair of U-shaped chassis plates, and this gives additional strength. Specially designed extended oil shock absorbers and solid axles guarantee you maximum confidence on any off-road terrain. Long metal front and rear traction for maximum stability located within the wheelbase.
ScoutRC 4WD all-wheel drive transmission ball bearings, and this is a guarantee of maximum efficiency and long running time - you can easily ride 20 minutes on a fully charged 6-cell battery (battery and charger included). To ensure transmission maximum torque from the engine to all four wheels with soft rubber tires, front and rear differentials are completely locked.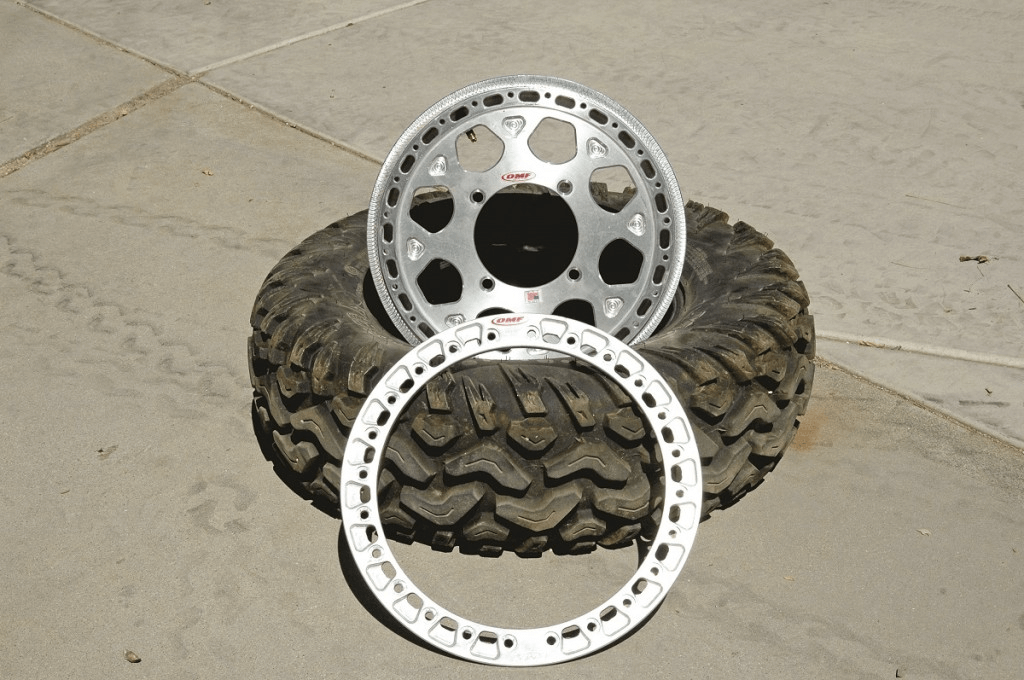
MaverickRC was a fan favorite in Europe and the UK in for many years! Maverick kits and parts were developed in Great Britain by the real luminaries of radio-controlled cars and the most the best HPIRacing specialists! To give you the best fun for your money, MaverickRC is constantly being upgraded. We always try to take into account customer feedback, test, we invest all our energy and do our best to make the machine gave you pleasure on the road, on the beach, in the park ... everywhere, where you like to run the car!
Model Features Maverick Scout RC :