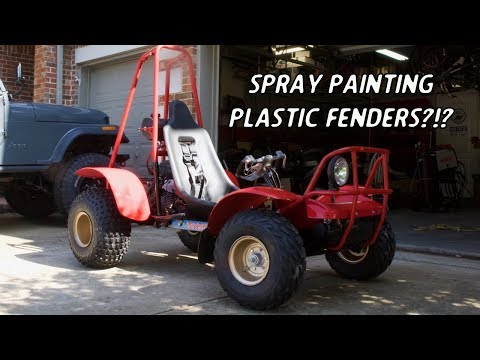
If you’re wanting to change the look of your ATV without needing to spend the money to buy all new plastic body parts, one option is to paint the existing plastics. There’s a quick and easy way to get this done, and a longer more professional approach. Either way, it’s cheaper and more rewarding than buying new ATV plastics all together.
Most ATVs come with colored plastics already, maybe with some printed graphics on them. Some ATVs may even have hydrographics or water transfer printing done. This can lead to some pretty cool designs that would be almost impossible for the average person to recreate with spray paint or other painting methods. I go over hydro dipping in more detail below.
In general, to paint ATV plastics, you’re going to need to clean the plastics and sand them down, then remove contaminants in the plastic that prevent paint from sticking. After you’ve done that you’ll want to use a primer, paint, and top coat to seal and protect the paint job. I will go more in depth below with a step by step guide.
If you don’t want to go through all that trouble, there is a quicker method. It probably won’t last as long as taking the professional approach, but it works well. Before you begin either method, you’ll want to make sure your plastics are in good condition. Check out this article on Repairing ATV Plastics if you want to fix them up a bit before painting.
This method is the easiest most straight forward way to paint your ATV plastics. Simply get a can of this Krylon Fusion Spray Paint For Plastic from Amazon. It can’t get much easier than just spray painting right?
You will first need to take all the plastic pieces off the machine that you want to paint, unless you’re really good at taping off the painting area. Every time I try to just tape off the area, I end up still getting paint where I didn’t want. It’s up to you on this one, I take the plastics off the quad from now on.
It’s also easier taking the plastics off because you need to clean them before applying paint. It’s best to use a bucket of warm soapy water, take extra care to get all of the dirt and grime that will prevent the paint from sticking. Use a rag or sponge to thoroughly clean the plastic parts.
Krylon claims that you don’t need to apply a primer before painting with Krylon Fusion paint. I’m a little skeptical about that, but it’s up to you. I’ve just seen the paint last longer when a primer is used. You might be ok if you’ve cleaned the plastic well enough.
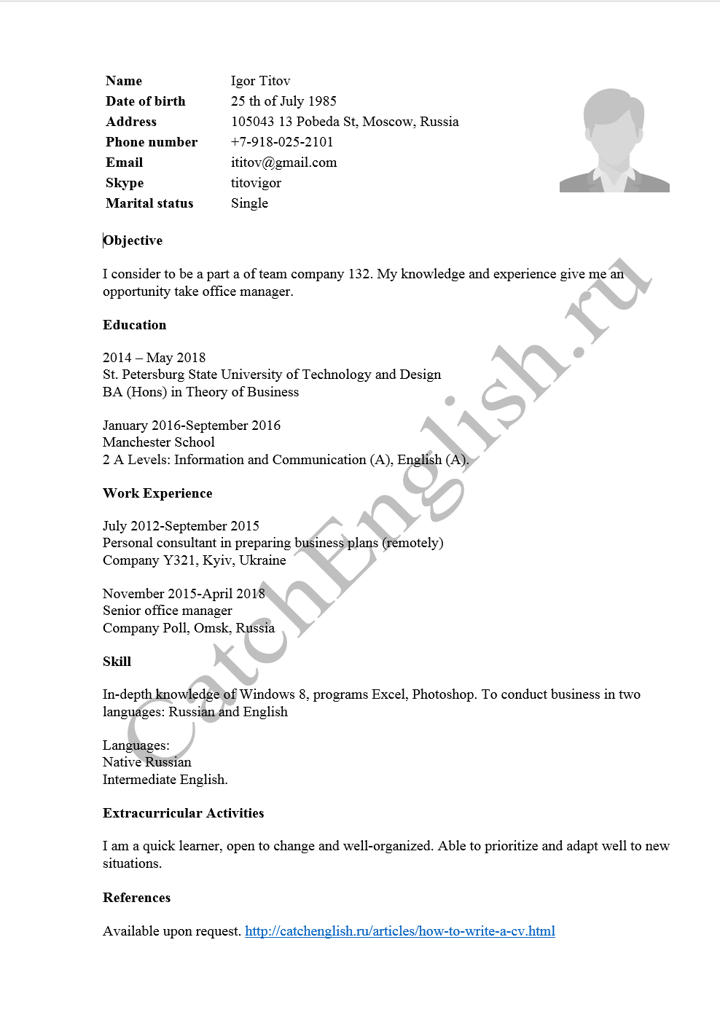
Now you’re ready to paint, I’ve done this before by hanging the plastic from a tree with a rope. But this can also be done by simply laying the plastic on a bench or outside. Try to get into an area about 65 – 70 degrees if you can to help cure the paint.
I recommend painting from the bottom up. If you spray from the top down, then when you get to the bottom the over-spray will get into the top and make it look grainy.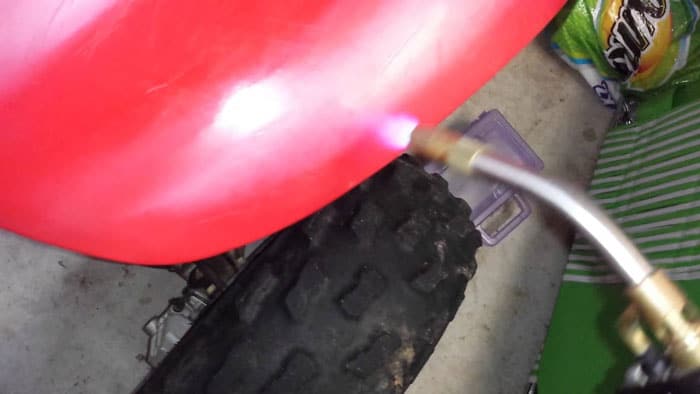 You should try to spray in light coats to avoid the paint running. If you spray too much in area the paint will lift. It’s up to you how it looks after the first couple coats if you need another one.
The paint itself will dry in about 15 – 30 mins but it’s recommended to wait 24 hours before handling. Also, it will take a week before the paint is chip resistant, according to Krylon.
The biggest problem with this method is it doesn’t last a long time. Chipping and cracking after a couple years is pretty common with this approach.
Hydro dipping is only in the article because I think it’s one of the coolest ways to paint something. You may have seen this before. They lay a graphics film over a bucket of water and as they dip something into the film adheres to it giving it a cool graphic design paint job.
They do sell kits you can use at home for pretty cheap, like this HydroGraphics Kit From MyDipKit
on Amazon. I can’t vouch for this myself because I’ve never tried it out. I do know, to get it professional done at a place is usually gonna run you somewhere around $500.
I’ve seen the hydro dip paint jobs hold up pretty well too, but again, those were professionally done. Not to mention you can get some pretty awesome looking graphics on your quad. It will definitively turn some heads.
This is not that hard to do, but it will take some time. A lot of sanding, cleaning, and waiting for paint to dry. First, take all the plastics you want to paint off the machine. You can’t do this method with the plastics on the machine, it just won’t work.
Start by cleaning the plastics thoroughly with warm soapy water. This is just to get all the dirt and dust that you can off the plastic. Next sand the plastic with 180 or 200 grit sand paper. You don’t want to press hard enough to create wells in the plastics so be careful.
Over time, ATV plastic exposed to the sun and other elements will get a thin coating on them.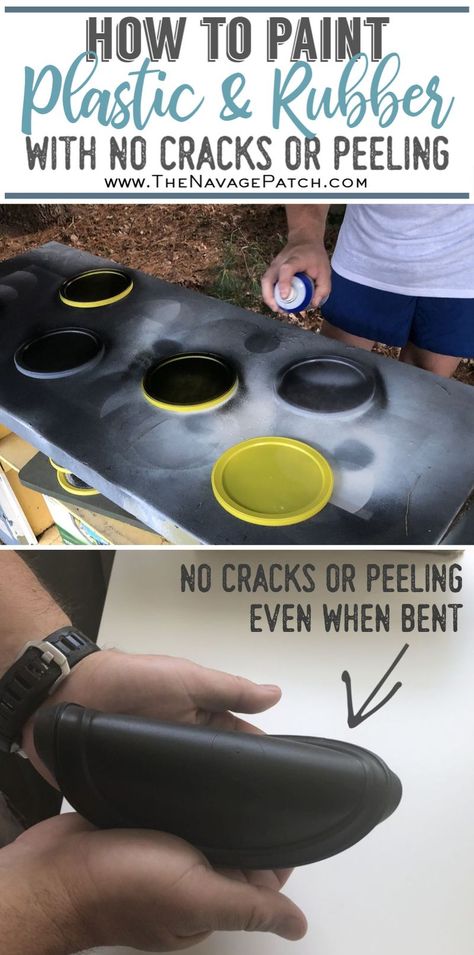 The point of this step is to remove that coating.
Use a scouring pad or scuff pad like they do with burnt on stuff on the dishes. Like a Scotch pad or Brillo pad. Use whatever cleaner you’d like for this step, 90 – 95 percent alcohol works or even carb cleaner if you have any laying around.
Make sure to scrub good this time, not to wear out the plastic but to get a good scrub on all parts of the plastic. This will determine how well the paint sticks to the plastic, it needs to be super clean.
You should sand with 200 grit sand paper again if you notice any spots you missed the first time around before starting with the sandblaster. Use 80 grit aluminum oxide in the sand blaster.
If you don’t have a sand blaster, sand with 400 grit sand paper and scrub again with a cleaner. It’s best to use a sandblaster, but if you can’t, do the best with what you’ve got right?
Get the plastics dry and spray down with a surface cleaner or degreaser of your choosing.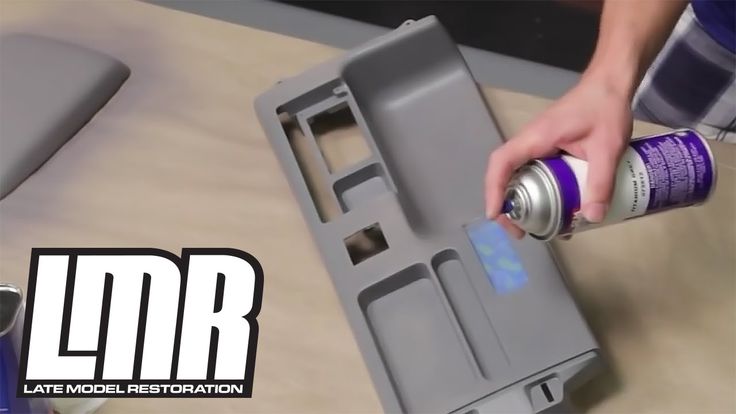 Something like this Panel Prep Surface Cleaner and Degreaser from Amazon will work just fine.
Spray a nice heavy coat of this stuff onto the plastics and give it a minute to work. This will dissolve any contaminants still on the plastics surface that might prevent the paint from sticking. After waiting a minute or so, wipe the cleaner off with a paper towel or rag.
Now apply an adhesion promoter of some kind. This will help keep the paint stuck the plastics for a long time.
It helps keep your paint job durable and prevent chipping and cracking in the future.
I use this Polyvance Plastic Magic from Amazon. It’s an aerosol spray like a can of spray paint and it’s nice and easy to work with. Apply two coats of this, making sure to let it dry completely.
You will need to let the first coat flash before applying the second. You’ll see it sort of change color and it should happen pretty quick.
Now apply a coat of a high build primer of your choice.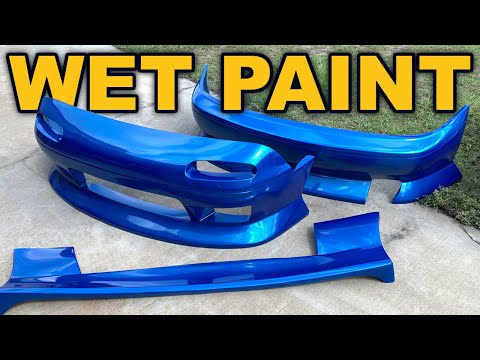 Here’s a link to a 16oz Grey High Build Primer if want to stick to the spray cans.This step is important for filling any scratches left by the sanding or sandblasting steps. Or any existing scratches you had that you want covered.
Wait for the primer to completely dry before continuing. After the primer has dried, sand it down with 320 – 400 grit sand paper. A lot of primers dry with a thin top coating you need to remove. Plus this will smooth out the surface for the next step.
Before applying the flexible sealer, now is a good time to fill any gouges and big scratches with some type of flexible filler like Putty Flex. Let cure and sand down until smooth to match the rest of the plastics.
The flexible sealer is for use over any primed plastic parts. You could skip this step, and a lot of people do because of how expensive the sealers can be. It’s not totally necessary, but will extend the life of your paint job for sure.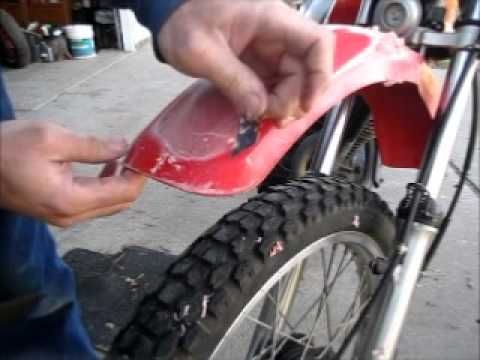
The all season sealer will protect against cracking due to the heat of summer and cold of winter. Here’s a link to a good option if you want to check it out. It’s the All Seasons Waterborne Flexible Bumper Sealer from Amazon.
Let the sealer dry completely before continuing.
Finally, the actual painting step. Use a paint and clear coat of your choice, if you still want to use spray cans the Krylon Fusion for plastic we talked about above will work. When selecting a top coat, make sure there is a flex additive in it or add one yourself.
Let the paint dry between coats and don’t put too much paint on at once. The paint will run and you’ll have to sand down and start over. If you do need to sand down the paint, just sand down to the primer or sealer, I would start with a higher grit like 600 – 800 and drop to 320 if you need to. That way you don’t have to re-do those steps.
That’s it! it’s really not too hard once you get going. It can be time consuming waiting for all the different primers, sealers, and paints to dry though. Just to recap, the quick method works great, just won’t last for years and years. It’s definitely a lot easier though.
If you want your machine looking pristine, go with the professional method. your time and effort will surely show once you’re done.
Sharing is caring!
If you are a motor enthusiast, you must have heard about the concept of ATV plastics. These plastics have been specially designed to give protection both to your ride and you from the rocks and dirt that you will inevitably come across while riding. If you are into colourful graphics, then you can use the ATV plastic to customise your bike so that it starts to look even more professional.
When choosing the perfect ATV for your vehicle, it is essential that you keep the following factors in minds- performance and looks. You can check the specifications before buying to ensure smooth functionality. However, when it comes to the appearance of the ATV plastic, you can go DIY and paint it yourself.
Painting ATV plastics is not as difficult as it sounds. It is fairly easy if you know what to do and how to proceed. Remember, the most important thing you need to do is gather all the tools you might need beforehand. Unless you are well-prepared, it might take a lot of time, and you will end up disliking it. After you, it is your ATV that needs to be made ready for painting.
Contents
Let us help to get through this process with minimum hassle. Just abide by the instructions listed below, and you will breeze through it.
To paint a surface, the first thing to do always is cleaning it thoroughly so that no dust can hamper the paint coat. Once you are finished with that, use a 180 grit sandpaper on the entire surface that will be painted.
These ATV plastics have been out in the open battling natural elements like sunlight and wind for a long time which leads them to develop a thin layer or crust on the surface. Sanding will help you remove this unwanted crust so you can move on to the next step. Don’t go soft because you need to get rid of every last particle. When clean your ATV, you also can using best motorcycle oil to fill oil to your vehicle.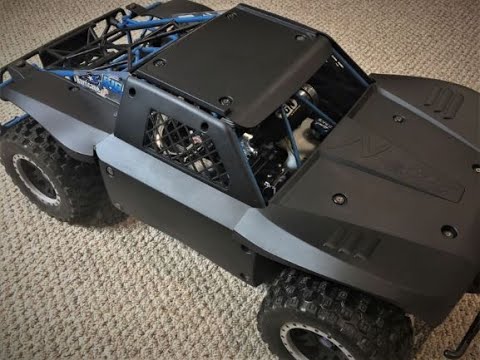
Once you are done sanding, it is time to remove all water-soluble contaminants from the surface that is to be painted. Use a scuff pad and a solution of your preference to do this. This step is also helpful in eliminating any contaminant that might have seeped into the plastic during the previous step.
We cannot stress it enough that unless the surface is squeaky clean, the paint will either not settle or it will lose the texture and gloss. If you want to make your efforts count, pay particular attention to these first few steps.
It never hurts to be a little extra careful or take some precautions. You can repeat the sanding process with 180 grit sandpaper once more just in case you missed any spot the first time around. This is optional, but it is best if you do it anyway.
Once you are finished with the tedious cleaning, you can go directly to the next important step. Sandblast the ATV plastic, and make sure that you cover the entire surface that you want to paint, with 80 grit aluminium oxide. Sand is a very effective cleaner, and with this step, you will be one step closer to finally applying paint. However, hold your horses a little while longer because we are yet to do some more cleaning.
Use a plastic cleaner to complete the cleaning process. You can choose the brand based on your market research. They are available as sprays which are really easy to use. All you have to do is spray a heavy coat and then wait till the solvents manage to dissolve all contaminants. Give it twenty minutes to do its job and then wipe the coat off using a clean paper towel.
Now you have to apply two heavy coats of any industry-level adhesive on the surface of the plastic. Do not double-coat without letting the first coat flash off first. Before you go on to the next step, make sure that the adhesive has dried off completely.
Since we are now getting ready to paint the ATV surface finally, we need to layer and texture it properly. Use the waterborne primer surfacer to slather the surface completely. Due to the high build, you won’t have to worry about any scratches. However, the first thing that you need to look at is to leave the primer to dry.
Since you will have to use high-build primer surfacer, you need to make an extra effort if you want that perfect finish. In other words, you have to sand the entire surface till it is absolutely smooth. Use a 320 grit paper for maximum effect.
Now it is time to cover up any imperfections that may have already been there or which were caused by our rigorous cleaning. Use the best finishing glaze that you can find to cover up these spots. Find one that has a lower viscosity if you want a smooth flow.
Give the finishing glaze some time to settle down and then use sandpaper to smoothen the surface out. After you paint, even the smallest undulations will be noticeable. So sand it well.
Now it is time for the one final step before you start off with a paint brush. Apply a freeze-tolerant waterborne bumper sealer on the surface that will now be painted.
Wait till the sealer dries before you start applying the paint. Do not forget to double layer it- a basecoat and a clear coat are enough. Use a flex additive on the topcoat. Flex additives help in better adhesion of paint to plastic surfaces.
Your ATV plastic is now fully painted and all ready for use! There may be a lot of steps but at the end, it will be well worth your time.
Posted by Ronald Bounds
in VEHICLES
My name is Ronald D. Bounds, founder and editor in chief here at The Rider Base. We are enthusiastic about speed and travel. This website is built to share the information for rider. We help you to choose motorcycle accessories for yourself without much time.
KidsAuto7 thank you very much for a wonderful car! The car is super, the kid is very happy, does not get off it! Thanks again - we will recommend to our neighbors to ride together)))
Anna Stepanova
We would like to express our deep gratitude for your online store!!! We ordered Mercedes, the order was completed on time, the quality is good, it does not take up much space, and it is suitable for the street and for the apartment. Great machine! Both we and the child are delighted! Once again, thank you very much. Good luck to you!!!
Elena Egorova
We bought a car and were very satisfied. The child does not roll, we are not overjoyed: the doors open, the music plays loud and clear, it drives silently, it starts from the button and, most importantly, the control panel for parents in general happiness, there is no limit, thank you very much !!!!
Inna Sergeevna
Hello everyone! And we will leave our positive feedback about KidsAuto7.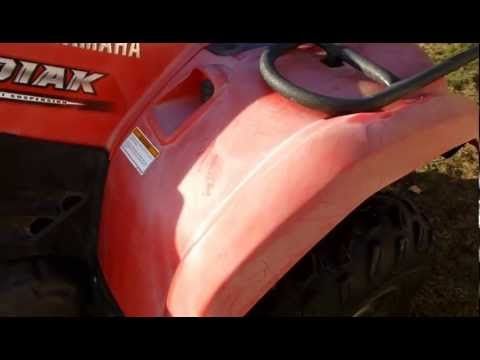 We ordered a Gelik machine, we were worried about 100% payment. My worries turned out to be in vain. The car arrived on time. There was no limit to the delight of the baby, but what is there, we parents ourselves jumped for joy from such a work. In general, everything is just super!!!
Ivan Vasin
Today they became the happy owners of a miracle car))). The child is delighted! And of course we are happy! The machine is very high quality and beautiful. Service is top notch. There were experiences for prepayment, but after reading the reviews here and in the group in contact, they immediately paid! The price is cheaper than in stores. Thank you very much! We will definitely recommend you to friends and in the future we will order only from you)
Natalya Zerkacheva
We bought a car for our daughter like her father, now she will learn from this one. It’s very easy to learn, everything looks like in the real one, then it will transfer to dad’s. Thank you very much for this wonderful car! Everyone was satisfied! We only have to hang the numbers on her, we really like the fact that she herself can manage and I can help her from the remote control. Ride with the wind and have fun! Thank you!
Ekaterina Virova
Excellent children's electric car. A very good quality. Cars are real. The son was pleased. I advise everyone!
Irina Ivanova
Thank you for your help in choosing! The electric car is super, the quality is 100%, the delivery is very fast! I recommend this store!
Yulia Romanova
Everything is fine!!! We chose a Mercedes electric car. Arrived quickly, complete set. I will recommend you!
Ilya Yusupov
We bought a motorcycle for 13000 rubles. Very user-friendly site plus the help of the manager. The child is happy!
Vika Alekseeva
I bought a Children's Electric Car Ford Ranger F650 for my grandchildren. Liked the look and all-wheel drive. Plus, the hood and trunk open. Price arranged. The order was taken quickly. Delivered as agreed Helped to raise to the floor I recommend this store to everyone!
Evgenia Ivanovna
We were pleasantly surprised by the large selection of children's electric cars available.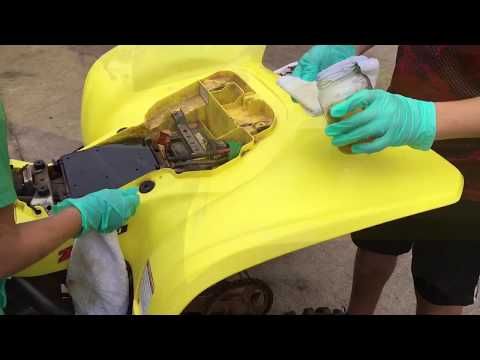 Pleased with the low price.
Marina Aromova
It took a long time to decide what to give the child for the New Year, so that he would like the gift. We looked for a lot of places, but there were ordinary toys. We found this store online and we love it. As a result, we bought an electric four-wheel drive Buggy. The child was overjoyed!
Alexander Perov
Excellent store, huge selection, I advise everyone, you will not regret it. Thank you for the joy for our young driver!
Alena Repina
Our order was sent quickly. Very convenient payment methods. In a short time delivered to the terminal TK. I recommend!
Maxim Yurievich
High quality of service and quality of goods. Neighbors advertised))
Maria Pushilina
Large selection. Convenient site. The prices are real. In the presence of real pieces of 100 children's electric cars!
Denis Igorevich
Prompt delivery. They helped with the choice. The assembly of the electric car took no more than 30 minutes.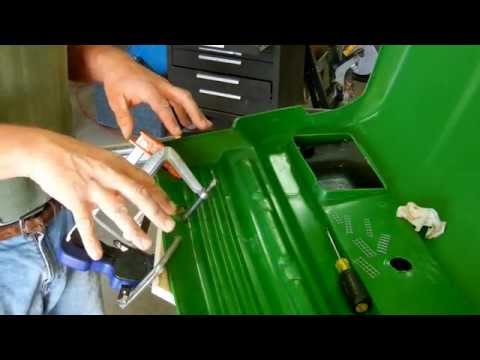 Everything is intuitive. The machine itself is very beautiful and everything suits me in terms of quality. Thanks for helping me choose!
Ksenia Vasilievna
The process of coloring plastic from an aerosol can has its own characteristics. First of all, they relate to the choice of materials and surface preparation. Let's go through the process step by step.
It is almost impossible to paint products made of polyethylene, Teflon, silicone and polypropylene - the paint simply does not adhere to them or is very weak. Other plastics can usually be dyed. But keep in mind that there are tens of thousands of different plastics, and some of them may surprise you. Therefore, if you are dealing with some material for the first time, it is best to test stain on a small area.
If possible, if the plastic is sufficiently hard, it is better to mat the surface with a special abrasive sponge.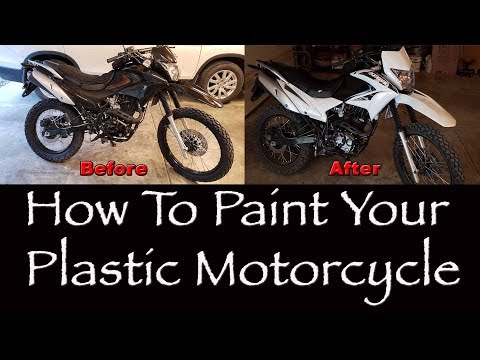 Adhesion to a matte surface will always be higher than to a glossy one. The choice of primer depends on the type of enamel that is supposed to be applied to the plastic and on the condition of the surface.
If you plan to use Acrylic Enamel or Primer Enamel, you can do without the use of Adhesion Activator KU-6000 - acrylic materials have good adhesion to plastics and high elasticity. But the use of the Adhesion Activator will not spoil the situation, but will only further improve it. The activator is applied in one thin layer.
If alkyd enamels are to be used, the use of Adhesion Activator KU-6000 becomes mandatory. Without it, the adhesion of alkyd materials to plastic will be low. In addition, alkyd enamels are less elastic, so it is recommended to cover plastic with them only in case of emergency. For example, when high solvent and abrasion resistance is required.
If the surface has minor scratches or other shallow damage, apply KU-220X Acrylic Filler Primer or KU-210X Universal Acrylic Primer in a sufficiently thick layer.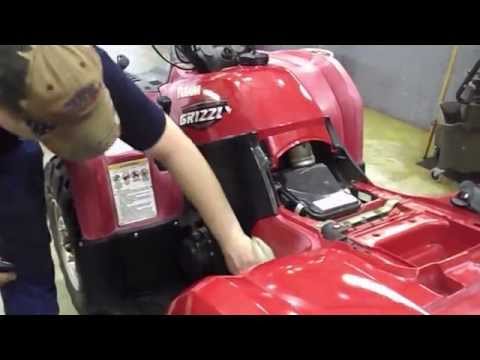 After drying, the filler primer should be sanded with fine sandpaper.
Plastic surfaces can be painted with acrylic, alkyd and cellulose ether (metallic car base) enamels. But first, you need to pay attention to the primer-enamel for KU-60XX plastic. As the name implies, it can be used both as a primer and as a top coat. It can be applied directly to plastic (it can also be applied to the Adhesion Activator and acrylic primer) in several layers. And that's it, a matte finish corresponding to one of the RAL colors is ready. But if there is no suitable color in the priming-enamel palette, you can apply the enamel that you like the most on top of it.
Acrylic materials are best suited for applying to plastic: universal quick-drying high-gloss and matte RAL KU-AXXXX enamel and silk-mat SATIN RAL enamel.
Acrylic metallics SILVER GRAIN FINISH, REFLECTIVE FINISH, MIRROR FINISH, although they differ in the type of pigment (more about the types of pigments here), are applied only to pre-primed surfaces.