Changing a bike tire might not seem like an especially important life skill, but if you ride a bike in any capacity, it’s a skill you should learn. No one ever plans on having their ride interrupted with a flat tire, but flat tires are one of those annoyances that every rider has the displeasure of experiencing at one point or another. By thinking ahead and taking some time to learn how to change a flat, the hassle of having to change a tire remains just that: an annoying interruption, but not the end of your ride.
If you want to successfully change your bike tire, then before even learning the “how” of it, you first need to know and collect the “what.”
In other words, you need to be prepared, which means having a fix-a-flat kit that you take with you on each ride. At the very least, you should include the basic materials required to effectively fix your flat; what you’ll need will depend on whether you’re riding tubeless or tubed.
Putting together a fix-a-flat kit might seem like an afterthought, but having one on hand might be the difference between a minor disruption to a ride and a major aggravation. If you end up with a flat, remember - always find a safe place, away from traffic and other possible dangers, before working on your bike.
The first step in changing a flat tire might seem obvious, but here it goes: remove the wheel.
If your tires are tubeless and you have a tubeless repair kit, then you might be able to skip this step. If the damage to the tire is a simple puncture, you can just plug it without taking the wheel off. However, if you find that the damage to the tire is extensive enough to where plugging it won’t resolve the issue, then the wheel will need to be removed. To remove the wheel from your bike, start by flipping it upside down.
Pro tip: You might find it easier to work on your bike when it’s upside-down. When flipping your bike, remove the computer from the handlebars to avoid scratching it.
Removing the rear wheel might seem intimidating at first, particularly when you realize that the chain and derailleur are located in the rear. However, the process of removing the back wheel isn’t much more difficult than removing the front, especially if you take your time. To begin, first shift the bike into the smallest sprocket, creating slack in the chain for easier wheel removal and installation. Raise the bike by the saddle and while pedaling with your hand, use the right shift lever to shift gears. Repeat this, using the left shift lever, so that the chain ends up on the smallest chainring in the front as well.
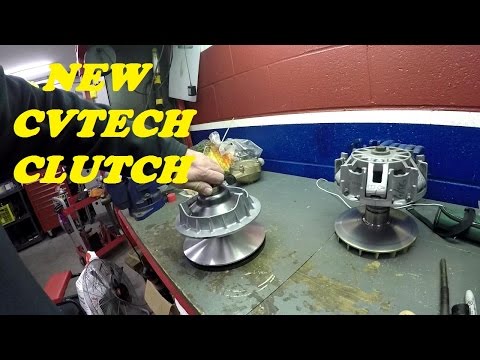
While typical wheel removal requires that you open the brake if you’re addressing a flat tire, then it’s likely that the tire has already lost enough air so that it slides out easily. If your bike is equipped with disc brakes, then you’re in luck because the wheels can be removed without touching the brakes. Quick releases that hold the wheel in place are especially common. To loosen the wheel via quick release, pull - do not twist - the lever out and away from the frame until it is completely open. You should be able to remove the wheel with ease by carefully lifting the bike by its saddle and letting the wheel fall out. If it doesn’t fall on its own, hitting it with the palm of your hand gently should be enough to make it drop. If it still doesn’t come out, then check to make sure the chain and derailleur aren’t stopping it. If they are, lift your bike by its saddle and, while holding it up, reach around with your other hand to pull back the derailleur and consequently, the chain. Some derailleurs are equipped with a clutch, requiring that you release the clutch and then remove the axle. Push the derailleur cage towards the crank and let the wheel drop. At no point should you find yourself trying to force anything to move.
Once the wheel has been removed, it’s time to address the tire itself.
Standard tires are designed with an inner tube, which is inflated with air. While relatively inexpensive to replace, making them a popular option, tubes can be punctured or pinched flat relatively easily. Tubeless tires don’t have an inner tube and are instead equipped with an airtight rim that the tire snuggly rests in.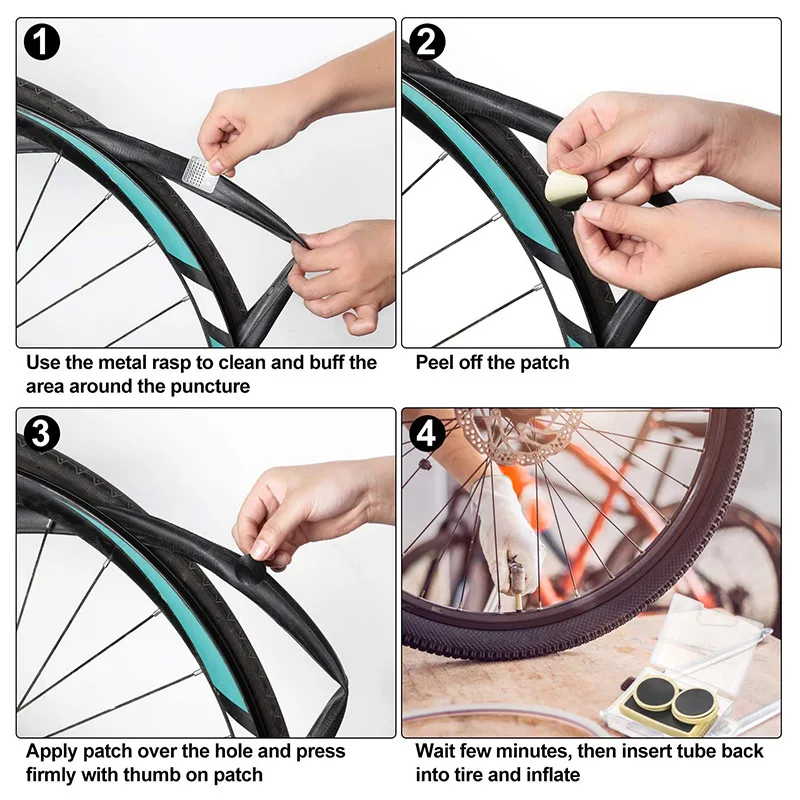
If you’re running tube, then you’ll need to remove it; if you’re running tubeless, you’ll need to patch it with a tire plug. Tire plug kits are sold at most reputable bike shops and consist of a strips of rubber and an insertion device, requiring no other equipment or changing out hardware. Most tubed tires can be converted to tubeless.
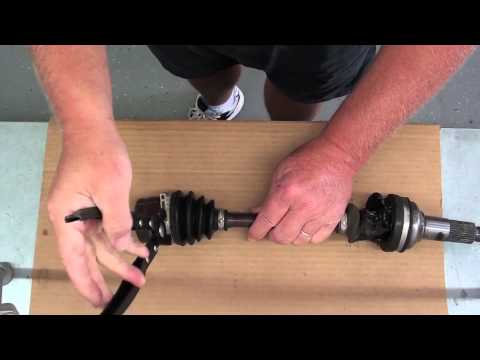
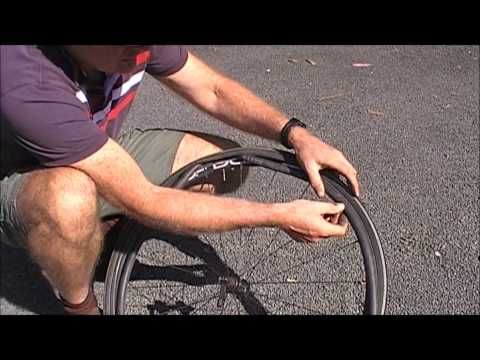
To remove the tire, you’ll need to use your tire levers. To do so, insert the flat end of the lever under the bead. Place a second lever under the bead and move along the rim until the tire is off. In most situations, you can reinstall the replacement or a patched tube without completely removing the tire. By breaking the bead on just one side, you will save a lot of time and greatly simplify the process.
While many would recommend you run your finger along the tire to search for the culprit of your flat, doing so could also result in you having to do some patchwork on your finger, too. If whatever punctured your tire is still there and it’s capable of piercing a bike tire, then your finger stands no chance against it.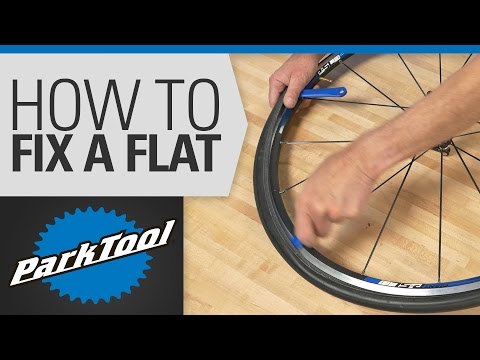 Before doing a hands-on analysis of the problem, visually inspect the tire, both inside and out, first. It might take longer, but you’ll be able to avoid a finger cut and maybe even a tetanus shot. You can also pack cotton pads or use something else to create a barrier between your finger and the sharp object that it might encounter, but there’s still a risk of injury . Tire levers are used for the removal of tires, but you can also run one along the tire for inspection purposes if you prefer playing it safe.
If both the visual and tactile inspections fail, reinflate the tire to see if you can hear the air leaking out of the puncture point. If you find only one puncture hole, then you’re most likely looking at road debris as being the culprit. Depending on the location and manner in which your tire has been punctured, a pointed tool, such as a screwdriver, can be used to push out the object in question before it works itself inward and creates additional punctures. If you see two holes next to each other, then it’s likely that you’re dealing with a pinch-flat, which means your flat wasn’t caused by road or trail debris; it was caused when the tube got itself pinched between the tire and rim.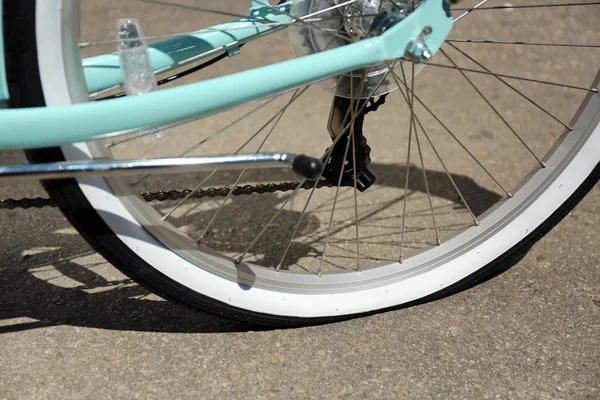
Patching tubes is an excellent option for anyone who prefers pinching a few pennies, going green by reusing, or being resourceful when there are no more spares. Patch kits are available exactly for this purpose and come with everything you need need in order to get the job done. Patch kits also happen to be very compact so they are a perfect backup, even if you prefer to replace the tube outright.
If patching is your thing, then you’ll want to start by cleaning the affected area and then roughing the surface with an emery cloth or sandpaper. Kits come with two kinds of patches: glueless and those required glue. If your kit has glueless patches, then it’s basically like putting on a bandaid: peel off the backing, place it over the hole, and press with firm pressure. If your patches require glue, then simply add a thin layer of glue to both the tube and the patch. Once the glue has reached a tacky consistency, place the patch and press firmly until you’re sure it’s solidly in place.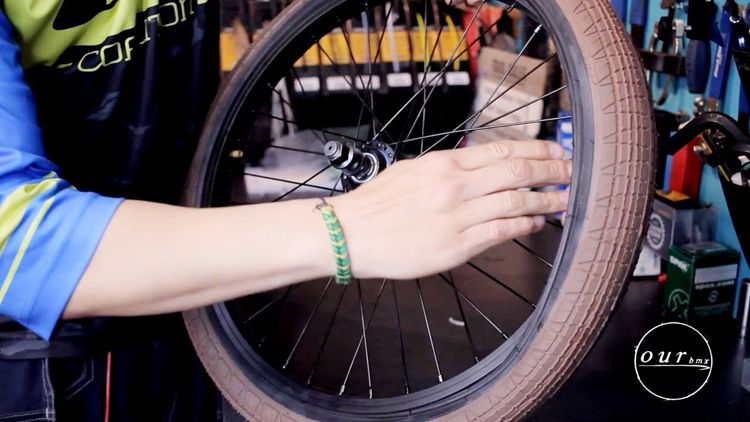
There are some flats that are simply too severe to patch. In those circumstances, you’ll need to skip this step and simply install a new tube.
To install your tube, you’ll start by using your pump to inflate it just enough so that it obtains its form, making it easier for installation and reducing your chances of suffering a pinch-flat. Starting with the valve stem, put the tube on the rim and insert the stem straight through the valve hole. Carefully work the tire back onto the rim by rolling the bead away from yourself using your hands, not a lever; levers increase the likelihood of accidentally puncturing the replacement tube. Upon reaching the valve stem, wrap sides of the tire bead low into the rim and push up on the stem to get the tube into the tire.
Pro tip: if you align the branding on the tire with the stem, you’ll be able to locate the stem much quicker next time.
To avoid having to deal with another flat, it’s important that you take extra care to ensure that the tire bead isn’t pinching the tube.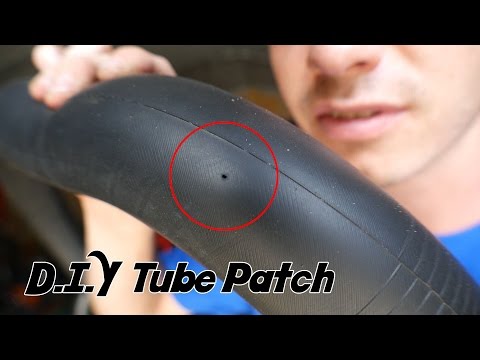 Do this by grabbing the tire with both hands and "massaging" and twisting it side-to-side as you work around the rim. This will ensure that the tube is positioned correctly inside the tire, away from the bead that can pinch it.
Now is when you find out whether or not your efforts paid off; it’s time to inflate your tire. To do this, you can use either a CO2 cartridge, a minipump, or both. Each method of inflation has its pros and cons, so ultimately, choose what’s most comfortable for you. If possible, equip yourself with both.
CO2 cartridges are highly effective, especially when your goal is to inflate to higher pressures, but they are a one shot deal, so there’s no reusing them. It’s a good idea to practice tire inflation at home using a CO2 cartridge to ensure that when the inevitable occurs, you don’t blow out your tube or waste the cartridge, and get left stranded. The key to using a CO2 cartridge is to ensure that the inflator is properly connected to the valve stem.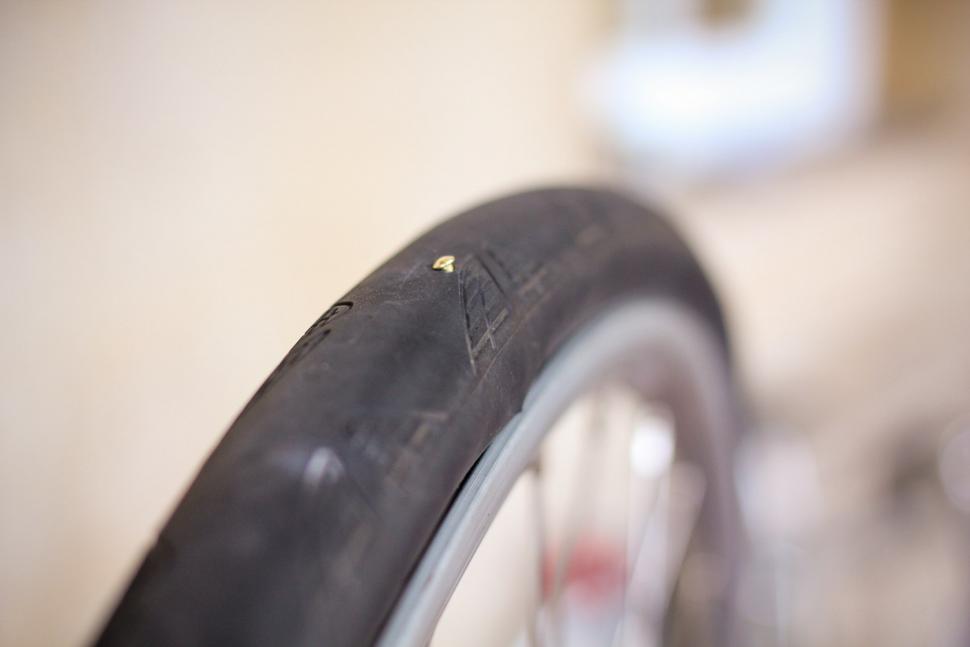
Having a minipump in your arsenal is highly recommended so that you always have a backup method for tire inflation, even if it’s not as easy to use as CO2 cartridge. Having a pump with a hose is also strongly suggested because it allows you to push the pump against the ground for better leverage, allowing you to accomplish higher pressures; pumps that attach directly to the valve stem don’t offer this advantage and might cause damage to the valve stem or even the rim when used improperly. Combination mini pump/CO2 inflators are also available.
As you’re inflating to your desired PSI, double and triple check the bead so that you’re sure it’s sitting in the rim correctly. Only after you’re certain that everything is in its proper place should you reattach your wheel.
Last but not least, it’s time to install the wheel. The processes of replacing the front and back wheels vary a bit, but neither is especially harder than the other, as long as you know how to effectively get the job done.
To attach the front wheel, first line up the fork dropouts with the axle of the wheel and gently lower the fork onto the axle. Carefully push down on the handlebar to check for the proper placement of the axle in the dropouts. It’s important to be mindful that the quick release or thru-axle lever is on the opposite side of the drivetrain and not touching the frame. Hold the quick release lever in place as you tighten the bolt. If you find that the lever closes too easily or ends up making contact with the frame, just open the lever and tighten the bolt a bit more. Be careful that you don’t over tighten the bolt, as it should be tightened just enough to allow you to use firm pressure when closing the quick lever. If your bike is equipped with rim brakes, don’t forget to reconnect, adjust, and check them for functionality.
If your flat occurred on the rear wheel, then lay the top of the chain around the smallest cog on the cassette and make sure the frame dropouts line up with the axle. As you gently push the wheel back into the frame, take care to also pull the derailleur down and back so that it doesn’t get in the way. In the event that the wheel doesn’t go in easily, remove it and try again. If you’re sure that the wheel properly placed, then it’s time to close the quick release (and rim brakes if applicable) or insert the thru-axle into the frame and hub and thread it shut. The final test in determining whether your bike is ready to continue its journey is by lifting the rear wheel and spinning the cranks. If it runs smoothly, then you know you’re good to go.
Flat tires are already unplanned and unexpected; planning ahead by prepping a fix-a-flat kit and learning how to change your tire can ease your mind for such unfortunate circumstances, but what do you do when even fixing your flat doesn’t go as planned? Read on for some quick, easy solutions when even flat tires don’t go your way.
Small, unfixable punctures.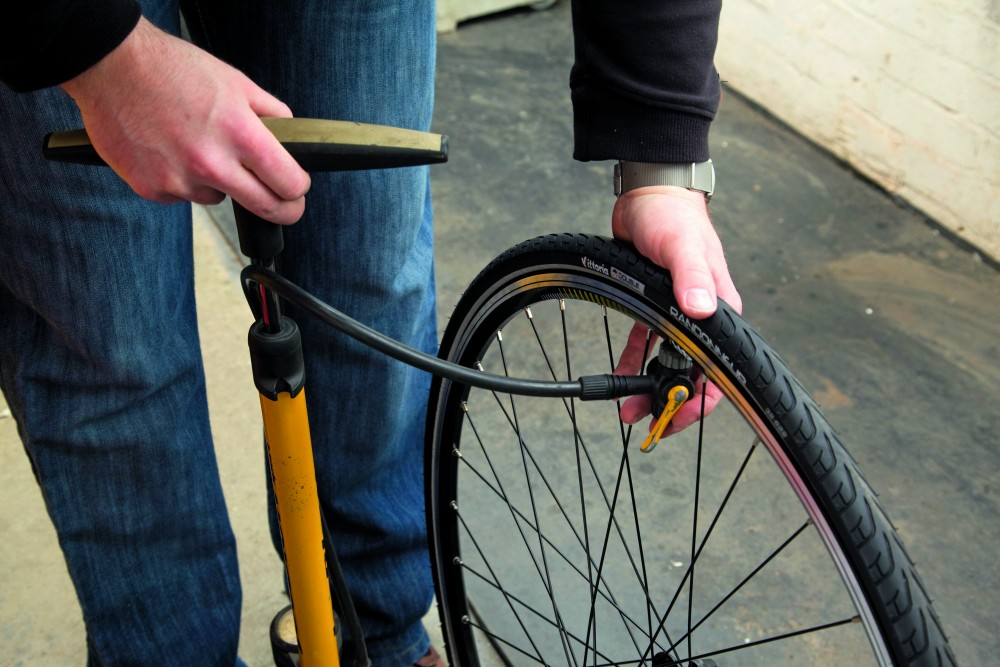 Super glue is already a life-saver in so many situations, so why should cycling prove to be any different? Super glue is a great quick fix for smaller punctures that might not be fixable otherwise, albeit temporary.
Large, unfixable punctures. If you find that you end up with a hole that’s simply too big to repair, then it’s time to resort to some out-of-the-box thinking. Cut out the damaged innertube section and tie the two ends together. It’ll be obvious to you that it’s not a perfect solution, but you should at least be able to reach about 50 psi, which is certainly enough until you can better resolve your tire situation.
Unfixable tire and sidewall gashes. In the event that your tire or the sidewall of your tire ends up sliced or gashed beyond standard repair, don’t despair; make a boot instead. Using a dollar bill, old gel wrapper, or piece of duct tape to cover the hole from the inside is a quick, easy way to resolve your emergency until you get home. It might not be ideal, but it should suffice until a more permanent resolution can be made.
Learning the skill of bike tire repair can be thought of as a form of insurance: you might not want it and you might never use it, but if ever find yourself in a situation where you need it, you’ll be glad it’s there. The folks at Velosurance are all cyclists and understand that it’s only a matter of time before an unfortunate circumstance arises. From gap medical to liability, vehicle contact protection to even roadside assistance - for when you’ve got a flat and are fresh out of options - Velosurance offers a highly customizable policy to provide coverage for nearly any cycling associate risk. Whatever your needs, chances are, there’s a policy for you.
Anyone who has been riding bikes for a while can tell you that sooner or later, you’re going to get a flat. Even with tube sealant that prevents flat tires for up to two years, it’s just an unavoidable occurrence. When flats occur, the best thing you can do is be educated and prepared to patch the tube so that you can quickly get back on the road. Let's get started:
Consider these different flat tire scenarios: The at-home repair scenario where you're walking your bike into the garage and notice that the back wheel is sagging a little bit—you have a flat. Or, the on-the-trail repair scenario where 20 miles into a 50 mile ride, you go down hard on a rock and get a nasty pinch flat.
We’re going to walk you through some of the materials you’ll need for either situation, and then how to use them for both. Here’s a list of some things you will need to repair your tube.
Follow these 4 easy steps to patch your bicycle tube and repair your flat.
Step 1. Remove Your Tire
Take your tire lever and hook it around the outer edge of the tire (the bead) to get it off of the rim. Once you have the tire lever under the tire rubber, hook the other end of your tire lever around one of your spokes to keep the tire elevated.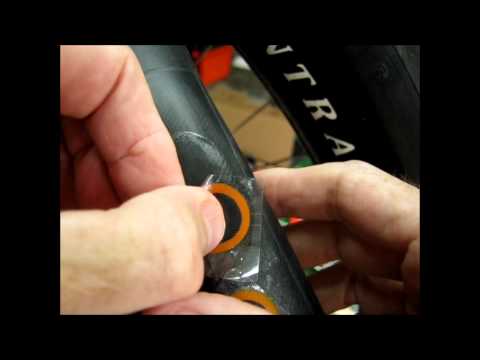 With a second tire lever, work your way around the rim, taking the tire out of the bead until one side has been completely removed from the rim.
Step 2. Find the Leak
If the puncture or gash in your tube is not easily apparent, you’re going to need to fill the tube back up to locate where the air is escaping from. There are a couple of different ways to find the leak. The layman’s way would just be to run your hand along the tube and try to feel it out.
The bucket of water method that we mentioned earlier, however, is a more accurate way. If you’re at home, fill your sink or a large bucket full of water and submerge each end of the tube. Watch for air bubbles escaping from your tire to locate your problem area.
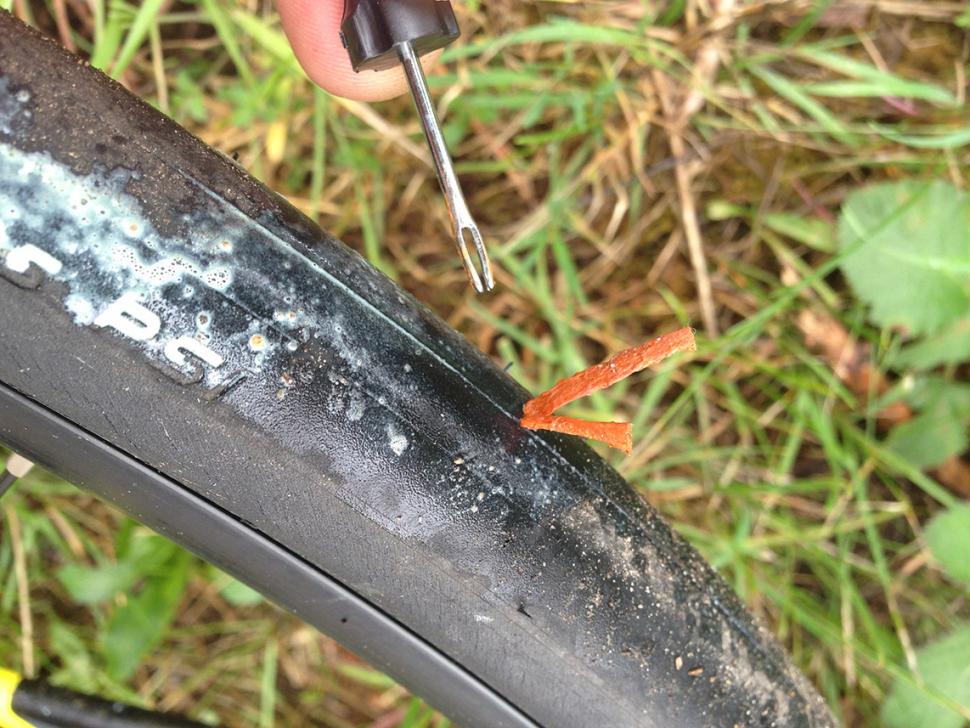
Make sure you submerge each side, as there may be more than one puncture. Be sure to check the inside of the tire to make sure that the puncture-causing object has been removed. Once located, mark that spot with your tire marking chalk.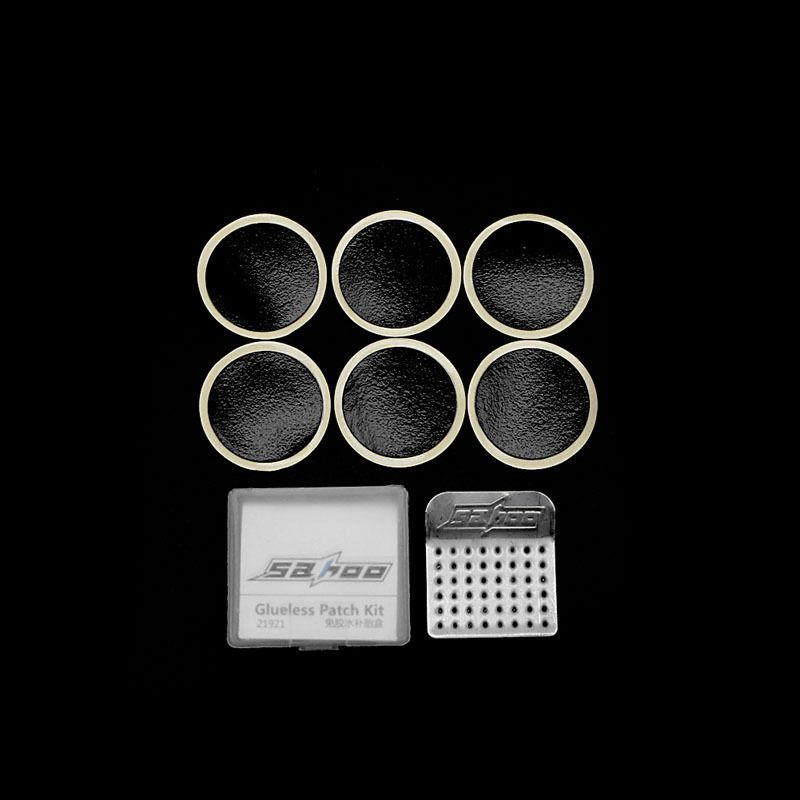
Step 3. Patch the Hole
When patching the hole in your bicycle tube, make sure that the area around the puncture is clean so that the patch will stick. Using the scuffer from your patch kit (sand paper or emery paper will also do the trick), rough up the area around the puncture so that your adhesives have something to grip.
If your patches don’t require glue, simply press them firmly over the hole. For patches that do need glue, add a layer of glue and spread it evenly around the area. Wait for the glue to get a little tacky, and then press on your patch. If you have the materials available to you at home, some cyclists will sprinkle talcum powder on top of the patch so that that patch/adhesive doesn’t stick to the inside of the tire.
Step 4. Put It All Back Together
Put a little air into your tube and then put it back in the tire, making sure, again, that there are no foreign objects remaining in the tire. Be sure to insert the tube and tire back into the rim using only your hands, as the tire levers may pinch the tube and cause another flat (we certainly don’t want that after all your hard work).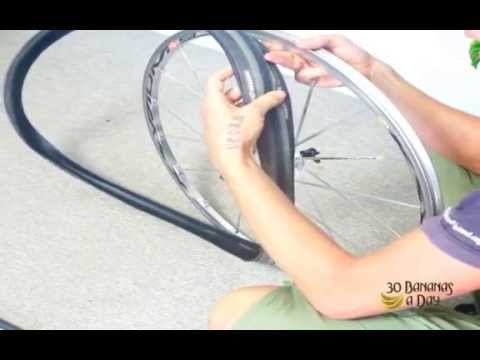
Once you’ve pushed the tire back in and the valve stem is securely inside the tire, inflate your tube back to maximum pressure, being sure to check the tire one more time to make sure that the bead is installed snugly. Ready to ride!
content
To apply bicycle patches, first use vulcanizing adhesive to seal the gap. Make sure you apply enough and wait a few minutes for the glue to dry. Position the patch so that it is fully attached to the tube.
patch tire
The critical decision after applying the mortar is to let the area dry for at least one or two hours, especially if it is hot and humid, because if we let it dry for just a few minutes and apply a patch, it will most likely dry. take longer or finish peeling early.
How much does it cost to fix a flat tire? While you might think that puncture repair can be expensive, it is actually one of the cheapest auto repair services. The price usually ranges from 6 to 20 euros, although they are usually around 10 euros.
What are vulcanized plasters? If there is a small puncture or superficial cut that does not compromise the safety of the wheel and therefore the vehicle, a vulcanized patch can be used, a method that is more durable and cheaper than a complete wheel replacement.
iron on fabric
Place patch with sticky side down and apply hot iron to fabric, pressing for approx.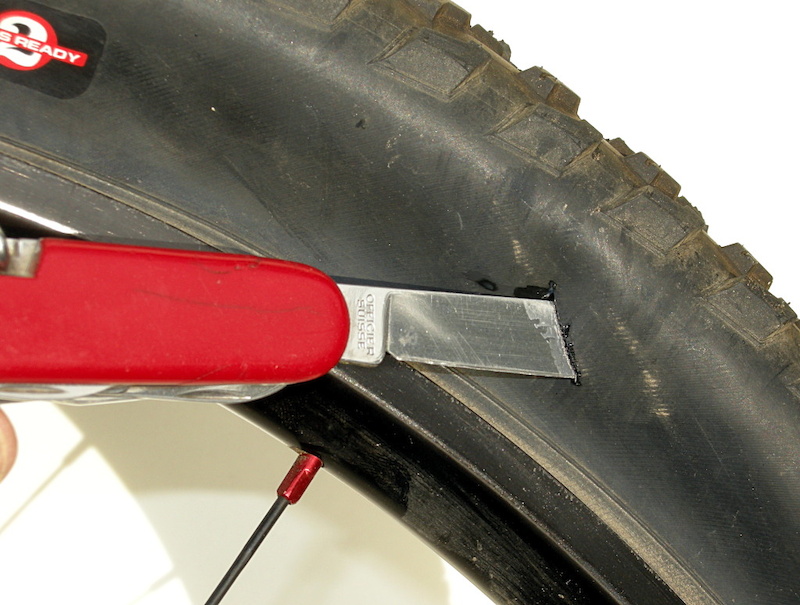 30 seconds to ensure adhesive adheres to fabric.
These are adhesives based on phenolic resins. These adhesives instantly react to interaction with the surrounding air and dry quickly.
How long does it take to repair a tire? The process lasts “between 2 and 15 minutes,” the operator says, “depending on the shape and condition of the -N rim. de la R.: those with more nooks and crannies are more expensive to clean-“.
The cost of tire repair depends largely on the type of damage. A punctured tire can be easily repaired with a vulcanizer and will cost no more than 200 pesos.
If the rim has deep damage, lack of material, warping, cracks, damage to the inner spokes, etc.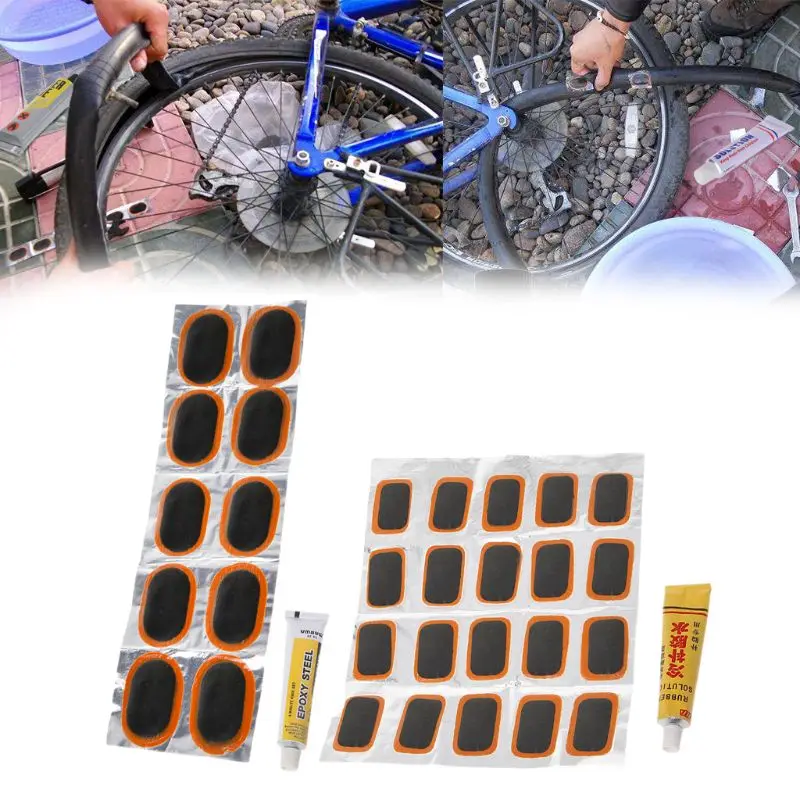 , it is not recommended to repair it, as the repair can be done from the outside, but there may be internal damage and cracks that can lead to worst case rim…
The answer is simple. It's just a matter of physics. Bicycle tire pressure is reduced due to the composition of the air containing nitrogen and oxygen. Be aware that a flat tire is not always synonymous with a puncture.
The regulation states that tire repairs must be carried out within the central three-quarters of the drawing, called the “small repair area”. It is also not allowed to repair the tire if the puncture is equal to or greater than 6 mm in diameter.
Be aware that tires can lose air due to differential pressure, this effect is called the permeation process and affects all tires, regardless of type or application, since the joints that make up the tire are not completely sealed, and their porosity allows .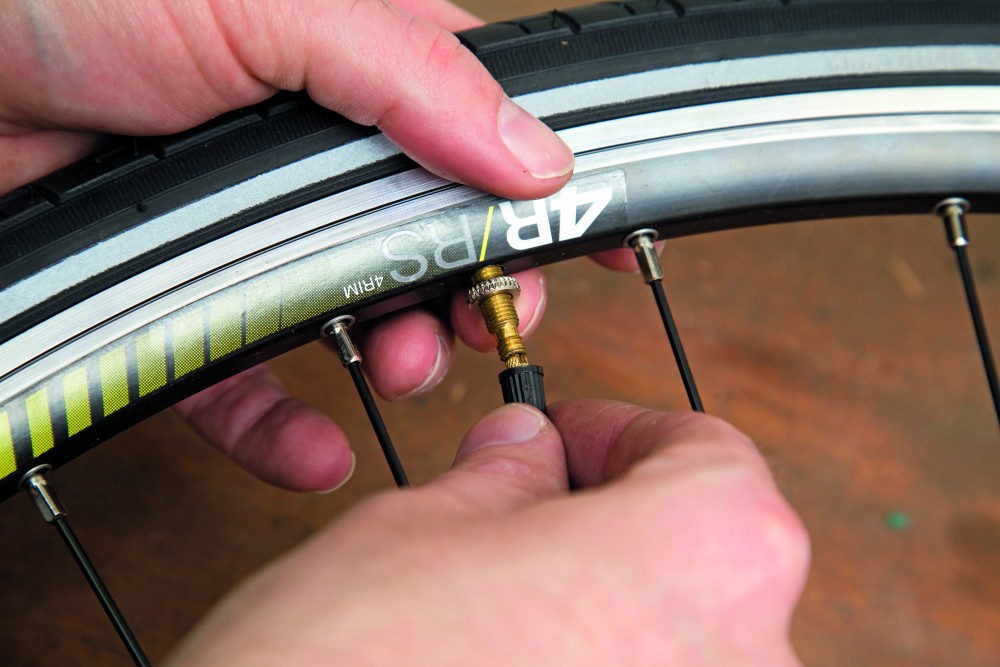 ..
..
Patch: This is the most common method recommended by professionals because it is a quality solution. After examining the tire, the specialist puts a mushroom-shaped patch on the inside of it, which hermetically closes the cut.
Tire curing consists of heating the rubber and sulfur on the surface of the tire and applying pressure to either install a new tread band or repair tire damage.
PRP Tire Repair Patch
This repair method is one of the most recommended as the patch has a pin that fits into the puncture and a base that seals the inside of the tire, all reinforced with a special adhesive.
Apply the patch on the garment step by step
Set the iron to 110º without steam.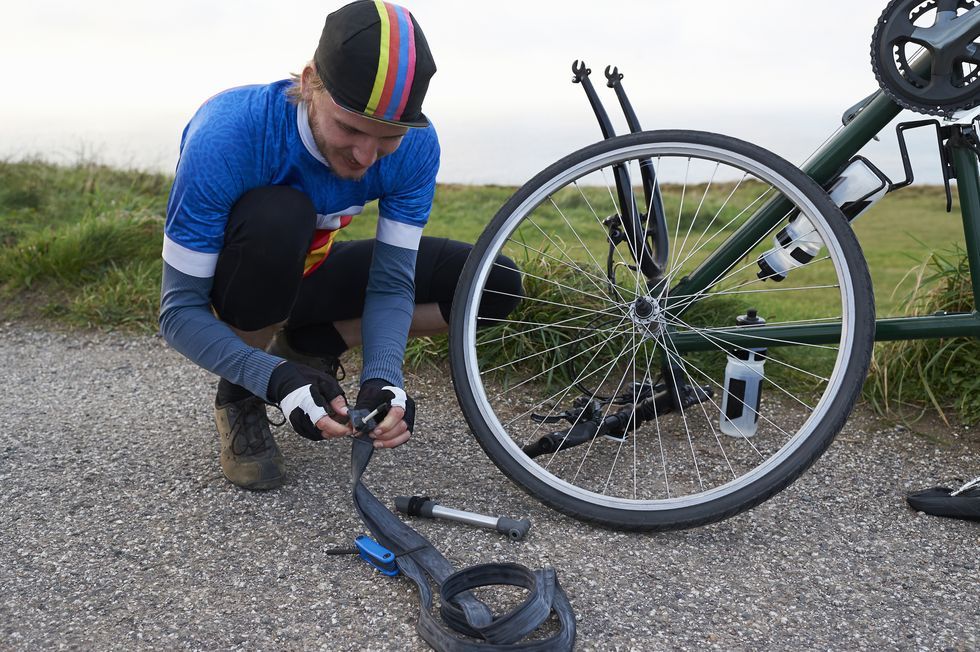 Lay a white cotton cloth over the patch and apply the iron for 20-30 seconds. Move on to small heat strokes until the entire patch is stuck. Make sure it is well glued and the edges are not raised.
Stick the patch to your clothing: peel off the backing paper and place the patch where you want to stick it. Iron on clothes at 140ºC for 15 seconds. And your clothes with a patch are ready.
The best adhesives for this type of plastic are polymer adhesive, epoxy or epoxy adhesive, binder, superglue and cyanoacrylate, also known as instant or cyanoglue.
What is the strongest adhesive? In terms of tensile strength, the strongest adhesives are epoxy adhesives, especially one-component heat-curing epoxy adhesives. With a tensile strength of 35-41 N/mm² (5100-6000 psi).
How to Make Organic Homemade Glue
Place sugar and flour in a saucepan with a little water.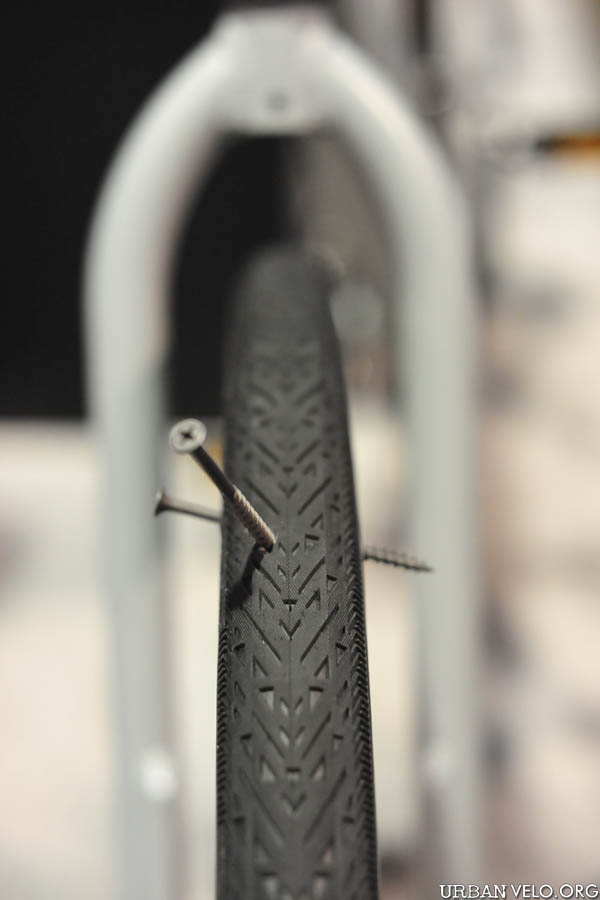 Cook over medium heat until a thick mixture forms. Add vinegar and let it cool. Place it in a reusable glass container and refrigerate to keep it cold.
m. Plaster [= a piece of cloth, paper, leather, etc., which is stuck to something, usually to cover an opening, or a piece of cloth or other similar material containing medicine, and applied to a certain part of the body ].
In fact, continuing to drive on a flat tire means inexorably damaging the tire itself, which can be repaired at little cost. But that's not all: in addition to rubber, after a short time, the rim, on which the weight of the car will be unloaded, will also be damaged.
Driving with a flat tire. Drive slower. Avoid driving faster than 24 to 32 mph (15 to 20 km/h) with a flat tire. You can cause irreparable damage to the metal wheel under the tire and even lose control of your vehicle.
If a tire explodes while driving, you will lose control of the vehicle to a greater or lesser degree depending on the speed you are driving. Therefore, you must hold the steering wheel firmly and keep the car straight until you stop in a safe place.
The average salary for a vulcanizer in Mexico is $72,000 per year or $48,000 per hour. Entry level positions start at 9$8,663 per year while more experienced professionals earn up to $8,663 per year.
Llantero's average national salary in Mexico is MXN 6,101.
Leveling is the process of adjusting the steering, suspension and tires of a vehicle, while balancing is the adjustment of the vehicle's balance of forces to prevent vibration and bouncing when making any turns.
A good way to assess their condition is to lift the tires and look down at them.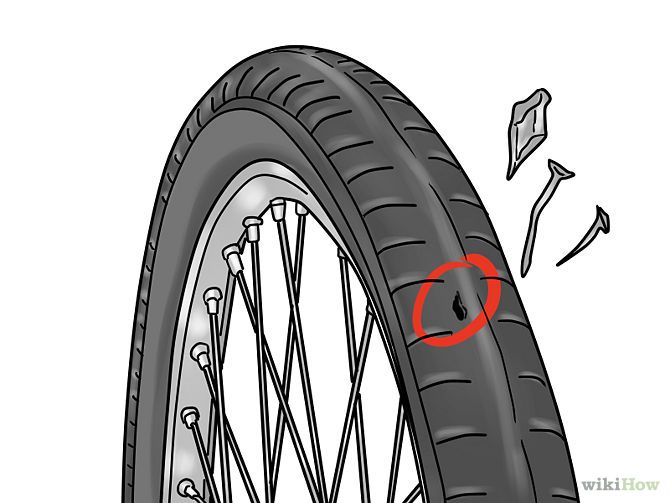 If they've been refurbished, we'll know because they'll have welds on them.
Cosmetic damage from potholes includes scratches on bumpers and side skirts. More serious damage includes scratches along the frame that cause rust, and leaks or holes in exhaust pipes, mufflers, or catalytic converters.
To avoid this and keep your tires in good condition, here are five signs that you need new tires.
Damage will also depend on whether the bike has been exposed to direct moisture and sunlight. In the worst case, it can take about a month before you notice corrosion.
This range is usually between 90 and 140 kg, depending on the type of bike and materials.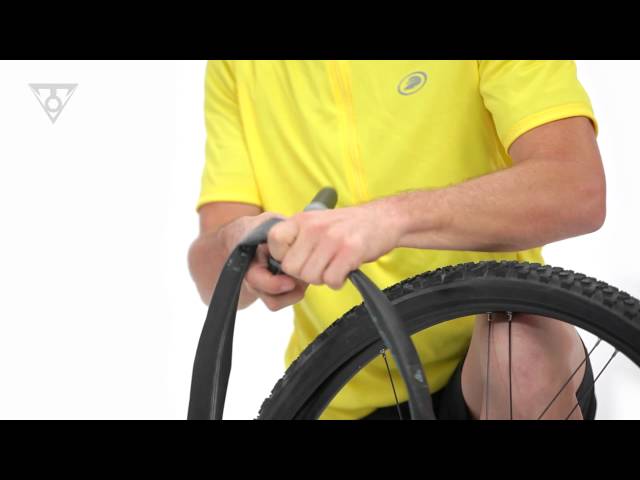 It is many times easier to look for the characteristics of the wheels that the model in question mounts.
Insufficient tire pressure.
Too high pressure reduces tire grip; too low pressure allows the tube to pinch on impact (on a pothole, on a step), and rubbing the rubber against itself often causes holes in the tube.
Punctures that leave holes up to 6 mm in diameter in the tread are easily repaired. If the hole that caused the puncture is larger, it is best to replace the tire with a new one.
The tire bead is the area of contact with the rim that holds the tire firmly and securely. It, in turn, consists of several elements: wire, stuffing, rubber and, finally, a fin, which provide, as we say, an adequate fixation between the wheel and the rim.
First, you can visually inspect the tire tread and check it for obvious punctures or nails.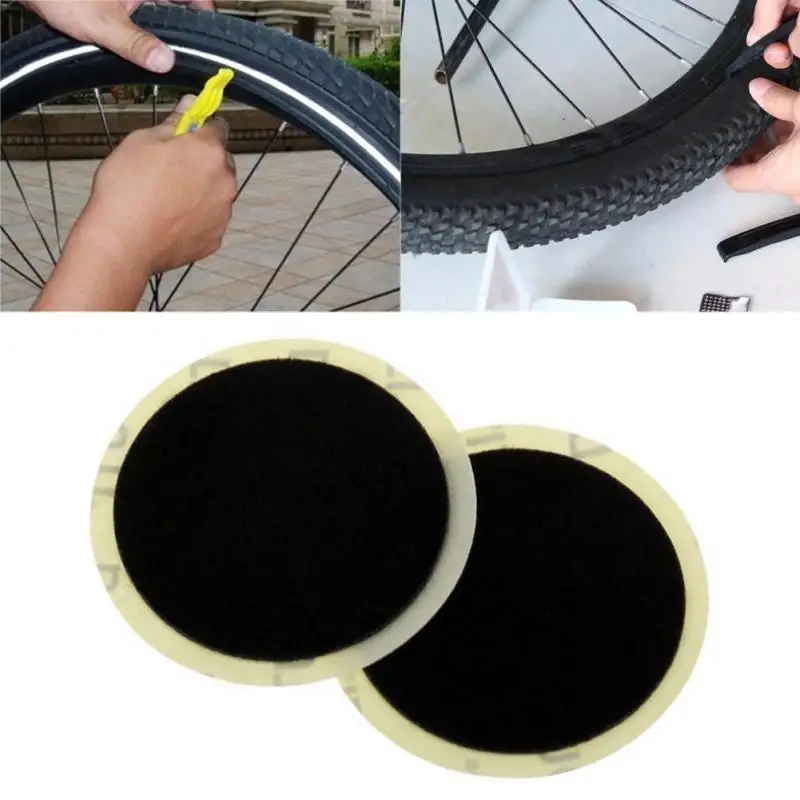 Slow air leakage can even be caused by a hole in the tread or sidewall.
Wheel porosity, when air seeps through the tire itself, is often overlooked. This is usually caused by poor casting or corrosion due to the use of incorrect wheel weights. There is a correct and generally accepted way to fix these types of leaks.
To avoid this and keep your tires in good condition, here are five signs that you need new tires.
The steps are as follows:
How to change a car tire?
contents
The price usually ranges from 6 to 20 euros, although it is usually around 10 euros. This price range depends on the condition of the tire and how serious a proper repair is.
How to patch a bicycle tire in 6 steps
How to fix a bike puncture in 7 easy steps
If we are in a hurry, one option is to wait at least 40 minutes and touch the solution to the ends of the area - where the patch will not stick - and if it is completely dry to the touch, it can be applied. . Blowing and heating to dry faster are counterproductive.
The best thing in these cases is to put the vulcanized patch inside, a quick and safe repair, that is, in a workshop, that after a while the tires can lose air and be damaged, of course.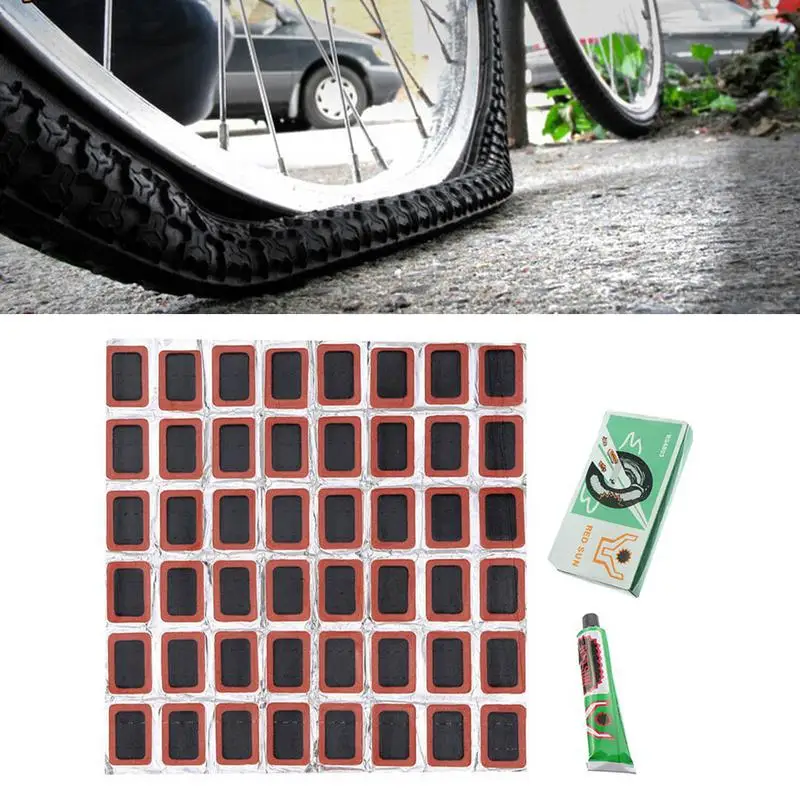 ..
..
Below we detail prices for the main events: Bicycles. Wheel trim costs $200 to $300, brake repairs are $200, and a patch is $80.
To apply bicycle patches, first use vulcanizing adhesive to seal the gap. Make sure you apply enough and wait a few minutes for the glue to dry. Position the patch so that it is fully attached to the tube.
Xiaoling Tire Adhesive 20g Ultra High Quality Tire Repair Adhesive Tire Repair Tool Waterproof Patch Adhesive Patch.
The regulation states that tire repairs must be carried out within the central three-quarters of the drawing, called the “small repair area”. It is also not allowed to repair the tire if the puncture is equal to or greater than 6 mm in diameter.
In addition, the mere fact of driving on a rim or with a flat tire is a risk, especially on corners where the tire can come off, guaranteeing you an accident. On the other hand, you will damage the tire itself.
The answer is simple. It's just a matter of physics. Bicycle tire pressure is reduced due to the composition of the air containing nitrogen and oxygen. Be aware that a flat tire is not always synonymous with a puncture.
patch | Definition | Spanish Dictionary | RAE - ASALE. 1. tr. patch (‖ install patches).
What are vulcanized plasters? If there is a small puncture or superficial cut that does not compromise the safety of the wheel and therefore the vehicle, a vulcanized patch can be used, a method that is more durable and cheaper than a complete wheel replacement.
Tube filled with gunpowder to set fire to mines and wells.
Engine mounts, also known as engine mounts, are rubber parts with a metal base. Inside the car, they are extremely important elements, as they act as a link between the engine and the chassis.
If this is your first bike, it's best to start with something assembled. With a little knowledge, it's very easy to screw up things like stem size, handlebar type, or how to combine hubs/gears/brakes, plus it's a lot more expensive.
Striped (no rays) $10.000.
These are adhesives based on phenolic resins. These adhesives instantly react to interaction with the surrounding air and dry quickly.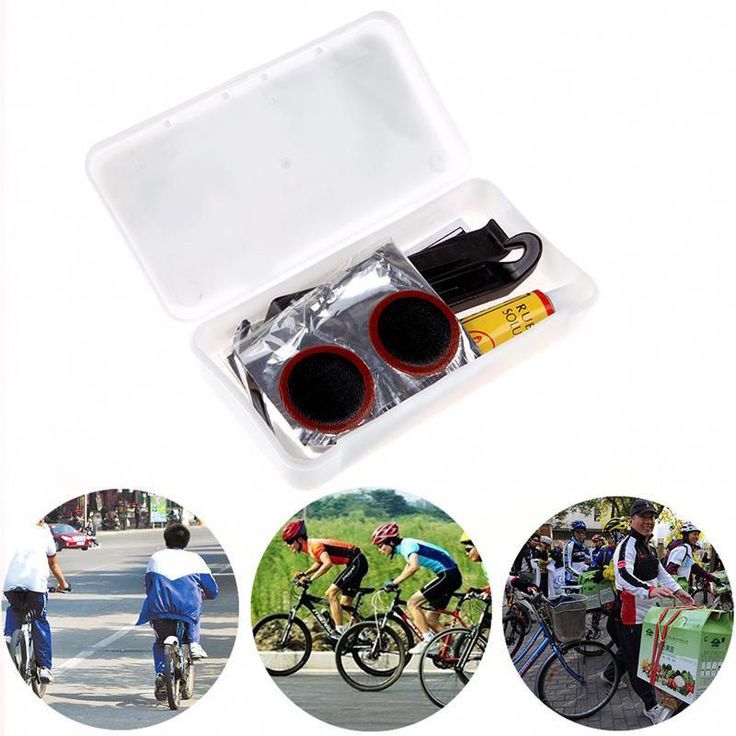
The process lasts “between 2 and 15 minutes”, says the operator, “depending on the shape and condition of the -N rim. de la R.: those with more nooks and crannies are more expensive to clean-“. After the lacquer and paint have been removed, compressed air is applied to the rim to clean out any possible material residue.
Too high pressure reduces tire grip; too low pressure allows the tube to pinch on impact (on a pothole, on a step), and rubbing the rubber against itself often causes holes in the tube.
Stick the patch with rubber glue as it sticks best to inflatables without coming off again even if you get wet, then put something heavy on the patch to press it down and let it dry overnight! !
Driving with a flat tire.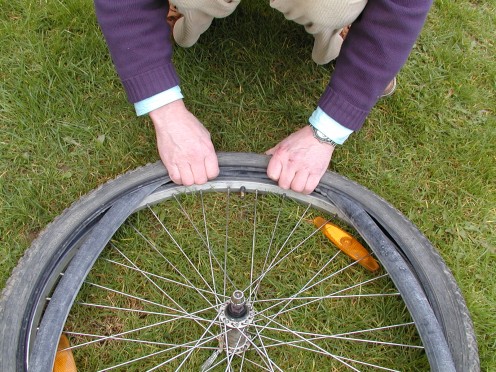 Drive slower. Avoid driving faster than 24 to 32 mph (15 to 20 km/h) with a flat tire. You can cause irreparable damage to the metal wheel under the tire and even lose control of your vehicle.
The presence of a lump or egg in the tire is a clear sign that the inner layers have suffered irreparable damage, it is the inner part of the tire, the radial structure that has undergone a rupture. The tire is supported by air or nitrogen pressure (better than the latter).
Punctures that leave holes up to 6 mm in diameter in the tread are easily repaired. If the hole that caused the puncture is larger, it is best to replace the tire with a new one.
Well, the first step in the event of a puncture that causes the tire to deflate quickly while driving is to hold the steering wheel firmly. In this way, you will be able to maintain direction without the vehicle being unbalanced due to the flat tire effect.
Physical evidence of a tire, indicating that it should be replaced, is:
It usually takes about a year for a tire to lose its minimum safe pressure, but if our car has been exposed to extreme temperatures and the situation suddenly changes, the porosity can increase and lose more air than usual.
You will notice how it wears, especially if it takes time at less pressure than recommended. Transportation of a tire in a flat state increases the wear of its outer edges, the shoulder areas of the tire. You will also notice that the tire is hotter than the others.
Mountain bike tire pressure chart
| Tire width (inches) | ||
|---|---|---|
| 60 kg | 2 bar / 29 psi | 1.9 bar / 27 psi |
| 70 kg | 2.1 bar / 30 psi | 2 bar / 29 psi |
| 80 kg | 2.2 bar / 32 psi | 2.1 bar / 30 psi |
| 90 kg | 2.3 bar / 33 psi | 2.2 bar / 32 psi |
patch | Definition | Spanish Dictionary | RAE - ASALE. 1. tr. Install patches.
Parchar is used when someone is going to get together with friends or acquaintances, usually to have a good time, it is used as a synonym for a meeting or meeting, for example: 1) I'm going to hang out with the guys from the university to get work done, 2) let's patch up and play a little.
He said about one thing: that it was poorly made or in poor condition.
Steps for applying patches to clothing
Step 1: Decide where on the garment you want to place the patch. Step 2: Apply the patch in the right place. Step 3: Place a cotton cloth between the iron and the sticker. Step 4: Iron without steam for about 20 seconds.
Birth control patches work in a similar way to combined birth control pills. The birth control patch prevents pregnancy by releasing hormones into the blood that prevent the ovaries from releasing an egg (ovulation).
The cost of the plaster is 50 pesos; vulcanized varies from 100 to 150 pesos.
Vulcanized hard rubber, sometimes sold under the brand names ebonite or vulcanite, is used to make hard objects such as bowling balls and saxophone mouthpieces. Uncured natural rubber is sticky, deforms easily when hot, and becomes brittle when cold.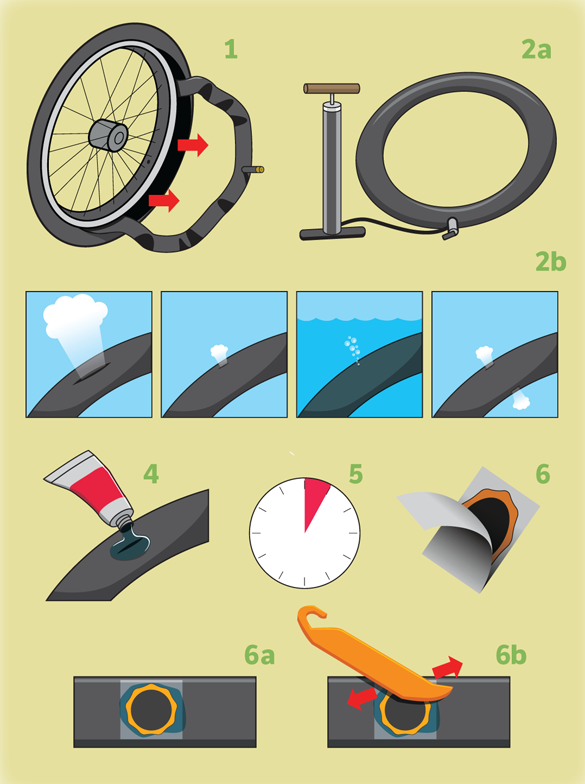
Tire curing consists of heating the rubber and sulfur on the surface of the tire and applying pressure to either install a new tread band or repair tire damage.
It usually takes 15 to 20 minutes to repair a puncture. But the time will also depend on the complexion and the type of tire puncture.
“Talacha costs no more than 80 pesos, it depends on the workshop, it is a simple job that does not require much labor,” said mechanic Raul Velázquez.
Driving with a flat tire. Drive slower. Avoid driving faster than 24 to 32 mph (15 to 20 km/h) with a flat tire. You can cause irreparable damage to the metal wheel under the tire and even lose control of your vehicle.
Tire curing consists of heating the rubber and sulfur on the surface of the tire and applying pressure to either install a new tread band or repair tire damage.