Having spent the better part of a year installing tires at the Pep Boys in Fredericksburg, Va., I thought I knew a thing or two about how a tire is mounted to a rim. It was my first job after graduating from college, and knowing very little about working on cars, I was an eager pupil. As I soaked up knowledge from my well-meaning teachers, I felt confident that following their directions would give me the power to mount and balance tires perfectly.
But 16 years later, while re-learning how to use the tire mounting and balancing machines at Brooklyn Motor Works– where, in case you were unaware, we're rebuilding a 1988 Toyota Land Cruiser – I discovered that I also had to re-learn the whole tire installation process. But that's nothing new. As Carlos, Brooklyn Motor Works' proprietor has pointed out, we learn many things as hobby mechanics that must be un-learned when there are schedules to keep and customers to satisfy.
Anyway, here's the correct way to mount tires. Now that I know these simple tricks, I'm wondering if any of the 12 tires on the three dilapidated beater cars I drive around on a regular basis are actually mounted correctly. Chances are, they're not (I had 'em mounted at Pep Boys).
1. Remove the valve stem core to deflate the tire. Set the core aside for later use (if you're installing new tires, pull out the stem and install a new one, removing the core).
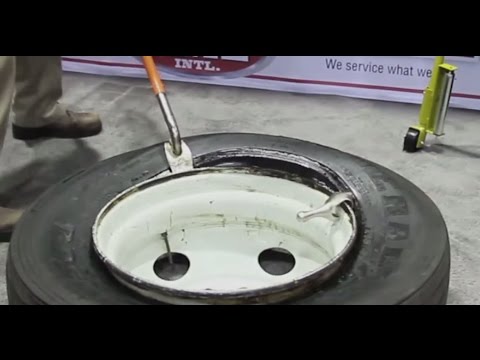
2. Use the tire machine to remove the tire from the rim
3. With the tire off, run your finger along the inside lip of the rim. Does it feel perfectly smooth? If not, it needs to be. Rust pitting can cause leaks, and will cause the bead of the tire to hang up when it's trying to seat on the rim (the beads are the really thick parts of the tire that come into direct contact with the inner and outer lips of the rim.
4. To remove rough patches, use several different grades of abrasive pads (I used coarse and medium Scotch Brite pads) to smooth out the inner lip of the rim, as well as the part of the rim the bead slides over as it seats on the lip. If there's too much damage, it may be necessary to get another wheel. You'll never be able to balance a wheel if the tire isn't properly seated upon it.
5. Before installing the new tire (or, if reusing the old one, the same tire, mounted the same way it was before), apply a generous amount of tire bead lubricant to the tire beads and the rim. Don't use soapy water (not enough slip) or grease (you'll never clean it all off and the bead could pop off the rim in hard cornering). Bead lubricant is slippery, but dries, allowing the bead to set.
6. Use the machine to install the tire. Then, remove the wheel from the machine mounts.
7. Spray more bead lubricant between the beads and the rim.
8. With the stem core still removed, inflate the tire to its maximum pressure (you'll see that number printed on the sidewall of the tire). The beads should pop onto the rim pretty quickly if the rim lips are smooth and you've used enough lubricant. It'll go "POP.. POP!" as the beads seat.
9. Install the stem core and re-inflate the tire to its max pressure.
Assuming you followed all of these steps correctly, your wheel and tire are now ready for balancing. Then you'll adjust the tire pressure to the vehicle manufacturer's specifications when you mount the wheel and tire back on your car.
Now, I realize most people don't have access to a tire mounting machine, but being aware of what it takes to mount a tire will, at the very least, give you the tools to ask your tire installer if they're mounting your tires the right way. If the tire shop you're using is doing things the quick and dirty way (mounting tires dry on pitted rims), find a better shop! No one wants to feel a sickening shudder as the car passes 65 miles per hour on the highway.
Last modified by Ian Haynes
Tires don’t come cheap, and if not mounted in the right manner, you may be going in for a replacement much sooner than expected.
That said, whether you have a severed tire beyond repair or need to replace the tube within your tire, it needs to be removed from the rim – repaired or replaced – then mounted back.
Whether you want to cut costs or treat it as a DIY project, you will be happy to know that with the right tools, you can manage tire mounting.
So,are you up for the challenge and ready to put in some elbow grease?
Read on to know how to mount tires by hand!
Though professional mounting is much-recommended, it can burn a hole in your pocket. Depending on the rim-size and the car you drive, be ready to pay anywhere from$13 to $45 per tire.
Ifyou want said deed done on all four plus the spare, it may cost you around $65 to $225 – nowthat’s a hefty amount.
When you mount tires yourself, all you need to pay for are the tires (obviously) and possibly valve stems.
And the rest you pay in effort instead of hard-earned cash.
Before you begin, make sure that you got the right tire that matches the rim;for instance, a 15-inch would fit a tire sized at 15 inches.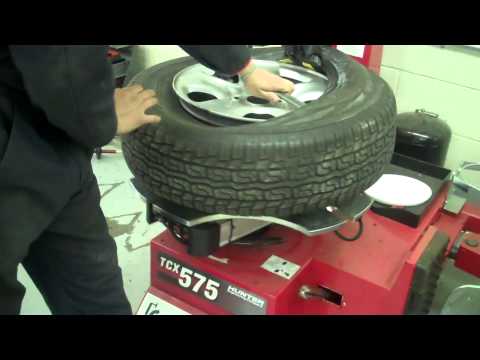 Also, make sure you have the following tools in arms reach:
Here we go:
If the rim in question has a functioning valve stem in place, skip to the next step; if not, take a valve stem, and lubricate it with some tire lubricant.
Now, insert it from the inside in the present hole; the tire will later cover this area. With the help of pliers, pull the valve stem till it seems to have a perfect fit.
For a seamless placement, it would be best to thoroughly lubricate the tire and the rim by hand or by using a spray. Therefore, apply a reasonable amount of lubricant on the outside edge of the rim and the inside bead of the tire.
Before you start, make sure that every inch of the tire bead is lubricated
Lay the wheel on a flat surface that has no bumps or cracks.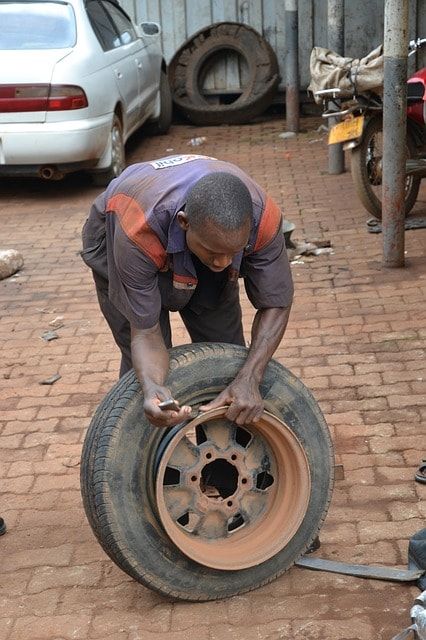 If the ground below seems rugged and may lead to potential scratches, put cardboard beneath the wheel.
Now, place the tire right on top of the wheel in a manner that the rim’s top lip connects to the tire’s bottom bead.
Step on the tire, and begin thumping your feet to connect the wheel’s top lip to the tire’s bottom. Ideally, you should apply force on one side, then use the other leg to apply pressure on the opposite side.
Some mild jumps will do wonders and quicken the insertion process. However, you should bring in a friend to help you with this — they can hold your hand to maintain balance while thumping and jumping.
With the lower half of the tire inserted, now is the time to get the upper one seated. Though not easy, but some lubrication may help you in easily sliding it in.
Therefore, add more lubricant on the top part of the rim as well as the tire.
Like we recommended pushing the tire on one side, you have to do the same here but for the upper end.
Press one end of the tire so that it goes below the edge of the rim. The chances are that, despite you putting a considerable amount of force, the tire does not make past the lip; if so, press on the bottom end.
The idea is to create a big enough wedge between the upper lip and the upper bead of the tire to accommodate a pry bar.
With the help of the inserted pry bar, stretch the tire over the rest of the rim. While prying the tire’s bead on the rim’s upper lip, press down on the tire with your hands.
This two-part process may require a reasonable amount of time, but in the time it takes you to do a complete rotation, the tire will land right in place.
To avoid scratching up your alloys, keep the pry bar pressed against the bottom portion of the wheel’s upper lip.
If done right, the tire’s beads will be covering the wheel’s lips.
If you have followed every step correctly, your tire is correctly placed and needs just to be inflated.
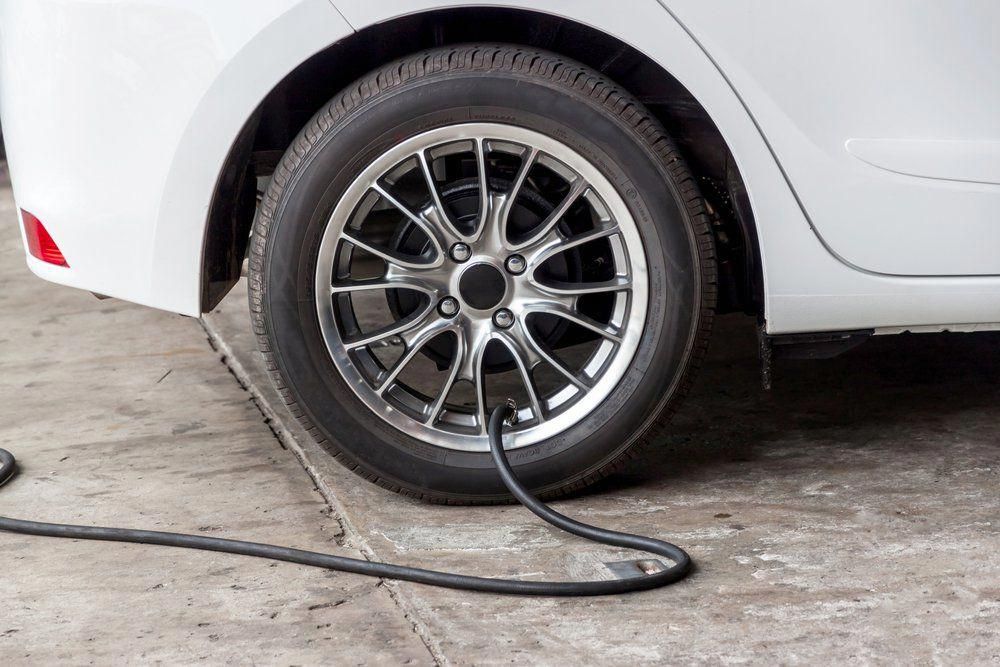
Remove the cap from the valve stem, and use an air compressor to fill up the now mounted tire. Remember to keep your hands, clothes, or other tiny belongings away from the tire bead.Once inflated, all items underneath cannot be removed without moving the car.
Refer to the vehicle manual or the instructions on thetire’s side to know how much the recommended tire pressure for a comfortable and safe drive is.
Here are some common mistakes people tend to make when mounting tires to rims, so you should always remember to:
All in all, having a correctly mounted tire keeps you and your ride safe and keeps the tire inflated at all times.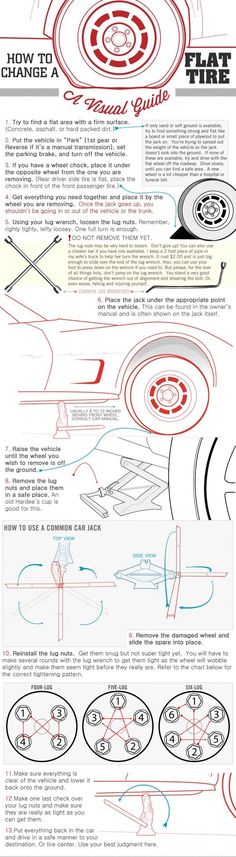
That said, for best results, we strongly recommend you to get the task handled by a professional.But, if you want to DIY, follow the steps mentioned earlier to the T — won’t take you that long!
Nikolaev bicycle shop "Sportek"
Published: 02.02.2021
Beading tires on a bicycle wheel is a fairly common and not complicated procedure.
We will not tell you in full how to remove and put on a tire on a wheel rim - there are many different videos and articles about this on the Internet. Let us dwell on only one important moment, but not often discussed by the authors of videos and articles, when, when putting the tire on the rim, the last 10-20 cm remain, and the tire does not want to “sit down” in any place.
In order to tighten the last part, you need to make sure that as you put on the previous parts of the tire, the bead cable does not start to get into its “rightful place” in those parts of the wheel where the tire has already sat down.
That is, during the beading process, you should try to keep the edges of both beads of the tire with the bead ring in the center of the rim - where its “deepest” place is. Thus, slack is formed and the last centimeters of the edge of the tire are much easier to throw over the high side of the rim.
This is illustrated more clearly in the picture:
In case it doesn't work out at all, of course you can use the usual bead blades that many cyclists use.
But for these purposes, in addition to the commonly used blades, there are also special combined blades designed also for putting a tire on a wheel, and not just for removing it.
For example:
Featured Products
11 UAH
BauTech bead blade for bicycle tires (plastic)
15 UAH
BauTech bead blade for bicycle tires (metal)
Comments (0)
x
For the normal operation of the car, it is necessary to periodically replace and install high-quality tires. This is an almost simple process, but not all motorists can handle it, especially for beginners.
Usually replacement is carried out for certain reasons:
To carry out competent work on replacing rubber, it is necessary to follow the recommendations and rules. Otherwise, it can lead to a wheel out on the track and a serious accident.
Contents
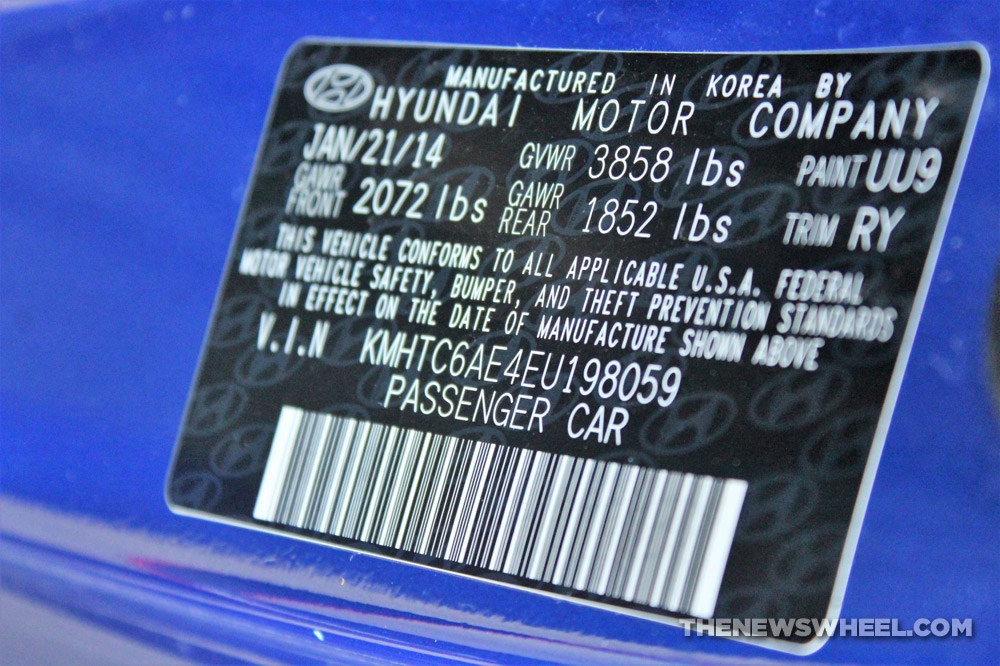
sizes and characteristics recommended by the car manufacturer. There may be small differences, but not more than 2%.
General properties and dimensions are specified in the vehicle's instruction manual. If these are not available, use the recommendation of the car dealer.
The next step is to find out the load index of the tire being installed, as well as the speed characteristics. They should not be less than the parameters specified in the instructions from the manufacturer.
Tire changes can be made with higher index values, but not with lower requirements. Typically, indexes are indicated in the operating instructions for the car.
Next, analyze the air pressure characteristics of the tires. The indicators must be completely identical with the factory settings. Otherwise, the wheel may be severely deformed and burst when driving a passenger car.
If the tires are over-inflated or, on the contrary, have less air, this will negatively affect the stability of the vehicle and its high handling characteristics. Tire pressure indicators are indicated in the operating instructions for the car.
Now let's highlight another important rule that beginners and experienced car owners should use when installing a complete set of tires: when purchasing sets of tires, you need to make sure that the characteristics of the landing and offset of the disk correspond to the factory parameters of the vehicle.
If these properties do not match, then this will negatively affect the handling of the car and quickly lead to deformation of the car suspension. General departure and landing characteristics are specified by the tire manufacturer and the factory where the vehicles are produced.
On any type of passenger car, the front tires are most often deformed, since most passenger vehicles have front drive axles. Accordingly, the rear wheels on them are subject to less wear.
Many owners often try to regularly change the front tires, and leave the rear tires for a few more seasons.
But in this situation, every car enthusiast should know that the absolute indicators of safe and reliable driving will only be achieved by using all 4 tires with the same tread.
Therefore, it is recommended to replace all sets, not just the front wheels. Because the vehicle loses high control, resulting in poor suspension performance.
Naturally, tires are expensive products and not everyone can afford to regularly replace products, especially in a complete set.
In such a situation, you can divide the installation of tires into two stages. To begin with, the front tires are replaced and after a certain period of time the rear tires are installed. However, all processes are recommended to be performed only with identical pairs of tires.
It is also not recommended to tighten the process of mounting the rear rubber. Since at the time of driving a car, the level of risk of skidding on the rear axle increases.
If the installation of new tires has to be done urgently due to deformation of the old ones, then you should know a certain rule. Regardless of the model or brand of tires, the thickness of all four treads must be identical to each other.
If only one tire is damaged and cannot be repaired, at least a pair of new ones should be used.
You can only replace one damaged tire if the set is brand new and has only been driven a few hundred kilometers.
In this situation, the owner of the vehicle can purchase only one similar tire and install it instead of the damaged one, without fear of losing the quality of control and safety while driving.
When a motorist has traveled more than 1000 km, it is no longer possible to change only one tire. The protectors wear out quickly enough, and balance will probably be lost when installing only one new one.
It is not recommended to allow a situation where the thickness of the tire tread on one of the axles has different indicators, since the balance and high-quality control of the vehicle are lost.
Immediately before installing a new tire on the rim, a detailed check of its condition is required.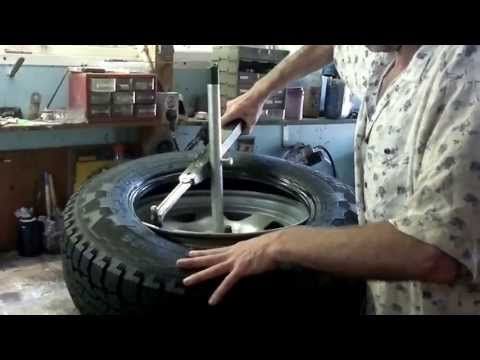
First of all, it is recommended to carefully inspect the tire for possible defects or small microcracks, and also to make sure that its dimensions correspond to a cast or stamped wheel.
The disc is checked for serious defects, distortion, and wear on the flanges and rim. It is recommended to remove additional weights balancing the wheel and valve at the time of replacing the old rubber. This procedure is performed only in the situation when the tire does not have a chamber.
When installing a new tire, it is advisable to take into account the marking in the form of colored marks applied to its surface. They indicate the main direction of rotation in the form of an arrow on the side.
Easier and easier mounting of the tire is directly related to the application of individual spots on its beads or the use of soapy liquid. However, do not overdo it with lubrication, as the rubber will begin to slide on the disc rim.
Installation of new rubber on the rim is carried out in the opposite direction with respect to dismantling.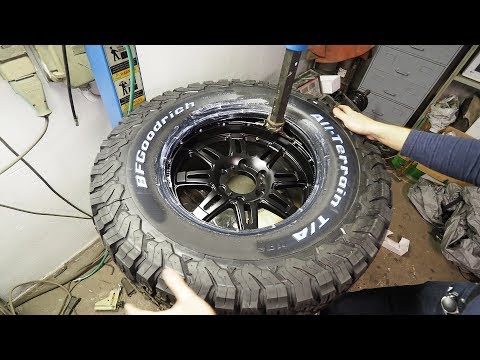 First you need to put the tire on one side of the disc rim, and then insert the inner tube. Moreover, the valve should fall into a small hole in the rim. The next step is to install the second sidewall of the rubber.
If the tire has a chamber, then a simple procedure is followed. First, you should inflate the tire with a pump or compressor with a certain pressure level that does not exceed the norm.
Thus, the tire fits well on the rim, after which the air pressure should be reduced to the desired parameters. Here it is important to take into account the fact that the pressure is measured at the moment when the tire is installed on the wheel, subject to the car weight.
For tubeless tyres, this process is a bit more complicated. A simple pump for pumping or a special compressor cannot be used until the rubber beads are completely leaning against the disc rim, since air actively penetrates through the gap between it and the tire.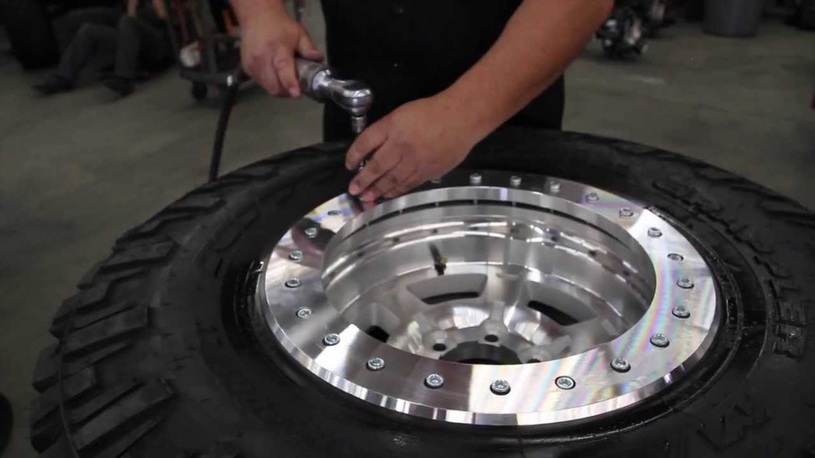
You can use an alternative method: inflate the vehicle tire to four atmospheres. Then we remove the hose and install one of its ends on the valve of the mounted rubber.
First unscrew the nipple and insert a part of the hose with a special fitting into the inflated tire.
Then, once the nipple is installed, most of the air will enter the tubeless rubber and set it in place by stabilizing the pressure. At car service stations, original compressors with large receivers are used to inflate wheels.
However, such a task can be done by yourself, if you show a little skill and logic. Also, do not forget that after installing new rubber, the wheel is balanced.
Every owner and experienced motorist knows that the front tires should be changed at the very beginning. Since the car is subject to a lot of skidding when driving on worn rear tires, there is a great risk of deformation and rupture of the front wheels.