By Diana K. Williams
When it comes to removing the wheels on your lawn tractor, it can be perplexing if you’ve not done it before. Pull the plastic cap off the wheel hub of many brands of tractors and rather than finding a lug nut to unscrew, you’re met with a snap ring system. Getting this ring off isn’t as daunting as is looks.
Snap rings are use to hold on front and rear wheels. Use snap ring pliers, sometimes called retaining ring pliers, to remove snap rings from the axle. Snap ring pliers work by sliding the tips of the pliers into the grip holes in the ring, then moving the handles of the pliers to expand the ring to a point where you can slip it off the end of the axle. Snap ring pliers come in different sizes and angles so size the tips of the pliers to the size -- the bore -- of the hole. Pliers with straight tips or 45-degree angled tips work well for removing lawn tractor wheels.
An essential tool in removing front or rear tires from a lawn tractor is a hydraulic lift jack rated to hold the weight of your tractor. Use the jack to lift the tractor far enough off the ground so the wheel you want to remove is not touching the ground. For safety, use a hydraulic jack in conjunction with a jack stand placed under the frame of the tractor so it is touching it. If the hydraulic jack fails, the stand will continue to hold the tractor in place, preventing the tractor from falling on you or damaging the axle.
While it's best to use the right tool for the job, sometimes a substitute works just as well without causing damage to your tractor or being dangerous. A flat-head screwdriver can be used to pry a snap ring off an axle if you don’t have a pair of snap ring pliers. Just slide the screwdriver under the ring and work it out of the groove in the axle. Just use care not to break the ring. If the washer has become fused to the wheel, use the flat-head screwdriver to pry it off.
Rear and front tires aren’t the only wheels on a lawn tractor that can be removed. The gauge wheels, or deck wheels, on the lawn mower deck can also be removed for replacement or to set the height of the deck. Remove these wheels using a socket wrench sized to the bolt holding them on. The wrench’s ratcheting action speeds up loosening the bolt. If the bolt’s nut turns while ratcheting the bolt, hold the nut in place with a standard wrench of the correct size.
References
Writer Bio
Diana K. Williams is a certified Master Gardener, has more than a decade of experience as an environmental scientist, and holds a Bachelor of Science degree in biology and environmental studies from the Ohio Northern University. Williams is a winner of Writer’s Digest Magazine's annual writing competition.
John Deere, Stock Photos
Harbor Freight sells tire irons and other tire mounting tools.
The most dangerous part is seating the beads, since force is required from the air pressure. Wear eye protection and protect yourself. Be sure both beads have seated before installing the valve and inflating the new tire.
Lawn tractor tires, golf cart tires, rototiller tires, wheelbarrow tires -- most of these are small, tubeless tires and can be changed pretty easily with some elbow grease and a few simple tools. Heck, I have even changed motorcycle and car tires before with the same method. I assume that you already have your new tires ready to install, so let's get started.
REMOVE THE WHEEL -- I assume you know how to remove the wheel from the tractor. Simply jack it up, support it with stands, unscrew the lug nuts or remove the axle pin, and remove the wheel.
LET OUT THE AIR -- You can push and hold the valve down until all of the air is out, or you can use a cheap valve stem tool to unscrew and remove the valve. This is preferable because it's faster and also when you reinflate the new tire, it will inflate quicker and seat the bead easier -- more on that later.
BREAK THE BEAD -- This can be tricky. Many times, the tire becomes stuck to the rim. You need to push the tire down as close to the rim as possible and break the bead. Here's how I have done it. Lay the wheel down in the driveway or garage and put a board or ramp down with one end on the tire next to the rim. With someone watching, slowly drive your car up onto the ramp until the weight of the car on the board pops the tire down and free of the rim. Lay the wheel on the floor or on a workbench.
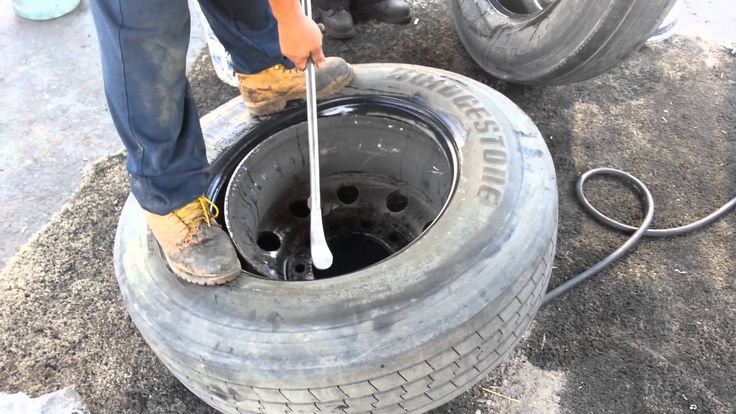
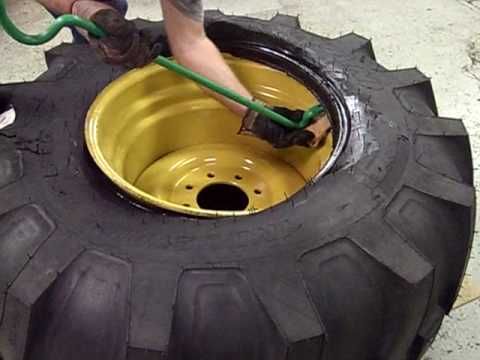
REMOVE THE TOP BEAD -- Place a piece or carpet or other protection on the rim next to the tire. Get out two tire irons and place them a few inches apart on top of the rim and under the tire, as shown in the picture. Lever the tire up and clear of the rim. Leave the two irons in place and put the third iron a few inches outside of one of the two, on top of the rim and under the tire, and lever that section up and over the rim. Pull the middle iron out and repeat prying up small sections until the whole bead is free and above the rim.
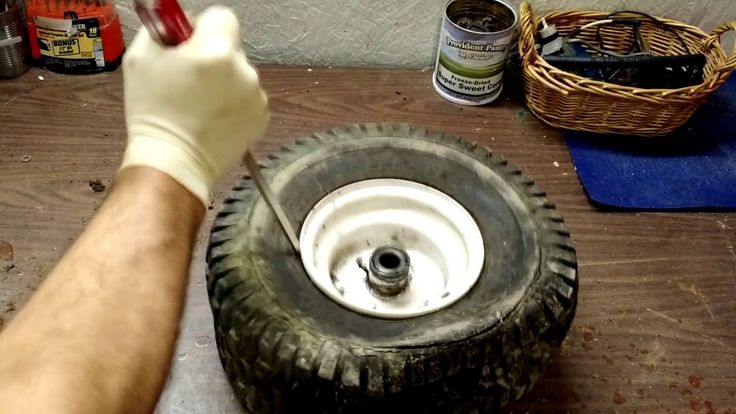
REMOVE THE BOTTOM BEAD -- Now pull the bottom bead of the tire up so it touches the top of the rim. Working from under the tire now, use the same technique to pry the bottom bead of the tire up and over the top of the rim, as you see in the photo.
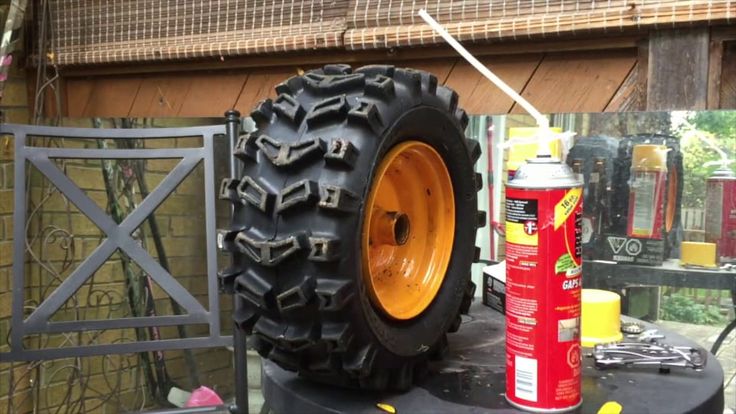
CLEAN AND LUBE THE RIM -- There is usually rubber or other gunk stuck to the rim that you want to remove. The edge of the rim that contacts the bead needs to be clean and smooth in order to seal properly. When clean and shiny, spray the soapy water onto both the rim and the new tire beads to make them slippery.
MOUNT THE NEW TIRE -- Put the new tire over the top of the wheel and push down with some force. You should be able to get about 1/2 the bottom tire bead over the rim. Using your tire irons again, lever the bottom bead over the top of the rim all the way around. Then do the same to the top bead.
SEAT THE BEADS -- With the valve stem still out, attach an air hose to the valve. It is possible to do this with a manual pump, but MUCH easier with compressed air. If you don't have a compressor, take the tire to a gas station and use theirs. The trick to this is getting the beads wet with more soapy water and compressing the outside of tire so that the beads touch the rim on both sides. If you have a ratcheting tiedown, you can use this around the circumference of the tire and squeeze it so that the beads touch the rim. Inflate the tire until you hear two loud POPS as the two beads seat against the rim. You may have to overinflate the tire slightly. Be sure to do this safely.
REPLACE STEM AND INFLATE -- Once the beads are seated, let out the air, replace the valve into the stem and inflate the tire to the proper pressure.
MOUNT THE WHEEL -- Replace the wheel back onto the tractor and tighten the lug nuts to the proper torque or reinsert the axle pin. You're done!
0003Related materials
Tire inflation with nitrogen and 7 more wirings at the tire fitting
In the middle-end of autumn, car owners storm tire shops. However, you can disassemble the wheels yourself. We'll show you how to do it. We will need a special tool, as well as a screwdriver to unscrew the wheel valve, and a couple of pliers to help remove the tire from the rim.
To rid the rim of the tire, we bought a simple but very useful device - a mechanical wheel beader. There are several options on the market, but we chose the one produced by the Sorokin company. It is inexpensive. Thanks to the ability to adjust the retractable linkage, tires can be removed from discs of different diameters. You only need to select the desired position of the rod and tighten the two bolts holding it, after which you can start working. nine0003
Related materials
Is it possible to pump up a wheel without a compressor - the experiment "Behind the wheel"
We took a 16-inch wheel. It is more convenient to remove the tire if you put it on the floor. In order not to scratch the aluminum disc during work, we will place a sheet of foamed polyurethane under it, which is used in construction for sound and heat insulation. We unscrew the cap on the valve, holding it with a finger, unscrew the spool so that it does not pop out under air pressure. The tire starts to deflate. nine0003
Before carrying out work with the help of a special tool, it is necessary to moisten the working edge of the disc with a penetrating liquid. Otherwise, we risk damaging the disk. Also, the liquid, having seeped under the edge, will facilitate the removal of the wheel from the humps.
We apply our device to the disk. Its hook in this case should protrude from the mandrel by 7–8 cm. For reference, this is one hole on the retractable rod. With a hand, we press on the device from one side so that it goes under the protrusion of the disk, and we wind the hook under the disk from the opposite side. We spread the levers of the device in different directions. The main thing is not to try to throw off the tire immediately, but to move it off the hump gradually. Otherwise, the tire may be damaged. Please note that the device should not be inserted near the wheel valve. nine0003
Related materials
Changing shoes correctly: everything you need to know about disks
Pulling out and moving the tool, slowly move the tire off the hump around the entire circumference. You can hold the side of the flight attendant, where there is no hook, with your foot. Having removed the tire on one side, turn the wheel over and do the same work on the other. Don't forget about lubrication. By the way, it is not necessary to use a liquid, a silicone composition is also suitable.
We removed the tire from each side of the humps. It remains to take mounting blades and completely remove the tire from the disk. We process the belt with penetrating lubricant. It is advisable to get on the inside of the rim, this will make things easier. We start the first blade under the tire. It is convenient to do this in the area of the wheel valve. We take the assembly aside in advance so as not to damage it during work. Hold the mount with your foot. We insert a second spatula next to it and lift the edge of the tire with it. We do this along the entire inner circle, also gradually. We removed the tire from one side of the disc, it remains to do the same on the other. We turn the wheel. We wind the blade behind the disk and begin to remove it from the tire. As soon as we succeeded, we can consider that the work is over. nine0003
Taking apart the wheels yourself is easier than you think. The main thing is to stock up on the right tool and free time, as well as take into account the characteristics of rubber.
Please send all questions and suggestions regarding the Technical Environment series to: [email protected].
Our new video
Serial crossover from the USSR (not Niva!) - test "Behind the wheel"
How Haval Jolion is assembled in Russia: report from the factory
American Niva test (+ video)
Did you like the article? Subscribe and you will always be in the know!
Driving in Zen
News smi2.ru
Working on a tractor, one has to deal with punctures and cuts in the wheel, the most difficult to repair is the rear tires. If the tires are very worn out, it is better to replace them by choosing original branded models. Our catalog contains tires for wheeled excavators and tractors, from which you can choose the most optimal set. The page contains an assortment of regular models with information on sizes and other parameters. nine0003
Minor damage can be repaired by sealing the tire. To complete this task, you need to disassemble the wheel, and this is a very laborious work. However, if you have an assistant and experience, serious difficulties should not arise. In this article, we will give useful instructions, after reading which you can carry out repairs yourself.
Before proceeding with the repair, it is necessary to dismantle and remove the rubber from the disk. The most convenient way to do this is by hanging the rear axle of the tractor with a jack or using the hydraulic system. In the latter case, a massive stump or other base can be placed on one side at the back. To disassemble, you will need 2 crowbars, a sledgehammer, a massive chisel, instead of which you can use a blunt ax without a handle. nine0003
Step-by-step instructions for removing a tire:

The damage can be small or extensive, further repair depends on the degree of the defect:
On the inside, a patch is also glued over the entire area to prevent the camera from being rubbed.
As regards the latter situation, it is better to replace the tire with a new one in case of a three-dimensional cut. As practice shows, after deep and penetrating cuts, the rubber goes a little and still has to be changed.