Apr 16, 2019
Last Updated on November 16, 2021 by allprotrailersuperstore
As the proud owner of a trailer, you know it requires diligent upkeep. And although you can do some of the necessary care and maintenance tasks yourself, in the comfort of your lot or driveway, others require a professional touch and call for you to bring your trailer into the mechanics to get it checked out.
While there’s certainly a time and an occasion for the professionals to get involved, however, there are several tasks responsible trailer owners should know how to perform themselves. One such task is knowing how to change a trailer tire. If you’ve never done that before, don’t worry. It’s more straightforward than it sounds, and is something anyone can quickly learn how to do.
Today, to help you learn this new skill, we want to walk you through the process from start to finish, as well as discussing how to recognize when to change a trailer tire and realizing when it’s time to call for a little professional assistance.
The most common reason you might need to replace a trailer tire is when you get a flat. Flat tires happen to all of us at one time or another, and there isn’t always a way to prevent them. Maybe you caused the flat by making a mistake somewhere along the line, but it might also result from circumstances beyond your control. The most common reasons for flat and damaged tires include the following.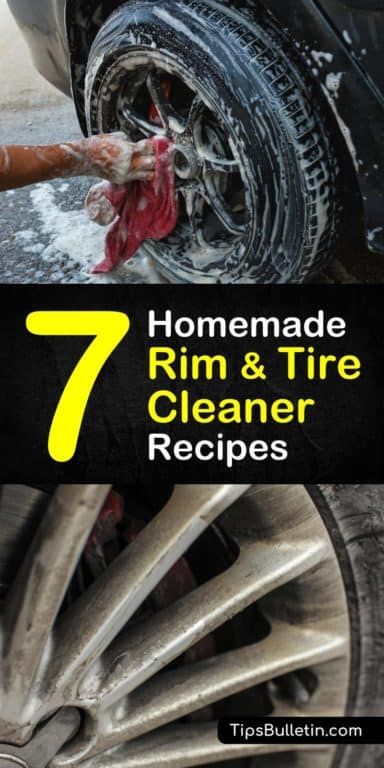
Sometimes, it’s easy to know when you need to change a trailer tire.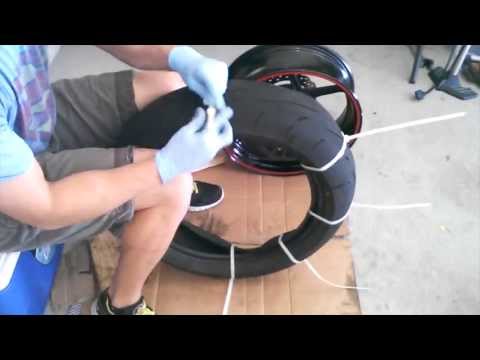 For example, if you’ve broken down on the side of the road with a flat tire, there’s usually no mistaking the problem. If it hasn’t quite come to this yet, however, you can still realize your tires need changing by looking for the following.
So you’ve determined you need to replace your tires. The next step? Figuring out how to find new ones. Here are some of our best tips for completing this process.
The easiest solution is to write down the details about the tires you already have on your trailer, or take a picture of the tire designation. Then, head to your nearest tire center or online store and search for this same model. By doing this, you’ll ensure you get the right tire for your trailer, since you’ll be getting the same ones you had on it before. The only drawback to this technique is that it isn’t the best choice for situations where you didn’t like your last pair of tires, and you’d prefer to get a different brand.
Everyone will have differing opinions about which tires are the best. However, as long as you’re choosing designated trailer tires instead of passenger car tires, you’ll be in good shape.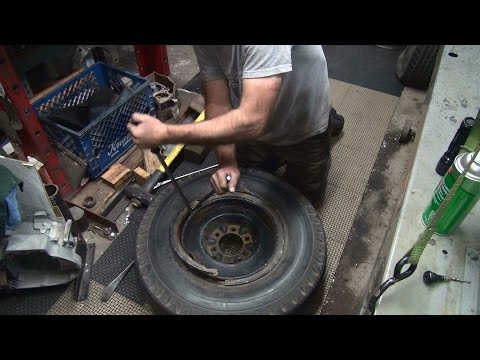 To make sure you buy the correct type of tire, always look for the ST designation. If the tire in question has this mark on it, you can be sure you’re on the right track.
Do you have any friends who use trailers like yours? Ask them what tire make and model they prefer. Call up your mechanic and ask what they’d recommend. You might even ask the tire company what tires they recommend for your specific trailer. You shouldn’t feel the need to follow these recommendations to the letter, but they can be a great jumping-off point for you to decide.
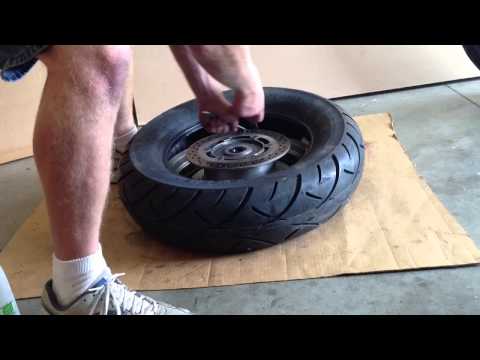
Once you’re armed with your replacement tire, jacking up the trailer is your first step in the process of how to change trailer tires. Before doing this, however, take the precaution of loosening the lugs ahead of time.
You can also loosen the lugs after you have the wheel jacked up, but doing so will leave the tire free to spin while you try to unscrew the nuts. By completing this step while the tire is on the ground, you ensure the tire will stay still.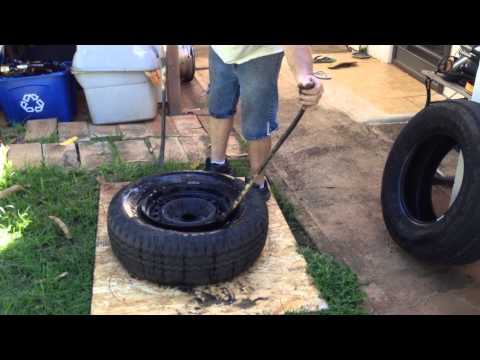 Use a lug wrench to partially unscrew the lug nuts, but don’t remove them yet. Leave them in the wheel, loosened to the point where they’ll be easy to remove once you’re ready.
When you’re finished loosening the lugs, place the jack under the trailer’s frame, at the back side of the damaged tire. On the other side of the trailer, slide a wheel chock under one of the tires to keep it from sliding around. Then, steadily jack up the trailer until there’s enough room to take the tire off the bolts and get a new tire on again. Keep in mind that if the old tire is flat, you’ll need to jack the trailer higher than you might think. A flat tire doesn’t need much room to slide off the bolts. A new tire will be larger and need more space.
Once you’ve safely jacked up your trailer and you have all your tools ready to go, it’s time to get started on the process of changing the tire itself. Follow these steps, and you can’t go wrong.
 Remove the Tire
With the tire safely in the air, reach in and remove the lug nuts you loosened earlier. These should come out easily, after which it will be a simple matter to slide the used tire off the lug bolts. Keep the nuts nearby, as you’ll need them again. You can now put the old tire aside, as it has served its purpose.
Once you’ve removed the tire and the wheel hub is bare, this is a perfect time to glance at it and make sure everything still looks normal and functional. Check that the studs and bearings are in good working condition, and reassure yourself that nothing is cracking or buckling. This inspection isn’t necessary to the changing of the tire, but it is a rare opportunity to see the wheel hubs laid bare, so it makes sense to give them a quick once-over while you’re at it.
It’s time to grab that shiny new tire and lower it into place on the lug bolts. If you see anything that seems off — maybe you somehow bought the wrong size or type — now’s the time to notice that and head out to buy the correct tire this time.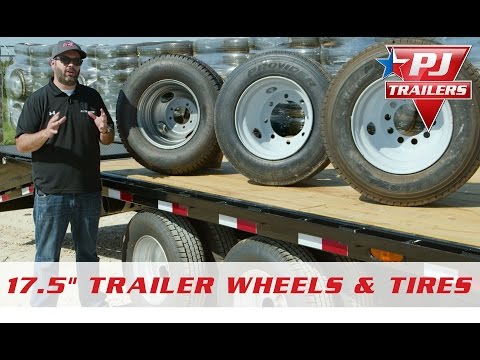 Give the tire a thorough look to ensure everything seems ordinary before proceeding.
Grab those lug nuts you removed earlier and put them back on to secure the new tire in place. You can do the first few turns by hand. You won’t be able to tighten them all the way yet, since you’re only using your hands and the wheel is probably trying to spin in circles. For now, get them as tight as you can, to make sure the tire isn’t going to fall off.
Once the lug nuts are as tight as you can get them with your hands, it’s time to lower the jack until the tire rests flat on the ground. Pull this out from under the trailer and set it aside, and don’t forget to remove the wheel chock from the other side of the trailer as well.
With the added pressure of the tire against the ground, you should have the resistance you need to finish tightening the lug nuts the rest of the way. Grab your lug wrench again, and use this to tighten the lugs to the fullest extent, until they positively won’t move anymore. The last thing you want is for the lug nuts to come loose and the tire to go flying off as you’re driving down the road.
Congratulations, you finished the job. The new tire should be securely in place, and shouldn’t need any more maintenance for a long while. All that’s left to do is clean up the tools scattered around and dispose of the old tire. To get rid of a used tire, wait for a bulk trash collecting event in your community and dispose of it then. You might also visit your local mechanic’s shop and ask if they recycle tires. You can even recycle your tire yourself by turning it into a tire swing, a garden planter or even a compost bin.
If you do decide to recycle your tire yourself, make sure to remove the rim and wheel weights before you put your tire to its new use. Cutting the rim away from the tire can be dangerous, however, so don’t attempt this unless you have experience with power tools and feel confident you know what you’re doing.
Sometimes, no matter how many tutorials you read, you may not have the confidence and skill to change a trailer tire yourself. This is entirely natural, and nothing to feel awkward about. Plenty of people seek professional help with their tire replacements every day, and if you choose to do the same, you’ll be in good company. If you’re ready for new tires and you don’t feel up to replacing them on your own, we want to help. Our team here at All Pro Trailer Superstore has years of experience in replacing tires on all kinds of trailers, and we’d be delighted to work with you on your trailer.
Tire replacement isn’t the only service we offer, either. Whether your trailer needs inspecting, repairs or some extra customization, we’re glad to help. What if you don’t yet have a trailer, but are thinking of taking the plunge and buying one? We sell trailers as well. Although our headquarters is in Pennsylvania, we’re proud to serve trailer owners, renters and buyers across the Mid-Atlantic and New England area.
Are you ready to get your tires fixed and prepared for your upcoming trip? Bring your trailer into Trailer Superstore today and learn why so many people trust us with their trailer maintenance needs.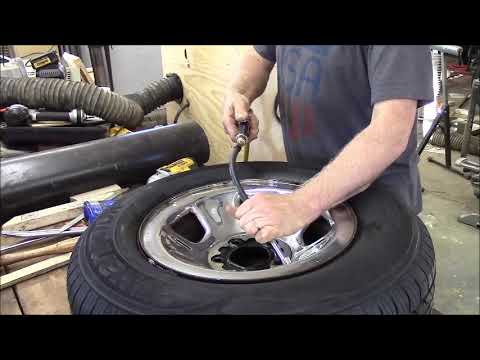
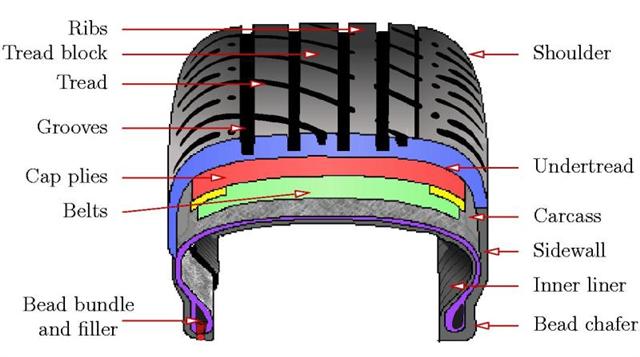
Proper wheel selection is a very important component of your trailer gear system. When replacing your trailer tires and trailer rims it is critical that the proper size and load range be selected in order to match the load requirements of the trailer. The following characteristics are extremely important and should be thoroughly checked when replacing trailer tires.
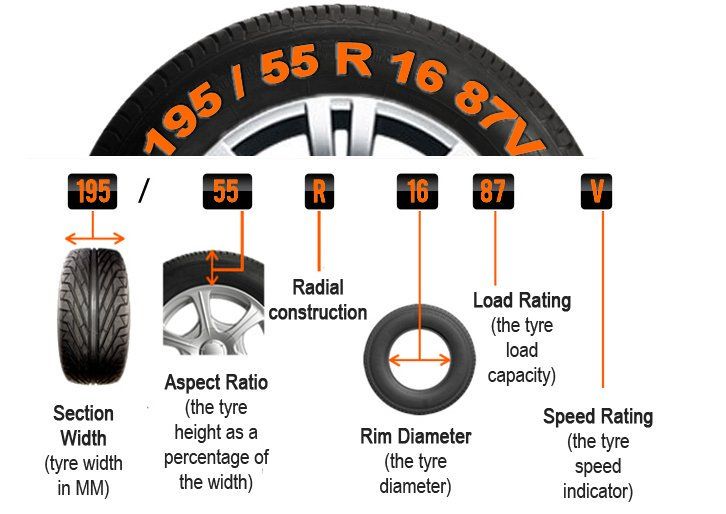
Quite often consumers are uncertain how to read or interpret specifications on a tire side wall. This problem is compounded by the Trailer Tire Industry's use of three different size identification systems on trailer tires. The following are examples and explanations of tire code.
Proper trailer rim selection is also important to assure replacement wheels will match your existing trailer hardware. Be certain to match your wheel 'bolt circle' pattern to the axle hub. The wheel bolt circle is determined as follows:
Tire 'load range', or the maximum weight each tire can safely support, must be considered when selecting the proper size tire for your application. The load range and maximum weight capacity are indicated on the tire side wall.
TrailerTires.com carries a full line of nylon bias ply boat trailer tires and utility trailer tire. These 'Special Trailer' (ST) tires have been constructed for better high speed durability and bruise resistance under heavy loads. Trailer tire construction varies substantially from automotive tires, therefore it is essential to choose the correct tire for your towing application. In general, trailer tires have the same load range (or ply) from bead to bead and are bias ply construction. This allows for a stiffer side wall which provides safer towing by helping to reduce trailer sway problems. The use of 'Passenger Car' (P) tires a on a trailer is not recommended because their construction, usually radial or bias belted, allows for more flexible side walls. This could lead to increased trailer sway and loss of control.
Tire 'inflation pressure' is also an important factor in proper handling as well as tire life. Maximum inflation pressure is indicated on the tire side wall and should always be checked when the tire is cold before operation.
Finally, an important safety procedure is to apply and maintain proper 'lug torque' on trailer rims. Too little torque may cause the wheel to wobble or fall off. Wheel nuts/bolts should be torqued after each wheel removal, retorque after 50 miles and frequently thereafter. Follow the manufacturers recommended torque patterN:
Use 60 degree cone angle zinc plated nuts or lug bolts initially tighten to 12-20 ft. lbs. using a cross tightening sequence (1,3,2,4 or 1,3,2,5,4). Finish torquing to 70-80 ft. lbs. (NOTE: Nuts and studs should be clean, dry and not lubricated.) Retorque after 50 miles of travel and frequently thereafter.
90,000 here are you yourself (and you can’t) - the magazine for the wheel ofLADA
UAZ
KIA
Hyundai
Renault
Toyota
Volkswagen
Skoda
Nissan
BM -Benz
Mitsubishi
Mazda
Ford
All brands
Most often, we ourselves are to blame for the fact that tires become unusable.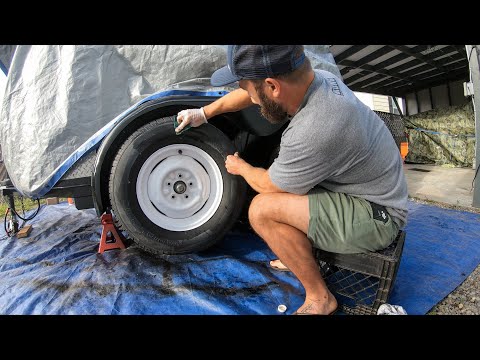 But this can be avoided.
Related materials
You have never seen such tires: even the police were surprised
In the process of using a tire, a variety of damages can occur, most of which are the fault of the driver. As a result, rubber is wasted, and since the law prohibits the use of different tire models on the same axle, you have to spend money on replacing the second tire.
The most common damage is puncture . This is the most harmless type of damage, but only if you notice it in time and repair it right away. It is absolutely impossible to drive on a flat tire, even a couple of meters! The damage caused by running on a flat tire or with low pressure is catastrophic. This causes the sidewalls to deform more than they should, which causes the tire to overheat, delaminate, and the carcass becomes unusable due to broken cords. As a result, the tire will have to be thrown away. In addition, the edge of the rim can also be damaged.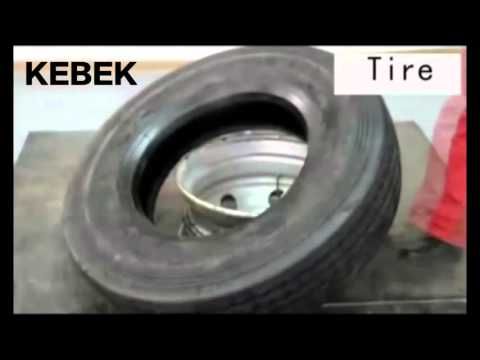
Punctures are of two types: with and without cord damage. To determine this, it is necessary to remove what pierced it. If the edges of the puncture tightly converge, then the cord is not damaged and it will be possible to repair the tire without removing it from the disk. Otherwise, if the edges do not converge, you will have to disassemble the wheel and make repairs with strengthening the frame from the inside. Alternatively, in the field and in the absence of a spare wheel, such a puncture can be repaired without removing the tire from the rim, after which you can carefully drive to a tire fitting or garage and make a full repair.
Related materials
Is it possible to pump up a wheel without a compressor - the experiment "Behind the wheel"
When repairing, the puncture site should be cleaned and marked. Further, it all depends on what kind of repair kit you have - as a rule, instructions are attached to them. There are sealants that are poured into the tire through the nipple, after which the wheel turns with the puncture down and the substance seals the hole. Repair using a tourniquet or insert is somewhat more complicated, but also more durable: the edges of the hole are polished with a special tool, after which the tourniquet treated with a special compound must be inserted into the tire through a puncture with a special awl, pulled out (not completely) out and cut flush with the surface.
In case of damage to the cord due to a puncture, the tire must be removed from the rim in order to install a reinforced patch with an additional cord on its inner surface. One of the sides of such patches has an adhesive layer that promotes cold vulcanization. After such a repair, wheel balancing will be required. To seal punctures from the inside, patches in the form of a mushroom are also used, with a leg that goes into the puncture. Such patches are also covered with a special adhesive for cold vulcanization.
Cuts or holes , unlike punctures, are not repairable, as they violate the integrity of the frame, which can no longer be strengthened.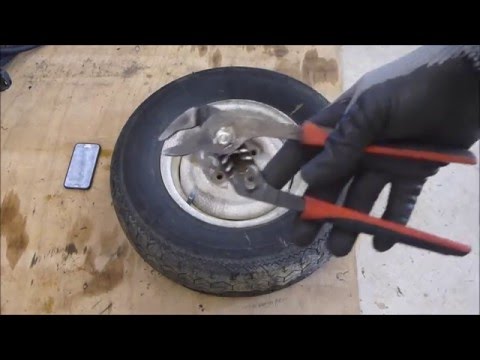 In addition, breakdowns are always sudden and occur on the go: the tire abruptly loses pressure and before the car comes to a complete stop it has time to make several revolutions “on the rims”, which breaks the cord and destroys the layers. It is not recommended to use such a weakened tire, even if it was possible to repair and strengthen the place of the rupture or cut, in the future.
Related materials
8 tire storage rules - do you follow them all?
Incorrect storage of tires can cause cracks . The danger of such damage is that moisture enters the cord through cracks, which renders the frame unusable. In addition, air can escape through cracks. Unfortunately, cracks are not repairable, and tires with them will not last long: sooner or later they will deform, become covered with swellings due to rusted and torn cord or because of driving with pressure below the recommended one.
Blisters or bulges can appear on a tire for a variety of reasons - it always happens due to a broken cord or delamination in the carcass. In the first case, an obstacle was hit and the impact broke the cord or the cord was cut through with a sharp object. In the second case, there is no damage on or near the hernia, which means that it appeared either due to a factory defect, or due to frequent driving with pressure below the recommended one. The danger of hernias is that they can explode at any moment and provoke a skid, which will lead to an accident. If there is nothing to replace a tire with a hernia, then it is better to rearrange it to the rear axle and drive very carefully. Like cracks, a hernia cannot be repaired. Sometimes small blisters resulting from impacts or cuts are reinforced with reinforced patches, but there is no guarantee that the tire will not explode. Therefore, tires with hernias are recommended to be replaced immediately.
Related materials
Tire blackening - 6 ways to polish. Inexpensive!
Tire sidewalls can be damaged by rubbing against curbs or the asphalt edge when pulling over.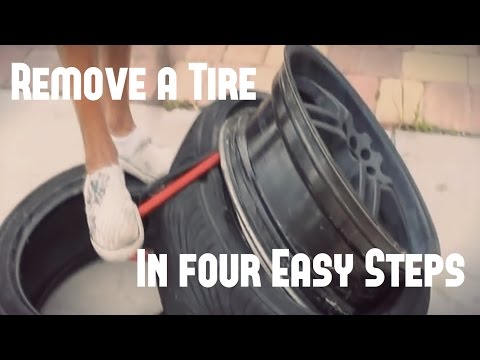 If you are prone to such a driving style, then it is recommended to inspect the inner and outer sidewalls from time to time and, if abrasion is found, swap the wheels in order to prevent the cord from being exposed - the rubber thickness on the sidewalls is small (1.5–3 mm), and it can be rubbed to the frame very quickly.
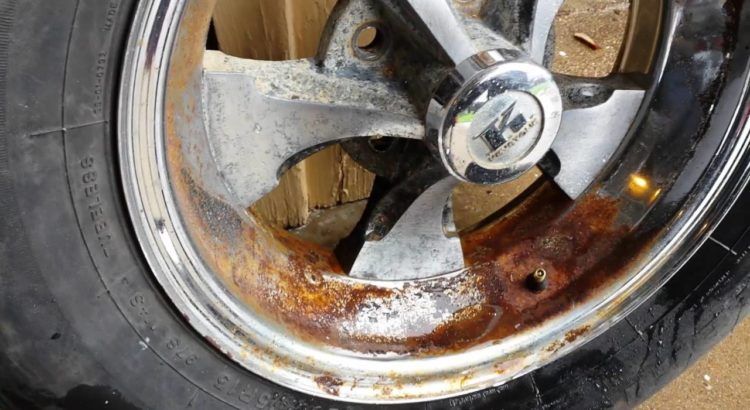
Often the cause of tire damage can be poor-quality tire fitting , during which the bead ring was damaged. In this case, the tire loses its geometry and “sits” crookedly on the disk - it writes out “eights” during rotation, and lateral vibration appears during the ride. It is impossible to repair such a tire - you need to replace it with a serviceable one as soon as possible before it damages the suspension: rods, hubs and bearings.
You can find out whether you are using tires correctly and what invisible damage they have received by the characteristic wear of the tread, the varieties of which are collected in the table for convenience:
Double side shoulder wear
Driving with lower than recommended tire pressure.
Inflate the tires to the pressure recommended by the automaker (a plate with recommendations is attached in the driver's door opening) and find the cause of the fall: puncture, cracks, hernia, nipple, rust on the disc rim in the place where the tire fits, etc.
Center wear
Tire pressure too high.
Reduce the pressure to the recommended (indicated on the tablet in the driver's doorway)
In the form of rings and furrows
can be found on trailers or rear wheels of pickups and vans due to vibrations and vibrations and vibrations due to vibrations and vibrations bouncing at high speeds.
Changing wheels on a loaded axle to equalize wear, driving with a heavier load.
Chipped wear with cuts
Frequent wheel spin on rocky surfaces.
Move the wheels to a non-driving axle, use the gas pedal more carefully when starting to move.
Photo: Petr Urbanek / Unsplash
Our new video
When the roadster "Krim" will appear - new details
New Russian sedan at the price of Vesta on "Behind the wheel" tests
When will the Russian electric truck EVM Pro appear? Details known
Did you like the article? Subscribe and you will always be in the know!
Driving in Zen
News smi2.ru
05.03.2013
Probably the most common failure for a cyclist is a tire puncture, especially if he rides in an aggressive style.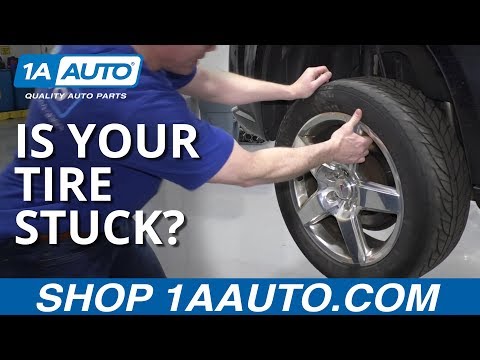 Either he hit the glass, then a nail, and sometimes he just ran into the curb at speed. Experienced cyclists can change the tube in the bike with their eyes closed, but what about a beginner who can’t even take off the wheel, let alone change the tube. The main thing is not to despair! If you are traveling a long distance (and always better), take a pump with you, a spare tube, or, in extreme cases, a "bike first aid kit" for the wheel. Someday she will save you from the fate of pulling the bike "on yourself".
So, if you punctured the wheel , first you need to get off the bike, in no case continue to move on a flat tire . Firstly, you will tear the tube even more, and secondly, you can ruin the tire, and in the worst case, the rim.
How to change the inner tube on a bicycle
1) If the wheel has not completely deflated, deflate it to the end, to do this, unscrew the nipple (spool) cap.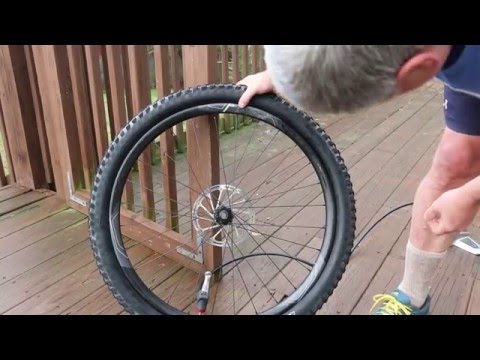 If you have a nipple (spool) the same as in the car, press something sharp on the small button in the middle and hold until the tire is flat. If you have a cap with a key for the spool, then just unscrew it. If you have a nipple (spool) like in old bicycles, unscrew the lamb and take it out.
2) Remove the wheel. If the wheel is on an eccentric, removal will not cause difficulties, if not, then keys will be needed (depending on the bike and wheel - 13-17).
3) If you have pliers, use them to remove the rim from the wheel, if there are no pliers, you can use an improvised tool (wrenches, etc.), but it is advisable not to use objects with a sharp edge - this can lead to damage to the tube or rim. Tear the tire with your tool and, resting it against the rim, press down until the edge of the tire comes out of the rim, then take the second key or mount and do this action again, while NOT removing the first key. When you feel that the keys do not lean back when you release them - just try to move the second key in a circle away from the first key.
4) Remove the camera by simply grasping it with your fingers. Grasp the opposite side of the nipple (spool).
5) In principle, it is possible to insert a new tube, but I recommend removing the tire completely (this can be done by hand or with tools (wrenches)).
Check the condition of the rim: there are no metal burrs inside, check the condition of the rim tape, look inside the tire. This should be done if you change cameras frequently and don't know where you might have blown a tire.
How to install a tube in a bicycle wheel
1) Take a new tube or a sealed tube (how to glue a tube), squeeze it with one hand and move it around - this will help to clean it of unwanted foreign objects (pieces of rubber, metal chips, etc.) .d.)
2) Lightly inflate it, if you removed the tire completely, put it on one rib (if the rubber is directional - make sure you install it correctly (you can peek at the rear wheel if the treads are the same)).