Outside's long reads email newsletter features our strongest writing, most ambitious reporting, and award-winning storytelling about the outdoors. Sign up today.
Outdoor enthusiasts are more subject than most to having to deal with a vehicle breakdown in a remote location where immediate help may not be available. Since tire punctures are by far the most common problem a vehicle will experience—and something more likely to happen on dirt roads—and since you can’t always count on your spare tire, it makes sense for us to arm ourselves with the tools and knowledge it takes to repair them ourselves. Here’s how.
How Do You Know You’ve Got a Puncture?On a paved road, if your steering wheel starts to wobble vaguely in your hands, or if you hear a loud thumping sound that coincides with your wheels’ rotation, then you’ve got a flat tire. Off-road, at lower speeds, you’ll likely hear that thumping before you feel it.
In both cases, avoid risking further damage to the tire or vehicle by finding the first safe location to pull off the road or trail.
Video loading...
Don’t Rely on Your SpareIt’s become less and less common for new vehicles to come equipped with a full-size spare tire. Space savers, or donuts, are only designed to get you a very short distance at very low speeds—across town to the tire shop, basically. You should avoid using a space saver on a dirt road or trail if at all possible.
And even if you have a full-size spare with a matching tire and wheel, it’s still possible to puncture more than one tire at a time. And man, that’s going to cause a big problem if you’re not prepared or if it happens somewhere you can’t easily call for help.
What You NeedThe tools you should have to fix a flat tire yourself don’t cost much more than getting a tire plugged at a tire shop. And they’re hundreds of dollars cheaper than calling for a tow. They’re also small and light.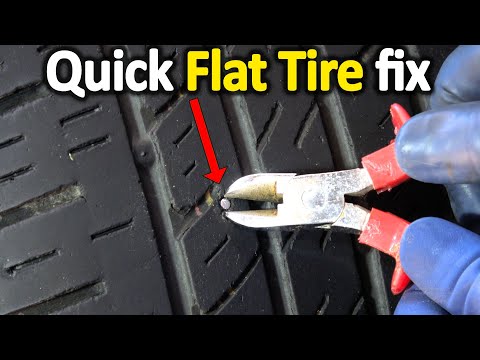 There’s really no excuse for not carrying this stuff in your car or truck.
The best tire-repair kit I’ve found is made by Boulder Tools and costs $38. Like other kits, it includes rope plugs and the tools you need to install them, but this one goes above and beyond by including items like needle-nose pliers, spare valve cores, and a folding razor blade.
You will also need a compressor. That’s what you’ll use to reinflate your tire after you fix the puncture, or how you’ll air back up to road pressures if you’re airing down for off-road driving. If all you need is an emergency option, one of these $23 Slime compressors is perfect. It plugs into your cigarette lighter (or 12-volt outlet), so you don’t even need to open your hood. You don’t want to rely on something like this if you’re regularly inflating oversize off-road tires, but that’s a story for another time.
I also stick a can of Fix-a-Flat in every car my family owns, plus those of most of my friends. Fix-a-Flat includes both a sealant and compressed air in a single can, allowing you to take care of the kind of small punctures caused by a screw or nail without even removing the wheel. And that capability makes it a unique tool in your arsenal—one that can come in handy for even complicated repairs where it’s not safe to to try and remove a wheel or where gaining the ability to roll the car a few hundred yards can make the situation much safer (think: a steep slope off-road or the side of a busy highway, with trucks rushing past just feet away).
Everyone should also carry a quality tire-pressure gauge. Use it to check the pressure of your tires once a month, and adjust them to factory-recommended settings if they’re off. Ambient temperatures, elevation, and just time can all cause a tire to lose or gain pressure, and when it does so, it can harm your fuel economy, handling, and performance.
Avoid TroubleRegularly inspect your tires and replace them before the tread wears to 2/32nd of an inch deep. An easy way to check this is to insert a penny upside down into the tread (Lincoln’s head first). If the tread reaches past Honest Abe’s hairline at his forehead, you’re good. If not, order new tires. Tires worn to or past 2/32nd of an inch of tread will be much more prone to punctures and won’t provide the same grip as a tire in good condition.
Tires also have a maximum life span of six years. To determine how old your tires are, look for the tire identification number on the sidewall: it begins with DOT, is 11 digits long, and ends in four numbers. The first two digits of those last four numbers represent the week (of 52 in a year) the tire was manufactured. The last two are the year.
If your tire shows any signs of cracking or tearing, or if anything white or metallic has worn through the rubber, replace it immediately.
You also need to make sure you’re using an appropriate tire for the conditions you’re facing. If you’re traveling off pavement, a quality all-terrain tire will help you avoid punctures both in the tread and, more importantly, the sidewall.
Make sure any vehicle you’re driving has all of the necessary tire-change tools present and accounted for. You’ll need a lug wrench and a jack at a minimum. Don’t be that person who forgets to put them back into a car. I even check for these things in rental cars before driving off—they’re that essential.
Right in the middle of your tread is a good place to find a foreign object. (Nathan Norby)Step One: Find the PunctureOnce you’re in a safe place, hop out of the car, and find the flat tire. Try to identify the source of the puncture. Sometimes a foreign object will be very obvious at just a glance. Sometimes you’ll need to roll the car a foot or two to expose the problem.
If you are able to see that there’s obviously a nail or screw embedded in your tire’s tread, that’s good news. If the nail or screw is strongly embedded into the tire’s tread, there’s no need to remove it at this time. Get out your can of Fix-a-Flat, follow its directions to connect it to your tire valve, and empty the entire contents of the can into the tire.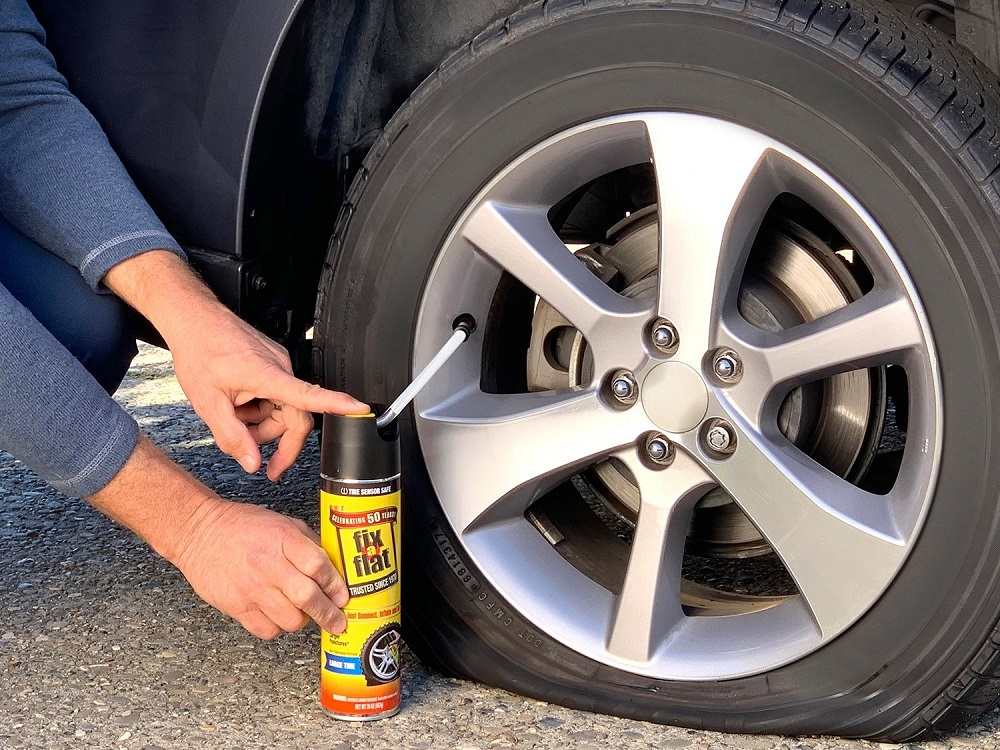 You should see the tire visibly inflate. If it returns to normal, drive off immediately, go a few miles, then stop and check your tire pressure, adjusting it if necessary. If the tire seems to be holding air, you’re good to continue driving, but take a look at the tire any time you stop. When you get back from your trip and have the time, go ahead and follow the rest of the steps here to repair the puncture with a plug.
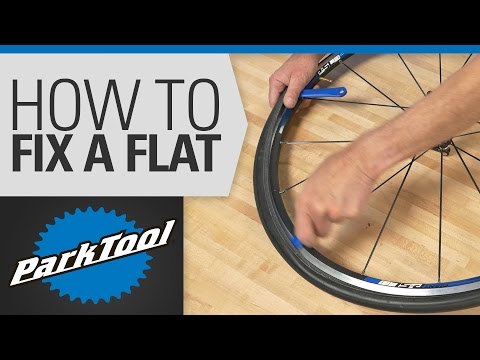
If you can’t find the source of the puncture, if it’s an exposed hole, or if you don’t have a can of Fix-a-Flat, you’ll need to take the wheel off.
Step Two: Remove the WheelFirst, remove your spare (even if it’s a space saver), and place it under the frame of your vehicle in front of the front tire or behind the rear tire. That way, if your vehicle falls off its jack, it will fall onto the spare, minimizing injury to you and damage to the car.
Loosen the lug nuts before you raise the vehicle. Remember: lefty loosey.
Next, follow the instructions in your owner’s manual to locate and use the jack accordingly.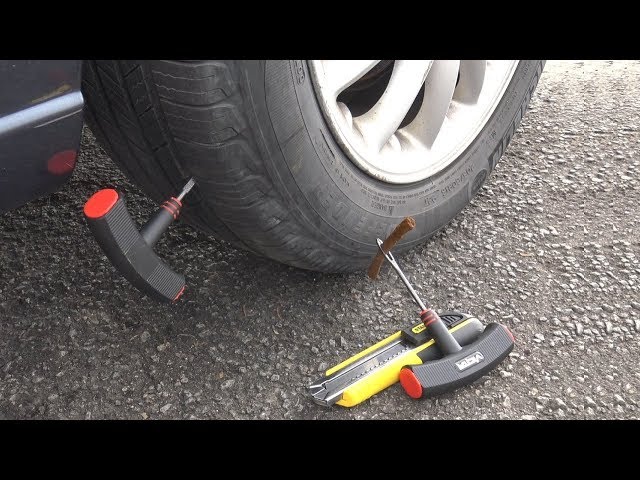
Once the wheel is off the ground, finish removing the lug nuts. Put them somewhere safe. Pull the wheel out toward your body. Be careful—wheels can be heavy.
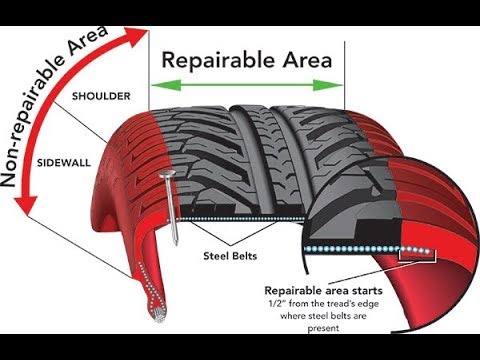
Step Three: Evaluate the PunctureIf you have a hole in your tread, it can be fixed. Tires in good condition won’t experience more than a simple hole in that location. If the hole is in your sidewall (the portion of the tire that rides roughly vertical), you just need to mount your spare and have the tire replaced at the first possible opportunity.
If the hole is in the tire’s tread and can’t be taken care of by simply dumping a can of Fix-a-Flat into it, roll the tire around to the back of your vehicle where tools are and where you can safely work away from traffic. Look for holes and foreign objects as you roll it. If a hole is small and the tire is no longer leaking air, it may be a good idea to mark the hole for easy reference later.
The recommended kit includes these needle-nose pliers; otherwise, a multitool is a good stand-in.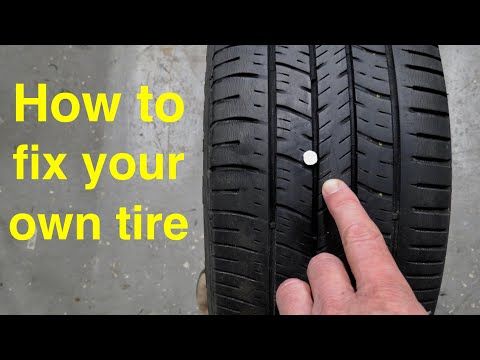 (Nathan Norby)Step Four: Remove the Problem
If there’s a foreign object in your tire, and the tire can no longer hold air, remove it. In the video, I used a screw gun to put the screw in the tire, meaning its threads engaged with the rubber and steel belts. Most roads don’t have their own screw guns, so the puncture won’t engage the threads in the same way, and it should be easier to pull out using your needle-nose pliers.
I’ve seen tires punctured by everything from a steel bar to a particularly nasty cactus barb. Organic objects like tree branches can leave residue behind. Try and get all of that out of the way.
The reaming tool will slowly enlarge and clean the hole. (Nathan Norby)Step Five: Enlarge the HoleIf the hole is larger than a pencil, skip this step. If not, grab your tire-repair kit’s reamer, and use it to enlarge the hole until it is roughly the size of a pencil.
If you have a very small hole, this will be difficult at first. Install the reaming tool by slowly screwing it into the tread while applying downward pressure. Otherwise, just push the tool into the hole all the way up to the handle, then yank it out. Repeat until the hole is large enough that you can insert and remove the tool without much effort.
Remove a rope plug from the plastic wrapper, flatten one end with the needle-nose pliers, and push it through the eyelet on the installation tool. Grasp the protruding edge of the plug with the pliers, and pull it through the eyelet until equal lengths of the plug protrude from both sides.
Grab a finger of lube from the kit, and apply it to the plug and leading edge of the tool.
Firmly push the installation tool in as far as it will go, then yank it out as hard as you can. (Nathan Norby)
Place the tool tip down on top of the hole in the tire, grasp the tool securely with both hands, and force it through the tire until the depth guide is flush with the tread. Then yank the tool straight out of the hole as hard and fast as you can. The rope plug should pass through the eyelet and remain inside the tire.
The plug should remain in the tire when you yank the tool out. Now just trim off that excess length. (Nathan Norby)If you have only a small puncture, one plug should do. If not, you may need to install a second or third. If you must install multiple plugs, then plan on taking that tire to a shop the first possible opportunity, where it can be evaluated for safety. You may have to replace it. But most of the time, that single plug will be enough. Use the razor to trim the excess length flush with the tire tread.
If your tire holds air up to the recommended pressure, then odds are it’s going to be good to go. Just check the pressure again after a few miles to make sure. If for some reason you’re losing a little air around the plug, try adding Fix-a-Flat. (Nathan Norby)Step Eight: Reinstall the Wheel
Use your air compressor to inflate the tire to the recommended pressure. (You’ll find that listed inside the driver’s doorjamb.) Once inflated, reverse the tire-removal steps described above to reinstall the wheel. First, install the lug nuts by hand to secure the wheel to the hub. Then, once you’ve lowered the vehicle back down and removed the jack, use the lug wrench to make sure all the lug nuts are as tight as possible. Tighten them in a star pattern, so the wheel snugs back to the hub evenly. Remember: righty tighty. Check these again later that day.
Return all your tools, the jack, and the lug wrench to their proper locations. You’d don’t want to misplace this stuff.
And that’s it. No tow truck. No hiking out a dirt road in search of help. No waiting on AAA while sitting on the side of a busy highway. No huge expense. And no more than a few minutes of hard work.
So, you have a flat tire or one that’s leaking air. It’s not the end of the world. Luckily there are safe and cost-effective ways to properly repair most tire punctures. The purpose of this article is to show you the difference between a safe, permanent repair and a temporary string, plug or patch repair.
According to the National Highway Traffic Safety Administration (NHSTA) and the Tire Industry Association (TIA), the only method to properly repair a tire puncture is to fill the injury with a repair stem and back the stem with a repair patch. This is commonly known as a combination repair or a patch/plug repair.
Patch/plug repairs are most often performed using a one-piece repair unit that combines the repair stem and cap (or patch) into one unit. However, special circumstances may require the use of a two-piece combination repair (ex. If the angle of the puncture exceeds 35 degrees). The repair is then permanently bonded to the inside of tire and through the injury channel using a cold, chemical vulcanizing process. The repair essentially becomes part of the tire, creating an air-tight seal that keeps air in and moisture and contaminants out (more on this procedure below).
Emergency roadside plug repairs are NOT intended to be a permanent tire repair. Plugs and string repairs are designed to get you back up and rolling long enough to get home or to the nearest service center to perform a proper tire repair.
The common misconception with plug and string repairs is that because they hold air, they are safe to use. While it is true that many plug repairs do a great job of keeping air in the tire, that’s only part of the equation. Because they’re not completely sealing the injury, plug repairs may allow air and moisture to penetrate the body of the tire. Over time, this could lead to a dangerous (or even deadly) blowout.
A tire repair that uses only a patch is also NOT considered proper or safe. A properly installed patch will do a great job of allowing the tire to hold air. However, similarly to the plug-only repair, the patch does not fill the injury channel. Therefore, air and moisture could seep into the tire from the tread surface and eventually damage the tire.
The Proper Tire Repair Process According to Industry GuidelinesOnly a proper patch/plug repair completely seals the puncture from inside the tire and through the entire injury channel. There are a few extra steps necessary to perform a proper tire repair in accordance with industry guidelines. We’ve developed a simple acronym to help organize and remember the steps: R.E.P.A.I.R.
 The over-buffed area of the inner liner is treated with a thin layer of rubber sealant, and the excess repair is trimmed to approximately ¼” above the tread surface.
There are a number of factors that may determine whether or not your tire is safe to repair. These factors fall into three main categories:
 Excessive wear, casing separation, impact damage and other conditions may make it unsafe to properly repair your tire. For a more comprehensive list of repairable vs. non-repairable conditions visit our blog Can Your Tire Be Repaired?
The occasional flat or leaky tire is an unavoidable part of life. But, taking shortcuts to repair it can be dangerous to you and your passengers. Take the time and do the research to do the job right and/or find a reputable tire repair shop trained in proper tire repair procedure.
02/22/2018
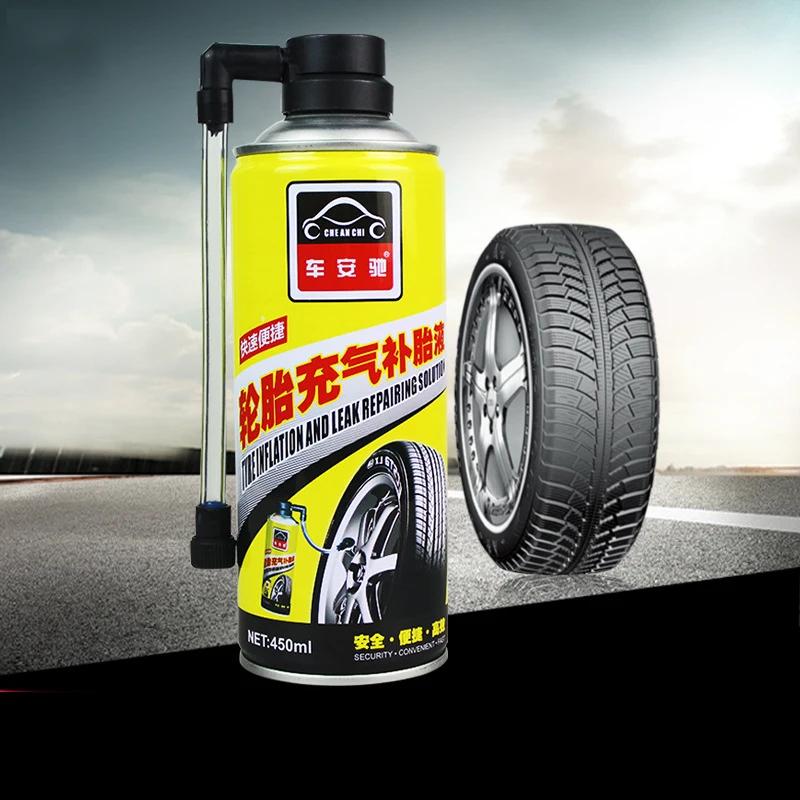
Despite the objective importance of the spare tire, not all drivers always have it with them. Some do not carry a spare tire out of hope or belief that their tires are invulnerable. Others deliberately take this step, as they stocked up with a special tool in advance, which, if necessary, can eliminate a tire puncture along the way. What else can be used and how to do it right? Let's figure it out.
Contents of :
Conventionally, all methods for express tire repair can be divided into two categories:
Consider ways to restore a damaged tire on the road. The first three methods are temporary. The latter, with the right approach, allows you to completely restore the tire.
 This method is relevant if you have a long trip under time constraints.
 A simple screw or self-tapping screw (preferably larger in diameter than the size of the puncture) is taken and screwed into a hole on the surface of the tire. The self-tapping screw can be borrowed from the fender liner or plastic interior elements. This method will not eliminate the air leak, but will allow the car owner (perhaps with a few swaps) to get to the nearest tire service.
 After removing the foreign object, the hole is processed with an awl with abrasive edges: this tool must be inserted into the puncture and cleaned and worked out several times with intense reciprocating movements. Then the raw rubber tow is removed from the package and inserted into the eye of the second awl so that both ends are the same length. The hole in the tire and the raw rubber is treated with an activator. Next, the awl is inserted into the puncture in such a way that small ends of the tourniquet, about a centimeter long, remain outside. After 5 minutes, the excess remaining on the surface is cut off. This method can also successfully eliminate small side cuts.
There is a technique that allows using wire and several bundles of raw rubber to get rid of even extensive side damage to tires. However, it is quite difficult to implement and not every driver will be able to implement it.
Consider a few well-known tools that are most widely used to repair punctures:
 The maximum diameter of the repaired hole is 4.5 mm. This is almost always enough to repair punctures caused by nails and screws.
Our online store offers a wide range of tire repair products. You can order them through the TopDetal. ru website or by calling 8 800 444-75-16.
Also read on our website about the best liquid rubbers.
Back to the list
No one is immune from such trouble: the wheel suddenly depressurized, and the driver, who was sitting quietly in a comfortable cabin a minute ago, faces a problem: what to do about it?
Let's start with the fact that a tire puncture on a modern car still needs to be noticed. Therefore, the driver needs to monitor the force on the steering wheel, the noise from the wheels and the tire pressure indicators on the instrument panel (if any). If a punctured wheel is not noticed in time, the tire will be completely chewed up and the issue of its repair will be removed: only a replacement.
But we will proceed from the fact that the puncture was noticed in time. If there are signs of a flat tire - the car is pulling to the side, a rumble or rhythmic noise from the side of the wheel, wagging the stern - you need to gradually reduce the speed and slowly pull over to the side of the road in a safe place. Dealing with a flat tire right on the roadway is dangerous, you should not do this.
Not in all cases the driver can solve the problem of a flat tire on his own. But you need to try to find a puncture or air leak in order to immediately decide on a strategy for solving the problem.
 It depends on him what to do next. You can more accurately note the puncture by watering the suspicious place with water: the outgoing air will bubble a film of water that has lingered on the rubber.
 A leak due to corrosion is “cured” after disassembling the wheel, but the advantage of such a malfunction is that the tire loses air rather slowly because of it.
First of all, do not immediately remove the flat tire to repair it or change it to a spare tire. Try to determine the intensity of the air leak. It may be easier to pump up a flat tire with a compressor or pump and drive to the nearest tire shop, where professionals will take care of it. In some cases, for example, if two wheels are damaged with one available spare tire, only periodically pumping up a better preserved tire and you can get to the service station. “Promising” in this regard is a leak at the place where the tire fits on the rim and a puncture on the tread - usually such damage does not lead to an intensive release of air, that is, by pumping up the wheel, it is quite possible to get to the workshop.
If the decision is made to have the wheel repaired on site, follow these tips.