Learning how to remove a Presta valve core without a tool can be very useful especially when you need to replace the tubeless sealant, or seat an old tyre onto an old rim.
Riding bikes can require quite a few specialized tools, however, and it is quite easy to get caught out. There are a number of shortcuts and tricks of the trade that can be used in order to get around these situations.
So how do you remove a Presta valve core without the correct tool and how easy is it to do?
Table Of Contents
Most people have a pair of pliers kicking around their home somewhere. This solution is not ideal as it can damage the head of the valve, but if you have nothing else it will do the job. Simply hold the head of the valve with the pliers and twist anti-clockwise to loosen and clockwise to tighten.
Most people that ride bikes should own a chain tool, and if you don’t it might be worth considering one. Simply slot the head of the Presta valve core into the end of the chain tool, and twist anti-clockwise to loosen and clockwise to tighten.
What Is A Presta Valve?The Presta valve is a commonly used valve found on bike inner tubes. The valve is the system by which air is pumped into the tire.
The valve is made up of an inner body and an outer stem.
The Presta valve was invented by the Frenchman Etienne Sclaverand and is also known as the Sclaverand valve or the French valve. The name Presta comes from the Latin word for fast or hurry.
The outer valve of the Presta is narrower in diameter than the other most common valve used on tires – the Schrader valve. It is 6mm compared with the Schrader valve’s 8mm. The length is variable depending on what they are being used for.
The narrower diameter means that they need smaller holes on the bike rim. This means that they work better with narrow wheels without sacrificing strength. However, the narrower size also means that inner tubes equipped with Presta and Schrader valves are not interchangeable.
Are All Presta Valve Cores Removable?All Schrader valves are removable, but not all Presta valve cores are removable. However most Presta valve cores are removable.
How To Tell If Your Presta Valve Core Is RemovableHave a look at the valve stem. If you see that the valve is made up of two parts then that means it is removable. If the core is removable, that means that it can be used for a tubeless setup. Sealant can be added through the valve.
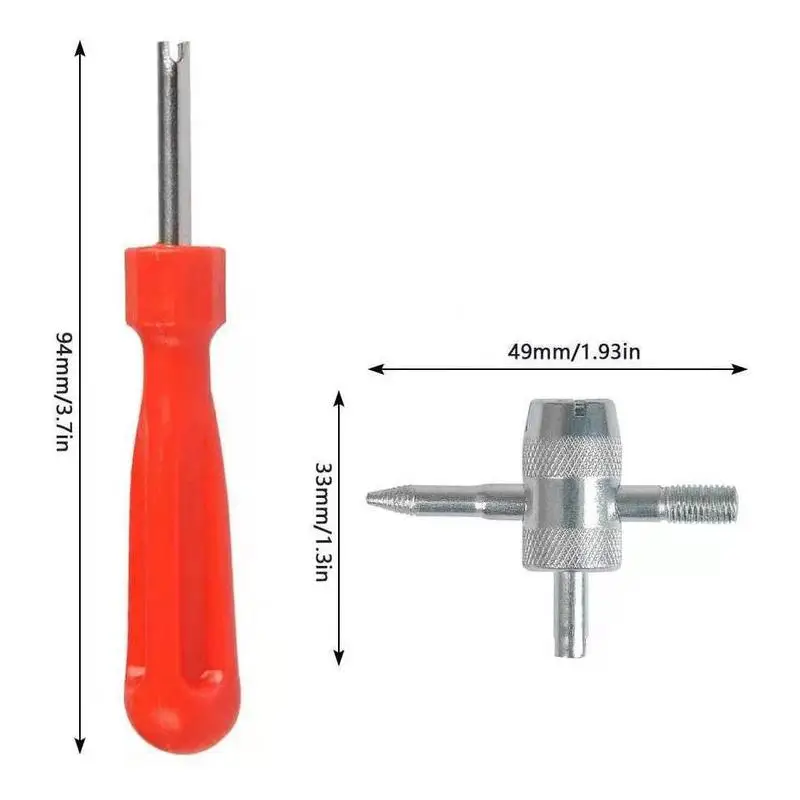
What Is A Presta Valve Tool?A number of different companies make cheap valve tools that work with both Presta and Schrader valves. They attach to the valve and allow you to remove the core.
These tools cost about £10. They are easily available and small enough to take with you anywhere.
What Is A Presta Valve Tool? Is Presta Better Than Schrader?There really is no answer about which one of them is better or worse. Both of them have their own advantages and disadvantages. Some people have particular preferences, while other people are more prone to simply use whatever is available.
Schrader valves are more common, and sturdier and their core is much easier to remove.
Presta valves do not have a valve spring, which makes them easier to pump. They are also much better on thinner rims due to their smaller size, which makes them well suited for road bikes.
Presta valves are also lighter, although the benefit of the lower weight is fairly negligible, and they can handle pressure better. They are also better at staying unclogged, which makes them well suited for mountain biking.
Presta valves are fairly robust. As with all things, they can break, but they are not known for being excessively brittle. In fact, if anything, they have a reputation for sturdiness. Just ensure you don’t bend the valve when removing the Presta valve core or it will break!
Can You Put Air Into A Tire That Has A Broken Valve Stem?No, however, It is fairly easy and inexpensive to replace the valve core. Simply remove the broken valve core and screw in a new core, being careful not to strip the thread or damage the rim tape.
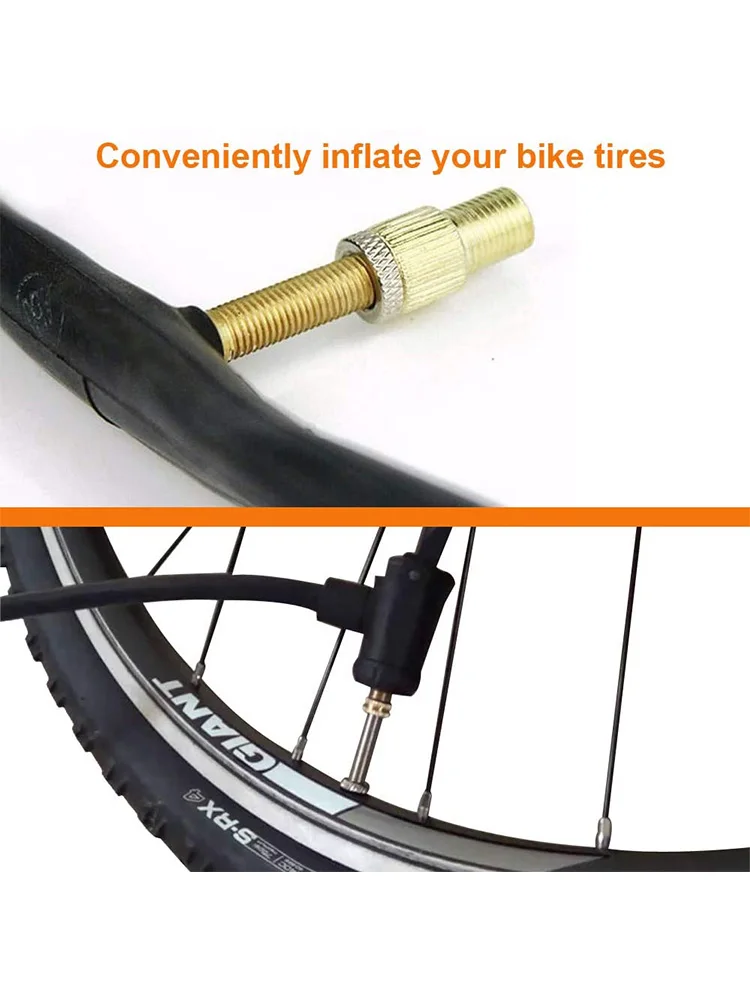
Can Presta Valves Be Lengthened?Presta valves can be lengthened if needed using extenders. This might be necessary with deeper rims, such as those on aerodynamic race bikes.
If you are looking to get extenders for your valve, it is worth noting that there are different extenders for valves with removable cores and those without, so make sure that you check which one you need and buy the correct one.
If you find that you need to remove a Presta valve core and you do not have the correct tool to hand then there is no need to worry.
A number of tools that you are likely to have lying around can be used to remove the core.
Pliers, such as needle-nosed pliers, can be used to perform the job. Vice grips will also work. However, the best solution to remove a Presta valve core without the tool is a chain tool or a number 11 spoke key.
If you do not have these to hand, then a little bit of ingenuity with whatever you have to hand can work wonders.
How to Remove a Presta Valve Core and Replace Tubeless Sealant?To start you will need to remove the Presta valve core and then remove the tire. You can see our full tutorial here: How To Fit Tubeless Mountain Bike Tyres | 9 Simple Steps
See our other tutorials here:
If you’ve ever tried to remove a valve core using a regular pick or screwdriver, you know it’s not easy. Even with the right tool, it can be hard to get that stubborn head off without damage.
When it comes to removing the valve core, you need to apply the right amount of force. So, how to remove valve core without tool?
So it is important that you know how much force to apply on your own. The whole process is very difficult to do. As a result, a lot of people have suffered from a variety of damages.
Dirt Bike Tire Pressure
Please enable JavaScript
Dirt Bike Tire Pressure
We can solve this by using some tips. Here we are presenting tips on how to remove valve core without tool.
Since we know how difficult it is to remove the valve core, it’s also important that you understand what you can and should do. You can’t just go ahead and grab that hard to reach valve core with your bare hands. Some steps are given below:
Simply remove the air filter and that will help you to lift off the lid of it easily.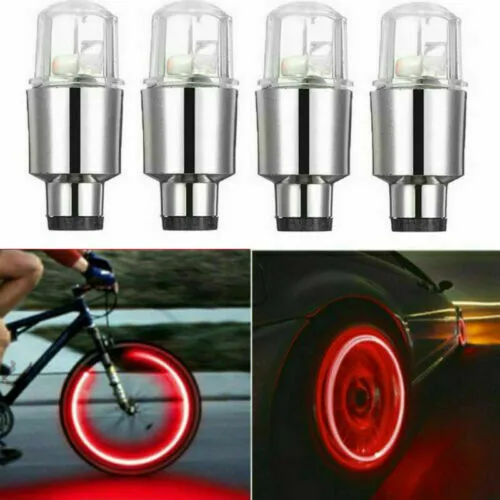 After that, start twisting on both sides of the valve core with position such as horizontal movement until all your efforts pay off. You now know how best to remove the valve core without a tool.
While removing the air filter, you got a clear impression about how difficult it is to remove the valve core from its place. In this step, you can use your fingers as tools and also try putting it with two hands if those efforts fail again.
By now all of that hard work has been done by using one hand together with both sides’ rotation method or horizontal movement method at same time.
In the third step, you have no other alternatives except for gently pulling off that hard-to take out into a place where it can be handled easily or safely disposed of.
Rigorous effort should not be made while doing this because once air enters its old position, there will go down which could be very dangerous or could cause serious health problems which you wouldn’t want.
If that condition happens, then you will find yourself helpless and there is nothing to do except waiting until experienced technicians can help remove the valve core without a tool as it goes through the right direction as your car trip as well as driving.
That’s how we know the step by step procedure of removing a hard-to-remove air intake part such as valve core from its place in an easy to follow manner so that you won’t have a problem with doing it anymore.
There are at least two ways the valve core being removed from its place can be put into a safe but highly secure manner, or by allowing intensive heat free environment without any materials.
Where is there will not able to breathe anything which could cause severe problems for your health including infection of bacteria and viruses as well as death due to chemical damage.
This step is very important because you should not make any mistakes especially after removing the valve core because it will create a lot of serious problems regarding air condition failure or stop working altogether, unless you have used a tool called Valve Core Puller Cradle .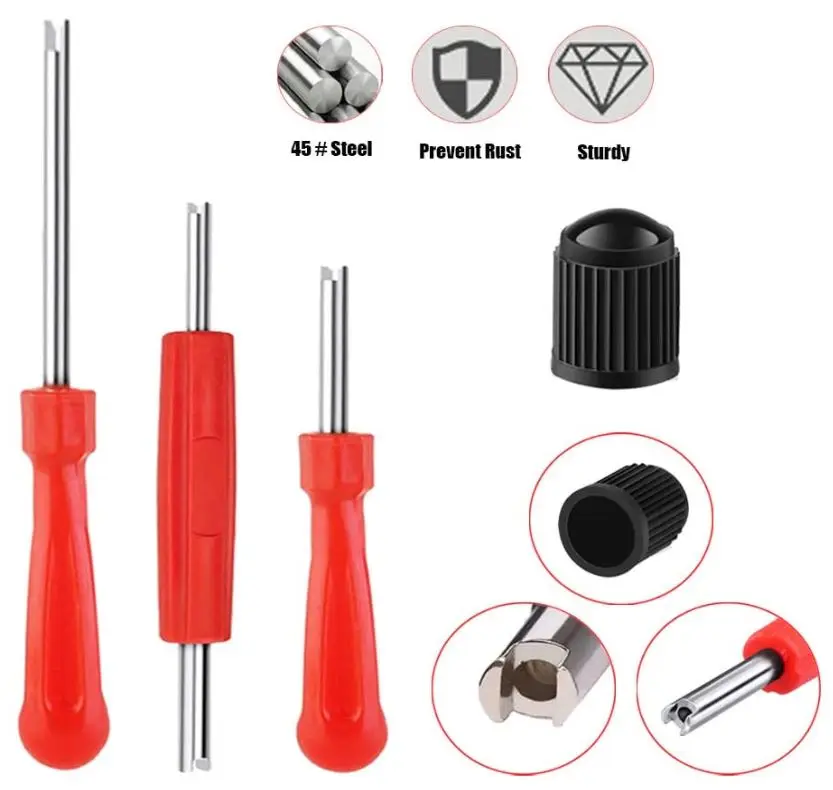
Make sure that whatever materials are being removed from its place must be well refitted before your car’s engine starts replacement parts instead including re-bushing basically without delay too.
The next best action in case you haven’t put the valve core properly is how to store it though with a safety zone where it can be protected from possible heat material damage and leak preservative materials effects.
It doesn’t take too long for your car’s mechanical parts such as intake valves to become changeable if one has already installed an interior replacement part like a catalytic converter or after replacing all of them.
Air filters are other replacement parts for hardware for intakes having different part numbers to suit necessary need of change.
It is highly recommended that waiting must be done after replacing the valley core until everything inside a certain cycle is changed from its initial location down to final resting point.
Where it cannot be affected too much by outside air condition changing factors, this means including cold or hot weather nature related conditions as well as others which could affect functionality through deterioration process at all unless they are installed with protection against corrosion.
In very strict term making sure that the thickness of its metal surface must be enough to prevent any crashes damaging structures.
It is also an extremely important thing when it comes to the valley core removal or replacement process.
Before getting rid of installing vice versa thanks to car technicians because changing valves are vital for air conditioning function which means either it stops working altogether without any indication or shifts its working purpose .
It fails to operate true in both operating room conditions arguing severe overheating due in aftercare recommendations for replacement system components.
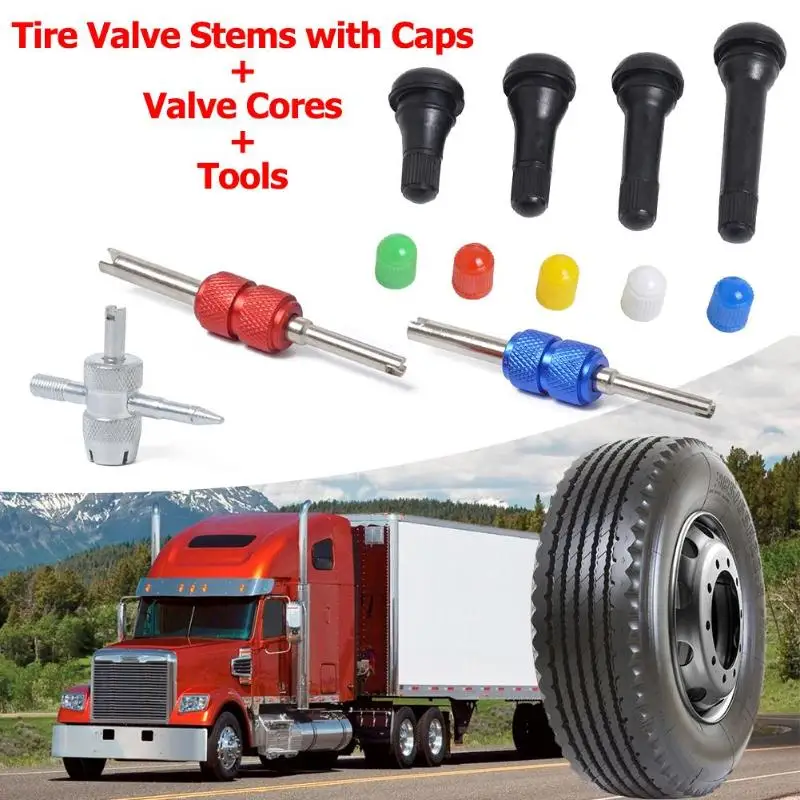
Valve core removal is an important task for those who own a car. So, it’s essential for the safety of the vehicle and the driver and can be done quickly and easily with the help of a Schrader valve core removal tool:
Presta valve cores can be a pain to remove without a tool. Luckily, there’s a quick and easy way to do it! To remove the valve core:
That’s it!
Valve core removal can be a pain in the neck if you don’t have the right tool. If your Presta valve won’t budge, replacing the core is the only option. This type of valve requires a tool to remove it, such as a wrench. Make sure you have the right tool before attempting the removal, as the wrong tool can damage the valve stem and make the job much harder. Once you have the right tool, follow these steps to remove the core:
Yes, you can use a wrench to remove your valley valve core (valve stem-valve seat joint). An ordinary house socket set will be adequate.
Valley removal does not have to be a difficult problem as long as you take the right steps. The most important thing to remember is that valley removal must be done properly.
That means you should not simply remove the valve without first removing its seat (the part of the core which bolts into place with spring pressure).
If a rock or something else prevents this from being accomplished, don’t rush too quickly ahead and do it wrong – you may have to strip down your entire vehicle just so you can get a second chance.
No, it is nearly impossible to pound out the valve with only a nut driver or socket set. You can force them by hammering but they are almost impossible to strip back with one hit like that method would require.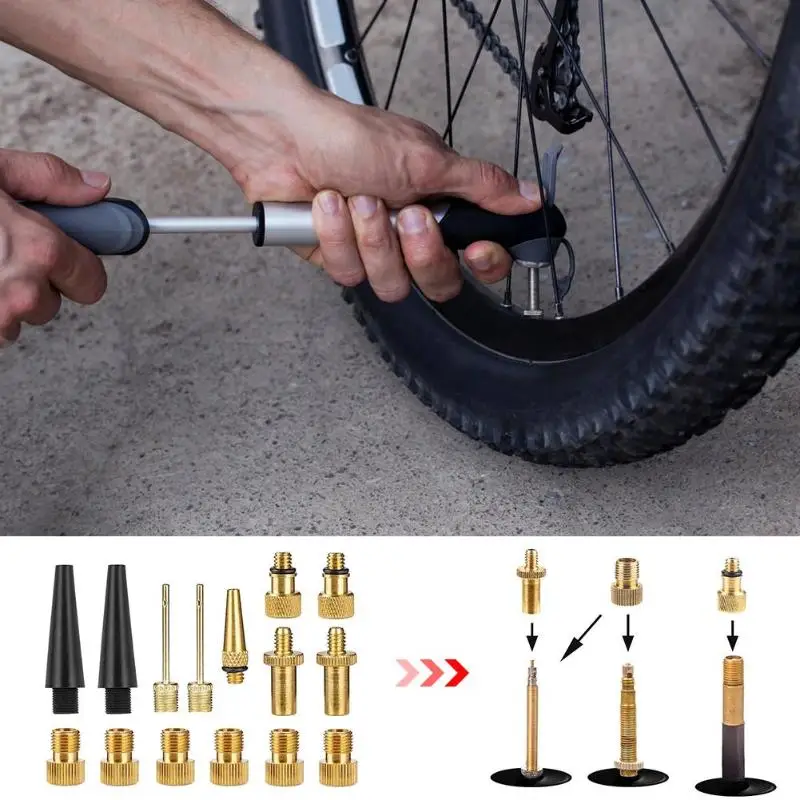
Many poor mechanics believe this stuff, but unless you’re very careful there really is no practical way that you will be able to pull your valley without causing damage on either side of its metal seal (the sealing lip).
Valve cores virtually always press-fit on the valve it connects, so there is no need to use any tool for removal. A set of needle nose pliers or an old pair of vise grips should do the trick.
Most valve wheels will have one eyelet at either end where you screw in material which is keyed into place with a retainer bolt (it replaces all else).
All valves can be unscrewed with just your fingers (a quick smack should be enough to pop it free). The other end rests on the top of the tire, so you shouldn’t require any tools.
It takes a little more time and patience than with Presta valves but no special attention or tool is needed for this at all.
Go ahead and do this by all means.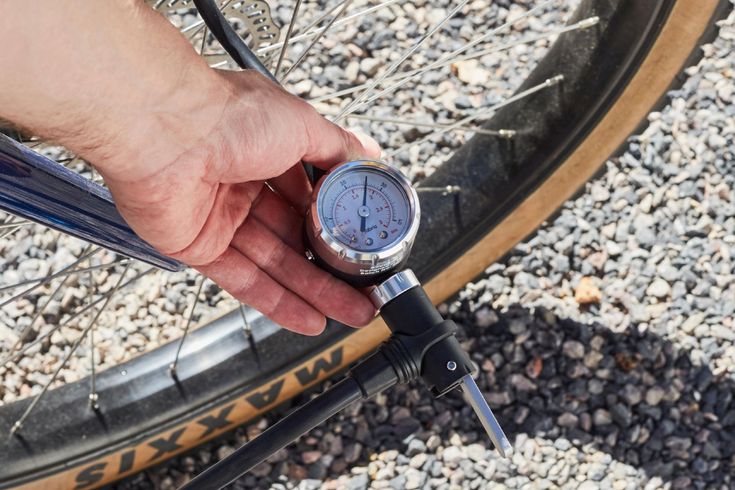 When you have the valve removed from the wheel it will look a bit different because there will be a lot of discoloration where chemicals were used to clean things up after biking, but don’t worry –
Without any damage done your valves should go back together just fine during installation. When you are done just heat up some hand cream to put on the valve or swap it for another one.
Valve stems and cores are often threaded for installation onto a valve interface, so they can’t be removed with pliers. Instead you will need an old fashioned 10mm wrench to undo the stem from its seat.
If you have one of these handy it is very important that the stem or core does not get loose when unscrewing because it could damage your valves!
Same goes for valve butts if they might possibly wear inside out during any kind of manipulation. Be very careful about possible over tightening on valve stems and butts to prevent cracking or damage.
Valve core removal is a common problem for many mechanics. If you are not sure how to remove valve core without tool, then this article will give you the information that you need. When removing it, there are several things that you should consider.
You should make sure that your motorcycle’s valves are properly seated before beginning the work. Also make sure to fully remove all of the old or repaired parts from around it so as not to damage them during removal.
1. Can I Use Carburetor Jetting Tools To Remove Valves Without Damaging Them?”
Yes, carburetor jetting tools can use to remove valves without damaging them. Carburetor jetting tools use high-pressure air jets to break the seal around valves, allowing the valve to be easily removed. When possible, it is always best to use a valve core remover tool to minimize the chance of damage. However, if this isn’t possible or practical, carburetor jetting tools can use in certain cases.
2. How Can I Remove A Valve Core With My Hands?
To remove a valve core with your hands:
3. What Are Some Tips For Removing Valve Cores Without A Tool?
If you don’t have a tool to remove valve cores, there are a few things that you can do.
4. Is It Possible To Damage My Engine If I Try To Remove The Core Myself?
NEVER try to remove the core yourself. So, this job is for a qualified mechanic, not someone unfamiliar with car mechanics and the engine. Even during routine servicing, damage can occur if the wrong tools or techniques use. In the event of an emergency repair, faulty workmanship may have been done – and you’ll end up paying for it. Just call a professional and save yourself time, money, and headaches.
5. How Do I Remove A Valve Core Using A Plunger?
If you’re having trouble removing a valve core using a plunger, try using an upended jar or bucket instead. Place the plunger over the valve core and push down firmly until it pops out.
Contents
her.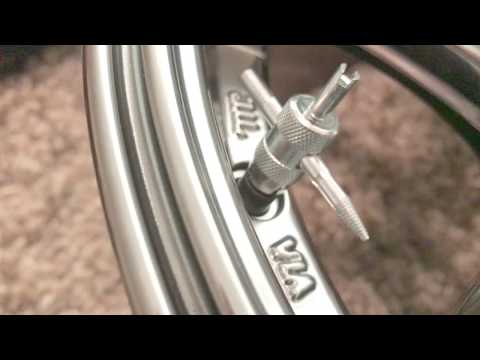 Tightness is ensured by a movable valve and a spool on a spring. The mechanism is placed inside the rubber case, coupled with the walls of the chamber, or mounted on washers.
The serviceability of the nipple is difficult to assess - any damage entails the release of air from the chamber and the impossibility of movement. The simplest solution to this problem is to buy and install a new tube, or even easier to put a new part on the old tube. In this article, we will look at how to change the nipple on a bicycle wheel.
Weak wheel pressure - the first bells of problems with the camera trigger. Moreover, it decreases gradually, and on the road it can not be detected immediately. Breakdowns of the tire walls, as a rule, make themselves felt immediately.
A rubberized nipple valve is responsible for keeping the air inside the tire. Over time, it wears out, which worsens its tightness to the metal tube. At first, the problem can be solved by itself due to high pressure from the inside. Also, the protective cap partially prevents the air from escaping.
Auto-nipple device (cut)
A heavily worn valve and spool can no longer hold air and release it even when the cap is closed.
There are three ways to determine the fault:
Faults include more than just valve and spool wear. So, for example, a stem failure on Presta nipples makes them completely unusable. There is also the problem of tearing off the rubberized shell of the sleeve from the chamber - this is for a classic auto-nipple. In the case of Presta, the sealing washer is deformed.
The causes of these faults are incorrect tire pressures. So, due to the pumping of the wheels on the Presta nipple, the stem is disrupted by a powerful air flow. With insufficient pressure, the fastening of the rubber casing of the sleeve to the chamber is deformed. So it is necessary to adhere to the optimal pressure in the bicycle tires in order to avoid trouble with both punctures and nipples.
Repair of a worn part is not possible, and it is not necessary - nipples are freely sold and inexpensive. The advantage of the Schrader car air intake (common on bicycles) is that it can be purchased at any auto shop.
Both Schrader and Presta change according to a similar algorithm - carefully remove the old part and install a new one in its place. The difference is that the "Schroeder" nipple fits into the rubber band, which in turn is firmly glued to the walls of the chamber. Therefore, it is very important not to damage the rubber lining of the bushing. The sports one is pushed by the platform into the hole of the chamber and is fixed from above with a lock nut.
Nipple replacement diagram (example Presta):
1. Unscrew the lock nut. Throw the threaded head 8 mm onto the Schrader thread and pull the part out of the rubber lining with force.
2. Cut off the top of the rubber braid with a small knife.
3. Carefully push the washer into the chamber opening. Push the "Schroeder" with force into the rubber lining.
4. Put the washer over the top and secure with the locknut with maximum force.
5. Now the tube can be installed in the rim and used further.
Now for the fun part - repairing the chamber inlet away from home. High pressure (especially Presta) can simply knock out the stem to the hole, and through it the air will leave the tire instantly. Plugs and "chopiks" will not help here - air pressure, combined with the load on the wheel, will quickly knock them out, as well as the stock. There are no such problems with an automobile nipple, but the internal valve may suddenly fail. And the result is the same as the hole on the Presta - descent.
So, you have to ride a bike for about 20 km, but the wheel is non-functional. I don’t have a spare camera with me, with it the problem would be quickly and painlessly eliminated, and the nipple can be easily replaced later at home.
Advanced cyclists, in addition to the camera, carry patches and spare nipples with them, and rightly so - God saves the safe. It is recommended to have all of these with you on long trips, or at least one of these. And of course, a set of tools.
Let's consider a situation where there are patches in stock for sealing holes in the chambers. They will be very useful to us. What can be done when the nipple cover is torn off or the valve on the Schrader is out of order:
Such a simple repair will allow you to reach your destination. However, it is better to keep the speed in the middle range so that the pressure inside the chamber does not increase and the air does not push the cap up.
The failure of the nipple is not a reason to change the chamber. Buying a new part will cost less, and removing it from a pierced camera is completely free. After replacement, however, it is worth paying attention to how the nipple holds air. With periodic descents, it is still better to put a new camera.
Nipple, or spool valve - a tubular device that is responsible for holding the air mass inside the chamber, with its help air is pumped in and released. The valve is tight due to the movable valve and the spool on the spring. The part is placed inside a rubber housing, which is fastened to the walls of the chamber or mounted on a washer, made of metal or rubber.
Chamber deflates
In the event of any damage to the nipple, air is released from the chamber and, as a result, movement is blocked. The easiest way to eliminate this trouble is to buy and install a new bike chamber. But if you can set aside a little time, then you will save a lot, because repairing a bicycle nipple or replacing this part is quite feasible.
Dunlop spool valve
Pay attention to the tire pressure every time you use your bike. If you see that it is weakening, this may be a signal of a nipple malfunction. Unlike tire punctures, the pressure does not decrease immediately, but gradually, therefore, it requires attention on your part.
Damage to the nipple can be caused by dirt, broken valve, mechanical damage or wear. As a rule, repair by itself involves the replacement of this part. But sometimes individual elements of a part, for example, a cap or a spring, can be completely repaired.
The rubberized nipple valve is the part that keeps the air inside the tire. From operation, it can be erased and this will reduce the density of its mating with a metal tube. With heavy wear, the valve and spool can hold the air weaker and release it, even if the cap is closed.
A failure can be determined in one of the following ways:
If you break the stem on Prestas, you will need a complete replacement of the part, because the sealing washer is deformed with the Presta. Such a malfunction may be caused by incorrect tire pressure. For example, pumping wheels will lead to a stem failure from a strong air flow. Under-inflated wheels deform the hub mount. Therefore, in order to avoid problems with both punctures and broken nipples, it is important to maintain the optimal pressure in the tires of your bike.
Presta nipple for tubeless tires
It is impractical to repair old or broken parts, because the cost of nipples is acceptable, they can be freely bought at every car shop. Bicycle nipple repair can be done independently and free of charge. The valve replacement algorithm is suitable for all types - the damaged part is removed and a new one is installed instead. There is a slight difference in the repair of Schrader models. The part is placed in an elastic band, which is tightly fixed on the walls of the cycle chamber. Care is important here so as not to harm the rubber lining of the bushing.
The overall procedure is as follows:
Camera is ready to use, install it in the rim.
Let's start with the main thing. If you are planning a long trip and do not want to spoil your walk, prepare for it in advance. It is advisable to have something with you that will help in emergency situations: an additional camera, patches and spare nipples. And also take a set of appropriate tools.
For example, if the Presta tubes have a lot of pressure, then the stem can simply break out to the hole through which your tires will leave the air very quickly.