The tires on your car perform millions of revolutions in its entire life. As such, they run the risk of being punctured by screws, nails, and other sharp objects. If there is a screw in your tire (with or without a leak), what should you do?
If the screw punctured the tire’s sidewall or close to it, the tire will need to be replaced soon. Likely, it will just take a few days until you will need to add air to the tire. If the screw is at the center of the tread area, you will need a proper tire repair as soon as possible.
It is potentially dangerous to continue driving with a screw in your tire. A blowout is likely to happen. A blowout is the sudden loss of air pressure in the tire, sometimes accompanied by the sound of an explosion. Furthermore, driving too long with a screw in the tire can ruin it. It will do more damage to the tire, and you may have to replace it instead of just having it patched up.
Read on to learn more about what you need to do if you find a screw in your tire, how to get it out and repair it, how long you will be able to drive with the screw still in, and other important info that will help you resolve this problem.
The majority of tire punctures are straightforward to repair. However, a screw in the tire is a different matter, especially if it is near or at the tire’s sidewall. If this is the case with your tire, driving your car continuously will ruin it completely – if it is not already. You may need to replace the tire instead of just plugging the hole.
When the screw has punctured the tire, a hole is already created. A screw in a tire (no leak) is developed where the screw is actually plugging that hole. But every time the tire rotates, that screw will rub against the wall of the hole. The hole will get bigger as this goes on and on.
Two things can happen after that: a) the tire could blow out or b) the hole grows bigger and bigger until it becomes unrepairable.
This is somewhat serious considering the risks you face on the road and a new tire’s cost. Therefore, you need to ensure that your tires are free of screws, nails, and other sharp objects that deeply embed themselves into the rubber.
If the screw has penetrated deep enough into the rubber, air can leak out. This condition is still repairable. But you still need a tire professional assessment whether he can still repair it or if it is wiser for you to buy a new tire.
If you hear a hissing sound coming from a tire, pull on the shoulder and stop your car. Inspect your tires to see if there’s any puncture in them. If there’s a screw in the tire, take out your spare tire from the trunk and replace the tire with a screw in it.
This is one of the reasons why your car or truck should always carry a spare tire. If the screw is not yet deeply embedded in the tire, you can try to remove it. Get a suitable set of pliers and grab the head of the screw and pull the thing out.
If the screw is deeply embedded into the rubber, take the tire to a tire repair shop nearest you. Have them look at the tire’s condition and ask them to remove and repair the tire if they can still repair it.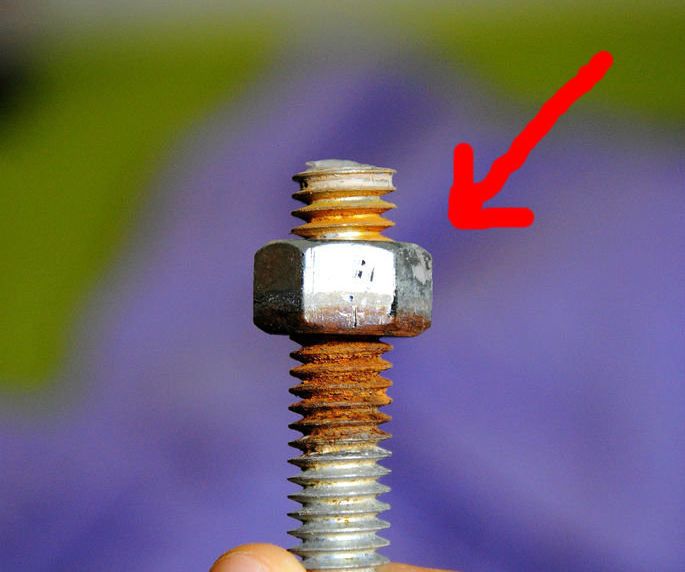
If the puncture is not so serious, the patching and vulcanizing that the tire center will do will be sufficient to make your tire usable. But if the puncture is on the tire’s sidewall, the mechanic might advise you to replace it altogether. Try to save the tire if there is still enough tread in it.
If you are beginning to drive, this situation may be stressful. Examine the tire and check if it is flat or not. If it is not flat, and there is no leak, don’t remove the screw yet. It acts as a plug for the hole that it has created.
But don’t drive the car. Replace the tire with the spare on the trunk. Then drive to the nearest tire repair shop and have them take a look at the punctured tire.
If you don’t have a spare tire and the tire is not flat, don’t touch the screw or the tire itself. Touching the screw may compromise the ‘seal’ that it created when it punctured the rubber. You can still drive the car but slowly until you reach the nearest tire shop.
Be aware that the longer you drive, the worst it can get. Therefore, you need to assess your situation correctly. Is it better to drive your car to the nearest tire shop or call for them and wait for the rescue team in your current location?
It is really very easy to remove a screw that has embedded itself into the tire. All you need is a pair of pliers, either a small long nose or ordinary pliers. If the head of the screw is still sticking out of the rubber, grab it with the pliers and then slowly pull the whole thing out.
However, if the head of the screw is already deep into the tire’s tread, you will need a small but sharp and pointed scraping tool. You will use this to carve out some small space around the screw head until you create enough space for the long nose pliers to grab the screw head. Once the pliers can grab the head, pull the screw slowly out of the rubber.
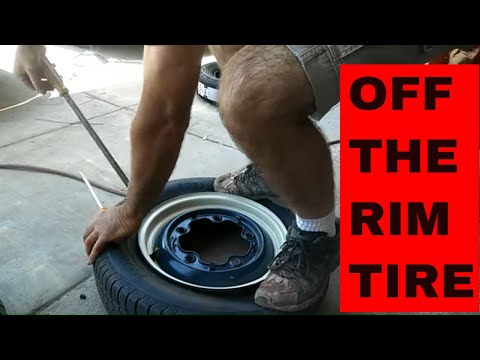
The correct way of repairing a punctured tire is by removing it from the wheel of the car. That way, you can inspect the tire in and out and determine where and how much damage the screw has done.
Be aware that any damage to the tire wall is unrepairable. Only punctures on the tread can be repaired.
Below are the general steps to repair a tire that has been punctured by a screw, nail, or other sharp objects:
 Ensure that half of the hole is covered by the patch.
Below are the general guidelines for repairing screw-punctured tires:
 This void will allow moisture to enter the tire body, which will eventually corrode its steel belts.
What Is the Fast Way to Deflate a Tire?
Your most immediate worry, if a screw punctures your tire, is the loss of air pressure. However, if the screw is not immediately removed from the tire, the puncture area will be unstable. It will eventually lead to the separation of the tire tread.
If you insist on driving your car with a tire punctured by a screw, it may result in more costly damage. The possibility of a blowout is very high if the puncture is located on the tire’s sidewall. This could even lead to more disastrous consequences.
Some car owners have driven their cars for 3 weeks with their tires punctured by a nail in the tread center section. There can be a screw in the tire and no leak if the screw plugs the hole perfectly.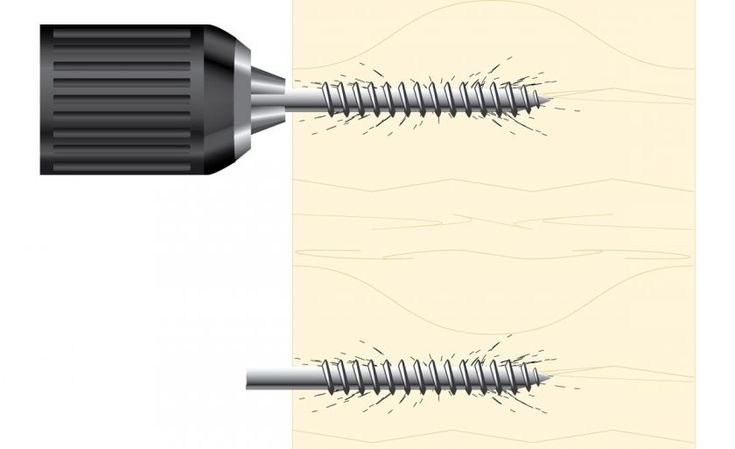 If the puncture is at the sidewall or close to it, a tire could not have lasted that long.
It really depends on the location of the puncture. If the screw is tiny, perhaps you will be able to go around driving for weeks without noticing any change in your tire pressure. However, if the screw is big, your tires could go flat anytime.
The best thing to do is to have the puncture fixed right away – if you can fix it. But if you can’t repair it, there is no other alternative but to buy a new one. It’s better than meeting an accident while you are driving with a questionable tire on your wheel.
Repairing the puncture is not that costly. Generally, the cost will be anywhere between $10 and $20. Some tire sellers would do it for free if you bought your tires from them.
It is also possible to do it on your own if you have the know-how and have the proper equipment and tools to do the job. But since it costs a minimal amount, have it done at the nearest tire repair shop.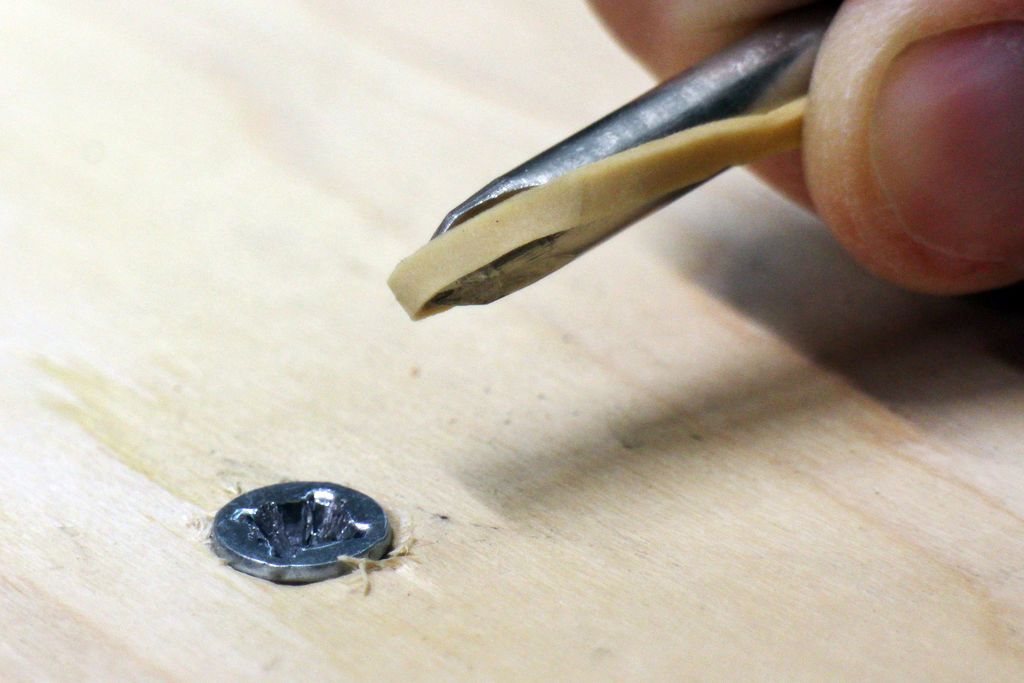
If the screw is on the tire’s sidewall or near to it, you will need to replace the tire soon. But if the puncture is on the top of the tread, you may still repair the tire by removing the screw and patching or vulcanizing the hole.
It may take a few days before you need to add air to your tire. To avoid this situation, check your tires regularly. Make sure that no sharp items are embedded in the tires. It is easier to remove a screw that has not deeply punctured the rubber rather than a screw that has been there for weeks and months.
Related reading:
Nail in Tire [How to Repair? What to Do?]
Cost to Patch a Tire
Causes of the Tire Pressure Sensor Fault Warning
Low Tire Pressure Light On But Tires Are Fine
There are a handful of things in the automotive world that cannot be predicted or avoided. One of them is a nail in your car tire. No matter how careful you are, and how good of a driver you are, chances are you’ll get a nail or a screw in your tire at some point.
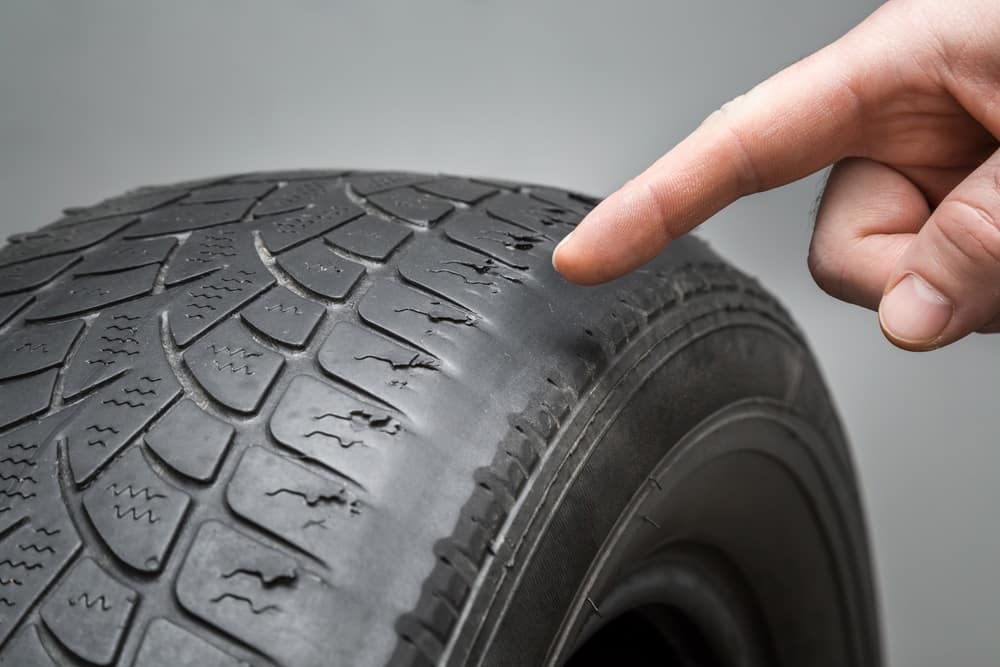
Noticing a nail in your tire isn’t always easy. Nails don’t always make your tire leak initially, so you may only notice it visually—or you may not notice it at all. Sometimes nails cause a slow leak, which you may not notice for a while. Of course, sometimes a nail in the tire will produce a flat almost immediately.
Whatever the symptoms, you want to remove a nail if it’s in your tire. Here's how to do it, with a little help from car insurance comparison shopping app Jerry.
RECOMMENDED
No spam or unwanted phone calls · No long forms · No fees, ever
ZIP Code
ZIP Code
Find insurance savings (100% Free)
Getting a nail out of a tire is actually quite easy.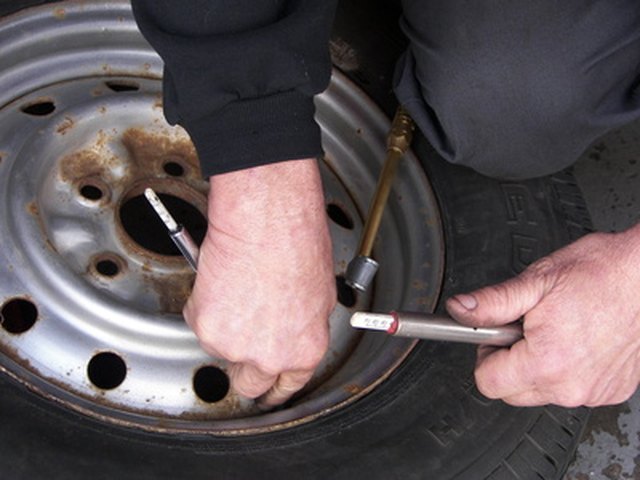 However, if you’re going to take a nail out of your tire, you need to make sure that you have a plug and patch kit, which you can find at any auto parts store. A plug and patch kit will allow you to fill the void left when you remove the nail.
To remove the nail, simply use a pair of pliers to pull it straight out of the tire. If the nail is deep in the tire and isn’t coming out easily, you can use the pliers, a screwdriver, or any other sharp, pointy tool to dig out the tire around the top of the nail until you can pull the entire nail out.
Once the nail is out, follow the instructions on the plug and patch kit that you purchased and fill the hole in the tire. Always inflate your tires to a safe tire pressure before driving your vehicle again.
MORE: How to plug and patch a car
Knowing how to take a nail out and patch your tire is a great skill to have, and it can really help you out in a pinch. However, just as with a spare tire, a self-patched tire should only be considered a temporary solution.
Even if your patch is holding in air just fine, your tire is much more likely to blow, so you should get it replaced or professionally repaired sooner rather than later.
If your tire is still in good shape (other than the nail hole), an auto shop can patch it from the inside. This will fully fix any issue caused by the nail while usually costing less than purchasing a new tire.
However, there are times when you shouldn’t remove a nail and patch the hole. If the nail is in the shoulder or sidewall of the tire, a patch simply won’t hold. Furthermore, if the nail leaves a hole that is larger than a quarter inch, you cannot safely repair it yourself.
If the nail in your tire fits any of these descriptions, you need to have your tire replaced or professionally repaired. If not, you can remove the nail yourself, patch it up, and safely drive your car until you can get the tire fixed.
MORE: Will insurance cover a flat tire?
If you're worried about a nail (or something else!) leaving you stranded on the side of the highway, you should consider a roadside assistance plan.
Jerry’s emergency roadside assistance offers several services, should you ever need them. You’ll have emergency jumpstarts, fuel delivery, tire changes, and vehicle towing up to 10 miles (and more) at your fingertips if the need arises.
Exclusive benefits will net you even more services and peace of mind. If your car needs to be towed, you’ll get up to $25 in Uber credits to help get you where you need to go. Not to mention up to $100 for key replacement, and up to $100 in tire repair per incident, amongst other perks, to help ease the financial pain of any roadside issues.
So if you ever get a pesky nail in your tire that you can't quite fix yourself, you can rest easy knowing Jerry's got your back.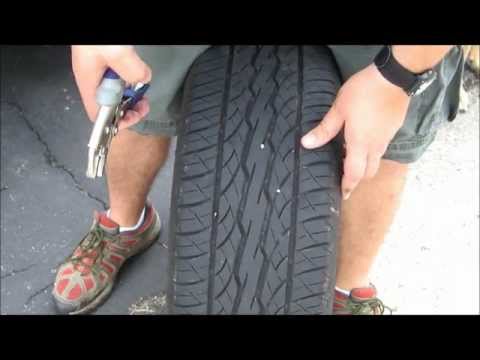
Jerry can also get you great savings on car insurance.
It’s this simple: download the Jerry app or go to getjerry.com. In less than 45 seconds, Jerry collects all of your information from your existing insurer. Choose from competitive quotes from 50-plus top insurance companies and Jerry takes care of the rest—securing your new policy and helping you cancel your old one. No long forms. No calling around. No hard work. Just savings. The average Jerry user saves $879 a year on car insurance.
RECOMMENDED
Judith switched to Progressive
Saved $
725
annually
Alexander switched to Travelers
Saved $
834
annually
Annie switched to Nationwide
Saved $
668
annually
Photo: AvtoVzglyad
Collapsed bolts and studs, "slicked" edges of the car increase the cost of repair.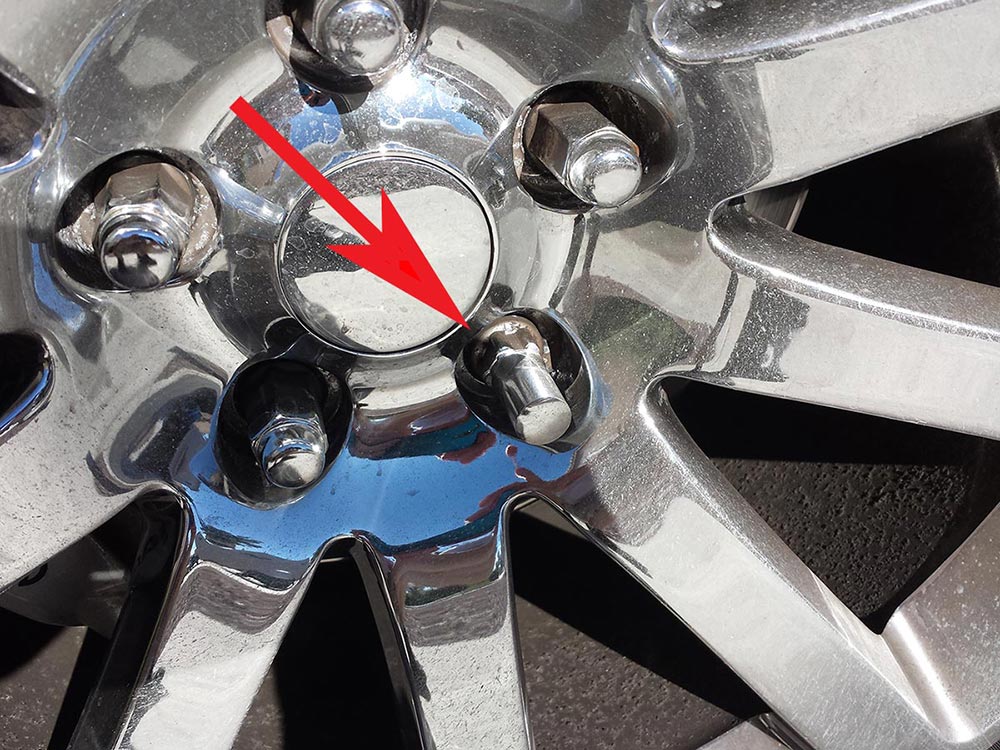 How to disassemble threaded connections and keep fasteners intact? The experts of the portal "AvtoVzglyad" will prompt.
Lika Shutter
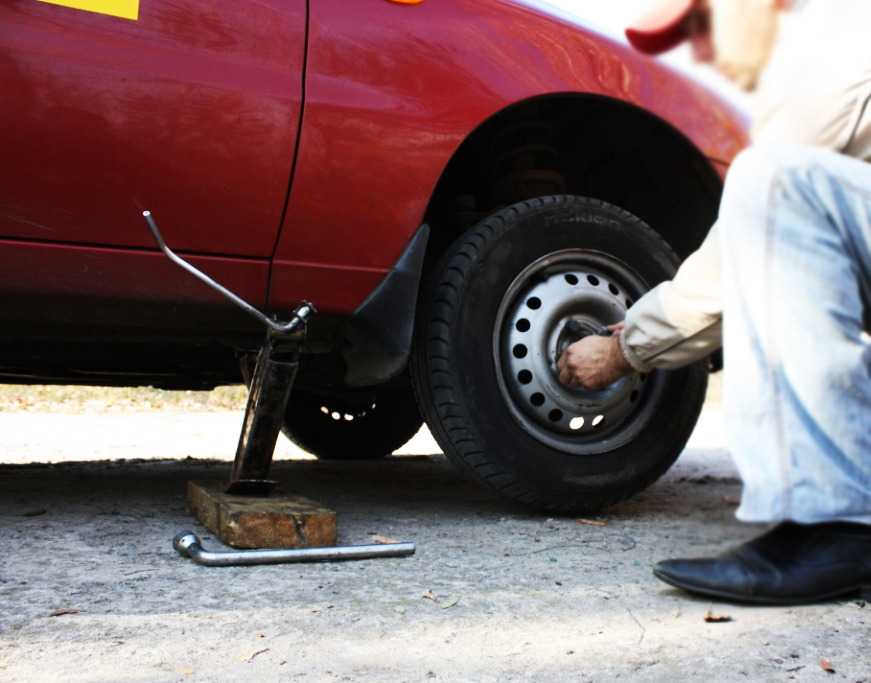
Very often repair or maintenance of a car begins with the disassembly of threaded connections. For example, when a seasonal tire change occurs. By itself, the process of unscrewing the bolts is not difficult, but only if the fasteners resist. As practice shows, during the summer season, wheel bolts and nuts can boil.
A rolled bolt, especially when its body is left in the hole, will either have to be drilled or removed with an extractor (this is such a special reverse screw that is screwed counterclockwise into a pre-drilled hole in the body of the bolt or stud), which requires a special tool , and experience. If you act ineptly, then it is quite easy to damage the threads in the well, and then you will have to correct it with the help of taps, which, again, not everyone has. Well, “dancing with tambourines”, when a steel bar is welded to a broken bolt in order to unscrew its remnants, this is generally aerobatics.
Who has a welding machine? Who can accurately and at the same time securely “grab” the details? Not only will you have to pay extra for this work, but how much time will you have to kill searching for and buying the necessary fasteners. Therefore, taking care of how to unscrew the soured fasteners so as not to damage it is worth it in advance.
Photo: AvtoVzglyad
To avoid all the problems described above, experts recommend using specialized tools that make it easier to disassemble soured fasteners and minimize the likelihood of damage. We are talking about the so-called penetrating lubricants, including all kinds of "liquid keys".
Actually, the name speaks for itself, and their main property is precisely penetrating, that is, how quickly the composition will penetrate into the joint, and it will lend itself to unscrewing. By the way, one of the best among them is the Liquid Key from Astrohim. As practice confirms, the domestic composition effectively impregnates rust, minimizing the shear moment, and it will not be necessary to “soak” soured fasteners for a long time.
Compounds of this kind are applied directly to fasteners that have been previously cleaned of dirt and rust. After a few minutes, you can pick up tools and unscrew the fasteners, which should “go” with less effort
and, most importantly, stay safe and sound. Shamanism? — no, physics and chemistry in action!
Photo: AvtoVzglyad
The active composition, penetrating through the micropores into the gaps between the parts, delivers lubricating components there. It is they that impregnate the corrosion products and reduce the shear moment of the "stuck" elements relative to each other. But the effect is achieved only on the condition that the composition penetrates as deep as possible into the soured compound. What's the point if it wets only the surface layer of rust?!
Therefore, in order not to jump on the balloon wrench or not to use an extension (pipe), risking turning off the fasteners or loosening the stud (it can turn in the drum or hub), you can simply soak it with a “liquid wrench” and unscrew it without barbaric methods.
The highly penetrating compound is also useful if you remove the wheel and find that the brake pads and discs are worn and need to be replaced. Having processed the mountings of the discs, calipers and brackets, we take a smoke break, calmly unscrew them and change the worn parts to new ones. The winter road places special demands not only on the tires, but also on the brakes, which must always work flawlessly.
We look for inexpensive and good wheels for the winter
34654
We look for inexpensive and good wheels for the winter
,000 3465555000 9000 9000 9000 Avtovzglyad:0001
It happens that a screw or screw that has a countersunk or semi- countersunk and round head, where there is a tightly torn off cross-shaped or straight slot, and the screw or screw is tightened to the surface butt - in such cases you will not be able to take pliers and pull it out.
It is not permissible to damage the surface to which the screw is screwed - it is not at all an option to choose material from under the head so that it can be fixed with pliers. Moreover, it is not allowed to use a crowbar, as in the case of nails.
Now we will look at some solutions for removing a broken screw.
When your screwdriver slipped over the edges for the first time, you need to stop and not try to unscrew it again. Usually in such cases the situation is aggravated and leads to great difficulties. The first priority is to preserve the head in which the screw is located.
You can try another screwdriver first. It may happen that the screwdriver just does not match the screw you have chosen. Using other screwdrivers, you need to make sure that the tip of the screwdriver clearly entered the hat. If there is no sense in changing tools, then you need to move on to other, more effective methods.
All you need to prepare for this is a small piece of rubber or rubberized material. You can use a medical tourniquet, rubber from a bicycle or car tube, a rubber ball, etc.
Take what you have at hand and cut out a small rectangle. You need to put it on the licked screw, then rest it with a screwdriver and carefully, slowly start to unscrew it.
This is a very simple manipulation, but here it is important to direct the pressure on the screw from above.
After a few turns, edges can be printed in a piece of rubber, after which the screwdriver will scroll. We shift the gum to a new surface and continue to unscrew the screw further.
I did this operation using a tourniquet and a bicycle inner tube folded in half. As a result, everything gets out without question.
Video of how to do it :
An improved way to remove a stripped screw can be used - using an extractor. They resort to his help mainly when it is necessary to unscrew a broken screw. In this case, when unscrewing it, it will not break.
The extractor is the same screwdriver, only with a difference in the form of strong and coarse metal threads located on the tip. They allow you to easily get into the head of the screw and eventually unscrew it.
It may happen that the above methods did not give any effect. In this case, the screw can be drilled out completely to the base. This method can also be used when the screw cannot be unscrewed through the stripped thread. In such a situation, when drilling, the thread is completely destroyed, and the screw is easily removed from the workpiece.