Whether you are taking your mountain bike for a ride on the local trails, packing your cruiser bike for a trip to the beach or bringing your road bike along for family vacation, you may find yourself needing to remove the front wheel to take your bike where you want to go. Removing a wheel from your bike will make it easier to fit in the back of your car and some bike racks require the front wheel to be removed before you can strap your bike into the rack. You will also need to know how to remove a wheel if you get a flat tire. Check out our video on how to remove a bike tire and fix your flat.
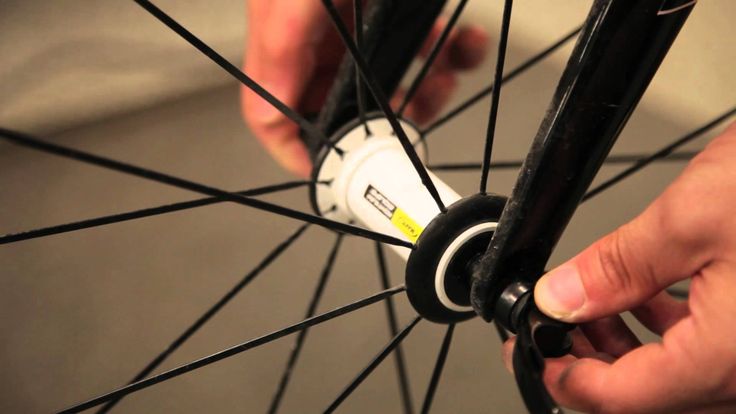
A quick release axle has a 5mm rod with a camming lever on one side and a nut on the other and its function is to allow you to remove the wheel of your bicycle without the use of a tool. A quick release axle also allows you to remove the wheel without removing the axle. The axle will stay inserted in the hub.
All you have to do is pull the lever to the open position and loosen the nut on the other side.
Some bike hubs (particularly mountain bikes) require larger axles (12mm, 15mm or 20mm), which are called thru axles. These axles also have a camming lever on one side of the hollow rod, while the other side is threaded into the fork. This system allows you to remove the wheel without the use of any tools BUT you do have to remove the axle from the hub to take your wheel off of your bike.
If you have a bike rack on top of your car that requires you to remove your front wheel, make sure you have the correct adapter for your bike’s axle!
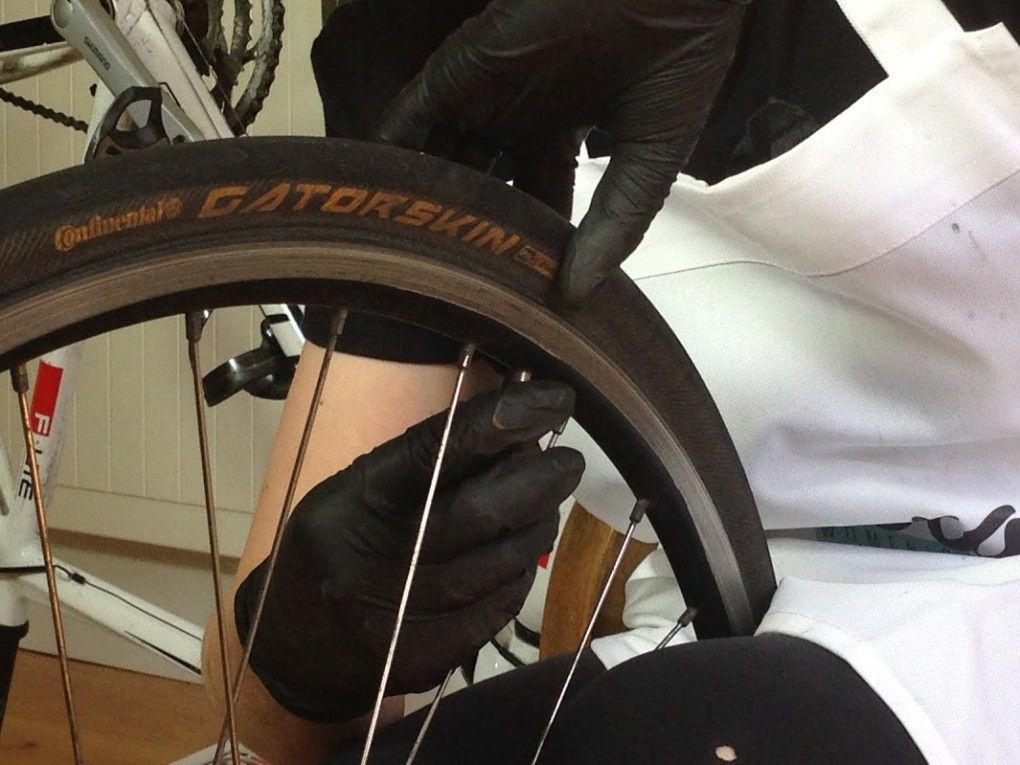
1. Release Your Brakes: If your bike has rim brakes or cantilever brakes, you will need to release the cable tension so you can remove your front wheel. For rim brakes, there should be a lever near the caliper that will release some cable tension, thus allowing your brake pads to be far enough from the rim for your tire to slide past them.
2. Flip Your Bike Over: Flipping your bike over to remove your wheels is ideal, unless you have a mechanic stand handy. When you are changing a flat tire on the side of the road or trail, allowing your bike to rest on the seat and handle bars will give you a more stable platform to work with. Flipping your bike over makes things a little easier and reduces the risk of your bike falling over after the wheel is removed.
3. Open the Quick Release or Remove Axle: If your bike has a quick release, flip the lever into the open position. If the lever is tight, you can use a tire lever to pry it open. Holding the lever still, loosen the bolt on the other side of the axle, but DO NOT remove the bolt completely. For thru axles, open the lever into the open position and turn the lever counter-clockwise to unthread the axle and remove it from the hub.
4. Lift the Wheel Up and Out of the Fork: Make sure you do not dislodge your calipers if you have rim brakes and be careful with rotors if you have disc brakes.
1. Guide Your Wheel Back Into The Fork: If you have rim brakes, be careful not to dislodge calipers when you reinstall your wheel. If you have disc brakes, guide the rotor in between the brake pads.
2. Tighten the Axle: If you have a quick release axle, settle the wheel completely into the dropouts. Make sure the quick release axle is on the non-drive side of the bike, matching the wheel. Holding the lever in place, tighten the nut on the opposite side and push the lever into the closed position. It should feel tight, but it should not be too difficult to close the lever. If you have a thru axle, line up your hub with the holes at the bottom of your fork. Look to see which side of the fork is threaded and push the axle in through the opposite side. Turn the lever clockwise to thread the axle into the fork. Once tight, push the lever into the closed position.
3. Flip your bike over: If you have cantilever or rim brakes, make sure your brake cable is reconnected or tightened properly.
4. Spin your wheel: By spinning your wheel, you will make sure your brake pads are not rubbing the rim or the rotor. If your wheel does not spin, it could be crooked in the fork’s dropouts. Flip your bike back over, loosen your axle, push down on the wheel and tighten the axle again.
Need to learn how to remove your rear wheel? Check out our video!
Helpful Tip: If you have hydraulic disc brakes do not squeeze the front brake after you have removed your front wheel. The brake pads will move closer together and you will not be able to get the brake rotor back between the pads. If your brake lever is accidently compressed, the ideal tool to separate the pads is a pad separator tool. If you do not have this tool, you can use a flat bladed screw driver or a credit card to wedge in between the two pads and carefully work them apart. It is possible to damage the pads if you use too much force. Also, make sure whatever tool you use is clean so it does not contaminate the brake pads. Replace the wheel and squeeze the brake lever a few times to reset the pads.
How to Troubleshoot a Bicycle Pump
How to Install a Bicycle Pump Side Clip
by Wade Shaddy
Front tires are designed for easy removal using only your bare hands and a few hand tools. Most experienced cyclists can remove a front tire in minutes. Road bike tires should be replaced after 1,000 miles. Mountain or cruiser tires should be replaced when you can see cracks or splits in them. Removing, replacing and repairing tires is a basic skill that every cyclist should understand before hitting the open road.
Flip the bike upside down and balance it on its handlebars and seat. Most bikes have a large lever on the left side of the wheel axle tucked along the bike frame. Use your fingers to push the lever away from the bike frame to open it. This releases the wheel axle from the bike frame. If you have an older bike, it may have nuts on the wheel instead of a lever. Use a 1/2-inch wrench on both sides to turn both nuts counterclockwise to release the wheel.
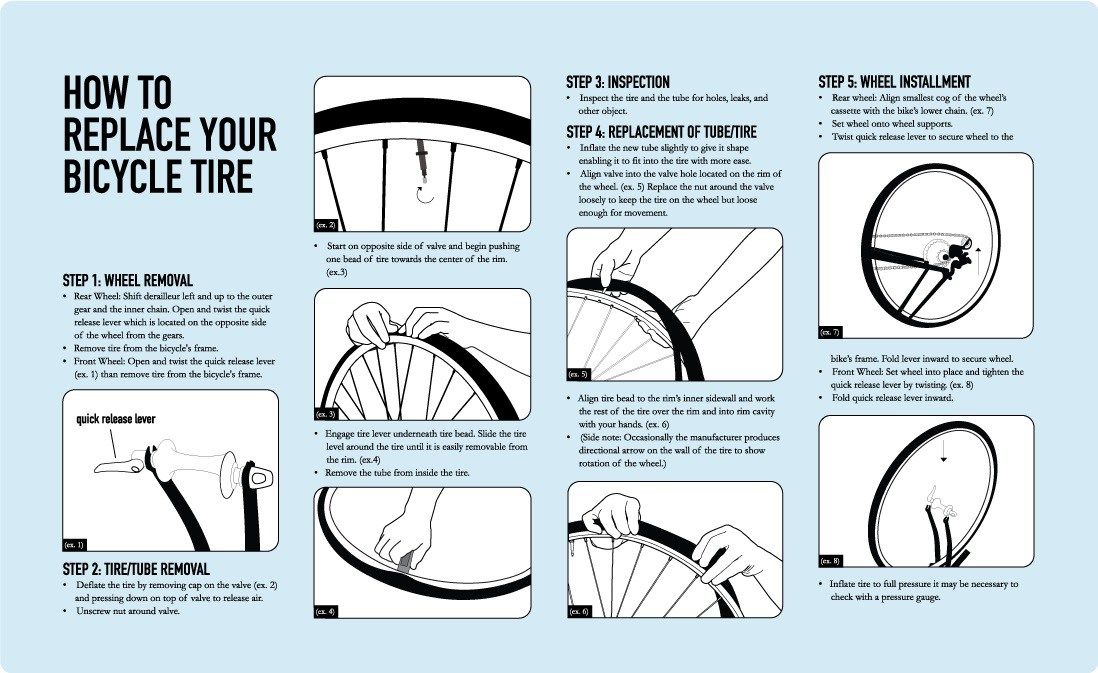
Pull the wheel straight up and off the bike. Place the wheel on a flat surface. If the tire still has air in it, remove the valve cap and let the air out of the tire. For Schrader valves, insert the tip of a ballpoint pen into the valve and push lightly to deflate the tire. If it's a Presta valve, unscrew the small ball at the top of the valve, and push down on it to release the air. Schrader valves look like car-tire valves. Presta valves are skinny and usually longer.
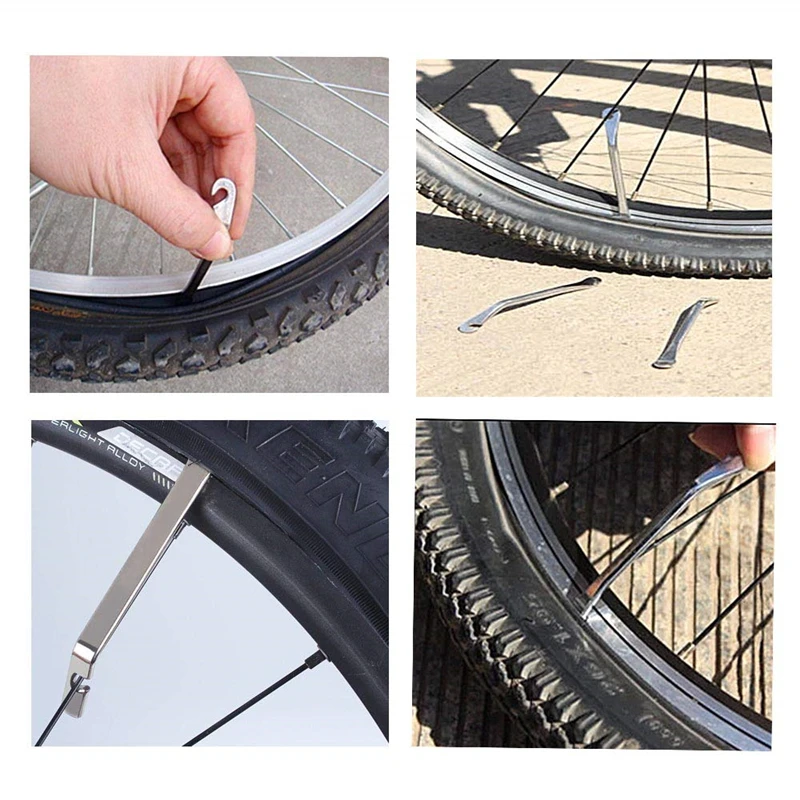
Insert the curved end of a plastic tire removal tool between the tire and the rim. The curved part should be facing up. Pry the end of the tool toward the spokes to lift the edge of the tire up and off the wheel. There is a small notch in the end of the tool. Hook the end of the notch over a spoke.
Insert the curved end of another plastic tire removal tool between the tire and the rim, four inches from the tool already in place. Pry down on the tool to continue popping the side of the tire off. Pull the lever out and insert it four inches farther down the rim, pry and reinsert the lever until the side of the tire is completely off the rim. Try not to slide the tool.
Reach into the tire with your fingers when one side of the tire is completely off the rim. Grab the tube just above the valve stem and pull it up and out of the tire.
Hold the wheel and tire up between both hands. Use your thumbs to push the tire forward, away from your body as if you were going to put it back on the wheel, but keep pushing until both sides of the tire pop completely off the opposite side of the rim. Once the tire begins to come loose, it will peel off the rim without you forcing it.
Replace the tire by first popping one side of the tire over the rim with your fingers. Insert the tube, then push the second side of the tire over the rim as far as possible using only your fingers. When the tire gets too tight and the remaining few inches won't fit on the rim, insert the tire lever and pry the final few inches back on the rim.
References
Resources
Tips
 Some tires come off very easy, and you can remove them without using tools. Other tires are stubborn and require more prying and swearing.
 Warnings
Writer Bio
Specializing in hardwood furniture, trim carpentry, cabinets, home improvement and architectural millwork, Wade Shaddy has worked in homebuilding since 1972. Shaddy has also worked as a newspaper reporter and writer, and as a contributing writer for Bicycling Magazine. Shaddy began publishing in various magazines in 1992, and published a novel, “Dark Canyon,” in 2008.
Image Credit
Jupiterimages/Photos.com/Getty Images
SHARE SHARE TWEET EMAIL
| Some beginner cyclists ask how to remove a wheel from a bicycle. Moreover, difficulties arise, as a rule, with the rear wheel. Quite often you can hear such phrases: "Oh, I'm afraid to remove the rear wheel, there are so many things screwed up, screwed on, I'll never put it back on and I'll definitely break something. I'll go to the service center better." Of course, you can do this, but rather than repeatedly wasting your time and money to go to a bicycle repair, it’s easier to just figure out how to do this operation yourself, especially since such a need may arise somewhere in the forest outside the city, and a bicycle workshop there will definitely not be found.
How to remove the front wheel?
Installing the front wheelAs you perfectly understand, the process of installing the front wheel is the reverse of removing it, and it makes no sense to describe it in detail.
How to remove the rear wheel? Removing the rear wheel is EXACTLY the same as removing the front wheel.
Installing the rear wheelThe installation process is also similar to the installation of the front wheel, with a small exception: it is necessary that the chain fits correctly. To do this, we bring the wheel to the attachment points, put the chain on the sprocket and then put the wheel in place. True, a situation may arise in which it seems to you that the chain is twisted, and in order to untangle it, you will need to remove it. This is not true. You just need to twist it back and forth, imagine how it was installed before on the stars and most importantly - do not panic. That seems to be all. Now you have mastered the art of removing and installing wheels.
P.S. If you also want to change the camera, then this article is especially for you. |
1 . what kind of brakes does your bike have?
- if you have disc brakes, then go straight to step 2.
- if your bike has a rim brake, then you need to release it. This procedure is approximately the same for all types of rim brakes: to release the V-brake, you need to squeeze the pads with your hands and pull out the arc, as shown in the figure.
2 . turn the bike upside down, it is quite stable on the handlebars and saddle. Be careful not to damage the equipment attached to the steering wheel (bicycle computer, bell, bicycle headlight, etc.)!
3. How is your wheel fixed: a regular nut or an eccentric (a small lever)?
- if the wheel is fastened with nut , then two suitable wrenches must be taken. Throw one on one side, the second on the other, and turn one of the keys counterclockwise, holding the second in place. It is not necessary to unscrew the nuts to the end, but simply loosen them until the wheel can be safely removed.
- if the wheel is fastened with an eccentric , then everything is simple here - no tools are needed. We pull this eccentric towards ourselves, as shown in the figure, after which it is necessary to unscrew it a little more counterclockwise, holding it on the back side with your hand until it becomes possible to pull out the wheel.
4. pull the wheel up, and if you did everything right, it can be easily removed.
*on bikes with disc brakes, do not press the brake lever with the wheel removed, as this can compress the pads, and you will have to fiddle with them.
The process of installing the front wheel is the reverse of removing it.
1. insert the wheel back as it was. Do not confuse the direction of rotation of the wheel (written on the tire). Remember that your bike is turned upside down and you should think about the direction of movement. In the case of disc brakes, it is difficult to confuse, since it is necessary that the disc hit exactly between the pads.
2. tighten the nuts or tighten the eccentric
3. flip the bike
4. if you have rim brakes, then you need to return them to their original state. We check that the wheel does not hang out, spins freely and the brake functions, otherwise we check everything again point by point.
The process of removing the rear wheel is TOTALLY the same as the process of removing the front wheel.