If your ATV engine is not getting enough fuel, it won’t run properly. You’ll notice it bogging down and just not having the power it used too. If you’re not getting fuel to the engine at all, it won’t even start for you.
The most common reason an ATV engine is not getting fuel usually has to do with the carburetor. Either a stuck needle valve or a loose or cracked vacuum hose are the most common issues. Don’t worry, there are pretty straight forward things you can do to check where your problem is.
There are a few different reasons you may not be getting fuel to your engine. It’s not that hard to check the parts to see if their working properly. I recommend going step by step checking one thing at a time, eliminating possible issues as you go.
If you have a fuel injected engine, you can skip this next part and jump straight to the fuel injectors, fuel pump, and compression check sections.
I would first check the carburetor to help narrow down where you should start your investigation. All you need to do is spray a little carb cleaner or ether down the carb and see if your engine will fire up with that. Or you could pour a little gas in the carb and try to start it up.
If it does start, and then dies right away, at least we know now it’s a problem getting fuel to the carb. We know that now because, when the carb has fuel, the engine will run. You should check to make sure fuel is getting to the carb now.
If it still doesn’t start at all, you may have a problem getting fuel from the carb to the engine. That is telling us the problem is further down the line. It could be an issue with compression if that’s the case.The engine doesn’t have enough compression to pull in the fuel it needs and stay running. I will go over how to do a compression check later in this article.
Another check to do with the carburetor is to adjust the idle mixture screw.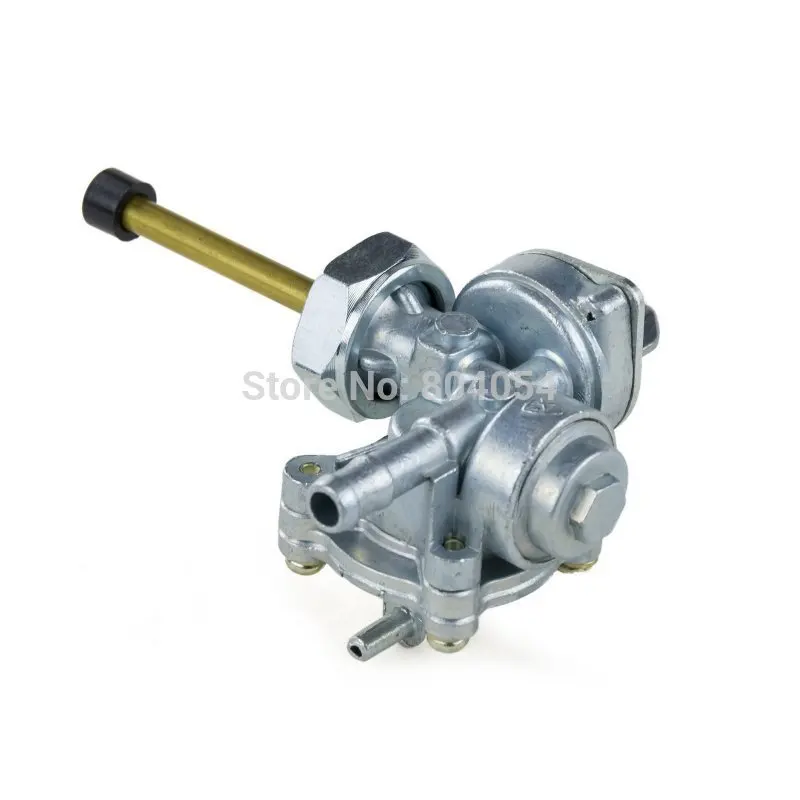 I know it sounds too good to be true, but a lot of times this adjustment isn’t set right so the engine isn’t getting the right air/fuel mixture to run properly.
Ok, you sprayed something into the carb and the engine started up for a few seconds. Great, now we need to make sure the carb is getting the fuel it needs for the engine to run. Disconnect the fuel line going into the carb and put that end into a bucket or something to catch the fuel.
You may need to take out any spark plug, or just unplug them, just in case. And try to start the engine and look to see if fuel is coming out of that fuel line. If there is, then you have no problems getting fuel from the gas tank and it is probably a needle valve or float problem.
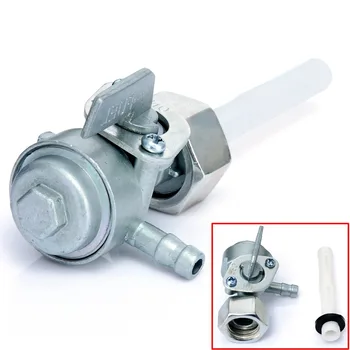
If there’s no fuel coming from the tank down that fuel line, then you’re problem may be an issue with the fuel pump, if you have one, or an obstruction in the fuel line or shut off valve. I will go over how to diagnose the fuel pump later in this article.
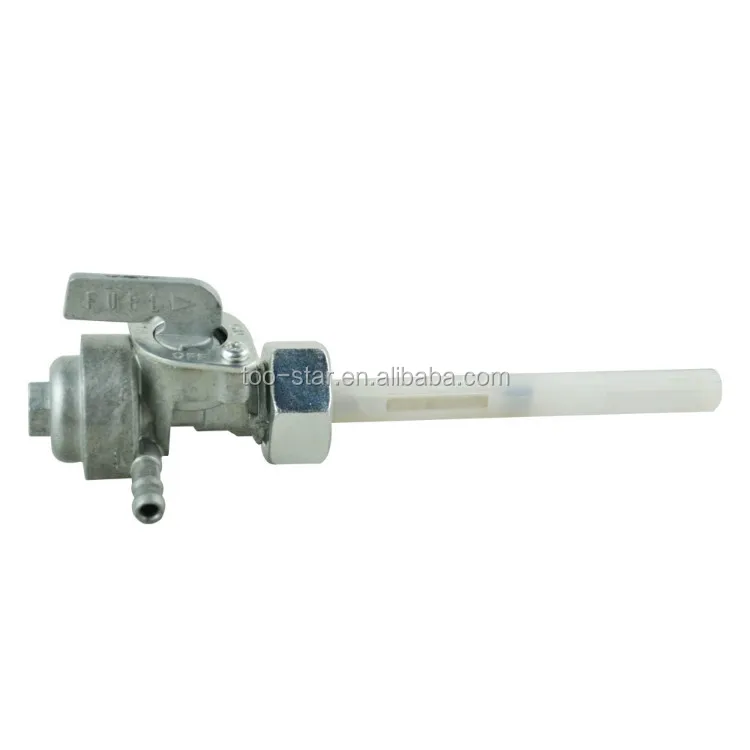
If the needle valve in your carb is corroded, it will not allow fuel to flow to the engine properly. Same thing will happen if your float is getting stuck. You’re going to need to clean the carburetor and possibly replace those parts if they’ve gone bad.
First remove the float bowl to gain access to the carburetor insides. Then you can remove the pin holding the float in place. Before you do that, you can try moving the float up and down with your hands, the float should move freely and have no resistance feeling when moving it.
The needle valve will be attached to the under side of the float, here is a picture of what you’re looking for. You can try cleaning the needle valve using carb cleaner. Just soak the thing and let it sit in carb cleaner for a few hours.
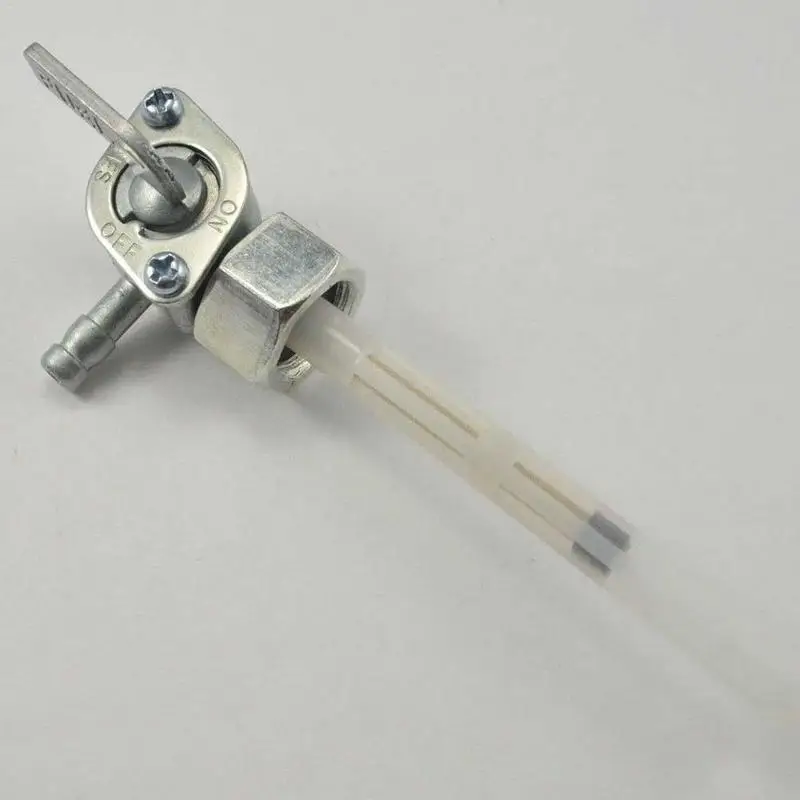
If that didn’t help, or you just don’t want to do it, no big deal. Needle valve are pretty cheap online. Here’s an example of a
Carburetor Float Valve Needle on Amazon to give you an idea of what you’re looking for.
You can also replace the float if you want to, usually you don’t have to but i would give it a good cleaning. Double check all the seals and everything since you’ve got the carb open, and clean out everything really good.
Remove Needle Valve SealCheck the bowl gasket, if this was bad, you would have noticed the carb leaking fuel before. To check and replace the valve seal, you’ll need a pick or something to pull it from the carburetor. I’ve used a sheet rock screw before. Just thread the screw in a little and pull out the seal.
Check out the picture for an idea of what you’re looking at. Once you’ve removed the old seal, insert the new one and make sure it’s seated all the way.
You can do that with a metal punch or something, just make sure you don’t hit too hard because you could break the aluminum frame of the carb. Reassemble with new needle valve and you should be good to go.
Fuel injectors can get gummed up after a while if they aren’t cleaned regularly. The end of the fuel injector has small holes in it that the fuel passes through, creating a spray that enters the cylinder. If those holes get gummed up, the spray will be off, and you’re engine won’t run.
If you think it could be a problem with your fuel injector, I’d recommend trying to clean them first before buying new ones because they can be pretty expensive. First, you’ll have to remove the fuel lines that hook to the fuel injectors.
You could always remove the fuel injectors completely and let them soak in some fuel injector cleaner. I use this B-12 Chemtool Thru-Rail Fuel Injector Cleaner but you can use any carb cleaner / fuel injector cleaner you want to.
If you don’t want to remove the fuel injectors completely you can try another method. You will still need to remove the fuel lines and let all the gas drain out of them. You will then fill the fuel line with fuel injector cleaner, and then reconnect the fuel lines.
Try starting the engine for at least 20 seconds. If it does start, don’t let it run for longer than 20 seconds. Then you want to sit and wait about 10 minutes or so. You need to give the fuel injector cleaner time to do its work. Repeat the process five more times, but only try to start for 10 seconds, and then let sit for ten minutes.
I know it’s not the official way to clean the injectors, but I’ve seen it work, and it can save you from all the work of removing the injectors. Once you get the quad running, you’re going to want to add a fuel additive to your gas to keep the injectors clean.
You should be doing this at least once a year anyway. I do it with my maintenance checks before spring begins every year. I usually just add some of this Gumout Complete Fuel System Cleaner to the gas tank before I start it up for the season.
I would say to try blowing air through the fuel pump to make sure fuel will be able to flow freely through it. But if you have a vacuum operated pump, you won’t be able to do that. There are diaphragms in there that could get damaged.
To make sure you’re vacuum operated fuel pump is working correctly, pull the vacuum line to the fuel pump off and crank the engine. You should feel a good amount of suction at the mouth of the carb.
The engine crates a vacuum pulse to the fuel pump, which in turn creates an amount of pressure that pushes fuel into the carburetor. If you’re not getting good suction, try replacing the diaphragms in your fuel pump and make sure your vacuum lines aren’t cracked.
If you can, try cleaning the fuel line out and replacing the fuel filter to make sure you’re getting fuel to the carburetor. Inspect the fuel pump for wear and loose or cracked hoses. If there is no vacuum in the hose, you’re carb won’t get any fuel. This is most likely caused by a crack in the vacuum fuel lines or a bad fuel pump.
You may find it easier to just replace the fuel pump all together since they aren’t usually very expensive.
The compression check is pretty straight forward, you’re trying to see if you’re engine can handle the right compression to run properly. Without compression, you won’t get fuel and your ATV won’t start.
The steps are pretty simple if you have a compression tester kit. Basically, you remove the spark plug, hook up the compression tester and run the test. You just have to make sure your engine is at the down stroke in the compression cycle.
I go over this process in a lot more detail and explain step by step how to perform this test in my article, Top 7 Reasons An ATV Smells Like Burning Oil. If you weren’t getting good compression, but enough that the quad still ran, you would leak oil into the cylinder. Go to that article and scroll down to the leak down test section for a step by step guide on checking for compression.
Sharing is caring!
Looking For Something Else? Search
 com and affiliated sites.
This material is about maintenance and use. If you want to get acquainted with the model, figure out which ones are and how they will improve your life - look at the material on the existing versions of Kaba, how to choose them and where to buy.
The most numerous version of Kaba 50cc, produced in this form from 1982 to 2011
This knowledge base covers Kaba, which were produced up to and including 2011 and are the most popular in Russia. Frame numbers: C50, C70, C90, AA01, HA02, injector and carburettor. Separately, there is a knowledge base AA04, JA10 since 2012.
In order to find out the year of manufacture, you need to find the frame number or a sticker under the seat. Then use two basic materials to determine the year of manufacture: by the frame number and by the sticker under the seat.
From left to right: frame number under the left plastic cover, engine number under the left engine cover, sticker under the seat86 and 1991. Let's use the sticker under the seat and the second material, and it will be clear there that the C90-H is a 1987 release. This is the most reliable data about the year, after which you can look at other marks, if only out of interest: engraving the date under the remote control, on disks and very rarely on the date on rubber.
Not everyone immediately starts using a semi-automatic as if they had been driving it all their lives. It seems that the gear changes are harsh, with the rider swaying. Everything becomes smoother in the process - knurling affects the feel of the box. First, adjust the clutch to eliminate bad feelings from incorrect adjustment - video instruction at the end of the section.
Shift gears: press firmly down, release smoothly. When switching up 1 → 2 → 3, the gas must be released and switched. When switching down 3 → 2 → 1 - you can give gas or just switch at speeds of 15-20 km / h from third to second, up to 10 km / h from second to first. Right away it may not fit, but over time it will work out.
The box has blocking from accidental shifting of gear from third to neutral, so that at 60 km / h you do not turn on the first. Works in motion, allows you to switch only after a complete stop. There is no such protection on the mailer, you can turn on the neutral on the go.
To make it more convenient to shift with the heel - you can change the position of the gearshift tab and put the rear part higher, lower the front. You can change the gearshift lever to a motorcycle one and switch with your toe. A fairly common option: rearrange the sock from the front to the back. The author of this article rides like this all the time and does not even try to shift with his heel.
Adjust the position of the foot to switch with your heel or simply change the toe
If the moped picks up speed but does not accelerate, this is a slipping clutch. Start by changing the oil to the right one - I described this in the next section. If the oil change did not help, then it's time to change the clutch friction discs.
Friction discs Clutch set 3 pcs, suitable for cabbage cabs until 2011:
EBC CK1148
Ferodo FCD0107
NewFren F1639
TRW MCC101-3
Vesrah VC-14000
PARMAREMALS OFFICE -30, 10W-40, 15W-50, JASO approval MA
The oil in the cab works simultaneously in the engine and in the gearbox - this system is called "wet clutch". Japanese manuals for cabs of all years indicate 10W-30 oil with a JASO MA wet clutch approval. The American instructions have a link to the ambient temperature: up to 35 ° C 10W-30, and at temperatures up to 45 ° C already 10W-40.
In addition to the ambient temperature, consider your operating conditions - the viscosity in the instructions is indicated for the case when you adhere to the 35 km / h allowed for Japan and do not force it off-road.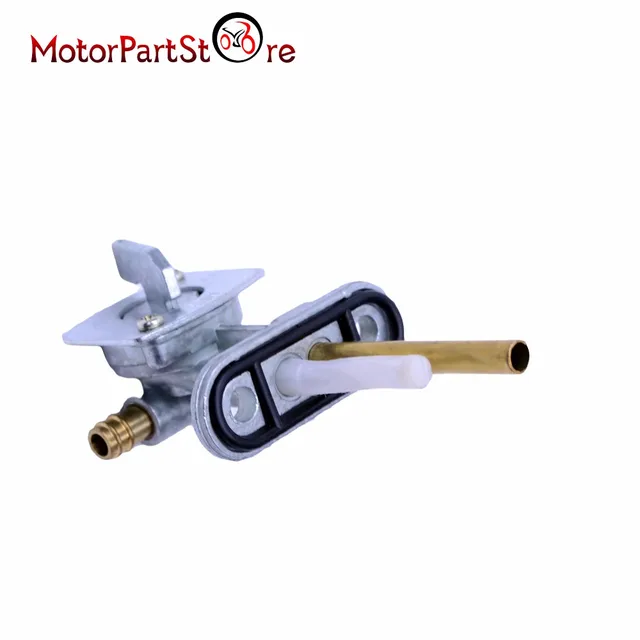 It is not scary to fill in oil with a different viscosity and earlier than the prescribed interval.
Viscosity depending on operating conditions
10W-30 - use oil with this viscosity if you drive in a quiet mode up to 35 km / h, without spinning the throttle to full.
10W-40 - standard viscosity for most situations: city, including traffic jams, driving on the ground with rare slippage. You can allow periodic spin-ups in the cutoff.
15W-50 - fill this oil on a long journey when the throttle is constantly open to full. Also, this viscosity is useful for off-road driving with frequent slippage and poor engine cooling.
It's okay if you fill in the rest of the car oil 5W-30, 5W-40, not a single Cab has died from fresh car oil. True, the clutch may slip and then it is better to find another option. If there is a choice on the shelf, look at diesel truck oil - it has strong base oils, and the formulation often meets the JASO MA standard, but this is not claimed in any way.
The selection shows oils that are better in some ways, worse in some ways, but the engine will work fine with any.
Motor oils 10W-40 approval JASO MA
| Oil grade | Cost | Art. No. |
| Eni i-Ride 10W-40, 1L | ≈350 ₽ | ENIIRIDEMOTO10W401 |
| Zic M9 4T 10W-40, 1L | ≈400-450 ₽ | 137210 |
| Eurol Motorcycle 10W-40, 1L | ≈450-500 ₽ | E1000971L |
| Castrol Power1 10W-40, 1L | ≈600 ₽ | 15688B |
| Motul 5100 10W-40, 1L | ≈600-750 ₽ | 104066 |
The oil change interval in the official instructions is 3000 km.
There is no oil filter in this generation cab.
The official instruction implies that you will use it “officially”: do not drive more than 35 km / h, no off-road and passengers on 50 cubes. The figure of 3000 km should be treated as a guideline and as the operating conditions become more difficult, reduce this interval.
If you are changing the oil for the first time after purchase, buy an inexpensive oil, drive it 100-200 km and drain it. So you flush the crankcase after an unknown oil with unknown change intervals for an extra 200 ₽. In severe cases, it can be repeated. If you drain black oil, it is not necessarily bad, on the contrary, the oil washed the engine well.
The oil capacity is usually indicated on a label on the right engine cover. The smaller value is the volume of drained oil, the larger one is the total volume of the crankcase. If you exceed the maximum volume, there is a chance to push the seals.
This label shows: oil drain volume 600 ml, crankcase volume 800 ml
There are two drain plug-like bolts on the bottom of the crankcase. To change the oil, you need the right one in the direction of travel.
Oil change steps
"Waffle" on the dipstick often breaks - wipe gently
The filter can be serviced, this is provided for by the instructions - blow it from the inside with compressed air, from the outside with a vacuum cleaner - this will buy time until a new filter arrives. It is understood that such service will be within 10,000 km.
Air filter part numbers
| Filter | Art. No. | Where to look for |
| Bore 39 mm, large body | 17211GB4010, Hiflo HFA1002, NTB | Easy to find non-original Hiflo HFA1002 by searching Yandex |
| Bore 39 mm, before 2000 | 17211GB4680, NTB | Japan → Emex, ZZap → Search Yandex |
| Bore 50 mm 2000-2012 including injectors | 17211GBZ700, NTB, dimensions | Japan → Emex, ZZap → Search Yandex |
Spark plug does not indicate replacement in kilometers, focus on appearance and gap. Leave the old one in reserve in case there are any problems with the new one. Use C6HSA for cool off season, C7HSA for full warm season.
Factory parameters of spark plugs
| Moped year | Article of candle | Gap, not more than |
| Before 2007 | NGK C6HSA, C7HSA, Denso U22FS-U | 0.6-0.7 mm |
| Injector 2007-2011 | NGK CR6HSA, CR7HSA, Denso U22FSR-U | 0.6-0.7 mm |
Carburetor has a large service area. Most often, a simple disassembly, cleaning, carburetor adjustment is enough to make everything work as it should. In case everything is bad, you can buy a repair kit on Webike or from Alpha, but not everything is suitable from there.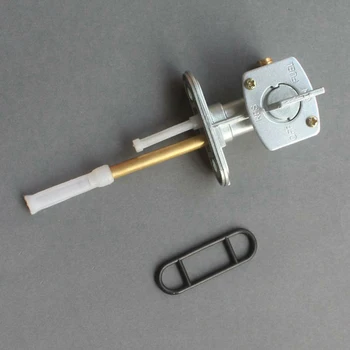
Not all carburetors can be adjusted from the factory, on some Kaba there is no notch for a screwdriver - then you need to make a notch for the slot yourself. Then play around with the screws so that the reaction to the throttle stick is instantaneous in both directions - opening and closing. The correct setting will be indicated by a spark plug after the engine is running - it should not be in a black coating, in which case the carburetor is rich, or in white - it means that the mixture is poor.
Carburetor dimensions
| Model | Diffuser size |
| C50 | 14 mm |
| C70 | - |
| C90 | 16-19 mm, year dependent |
Both the carburetor and the injector have the same compression ratio and are suitable for gasoline with an octane rating of at least 90.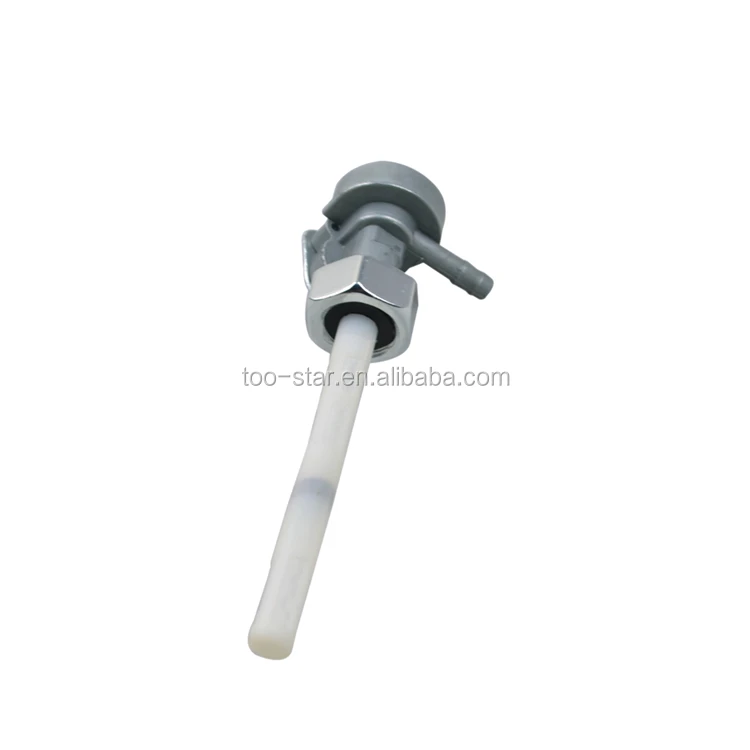 The higher the octane rating, the higher the combustion temperature, and there will be less deposits in the engine. Even from high-octane gasoline, you can feel an increase in power and a decrease in consumption, however, at the level of error. You can constantly ride on any one, or you can alternate filling AI92 and AI95 - focus on local gas stations and your sense of beauty.
Fuel Tank Capacity
| Carburetor | 4.3 liters |
| injector 2007-2011 | 3.4 liters |
Standard flow
| Model | Flow rate |
| C50 carburetor | 1.8—1.9l/100km |
| C50 injector | 1.6 l/100 km |
| C90 carburetor | 2.2—2.6l/100km |
Standard sprockets
| Model | Drive sprocket | Driven star | Pitch and chain links |
| AA01, C50 | 13 | 39 | 420, 98 links |
| Postman, C50 | 13 | 42 | 420, 100 links |
| Little Cub, C50 | - | - | - |
| Custom Cab, C50 | 13 | 42 | 420, 100 links |
| HA02, C90 | 15 | 39 | 420, 100 links |
A set of sprockets and chains with size 428 is also sold and placed - it has a higher resource, but at the same time, the weight of the set increases and the load on the engine increases.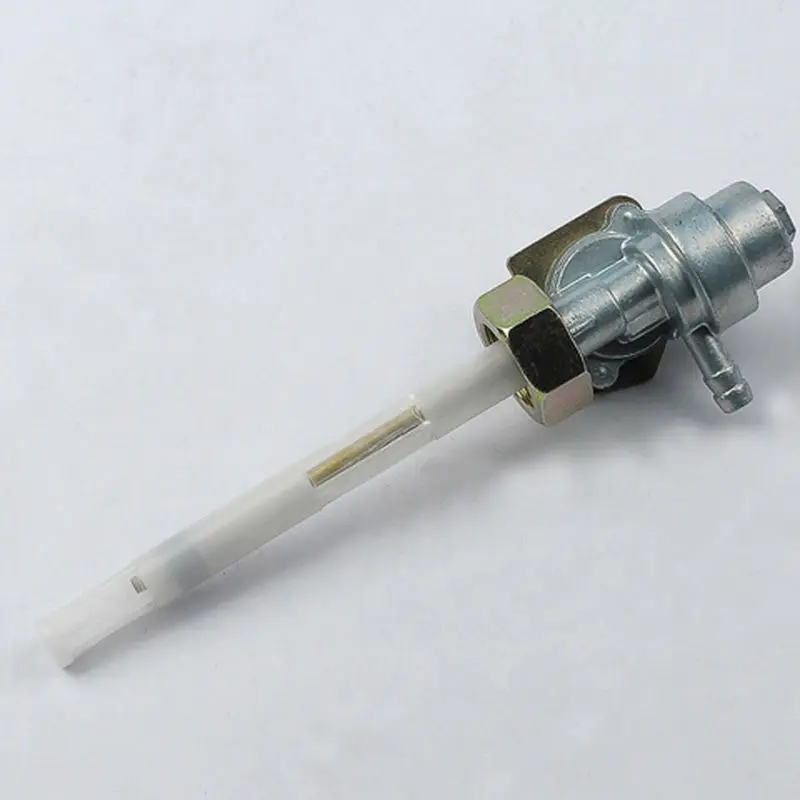 Change sprockets more often or load the engine more - the choice is yours. To change the size to 428 or 420, you need to change the entire set of sprockets and chain.
The sprocket is loose on the shaft a little, this is normal.
To make top speed a little more, rpm less, gears more authentic - put the drive sprocket a tooth more or the driven sprocket a few teeth smaller, for example 14 × 39 on the Super Cab; 14x42 on a mailer, 16x39 on C90. Most cab drivers talk about positive changes in movement with such a small change.
Ratio
| Teeth | 13 | 14 | 15 | 16 | 17 |
| 36 | 2.77 | 2.57 | 2.40 | 2.25 | 2.12 |
| 38 | 2.92 | 2.71 | 2.53 | 2.38 | 2.24 |
| 39 | 3.00 | 2.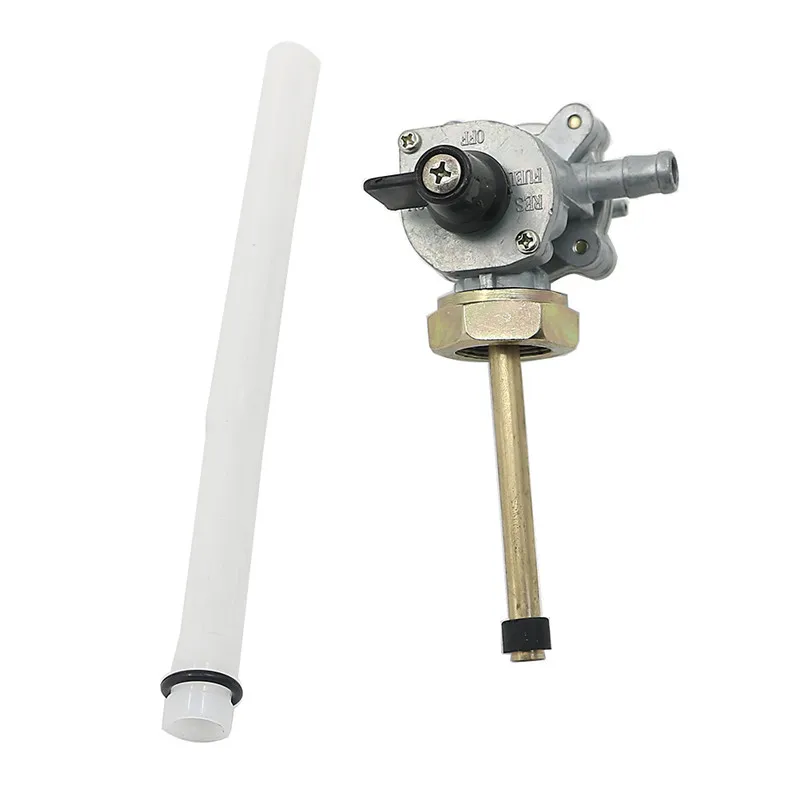 79 79 | 2.60 | 2.44 | 2.29 |
| 40 | 3.08 | 2.86 | 2.67 | 2.50 | 2.35 |
| 41 | 3.15 | 2.93 | 2.73 | 2.56 | 2.41 |
| 42 | 3.23 | 3.00 | 2.80 | 2.62 | 2.47 |
In Russia, there is a large selection of chains and sprockets for Kaba. For example, kits from the Chinese Alpha, which can be bought at any nearest moped shop. If you drive a little and not fast, then this one will do, it will serve for several years in the mode of 500-1000 km per season. Nuance: the Japanese star lock does not fit Chinese stars - they do not match in size. See that the set includes a Chinese lock or buy separately.
There are better options, such as AFAM or JT chainrings, in combination with a D.I.D chain. or EK - such kits are more expensive, but their resource is higher.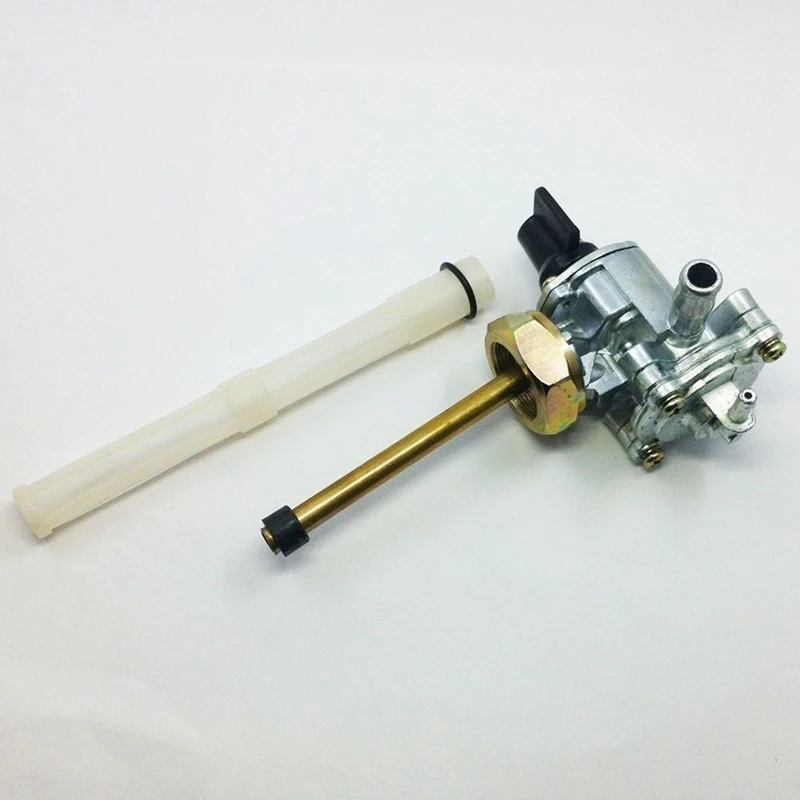 This is your option if you drive constantly and want to do less chain tightening.
Depending on the quality of the kit, lubrication and chain tension, the kit will last 5000 km (the worst China) - 15000 km (JT + D.I.D.).
Codes for chains and sprockets, links to magazines
DID 420D chain, 100 links - 420D100
circuit DID 420D, 106 links-420D106
DID 420NZ3 chain, 106 links-420NZ3106
Official dealer D.I.D
Leading star 13 teeth-23800GB4000, JT JT253.13, AFAM 20101-13, NTB, Thauvanskaya SFR STRIELS — 23800040010, JT JTF253.14, AFAM 20101-14, NTB, Taiwan SFR
15 tooth sprocket — 23801179700, JT JTF253.15, AFAM 20101-15, NTB, Taiwan SFR
16 tooth sprocket JTF25, 3.16. AFAM 20101-16, Taiwanese SFR
36 tooth sprocket - 41201GB5810, AFAM 10105-36, JTR257.36, size
Driven sprocket 39 teeth - 41201GT0750, JTR211.39, Kitako, size
Driven sprocket 40 teeth - JTR257.40, size
The rear sprocket for the mailer stands apart - it has a non-standard central hole and stars from Alpha will not fit.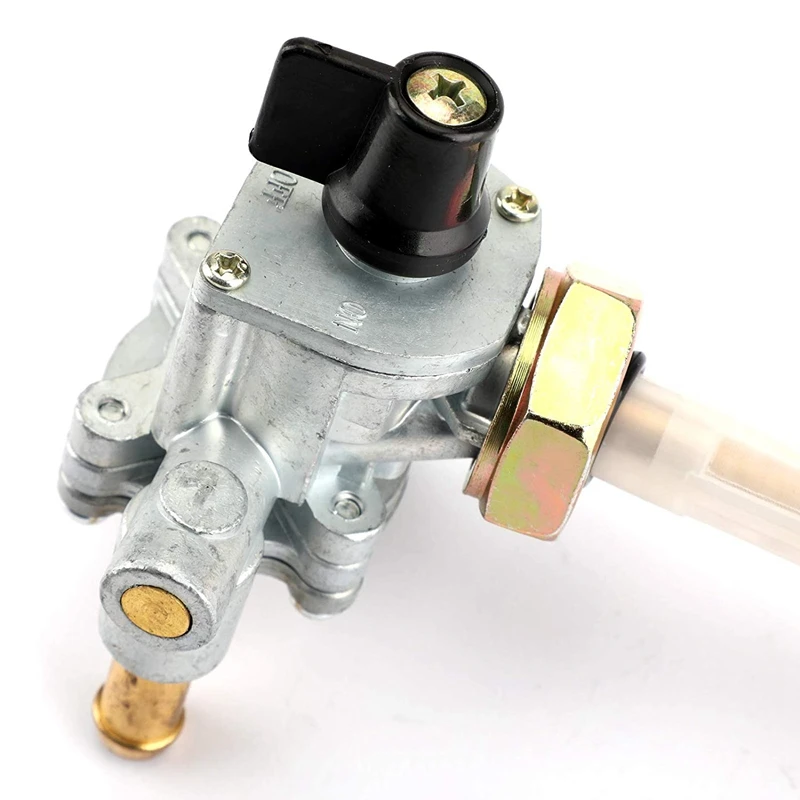 The search for analogues from other motorcycles has not yet yielded results, but in Russia there is a JT star for sale specifically for the mailer.
Postal sprocket 42 teeth - 41201GBJ740, JTR120342, Kitako, size
The interval for lubricating and tightening the chain in the official instructions is 500 km.
Kaba has a chain without rubber seals - this one can be safely washed in gasoline or in any other chemistry that is at hand. Let the chains dry before lubricating. After lubrication, also wait 5-15 minutes before moving off.
To reduce the wear of the sprockets and the chain itself, keep an eye on the tension. Check the tension in the chain case window - if it fell below the visual center of the hole, then it's time to get the tools and tighten.
If you mainly drive on smooth asphalt, then tighten so that the chain deviates upwards in the casing window by no more than 1 centimeter, and if off-road, then by 2 centimeters. Add half a centimeter to this if you weigh 100+ kilograms.
Factory tire sizes
| Front wheel | Rear wheel | |
| C50 | 2.25-17 | 2.25-17 |
| C70 | 2.25-17 | 2.50-17 |
| C90 | 2.50-17 | 2.50-17 |
Factory tire pressure
| Wheel | Regular cab | Postman |
| Front wheel | 1.75 bar | 2.0 atm |
| Rear wheel | 2. 0 bar 0 bar | 2.25 bar |
When choosing, you need to pay attention to the size in combination with checkers. The front fender can fit a 2.50-17 or 70/100-17 tire with any studs, and 2.75 fit with or without studs. Back you can put 2.75 with any checkers, and 3.00 with or without modest checkers.
There is a nuance that the game with dimensions rests on the power of the Super Kaba C50 - it will be quite difficult for him to turn wheels larger than 2.50. To compensate for the heaviness of the 2.75 wheels, put the drive sprocket one tooth less or the driven one a few teeth more. C90 is less susceptible to this, it will calmly digest 2.75 on two axes.
Tire models, which can be found in Russia
· Petroshina front l358, back L359, SUV L263
· KENDA Road K422, mixed coatings K761 , mixed coatings MC51, off-road C-19 Mitas store
Metzeler road ME22 Mosavtotyre
IRC road NR6, mixed coatings TR1, off-road GP1
Pirelli City Demon
Michelin City Pro Mosavtotyre
Wanda P2005 — an adequate size and you can imagine that this is a tire for a tour enduro, not a pit bike
Send links in the comments.
IRC tube - good basic tube
Reinforced IRC tube - it only makes sense if you drive off-road or with a deuce
Rim tapes
Honda Super Cub tire reviews
When replacing a tire, throw it in the sun or heat its bead with a hair dryer and use tire paste, so there is less chance of bending the rim. When using water and soap, the caps of the needles begin to rust.
Video how to remove the rear wheel
Video how to change a tire
Usually there is no problem to pick up live. But it happens that it is not available, and what kind of base it is is unknown. Follow the links to search queries in which you can compare the appearance of the lamps and order by the article number from the example.
| Location | Marking | Example |
| Near/Far | 12V 30/30W P15D25-1 | Koito 0411, Osram 62377 |
| Turn signals | 12V 10W T13 or 12V R10W BA15s | Stanley WB001 or Osram 5008 |
| Stop/clearance | 12V 18/5W T20 or 12V 18/5W BA15d | Stanley W7874 or install 21/5W |
| Speedometer illumination | 12V 2W BA7s | Bosch1987302224 |
| Neutral and turn signal lights | 12V 1. 7W T10 7W T10 | Koito 1589 |
Experience of installing LED lamps in the head light
Video how to replace the head light bulb
The appearance of light bulbs. Two types are used for stop light, marker and turn signals, compare
Pads and drum go long. If you have worn linings on the brake drum, this is a sign of a high mileage for a moped. Sometimes, regardless of the remaining friction on the block or drum, they need to be replaced due to old age / oakiness and enjoy the new quality of braking.
To improve braking without changing pads, simply clean the brake dust that accumulates inside the drum and lubricate the brake pin. Video how to remove a wheel in the tires section. Don't forget to maintain the brake cable - fill it with universal light grease, or replace it.
Standard Drum Brakes
Honda 06450121730
DP Brakes 9126
EBC 303
Ferodo FSB704
Galfer MF002 ≈9 MCS0 410041 Newfren GF1043
Vesrah VB-101
Oversized drum pads
These pads are for the rear mailer drum and front C90 drum since 2001.
06430-GBJ-K10
Front brake cable - 45450GBJ830
Video how to change brake pads
The battery works: a brake light, turn signals, a neutral and turn signal lamp, a horn, and an injection moped supplies fuel for starting.
In Russia, it is easy to find batteries of well-known brands, everything is stable with them: Exide, Bosch, Varta. They also installed the following: Moratti (normal), Delta CT1204 (50/50), Red energy (not very).
Video how to replace the battery
A sore point of the linkage suspension in Kaba - the front wheel leans to the side when braking. This happens when the bushings are worn out. After replacing the caprolon bushings, laxity disappears and the wheel does not break to the side.
There are two types of bushings: for new-style levers without grease fittings and grease fittings, and for rare old-style levers with grease fittings. Almost all of them have levers of a new sample, respectively, and you need to take bushings for a new sample. If you have an oiler press on the levers, take bushings for old-style levers.
Order a set of caprolon bushings with delivery across Russia
Not only caprolon bushings, but also metal bushings wear out - play and squeaks appear. It would be perfectly correct to replace everything else. Complete kit for replacing the front suspension in a conventional Cabe with a 10 mm axle and levers without grease fittings:
To make the shock absorbers stiffer, for example, for heavy loads or for a passenger, put Chinese shock absorbers. Usually they are tougher.
In order not to change the shock absorbers themselves, you can change the worn components:
of the rear shock absorbers springs - 52401GB4681
Dampers of the rear shock absorbers - 52410gK4971
 7 mm
7 mm o-ring left crankshaft cover 107×2 mm
o-ring screws left crankshaft cover 6×1.7 mm
crankshaft oil seal 18.9× 30x5 mm
Rear hub oil seal 27x40x6 mm (not suitable for postman)
Front wheel oil seal 21x35x7 mm
Oil seals are sold in every moped shop in sets from 139FMB, but you can search better quality. For example, by searching in Yandex or Google for the size of the stuffing box.
Large set of seals for a boar
A set of three oil seals Takegawa
Set of Chinese oil seals
front wheel, 2 pieces - 63002RS or 6300LU
rear wheel, 2 pieces - 63012RS or 6301LU
rear -wheel champion, 6201 mailer wheels - ???
Rear hub mailer — ???
How to decipher the numbers and letters on the bearing
6300 - bearing size;
2RS and LLU - Rubber Seal
Cool bearing manufacturers: NTN/SNR, Koyo, NSK, SKF.
Can be found by searching by size in Yandex or Google, as well as by bearing size in spare parts stores like Emex. There are also Chinese from alpha, but I do not advise.
Wheel Damper Kit - 06410-GBJ-J01, NTB
Wheel Damper Kit Mailer - 06410-GBJ-J40, NTB
Throttle Cable (82 cm) - 17910GB4771, NTB
- Front Brake Cable 45450GBJ830; NTB; Chinese, fits C grade plus
Speedometer cable tightened with a screw (98 cm) - 44830GBJ000; NTB
Threaded speedometer cable - 44830GB4680; ((https://www.webike.com.ru/products/20576843.html NTB)
Carburetor suction cable (75 cm) —
Madmax brake light for inexpensive https://japan.webike.net/products /20365912.html
Gates Gasoline Hose with fabric braid 5mm, 1 meter — 4324-10055
Paronite sheet, 0.5mm 500x500mm — VSK00061735
Ignition lock for carburettor cabs fits Irbis TTR125.0003
KAYO Timing Roller Large 020012-004-8998
KAYO Timing Roller Small Toothed 020012-004-3572
Timing Chain 82 Links (up to 72 cc) SFR 010136-909-5825
Timing Chain (10 links to 94 cc) SFR 010136-909-9539
For tables, spare parts known to me are used, which can be found everywhere in online stores.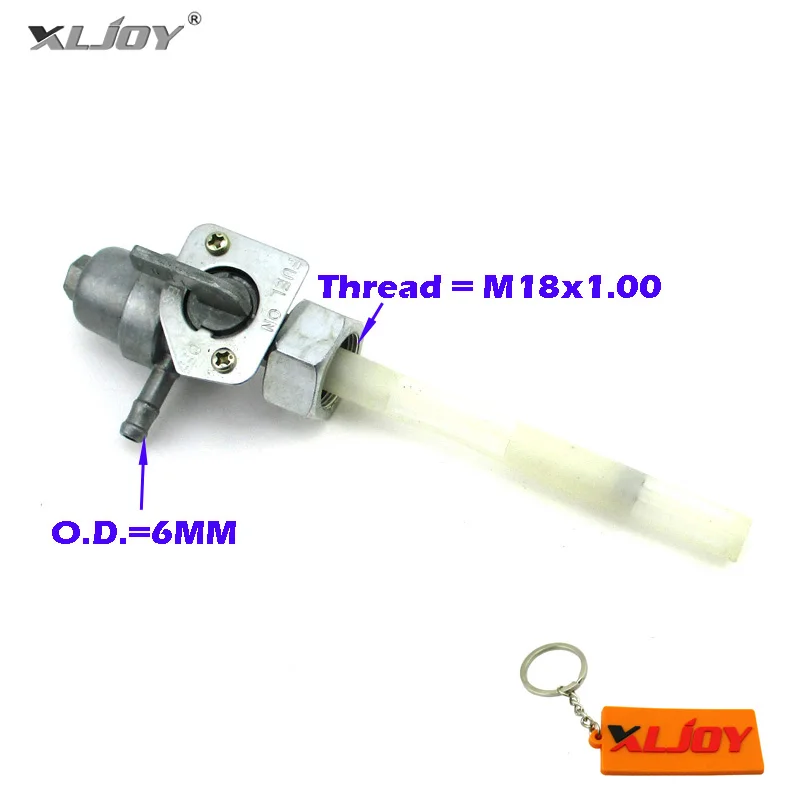 Use these tables to narrow your search, not as truth. There are many options for Chinese spare parts, I can not take into account something. Trying it on live is always safer.
Engine
Indices of Alpha motors from which spare parts are suitable for a carburetor engine:
139FMB (50 cc),
147FMH (70-90 cc),
152FMH (110 cc).
Almost nothing is suitable for injection engines from Alpha.
| Part | Injector Cab | Carburettor Cab | Nuances |
| Crankshaft | - | ?? | |
| Connecting rod | − | + | |
| Cylinder | - | + | |
| Piston | - | + | |
| Piston rings | - | + | |
| Oil seals | - | + | |
| Timing chain | + | + | 82 links up to 72 cubes, 84 links for 90-110 cubes |
| Tensioner rollers | + | + | |
| Camshaft star | + | + |
Chassis
| Part | Regular cab | Postman | Nuances |
| Front axle | + | + | Shaft diameter 10 mm |
| Swingarm axle | - | - | The axle from Alpha is thicker and longer |
| Rear axle | + | - | Same length, diameter 12 mm.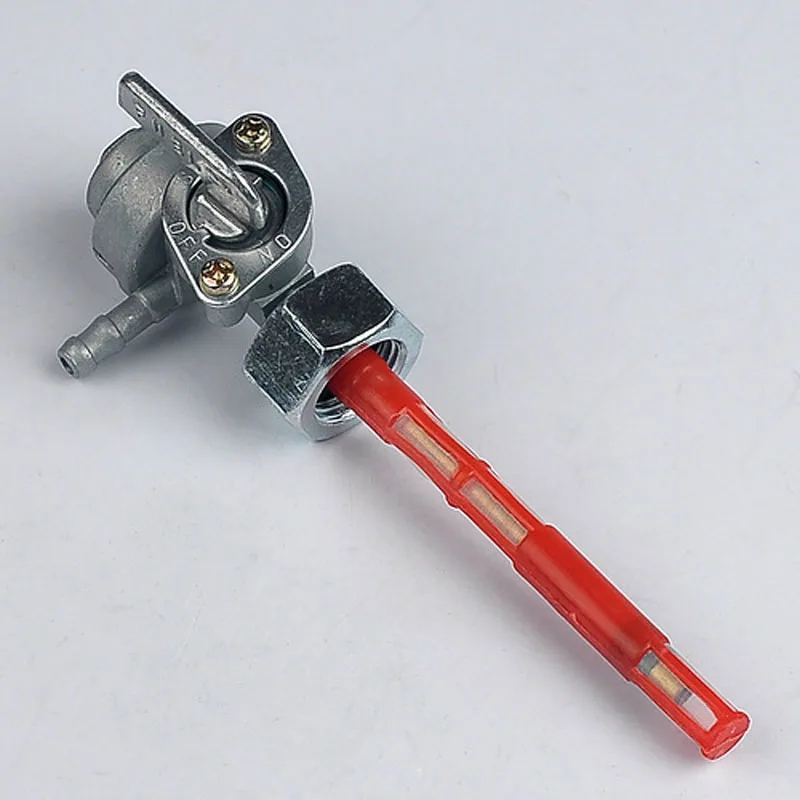 The mailer is thicker than The mailer is thicker than |
| Front wheel | + | + | Shaft diameter 10 mm, drum diameter 111 mm |
| Rear wheel | + | - | The mailer will not stand on the axis |
| Front drum | + | + | May require rework |
| Rear drum | + | - | May require rework |
| Dampers | + | - | Postman has dampers larger than |
| Hub | + | - | |
| Hub bushing | + | - | |
| Brake pads | ± | ± | Regular (105×25 mm) and large for mailer back (110×25 mm) available |
| Chain guard | + | - | Holes may need to be adjusted. The postman has a wider hole for the hub |
| Chain tension lugs | + | - | Needs | staggered hole kit
| Drive sprocket | + | + | |
| Driven star | + | - | The mailer has its own star |
Other
| Part | Fits | Nuances |
| Remote control left | + | Left-hand turn signal control |
| Control panel right | + | For right hand light control |
Cab is designed for confident slowness - love it the way it is.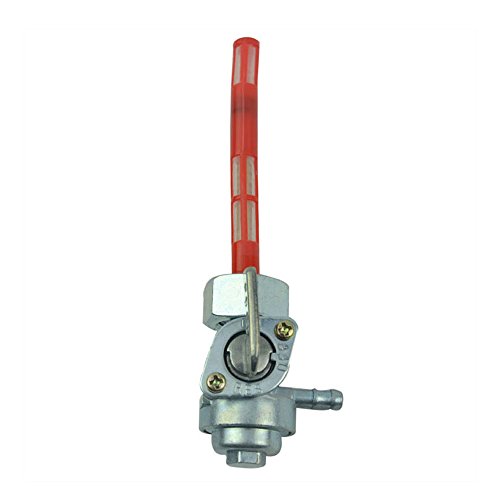 But if the standard power of 50 cubic meters is not enough for you, then there are several options for how you can fix the situation. Be careful, even after tuning there is a chance that you will not get the desired effect and then you should reduce expectations or change the technique.
- Supply CPG 72cc without replacing the head ≈2000-3000 ₽. On Chinese spare parts, this will happen only in one case - you need to take a 147FMH cylinder, and to it a low piston from a 139QMB scooter. The famous article "Ozverin for Kaba" tells about this method.
cylinder-piston group 72ss, 47 mm ≈1500 ₽
Low piston from a scooter ≈300 ₽
Set 47 mm ≈200 ₽
-Set the CPG 72ss ≈7000 ₽ for this: Change the GBC, as well as put a carburetor 16mm and wider exhaust. This will give the coveted 70 km/h in any conditions: uphill, against the wind, loaded. The installation process is described in the cubing increase manual. 9Ol000 ≈8000 ₽. will fit on a standard cylinder head, will give an increase in thrust, but there will be almost nothing on high ones. One of the easiest and most reliable ways to improve the start from a traffic light.
Kitaco carburettor cab tuning kit ≈8000 ₽.
- For the injection motor, supply the SP Takegawa kit ≈28000 ₽. Injection Cub without numbers starts to ride almost like a carbureted Super Cub C90, but still will be inferior to it. Along with speed, fuel consumption also increases to 2.5-3 liters. And the pluses are that you are still without numbers, technical inspection and insurance.
SP Takegawa AA01 injection motor tuning kit ≈28000 ₽
- Obtain a license and buy a Super Cub C90, C110 or other motorcycle - 20-45 thousand ₽. It seems like a joke, but often tuning turns into infinity, which the owner does not need - he would like to drive, not tinker. In this case, it is better to take a model that gives the desired speed from the factory. Learn to drive for ≈20000 ₽, add money to С50 and buy С110 ≈25000₽. Or just go and buy a normal maxiscooter.
All parts catalogs C50 up to 2008
Carburetor catalogs: C50 1995, C50 AA01 2000, C90 1992, C90 2007
Catalogs for injectors: AA01 Postman, C50 custom and regular
There is no “everything for Super Kaba” store in Russia. Our fate: it is unstable to grab spare parts from a disassembly, in the community, to pick up from a car or from Alfa live, there are spare parts on Droma. Original spare parts are available on Vibike, Megazip and Impex.
Spare parts from Japan0041 https://www.megazip.ru/ - Russian service, spare parts by article
https://www.impex-jp.com - service for buying spare parts from the Yahoo auction, used units and new
Spare parts in Russia
http://avito.ru - there are Super Cabs in the analysis
Map of stores with spare parts in Moscow
Keys, sockets: 8, 10, 12, 14, 17, 19, 23
Phillips screwdriver, impact screwdriver
Spark plug 16 mm
Pliers
Pry bars, spool driver
Puller sizes and ordering links 910
A blinking red light indicates that you have exceeded the 35 km/h limit in Japan for mopeds up to 50cc. Japanese traffic police have already left for you.
The bushings on the front linkage wear out. Refer to the suspension section and order the bushings indicated there.
Check the ignition key → Add gas → Check the position of the carburetor valve → Pull the choke → Check spark plug → Drain old gasoline air filter → Adjust carburetor → Check compression
The injector has a fuel filter on the fuel pump. When it clogs, the moped starts to jerk. The terminal stage - it can start because the pump supplies a lot of fuel when the key is turned, but when the throttle is opened, it stalls. You need to disconnect the nozzle, remove the tank, disconnect the chip from it and remove the fuel pump. Disassemble the pump, be surprised at the amount of debris, clean the fuel filter.
Blinking indicates a malfunction. For example, the lambda probe sensor may be broken or you have poured too much oil into the crankcase.
Count the number of blinks, find this number in the list:
1 - inlet pressure sensor
7 - oil temperature sensor
8 - throttle valve sensor
9 - temperature sensor
12 - injector, circuit malfunction, sensor malfunction
21 - malfunction O2 sensor
29 - IAC valve
33 - engine control unit malfunction
91 - ignition coil
105 - fuel supply system, air / fuel ratio
Change oil - YouTube
Change candle - YouTube
Change air filter YouTube
Change tires - YouTube
Change brake pads - YouTube
Check wheel bearing play - When changing rubber
Change rear wheel dampers - YouTube how to remove a wheel
Replace the brake and gas cables
Change the chain - YouTube
Adjust the clutch - YouTube
Change the battery - YouTube
Installing the turn signal sound repeater
Japanese YouTube channel for Kaba maintenance
The electrical circuit appeared thanks to Anatoly Reznikov.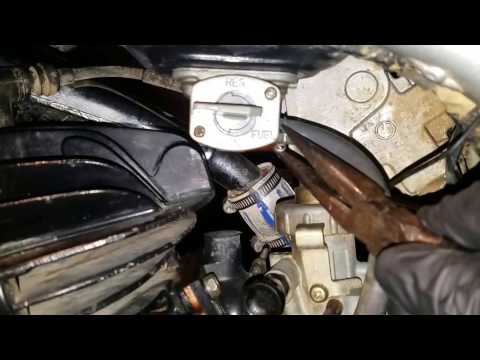 On his website, you can find finishing touches for Kaba to your liking.
Circuit diagram Honda Super Cub, carburettor.
| Model | Postman C50, JBH-AA01 injector | C50, JBH-AA01 injector |
| Length | 1.84 m | 1.8 m |
| Width | 0.675 m | 0.66 m |
| Height | 1.02 m | 1.01 m |
| Wheel base | 1.18 m | 1.175 m |
| Clearance | 13 cm | 13 cm |
| Weight | 87 kg | 79 kg |
| Seats | 1 | 1 |
| Turning radius | 1.8 m | 1.8 m |
| Engine size | 49 cm³ | 49 cm³ |
| Engine power | 3.4 HP/7000 RPM | 3.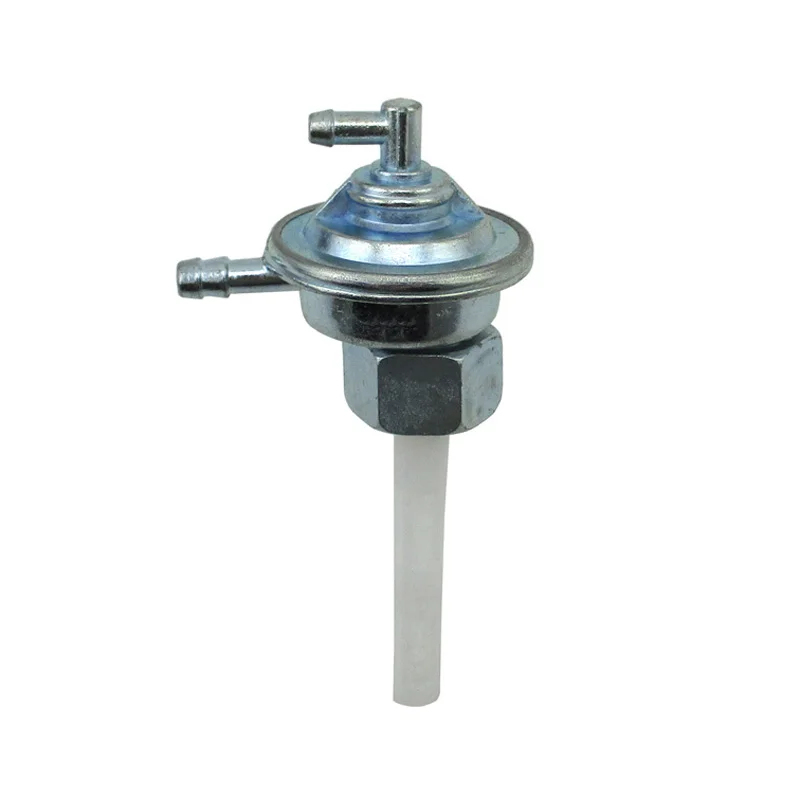 4 HP/7000 RPM 4 HP/7000 RPM |
| Torque | 3.8 N m (0.39 kg m)/5.000 RPM | 3.8 N m (0.39 kg m)/5.000 RPM |
| Compression ratio | 10.0 | 10.0 |
| idle speed | 1700 RPM | 1700 RPM |
| Candles | CR7HSA | CR7HSA |
| Spark Plug Gap | 0.6-0.7 mm | 0.6-0.7 mm |
| Tank capacity | 3.4 l | 3.4 l |
| Battery | YTX4L-BS12 V-3 Ah (10HR) | |
| Front tires | 2.25-17 | 2.25-17 |
| Rear tires | 2.5-17 | 2.25-17 |
| Oil | JASO MA, 10W-30, API: SL | |
| Oil change volume | 0.6 l | 0.6 l |
| Oil crankcase volume | 0.8 l | 0.8 l |
| Oil change | 3000 km | 3000 km |
| Air filter replacement | 10000 km | 10000 km |
This knowledge base is an extended user manual that answers the questions of what, how, where to change. But for connoisseurs, I post original Japanese user manuals.
Manual Honda Super Cub C50 6v, carbureted + wiring diagram
Manual Honda Super Cub C50, fuel injected
Translated manuals into Russian:
Partially translated Honda Super Cub C50, injection
Thread on the Easy Rider forum
Ukrainian Honda Super Cub club on Instagram
Australian postbikes C040Club 90
A selection of Honda commercials
Super Kaba promotional posters: one, two, three, four1540 Fused Pants »
Ed March & c90adventures Project
(free manual download)
File Format: PDF
File Format: PDF
90 . Without registration and SMS.
Optional: Online manual reading
Page:
( 1 of 114)
navigation
one
2
3
four
5
6
7
eight
9
ten
eleven
12
13
fourteen
fifteen
16
17
eighteen
19
twenty
21
22
23
24
25
26
27
28
29
thirty
31
32
33
34
35
36
37
38
39
40
41
42
43
44
45
46
47
48
49
fifty
51
52
53
54
55
56
57
58
59
60
61
62
63
64
65
66
67
68
69
70
71
72
73
74
75
76
77
78
79
80
81
82
83
84
85
86
87
88
89
90
91
92
93
94
95
96
97
9eight
99
100
101
102
103
104
105
106
107
108
109
110
111
112
113
114
Manual Table of Contents
 All information contained in this Guide is valid at the time of signing the document for printing. Honda Motor Co., Ltd. reserves the right to contribute
  Please read this section carefully. By following all the instructions and warnings in this section, you will protect yourself and your passengers. Security measures
  Some of these decals warn of a potential hazard of serious injury. Others provide important safety information. Attention to study sleep
  Fuel Type Decal: Unleaded Gasoline Only Drive Chain Information Decal: Follow
 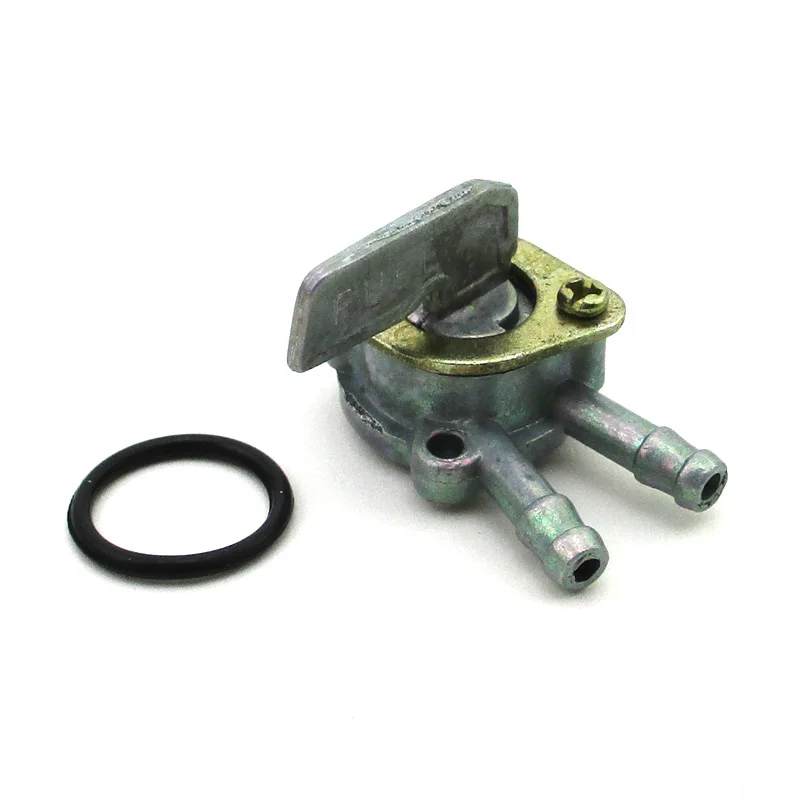 ●● If you must park the motorcycle on uneven ground, position it so that it cannot move or fall over. ●● Make sure hot engine surfaces
 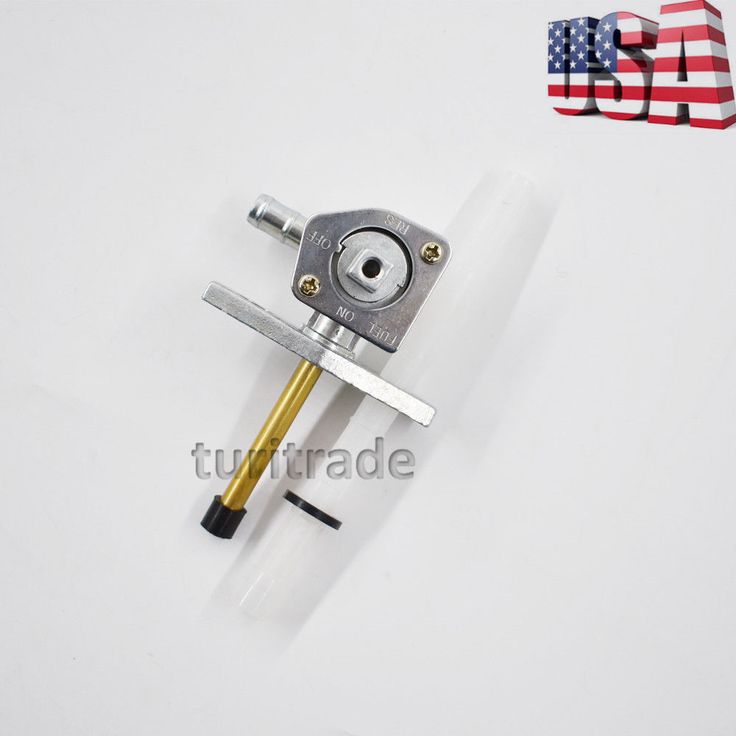 67 Front seat p. 50 Fuel tank p. 30 ABS Fuses (CBR250RA) p. 91 Rear seat p. 49 Drive chain p. 63 Rear spring adjuster p. 72 p. 62 Crankcase ventilation p. 71 Shift lever Side stop Operation Clutch lever p. 29 19 Book 1.indb 19
 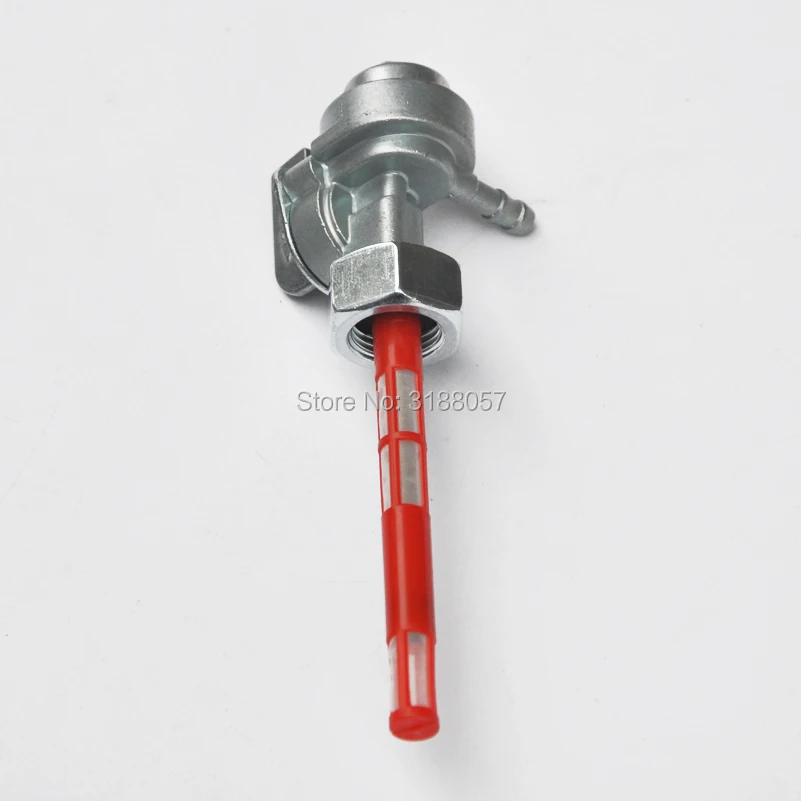 • Odometer: Displays the total mileage of the motorcycle since the beginning
 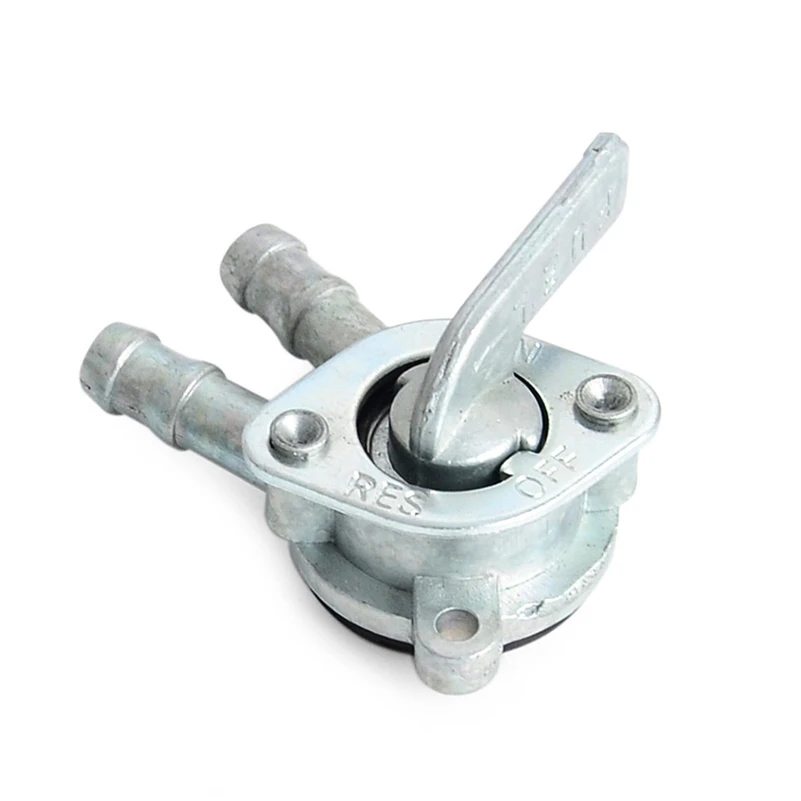 Steering column lock: By locking the steering wheel while parking, you will protect your motorcycle from theft. We also recommend using a U-shaped wheel lock or similar device. Press 1 2 Turn Ignition key ON Turns on the electrical system for starting and driving OFF
 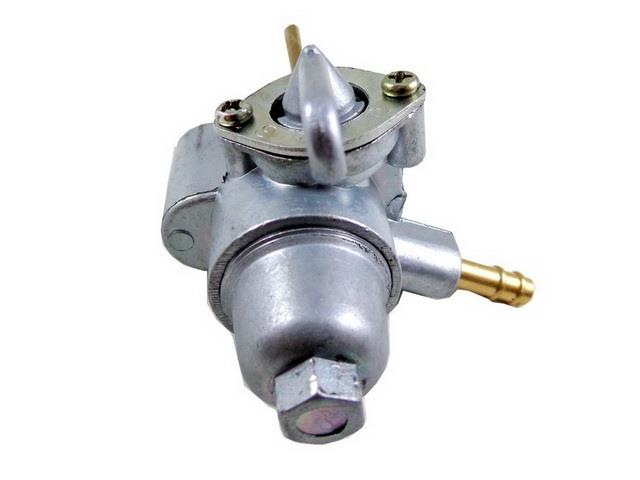 Fuel type: Unleaded only
  Maintenance All maintenance procedures must be carried out in full compliance with
 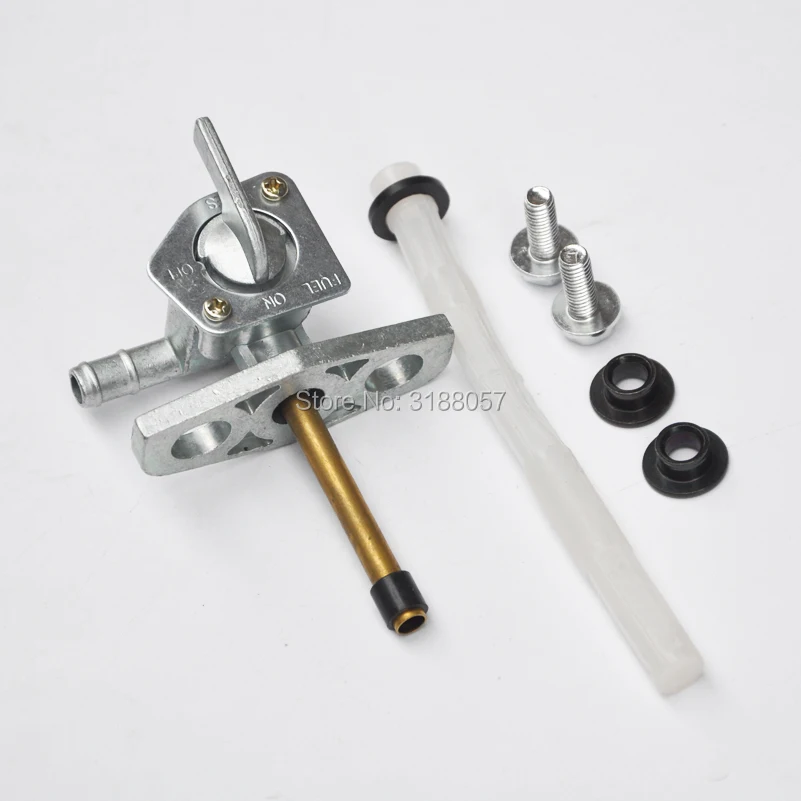 When ordering painted parts, specify model name, color and color code,
  Use only fresh brake fluid in a hermetically sealed container. If you have topped up brake fluid as
 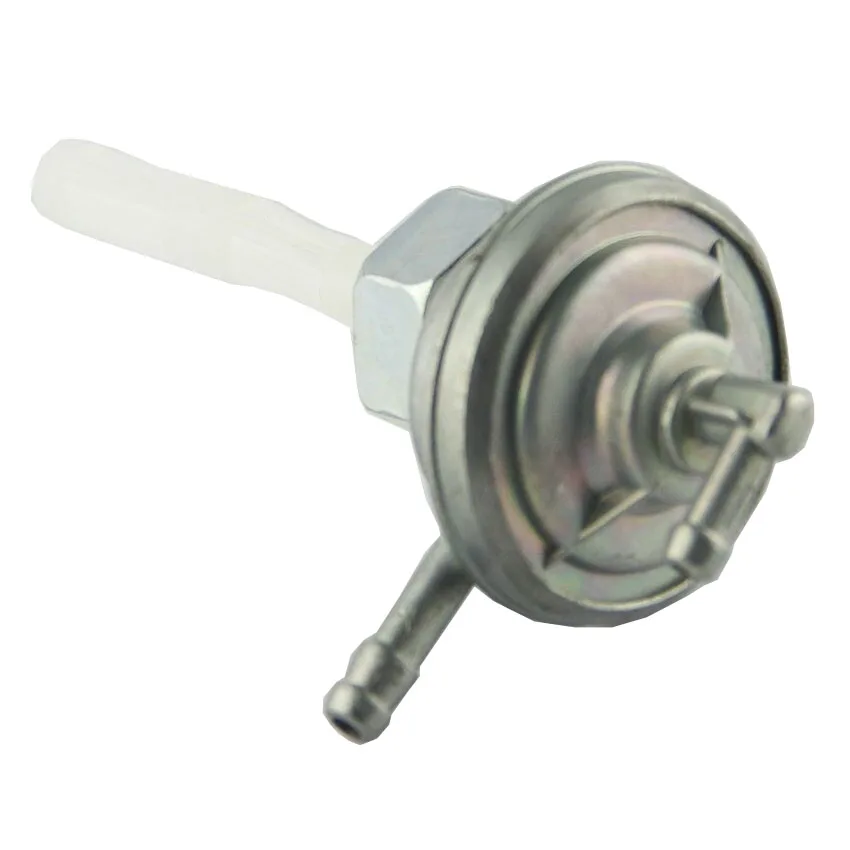 Maintenance For recommended tire parameters such as specifications, size, air pressure and minimum tread thickness, refer to Technical
  After installing the rear seat, be sure to check whether it is securely
  Disconnect the terminal from the negative battery terminal. 4. Disconnect the plug from a positive conclusion of the storage battery. 5. Carefully pull out
  2 kgf·m). 13. Check for signs of leakage. 14. Reinstall the lower fairing. CAUTION An incorrectly installed oil filter can cause significant engine damage. 10. Replace
  Front Visually inspect the pads on the underside of the brake caliper. 2. Rear Visually inspect the pads on the right side rear of the motorcycle. If the brake pads need to be replaced, see an authorized Honda dealer.
 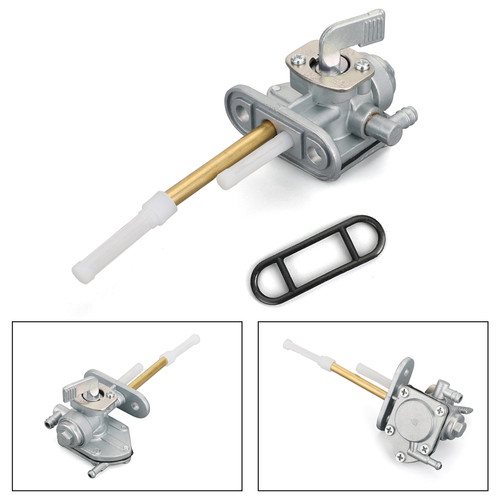 Except in an emergency, this procedure should be performed by an authorized Honda dealer. (CBR250RA only)
  Loosen the lower locknut. 3. Turn the lower adjusting nut to set the clutch lever free play between 10 and 20 mm. 4. Tighten the lower lock nut and again about
  Turn the dial with a Phillips screwdriver from the toolbox ( p.48). Follow the requirements and
  Troubleshooting If this happens, stop at
 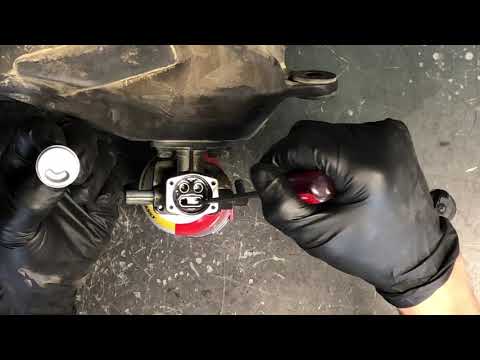 Troubleshooting 2. Loosen the front axle shaft nut. 3. Loosen the axle shaft pinch bolt on the left front fork leg. Axle shaft nut
  Tighten the rear axle shaft nut. Tightening torque: 88 Nm (9.0 kgfm). Troubleshooting 5. With the rear wheel in place, depress the brake pedal several times and check that the wheel spins freely.
  3. Insert a new
  ..................................................... .............................. 93 Instruments, controls, functions ............................... ................................................. .............. 94 Alcohol-petrol mixtures .............................. 95 Catalytic
  Using fuel containing more than 10% ethanol (or more than 5% methanol) may: ●● Damage
  pages 35–36 Transportation If you need to transport your motorcycle for long distances, you should transport it to
  00 kGf/cm2) Air pressure (driver only) rear 200 kPa (2.00 kGf/cm2) front Turn Signals Rear Turn Signals Front Position Lights License Plate Light 12V- 60/55W 12V-21/5W 12V-21W × 2 pcs. 12 V – 21 W × 2 pcs. 12 V – 5 W × 2 pcs.