Review by Paul Rutherford on April 21st, 2022
Parts are good quality and fit well.
Review by Ron Coit on January 18th, 2022
Did not come with instructions. I used YouTube and it was easy to install but hard to bleed.
Review by Rodd Mitchell on December 20th, 2021
Bought for a Christmas present, so has not been installed yet. Customer service and pricing were exceptional (5 stars on both). Arrived on time, as promised. Will definitely look to Revco for future purchases.
Review by Alex Gosselin on October 27th, 2021
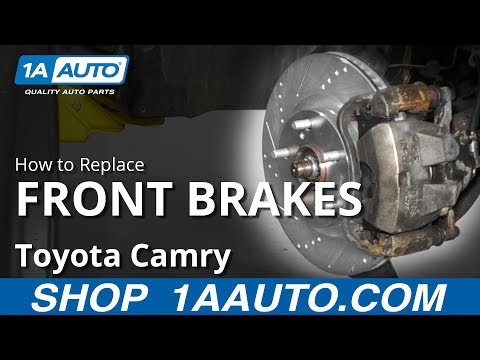
Recently purchased and installed on a 1998 Honda 300 Fourtrax. There were no instructions in the box, but available online on the manufacturer's website. No torque values for fasteners in instructions and the section on rerouting the brake lines was vague, making that part a bit more difficult. Good fit and kit seems well made. Good value overall and greatly improved braking performance over stock drum brakes. I would buy this product again.
Review by Paul on October 19th, 2021
The install was easy once I found a good YouTube video to follow. Only criticism is that no instructions were included with the kids.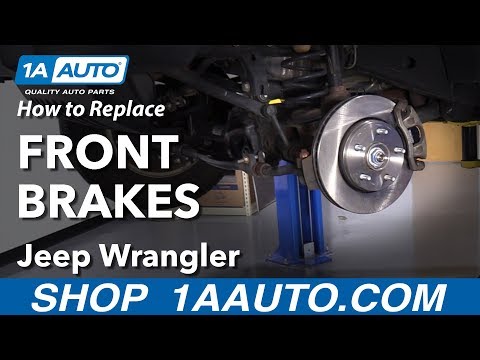 Everything fit perfectly and worked well.
Review by Unknown on August 20th, 2021
Nice to have a 450 foreman with front brakes Easy install
Review by Devin Evans on May 20th, 2021
Arrived earlier than expected bonus easy to install would get them for my other bikes.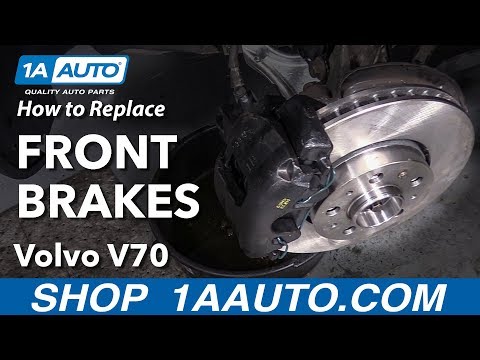
Review by Kevin Leidenius on April 28th, 2021
Everything worked as it should, instructions would have been nice but it wasn’t to hard to figure it out, i you tubed it, also found different models configure where the spacers go differently.
Review by Brad on March 20th, 2021
No instructions came with the product but with the help of YouTube they were easy to install. I would prefer more play for the brake lines.
Filter
Sort
Sort By: Featured ItemsNewest ItemsBest SellingA to ZZ to ABy ReviewPrice: AscendingPrice: Descending
Throughout the 1960s, Honda was well on their way to becoming a dominant force in the 2-wheel performance motorcycle market with models such as the CB77 Super Hawk, Scrambler CL450, and the Dream CB350 Super Sport and CB750. By 1970, the Japanese manufacturer entered the blossoming compact all-terrain vehicle market that was spearheaded by the Jiger ATV. Honda’s answer to the Jiger was the US90, a 3-wheeled power trike layout that combined the Jiger’s off-road capabilities with Honda’s famous motorcycle engineering and technological know-how.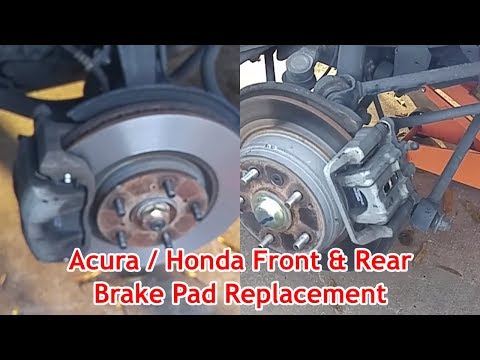 The US90 (later called ATC90) was an instant sales success and supplanted the Jiger as the new ATV sales king until 1982 when rival manufacturer Suzuki introduced the first-ever 4-wheel ATV, the LT125. The Suzuki LT125 went on to reshape the ATV market and its new 4-wheel design laid the groundwork for every other ATV that followed. Honda continued to push the boundaries of high-performance and utility 3-wheel ATVs with the ATC Big Red, but the demand for 4-wheel ATVs was far too loud for Honda to ignore so in 1984, Honda unveiled the TRX 200 FourTrax. The TRX200 paved the way for the FourTrax TRX250 and competition-ready TRX250R which was geared for ATV racing enthusiasts. Two years later, Honda followed up with the industry’s first four-wheel drive ATV, the TRX350 FourTrax 4X4. The 1986 Honda FourTrax 4X4 was a revolutionary landmark in ATV technology and its impact continues to resonate throughout the market today. Even Honda’s current crop of sport ATVs such as the TRX250X and heavy-duty rec/utility ATVs like the FourTrax Rincon, FourTrax Recon, FourTrax Rancher, and FourTrax Foreman Rubicon can trace their lineage back to that original groundbreaking 1986 TRX350 FourTrax 4X4.
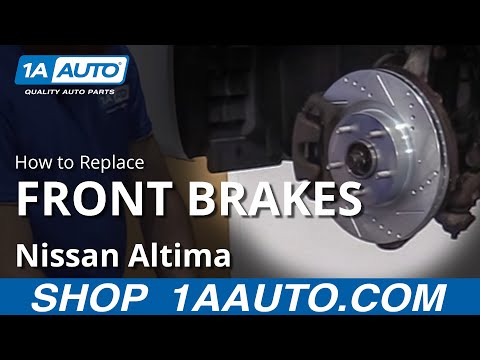
At Race Driven, we are ATV performance enthusiasts who race and ride with a lifetime of powersports experience. Our aftermarket performance parts and replacement components are engineered and crafted to withstand the harshest of everyday utilitarian use as well as the severe abuse of the racetrack. We work closely and directly with our manufacturing, prototyping, and powder coating company located in Escanaba, Michigan to ensure that our in-demand powersports products are available to you, the powersports aficionado, at the lowest possible cost. Browse our online inventory and search for CV joint boots, ATV chain and sprocket kits, Race Driven brake pads, Honda ATV brake parts, Dayco ATV belts, and other parts for Honda ATVs. We’re committed to bringing the highest quality products to all riders at an affordable price.
070810
Brake pads on a motorcycle, on average, have to be changed no more than 5000-8000 thousand km. I note that the better the brake pads you install, the longer they will last and of course the braking effect of the motorcycle is much better if high-quality brake pads are installed. Beware of counterfeit brake pads made underground in China.
○ New Sym scooters in stock with delivery to your region! Big choice. Best price guarantee!
Typically, pads with a residual "useful" residue of 1-2-3 mm are required to be changed, of course, it can be replaced earlier.
If you have a question about replacing the brake pads on your motorcycle, always purchase new brake pads for your motorcycle.
Do not "glue" and "weld" brake pads on the base of the old ones, buy only new pads for your motorcycle, let the new brake pads be standard (original) and not have metal chips and ceramics in their composition, such brake pads are all Equally, much better and more reliable than "modified" ones on their own.
“Homemade” - glued and welded brake pads at low speeds may seem “stable” and “reliable”, however, at higher speeds there have been cases of “separation” of the adhesive layer, which such a “separation” can threaten for a motorcyclist, probably not worth it even imagine ' reflect.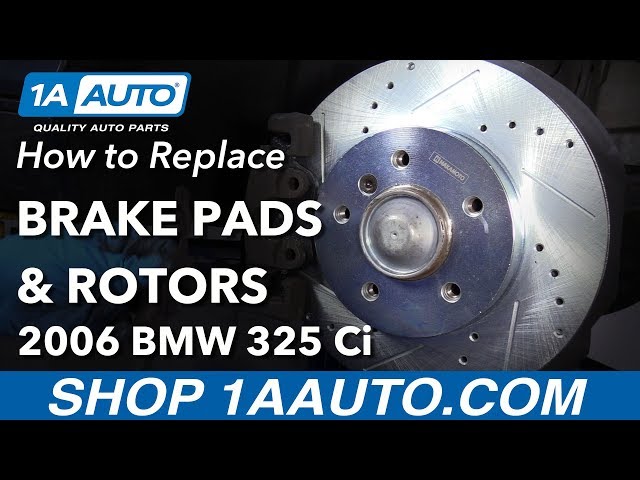
Just imagine you are accelerating a motorcycle, speeds are 120-160 km'h and suddenly there is a need for sharp braking, but there are simply no brakes or even "glued pads" fly past your angle of vision and you see this "flight".
To change the brake pads on your motorcycle, you will need two sets of pads for the front brake circuit and one set for the rear circuit.
1 set = 2 pads.
Details: You need to purchase two sets (two packs) of two pads - a total of four for the front brake circuit and a total of one set, two pads, for the rear brake circuit.
Recommended motorcycle brake pad manufacturers: EBC, SBS, DP, Ferodo, Versah ... or original, i.e. from manufacturers Honda, Suzuki, Yamaha, Kawasaki.
When choosing brake pads for your motorcycle, consider the type of motorcycle you have. For a road builder, “original” pads from a motorcycle manufacturer or, of course, analogues from Versah, EBC, Ferrodo, etc.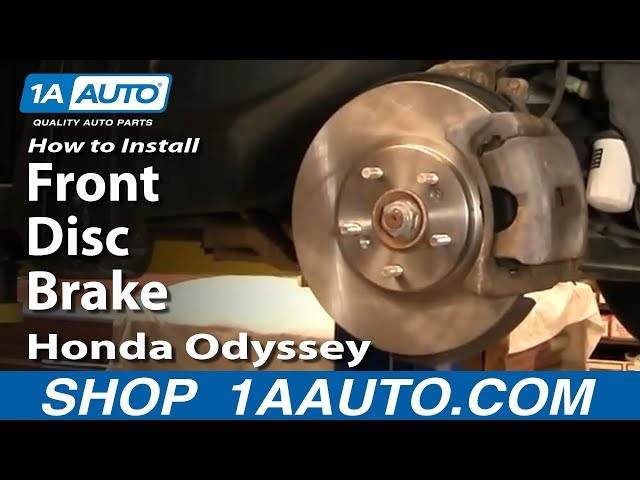 are quite suitable.
For a sports bike, brake pads with metal chips and ceramics in their composition will be more appropriate, but of course you can install original brake pads.
When replacing, take care not to inhale the dust from the brake pads.
Wait for the brake discs to cool completely, sometimes the discs after a trip in the “torn” acceleration-braking mode can warm up quite strongly.
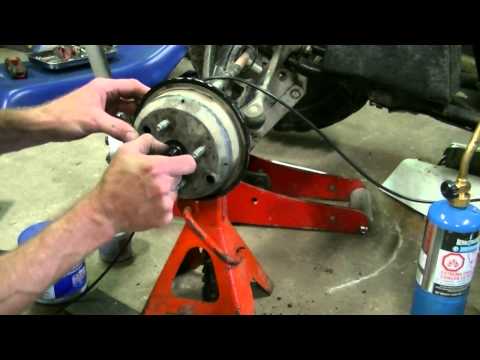
The arrangement of brake calipers is the same on almost all motorcycles, the arrangement of the rear brake caliper is usually identical to the front one, but with some differences, for example, in terms of the number of brake pistons.
If there are anther screws on the brake machine (for a minus screwdriver), unscrew the anthers. Next, you need to remove the long screw securing the brake pads. Usually, HEX keys (hex keys) are required to unscrew the fixing bolt.
If your brake machines have a clamping clip, remove the clip, after remembering the position, for further assembly.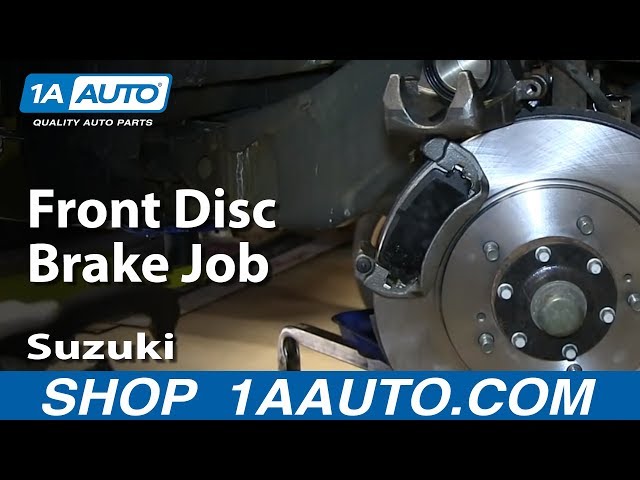
Next, you need to pick up the old brake pad “by the ear” with a screwdriver, remove it, and pull out the second pad in the same way. Next, with a minus screwdriver with a strong sting, gently squeeze the brake pistons, you need to push the pistons in a little more than half, be guided by the height of the new brake pads + the thickness of the brake disc.
In the process of dismantling the brake machines and changing the brake linings on a motorcycle, do not squeeze the levers and pedals of the brake circuits, otherwise the brake cylinders may come out of the grooves and air will enter the system, which can be expelled only by completely “pumping” the brake circuits.
Next, you need to install new brake pads. The process is similar to the parsing process. The pads are installed behind the brake disc and on top, a clamping bracket (if any) is installed, a fixing screw is screwed in, and an anther screw is necessarily screwed over the screw.
The process is similar to replacing the brake pads in the front brake circuit, the only difference is that sometimes because of the rear wheel, getting to the brake machine is a little more difficult than on the front circuit. Usually, the removal of the rear wheel of the motorcycle is not required, the mounting bolt is unscrewed and the brake machine is “shifted”. Further, the process of disassembling and replacing the brake pads of the rear brake circuit of a motorcycle is similar to the process of replacing the brake linings in the front brake circuit.
To bring the brakes into working condition, after installing a new set, it is necessary to depress the lever or pedal several times, repeat until a feeling of elasticity.
At first, until the brake pads “grind” to the brake discs of your motorcycle, noises and rustling are possible on low-quality brake pads, a whistle is heard. Also, at first, new brake pads are not so “grip”, so the first 100-500 meters should not be driven at high speeds. In general, you will need to get used to new pads, for example: brake pads from EBC with metal chips and ceramics are “grasping”, standard “original” pads are more “soft” when braking, so when switching from “soft” to “grasping” you need will get used to.
If you have any questions about replacing and choosing brake pads (linings) for your motorcycle, you can always ask your questions on our motorcycle forum.
You can buy new original and non-original motorcycle brake pads in our online motorcycle shop.
○ You can buy a scooter in our store by choosing a convenient payment method: cash to the courier, card, credit, installment.
140622
100522
180521
270421
160320
Podolsk,
st. Lobacheva 14 To contacts
#service #brakes
8 years ago
It is recommended to change the brake pads every 5000-6000 km. Replacement intervals are very conditional, because. There are many manufacturers of pads, and they are all of different quality, plus everyone has a different driving style. Pads need me when 1-2mm remains. The quality of the pads affects not only the durability, but also the braking performance. There are a number of verified companies (EBC, SBS, DP, Ferodo, Versah). Now Chinese pads have appeared on the market, we refrain from commenting.
The principle of changing pads on all motorcycles is almost the same.