Select TrimCustomLimited
1999 Buick Century Custom is equipped with Tire Pressure Monitoring System (TPMS).
| Front Tire | Rear Tire | |
| Tire Size | P205/70R15 | |
| Recommended Tire Pressure | 30 psi | 30 psi |
| Acceptable Winter Tire Pressure ⓘ | 33 - 35 psi | 33 - 35 psi |
| Tire Size Type | P-Metric | |
| Tire Load Index (Maximum Tire Load Capacity) | 95 (1522 lbs or 690 kg) | |
| Tire Speed Rating (Maximum Speed) | S (112 mph or 180 km/h) | |
1999 Buick Century Limited is equipped with Tire Pressure Monitoring System (TPMS).
| Front Tire | Rear Tire | |
| Tire Size | P205/70R15 | |
| Recommended Tire Pressure | 30 psi | 30 psi |
| Acceptable Winter Tire Pressure ⓘ | 33 - 35 psi | 33 - 35 psi |
| Tire Size Type | P-Metric | |
| Tire Load Index (Maximum Tire Load Capacity) | 95 (1522 lbs or 690 kg) | |
| Tire Speed Rating (Maximum Speed) | S (112 mph or 180 km/h) | |
Note: All tire pressure data listed is for informational purposes only. TirePressure.org does not warrant or make any representations regarding the use of or the results of the use of this information. Always refer to vehicle owner's manual for recommended tire inflation pressures.
It is indispensable to keep the right tire inflation pressures for 1999 Buick Century tires. Low tire pressure, and underinflated tires can prompt to lopsided and inordinate tire wear, poor handling, and diminished fuel economy. High tire pressure and overinflated tires can bring in reduced traction, poor slowing down and can even be a reason for a tire blowout. Check tire pressure routinely and keep up the right tire inflation for 1999 Buick Century to enjoy a safe and comfortable drive, get a good deal on gas and keep auto insurance expenses low.
Suggested tire pressure for 1999 Buick Century is controlled by the auto maker dependent on its qualities and unique equipment tire sizes. You can find out about 1999 Buick Century suggested tire pressure in owner's manual or on a tire bulletin on the side of driver's door or door jamb.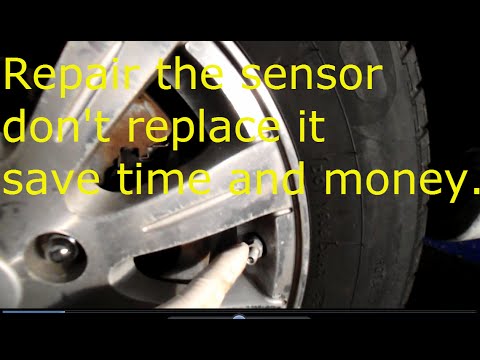 1999 Buick Century tire inflation will be recorded in psi (pounds per square inch), bar or kPa (kilopascals). Remember that tire inflation shown on tire sidewall is the greatest air pressure the tire can hold to convey its most extreme burden, and not really the recommended tire pressure for 1999 Buick Century. 1999 Buick Century may have diverse suggested tire pressure settings for front and back tires, particularly if equipped with staggered tires.
To check 1999 Buick Century tire pressure you should know its suggested tire inflation, and a tire pressures measure. Check tire inflation when tires are cold and have not been driven for at least 3 hours. Change 1999 Buick Century tire inflation to the suggested tire pressure levels as needed by adding air with a tire inflator.
In the event that you replace 1999 Buick Century original equipment tires with optional or plus tire sizes, be certain to follow steps on how to apply tire load inflation tables when replacing 1999 Buick Century tires to discover legitimate tire pressure for new tires.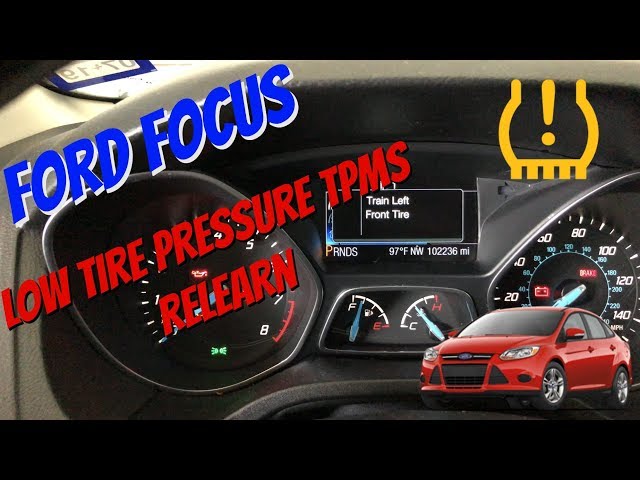 Continuously allude to the 1999 Buick Century owner’s manual for any particular safety advice regarding the application of replacement tires.
1999 Buick Century tire pressure varies with weather temperatures, so when temperatures drop tires may lose around 1 psi of air pressure for every 10 degree Fahrenheit diminishing in temperature. During winter season, 1999 Buick Century tires can be inflated 3 to 5 psi over the suggested tire pressure settings to make up for lower temperatures. Never over-inflate above psi showed on tire sidewall. Try to check tire pressure routinely in colder times to keep tires appropriately inflated for a safe ride on snow and frosty streets. Consult owner's manual for recommended winter tire pressure for 1999 Buick Century.
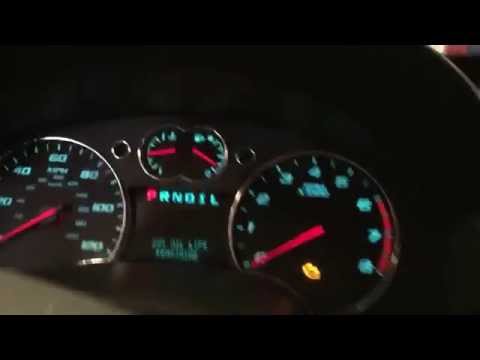
1999 Buick Century ought to be equipped with tire pressure monitoring system (TPMS) that utilizes tire pressure sensors to caution the driver when tire pressure is low. At the point, when 1999 Buick Century low tire pressure warning light is on, be sure to check all tires for low air pressure and inflate as needed.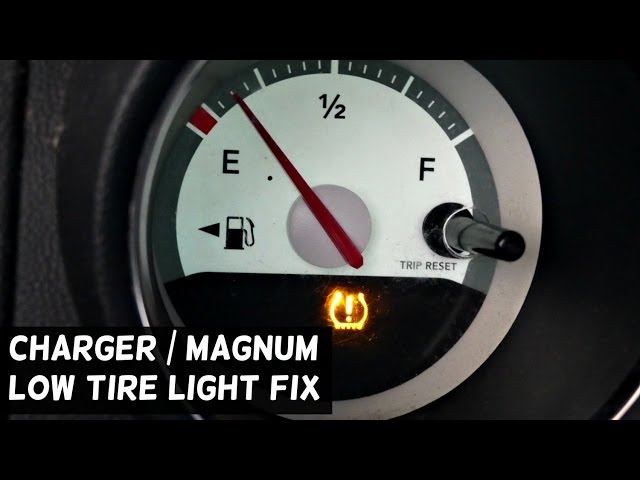 Refer to owner's manual on the most proficient method to reset 1999 Buick Century tire pressure monitoring system.
Indirect Tire Pressure Monitoring Systems (TPMS) are ones that do not have air pressure sensors inside the tires. Rather, they detect a low tire by comparing relative wheel speeds via the Anti-lock Brake System (ABS) wheel speed sensors. When a tire loses air, its diameter decreases slightly.
Indirect TPMS is not as sensitive to changes in tire pressure as direct systems that actually monitor the air pressure inside the tire, but they are not as expensive either. An indirect TPMS system is a relatively affordable add-on to a vehicle if it is already equipped with ABS. Even so, the vast majority of vehicles that have TPMS use direct systems rather than indirect.
Federal law requires the TPMS system to alert the driver if the pressure inside a tire has dropped more than 25% below the recommended inflation pressure. The same rules apply to direct and indirect TPMS systems.
One of the weaknesses of indirect systems is that they may not turn on the warning light if all the tires are underinflated by a similar amount. If the recommended pressure is 32 PSI, but all the tires are say 24 PSI (down 25%), the system won’t know there’s a problem because all will be rotating at the same speed when the vehicle is being driven.
INDIRECT TPMS APPLICATIONS
Indirect TPMS is used on a variety of General Motors models, a couple of Fords and a smattering of Toyota and other import models. You won’t find it on any Audi, Chrysler, Honda, Hyundai, Kia, Nissan, Mazda, Mitsubishi, Porsche, Saab or Volvo products because they all use direct TPMS with pressure sensors inside the wheels.
Indirect TPMS applications include:
• BMW X5 2002-2005
• Buick LeSabre 2000-2005
• Buick Lucerne 2006
• Buick Park Avenue 1998-2005
• Buick Regal 1999-2004
• Buick Rendezvous 2003-2007
• Chevy Impala 2000-2005
• Chevy Monte Carlo 2000-2005
• Ford Freestar 2004-2005 (some also have direct TPMS)
• Ford Windstar 2001-2003
• Lexus LS430 2004-2006
• Lexus RX330 2004-2006
• Mercedes C-Class 2007
• Mercedes SLK 2005-2007
• Mercury Monterey 2004-2005 (some also have direct TPMS)
• MINI Cooper 2004-2007
• Oldsmobile Alero 1999-2000
• Oldsmobile Aurora 2001-2003
• Pontiac Aztec 2003-2005
• Pontiac Bonneville 2000-2005
• Pontiac Grand Am 1999-2002
• Pontiac Grand Prix 2004-2006
• Pontiac Vibe 2005-2007
• Scion tC 2005-2006
• Toyota Corolla 2005-2007
• Toyota Matrix 2005-2006
• Toyota Solara 2004-2006
• Toyota Highlander 2004-2006
• Toyota RAV4 2004-2005
• Volkswagen GTI 2007
• Volkswagen Jetta 2005-2007
WHERE TO FIND RESET PROCEDURES
Though all of these applications use a similar technology and strategy to detect a low tire, there is no common reset procedure.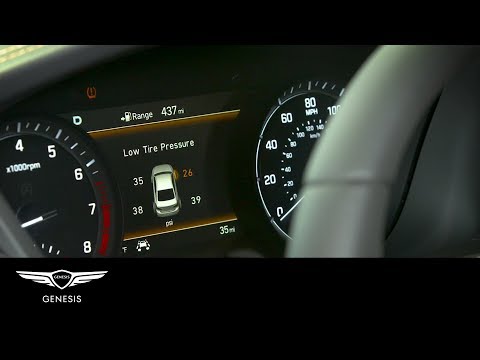 GM is probably the worst, with 10 different reset procedures depending on the application. Toyota is probably the best, with only one simple reset procedure for all of their indirect TPMS systems (though a slightly different procedure is used on the Lexus models).
With so many different reset procedures, it’s important to make sure you are using the right procedure for the vehicle your are servicing. The Tire Industry Association (www.tireindustry.org) publishes a great reference flip chart that covers TPMS reset and relearn procedures for direct and indirect TPMS on most domestic and import vehicles. This chart is a “must have” addition to your technical library, and is must faster and easier to use than looking up TPMS reset procedures online via an aftermarket or OEM service information website. The OEM websites all navigate differently, which means you can waste a lot of time hunting for information that is buried somewhere on their website.
TPMS reset procedures may also be found in the vehicle owner’s manual (if it hasn’t been lost).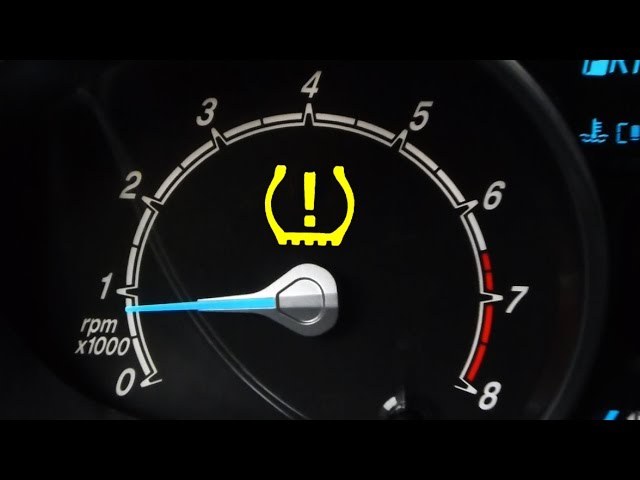 Open the glove box and check the index in the owner’s manual for any TPMS information.
INDIRECT TPMS RESET PROCEDURES
As a rule, most indirect TPMS systems have a RESET button for recalibrating the system. A reset is typically required after adding air to a low tire, after changing or servicing a tire, or after rotating the tires on a vehicle.
You usually turn the ignition on (engine off), and press the RESET button until the TPMS light flashes several times or goes off. But there are a lot of variations on this basic procedure. Here are some selected examples of how to reset the system:
BUICK CENTURY
On General Motors applications, such as the Buick Century, turn the ignition ON after all of the tires have been inflated to the recommended pressure, but do not start or drive the vehicle. With the key on, locate the TPMS reset button, then press the button until the TPMS warning light flashes three times. Now turn the ignition off.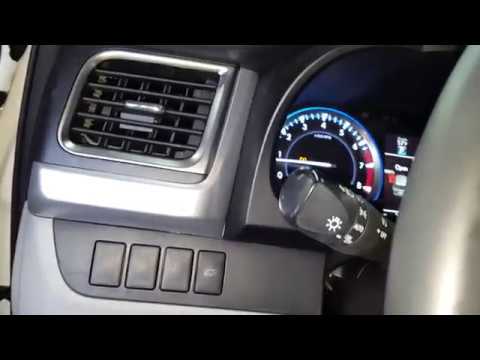 That resets the system and your customer is ready to go.
BUICK RENDEZVOUS
On some General Motors applications, though, there is no button marked TPMS or RESET. You may have to press other buttons on the instrument cluster or driver information center to get to the TPMS mode to reset the system.
On a Buick Rendezvous, you turn the ignition on (engine off), but hold down the MODE button on the driver information center until it displays “Low Tire Pressure Hold Set to Reset.” Then you press and hold the SET button until you head a chime and the DIC displays “Tire Pressure Reset.” You should then hear the chime rings three times and see “Tire Pressure Normal” on the display.
CHEVY IMPALA &
MONTE CARLO
On a Chevy Impala or Monte Carlo with indirect TPMS, a totally different reset procedure is required. You can use the light switch or radio to reset the system. With the light switch procedure, turn the ignition on (engine off), the turn the light switch from OFF to parking lamps three times within five seconds. With the radio technique, turn the ignition on (engine off). With the radio off, hold the DISP button until “SETTINGS” is displayed. Use the SEEK button to scroll down the menu until you see “TIRE MON.” Press the PREV or NEXT buttons until “RESET” is displayed. Then press the DISP button again. You should hear a chime and see “DONE” to indicate the TPMS system has been successfully reset. Use the SEEK button to scroll through the menu until “DONE” is shown, then press DISP once more to exit from the learn mode.
FORD WINDSTAR
There are a couple of ways to reset an indirect TPMS systems on a Ford Windstar. Some Windstars have a RESET button while others do not. On the minivans that do have a RESET button (to the left of the steering column on the instrument panel), turn the ignition on (engine off), then press and hold the button for three seconds. The TPMS warning light should blink three times then turn off. If the minivan does not have a reset button, turn the ignition on (engine off), the press the Trip/Odometer button on the instrument cluster until “TIRE RESET” or “CHECK TIRE” and “RESET” are displayed. Continue to hold the button for three seconds until the TPMS warning light flashes three times and turns off.
TOYOTA
On Toyota applications, the reset procedure is fairly straightforward, though it actually takes much longer to complete. Turn the key on (engine off), then press and hold the RESET button until the flashing TPMS warning light goes off. Or, if it is not flashing, hold the RESET button until the light flashes three times. Turn the key off. But the relearn procedure is not complete until the vehicle is driven at 19 mph or faster for at least an hour. You don’t have to do this, obviously, but your customer should be made aware of the fact that the TPMS reset procedure won’t be complete until the car has been driven awhile. During this time, the TPMS system may not be able to detect a low tire, so make sure all the tires have been inflated to the correct pressure before the vehicle leaves your shop. In our October issue, we’ll cover some reset procedures for direct TPMS systems.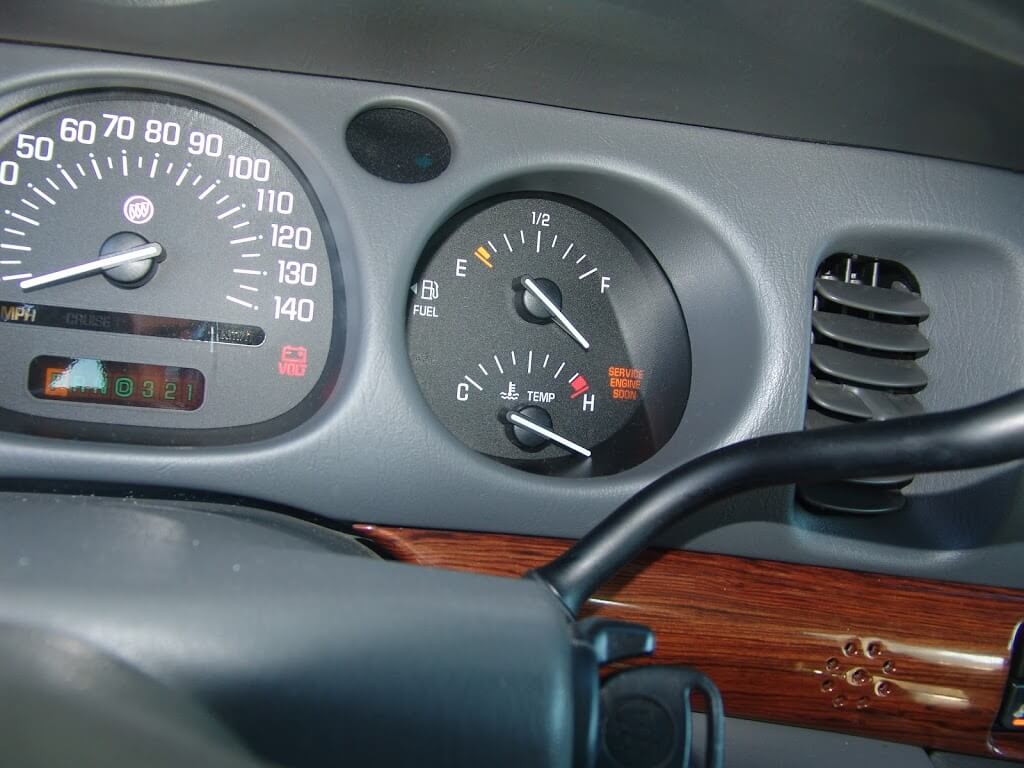
In this article:TPMS
TPMS or Tire Pressure Monitoring System is a set of equipment commonly found in modern cars. Its main job is to alert you if there are problems with tire pressure. For example, one tire has lost pressure - in this case it is not safe to drive, but the system will inform you about this, and you can inflate the wheel to avoid steering problems.
But sometimes the system does not work correctly. Some sensors may fail or the system needs to be rebooted. In this case, you may see a blinking or simply lit tire pressure error indicator on the dashboard. Resetting the pressure monitoring system will help you solve the problem if the sensor is working.
Please note that different vehicles may have different TPMS reset methods, so you may need to try several of them before you know the most effective one.
Initially, you just need to hold the tire pressure sensor reset button for a few seconds until the pressure indicator flashes three times and then turns off. But sometimes it doesn't help much. So we found other ways to calm down the pressure control system.
First, locate the TPMS reset button, which is usually located somewhere under the steering wheel. Start the car, press and hold the button for 3 seconds. Then drive at a speed of 80 km/h for approximately 10 minutes. Of course, you will need to find a suitable track for this. Steady driving is an important part of resetting tire pressure sensors this way. Of course, before this operation, you will need to inflate the tires to the required pressure.
In some vehicles, you will need to drive on any road and at any speed for 20 minutes after resetting the sensors, as long as you do not turn off the engine.
So, start the car, press the reset button and hold it for three seconds. Do not turn off the engine until 20 minutes have passed. You can drive or just let the engine idle for 20 minutes. This method of resetting pressure sensors should work for most vehicles. Again, inflate the tires to the correct pressure before resetting the system.
If the simple methods don't work with your machine, try another method. Start the engine so that the tire pressure monitoring system can register the changes. Then inflate the tire 0.2 bar above the recommended level. After a minute, completely deflate the tire. Wait one more minute to reset the sensors. Then inflate the tire to the optimum pressure level and let the engine run for another minute. The indicator should stop flashing.
The idea is to reset the entire engine electronics system by cutting off the power supply from the battery. First, make sure all tires are at the correct pressure. After that, turn off the engine, open the hood and disconnect both terminals from the battery. Wait 10-15 minutes. Reconnect the battery and turn on the ignition to check if the indicator lamp goes out.
If the above methods do not work with your vehicle, there is another option. Find a manual for your car or open a forum thread that talks about resetting tire pressure sensors in your car. Look for the combination of steps the manufacturer recommends to reset the TPMS system. Sometimes the combination can be quite strange and even complex.
If all methods fail and the error light continues to flash, the problem may be with the sensors. It is the blinking signal of the tire pressure lamp that often indicates a sensor malfunction. If there is a problem with tire pressure, usually the light will just come on and not blink.
This means that if the light is flashing, one of the sensors may be faulty. Replacing the element is not so easy because it is under the tire. The tire must be removed from the rim to replace the sensor.
After replacement, you will still need to reset the pressure control system for the new sensor to work. Otherwise, the indicator will flash or light up.
Where is the reset button for the tire pressure sensors?
The button is often located directly below the steering wheel. But there may be different options. If you don't find the TPMS reset button there, look around the steering wheel - it should be somewhere in this area.
Difficult to say for all vehicles, but for most vehicles, the travel time before the tire pressure monitoring system resets should be at least 10-15 minutes. If you turn off the engine earlier than 10 minutes after pressing the reset button, the TPMS will still send some error signals the next time the engine is started.
Drivers occasionally upgrade tires and wheels to larger ones and want their stock pressure control modules to work properly. The problem is that larger or flat-ride tires will have a different optimum pressure level, so the original gauges will always show an error on your dashboard.
One way to solve the problem is to buy other sensors tuned to the desired tire pressure level. Another way is to reset the control system in your car at the service station. Just check which option will be cheaper for you.
It's hard to say why manufacturers haven't added an option to automatically reset tire pressure sensors in cars. In most post-2015 vehicles, the TPMS is autonomous enough that it won't bother you much with reset requests. But in older cars, the system is not as advanced and sometimes a manual reset is required.
This system is designed to alert the driver of low tire pressure. If, while driving, a pressure drop in one of the wheels is detected, the corresponding indicator lights up on the instrument cluster, indicating the need for immediate pressure adjustment.
1. How it works.
The tire pressure monitoring system (TPMS - Tire Pressure Monitoring System) used on Toyotas is an "indirect" action circuit and functions as part of ABS, which is able to perceive a constant difference in wheel speed (a flat tire has less rolling radius and therefore rotates slightly faster).![]()
But such a TPMS cannot simply compare the speed of one individual wheel with the rest, since the car does not move in an absolute straight line very often, in any corners, the outer wheels will always travel more than the inner ones, and the front wheels more than the rear ones. Therefore, a conventional control system adds the speeds of each two diagonal wheels, calculates the difference between these sums, and divides it by the average speed of all four wheels. If the obtained ratio differs from the set one, then the system diagnoses the change in pressure, but it cannot identify a specific tire.
The disadvantages of this scheme are:
- impossibility to determine a sharp drop in pressure;
- the inability to determine simultaneously the pressure drop even in two wheels located on the same side or the same axle, not to mention all four wheels;
- the dependence of the system performance on the degree of wheel slip, the condition of the rubber and the vehicle load;
- actuation in case of pressure drop not less than 25-30%;
- the need for long-term calibration (pre-setting).
In this regard, Toyota used in parallel a second method of pressure control using ABS. The fact is that the tire and the rim actually represent an oscillatory circuit, the characteristics of which directly depend on the elasticity of the tire, and hence the pressure in it (meaning the circular vibrations of the tire in the direction of rotation). It turned out to be possible to isolate the frequency of these oscillations from the signal of the wheel speed sensor, and to judge the pressure drop by its change.
However, TPMS has a noticeable inertia - in order to detect a flat tire, you need to drive a considerable distance (sometimes up to 20-30 km), you will have to go a long way even after normalizing the pressure so that the indicator goes out.
2. Development.
This system was introduced by Toyota in the second half of the 1990s.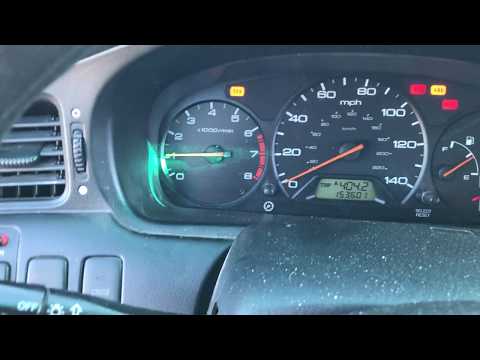 As you can see, it was used mainly on models of the Corolla family and large rear-wheel drive cars, ranging from class E and above.
But it seems that the Japanese cooled off quite quickly to this scheme, so today they have abandoned its use on most models, including the Corolla 120 of the later years of production.
| Model | Series | Release |
| Corolla | #E10# | 04.1997-04.1998 |
| Corolla/Sprinter | #E11# | 04.1997-04.1998 |
| Corolla | AE100, AE104, CE101 | 04.1998-08.2000 |
| Corolla/Sprinter | AE110, AE114, CE11#, EE111 | 04.1998-08.2000 |
| Sprinter Carib | AE11# | 04. 1998-07.2002 1998-07.2002 |
| Corolla Levin/Sprinter Trueno | AE11# | 04.1998-08.2000 |
| Corolla Spacio | AE11# | 04.1998-05.2001 |
| Corolla / Corolla Fielder | CE121, NZE12#, ZZE122, ZZZE124 | 08.2000- |
| Corolla Runx/Corolla Allex | NZE12#, ZZE122, ZZE124 | 01.2001- |
| Corolla Spacio | NZE121,ZZE12# | 05.2001- |
| Mark II | JZX101 | 09.1996-08.1998 |
| Mark II | JZX100, JZX101 | 08.1998-10.2000 |
| Mark II / Mark II Blit | JZX110 | 10.2000- |
| Chaser / Cresta | JZX101 | 09.1996-08.1998 |
| Chaser / Cresta | JZX100, JZX101 | 08. 1998-06.2001 1998-06.2001 |
| Crown / Crown Majesta | JKS175, JZS171, JZS175, JZS177, UZS171, UZS175 | 09.1999-2005 |
| Century | GZG50 | 04.1997- |
| Celsior | UCF3# | 08.2000- |
3. Indicator.
There are at least two options for indicators on the instrument cluster - ISO K11 and K10. The most famous of them, of course, is the first one - the "horseshoe with arrows". By the way, in the Western world with these indicators there is a similar problem - "what kind of light bulb is this?" - according to surveys, most of the drivers there do not understand their meaning.
A good indicator should come on when the ignition is turned on and go out after 3 seconds. If the system has detected a drop in tire pressure, then in order for the indicator to go out, after normalizing the pressure, it is necessary to drive a certain distance at a speed of at least 30 km / h. The indicator is powered directly from the output of the ABS control unit.
The principles of the system allow for the possibility of its incorrect operation (the indicator does not light up at low tire pressure or, conversely, it lights up at normal) under the following conditions:
- tires of non-recommended size are used,
- tires of different sizes or models are installed on different wheels,
- wheels have different grip,
- used spare wheel - "dokatka",
- used wheels with snow chains,
- tire pressure significantly exceeds the nominal,
- the pressure in the tire has dropped sharply due to a puncture,
- the system has not been pre-configured,
- the car is moving on a rough or icy road,
- the vehicle is moving at a speed below 30 km/h,
- for short trips (up to 5 minutes).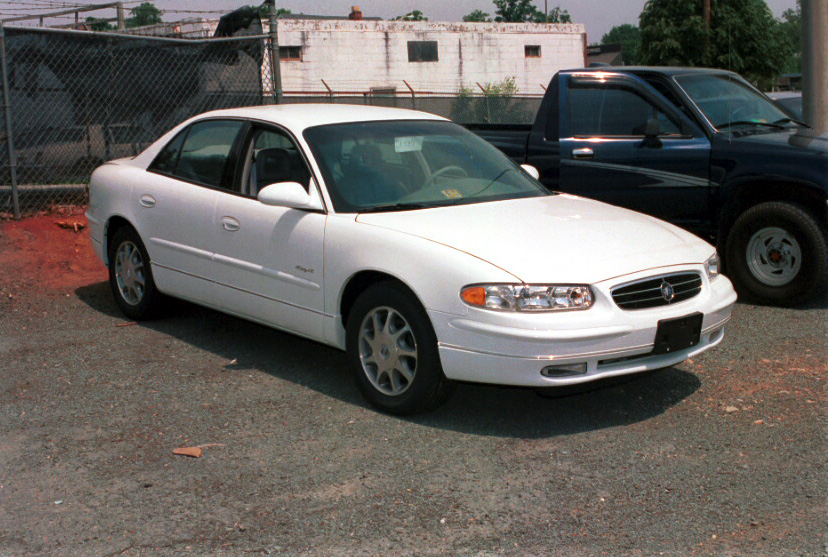
If the indicator stays on at normal pressure and in the absence of these conditions, this may indicate a malfunction of the TPMS itself.
4. Presetting.
Adjustment must be done after any wheel and tire (rim) replacement work has been performed, otherwise the system will not function properly. The adjustment procedure is shown below (preliminary pressure in all four wheels must be correctly adjusted).
Type 1 - models without setting button and with DLC1 connector (early version)
1) Turn on the ignition.
2) Connect the terminals "TS" and "E1" of the diagnostic connector DLC1 under the hood.
3) After 30 seconds, depress and hold the brake pedal until the system indicator flashes 3 times at 2 second intervals.
Type 2 - Set Button Models with DLC1 Connector (Transition)
Note.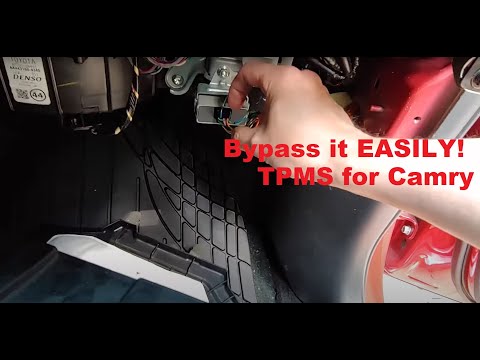 The installation buttons have several design options - with a pictogram, with an inscription or nothing at all, but differ in their characteristic shape and location - at the bottom of the instrument panel on the driver's side.
1) Turn on the ignition (the car must be stationary).
2) Connect the terminals "TS" and "E1" of the diagnostic connector DLC1 under the hood.
3) Press and hold the setting button until the system indicator blinks 3 times.
4) After that, in order for the system to save the correct settings, it is necessary to drive a certain distance.
Type 3 - models with setting button and without DLC1 connector (late version)
1) Turn on the ignition (the car must be stationary).
2) Press and hold the setting button until the system indicator blinks 3 times.
3) After that, in order for the system to save the correct settings, it is necessary to drive a certain distance.