Leaks along the tire bead are relatively common in ATV tires regularly run in mud, sand, and rough and rocky surfaces. This type of leak is typically relatively small, allowing the air to seep out overnight or over a few days.
To fix a leak at the tire bead on an ATV tire, you have several alternatives where these are the most common:
Each of these methods has its pros and cons to consider. Depending on your specific situation and what is causing the leak, one approach may be better suited over the other. We’ll cover each of them in detail in this post.
Bead leaks happen when the tire does not seal properly against the rim’s bead in a tubeless wheel. The bead area of the rim needs to be completely clean and undamaged for the rubber to make a tight seal against the rim.
Typical causes of bead leaks on an ATV tire:
Disassembling the tire from the wheel and addressing the issue causing the leak should be your primary alternative if you have the required time and tools. If performed correctly, it will provide a permanent repair without any of the cons that come with the other alternatives.
Pros:
Cons:
You may or may not already know where the tire is leaking. Even if you suspect that the leak is near the bead, it’s a good idea to verify exactly where the leak is located and make sure there are no additional leaks before moving on.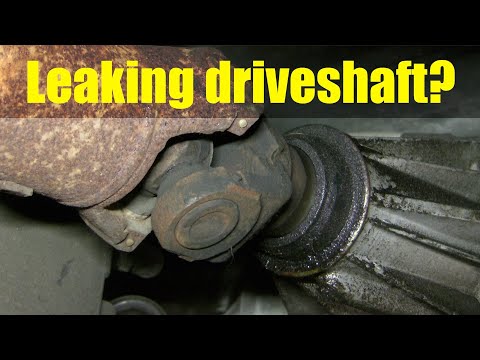
Use a valve stem removal tool to remove the valve stem. This will completely deflate the tire in just a few seconds. Alternatively, you can use an air-down tool to remove all the air. However, this method is more time-consuming than removing the valve stem core from the tire valve.
Depending on what is causing the leak, you may or may not have to break the bead to address the issue adequately.
If the leak is caused by dirt caked in between the rim and tire, but the rim is otherwise undamaged, you may get away with pulling back the tire slightly for cleaning. You can do this by finding a way to apply weight to the tire’s sidewall until there is a small gap between the rim and tire.
Cleaning without breaking the bead is easier on larger tires such as car tires or tractor tires. On smaller ATV tires, it’s less fiddly if you manage to break the bead completely. The result should be better as well.
If the rim is corroded or damaged, you are better off removing the tire from the rim entirely for proper access to the affected area.
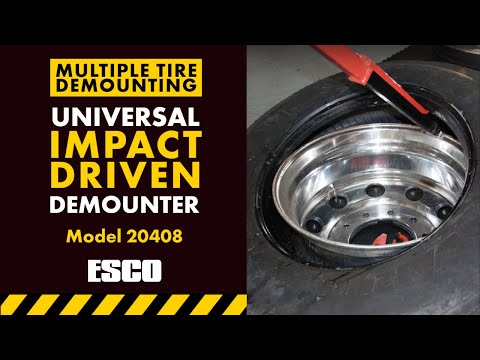
There are several ways to break the bead of a tire at home. My personal favorite is using a portable tire changer tool. These are readily available, relatively cheap, and work well on most ATV tires.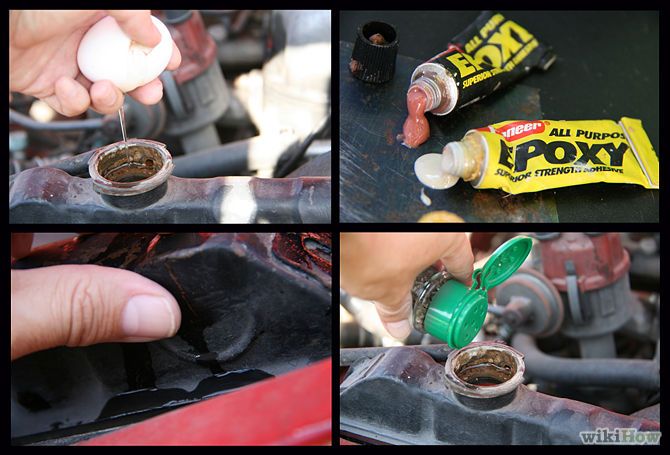
I recommend bolting the tool to the floor if possible. I installed threaded concrete bolt anchors to remove the device when not in use. A bolted-down tool ensures more control of the process and better leverage.
Tip: To boost the success rate and reduce the risk of tire sidewall damage when using this type of tool, leaves a tiny amount of air still in the tire before you break the bead. This will prevent the tire sidewall from giving in, causing the tool to slide out of position as you apply pressure.
As a cheap alternative to a store-bought tool, you could consider making a DIY bead breaker like the one I used before buying a dedicated tool.
Two pieces of wood and a couple of strong hinges give you a decent bead breaker in no time. Remember to cut the short piece of wood at about a 15 degree angle for better grip by the rim.Check this post for a few other ways of breaking the bead on an ATV tire.
This is how you break the bead:
A bead-breaking tool can be worth the investment, particularly for ATV owners who struggle with tire issues regularly.
After breaking the bead, you need to find out what issue is causing the leak. Use a flashlight for a good view. Look for dirt, corrosion, or rim damage; Sometimes, you may even find more than one issue that needs to be addressed.
Continue as described below according to your observations.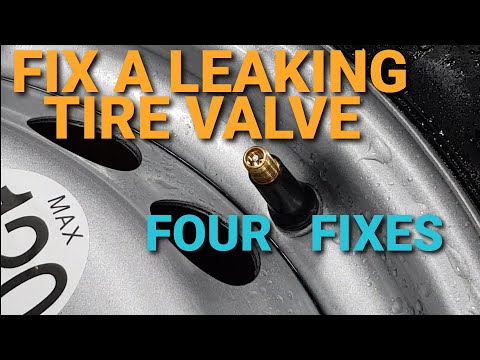
When you ride in dirt, mud, or sand, small particles and debris may begin to work their way in between the rim and tire. As more dirt builds up, it creates space for even more dirt until it eventually breaks the seal and causes a leak.

Both steel and aluminum rims may rust or corrode, but steel rims are particularly prone to leaks caused by rust.
Dirt and sand trapped between the rim and tire may wear down the paint over time, eventually causing the exposed metal to rust. Metals expand when they rust, creating gaps and an uneven surface that lets out air.
To fix a corroded rim, you need to remove the corrosion and apply a coating to prevent further corrosion issues.
Consider sandblasting and powder coating the rim for an even better and more professional result. I won’t detail how to do this in this post as it requires tools that typically only enthusiasts or professionals have access to.
The same method applies if the paint on your rim is flaky and starts to come off. Sand down all of the affected areas and apply fresh paint.
If you hit a rock a bit too hard or scrape the side of your rim against a hard surface, the rim may become damaged, preventing a tight seal.
You can repair minor nicks and dents by removing the tire from the rim and smoothing out the damaged part with a Dremel tool or fine-grit sandpaper.
Larger dents or cracks that may affect the rim’s structural integrity should only be addressed by a professional. Visible cracks left unattended may expand gradually until complete failure down the line. While tire sealant or installing an inner tube may keep a cracked rim airtight, it should only be considered a temporary fix.
Before you seat the tire back onto the rim, please take note of the maximum air pressure the tire can safely handle. Never, under any circumstances, exceed the specified max air pressure.
Bead sealer is specially designed to seal troublesome bead leaks that otherwise are hard to repair. It also helps prevent leaks, making it a good option for those that regularly find themselves with bead leaks.
Pros:
Cons:
 You also need to clean up the rim by scraping off the old bead sealer.
 Bead sealer is applied as a thin coat to the inside of the rim where it touches the tire. Follow the supplied instructions carefully for a good result.
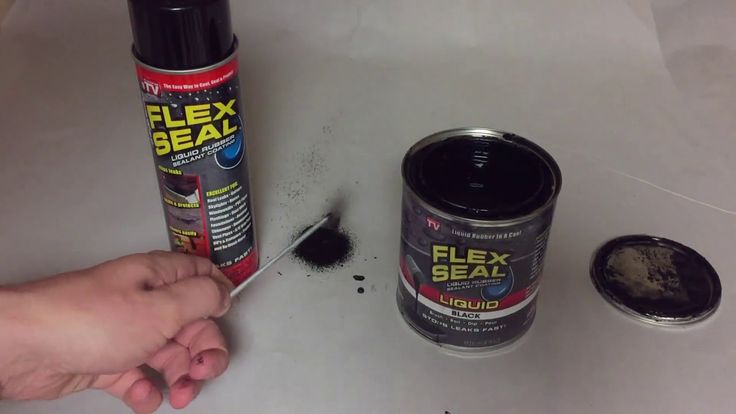
Another option to try if you don’t have access to bead-sealer is a quality silicone sealant, applied the same way as the bead sealer.
Ensure not to inflate the tire before the bead sealer or silicone has completely set, as it will force out the sealant.
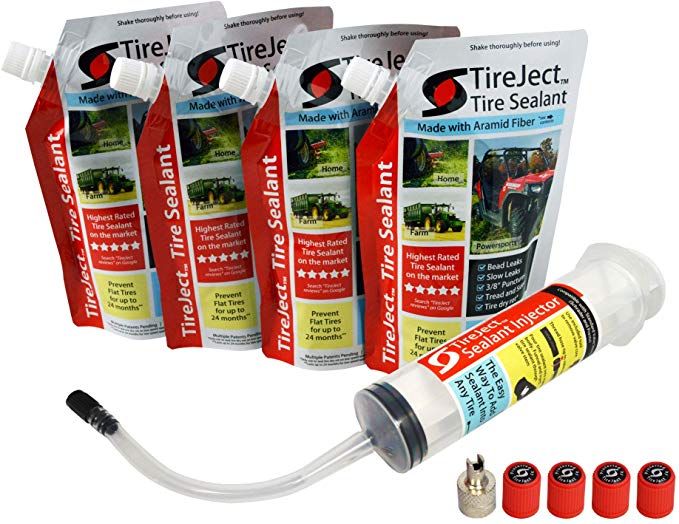
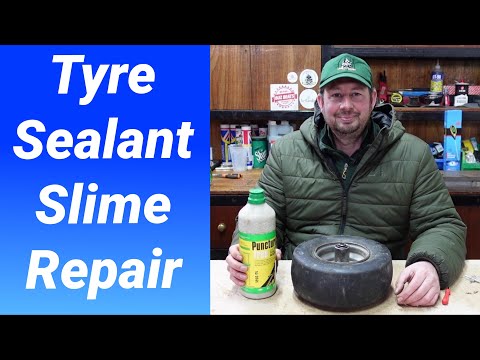
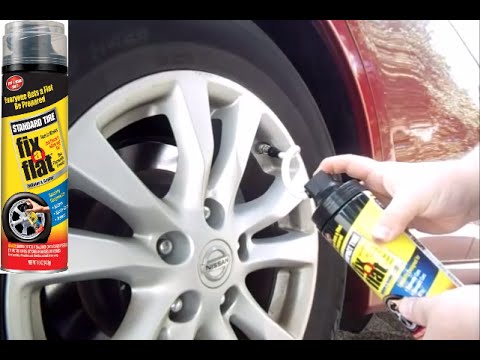
When you’re out on the trail and don’t have the tools or time to fix the leak properly, or if you’re simply looking for a quick fix, consider using a tire sealant such as Green slime.
Pros
Cons
Another option to fix a stubborn leak is installing inner tubes in a tubeless tire. However, tubes in low-pressure off-road tires are not always the best option.
Pros
Cons
Check out this post if you want to learn more about the pros and cons of installing tubes in ATV tires.
Sadly, there is no way to prevent bead leaks altogether. But, by applying one or more of the actions below, you will significantly reduce the risk of it happening.
If you know that you ride in a way that dirt will build up and eventually get a leak, it is better to clean when you have tools and time. Implement cleaning the bead into your maintenance.
How often you should do this procedure depends on how much and under what conditions you ride, but once a year could be a good starting point.
Bead sealer does not only help seal current leaks, but it also helps prevent new leaks down the line. The sealer keeps the gap between the rim and tire shut, so that dirt cannot begin to build up.
Inner tubes not only fix current leaks but will also help prevent upcoming leaks from causing any issues.
In this guide, you will learn how to fix any leaking ATV tire. This knowledge will more than likely come in handy sooner rather than later, and with just some simple tools, you will be able to handle most flats completely on your own.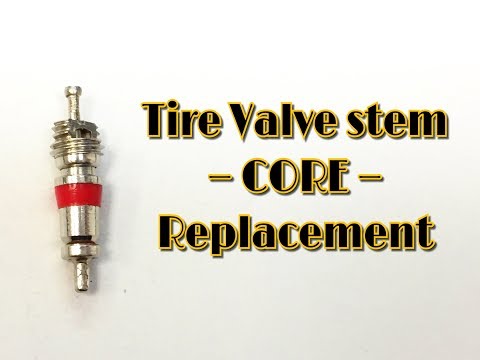
Sometimes the leak is small, and the tire will gradually deflate over several days. This is usually not the type of leak you have to repair out in the field but can wait until you return to your garage.
Other times the leak happens abruptly and needs instant repair before you can continue riding. That’s why it can be a good idea to carry some means of fixing a tire in your onboard toolkit.
Page Contents
Before you can start repairing, you need to determine where your tire is leaking. There are 4 possible locations where the wheel can leak.
There are a couple of simple ways you can quickly locate the source of the leak.
If the size of the leak is of some significance, you should be able to hear where the leak is. As soon as you have determined the leak’s approximate location, move on to the next step.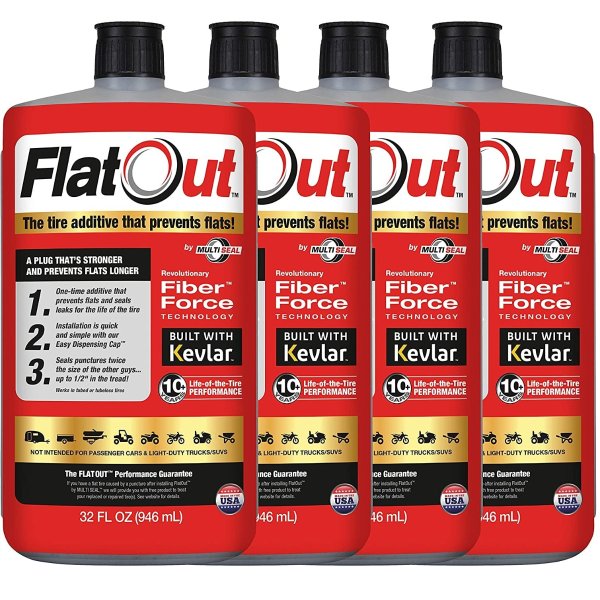
You won’t be able to hear the smallest leaks, but don’t worry, they can’t hide!
If you spray some soapy water on the tire where you think it is leaking, the escaping air will create small bubbles on its way out of the tire.
And voila, you have found your leak. Just a few squirts of dish soap in the water is all you need.
If you are out in the woods, plain water will also work, but the bubbles will be a bit harder to spot. When you think you have found the leak, you can rub some spit on the location to be sure, as spit is a more effective “bubble make”r than plain water.
Some of the methods for fixing a leak that I will describe in this post will require removing the tire off the rim.
This may sound a bit intimidating if you never did it before, but fear not. This procedure is actually not as hard as it may seem, and it’s something most DIY mechanics should be able to achieve with no real issues.
But if you don’t feel comfortable doing this procedure, any tire shop will be able to do it for you.
Make sure you release all of the air out of the tire before you attempt breaking the bead. This is done either by pushing down the small valve pin until all air is out or if you don’t want to spend all day, get a valve-stem removal tool. They only cost a couple of dollars.
There are several ways you can go about doing this. We’ll go through a couple of good methods for those who rarely need to have this done and do not want to invest too much into equipment that will be standing unused most of the time anyway.
Your first option is to get a set of Beadpro spoons. They are cheap and quite easy to use, but they take quite a bit of time compared to other methods. Follow the instructions on the package closely.
Because of the small size of these tools, they would be a great addition to your onboard toolkit so that you can take off a tire even in the woods if needed.
The next option requires you to use a so-called bead-breaker. Additionally, you will need a couple of tire spoons and a valve-stem removal tool. You can get all of these tools at most automotive supply stores.
But buying a bead breaker is probably not the most fun way you can imagine spending the 100 dollars you should expect to pay for a decent one. Luckily, you can save most of this money if you are willing to use 15 minutes of your time on a little DIY project.
Two pieces of two by four and a couple of strong hinges give you a decent bead breaker in no time. Remember to cut the short piece of wood at about a 15-degree angle for better grip close to the rim.To do this, you need:
Start by spraying a generous amount of soapy water to the bead area of the rim. This will act as a lubricant. Without proper lubing, you will have difficulty seating the tire with the low pressure that ATV tires run.
Remove the valve stem core to allow air to be pumped inside the tire quickly. Then fill the air with the air chuck as normal. You will hear a small “popping” sound when the tire slips over the bead inside the rim, one for each side.
If your attempt fails, try strapping a ratchet strap around the outside of the tire. Tightening the strap will push the tire walls out against the beads, requiring less airflow for the tire to be seated successfully.
Using a ratchet strap when seating the tire will help to force the tire sidewalls outward.Then try again with the air chuck. Don’t go crazy putting too much air into the tire with the strap fitted. All you need is the tire to catch the bead and seat.
When the tire is seated, you can release the strap. Be careful; it is under a lot of pressure and will come undone with quite a bit of force.
Always make sure you don’t put too much air into the tire. As soon as you hear the 2 “pops,” the tire is beaded, and you should release the chuck from the valve. Install the valve stem core and fill the tire to the desired air pressure using a gauged tire inflator.
To get a tire seated, you will need about 15lbs (1 bar) of air pressure. ATV tires with stiff sidewalls will require up to 40lbs to seat properly.
Just make sure you never exceed your tire’s rated maximum capacity, as this may result in the tire tearing or the tire slipping over the rim’s lip. The force of a tire exploding like this can send you to the ER in no time, be cautious!
A leak in the tire itself is likely caused by a sharp object like a nail, screw, or thorn piercing the rubber, creating a hole where air can escape.
There are several ways you can go about fixing a puncture in the tire. Some are fast and easy but have disadvantages like not lasting so long or making a huge mess inside the tire.
A permanent fix requires some more work and equipment and cannot be performed as easily out in the woods.
This is my favorite method for fixing a punctured ATV tire as it does not require you to break the bead of the tire and can be done in a hurry and anywhere with very few tools. It is not perfect, but it is good enough.
This method does have the disadvantage of not completely sealing the tire cord, leaving it exposed to the elements so that it may rust over time. Rust will weaken the cord, and given enough time; the tire can explode because of this.
However, this problem is more relevant to car tires, where you ride at much higher speeds and operate with much higher tire pressure.
To do this, you need a tire plug kit. These kits are cheap, and you can get them at almost any automotive supply store.
 This may require quite a bit of force, so get a good grip and utilize your body weight. This will clean debris out of the hole and make it the correct size for the plug you are about to fit.
This method is by many considered to be the proper way to patch a punctured tubeless tire.
You will need:
If your budget is really tight and you have plenty of time, you can even use some 120 grid sand-paper.
 This should take about 30-60 seconds with a motorized tire buffer tool and much more with just using sand-paper. Make sure you do not dig into the rubber too far to get into the tire cord.
If you wish, you can install a tire tube, even in a tubeless tire, and it will stop any leak.
However, this method is not ideal for ATVs.
If you puncture in the tube when on the trail, you will have a hard time fixing it on the go. And because of the rough terrain we sometimes ride on, ATV tires are quite prone to puncture. You may end up doing a lot of patching.
It’s best to have a setup that allows you to fix a leak easily out on the trails.
Also, the valve stem on a tubed tire tends to shift and tear when riding off-road with little air in the tires.
If you decide to install tubes in your tires, make sure you get tubes with tr6 valve stems that are purposely made for ATV use. These will not shift as easily as the tr6 that are more common on garden tractors and other small equipment.
This is the most common cause of why people get leaks in their ATV tires.
Because ATVs run at such low tire pressure, sand/silt from muddy water will migrate between the bead and rim, creating a leak. These kinds of leaks will not appear suddenly but worsen gradually over time as more dirt gets trapped.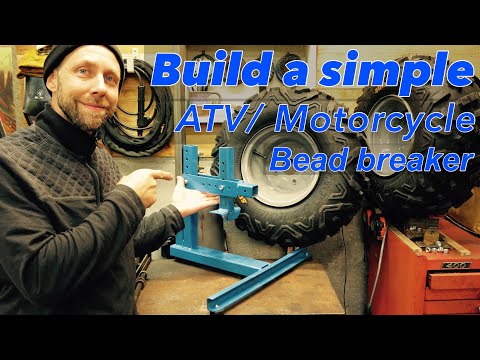
To prevent this, it’s good practice to break the beads and clean thoroughly between the bed and the tire once a year.
But some tires will leak no matter how smooth and clean the bead is.
If the problem persists after you have cleaned the bead on the rim, you can try taking the tire off the rim once more. Before you refit the tire, you can apply some bead sealer or silicone to the bead and the inside of the rim’s lip.
Bead sealer can be bought in most automotive stores or a tire dealer.
Please do not put too much air into the tire before the bead sealer/ silicone has completely set, as it will push out the sealant.
This fix should prevent any dirt from getting in between the rim and the tire in the future.
This, of course, only applies to steel rims. Over time, water trapped between the tire and the rim, combined with dirt and sand, will make the rim start rusting.
The most permanent option to fix this is removing the tire and getting the rims sand-blasted and powder coated.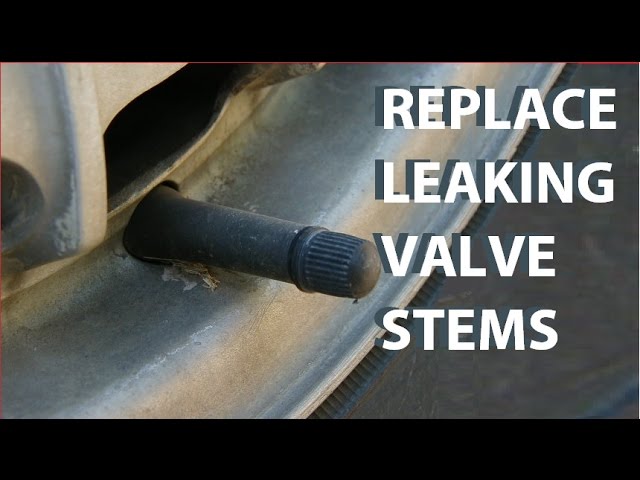 This will make any rusted old rim look like new and should make a tight seal between the tire and the rim.
If you don’t wish to spend (almost) any money to get the leak fixed, you can try the following:
If all else fails, use green slime, or install a tube.
If you’ve hit a rock or, in other ways, damage the tire or rim where it seals, you may get a leak.
As long as the rim is fine structurally, you may be able to fix this by removing the tire from the rim and smoothing out any nicks with a Dremel tool or some fine sandpaper.
Apply a bead-sealer before you refit the tire if you want to be on the safe side.
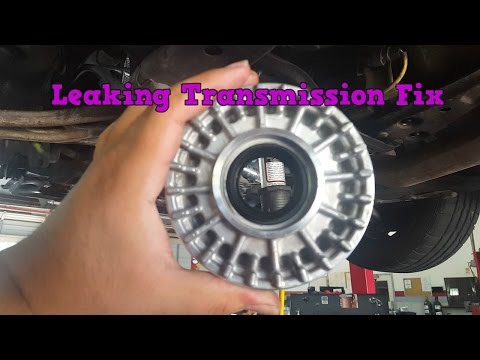
If the air is leaking from the core, you can try removing it with a valve stem core removal tool, cleaning with soapy water, and replacing it. If this does not fix it, you can try replacing the valve stem core with a new one.
If the air escapes from the outside of the valve stem, it is likely bad or badly fitted. Valve stems are quite cheap, so your best option is to replace it if it starts leaking.
De-bead the tire from the rim and use a valve stem tool to pull out the old valve stem. Clean the area where the valve stem sits and spray with soapy water before inserting a new stem from the inside of the rim.
Again, pull out with the valve stem tool until the new stem pops into place.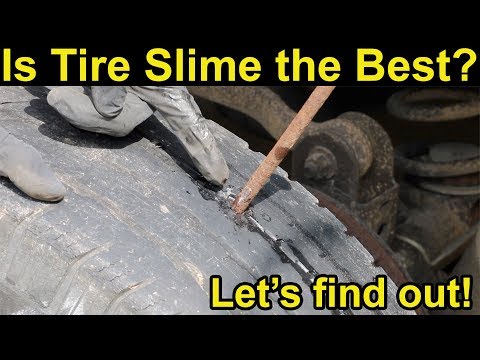 You will need a valve stem tool.
Related: How to Replace the Valve Stem on a Tubeless Tire
A cracked rim can sometimes be welded successfully with a TIG or MIG welder if the crack is not too big.
However, achieving a satisfying result requires some above-average welding skills. I recommend searching for a local specialist company to do this if you want to make sure you get a good result.
A small bend in the rim’s lip after hitting a rock may also make for a bad seal. Try gently tapping the bent part with a rubber mallet to straighten it out. Do not use a metal hammer as this may damage the rim further.
Putting a product like green slime or similar inside the tire will likely fix any of the types of leaks listed in this post, except maybe a bad valve stem core or a ripped tire.
Keep in mind that the slime makes a bit of a mess that needs cleaning the next time you remove the tire from the rim. You will likely not become very popular at your local tire shop when you give them tires filled with slime that will get their tire machine all messed up.
But if you are willing to live with the mess, it is a cheap, easy, and quick option to fix almost any leak.
You also get the benefit that the slime will also instantly repair new leaks as soon as they occur.
Remove the valve stem core to release all air before putting the slime into the tire so the back pressure won’t create a mess.
Be aware that the slime can unbalance the tires, causing the bike to vibrate when riding. Make sure you go for a ride instantly after injecting the slime, and don’t use too much.
A four-wheeler is an SUV by definition, which means that tires for a ATV are the most important part that ensures its flotation. Going to conquer the next track, you must be confident in your four-wheeler.
Whether racing or riding a quad over rough terrain, you can count on a safe and comfortable ride.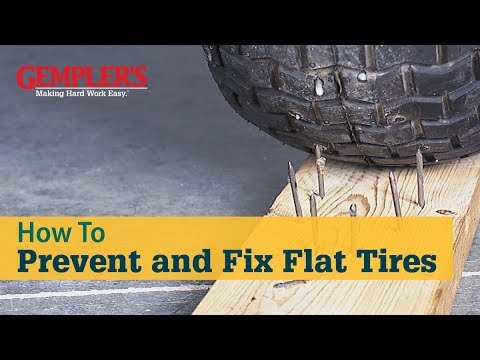 Experienced riders know that only high-quality ATV tires can provide maximum comfort and safe handling of this exciting vehicle.
Given the fact that the ATV was originally destined to conquer the off-road, manufacturers shoe SUVs in tires that provide confident driving on hard dirt roads. Naturally, a car on such wheels can also zip along the highway, although driving on public roads for most models is prohibited by traffic rules.
Even if you are not a professional athlete, you are unlikely to resist the temptation to conquer the viscous wetlands, or test the quad in liquid mud to evaluate its ability to overcome impassable areas. After all, that's what you bought the SUV for. Is not it? And if so, then it is clear that ordinary quad tires are of little use for sorties into the area, replete with deep puddles filled with viscous mud. It's time to think about equipping your ATV with real mud tires.
Real mud tires, unlike standard tires, have larger lugs that can bite into loose soil or sand.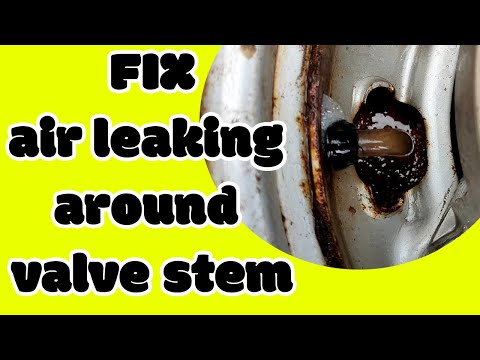 The tread, in the form of a discharged Christmas tree, resembles a pattern on tractor wheels. The diameter of such tires is increased and, depending on the model, ranges from 25 to 34 inches.
The most sought after ATV tires are between 26 and 28 inches as they fit most ATVs without any suspension modifications. The width of the cross-country tires is slightly larger than the standard tires, and the width of the front and rear tires is different. This allows the front tires to follow their own path, while the rear tires follow a slightly different path, gripping the curb and allowing you to go a lot further.
Under normal operating conditions, the main parameter that affects the stability and handling of the ATV is the crown - the tread area in contact with the road surface. The larger the contact patch, the better the handling on firm ground. Therefore, if you are a fan of high speeds, like to maneuver and ride on rough terrain full of hard dirt roads, forest rolled roads, as well as any other hard ground, choose tires with a radial cord construction (example 1, example 2, example 3). Also, the radial design of the cord very well fulfills the bumps that can get in your way, a protruding tree root, stone or something else, the radial design will allow you to overcome this bump in the most comfortable way!
ATV wheels require softer, lighter rubber for maximum road contact and traction to confidently tackle swampy terrain. Cross-country ability is enhanced by a special tire design. An important role belongs to the lamellas, which have a peculiar shape and optimal height. The ability of the lugs to self-clean is very important, since the adhering dirt greatly complicates the patency on loose soils. Sidewall strength is also important for mud tires. Passing elastic wheels on deep ruts is associated with the risk of damage. The presence of strong sidewalls minimizes such risks.
The diameter of the tires affects the ground clearance of the all-terrain vehicle, the increase of which increases its cross-country ability. The width of the tire changes the area of its contact with the road. Wider profiles sink less into soft and loose surfaces, helping you to move confidently through the mud.
When choosing tires for an ATV, you should proceed from the expected conditions of its operation. Ideally, tires should provide comfortable driving, both on hard dirt roads and in mud. However, in practice it is impossible to achieve such results. Different manufacturers solve this difficult problem in their own way. In principle, all solutions come down to the creation of rubber optimized for use on a certain type of road: solid dirt tracks, or loose soils, mud, sand, grass.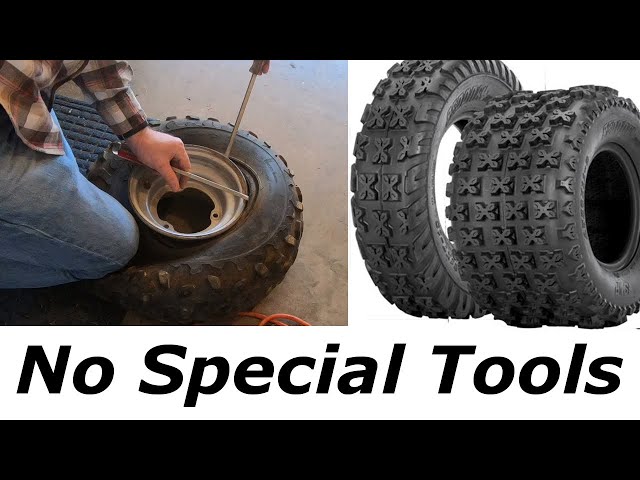 There are also all-purpose tires that provide average performance on different surfaces.
|
|
| DAKAR 2016. SERGEY KARYAKIN IN THE QUAD CATEGORY. |
The well-known American manufacturer ITP has succeeded in creating the perfect tire. It is by far the #1 tire and rim brand in its class. ITP products are known and bought by professional riders and extreme sports enthusiasts all over the world. Our well-known compatriot driver Sergey Karyakin participated in the Paris-Dakar race on tires with ITP rims. The ITP range includes the following tire types:
ITP tires are produced exclusively in the USA, which is an additional guarantee of their high quality.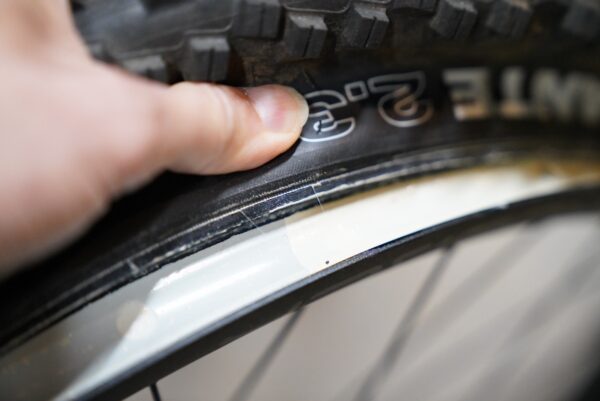
The softness of ITP tires is superior to all known brands. But this indicator is very important for off-road driving. In an effort to find the best properties for different roads, ITP tire developers create tires for all conditions of use, creating new and unique treads that can cope with their tasks on any type of surface.
The main advantages of ITP tires include:
Just to add, ITP also makes excellent rims for the ATV in various sizes, including beadlock and reversible beadlocks. The discs are made of durable aluminum alloy and are lightweight and stylish. They are compatible with sport and utility models of modern ATVs.
ITP wheels are produced using an original casting technology that provides them with an enviable resistance to deformation and cracking. In the US, ITP provides a lifetime warranty on its discs. The polished surfaces of these wheels go well with the matte color of the tires and give the SUV a touch of special drive.
Equipping your ATV with ITP wheels and tires, you can safely conquer the most difficult tracks on it. It is by far the #1 brand for ATV tires and rims.
| |||||||
| Home » Checkers against Christmas trees: how to choose tires for an ATV? Monodrive, or, as evil tongues call them, non-drive, ATVs are often criticized for insufficient cross-country ability.
In order not to get confused in the choice of wheels, first of all you need to outline the habitat of the ATV - wheels that work well in mud are unlikely to hold well on a flat and hard road. Conversely, tires that provide excellent traction on pavement will skid helplessly in mud, sand and snow. Of course, quads rarely ride the same routes, but there will certainly be basic coverage. In mud, sand and snow, herringbone rowing, a pattern reminiscent of the tread of tractors, is best. And for hard roads, grass and forest paths, a checker is better. There are also medium options on sale that combine elements of both patterns, but, like any compromise solution, it will not give the best result under certain conditions.
However, there is another option - when driving off a hard surface into a swamp, you can put chains on the wheels, with which their potential increases many times over. It is important to remember that rear wheel drive ATVs have tires on the front and rear axles that perform under different conditions. The drive wheels work with one vector, their task is to push the ATV forward. And the front wheels, the so-called "sloths", should hold the road well in corners and when braking. In other words, in the vast majority of cases it makes sense to put a herringbone on the rear axle and a checker on the front. This solution combines both decent cross-country ability and excellent handling. The main thing is to remember about pressure, without it even properly selected wheels will not work.
As for the dimension, when choosing it, it is better to focus on the manufacturer's data. With bigger wheels, the quad will look bigger and cooler, the ground clearance and flotation will increase, and the price will be an increased load on the engine and transmission, as well as a decrease in stability. The right tires provide excellent handling, stability and off-road confidence.
|
 Meanwhile, no ATV or buggy, even with all-wheel drive, can realize its off-road potential without good tires. At the same time, with the right tires, even rear-wheel drive vehicles will be able to drive in the most difficult conditions.
  The same applies to winter - an old set of wheels can be studded using screwed spikes or ordinary bolts with nuts. This tire will perform great on ice and hard packed snow.


.jpg)