Whether you had one rough pull or a hundred easy ones, wear and tear on your winch cable is natural. Everybody has to replace theirs with something new eventually.
It’s a simple job right?
Not so fast!
There are a few major pitfalls you need to avoid when changing your line. We’re going to walk you through how to replace an ATV winch cable or rope to make sure you get it right and don’t damage your gear.
Table of ContentsYou’ll need a few basic tools to replace your winch cable. There’s nothing special here—you should already have everything.
These steps will take you through the process of removing your existing synthetic rope or steel cable and replacing it with a new one. The process is nearly identical whether you’re replacing cable or rope, but we’ll note the differences when they come up.
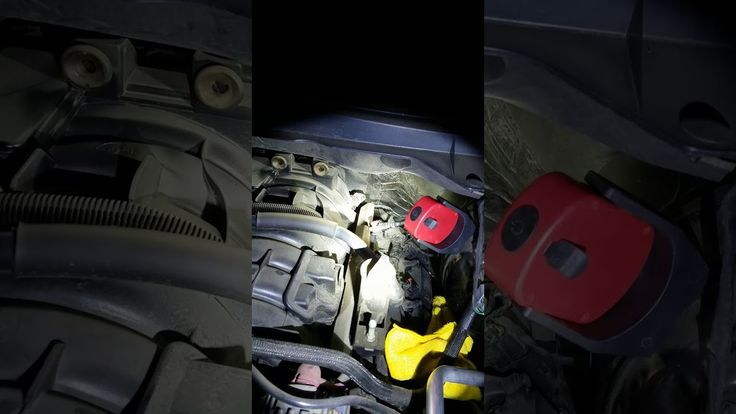
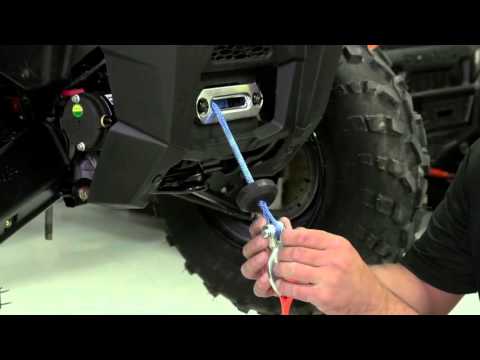
Before you do anything else, you need to figure out if you have room to remove your ATV’s winch cable while the winch is still installed.
If your winch is mounted on top of a bumper, you’ll have no problem keeping it installed.
However, if you can’t reach your winch drum with both hands, you may need to remove it. In some cases, removing the fairlead alone will give you enough space to work with. If you do have to remove your winch, the process is simple enough:
Removing your cable or rope is a piece of cake. If you’re working with cable, be sure to don your heavy-duty gloves to protect your hands.
Then, follow these steps:
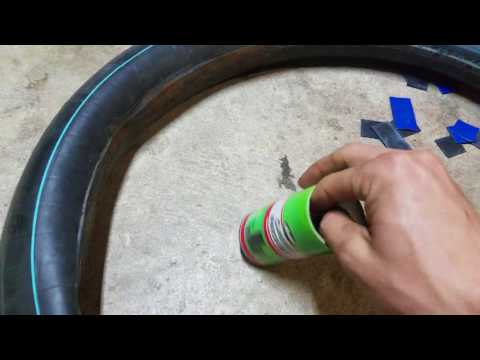
The line will run through a hole in the drum. With synthetic rope, the line will have a simple knot (tip: take a picture of the knot now so you can replicate it later). Steel cable will be secured with a set screw or locking bead.
If you’re removing synthetic rope, lighten the tension by pushing the long end of the line through the hole. Then, undo the knot and pull the rope through the drum. You may have to cut the end off if it’s covered in glue or tape that won’t allow it to run through the hole.
With a steel cable, you’ll need to use an allen key to loosen the set screw so you can pull the line out. On some winches, the cable will loop around a locking bead set into a slot in the drum. Just feed the cable through to lighten the tension on the bead so you can unloop the line.
It’s important to take this opportunity to inspect the condition of your winch, especially if you’re replacing a steel cable with a synthetic winch rope.
Look for grooves and ridges—anything that’s not smooth.
If it’s roughed up, you’ll need to file it smooth or replace the winch before using a synthetic rope. Those grooves can easily slice fibers when under the intense pressure of a loaded winch.
Installing your new line is a little bit more complicated than removing it. Make sure you pay careful attention to these steps. This is the part of the process where mistakes are likely to happen.
For synthetic rope, that means looping it around the drum and tying a knot. We recommend using electric tape to attach the loose end to the drum.
For steel cable, tighten your set screw or loop it around the locking bead.
To secure a synthetic rope to your drum, feed it through the hole and tie a knot. It’s helpful if you take a picture of the knot on the original rope so you can replicate it.To properly spool the line, you need a heavy load to tighten the line around the drum as you reel it in. Attach the end of your line to a tree and slowly winch the line in as you guide it onto the drum. Your goal is to achieve neat, tight rows with no crossover.
The tension ensures that the rows are packed tightly and won’t get damaged the first time you use it in a real winching situation.
Don’t be tempted to put your fingers through the hook or loop as you guide the last few feet in. It’s easy to crush your fingers in the fairlead if you get distracted for a moment.
The even loops around the drum ensure that the rope will feed out easily when you need it and won’t get damaged when you winch in under tension.Now you know how to replace an ATV winch cable or synthetic rope. The process is simple enough, but paying attention to the details will ensure that your new line lasts longer than your busted one.
If you need a new line, check out our replacement synthetic winch ropes. We have bright colors to make them easier to spot if you’re in mud, or you can roll with classic black if that’s more your style.
But if your winch has fully bit the dust, check out our Black Ops Winches. We have 2,500 lb. winches that are perfect for ATVs, but you can also get 3,500 lb.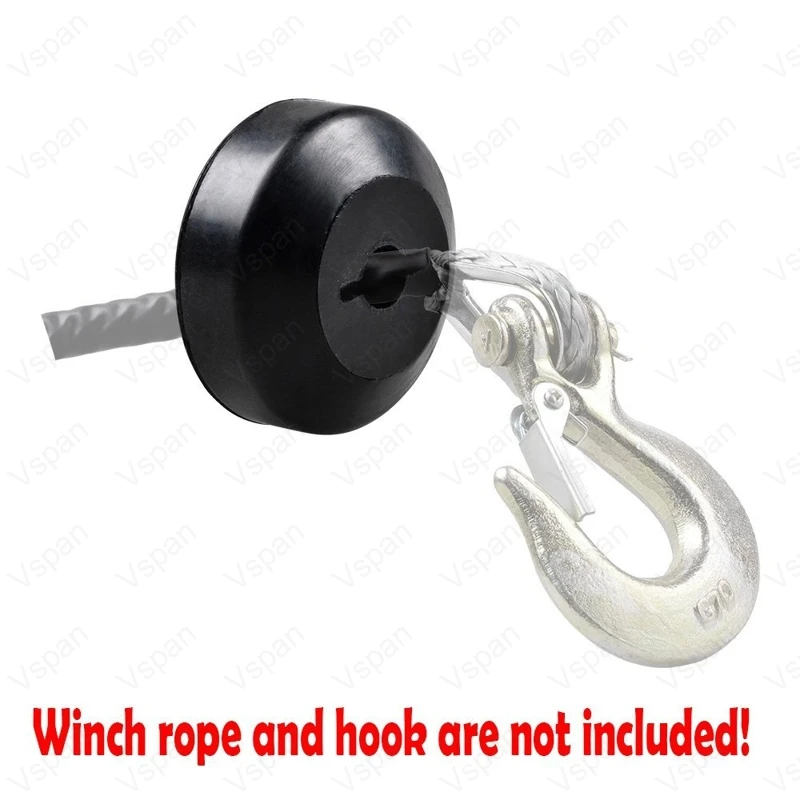 , 4,500 lb., 6,000 lb, and 12,000 lb. winches if you need a little more oomf.
Now get back out on the trail and have enough fun to get stuck. With your ATV’s winch cable replaced, those ditches and mud holes will look a lot more inviting.
Check out how to change a UTV winch rope on a Black Ops Winch:
This guide will tell you how to replace/install an ATV winch cable or synthetic winch rope, step-by-step.
The basic procedure for replacing an ATV winch line is about the same, whether you are:

The only real difference is how you attach the cable or rope to the winch drum (step 7), and what fairlead you should use.
Time consumption: 10-20 minutes from start to finish.
Mechanic skill level required: Low. If you know how to change a tire, you will be able to do this job.
Page Contents
Before you begin disassembly, make sure you have the proper tools and supplies at hand.
By now, you have probably decided whether you wish to install a new winch cable or a synthetic winch rope. If not, I recommend that you take a look at this post where we compare steel cables vs. synthetic ropes for ATV winching.

Some synthetic winch ropes come with an unfinished end where you have to splice the end loop yourself. However, most winch ropes on the market today come with an end loop straight out of the box. A metal thimble-insert makes the loop extra wear-resistant.
I recommend that you get a rope that comes with an end loop. It will save you time as well as reducing the risk of splicing the rope incorrectly. Therefore, this guide will not cover how to make an eye splice.
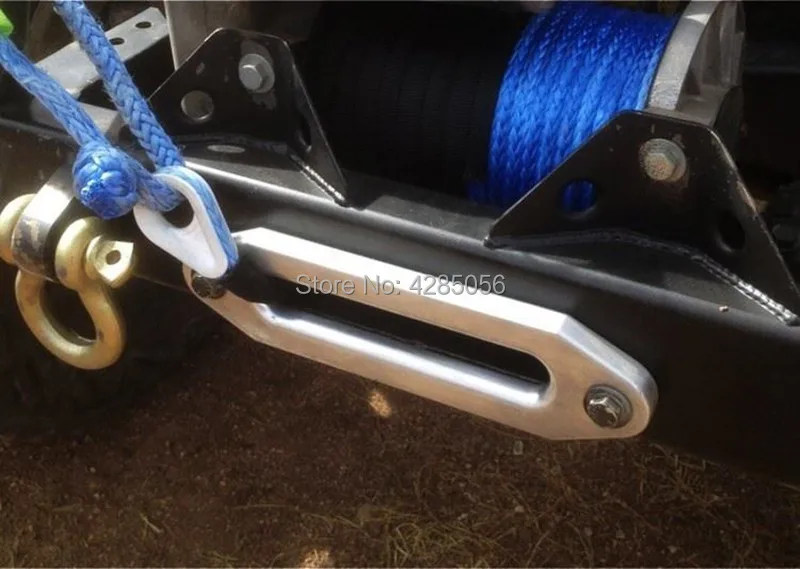
The type of fairlead you should use depend on whether you choose a steel rope or a synthetic cable.
With a steel winch cable, you should always use a roller style fairlead or a cast steel hawse. The steel cable will wear down a softer aluminum hawse fairlead in no time.
With a synthetic winch rope, you may use either steel roller fairleads or an aluminum hawse.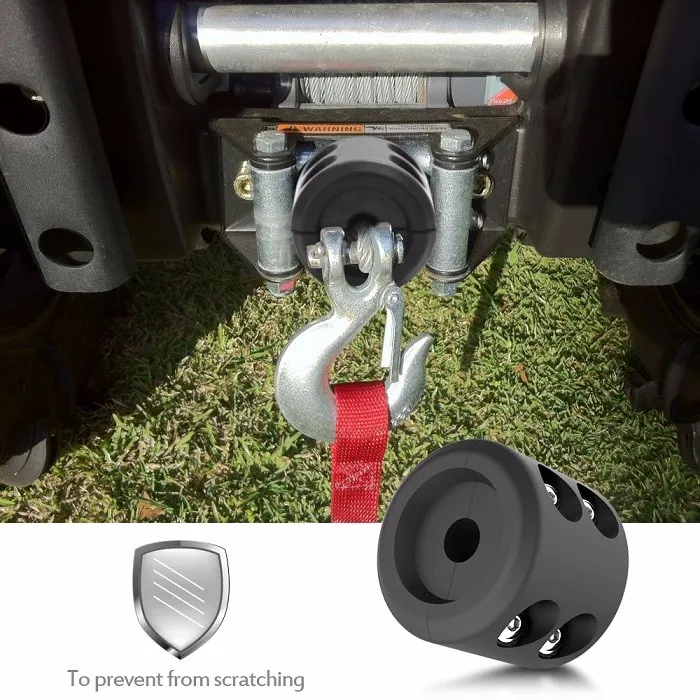 A cast-iron hawse does not have a smooth enough surface and will prematurely wear the rope. An aluminum hawse, however, is much smoother, which makes it ideal for synthetic ropes.
Steel roller fairleads work fine a well, as long as the rollers are not damaged or too corroded. The rollers must overlap in the corners where they meet or you may get binding issues that will damage the rope. Most newer steel roller fairleads have overlapping rollers, while non-overlapping rollers is more common on older models.
Now that you got all the gear and tools you will need, you are ready to begin replacing the cable.
Remove the locking pin (usually a split-pin) and the bolt that connects the hook with the eye loop. This allows you to remove the fairlead.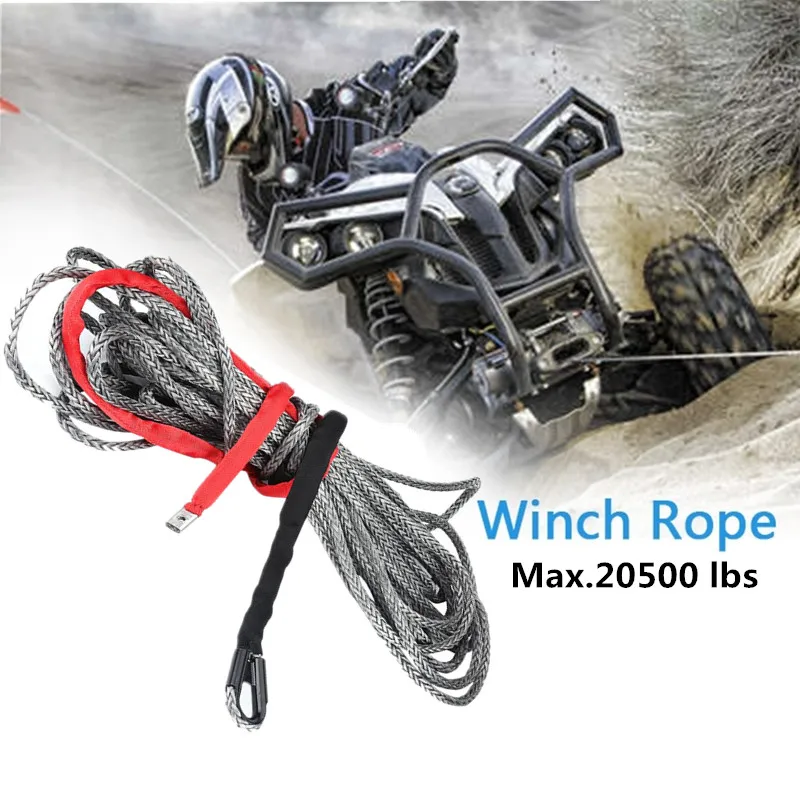 If the hook is in good shape, you will be reusing it with the new rope or cable.
Whether your existing fairlead needs replacing or not, you will most likely have to remove it to access the winch drum. It is held in place with two bolts, one on each side. Loosen the bolts and put the fairlead to the side for now.
On the side of your winch, you will find a switch that disconnect the winch motor from the cable drum. This is the free spool position, which enables you to unspool the winch cable by hand.
The design of this switch varies from manufacturer to manufacturer. On ATVs, a rotary-style knob at the very end of the winch is the most common.
On Warn winches, you should turn the knob clockwise until you hear a click, or until you can’t turn it any further without applying force. If you twist the knob too far, you need to disassemble the knob to get it working again.
With the knob in the free spool position, the drum should spin freely. In cold weather, however, the grease inside the winch gears may create some drag. But you should still be able to turn the drum by hand; it will just require a bit more pulling-force.
Make sure you use a pair of gloves for this step, especially if you are removing an old steel cable. The small metal burrs of a frayed cable are not going to be gentle with bare hands.
Grab the old line and pull on it so that it unspools. Pulling it by hand is better than using the winch motor to unspool the line. If it’s bound-up somehow, unspooling with the motor may only make it worse. So if you are able, unspooling by hand will work the best.
The cable I was replacing on this ATV was brand new, so I didn’t use gloves.The end of the line is likely mounted to the drum. There is a number of ways to how this is done. Here are the most common methods for mounting a steel cable to the winch drum:
The cable goes through a hole in the core of the winch drum.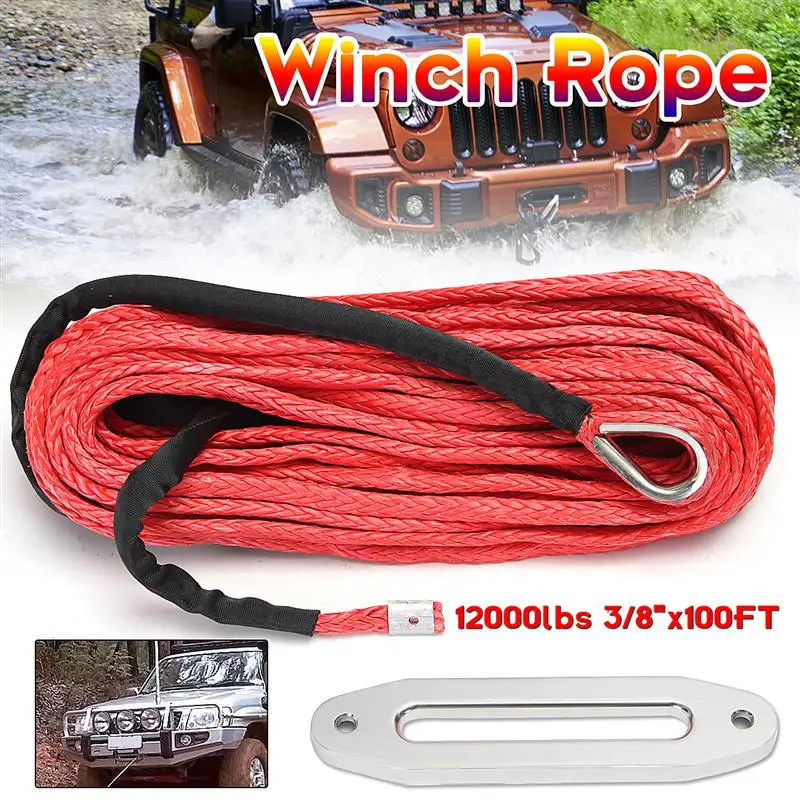 An Allen set-screw is retaining the cable in the hole. Loosen and altogether remove the set-screw to release the cable. Take note of with hole the cable is threaded into the spool through. You must thread your new rope or cable the same way.
The cable goes through a hole in the winch drum core. At one end of the hole, there is a wedge-shaped slot that fits a loop of cable as well as a metal locking bead. The bead helps tighten the loop when you pull on the cable.
To remove it, push the cable from the opposite side of the loop. This will release the bead so that the cable can be pulled out of the drum.
Older ATV winches often attached the cable by using a screw to the sidewall of the winch drum. This method is not that common nowadays, but you may run into it if you are replacing the cable of an older ATV.
If you’re replacing a worn synthetic rope, any of the methods above may have been used to hold the rope in place.
In adition, there is the method I will be recommending in this post, where you feed the rope through the hole in the winch drum core and make a knot around itself.
Its a good idea to take a photo of the knot before untying it. The hardest part of installing a new rope is to make a proper knot.
Here is a photo of the stock knot on my Polaris winch. As you can see, the tension of the rope has done a proper job of squeezing the knot so that it does not come loose. They have even glued the rope end in place. That part is optional in this guide.In step 7, I will show you how to create a knot like this.
Steel cables have been known to damage the winch drum or the fairlead rollers. Now is a good time to inspect them both.
Any sharp eges has to be adressed before you install your new rope, or your rope will get damaged. Use a file or a piece of sandpaper to file down any burrs or grooves to a smooth surface.
This step depends on what style of winch drum you have, and whether you are installing a steel cable or synthetic rope.
If your winch drum has a hole and an Allen set-screw, thread the end of the cable into the hole the same direction as your old cable was sitting. Lock it in place by tightening the Allen screw snug.
If the drum has the loop-and-metal-bead style locking mechanism, the procedure is not that different.
Feed the cable through the hole of the drum in the same direction as the old cable. Let a few inches of cable go through the spool. It should be enough to create a loop. Bend the cable into a U-shape, and let is slide back into the slot on the winch drum.
Insert the metal bead inside of the loop before you tighten the cable by pulling on the long end. Tighten as hard as you can so the cable sits firmly.
With synthetic ropes, it’s not that you can’t use the set screw or metal wedge method to mount the rope, but there are better ways that will make an even more slip-proof installation.
The method I find work best, and what many manufacturers recommend, is making a knot that tightens as you put tension on the rope. Here is how to do it:
The winch drum mounting-hole is a bit off-center. You need to make sure the drum is positioned correctly so that the rope will begin wrapping around the thickest part of the drum when you spool in. Which position is correct depends on which way the drum turns when you spool in.
Feed the free end of the rope through the hole, with a few inches of rope sticking out the other side of the drum.
Rotate the spool 180 degrees upwards so that the short end of rope points towards you. If the hole is positioned at the bottom, see step 1 above, you need torotate the spool 180 degrees downwards instead.
Grab both the short and long end of the rope.
While holding both ropes, rotate the spool back down 180 degrees. Again, if the hole through the drum was positioned near the bottom after finishing step 1, you will now need to rotate the drum up instead. The end result should look the same regardless of which direction your winch turns; the knot will just be upside down.
The shorter length of rope is now creating a loop of rope around the spool. Allow a little slack, thread the shorter end of rope from the outside and in underneath itself to make a knot.
Tuck the shorter length of rope under it’s own loop to create the knot.
The shorter length of rope should now lay across the spool.
Tighten the knot by holding the shorter length of rope with one hand while pulling on the longer length of rope with the other.
Slide the knot all the way outwards on the spool.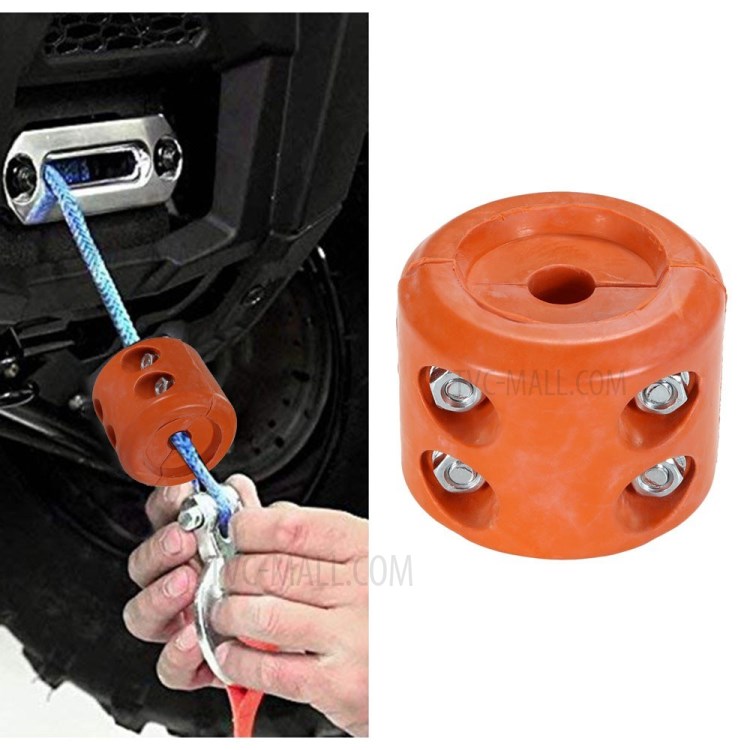 You are now ready to begin reeling the rope back onto the spool.
Turn off the free spool knob by rotating it in the opposite direction from what you did earlier. This will engage the winch motor so that you can spool the new rope or cable on to the winch drum.
From this point on, make sure you keep your hands at safe distancefrom the winch as you will be using the winch motor to spool the new rope or cable on to the drum.
The winch-line must be kept under constant tension as you spool it on to the drum. Otherwise, it may get jammed between lower layers of rope when you use the winch later on.
You will also need to guide the rope so that it spools neatly. Guide the rope at a steady pace from one side to the other. You should get a flat and even layer of rope across the full width of the drum.
If you have a remote, it is possible to do this step alone. But it’s easier to get the rope to wrap neatly if you get help from a friend.
One person should operate the winch controls while the other guide and keep the rope under tension.
Lay out the winch line before you start spooling. This will reduce the risk of tangling the rope.
Start spooling from the knot-side and work your way to the other side of the drum. Each rope winding should be touching the previous one.
This is how it should look like after half a turn.
This is how it should look like after one whole turn.
Then after two turns.
Continue winding until you get a flat layer of rope across the whole width of the winch drum.
When you reach the edge, it’s time to turn back and lay a new layer of rope across the drum. Make sure you maintain a steady pull on the winch line and continue untill all of the rope or cable has been spooled on to the drum.
Use the same method to spool a steel cable if that is what you are installing. Make sure to use gloves.
Start at one end of the drum.
And work your way across the width of the drum in a flat, smooth pattern.
In this photo, I’m using this method for installing a synthetic winch rope on my father’s new Textron. The steel cable had to go.
Thread the cable through the fairlead and mount the fairlead using the proper hardware.
Make sure the winch line won’t be scraping against the fairlead mounting plate. There should be at least 1/4″ clearance between the fairlead openings and the edges of the mounting plate.
If you are replacing your steel roller fairlead with an aluminum hawse, you may or may not not be able to use the same mounting hardware.
Therefore it is always a good idea to have a look at your mounts before buying the new hawse to make sure it will fit. It’s much easier to choose a different model with a slightly different design than to struggle with bolts that don’t fit.
To protect your fairlead from beeing damaged, it’s recommended to install a rubber bump stop. They are especially important if you are replacing your steel rollers with a softer material aluminum hawse.
If you don’t have one right now, just skip this step for now, but make sure you add one later.
Rubber cable stoppers are a cheap way of protecting both your winch and winch hook.Install the winch hook, and you are done. Make sure you bend the split pin so the bolt won’t fall out.
You are now done replacing the winch cable or rope of your ATV.
When you perform this job, it’s recommended that you perform a couple of quick and easy maintenance steps while you are at it. These will help prevent some of the common issues you may run into while operating your winch later on.
Corroded or loose terminals on your winch are a common cause of a winch that will not work. It’s also a common cause of a battery that keeps draining. In this post, I take a look at other possible reasons for a battery that keeps going dead.
Disconnect both terminals and remove any dirt or corrosion using a copper wire brush or some fine sandpaper. Repair or replace any damaged wire or connectors before you reconnect the connectors to the terminals.
It is not uncommon that a winch bolt or two may break or come loose. Now is the perfect time to make sure all bolts are in place and in good shape. Replace any missing or broken bolts with correct spec new ones.
If your steel winch cable keeps getting flat spots and breaking even under very little stress, it’s a good idea to replace it with a synthetic winch rope. Also, replace the roller fairlead with a hawse fairlead to go with the synthetic rope. This setup will last a lot longer.
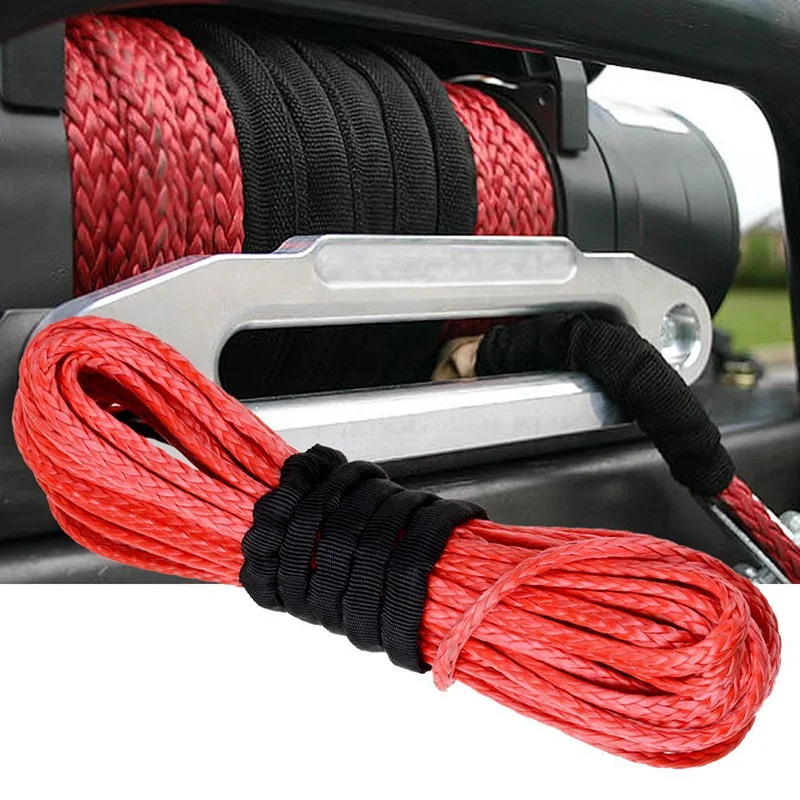
The cable should be rated at least double the pulling capacity of your winch. Do not get a rope or cable that is too thick as it will reduce how much you are able to fit on the spool. Typical synthetic rope size is 3/16 inch (5mm), while steel wires generally are slightly smaller with a size of 5/32 inch (4mm). Typical ATV winch cable length is 50 ft. (15m).
| Repair and maintenance > Steel cable termination.
|
Posted by by MotoDoctor
Owners of any ATVs have probably encountered the problem of a broken electric winch cable. It would seem that a sufficiently powerful cable and, according to all its characteristics, must withstand the load expected for this model of an all-terrain vehicle. It turns out that the cable breaks not at all because it is weak.
The fact is that on electric winches of ATVs, when the cable is wound on the drum, the cable is biting and breaking. After that, the cable loses its qualities. In the place where he was bitten, and a break occurs. All this is because the regular steel cable is very rigid and does not fit well on the electric winch drum. Yes, a few more minuses can be added to this, these are burrs about which you can injure your hands and in the event of a break, the steel cable is very unsafe. Therefore, it is better to replace such a cable without waiting for problems. The best alternative to steel cable is synthetic or Kevlar. Cables made of such material have good elasticity, and when winding they occupy a smaller volume on the drum, which makes it possible to install a longer cable than a metal one on the ATV electric winch. Of course, there is also a drawback to the synthetic and Kevlar cable. When dirt, sand gets inside the cable, it eventually becomes shaggy and delaminates. This is the only negative that can be easily eliminated by periodically washing the cable in soapy water and further drying. Replacing the cable on an ATV electric winch is not very difficult.
 But for this you need to remove the winch. Using the BRP Outlander 800R ATV as an example, we will consider replacing a steel cable with a synthetic one. The order of dismantling the electric winch:
When the electric winch is removed from the ATV, the old steel cable can be removed and the new synthetic cable can be wound on. Secure the beginning of the cable well on the drum so that it does not jump out of it when winding. We recommend that you paint the first meter of the beginning of the cable on the drum red, this will serve as a signal that the cable is ending and will give you the opportunity to leave a few turns on the drum, thereby eliminating the possibility of disconnecting the cable from the drum under heavy load.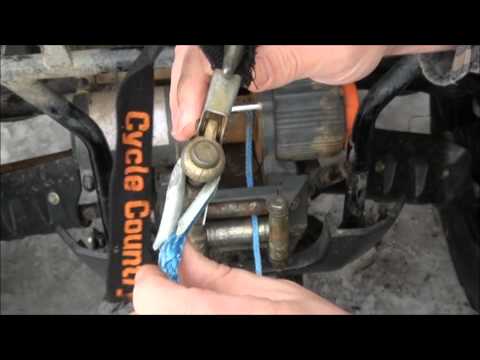

 This is especially important if you ride alone, and there is no second ATV to help unwind the bitten cable.
 To do this, you only need a strong flat-bladed screwdriver and ... Your vehicle
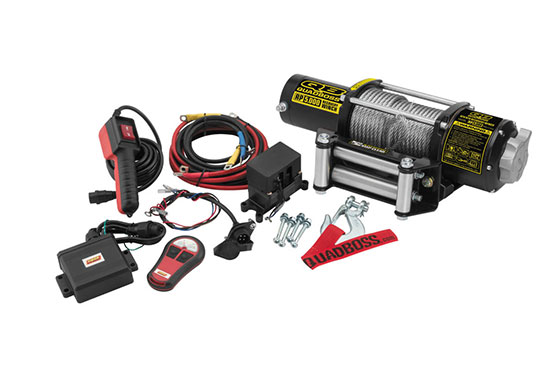
 At the first turn, it should turn out like this:
 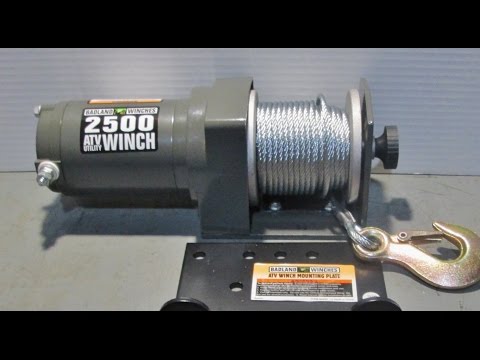 Let's start. You put the loop on the towbar, insert a screwdriver into the loop (mounting, crowbar - depends on the thickness of the cable), take the screwdriver with both hands on both sides and pull your car out of the swamp.
 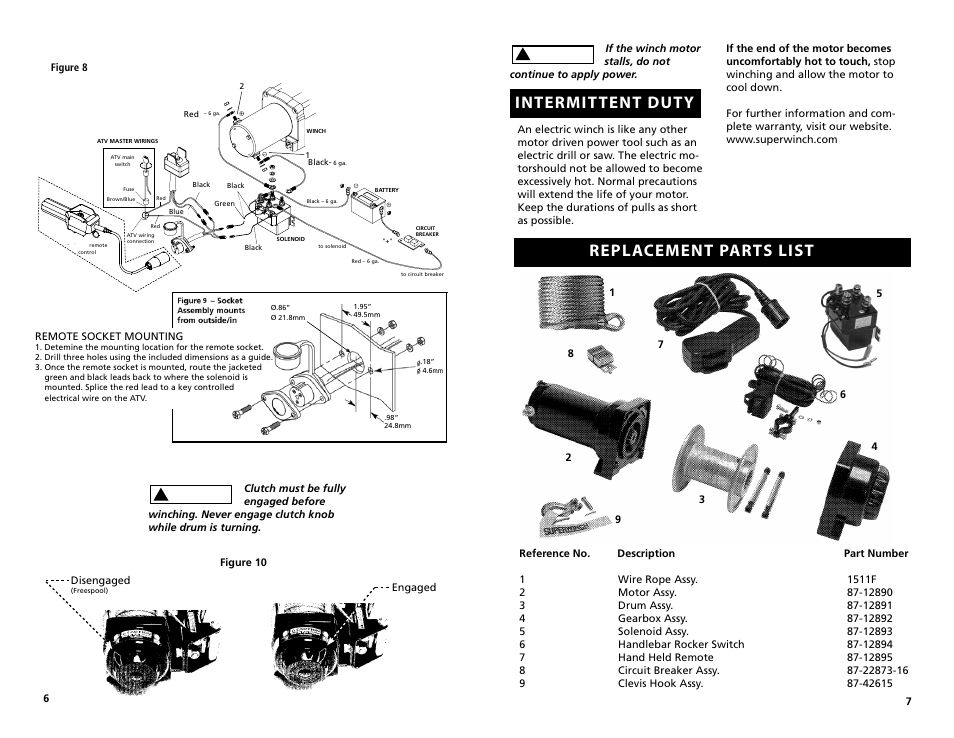 .. many years.
 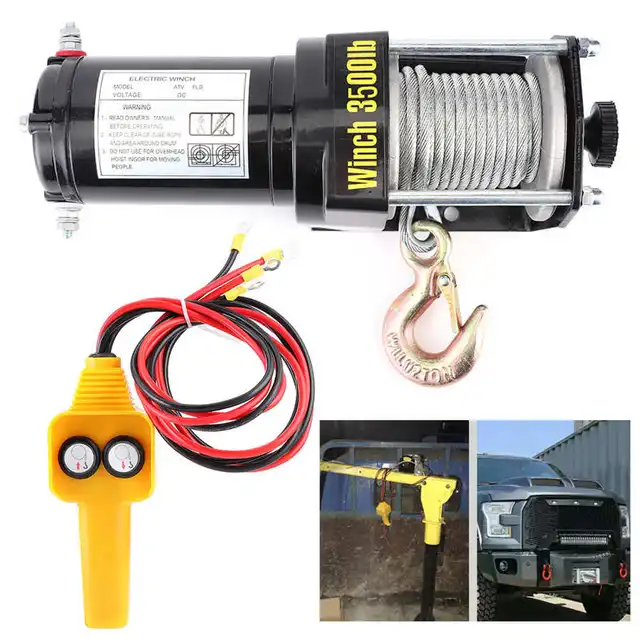 Firstly, the shackle will crush the cable on the drum, but although, if it already needs to be changed, then this is not so scary. It is much worse if the shackl jams the winch. That's when it will be possible in the field and not wedge it. Therefore, it is better not to do so.
 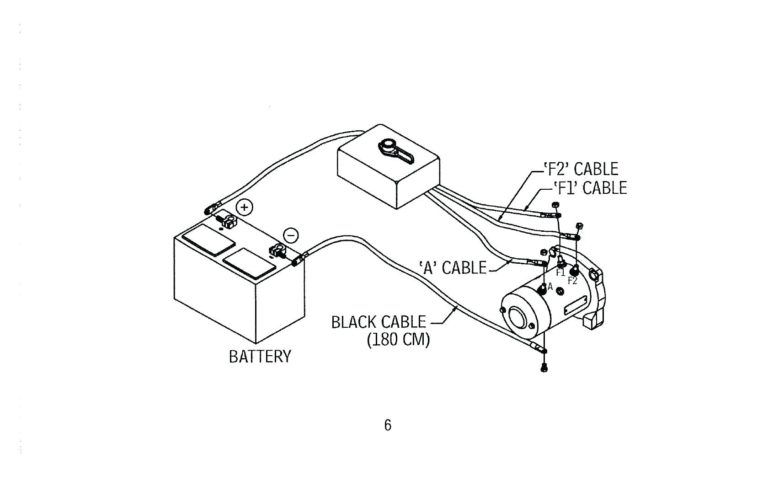 I pretty quickly broke off my cable at the very hook, and closed the hook in this way. Since then, I have used the winch many times and have not noticed any signs of unraveling the termination.