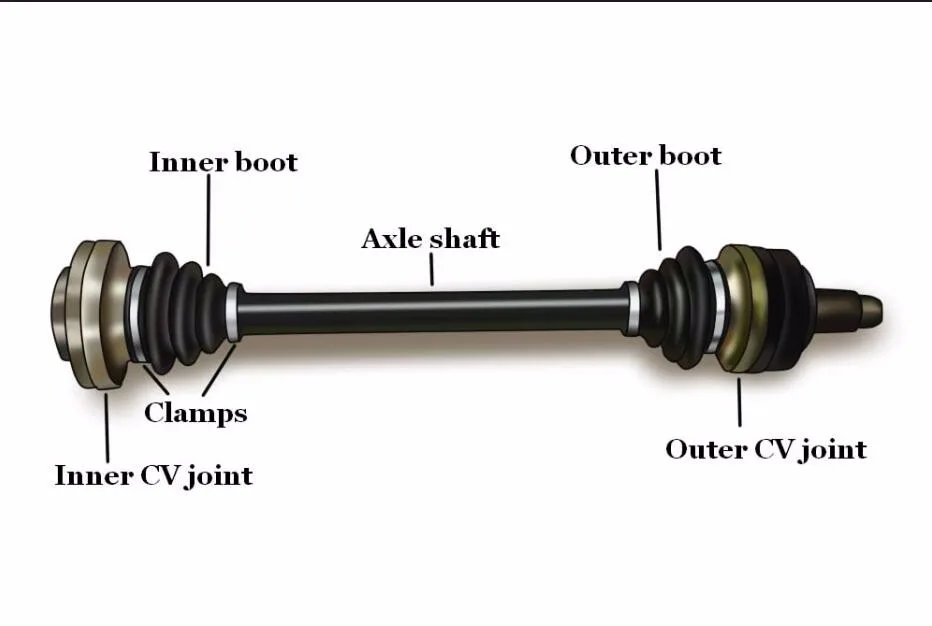
After removing your CV (Constant Velocity) axle and you are done rebuilding your vehicle’s CV joint. You need to place back the CV axle, also referred to as the half-shafts. Trying to install your CV boot, you notice that you do not have a clamp installation tool close by, and you have no idea how to tighten your CV boot clamp without the tool. Well, no need to worry. You can actually tighten your boot clamp without using any special tool.
All you need is a plier and a screwdriver to serve as your homemade CV boot clamp tool. With these simple tools, you can place back your boot clamp without having to spend money on buying a unique CV clamp installation tool or hiring a mechanic’s services.
This article will enlighten you on how best to tighten your boot clamp as effectively as using any special tool.
Remember to always put on your safety wears on before carrying any major or even minor repair procedures. I suggest that you buy a pair of sunglasses and some rubber gloves. If possible, a coverall. These safety kits will help avoid any form of injury that might occur when carrying out a repair. Moreover, it helps protect your skin from any toxic or harmful fluid that might spill, like the brake fluid, for instance.
With safety wears on, you can perform any repair without directly exposing your skin to any harmful substance or fluid you might handle during repairs.
It necessary you get your simple tools close by, so you don’t have to run about getting tools that you urgently need during a repair. It is advisable that you get a tools box, especially for mechanics who are constantly repairing a lot of vehicle systems.
Before you raise your vehicle, you should check your wheel by placing any non-sharp object that can prevent it from rolling in any direction. You can also set your emergency brake system for additional safety. Break loose the lug nuts of your wheels. Turn the lug nuts only about a quarter; please make sure that your wheels on the floor before doing this. Then place your floor jack under a solid part of your vehicle, ensure your jack is resting on a solid and level surface; it is important.
You can raise your vehicle enough to place the jack stands under other strong parts of your vehicle. You can place the stands at the same points on each side of your vehicle. Reduce the jack level, so that much of your vehicle’s weight is left to your jack stands. You can still leave the jack under your vehicle to support the stands.
You know also try using car lifts, it makes lifting your vehicle easier. Just make sure the adaptors are well placed in the recommended positions in your vehicle before lifting your vehicle and the vehicle should be placed in such a way that it is evenly raised by the lift. Also, ensure you inspect the lifts for fault and know the load limit it is designed to carry before using it.
After you have raised your vehicle to a moderate level, you can now wholly unscrew your lug nuts and axle nuts so you can remove the wheels. Always make sure you are careful.
You need to first take off the tie rod. If you notice a bad tie rod, you can replace it now. To remove the tie rod, use your pliers to detach the cotter pin. Then bend the cotter pin to make the ends straight, then use the rounded end to pull out the tie rod.
Now take off your castle nut using a socket wrench. Tap the threaded end that you took off the nut with either a mallet, preferably plastic, or a wood. If you only have the option of using a hammer, then place the wood between your ball joint stud and your hammer.
Be careful while you hit so as not to damage the threads with the hammer. You can try partially fixing back the nut on your stud. This will make you hit the nut instead of directly hitting your threaded stud.
Removing the stabilizer bar linkage is something you need to do because it will prevent you from forcing down the lower arm. It is very easy to do. Just ensure that you do not take off the washers, bushings, and nuts.
The lower arm bolt does not only hold the lower arm ball joint. It covers the rounded slot in the pin of the ball joint. Carefully unscrew the nut by keeping the bolt steady. The bolt should detach. Your lower arm’s pin should also come out from under; otherwise, you may have to hit your lower arm with any kind of hammer gently.
Your brake disc, wheel, spring system, and caliper are all placed on your steering knuckle, so you are now free to remove the whole steering knuckle easily. Take it off to the extent that you will be able to detach your axle from your splined hole.
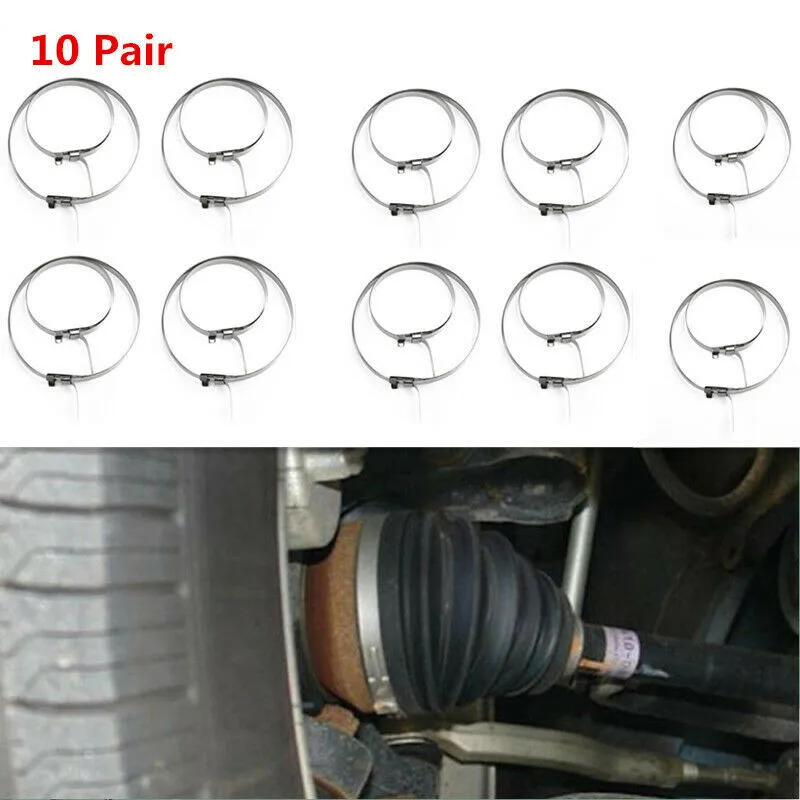
Place the boot clamp, which is a metal band around your constant velocity (CV) boot. The clamp is designed to rest on a grove by your vehicle’s manufacturer. Make sure you wrap the clamp in a counterclockwise direction around your boot.
Then thread the end of the boot clamp, which has holes under your metal clasp. The metal clasp is fixed to your clamp to ensure the clamp is well circled around your boot. Place the boot clamp to the left side of your CV boot.
Pull the thread outward to tighten the boot clamp around your CV boot. Use your needle nose plier to do this properly. This will tighten the clamp around your CV boot and create pressure on the metal clasp.
Bend the free end of your boot clamp backward onto your metal clasp and lock it by pressing it against your boot clamp with a screwdriver. Like I said earlier, all you need is just a plier and a screwdriver. So that’s it, you have successfully tightened your CV boot clamp, and the best part is you did it without buying any special CV boot clamp tool.
Once you have your boot clamp well-placed around the CV boot, grab your Lisle CV boot clamp plier and use its metal grip to hook the end of your boot clamp, then pull outward until it’s tightly fixed on the boot clamp. After making sure it’s tight, bend the free end of the clamp over the metal clasp. Please do not apply too much effort in pulling the end of the clamp outward; this can damage the clamp.
For the different types of CV boot clamps found, the first one is a normal sliding saddle with a ball that holds it tight, and the other is flat, and it has to be hooked together and crush the section binding it upward to pull it tight. Pull the clips together as tight as you can till one of the hooks enter one of the holes on the trail, further away from the raised portion, and holds the clip in place.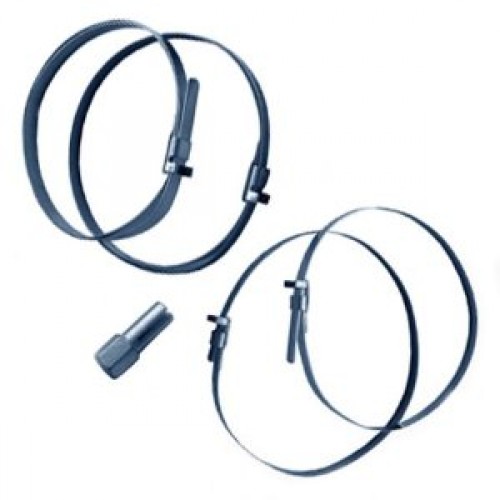
This can be done using your finger/thumb pressure or using a big pair of water-pump pliers. Then pinch the raised portion’s sides to compress them close together; this causes it to tighten the clip against the boot.
Of course, your boot clamps can be reused. If they haven’t cracked, damaged, worn-out in the CV, or have not slid off the half-shafts, they are fit for reuse. CV boots clamp hardly ever goes bad, so there is no cause to change the clamps in most cases. However, make sure you check the clamp thoroughly when servicing your CV axle system, so you will know if the clamps need to be changed or not.
The axle nut in the middle of your wheel is removed instead of the whole axle so that the axle will be loosed from the steering knuckle assembly at a later point and will not interfere with the process of replacing the CV boot. The steering wheel tie rod is also removed using a pair of simple nose pliers to remove the cotter pin. Next, the end of the threaded stud is whacked and break loose to remove it.
Disconnect the lower arm control system, the steering knuckle from the axle, and remove the old CV boot by inserting the wide end coated with grease over the axle CV joint. Install new clips, cut away the excess CV boot materials, and reassemble all components using a reverse method.
A cable tie, which is also known as a hose or zip tie, or ty-rap, can be used as your CV boot clamp alternative. They are cheap and easy to use in fastening or holding items together. They prevent grease from coming out and can also be used to tighten clips.
Easy! Right? Now you know how to tighten your CV boot clamp without using any special tool. I hope you got every step, and you are now able to tighten your boot clamp all by yourself. Remember to follow the guidelines carefully, and you won’t have to worry about anything. You can alert us if you have any questions.
Compare
Compare
Compare
Compare
Compare
Compare
Compare
Compare
Compare
Compare
Compare
Compare
Compare
Compare
Compare
Compare
Compare
Compare
Compare
Compare
Compare
Compare
Compare
Compare
The CV boot keeps dirt out of the CV joint that allows your wheel to turn. CV boot clamps keep the CV boot in place and protect it from vibrations while you drive. Failure to keep the CV joint clean and secure may lead to damaged CV boot clamps and eventual CV axle failure. If the CV axle on your vehicle fails, you shouldn't drive your vehicle until you repair all the necessary parts. You may have a torn CV boot if you notice clicking or popping when turning your vehicle, vibration while driving at high speeds, or grease on the inside of your tire or in your fender well. O'Reilly Auto Parts offers a wide selection of CV boot clamps and hardware for an easier repair. We also sell replacement axles and boots for most vehicles. Browse our full inventory of kits and clamps.
05/19/2021
Buying an old motorcycle is not a Chinese diploma. Armed with a little common sense and a couple of simple tips, anyone can pull off a profitable deal for themselves.
Chances are you know what kind of motorcycle you want if this is not your first time buying.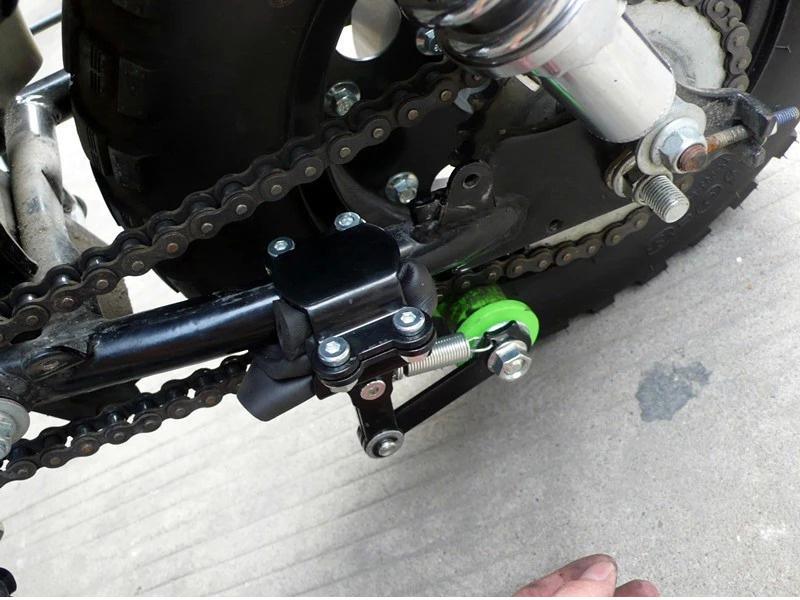 If the former, then let's move on to the next logical step and learn in advance about how to check a motorcycle before buying. Many motorcycles have their own distinctive characteristics that an inexperienced motorist can take for serious shortcomings. For example, a BMW usually emits smoke when starting the engine if it is parked on the left footrest. This is just a by-product of the exhaust system, which in no way means that the engine has deteriorated piston rings or something else. There is just “something else” that a person unfamiliar with the features of this model does not know. nine0003
Also, it would not hurt to improve the basic technical knowledge. You don't have to be an experienced mechanic to buy a used motorcycle, but you should at least know what a worn sprocket looks like or how to tell if knuckle bearings need to be replaced.
 It should also respond smoothly to gas. If the engine snorts and chokes before a set of revolutions, something is wrong. nine0014

 Lightly tap each spoke with a pen or screwdriver. A tensioned needle will ring, and a poorly tensioned needle will make a dull sound. Bent spokes should be replaced.
  Make sure all indicator lights and gauges are working properly. nine0014
 Check the knuckle bearings by moving the yoke towards the rear of the motorcycle. If it wobbles freely, the bearings are loose. In addition, the fork should swing from side to side without difficulty; if it doesn't, the bearings may be damaged.
 nine0014
The first impression of the product remains the same. The same goes for used motorcycles. In my experience, a bike that looks beat up has probably been hit really hard (falls, crashes). As a rule, people who are not worried about the appearance of their "iron horse" usually do not care too much about his condition. While there are definitely some motorcyclists out there who pride themselves too much on riding a beat-up bike, all the while keeping regular maintenance in mind. There are few such owners and they are very rare. Yes, perhaps a squat Vulcan/VTX/Virago or Volusia is, figuratively speaking, diamonds among a heap of rubbish, but the chances that in fact they themselves will turn out to be this heap are still more. nine0003
motobikebub/y
More news
How to teach a child to ride a bike - the best practical advice
how many different parts of the brain and muscle skills it takes to learn how to ride a bike. She was delighted trying to pedal, balance, turn and brake. nine0003
How to prepare for a bike ride
As the weather warms up, many of us take out or buy bikes and kick off the cycling season. It's so great to ride against the wind on a spacious road. If you accelerate well, you can even achieve the feeling of flying. But in order for the trip to bring maximum pleasure, you need to carry out the right preparatory measures.
Which tricycle should I buy for my child?
Thinking about buying a tricycle? Don't know which one to choose? Then read this article, and all doubts will disappear! nine0003
Checking when buying a used motorcycle
Buying an old motorcycle is not a Chinese diploma. Armed with a little common sense and a couple of simple tips, anyone can pull off a profitable deal for themselves.
3 criteria for choosing the perfect bike
It's hard to imagine our life without sports and bicycles. And the latter are presented in such a variety that it is very difficult for a “newly minted” cyclist to decide on their choice.
Motorcycle advice for beginners
There are two kinds of potential riders: those who know exactly what bike they want to buy, and newbies who are so confused by the sheer range of options and confusing terminology that they have no idea how to choose their first bike.
How to choose a children's bicycle
Choosing and buying children's bicycles is not an easy task, there are many nuances and they should not be forgotten.
How to choose a bike
When choosing a bike, consider the rider's height, intended use, riding style, and many more factors. nine0003
Nalini FW19/20 Collection: Fall 2019 - Winter 2020
The new Nalini Fall 2019 - Winter 2020 (Fall-Winter 19/20) collection of cycling clothing and equipment has been released and models from this collection are already on sale in our store!
7 interesting films about cyclists worth watching.
Cold weather is knocking on doors everywhere, forcing many cyclists to hide at home and put away their favorite bikes in the far corners. It seems that you want to ride, and the weather is prickly. A completely logical question arises - what to do with yourself during the "non-flying" weather? In addition to watching various cycling tricks on major video hosting sites, you can get acquainted with a number of interesting films! We invite you to take the time to check out some great cycling movies! nine0003
Cube 2020 bicycles have arrived
Dear friends, we are in a hurry to inform you that Cube 2020 bicycles have arrived!
Get 20% OFF Bicycle Accessories in February!
Get 20% OFF Bicycle Accessories in February!
As each boat is unique in its installation, it is important to determine on site what hardware is required. In any case, it is recommended to use reliable stainless steel bolts Ø 14.0mm. nine0003
Transom bolt-on motors will require two sets of bolts, nuts and washers - one to attach the lift base frame to the boat and one to attach the motor to the lift frame.
If the motor is already mounted, its mounting bolts can be reused to attach the lift frame to the boat transom. When doing so, make sure that only high quality, undamaged stainless steel bolts are used.
If the motor is mounted with clamps, only one set of Ø 14.0mm bolts with washers and nuts is required to mount the frame to the transom; of course, you can not forget about the safety bolts. nine0003
Since all transoms are different, you will need to determine the correct length of the mounting bolts. If holes are drilled for the bolts, you can determine the thickness of the transom by the length of the hole: you just need to add 5 cm to the thickness of the transom.
To determine the correct length of the motor mounting bolts, measure the thickness of the motor mounting frame and add 2.5 cm.
The lift frame removes the boat's outboard motor from the controls, batteries, and fuel tank by 17.5 cm. Allow adequate slack in the associated couplers and cables before installing the lift frame. The easiest way to check this is to lean the motor on a temporary support - on the holder stand and unfasten the mounting clamp or mounting bolts. Move the motor away from the transom by 18 cm without disconnecting the couplers and cables. nine0003
Note: Increasing the distance between the hull of the boat and the outboard motor improves the overall efficiency of the propulsion system. Since the propeller moves away from the transom, there will be less water turbulence in the propeller operating area, which improves propeller operating conditions.
The hoist frame is pre-drilled with industry standard mounting holes. If the boat's transom already has matching drilled holes, proceed to step 4 below on this page. If there are no holes, follow these steps:
1. Place the template on the center line of the transom. The projections of the holes should not coincide with the moldings, ribs, etc. on the transom.
2. With the template correctly positioned, reinforce it and mark the centers of the holes to be drilled.
3. Using a Ø 5.0mm drill, drill a pilot hole in each marked location, ensuring that they are aligned and that they do not interfere with the mounting bolt holes. Drill the holes with a Ø 14.0mm drill.
4. Before installing the frame, apply a bead of RTV type silicone sealant around each hole to seal it. nine0003
5. Four (4) Ø 14.0mm stainless steel bolts with complete washers and nuts with a nylon sleeve should be used to fasten the lift frame to the transom. First, insert the bolts with washers into both upper holes. Tape the heads of the bolts to hold them in place, lift the frame onto the transom, and, aligning the holes with the bolts, put the frame on the bolts. Insert washers and nuts onto the bolts from inside the boat. Nuts should not be fully tightened until lower bolts are installed.
Note: To provide more space for mounting mounting bolts, you can temporarily connect the battery and extend the lift frame into working position. This will make it easier to install the top bolts.
6. Installation is completed by inserting two lower fixing bolts into the holes with their reinforcement with capron nuts and washers. Fully tighten each bolt being careful not to damage the transom or lift frame.
1. Frame has holes to fit most outboard motor bolt plates. nine0003
2. Attach the motor plate to the lift frame with four (4) Ø 14.0mm stainless steel bolts of suitable length, using washers on both sides of each bolt.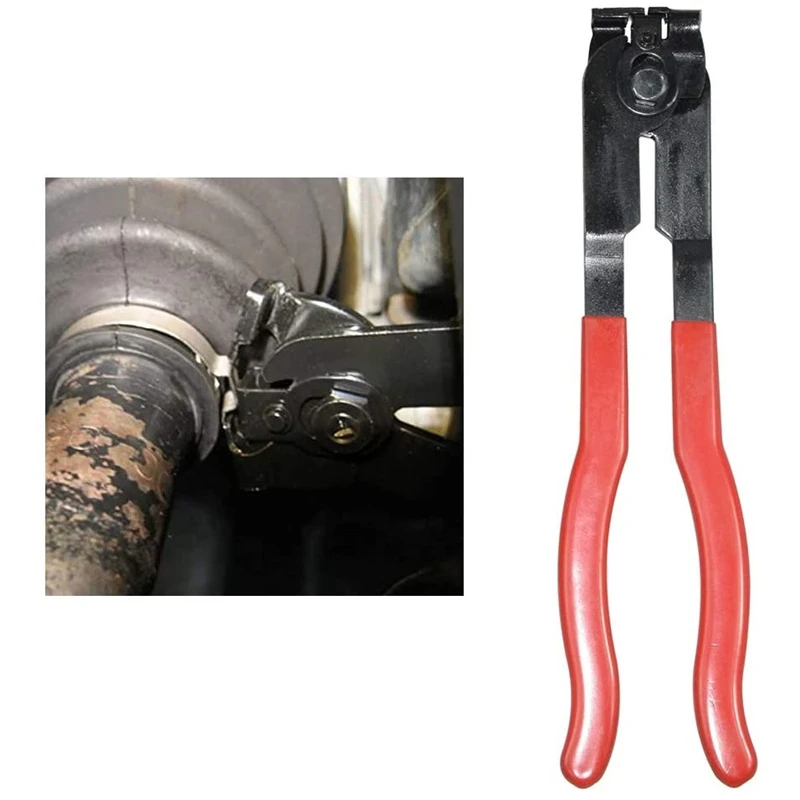 Fasten all bolts with nuts with nylon bushings tightly, but being careful not to strip the bolts and nuts.
3. If the motor mounting plate hole pattern does not match the industry standard mounting bolt pattern, additional holes can be drilled in the plate to secure the motor mounting plate to the lift frame. nine0003
1. From a block of wood with a section of 5x7.5 cm, cut a block about 28 cm long.
on top of the lift frame.
3. Leaving approximately 15 mm of play, tighten the clamp clamp.
4. Before completing the installation of the lift, fully extend the lift frame with the motor at low speed to check that the clamps or clamp handles are not obstructing the movement of the frame. Otherwise, the motor must be reinstalled. nine0003
5. Install the clamp safety bolts by drilling mounting holes in the mount clamp to match the location and size of the safety bolt holes in the outboard motor mount clamps.
In addition, it is recommended to put loops of cord on the clamp handles so that they do not accidentally get lost on the go if they loosen from vibration.
The outboard motor push rod is completely safe to use. The pusher equipped with an air intake tube is a precise mechanical device designed to raise and lower the frame with a reinforced motor. DO NOT allow water to enter the air intake cabin, so it is best to place the suction end of this tube under the engine hood. nine0003
1. Remove the outboard motor cowl.
2. Pass the intake of the air sampling tube through the hole in the motor frame, for which, if necessary, drill a hole with a diameter of 9.5 mm in the frame.
3. Allow enough slack in the length of the tube to allow the motor to move freely. Strengthen the tube under the hood so that it does not interfere with the moving parts of the motor. The suction tubes should be fixed vertically with clamps so as to exclude any possibility of accidental ingress of water into it. nine0003
The lift is designed to run on a conventional 12V boat battery and does not require a separate battery. The procedure for connecting the hoist to the main battery is shown below:
1. Fix the electrical junction box inside the boat with the included screws.
2. The push switch should be fixed in a convenient place close to the driver's seat. On a motor with a tiller, the lift switch should be attached to the tiller with clamps or tape. nine0003
3. Run three wires from the switch on the side of the remote control, and two wires from this box to the lift frame.
4. Apply a little dielectric grease to the connectors and connect them (it is recommended to wrap these connectors with water-repellent tape or enclose in a plastic tube).
5. Having connected all the contacts and wires, connect the ring contacts to the battery: red conductor - to the positive, black - to the negative terminal.
6. Operate the hoist to raise and lower the motor to check for sufficient slack in the electrical conductors, and then secure the conductors with the supplied clamps so that they are not pinched by the movable parts of the hoist during operation.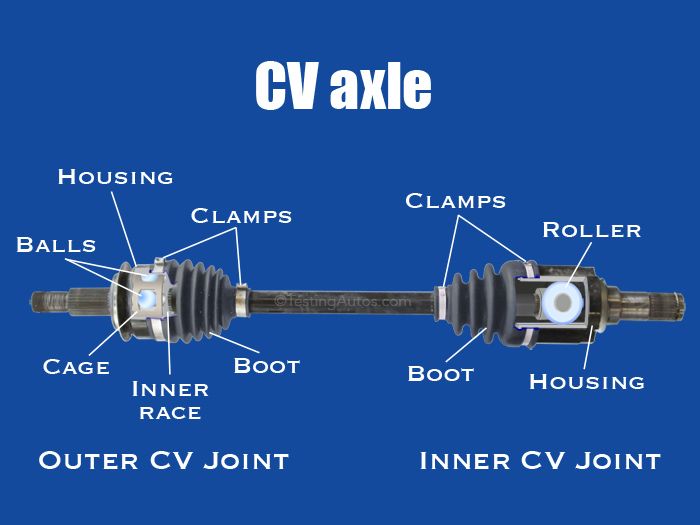 nine0003
With proper use and care, the lift will provide many years of service. There are two main causes of malfunctions for which the following precautions should be taken.
1.Transportation
The hoist push rod is a precision electromechanical product capable of developing a force of up to 22 kN to control the hitch angle of a powerful outboard motor. The ball screw drive of the pusher ensures that when folded, it will never “fold” spontaneously. nine0003
However, like the original motor mount, this hoist is not designed to support the motor when transporting the boat. Trailering can create significant force on the stern of the boat, damage the hoist mechanism and the outboard motor itself. Therefore, when transporting, the motor must be in the lowest position or it must be secured with additional clamps. Water entering the pusher will disable it. It is recommended to periodically inspect the fastening of the air intake tube to keep it in a dry place.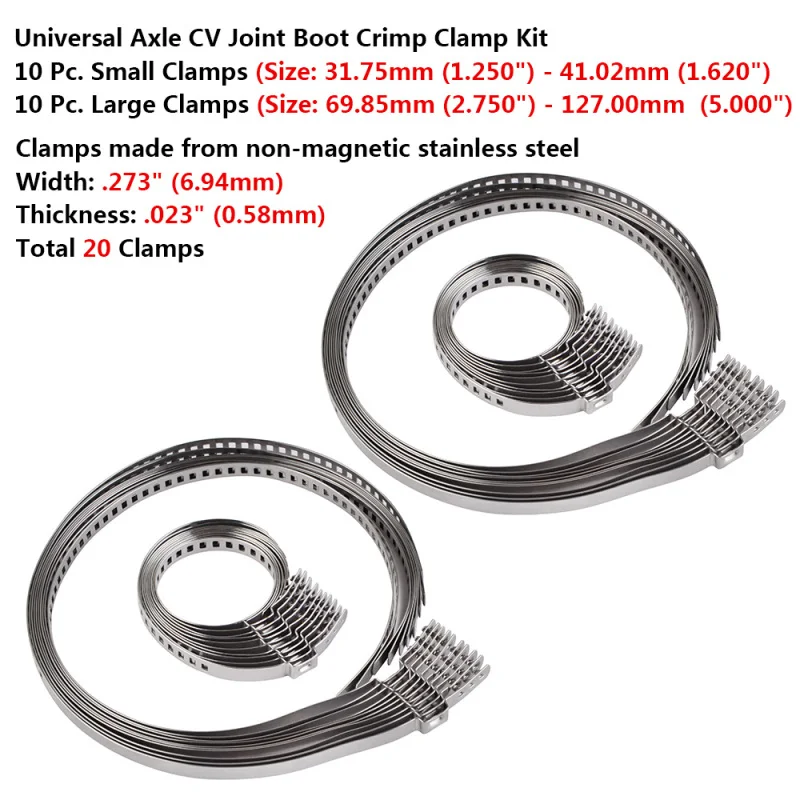 nine0003
NOTE: IMPROPER TRANSPORTATION DAMAGE FROM WATER INTAKE PIPE IS NOT COVERED BY WARRANTY. THE RESPONSIBILITY TO PERFORM THE PROCEDURES LISTED IS WITH THE MOTOR USER.
1. Electrical connections
Periodically, at least once a season, check the electrical contacts. If necessary, they should be cleaned and reapplied with dielectric paste to protect the contacts from corrosion. nine0003
2. Salt water service
The lift is made of high quality aluminum alloy with stainless steel fasteners, making it suitable for use in almost all waters. However, it is for use in salt water that a zinc anode should be installed to combat corrosion. In order to prevent premature discoloration and corrosion of parts, especially in salt and dirty water, periodically flush the lift with fresh water.
3. Grease replenishment
The pusher gearbox is filled with grease at the factory.