❚ The products mentioned in this article are selected or reviewed independently by our journalists. When you buy through links on our site we may earn an affiliate commission, but this never influences our opinion.
It might be a basic thing, but being able to pump up your bike’s tyres is an essential skill for any cyclist.
A lot of you will already know how to do this, but for those who don’t, the different valve types, pumps and, more importantly, what pressure to pump your tyre can be a bit overwhelming. Let us guide you through the process.
Pneumatic tyres were invented to get over the bone-jarring ‘ride-quality’ of solid wheels.
The air inside acts as a spring, providing suspension for you and allowing the tyre to conform to the terrain providing better traction and grip.
Pumping up your tyres is a quick job that can easily improve your enjoyment while riding. Running the wrong tyre pressure will negatively affect the way that your bike rides and can also make your bike more prone to punctures.
If you’ve never repaired a puncture before, you might not have considered how your tyres hold air inside.
The vast majority of bikes will use an inner tube. This is a doughnut shaped airtight tube that sits inside the tyre, with a valve for pumping it up that you see on the outside.
The tyre, when inflated by the tube, is what grips the ground and provides protection from punctures.
You may have heard of tubeless tyres, which forgo a tube and use a special rim and tyre to seal air without the need for a tube. These usually require tubeless sealant inside, which is a liquid that plugs any points where air is escaping.
Tubeless tyres are more commonly found in mountain biking, but the technology is migrating to road bikes.
The tubeless sealant also plugs punctures, and no tube means a much lower risk of pinch flats – that’s when your inner tube is pinched by the rim, causing a puncture. Tubeless tyres can, therefore, be run at lower pressures than those with an inner tube setup, for improved comfort, speed and traction.
At the very high end, you also get tubular tyres. This is essentially a tyre with the tube sewn into it, but they are rarely seen or used outside of professional racing.
Inflating your tyres to the correct pressure is an essential part of bike maintenance.Oli Woodman / Immediate Media
Running your tyres at either too high or too low a pressure can be potentially dangerous, as well as negatively impact the handling of your bike.
We’ll discuss later what the correct pressure is, but for the moment let’s look at possible problems.
An under-inflated tyre will rob your efficiency and leave you susceptible to annoying punctures.Oli Woodman / Immediate Media
If you run your tyres at too low a pressure, the tyre can wear prematurely. Excessive flexing in the sidewall can lead to the casing cracking and the tyre becoming fragile. This could eventually lead to a blowout.
Excessively low pressures also increase your susceptibility to punctures and may even result in your tyres literally rolling off the rim if you corner at speed (the pressure inside is what holds your tyre on the rim).
Damage can also be caused if the tyre deflects all the way down to the rim. This can result in dents or cracking, potentially compromising your wheel and resulting in an expensive replacement.
Conversely, running too high a pressure could result in your tyre blowing off the rim with explosive consequences. That pressure can also squeeze the wheel because if it’s too high the compressive force on the wheel can be too high.
In terms of handling, a low pressure can result in compromised handling with the tyre squirming under load. Your bike will feel difficult to control, slow and sluggish.
On the other hand, too high pressure can result in reduced grip and a harsh ride, leading to fatigue and in turn impacting handling.
There are two likely reasons why your tyre is flat. Either you have a puncture or your tyre has just deflated over time.
If you have a puncture, we’ve put together a comprehensive guide on how to fix a puncture.
Glueless patches are great for a quick fix, while a more traditional kit is a versatile option when you have a bit more time.
All tyre systems will leak air slowly because tubes aren’t completely airtight. For example, standard butyl tubes hold air fairly well compared to lightweight latex tubes, which leak comparatively quicker. Even tubeless setups will slowly leak air.
Old tubes will leak more air than new ones, so if yours haven’t been replaced in a while they may be worth looking at. Less likely, but also a possibility (especially on older tubes), is that the valve is no longer sealing properly.
The best way to check what’s going on is to try pumping up the tyre. If it holds air then there’s likely nothing more you need to do. If it doesn’t, then you likely have a puncture.
If it leaks air slowly overnight, either you have a slow puncture or simply an old tube that needs replacing.
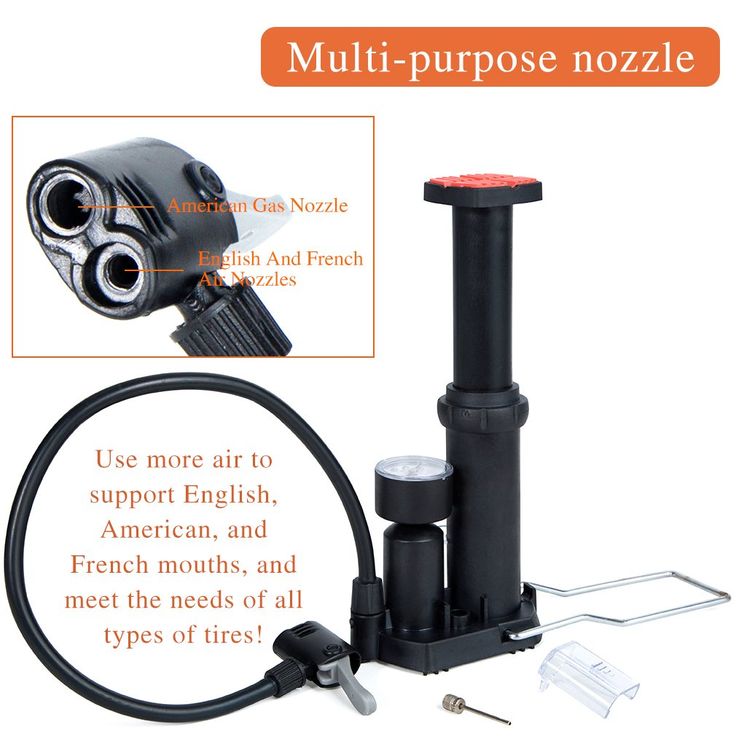
The first thing you’ll need to know before pumping up your tyre is what valve type is fitted.
The valve is the key part that keeps air in the tyre, but also lets you inflate (or deflate) the tyre.
The Schrader valve is also used for car tyres.Oli Woodman / Immediate Media
Schrader valves are more common on lower-end bikes and, in the past, mountain bikes. The same valves are used on car tyres.
The valve assembly is a hollow tube with a sprung valve that closes automatically and screws into the external body. A pin extends up from the valve and is usually flush with the end of the outer tube. This pin can be depressed to let air out.
The dust cap on Schrader valves is an important part of the design that can help fully seal the valve if it is not completely air-tight.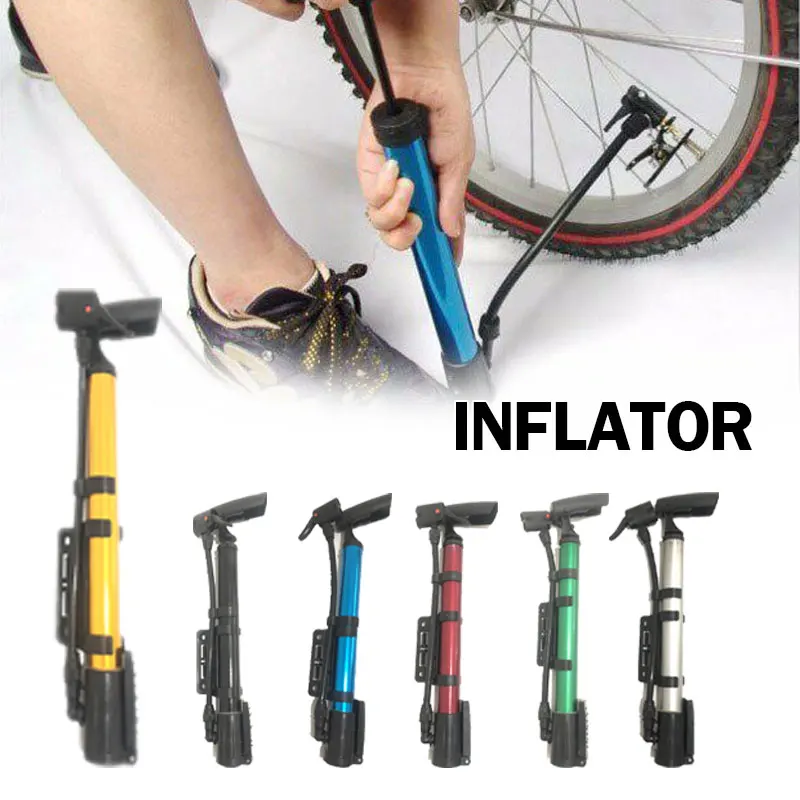 It essentially provides a secondary ‘backup’ seal.
The sprung design of the valve is a little susceptible to contamination from dirt or grit so it’s important to protect it too.
Presta valves such as this one are longer and narrower than the Schrader type valve.Oli Woodman / Immediate Media
You will only find Presta valves on bicycles.
They originated on road bikes where the narrower valve (6mm vs 8mm for a Schrader) meant a smaller valve hole (typically the weakest part of a rim) on narrow road wheels.
Nowadays they are seen on both mountain bikes and road bikes. Rather than use a spring, the valve is secured with a nut that holds it closed, though the valve itself is sealed ‘automatically’ when pressure inside the tyre pushes it shut.
With a Schrader valve, you can simply press the pin to release air, but with a Presta valve you first have to unscrew the little locknut. Don’t worry about the nut coming off the end of the valve body because the threads are peened to stop that happening.
There seems to be a myth that Presta valves deal with high pressures better – this probably isn’t true considering there are Schrader valves that can withstand many hundreds of psi (way more than you’ll ever need in your tyre).
Presta valves are definitely a little more delicate than Schrader valves, though. It’s quite easy to knock the threaded internal valve body and bend or break it, so a bit more care needs to be taken. However, valve cores are easily replaceable with standard tools.
In comparison, on Schrader valves, this requires a proprietary tool.
Presta valves may come with a lockring that secures the valve body against the rim. This can make them a little easier to inflate. The dust cap is not essential to seal it, but helps keep the valve clean.
The only other type of valve you may come across is a Dunlop (also known as Woods) valve. This has a similar base diameter to a Schrader valve, but can be inflated with the same pump fitting as a Presta valve.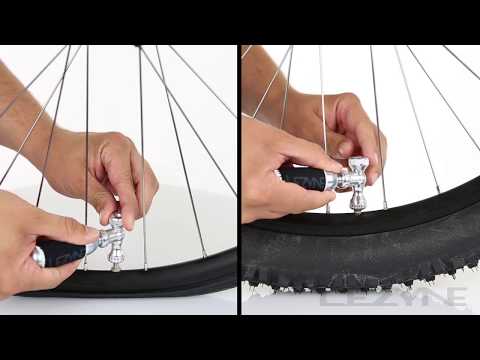
These are very popular on town/upright bikes in Europe and elsewhere in the world, but you’re very unlikely to come across one in the UK or in the US.
A tubeless valve can be difficult to distinguish from a regular Presta valve.Oli Woodman / Immediate Media
Valves for tubeless setups are attached directly to the rim, rather than being part of an inner tube.
More often than not, they are Presta-type, but Schrader ones do exist.
Oli Woodman / Immediate Media
If you’ve got a Schrader type valve, such as the one shown above, then the first thing you need to do is remove the dust cap (if there is one in place).
Oli Woodman / Immediate Media
Simply unscrew the cap anticlockwise to reveal the valve.
Oli Woodman / Immediate Media
Now attach the head of your pump.
Oli Woodman / Immediate Media
Inflate the tyre to a value between the minimum and maximum stated on the tyre sidewall and remove the pump.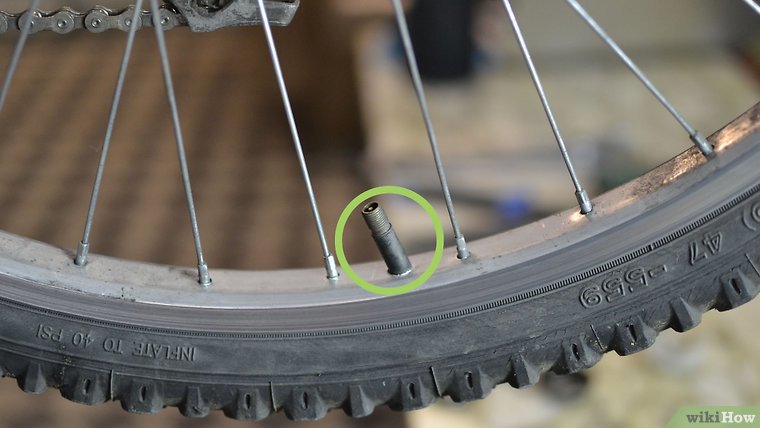 You’re done!
Oli Woodman / Immediate Media
If your bicycle has a Presta type valve such as this one then you will first have to remove the plastic valve cap (if fitted).
Oli Woodman / Immediate Media
The plastic cap will reveal another threaded cap to the valve.
Oli Woodman / Immediate Media
Unscrew the thread but be careful to not damage it in the process.
Oli Woodman / Immediate Media
Now attach the head of your chosen pump to the open valve and inflate the tyre to a pressure that’s between the minimum and maximum stated on the tyre’s sidewall.
Inflate the tyre to the desired pressure and remove the pump.
Oli Woodman / Immediate Media
Finally, close the valve by screwing it clockwise and reinstall the plastic valve cap.
If you have a tubeless setup, or tubes setup with sealant inside, then it’s worth taking a few extra steps to avoid gunking up your pump.
Turn the wheels so the valves are at the bottom and leave for a few minutes so any sealant can drain out.
Turn the wheels so the valves are at the top and pump up your tyres. The same goes when deflating tyres to prevent goop spraying everywhere.
We’d say that, if you can only own just one type of pump, get a track pump for home use because it’s efficient, quick and easy to use.
However, there’s no doubt that having an additional mini-pump for when you’re out on the road is rather useful – otherwise you risk being stranded at the roadside in the event of getting a puncture.
We’ve already got a guide on choosing the best bike pump for your needs, but here a few recommendations for you to consider.
The sky’s the limit with track pumps. They basically all do the same job, some with a more premium feel than others.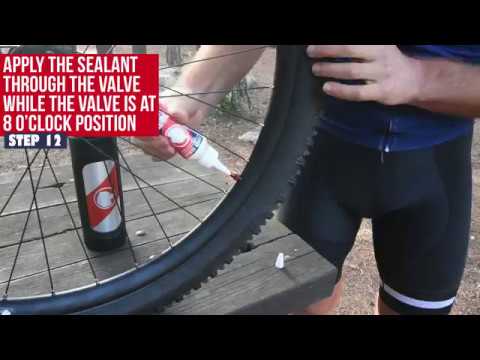
From a budget Park Tool PFP8 to the absurdly expensive Silca Pista Plus, you’ll be able to find something that suits your needs.
Mini pumps work but are a lot more frustrating to use. Again, there are lots of options available from mini track-style pumps to tiny pumps that will fit in a jersey pocket. We tend to prefer mini pumps with a hose because that reduces stress (and potential damage) on the valve.
Two of our favourites have been the Truflo TIO Road and the Lezyne Micro Floor Drive HP.
One other possibility for your inflation needs is a CO2 inflator. These use compressed carbon dioxide in a small cartridge to inflate or top up a tyre really quickly. Not something you would want to use on a regular basis, but perfect for an emergency repair.
The first thing to do is to attach your pump to the valve.
Remove the valve cap, and regardless of valve type, we find it’s good to release just a little hiss of air to ensure the valve isn’t stuck and opens and closes cleanly.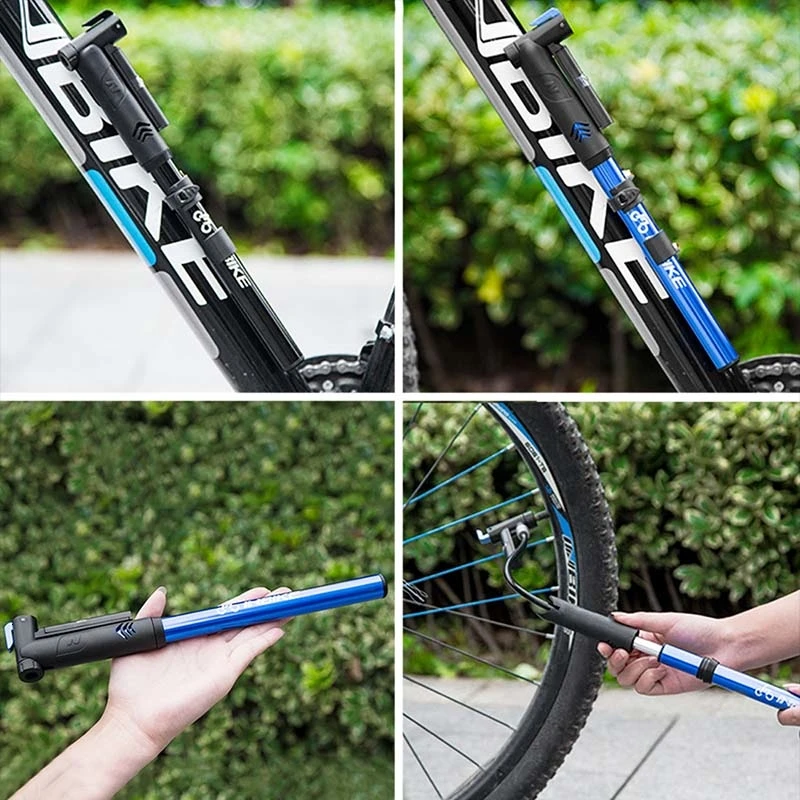 Either thread-on the chuck or push it on and lock it.
If your tyre is completely flat it may initially be a bit of a struggle to fit the chuck because the valve has a tendency to push back into the rim. Simply hold the valve from behind by pushing on the outside of the tyre so that you can lock the chuck on properly.
The lockring on Presta valves (if fitted) can also help, preventing the valve from disappearing by holding it in place for you.
The connection to the valve should be air-tight. A little escaping air is normal when attaching the pump, but shouldn’t continue for long. If it does, remove and reattach the chuck. If it continues to be a problem it may be worth checking the rubber seal in the chuck to see if it is worn out and needs replacing.
Remember to be gentle with the valves – they’re delicate. That’s especially the case if you’re using a mini pump without a hose.
Make sure to brace the pump with your hand wrapped around the spokes or tyre to avoid transferring too much of the pumping force to the valve, which could lead to damage.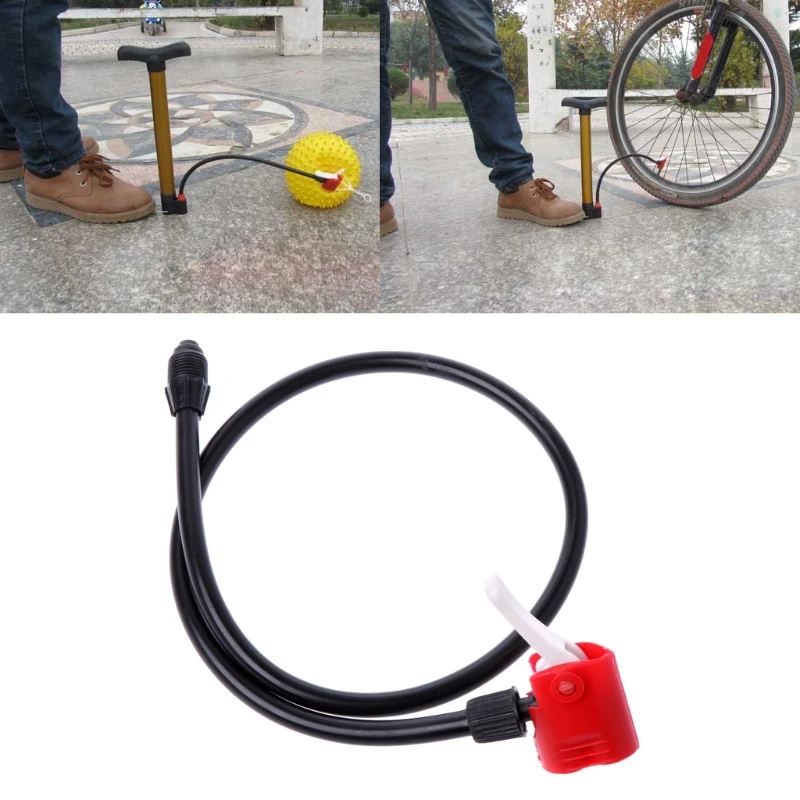
When you start pumping make sure to use the full stroke of the pump. You’ll find that the majority of the stroke is taken up compressing the air to the point where it will then be pushed into the tyre.
If you don’t use the whole length of the pump, the air won’t be pushed out of the bottom – you need to generate overpressure in order to move the air from the pump to the tyre. Instead, you’ll just end up with the shaft bobbing around doing nothing.
With a track pump, don’t just use your arms, use your body weight for the downstroke and pumping will become a lot easier.
You may sometimes find that the pump doesn’t seem to hold pressure, especially when inflating the tyre from completely flat. This may especially be the case with an older pump where seals may be slightly sticky.
We find it helps to pump vigorously initially, to generate enough back-pressure (i.e. pushing back from the tyre side) in the system to ensure that valves are actuated properly and seal up, in turn inflating the tyre. Keep on going until you get the right pressure.
When removing the chuck from the valve there is usually an audible hiss of air being lost. This is usually from the pump rather than the valve side. Pressured air in the hose and chuck is just escaping.
A pump gets the air in your tyre. The operating principle is simple; you increase the pressure inside the pump until it exceeds that inside the tyre. This ‘overpressure’ forces air into the tyre, increasing its pressure too.
A pump is just a manually actuated piston. On a pump’s downstroke, a check valve (allows air-flow in one direction) seals the piston chamber, resulting in air being pressurised as the pump is compressed. That pressure increases until it exceeds that inside the tyre.
At this point, a second one-way valve will allow air to flow from the pressurised pump chamber into the tyre. You extend the pump again, the check valve opens to refill the chamber with air and you repeat the process.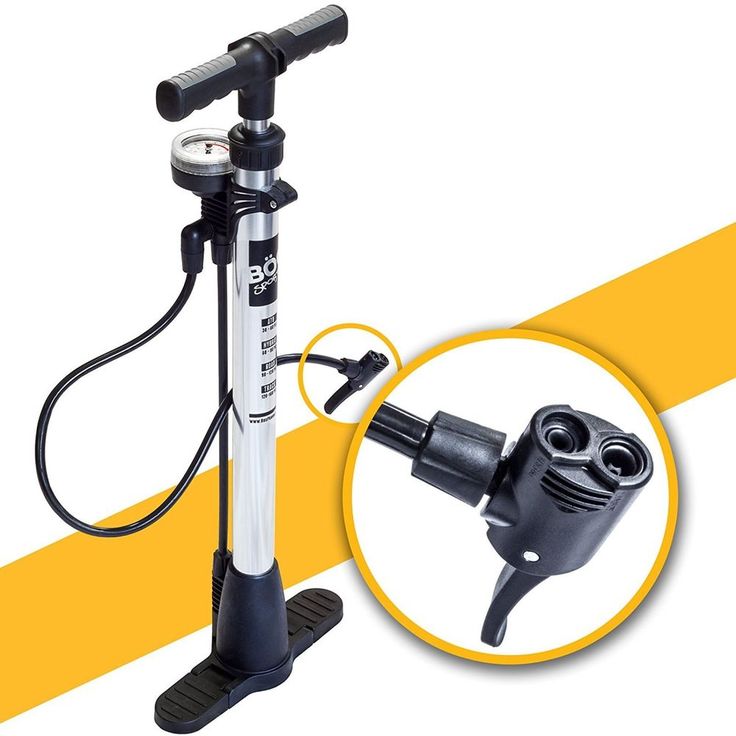
To prevent the pressure in the tyre leaking back out, the second check valve at the base of the pump closes. If it wasn’t there, the pump would just shoot open again.
Presta valves will close automatically, but the sprung Schrader valves are usually held open by a pin in the pump valve attachment (this means you don’t need any extra effort when pumping to overcome the pressure exerted by the spring.)
The head of the pump is also known as the chuck.Oliver Woodman / Immediate Media
The chuck is the part that attaches the pump to the valve and forms an airtight seal over the valve. One of two designs exist: threaded or push-on with a locking lever. Most pumps nowadays are also adaptable to either Schrader or Presta valves.
They will either feature two different attachment points or an adjustable chuck that can be changed to suit both types.
For larger pumps (and many mini-pumps too) the chuck is often on a hose, preventing your pumping force from damaging the valve.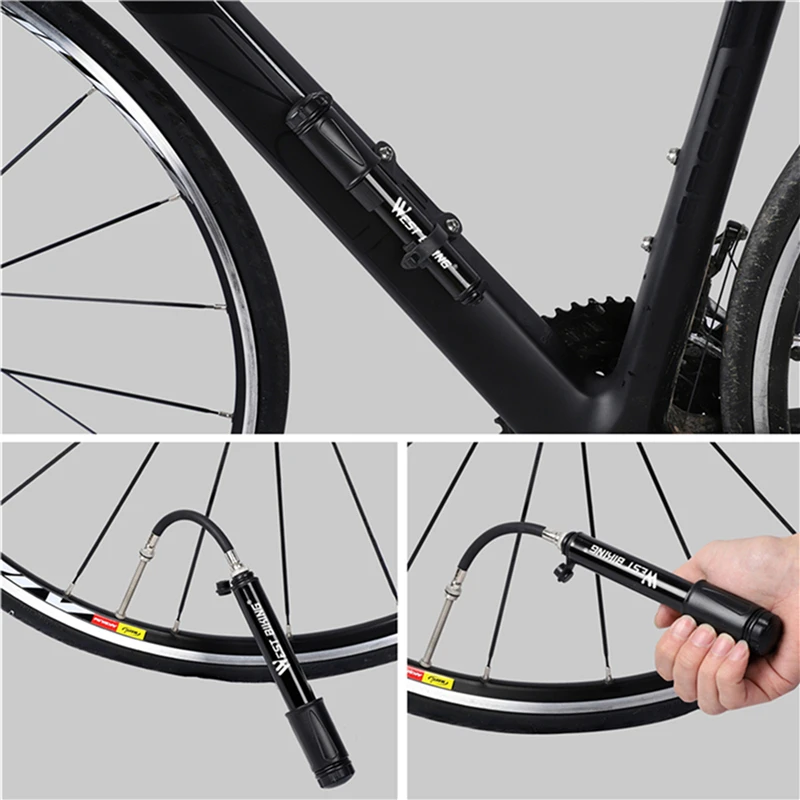
Pumps will often include a pressure gauge to check the pressure inside your tyre.
The right tyre pressure is perhaps one of the most contentious subjects, but there are definitely a few guidelines that you can use.
As a general rule, your tyre should be solid enough to prevent the tyre deflecting all the way to the rim, though compliant enough to provide some suspension – after all, the beauty of a pneumatic tyre is that you don’t have to have a bone-jarringly hard ride.
Most tyres will have a minimum and maximum pressure rating printed on the side. It’s advisable not to go under or over those limits because manufacturers have specified them for a reason. Of course, that means there’s still a lot of room to play with pressure and what works for you.
For mountain bikes the problem is relatively easier, with the usual aim being to improve traction, cornering and shock absorption.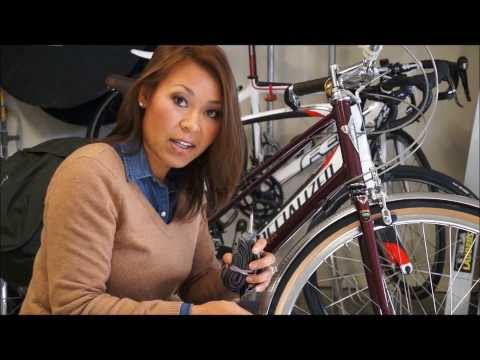
As a general rule, riders try to run as low a pressure as possible without having it so soft that the tyre squirms under cornering load or deflects enough for damage to occur to the rim.
For road bikes it becomes a little more complicated because along with traction and comfort, rolling resistance (how efficiently a tyre rolls) is a major consideration as well.
Contrary to what many assume, the new school of thought seems to suggest that harder is not necessarily faster.
On all but the smoothest of surfaces, a hard tyre will not have as much suspension, and instead of the tyre being able to deflect and conform to irregularities – keeping the bike moving forward – you will get bounced around.
On all but the flattest of surfaces softer tyre pressures can provide more comfort and be more efficient.
A tyre pressure drop chart.Frank Berto (Bicycle Quarterly)
The most comprehensive research into this was underatken by Frank Berto, who put together a tyre pressure inflation chart.
This testing determined that a 20 per cent tyre drop (the amount the tyre compresses when load is applied, measured by the height from the ground to the rim) was the optimum balance.
Incidentally, some manufacturers recommend a similar level of tyre drop, though the figure is open to some debate.
This value does provide a good starting point to experiment with tyre pressures. The chart looks at individual wheel load – i.e. your and your bike’s weight on each wheel (40 per cent front / 60 per cent rear is a good starting point) – and calculates the pressure for each accordingly.
You need not always get your pump/gauge out to check for tyre pressure.BikeRadar / Immediate Media
It’s a good idea to check your tyres before each ride. Usually, that just involves giving them a squeeze by hand to check the pressure.
No, it’s not super accurate, but you’ll quickly get a feel for the pressure in your tyres and be able to tell whether they need pumping up or not.
If you start to get really nerdy about it, you may end up investing in a pressure gauge, which can read the pressures in your tyres very accurately.
That’s especially helpful for mountain bikes where a few psi can make a large difference to handling and grip, but equally applicable on a road bike to find the exact pressure that works for you.
BikeRadar provides the world's best riding advice. We're here to help you get the most out of your time on the bike, whether you're a road rider, mountain biker, gravel rider, cycle commuter or anything in between. You can expect the latest news and features, in-depth reviews from our expert team of testers, impartial buying advice, how-to tips and plenty more.
It’s a beautiful day, the sun is shining, you’re ready to go for a bike ride….. but you have a flat tire.
Assuming it’s been a while since you’ve ridden your bike, you probably just have low tire pressure. An easy fix!
{Cover photo: Your Best Digs}We’ll show you (step-by-step) how to pump up a bike tire using both two different kinds of bike pumps: a floor pump and also a hand pump.
No matter how mechanically un-inclined you are, you’ve got this!
Before you even get around to pulling out the pump, take a moment inspecting your tire.
Bicycle tires (or rather their inner tubes) have two different kinds of valves. They are either a Presta valve or a Schrader valve. Check the pictures below to figure out what kind of valve you have.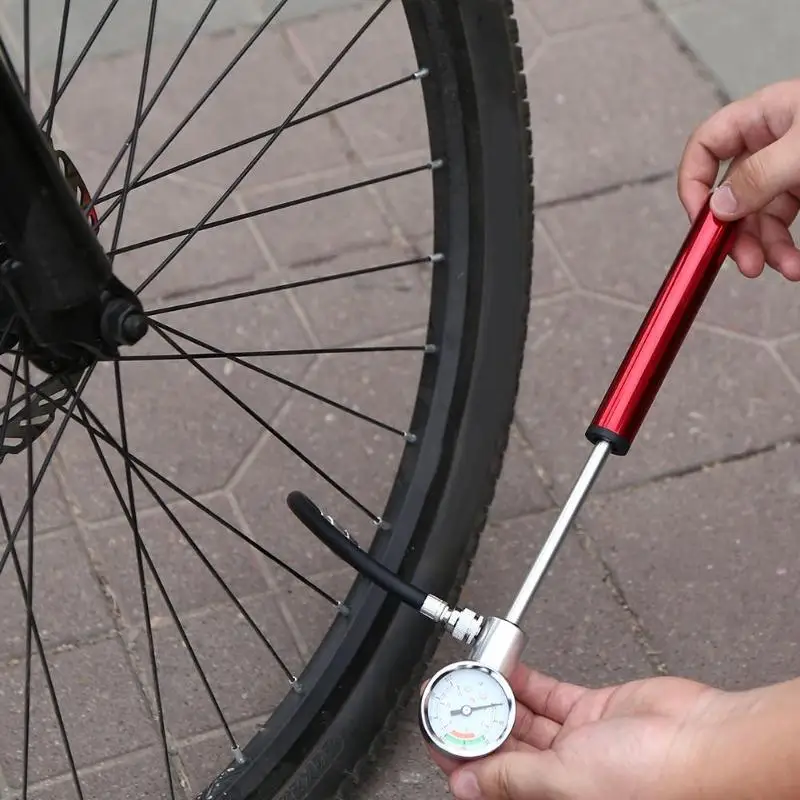
But wait a minute, you say, my valve doesn’t look anything like those pictures. It appears to be plastic. That’s because your valve has a plastic dust cap on it. Simply remove it by unscrewing it.
Why does it matter what kind of valve you have? Because different valves require different pump nozzles.
Most modern pumps (both floor pumps and hand pumps) will have both, but you have to use the correct one. Other pumps will only accommodate Schrader valves and you may have to get an adaptor* to accommodate a Presta valve (if your tires are Presta).
The next thing you want to do before starting pumping, is figuring out what the appropriate tire pressure is.
Bike tires (like car tires) measure air pressure in pounds per square inch, or PSI for short.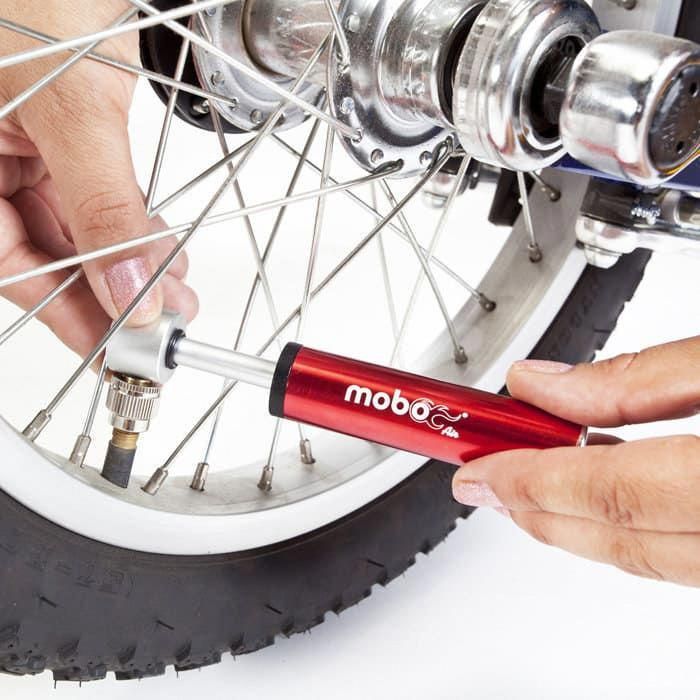 You want plenty of pressure so that you can roll fast, but not so much that you experience a harsh ride.
Also, if you inflate your tires too much, you could actually blow the tire off the rim. (Don’t worry—this is a pretty difficult thing to do).
Inspect the sidewall of your tire to find the manufacturer’s recommended tire pressure. If your tire doesn’t have this (most will), then here are some basic guidelines:
If you’re a lightweight rider, stick to the lower end of the psi range; if you’re heavier, go higher.
There is probably a plastic cap covering the top of your valve. Go ahead and unscrew this and remove it. Remember: left-y loose-y, right-y tight-y.
Put it somewhere safe so you can replace it again at the end.
Have a schraeder valve? Skip this step. But if you have a presta valve you will need to open the valve to put air in.
Unscrew it several turns. Again, lefty loose-y, righty tighty. If your bike has been sitting unused for a long time, or if it’s missing it’s dust cap, it may be difficult to unscrew it. In this case, use a pair of needle-nose pliers to help loosen it.
Release the valve by unscrewing it several rotationsOnce the valve is loose, go ahead and press down on the top (just for a second) to release it.
Most floor pumps will have two nozzle holes–one for a Schraeder valve, one for a Presta valve. The big hole is for a Schraeder, the little hole is for Presta.
Press the appropriate nozzle hole down onto the valve until it’s firmly on the valve. A little air may escape from the tire while you’re doing this. That’s okay.
Most air pumps will have a lever that you need to engage. Pull up on the lever until you’ve rotated it a full 90 degrees.
Once the nozzle is on the valve, pull the lever up.It’s worth noting that not every pump is like this. Some professional pumps will have a lever that you push in. That said, the vast majority of commercial pumps are designed to be pulled up on.
Put both feet on the base of the pump and use both arms to pull up on the pump and then push down. Continue pumping until the air gauge indicates that you’ve reached your appropriate tire pressure.
Push the pump lever back down (90 degrees) and pull the nozzle off your valve.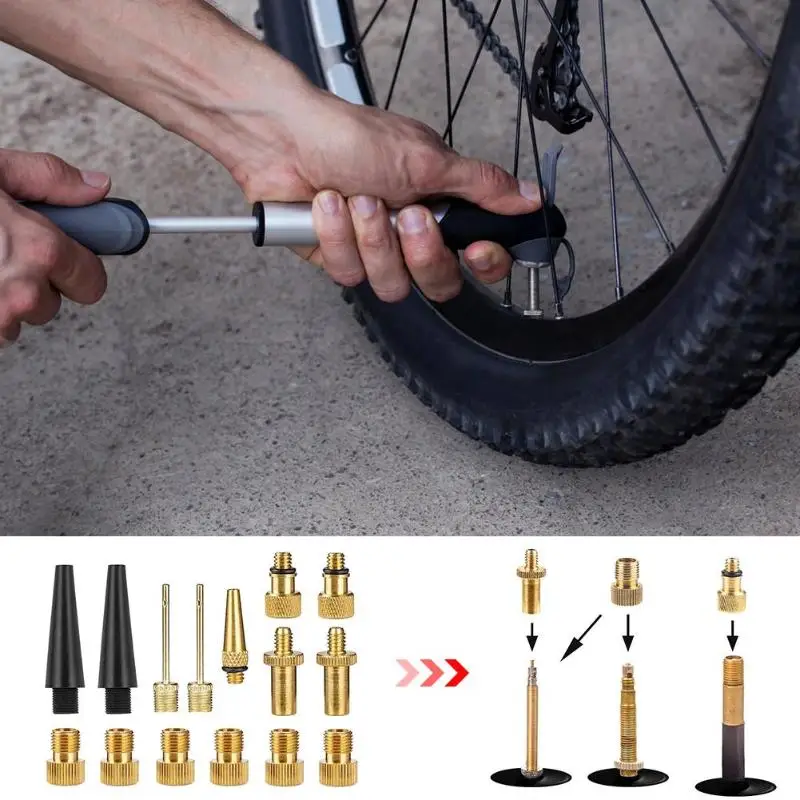 A little air might escape–again, that’s ok.
If you have a presta valve, make sure to screw it closed again.
Also, if you removed a dust cap at the start put it back on again.
You’re done!
A hand pump is a little harder to do, for two reasons: 1) each hand pump is quite different, and 2) it takes a lot more pumping to reach your desired tire pressure.
If you have a plastic dust cap on your valve, remove it first. Screw left to loosen it, then put it in a safe place so that you can replace it later.
If you have a presta valve, you need to open it before adding air to your tire. The top of the valve will unscrew–turn it left several rotations. Note that nothing comes off, it just loosens.
Then, press down on the valve for just a second.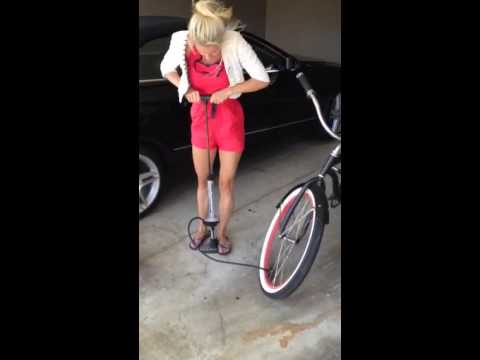 You should hear a short release of air. This means that the valve is open and ready to be pumped up.
Like a floor pump, most hand pumps will have to nozzle holes–one for a Schraeder valve and one for a Presta valve. The bigger of the two is a Schraeder, the smaller is Presta.
Other hand pumps, like the Lezyne HV Drive*, have a nozzle on the end of a hose. One side of the hose is for Schraeder and the other is for a Presta.
This hand pump has a Schrader nozzle on one side and a Presta nozzle on the other.Whatever type of hand pump you have, try to first identify which nozzle you should be using.
Then either press or screw (again this is different depending on the brand of hand pump) the nozzle onto the valve. A little air may escape in the process–that is okay.
Use one hand to hold the nozzle firmly on the valve, and the other to pump. Because hand pumps don’t have much volume, it will take A LOT of pumps to get your tire fully inflated. Rest when you need to.
Some, but not all, hand pumps have a switch that changes your pump from “high volume” to “high pressure.” You want to begin pumping in high volume mode, and once it becomes very challenging to pump anymore, switch to high pressure mode.
Many hand pumps will have a pressure gauge. Continue pumping until you get to your desired tire pressure.
If your pump does not have a pressure gauge, then you’ll have to manually feel your tire to determine when you have enough pressure. Firmly grip both sides of your tire and squeeze. It should feel firm and not too squishy.
Unscrew or pull of the nozzle. Don’t panic if you hear a little air release.
If you have presta valve, make sure to close it again by screwing right until it’s firmly closed.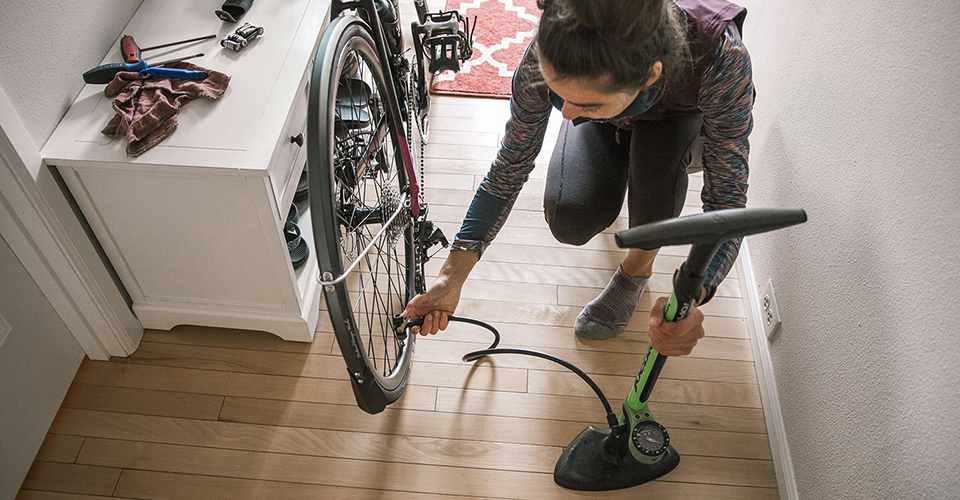
Also, if you have plastic dust cap, make sure to screw that back on as well.
Congratulations, you’re done!
Don’t already have a bike pump? Here are several we love, use, and recommend. It’s also worth noting the bike pumps can break and otherwise die, so if you’re not having any luck, it might be time for a new pump.
If you’ve pumped up your tire and it isn’t holding air, you have a flat that needs to be fixed. This means you either have an inner tube inside the tire that has a hole (most likely scenario), or you have tubeless tires that have a crack or need additional sealant.
If you’re willing to do a little more work, it’s easy to change an inner tube. Go to your local bike shop to get the right size tube or order it online.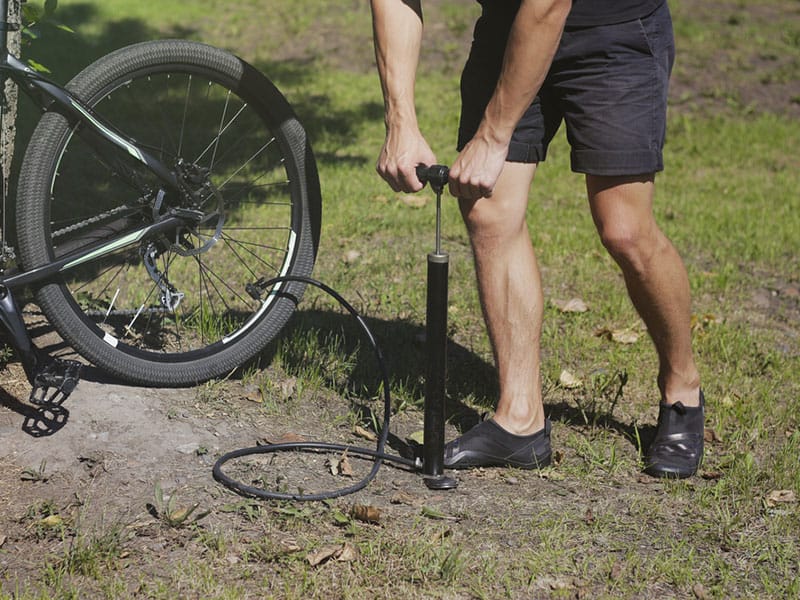
There are lots of YouTube videos out there that can show you how to change a bike tube. That said, it doesn’t cost very much or take much time for a bike shop to do it for you. If you’ve never fixed a flat before, it might be easiest just to take it to a bike mechanic.
Hello! My name is Darina, I am an illustrator and graphic designer, I recently got into cycling around the city and now I am writing about my experience in It’s my!bike.
When I was 10 years old, I rode a bike in the country - it was my only and favorite transport to fly through the fields and get to friends, rush out of a scary abandoned house or quickly drive under the oars of an owl in the dark home. Probably like many.
After that, for 12 whole years I hardly used a bicycle (but secretly dreamed of going to the market and to work with a wicker basket and a skirt) - in the center I was scared to ride next to cars, and on the sidewalks it was unbearably slow. Everything changed when I fell in love, and my friend, now husband, gave me a blue road bike and for the first week accompanied me on all my routes - in the morning to work, in the evening for salsa, on weekends to explore the markets and bike paths, because I was the only one it's so scary to drive next to honking cars! When I got used to it and felt right on the road, just like the driver of the car, I realized that there is no better transport, and now I’m talking about how life changes when you ride a bike (leave for lunch from work in the nearest park, overtake a traffic jam , get Pavlova's posture, improve concentration). In addition, I was so impressed with Copenhagen, which has more bicycles than pigeons, that I would like Russia to be the same. Every day I choose a bike and tell you why.
When I ride my bike, it rarely happens that the wheels are flat and I need to pump them up: every morning I go out with a pump to the yard where my bike lives and check the elasticity of the wheels. I check them ingenuously - I feel the tire around the entire circumference and if somewhere it bends, then it needs to be brought into tone.
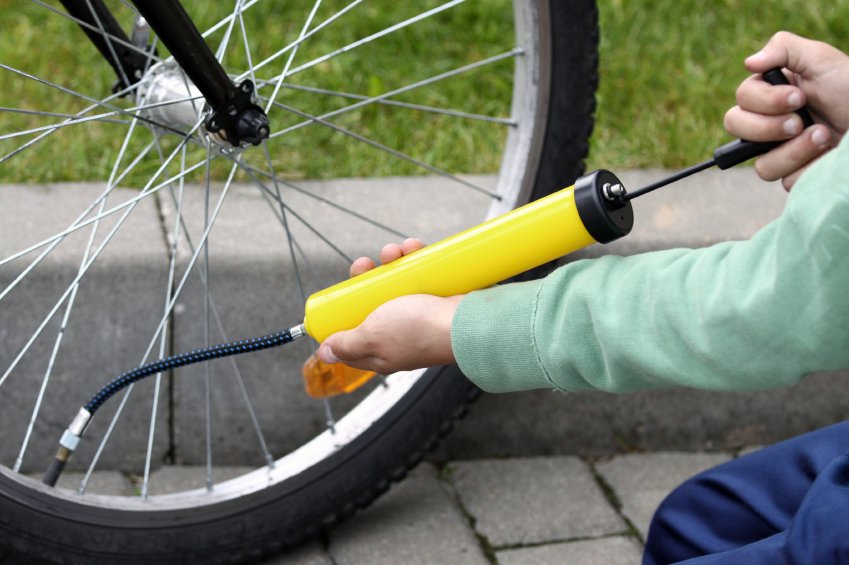
Inflating a wheel with a hand pump is not difficult, and even mischievous - you immediately remember how in the country before you drive away for the whole day you quickly pump up your bike and fly out of the yard on it like a bullet.
I do like this:
I scroll the wheel so that the nipple (the same process on the wheel) is on the side. Almost all modern pumps have two holes - a larger one and a smaller one for two types of nipples, I think you can see which one suits you.
I unscrew the nipple cap, put the pump on it, lower the pump lever down and fill the tire with air (almost morning exercises are obtained, especially if you pump not only with your hands, but with your whole body weight). Now snap the lever back, remove the pump and screw the cap on the nipple. Finally, you can go about your business.
I try to find a balance in this matter - if I don’t pump it up, then it’s hard to drive, and I’m angry that the wheel is almost dragging on the asphalt, I have to put a lot of effort, and the wheel is worn out. If you pump over, then the tire may burst from the glass that comes across or when jumping onto the curb. There is no ideal recipe, as in happiness, with inflating the wheels, but the maximum to which tires can be inflated is written on the side of the wheels. Most pumps have a pressure gauge and it is better to choose a pump with one, because there you will see exactly how much more you need to pump up the wheel for an easy ride.
| | |
| Gauge pumps are available on the It’s my!bike website | |
If you don’t carry a pump with you, like me, and the tire has flattened, then you can always ask a passing cyclist for a pump, after all, the amateur community led one of the friendliest in the world, or go to a car repair shop where you will pump up a flat tire.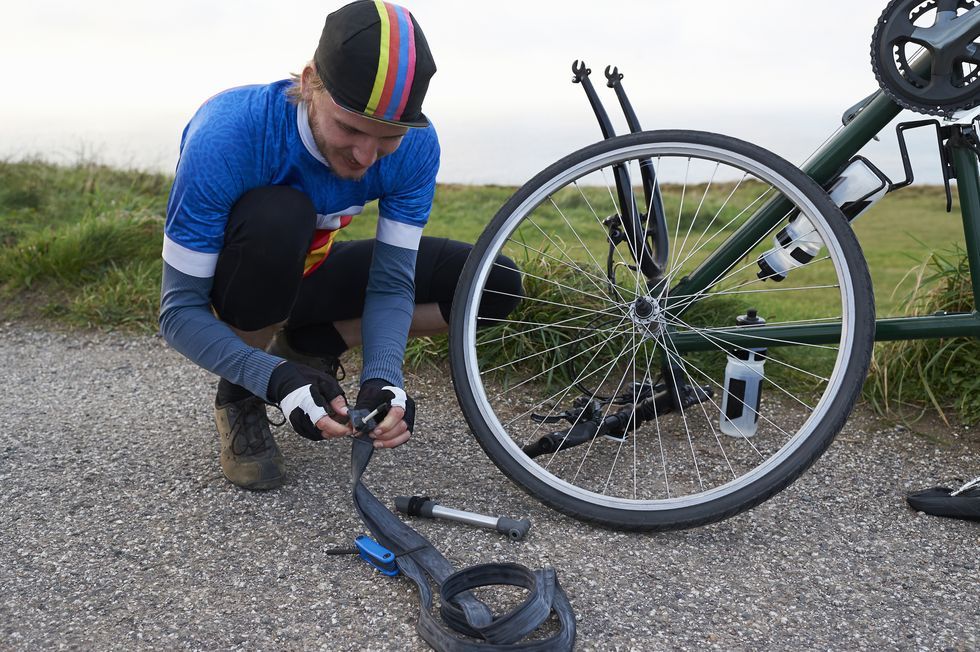 It’s even more interesting to visit a bike workshop/bike shop, for example, it’s my!bike, if you came to Berthold by bike in St. Petersburg or to the swing at Mayakovskaya in Moscow. Easy road and strong wheels!
8 places for bicycle breakfasts in Moscow
9 places for bicycle breakfasts in St. Petersburg
10 best bikes for the city
How to choose a bike frame size
How to choose the size of a bicycle helmet? 9Top
CONTENT OF THE ARTICLE:
 Presta valve
 No special effort is required to properly inflate bicycle tires. The only thing you need is the right tools. Using these techniques, you can easily find your valve type and choose the pump that is exactly right for your bike model, respectively, and learn how to properly inflate your tires.
Related: How to choose a bicycle pump?
1. Schrader valve, sometimes you can see the name American valve or automobile valve. The stem in this type of valve is surrounded by threads, you just need to press down on the stem with your thumbnail or other object such as a pen cap. If we compare Schrader valves with other types, then it is short and wide in diameter. Most often they can be found on cars, inexpensive or mountain bikes. To open this type of valve, you just need to unscrew the rubber plug.
2. Determine the recommended tire pressure for your bike. Often this indicator is located on the sidewall of the tire. Be vigilant and watch the pressure when you inflate your tires. It is recommended not to bring the readings to the lower line, as well as to the highest.
3. Position the pump. If you don't have your own yet, use the pump at the gas station, or borrow one from a friend.
4. Pump up the chamber. To do this, unscrew the rubber cap on the top of the valve and hide somewhere so as not to lose it.
5. To deflate a tire with a Schrader valve, simply press the springy valve stem with your fingernail or other small object until all air is expelled.
1. French valve (Presta) aka Sclaverand is commonly found on high performance road bikes. Compared to a Schrader valve, this one is longer and narrower in diameter, and has an outer stem that is capped instead of being surrounded by a core.
2. Valve opening. Unscrew the dust cap to open the Presta valve. Then you need to loosen the brass cap on the valve stem a little, it will not be able to come out completely, and you will have to lift it up a little. If you want to check if the cap is loose, you just need to press on the valve stem, and if you hear that the air comes out in sharp gusts, then this is a sign that you can stop.
3. Calculate the recommended tire pressure for the bike. This is usually a relief mark that is located on the sidewall of the tire.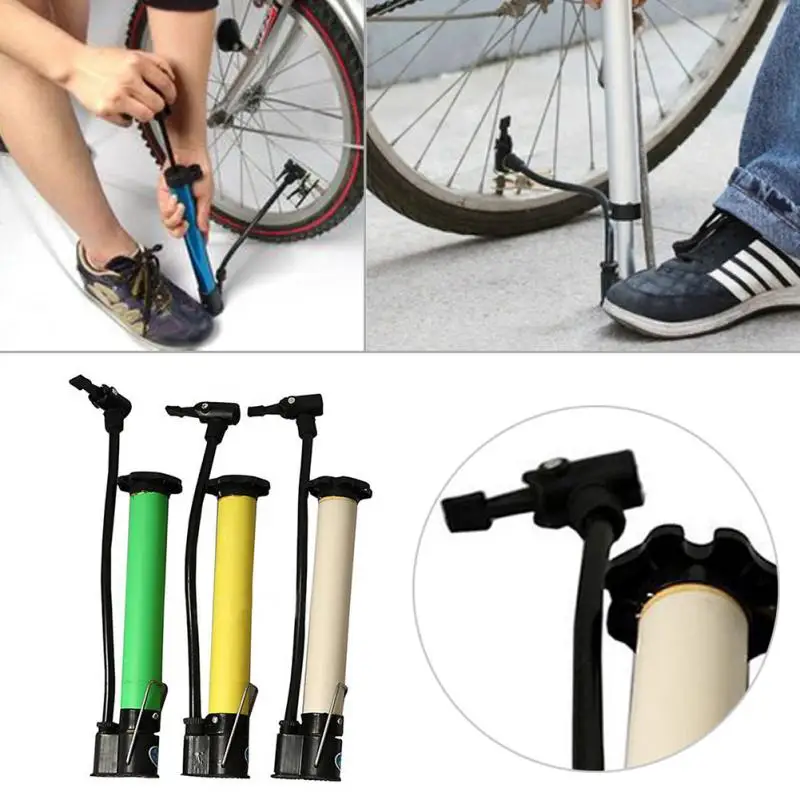 Most often, these readings are written in bars or PSI. Do not let the pressure go to the bottom line, and also to the highest, which exceeds the maximum.
4. Pump installation. You can use the pumps of any gas station stations or take them from friends. And as an option - buy in the store "everything for bicycles".
5. Inflate tires. Open the Presta valve by unscrewing the dust cap and loosening the smaller brass cap.
6. To deflate a tire with a Presta valve, open the brass cap and press the springy valve stem until all air is expelled.