When it comes to checking tire tread, there are a number of methods that can help you know if it’s time to replace a tire. Heavily worn tread will prevent a tire from performing as designed and can lead to unsafe driving conditions. One of the simplest, most common ways to check tread depth requires nothing more than a penny and a few moments of your time.
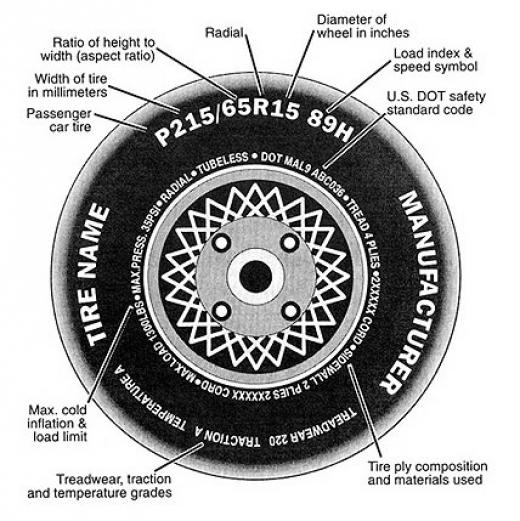
In the United States, tire tread depth is measured in 32nds of an inch. New tires typically come with 10/32” or 11/32” tread depths, and some truck, SUV and winter tires may have deeper tread depths than other models. The U.S. Department of Transportation recommends replacing tires when they reach 2/32”, and many states legally require tires to be replaced at this depth.
The idea of the penny test is to check whether you’ve hit the 2/32” threshold. Here’s how it works:
Place a penny between the tread ribs on your tire. A “rib” refers to the raised portion of tread that spans the circumference of your tire. Tire tread is composed of several ribs.
Turn the penny so that Lincoln’s head points down into the tread.
See if the top of his head disappears between the ribs. If it does, your tread is still above 2/32” , If you can see his entire head, it may be time to replace the tire because your tread is no longer deep enough.
When performing the penny tire test, remember not only to check each tire, but to check various places around each tire. Pay special attention to areas that look the most worn. Even if parts of your tread are deeper than 2/32”, you should still replace the tire when any areas fail the penny test.
Consistent wear around the whole tire is normal, but uneven tread wear could be a sign of improper inflation, wheel misalignment, or a variety of other things. If you see uneven tread wear, you should have a technician inspect your vehicle.
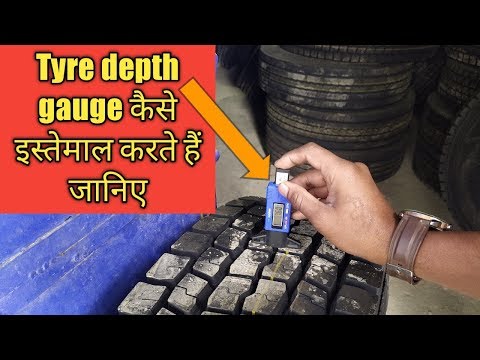
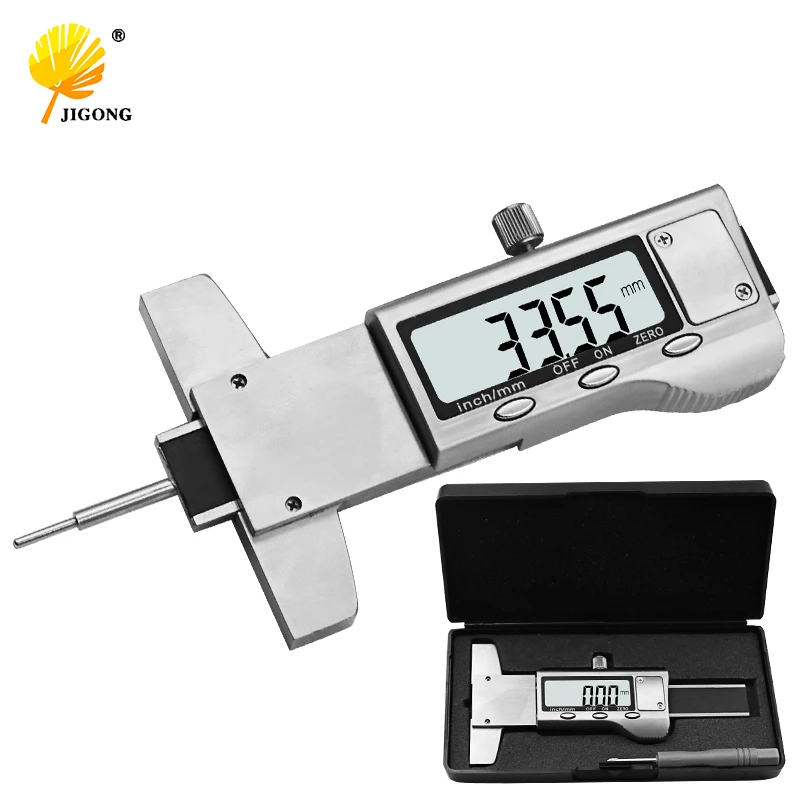
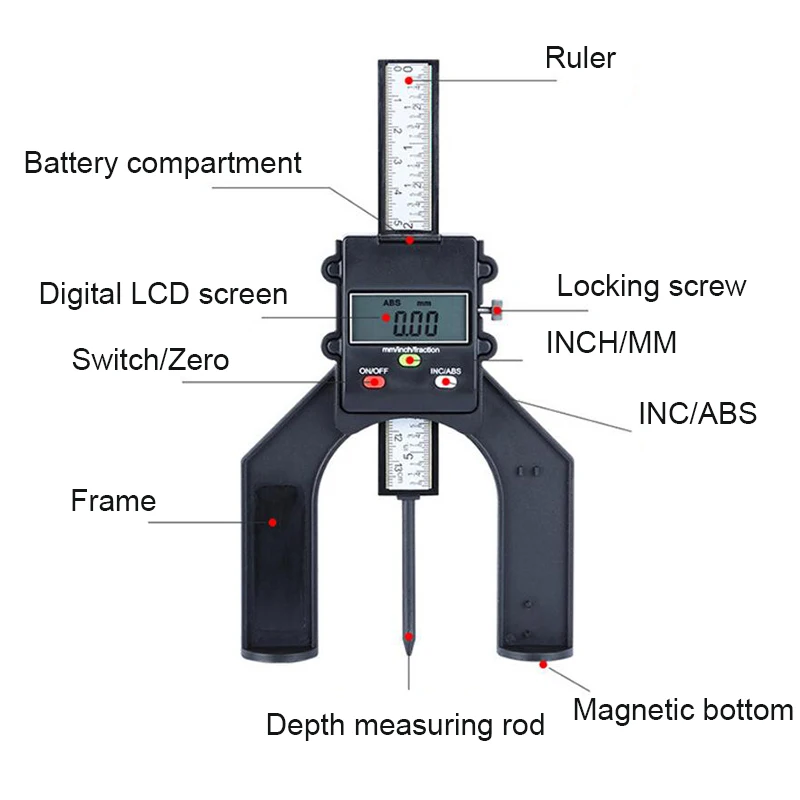
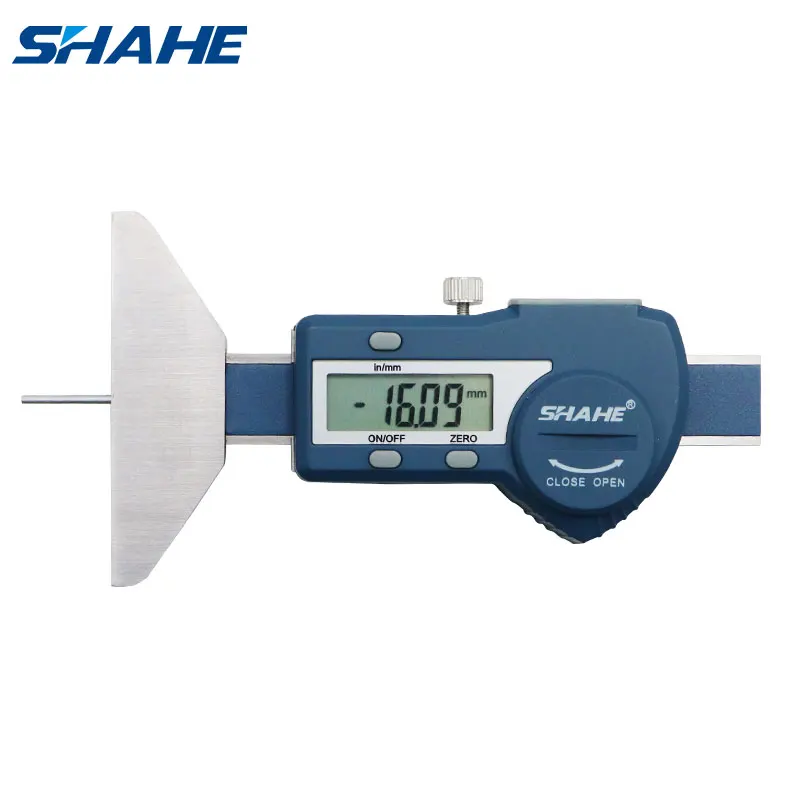
A simple way to check your tire tread depth is by using a tread depth gauge.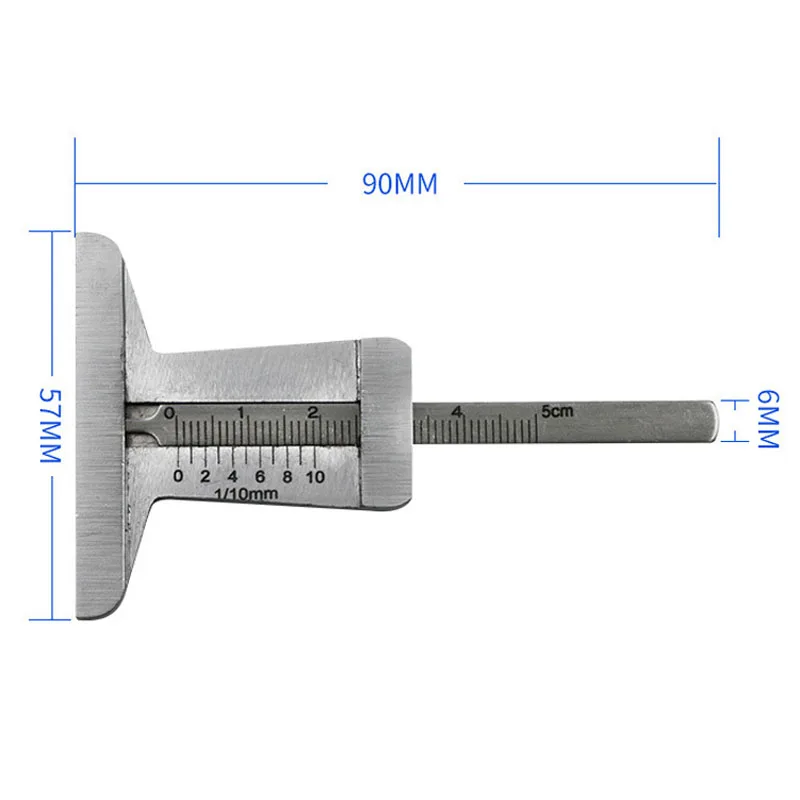 You can find tire tread depth gauges at your local auto parts store. There are many models available, but an inexpensive simple graduated probe gauge will work just fine. All you have to do is stick the probe into a groove in the tread and press the shoulders of the probe flat against the tread block and read the result. All gauges should measure in both 32nds of an inch and millimeters.
Another indicator of worn out tread already lives in your tires themselves. Every performance, light truck, or medium commercial tire comes equipped with indicator bars (or wear bars) embedded between the tread ribs at 2/32”. They’re there to help you monitor tread depth and make decisions about tire replacement. Just look to see if the tread is flush with the indicator bars. If they are, it’s time to replace the tire.
While the penny tire test does deliver on what it promises – indicating whether tread has reached the legal limit – it may not be the best indicator of whether your tires are safe for the road.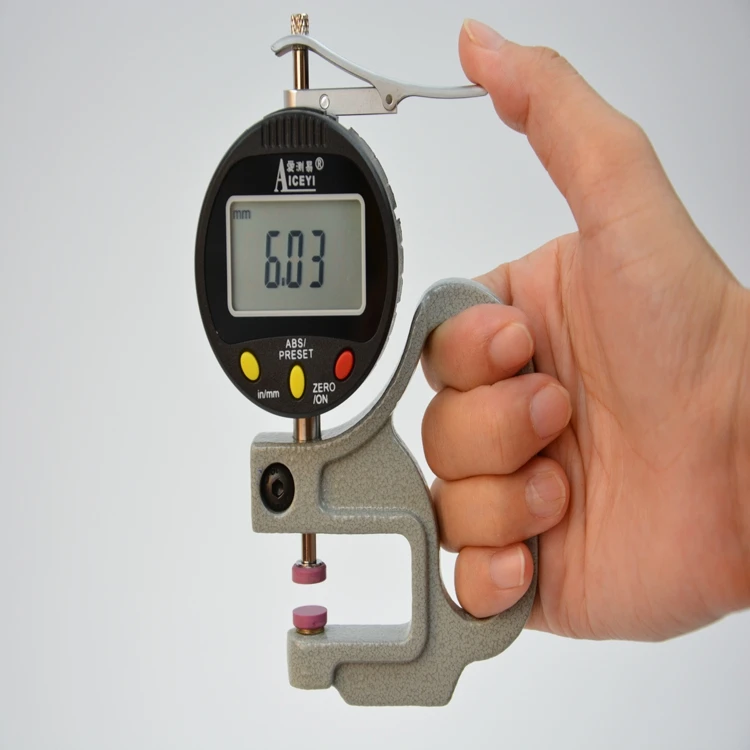 Tire performance can diminish significantly before your tread hits 2/32”. Even though the law deems fit for safe driving may not prevent you from hydroplaning or losing control in rainy, slushy conditions. If you think your tires may be close to needing replacement, have them checked out by a licensed mechanic.
Written by Steven Schiller
Fact checked by Henry Speciale
A tire tread is composed of ribs or grooves throughout the circumference of the tire. This raised portion of the tread expels water making the vehicle safe to drive under difficult weather conditions such as rain and snow.
However, when the tire tread wears down, it loses traction on the road and forces the braking and steering system to work harder especially on wet conditions. It becomes unsafe to drive when the tire tread depth reaches 2/32 inches.
But, how to check tire tread depth? Tire tread depth can be measured using a penny, a quarter, a tire tread wear indicator, or a tire tread depth gauge.
Table of Contents
In the US, you can measure tread depth on a tire using a penny.
Insert the penny to the tire groove with Abraham Lincoln’s head going in first.
Some recommend replacing tires as early as this tire tread depth measurement because of diminished vehicle performance. The tires may not survive harsh driving conditions.
Another way to check the tread on your tires is using a quarter test.
In this test tread on tires, the tire’s tread depth is measured using George Washington’s head.
 This calls for immediate tire replacement.
Conducting a penny test or checking tire tread with a gauge can reassure you that you measure tire tread correctly.
You can also check wear on tires without any tools because tires have a built-in tire tread indicator or wear gauge.
They can be seen as six bars throughout the tread ribs. The bar becomes visible as it reaches the minimum legal tread depth of 2/32 inches or 1.6 millimeters.
Some tires were designed with different grades of bar, such as 8/32, 6/32, 4/32, and 2/32. So check all the tread grooves to make sure it follows the tire wear indicator chart.
The tire tread depth of brand new tires of pickup trucks or large vehicles is around 15/32 to 20/32 inches.
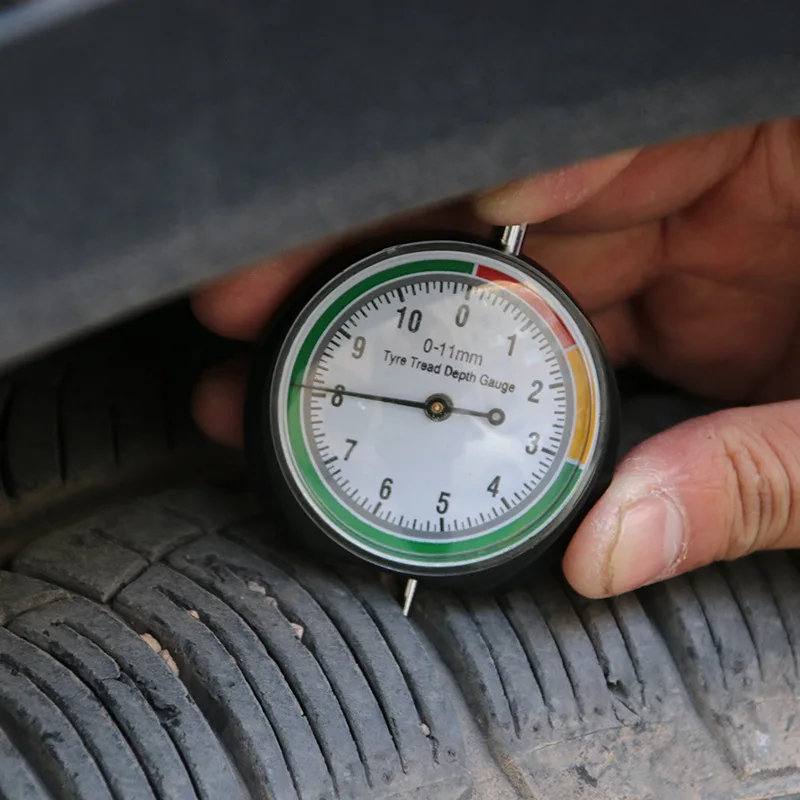
If you would like to get a precise tire tread depth measurement, use tire tread depth gauge.
Of course, this tool cannot measure a bald or totally worn-out tread.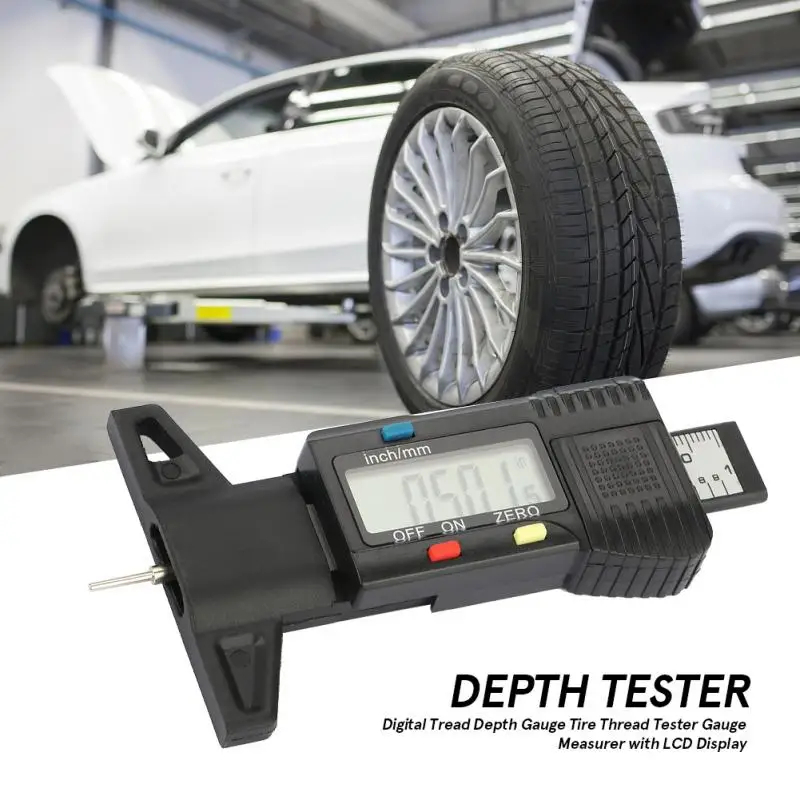
Look for the lowest tread depth. Insert the gauge pin into the groove, then press it towards the tread. This tool provides exact readings in inches and millimeters. They can be purchased in automotive shops for around $4.
What to prepare: Penny, Quarter, Tire Tread Indicator or Tread Depth Gauge
If a part of Lincoln’s head disappears in the groove, the tread is still above 2/32 inches.
If the tread covers Washington’s head, the tires are safe to use at 4/32 inches deep.
In general, tire tread depth should be checked every 3,000 miles or 5,000 km. It is also recommended to check the tread on tires seasonally or during changing of winter or summer tires.
Keeping a close check on your tire’s health is possible if you know how to check tire tread depth.
You can measure the tire tread depth with or without a gauge. The coin tests are helpful in providing an estimate of tire tread depth. However, if you would like to prevent vehicle accidents, the best way to check tread on tires is by using tire tread depth gauge.
The standard minimum tire tread depth is 2/32 inches but it is safer to plan tire replacement as soon as they approach 4/32 inches deep.
If you would like to know more about hydroplaning, feel free to share your thoughts.
Categories FAQsI'm Henry, the content writer for PPMC Transport. We build our site entirely on experience and extensive market and customer research. My goal is to create a trusted platform where people can go to determine what is best for their vehicles in terms of safety and convenience. Keep an eye out for our useful guide!
- Speciale Henry
Making wine, beer and other alcohol at home is an exciting but difficult task. As a result, it is possible to obtain a high-quality product with a natural composition, in which all the ingredients used are known. In the manufacture of alcohol, it is desirable to use special devices that will help control the fermentation process and the strength of the drink, the sugar content. We are talking about sugar meter, wine meter and alcohol meter. Consider how to use a hydrometer for wine, alcohol, moonshine, beer and other alcoholic beverages.
Alcoholometer - a device for determining the content of pure ethyl alcohol in the control liquid. With the help of a saccharometer, the sugar content of the wort is determined.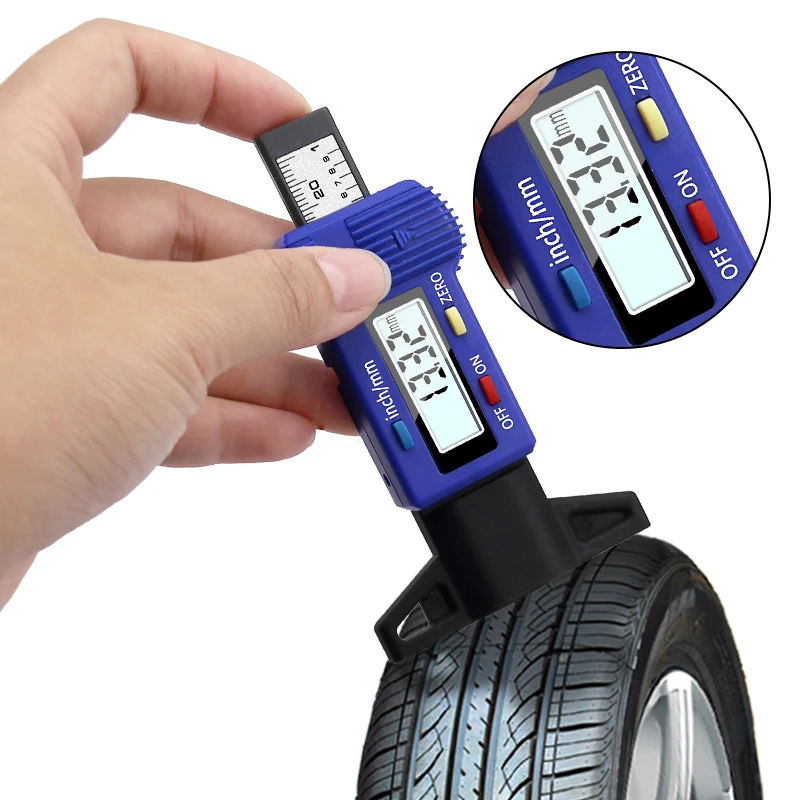 The amount of sugar directly affects the final strength of the drink. A vinometer is used to determine the amount of alcohol in a drink. Another device is a hydrometer, it allows you to measure both the amount of ethyl alcohol and the sugar content in beer and wine, control is carried out using two scales.
Household saccharometers and wine meters have a simplified design, they allow measurements during fermentation in the range from 0 to 25%. The disadvantage of a household appliance is a smaller scale of divisions and the presence of errors in measuring sugar. The device is optimally suited for use in everyday life, since the existing measurement error does not affect the final result in any way.
If you are making beer at home, it is advisable to buy a laboratory saccharometer and wine meter, as any inaccuracies in sugar content and errors will affect the result.
If you are just starting out with alcohol, you may find it difficult to use the saccharometer and wine meter. Beginning winemakers do not understand how a saccharometer and wine meter work, what it is for, what functions it performs, and as a result, they prefer to do it on their own, taking all measurements by eye during the production of alcohol. Sometimes this approach works, but sometimes due to a violation of the technology in adding sugar, the required alcoholic drink is not obtained. At best, the drink will not meet the required quality, it will wait for improvement.
To exclude such a development of events, it is necessary to determine the functionality of the saccharometer and wine meter - the first device shows the density of sugar contained in wine, beer, alcohol and other alcoholic beverages, the second serves to determine the percentage of alcohol in the drink.
Saccharometer and wine meter have a simple operation. They work under the influence of the elementary laws of physics, in particular the law of Archimedes. Depending on the density of sugar in a particular drink, the device will dive to a certain depth. If we compare the data on the sugar content obtained on the scale with special tables, it is possible to obtain the required data on the produced alcohol.
If you want to get the most accurate data, it is better to choose saccharometers. Vinometers belong to the category of universal devices, as a result they show data with some error.
Two types of hydrometers are used in domestic production of alcohol:
 Since measurements are taken immediately under two parameters, two scales are applied on the wine meter at once from different sides. How to measure with a culprit - follow the scale readings, comparison with tabular data is not required. The disadvantage of a wine meter is that, due to its versatility, measurements are obtained with a large error. To work with beer, it is better to use AC-3, since accuracy affects the quality of the drink. Alcohol is measured on a scale of 0 to 12%, sugar content on a scale of 0 to 25%. The percentage of error depends on the type of measurements being made.
 When making homemade mash, wine or beer, it is very difficult to do without a saccharometer, vinometer or hydrometer. With the help of devices, it is possible to measure the density of dry sugar-containing substances in a particular drink. You can measure the content of sugar, starch, malt, honey and other substances. The data obtained will help to make changes to the drink, add sugar and other ingredients in order to obtain alcohol of the desired strength with certain taste characteristics.
It is important to measure the density of sugar-containing solids in a drink with a saccharometer or wine meter at all stages of the fermentation of the drink. The initial wort should contain a large amount of sugar, the more it is, the stronger the alcohol will be in the end. By changing the parameters of the amount of sugar and the density of the initial wort, it is possible to regulate the strength of the final alcoholic beverage.
The initial density and sugar content of the mash is directly dependent on the type of yeast that will be added to the solution to start fermentation. Most often, baker's yeast is used in the home production of alcohol; for them, the optimal density indicator is in the range from 18 to 22%. For special alcohol yeast, the indicator is at the level of 20 to 30%.
The indicated indicators are relevant for mash. For other drinks, the following data is relevant:
 In the initial composition of the wort, the density of solids should not exceed 12%, this indicator will allow you to get a beer with a mild taste with a strength of not more than 4.5% of revolutions;
 With the help of a saccharometer and vinometer, you can determine the end of the fermentation process of the drink. If the indicator is at a level of 2 to 2.5%, the fermentation process is over, the drink is ready. It is advisable to repeat the measurements in another day, if the indicators remain the same - you have alcohol ready to drink in front of you.
If, after measuring the wort with a saccharometer, you get a gravity value of 2.5%, and the data remains unchanged for several days, this may indicate that there is still sugar in the drink, but not enough to continue fermentation.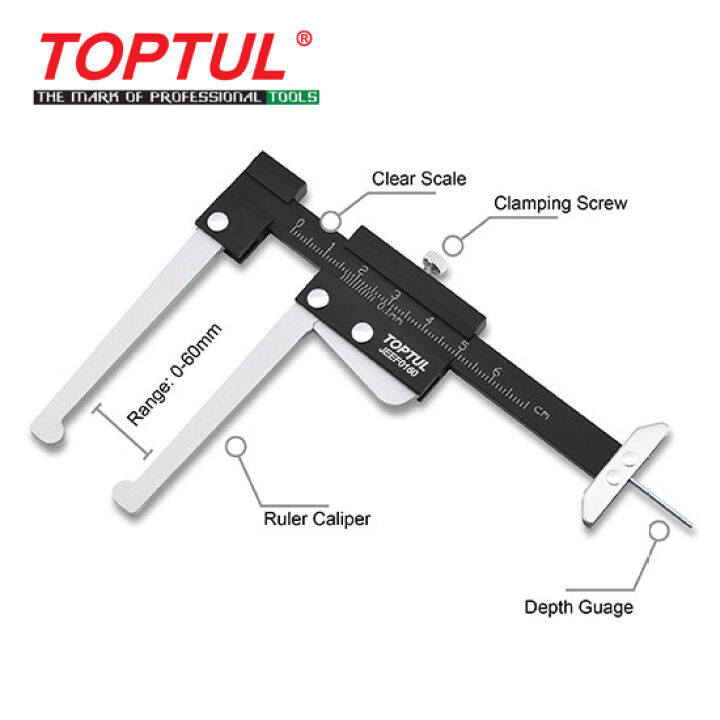 Further actions - distillation of mash into alcohol, bottling of beer and carbonization, clarification of wine, etc.
There are a few rules for using a gravity hydrometer:
If the initial gravity is insufficient to obtain the desired alcohol strength after fermentation, certain ingredients are added:
If the density is too high and it is necessary to reduce the degree of finished alcohol, the mixture is diluted with water to the desired reading.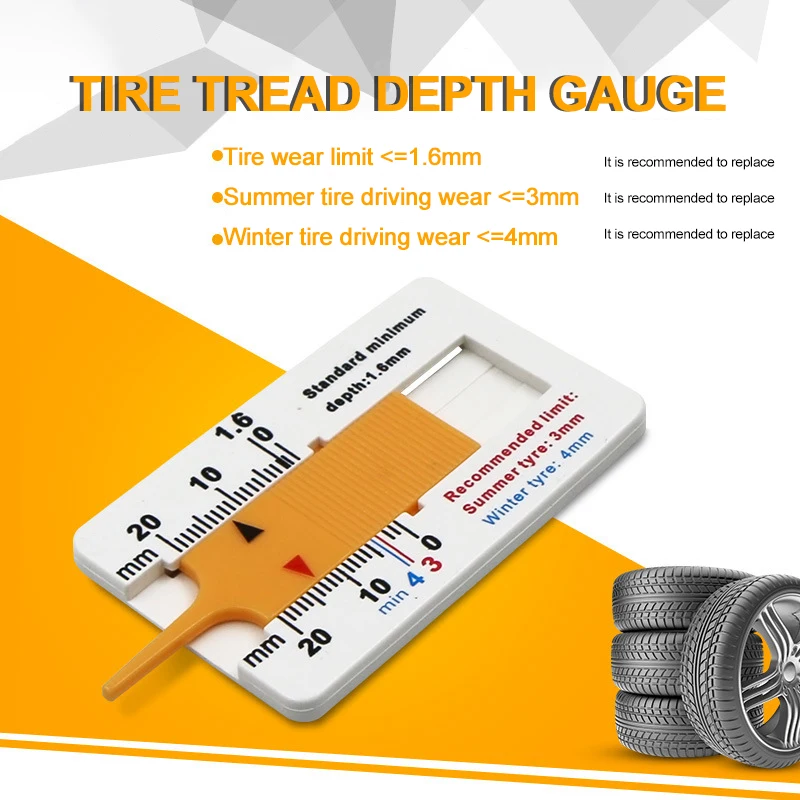 Water is added in small quantities.
The strength by saccharometer is determined after comparing the obtained measurements with tabular data. To obtain readings of the strength during fermentation, it is worth measuring the initial and final density of an alcoholic beverage; in the calculations, the final ones are subtracted from the initial data.
When using a domestic hydrometer, saccharometer or vinometer, a certain sequence of operations is followed. How to use; vinometer:
 The instrument must be clean and dry when working with wort.
 To check how accurately the device measures during fermentation and after it, whether there is an error in it, you need to immerse it in pure alcohol at a temperature of +20 degrees Celsius.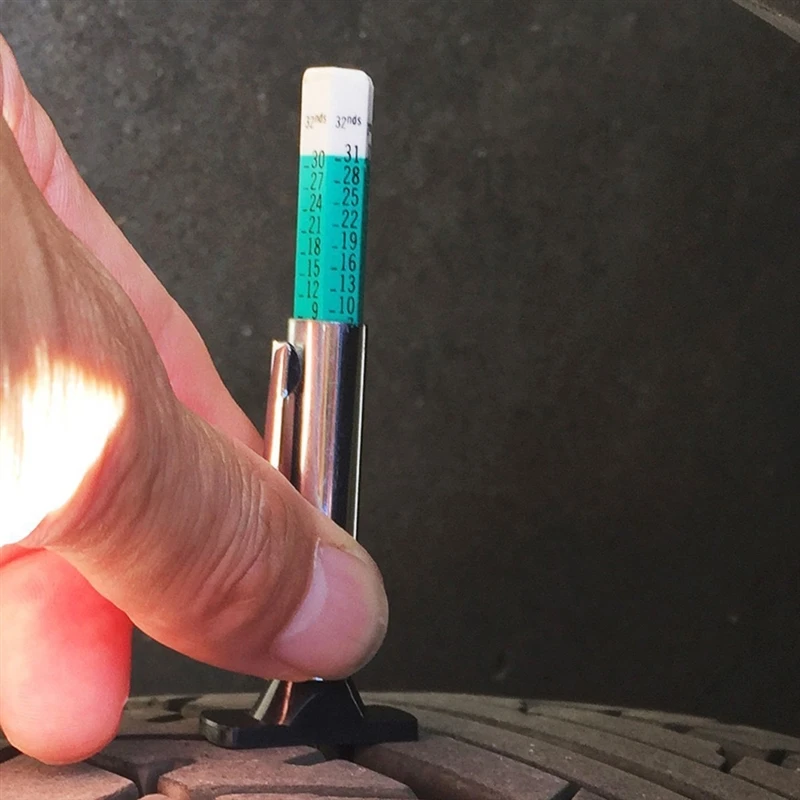 A device that works correctly, after stabilizing on the surface, will show zero readings, since there is no sugar in pure alcohol. Deviations from the zero level indicate the need for calibration.
Contents alcoholic beverages or to make some precision. That is when it occurs question how to use household wine meter and sugar meter. Now you can easily buy it in specialized store, order via the Internet, but not always to the hydrometer comes with detailed instructions. Often, a plate with the recommended density is simply inserted. various alcoholic compounds. But with what to compare them? Need to measure!
Household vinometer and sugar meter The alcohol meter measures the amount of ethyl alcohol in a liquid, the sugar meter determines how much sugar is in it. It is from this indicator that the final strength of the drink depends. The vinomer also determines the amount of ethyl alcohol. Often it is combined with a sugar meter in one hydrometer. Its distinguishing feature is two scales.
Domestic vinometer and sugar meter measures the mass fraction of sugar with range from 0 to 25%. Unlike laboratory hydrometers, it has a smaller division scale and precision. This makes it difficult to determine the real indicators, gives some error. For home winemaking and home brewing, where absolute precision is not needed, this device is excellent. But in the manufacture of beer such errors are reflected in the result, so it is better to purchase a laboratory wide scale hydrometer.
For the transparency of the picture, the wort is usually measured at the very beginning of fermentation and at the end, the strength of the finished drink is calculated from the indicators.
The vinometer is usually lowered into a flask. She is good because requires a lot of liquid.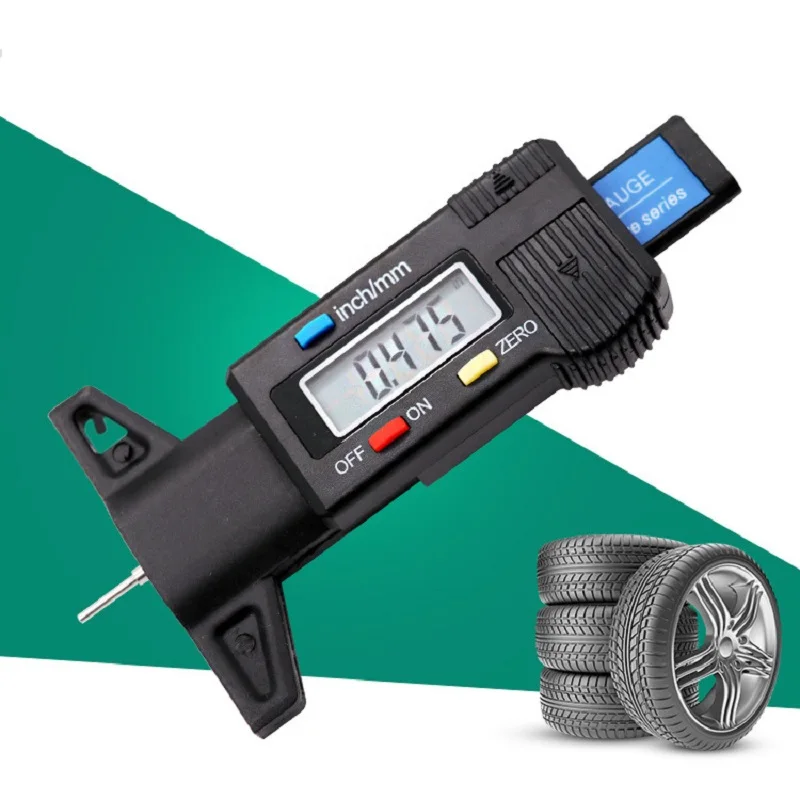 The downside is that the hydrometer can touch walls, it distorts the readings. Therefore, it is necessary to use a wide enough a flask or take an alternative dish - a narrow and tall glass, a stack, a jar.
How use a sugar vinometer:
How use a wine meter-sugar meter for mash? In exactly the same way. The only point is that the density of sugar in the finished mash should not exceed 2%. The more it is initially, the higher the concentration of ethyl alcohol will be at the end.