How to Install a Tire Inner Tube Properly
Because you don’t want your tire inner tube to split and fail before its time, it is important to complete your inner tube installation in the proper manner, without any wrinkling, twisting or pinching. Whether you’re installing tractor inner tubes, ATV tire inner tubes, industrial tubes, trailer tire tubes or inner tubes for farm implements, light trucks, trucks and buses, OTR or low tractor trailers, the process is essentially the same.
First, Consider These Quick Hits about Inner Tubes
*Inner Tube Sizing: To find the size inner tube you want, check the size information on the sidewall of the tire. Tubes, because they’re made of rubber with a range of stretch, will generally fit several tire sizes that have the same, or near the same, space for an inner tube.
*Radial Tubes vs. Bias Tubes: Because bias tires and radial tires are manufactured differently, you cannot use a bias inner tube in a radial tire without risking heat build-up and blow-out. Radial tubes, which are made from a rubber compound that has more flex, can be safely installed in both radial tires and bias tires.
*The New Tube Is Smaller than the Old Tube because the old tube has been stretched and relaxed and has taken on the tire’s shape. New tubes start out smaller than the tire.
*Tools You Will Need to Remove and Install an Inner Tube: It’s always helpful to have all the tools you’ll be using at hand before you start your inner tube removal and installation. You’ll need pliers, a tire iron or other pry tool, a rubber mallet, a valve core removal tool and an air pump.
Step by Step Inner Tube Removal and Installation
Getting the Old Inner Tube Out of the Tire
Before Installing the New Inner Tube
Installing the New Inner Tube
Unlike cheap tire tubes that can blow out and fail quickly, RubberMaster Inner Tubes and Flaps are made from premium rubber and are factory-tested for top air tightness, aging resistance and high temperature resistance for longer service life.
How to Mount ATV Tires
Mounting ATV Tires at Home
If you’ve been thinking about changing ATV tires or UTV tires at home, know that while it can be tricky the first few times because these tires tend to have stronger beads than on-road tires, it’s a pretty straight-forward process as long as you have the proper tools, and follow this step-by-step tutorial from the tire experts at Treadworld.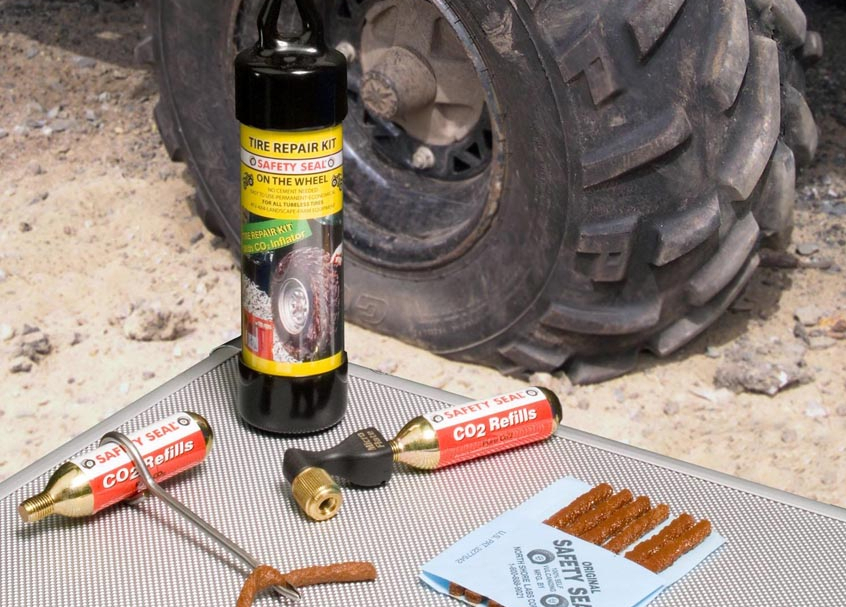 Also keep in mind that air under pressure is potentially dangerous so take any necessary precautions. Balancing your ATV tires can be difficult and is likely not necessary unless you’re racing or engaging in high-speed ATV and UTV activities.
The Tools You Will Need to Change ATV Tires
Remove the wheel from the ATV
When mounting ATV tires at home, it’s best to start with your ATV on a hard floor like a garage. Loosen the lug nuts a little to make them easier to get off, then jack up your four-wheeler so you can remove the wheel. Consider getting the bolts off using a hand tool rather than an impact wrench, which can on occasion be powerful enough to snap a bolt.
Deflate the ATV tire
Remove the cap from the valve stem and release all the air in the tire using either a valve stem core removal tool which will remove the stem and is the quickest method, or a tire pressure gauge that has a notch on the side used to push in on the valve stem or a screwdriver, which will take longer.
Break the bead on both sides of the ATV tire
This is likely the toughest part of changing an ATV or UTV tire because the bead is set to the rim a lot more firmly with off-road tires, than with on-road tires. That’s because off-road tires are asked to do things on-road tires don’t, like ride steep slopes, travel rocky terrain and land jumps. First, here are a few details. The bead retainer is a small ridge that goes all the way around on both edges of the wheel rim. It is intended to keep the tire in place so that aggressive riding won’t result in it sliding and losing the air seal. The tire bead is on the edge of each tire. Essentially, it’s a strong steel reinforced loop around both edges of the tire. Many times, a bead sealer is used on the bead to further keep it from popping off. In a nutshell, with this step, you’re getting the bead off the rim so you can remove the tire.
3 options for breaking the bead on ATV tires at home
There are essentially three ways to break the bead on an ATV tire. Likely the easiest method is with a BeadBuster, a tool designed for the job that clamps onto the rim and forces a wedge between the rim and the tire. BeadBusters are quick, simple and offer less chance for damaging the tire than other methods. A quick look shows they currently sell for around $100 at online shops. A cheaper alternative is using another of the several available portable tire-changing tools, generally available at any hardware store or auto supply shop. Most models need to be bolted to the floor, or some other heavy object. If you go with this alternative, you’ll want to leave 3-5 PSI air in the tire to facilitate success. Finally, there is the DIY method, which involves your inventiveness. Start by putting soapy water on the bead to help it slide. Devise the best way to get the tire in position so you’ll be able to force the tire to break free of the bead. You may want to use a 2×4 set as close to the rim as possible to push the tire edge away from the bead. Then flip the tire and do the other side.
 Again, it may help to have 3-5 PSI of air left in the tire with this method.
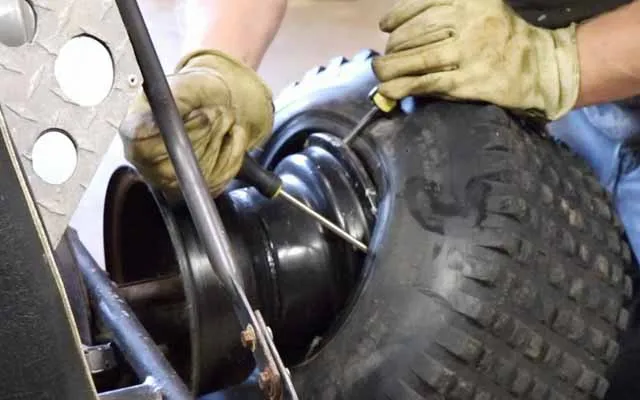
Peeling the ATV tire off the rim
You’ll want to use tire spoons or large screwdrivers for this step. Place one of the irons between the tire and the rim, and lift a section of the tire over the rim. Using one tool, hold that section away from the rim, and use the other tool to edge the rest of the tire over the side of the rim. Continue with this process until the full tire is from the rim, then remove the tire from the wheel rim completely.
Clean the lip rim on both sides and consider a sealer
The better you clean the lip rim on both sides, the better your new tire will fit. Wash off any dirt and debris. Use a stiff brush if necessary. Remove any rust. To get a good airtight seal, you need the surface to be smooth. If your rim shows any signs of pitting, nicks or other damage, you’ll likely want to apply a bead sealer, which is a rubber product designed to aid in bead seating.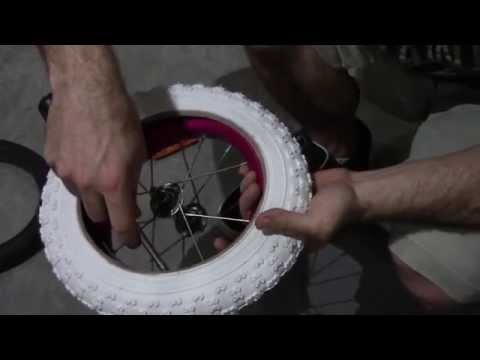 You may want to skip the bead sealer if you don’t need it in order to make changing the tire in the future easier.
Clean and lube the tire bead on the new ATV or UTV tire
So that the rubber will slide easier, put commercial tire lube or some soapy water on the bead retainer on both sides of the wheel rim. You can also use a light coating of baby powder, but stay away from WD40 as it can deteriorate rubber.
Check to see if your ATV tire is directional
Tires can be directional or multi-directional. Directional ATV tires should be mounted in a certain way for best traction and optimal performance and safety, while multi-directional tires work in either direction. Some types of four wheeler tires are directional depending on usage, like ATV mud tires for example. Look on the tire sidewall for an arrow, which indicates the tire is directional and should be mounted with the arrow facing the direction of the forward rotation. Another way to tell is by looking at the tread.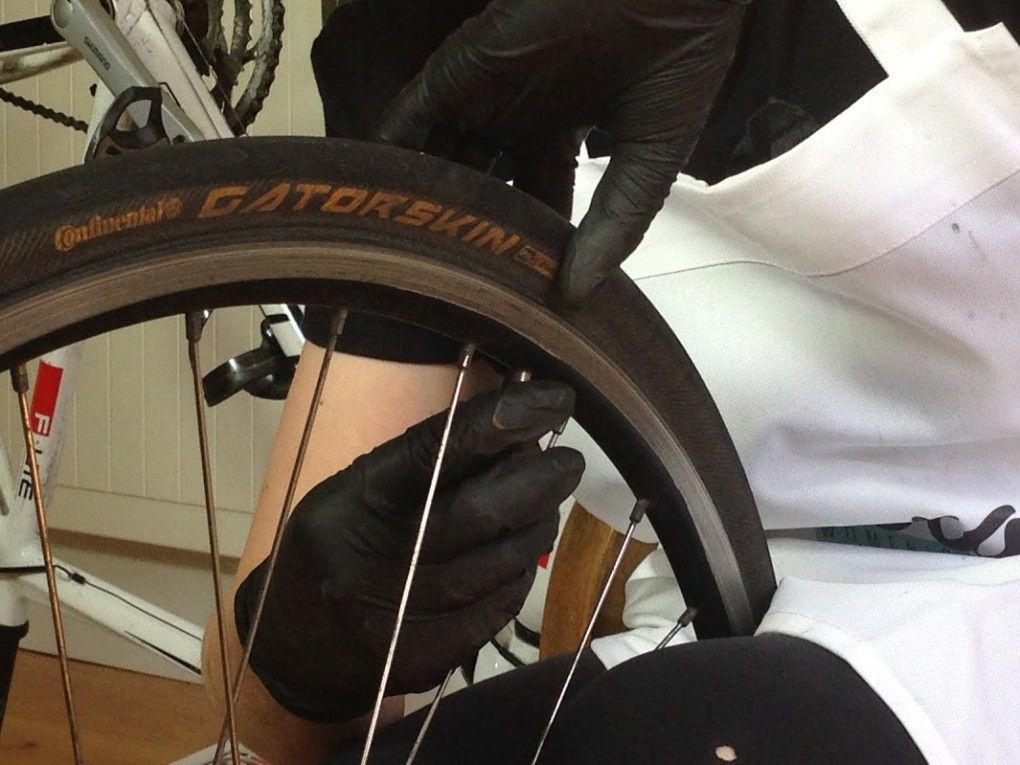 A tire with an aggressive V-tread is likely a directional tire and should be mounted so the tip of the V hits the ground first. Directional tires can be mounted on either side.
Pop the new tire on the rim and get it seated correctly
The next step is to get the tire seated and the bead lined up correctly. Start by putting soapy water or lube onto the wheel rim. With stiffer walled tires, place the tire on the garage floor then push the wheel into position. With tires that have a less-stiff wall, placing the wheel on the floor and positioning the tire may be easier. Push straight down with both hands to slip the bead of the tire over the lip of the wheel. To get the second bead pried over the lip of the wheel, you’ll need to use your tire spoons, working your way around the tire until you have the entire bead pried over the wheel. To hold air, the tire needs to be firmly seated on the bead. At this point, be sure the tire is lubed up and begin using your higher-powered air compressor to put air in the tire.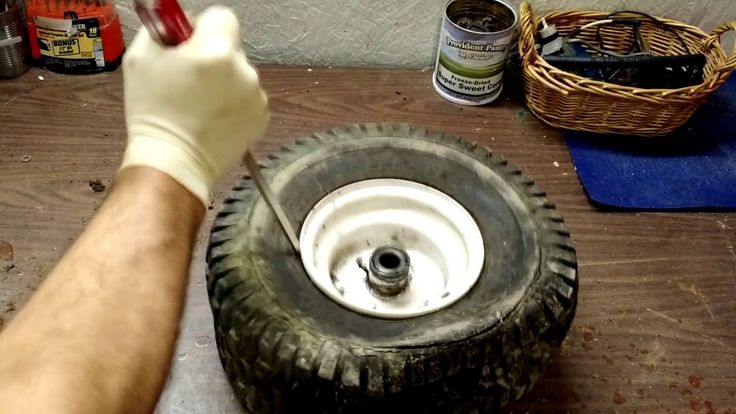 Don’t over inflate. The maximum inflation pressure should be stamped on the sidewall of the tire. The expectation is that as the tire inflates, both beads will seat themselves, as indicated by a loud “pop”, which should happen at a fairly low air pressure, 7-8 PSI. Once that occurs, let the air out of the tire. The beads will remain seated.
You may have difficulty getting the air into the tire fast enough to get the beads seated. That’s due to the gap that still exists between tire and rim. A good way to solve that issue is to tighten a ratchet strap around the middle of the tire, pushing the tire walls out towards the lip of the wheel on each side. Stop tightening as soon as the tire touches the tip of the rim. Then the tire should hold air because the gap has been closed.
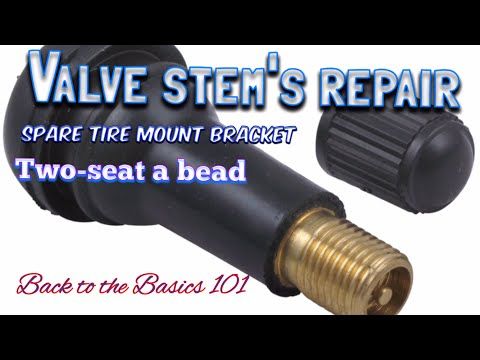
Reinstall the valve stem and inflate the tire
Use your valve stem tool to reinstall the valve stem, then inflate the tire before capping the valve stem to keep it free of debris. Now you’re ready to reinstall the tire on your ATV, having solved the problem of how to mount ATV tires at home.
Find Master ATV Tires here. Big selection, fast shipping and guaranteed quality.
Here at Treadworld, we have the ATV tires you need for wherever your adventures take you. Our wide selection of Master ATV Tires and Master UTV Tires are the high performance tires you want, made from top quality rubber compounds, triple-tested for quality before being X-rayed to be sure they’re perfect, and covered by our Ultimate Advantage Warranty. Don’t hesitate to contact our tire experts via live chat or email with any questions you may have, and to get the ideal Master ATV tires for you.
June 9, 2017
A puncture of a wheel (more precisely, its chamber) always happens suddenly. If trouble has overtaken you near the house or any other housing, it is not so difficult to find tools and seal the puncture site. If there is a bike service or shop nearby, they will always tell you how to change the camera on the rear or front wheel of the bike, and for a fee, they will do everything themselves. But if the puncture occurred in nature, far from any benefits of civilization, you will have to rely only on your own strength and the available repair kit.
When traveling far from civilization, your own repair kit is the only thing that will help with a puncture. You need to select it carefully.
 In this case, you need to focus on what fasteners are used in each individual case. For example, hex nuts are often used, for which a hex wrench is needed.
And then an unpleasant moment came - the bicycle wheel was punctured. You should start with a visual inspection of the tire. In some cases, if the hole is very large, it helps to immediately determine the puncture site. For convenience, this place can be immediately marked with a pen, marker, piece of charcoal, chalk, or in any other suitable way. Even if the intended location of the hole is found, it is still recommended to fully check the entire wheel, clearing it of debris. It may well be that there are several punctures.
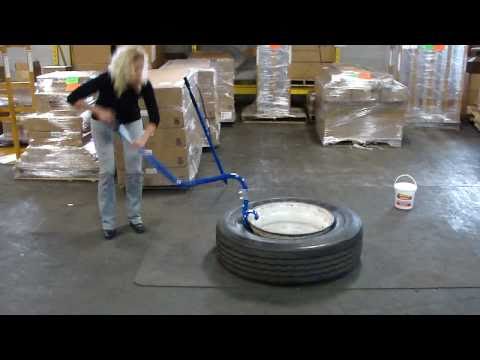
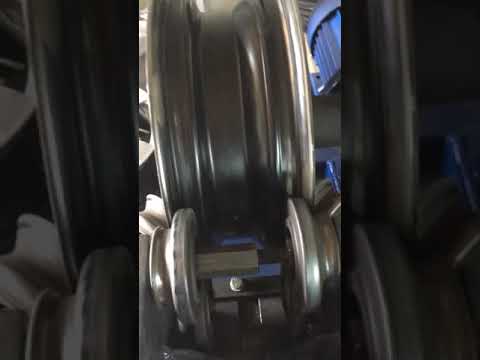
After inspection, remove the wheel (using the appropriate wrench from the repair kit). Now you need to remove the tire from the rim and get the camera out of it. It will be difficult to do this without the side rails included in the repair kit described above. It is necessary to insert the beads between the tire and the rim and pull them, gradually removing the tire. Removing the inner tube is usually easy, but if the tire is too stiff, it may be necessary to re-use the beads in the same way, only now they will need to be inserted not between the rim and the tire, but between the tire and the inner tube. If at the previous step the alleged puncture site has already been found and marked, it is recommended to additionally mark the same area on the camera. More clearly, how to remove or change a tire with a camera on a bicycle, is shown in this video:
When the camera is removed, you need to find the puncture site on it.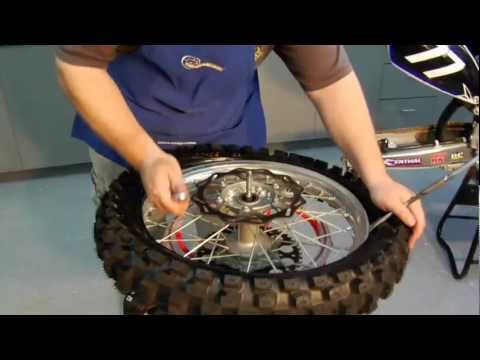 If it is already checked, it will be easier to search, but you still need to check the camera completely. To do this, you need to pump it up and by ear determine where the air comes from. If the hole is large enough, then this is not difficult to do, but if it is very small, you will have to act differently. You will need a container of water. It is most convenient to use a basin, but it is difficult to find it in the field. In this case, any body of water is suitable: a river, a lake, a reservoir, etc. You need to place an inflated chamber in the water and check where the air bubbles come from. This is the puncture site. It is important to remember that for repairs, you must first allow the camera to dry. But that's not all. While the chamber dries, it is recommended to carefully check the inner surface of the tire. There may be glass particles, thorns, and other similar elements that made a hole in the chamber and can make a new one. They need to be removed.
Once the hole is found, there is no other option but to patch or change the bike tube. With the replacement, everything is simple: we take out the broken camera, change it to a new one and install it back. But with a patch, the situation is more complicated. First of all, it is necessary to carefully process the puncture site and everything around it with sandpaper. A rough surface will allow you to better fix the patch. Now dripping glue. One drop is enough, which should be rubbed with a thin layer around the hole in a radius of about 2 cm. Then the glue should be allowed to dry a little and repeat the same procedure several times until the glossy glue layer becomes matte. Only now you can glue the patch. If they are available in different sizes and it is not clear what the actual size of the puncture is, it is better to take a larger patch. After the glue has dried, it is recommended to pump up the chamber to check if there are any other holes and if the patch is not letting air through. If everything is fine, you can install the camera in the tire and put the latter on the wheel rim.
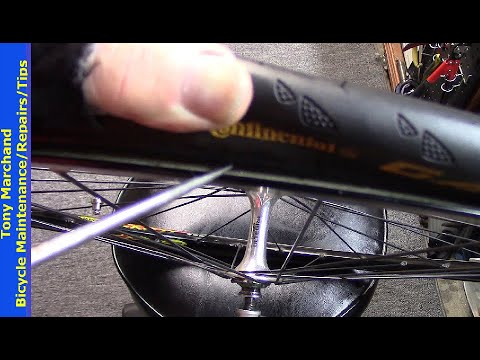
To make repairing a bicycle tube puncture more comfortable, consider a few tricks.
Tire repair not possible. They can only be replaced with new ones. On the other hand, they rarely break through enough to require replacement. Usually tires are changed as they wear out, when the tread is completely worn out. Less often, replacement is required in cases where tires are badly damaged due to punctures, impacts, exposure to chemicals and other factors. But the camera can be changed less often.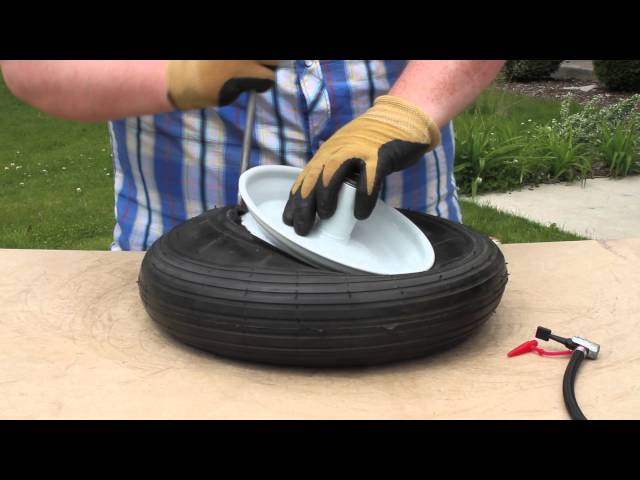 She is able to survive a very large number of punctures, but after another hole, when there is no living space on her, it is still better to replace her. You will also have to change the camera if the nipple is damaged, in which case repair is also impossible.
To summarize: when traveling, especially over long distances, you should always have a complete repair kit with you and remember the tricks that we have described in this article.
Default Name (A - Z) Product (A - Z) Product Code (Z - A) 24255075100
0
0
0
0
ATV wheel disc 7" (16X8. 00-7)
00-7)
in stock
Disc for all types of electric and petrol ATVs and 3 bolts Diameter in inches - 7 Overall diameter in mm - 202 mm Hub hole diameter - 55 mm Bolt spacing - 80 mm Mounting hole diameter - 8 mm Disc width in mm - 127 m.
1 058 UAH
0
ATV wheel disc 8" 3 bolts 18x9.50-8
in stock
Disc diameter - 8 inches Total disc width in mm - 170 For 3 bolts Hub hole diameter - 55 mm Inter-bolt fastening - 80 mm ..
1 610 UAH
0
0
Cast aluminum rear disc for ATV R8 18x9. 5-8 (8x7 inches) 4x110
available Diameter 8 inches Width 7" Installed tires 18x9.5-8 / 20x10-8 Diagonal bolt pattern 110 mm..
1 932 UAH
0
Cast aluminum front disc for ATV R8 19x7-8 (8x5 inches) 4x110
in stock Diagonal mount 4x110 mm Diameter 8 inches Width 5 inches Fitted tires 19x7-8 Diagonal bolt pattern 110 mm..
1 840 UAH
0
Rims for ATV r7 110-125 cc 16X8-7
available
rims are suitable for almost all children's quadrics with engine capacity up to 150 cc/cm fasteners for three bolts. for rubber 16x8-7..
1 058 UAH
0
0
0
Keyed rear rim 6" for children's mini ATVs
available
Pressed keyed rear rim for children's 24 and 36 volt electric and 49 cc petrol ATVs. Tire size 13x5.00-6 Inch disc size - 6 The total diameter of the disc mm - 173 Landing mount hole diameter - 16 mm Disc width r..
782 UAH
0
Tube (13X5-6, 145X70-6, 5.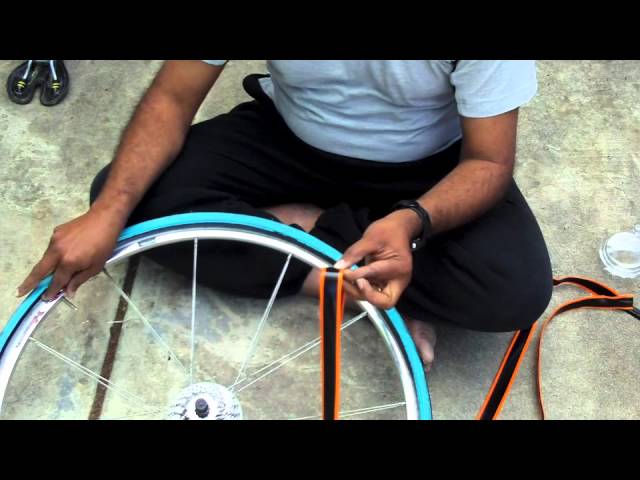 00-6) for children's ATVs
in stock front respectively! Direct valve. Suitable for Crosser "EATV-90304" \ Profi HB-6 electric children's ATVs and 49cc gasoline counterparts ...
276 UAH
0
Tube 4.10-6 for children's ATVs
in stock
Pneumatic tube for a 6" disc, for tires - 13x5.00-6 or 4.10-6, rear and front respectively! Direct valve. Suitable for Crosser "EATV-90304" \ Profi HB-6 electric children's ATVs and 49cc gasoline counterparts ...
230 UAH
0
Tube 4. 10-6 / 13x5.00-6 for children's ATVs Deli
in stock
Pneumatic tube for a disc with a diameter of 6 inches, for tires - 13x5.00-6 or 4.10-6, rear and front, respectively! Direct valve. Suitable for Crosser "EATV-90304" \ Profi HB-6 electric children's ATVs and 49cc gasoline counterparts ...
368 UAH
0
0
0
0
0
0
Children's ATV tire 13x5.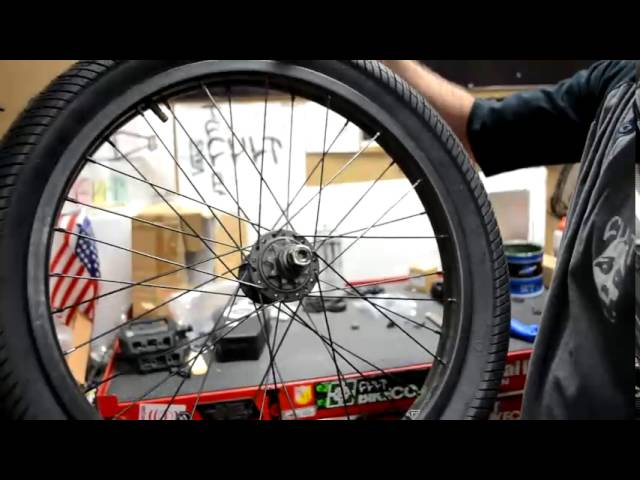 00-6 TT Increased tread 10mm NEW 2021
in stock
Original tire for Crosser/ Profi electric ATV for children, rear, size 13X5.00-6. Production China Suitable for a stamped non-separable disk, for a collapsible aluminum tire there are sizes 4.10.00-4 and 3.00-4 Operating pressure from 0.8..
828 UAH
0
Tire for children's ATV 4.10-6 TT
available
Original tire for children's electric Crosser/Profi ATV, front, size 4.10-6. Production China Fits on a stamped non-separable disk, on a collapsible aluminum one there is a tire in size 4.10-4 and 3.00-4. Soft (not oak) ...
690 UAH
0
Maiqilin children's ATV tire 13x5.