Home » Tire Patches vs. Tire Plugs: Which Is Better?
What are tire patches and tire plugs? Well, they are useful when you get a flat tire. In such cases, there’s a good chance that a minor repair can get you back up and running again quickly.
Three of the most common of these “minor repairs” are:
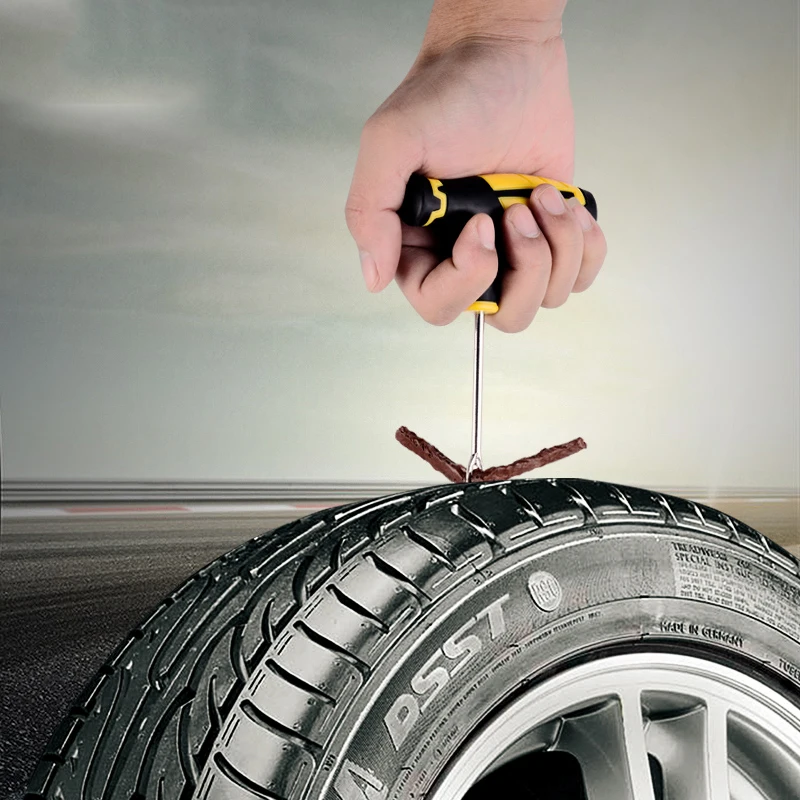
The first option, a tire plug, is cheap and fast to administer. Plugs work best when you’ve run over a nail or similar blunt object that punctures the tire and causes it to leak air. After the nail or sharp object is removed, the plug can be inserted into the hole to fix the leak. While plugs of the old days were problematic and served more as a band-aid type of repair than anything else, many plugs available today actually vulcanize to the tire to provide better stability.
Tire patchA patch, on the other hand, is considered to be a better quality tire repair. However, it’s a bit more laborious of a repair than a plug. Patching a tire actually consists of removing the tire from the rim and then using a die grinder to clean up a 2-inch diameter around the puncture to give the patch enough of an area to bond with. The patch is then pushed from inside the tire through the outside of the tire, sealed, and let dry.
The best modern tire repair solution is a plug/patch combo product. This is one piece and it combines the best benefits of both options.
Keep in mind that not all tire damage can be repaired. For example, tire bubbles are a dangerous problem that will result in needing new tires.
The question is: Can or should you repair a tire on your own?
If you purchased your tires from a mechanic or tire-specific business, then chances are they will either plug or patch your tire for free if it develops a leak and a patch or plug can resolve the issue.
Tire plugMany tire-specific businesses will also fix your tire via these means as a way of developing goodwill with you, the customer, so that when it comes to buying new tires you’ll consider purchasing that next set from them.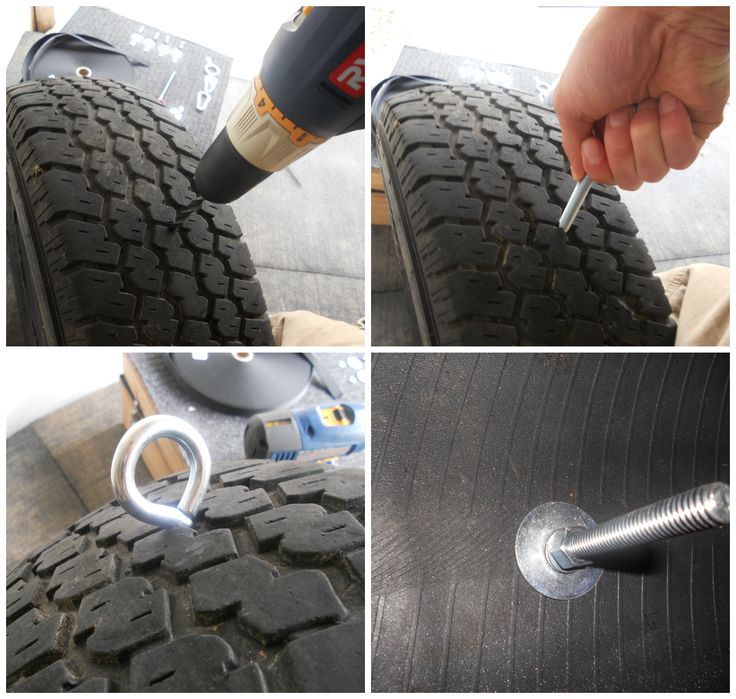
However, outside of these two scenarios, tire patching and plugging aren’t necessarily expensive (usually only $10-$20 a repair), but more of an inconvenience.
Considering this, patching your tires on your own might not be worth it.
DIY patching or plugging is still an option, yet we’d advise you to be absolutely sure of what you’re doing before going the patching route.
The plugging route is fairly simple (and cheap, as plug kits can be purchased for just a few dollars), as all you really need to do is locate the hole and insert the plug. Going the patching route is also fairly inexpensive, but there’s a lot more involved.
For instance, patching a tire consists of:
Plugs won’t usually work when a puncture is near the sidewall, as it likely won’t be able to completely seal the area. Plugs are also ineffective when the puncture is on an angle. Patches are usually the better-recommended option, but they do have their limitations. For instance, if a puncture is greater than a quarter-inch in diameter, a patch will likely be ineffective and the tire may be too damaged to repair.
What’s better – tire plugs or tire patches?Plugs, when installed correctly and in the right situations, can help a tire last for up to 25,000 additional miles.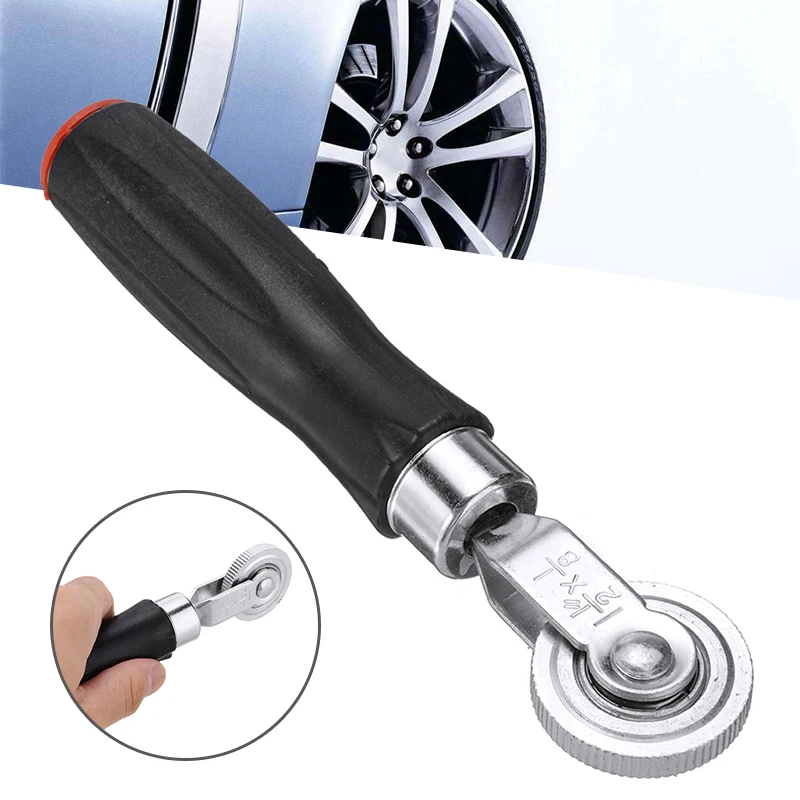 But while plugs can be effective, usually patches are considered to be the better, more secure option of the two. The patch/plug combo is the safest and most reliable option.
Yes and no. Years ago they were and if they aren’t installed correctly or in the right situations today, they still are. However, today’s plugs vulcanize to the tire and can help it last for tens of thousands of miles more.
VT-03P Plastic Economy Valve Puller w/Metal Rod Insert
Price: $13.47
WH-330-J-690 Turret Valve For Planetary Gear Wheels
Price: $24.54
A-148 Valve Cap - Large Bore
Price: $1.90
AD-1 Large Bore Valve Adapter
Price: $4.84
A-145 Large Bore Valve Core for IN-80A
Price: $1.55
ASGITW3 Safety Inflator Gauge 3ft.
Price: $59.13
511 Tubeless Valve/Aluminum Disc Wheels 4.25in.
Price: $36.96
326 Screw-On Air Chuck
Price: $26.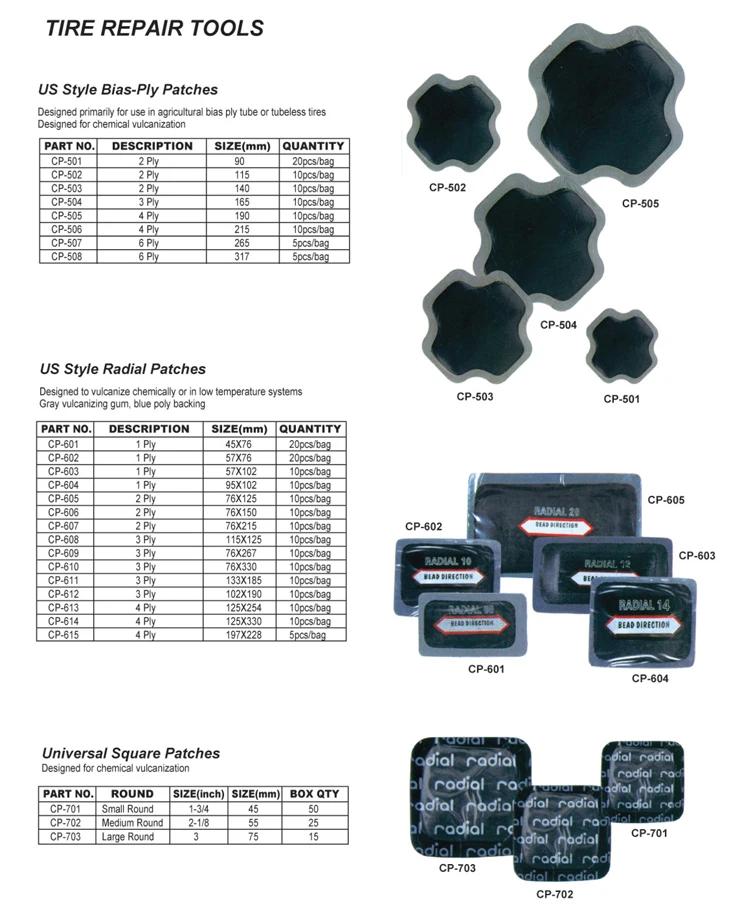 78
78
377 Lock-On Air Chuck - Long
Price: $26.86
TR-CH-16 Core Housing
Price: $5.18
14-330 Short Quick Change Adapter 5/8in x 3/8in Threads
Price: $9.90
13-673 Dipped Lead-Wire Combination Unit Qty/24
Price: $42.73
30 Corrugated Ball Bearing Stitcher
Price: $8.62
11-810 USA Style Radial C-O-I 2 1/4in. x 3in.
Price: $36.30
PR-110 Radial Repair Patch 3-1/4in. x 2-1/4in. Qty 20
Price: $40.66
11-808 C-O-I Radial Repair 1-3/4in. x 3in.
Price: $36.30
75N Universal Mounting Paste-Low Profile
Price: $33.94
203F Cold Vulcanizing Fluid w/Brush Top
Price: $14.82
H-5265 Lock-On Air Chuck
Price: $13.97
AW050Z AW Series Wheel Weight .50oz.-Zinc Qty:25
Price: $15.08
327LS Air Low Speed Tire Buffer
Price: $102.15
PFC-8 Ultra Fast Dry Vulcanizing Cement 8oz.
Price: $10.16
PPC-32 Pre-Buff Cleaner 32oz. Flammable
Price: $14.68
PLOS-16 Overbuff Sealant 16oz.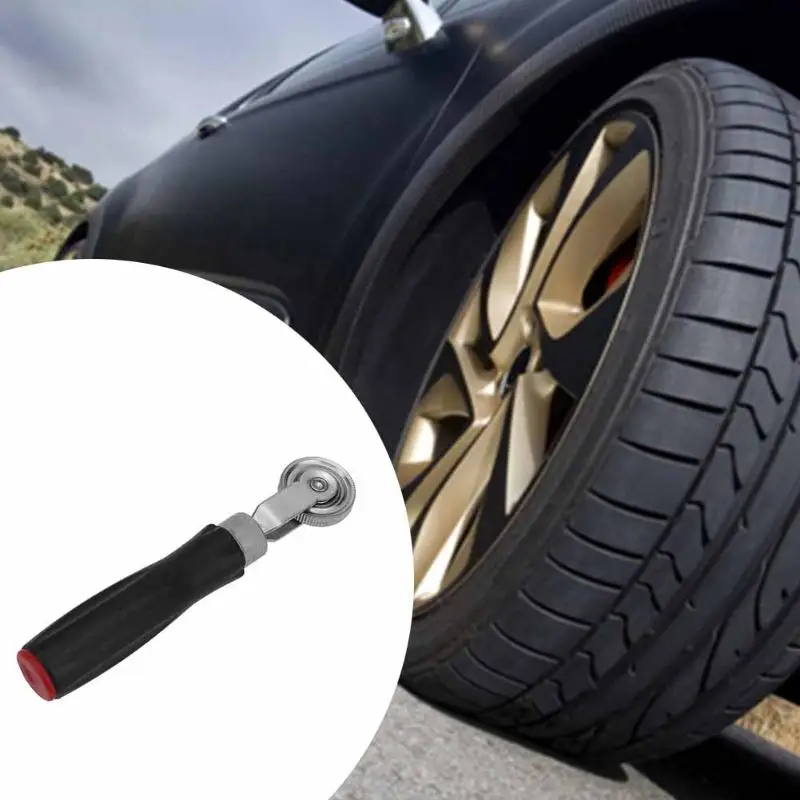
Price: $20.82
28 Tire Innerliner Scraper
Price: $3.75
5578 Thermopress MTR Solution 1kg. Can
Price: $33.18
199 Stickleback - Hand Rasp
Price: $6.36
BPM3 1/8" Lead Wire Pull Through Patch/Plug Qty/48
Price: $60.50
BPM9 3/8" Lead Wire Pull Through Patch/Plug Qty/24
Price: $37.60
13-382 Universal Quilled Combination Unit Qty/15
Price: $26.97
13-674 Lead-Wire Combination Repair Unit - Dipped Qty/24
Price: $47.97
14-100 Buffing Solution - Flammable 32oz.
Price: $14.50
TOTCW210N16 Contour Cup Rasp 16 Grit
Price: $15.04
SL9213 1-15/16in. Adapter w/Set Screw For 1/8in. Shank
Price: $4.43
SL9215 1-15/16" Adapter With Set Screw for 1/4" Shank
Price: $4.43
BU18T Carbide Cutting Tool 1/8in. Taper Burr
Price: $9.78
MC100Z Zinc MC Coated Wheel Weight 1oz.
Price: $21.02
415 Tubeless Rubber Snap-In Valve Qty/1
Price: $0.38
14-324 Long Arbor Adapter
Price: $3.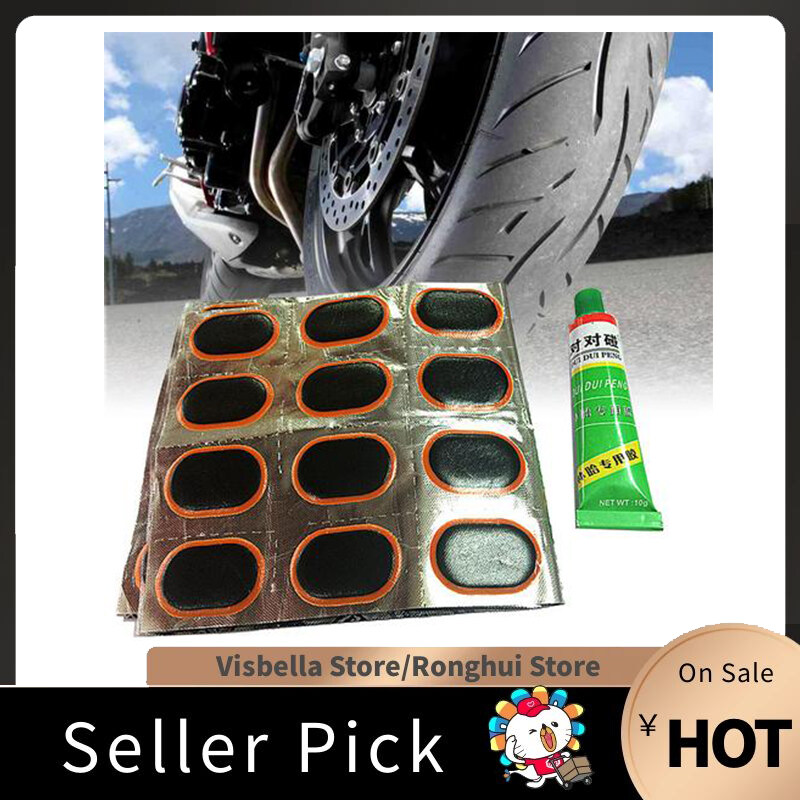 04
04
327 High Speed Air Tire Buffer
Price: $86.17
1100K TPMS Service Kit
Price: $2.03
TS-1 11" OAL x 2" Diamater Tire Swab
Price: $2.10
SNFN005ST FN Wheel Weights-Coated 5g. - Steel
Price: $10.85
80257 B Paintstik Marker - White Qty 12
Price: $19.90
80258 B Paintstik Marker - Yellow Qty/12
Price: $18.80
80257 B Paintstik Marker - White Qty 1
Price: $1.23
130323 EZ Break Nickel Grade 8oz.
Price: $25.66
80228 B Paintstik Marker - Purple Qty 12
Price: $17.70
1956 Murphys Tire and Tube Mounting Compound 2.5 Gallons
Price: $16.60
FL-4-1 Tire Lubricant Rim Rust Retardant 4.5lb
Price: $61.64
BL460 Black Jack 4in. Large Diameter Repairs
Price: $28.92
BL630 Black Jack 6in. LG Diameter Refill Repairs (30)
Price: $21.74
T-12-R Snap-In Tire Valve Qty/100
Price: $30.34
GA-155 Dual Foot Truck Service Gauge Qty/1
Price: $11.26
546D Truck Tubeless Tire Valve - 60 Degree
Price: $24. 89
89
5 Gallon Slick Tire Mounting Lubricant
Price: $94.14
MU40 Murphys Vegetable Soap Tire Mount Compound
Price: $73.74
EQFXFC40 Equal Flexx 3oz. Bag Qty 40
Price: $169.85
76F Innerliner Repair Sealant With Brush Cap 16oz.
Price: $27.51
12880 10-Piece 1/2" Drive Torque Limiting Socket Set
Price: $259.90
51421 Markal Tire Marker - Yellow Qty 12
Price: $12.30
CH-330-LO Dual Foot Air Chuck
Price: $12.85
PR-120 Radial Repair Patch 5in. x 3-1/4in. Qty 10
Price: $65.57
T34 Heavy-Duty Wooden Handle Hammer
Price: $104.02
T11KH Polymer Replacement Handle 32in.
Price: $79.34
344U Uniswivel Fitting
Price: $12.90
33052 Curved/Curved with Flat Tip Tire Spoon 30in.
Price: $38.56
ASAWL1 Tire Probe Awl
Price: $10.33
CS-1 Corrugated Ball Bearing Stitcher 1-1/2" x 1/16"
Price: $16.19
4223C 1in. Drive x 1-1/2 x 13/16in. Deep Budd Impact
Price: $55.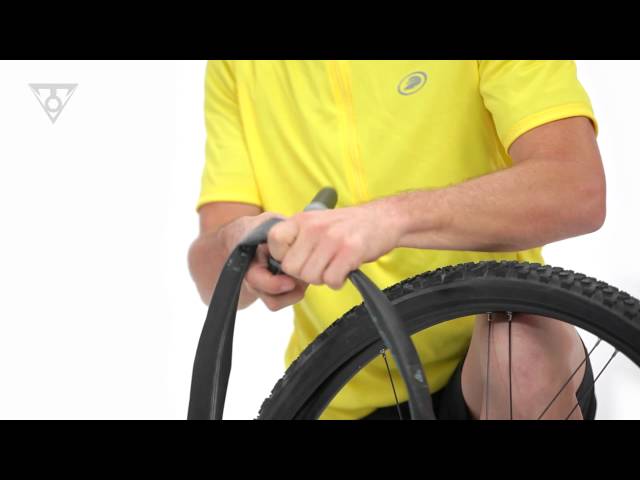 36
36
602HP Snap-In Valve 2in. Qty/1
Price: $0.67
RE2053B Rema Bead Butter 1 Gallon - Blue
Price: $11.58
RE3050 Center Post Tire spreader
Price: $69.36
96821 Valve Action Paint Marker - Yellow Qty 1
Price: $4.60
TI11511-1 Oval Emergency Boot 5-1/2in. x 8in.
Price: $5.07
12-370 Thin Black String Inserts Qty/50
Price: $17.50
13-788 Round Agricultural Combination Unit
Price: $34.60
14-204 Pistol-Grip Spiral Cement Probe
Price: $18.67
AS00040 Valve Stem Puller With Rubber Boot
Price: $7.66
5265 Valve Core Tool-Large Bore
Price: $8.16
5451 Heavy Duty Clip-On Ball Foot Air Chuck 1/4" FPT
Price: $22.24
T-13-WZ Snap-In Tire Valve 1.25" Qty/1
Price: $0.28
14-511 Heavy Duty Super-Blu Vulcanizing Cement
Price: $11.00
CH-333-LO Dual Foot Air Chuck - Normally Closed
Price: $7.79
996 Rim Hole Bushing
Price: $0.26
14-032 Vulcanizing Cement - Flammable 32oz.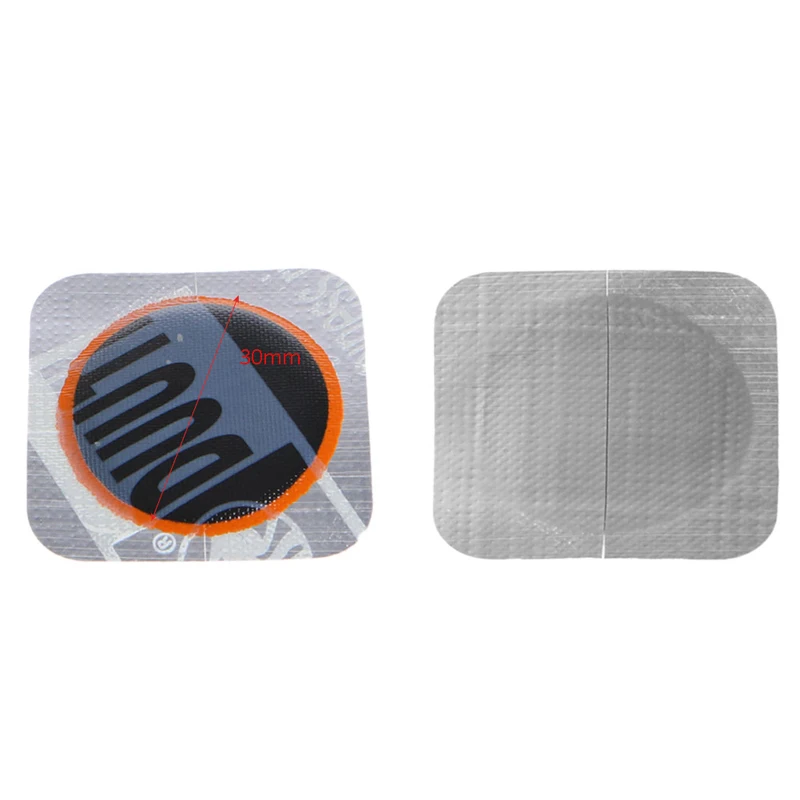
Price: $30.18
14-128A Inner-Liner Sealer - Flammable 16oz.
Price: $13.50
AW025S AW Series Wheel Weight .25oz. - Steel Qty:25
Price: $7.78
6174-USA 14in. Extra Long Air Chuck
Price: $23.39
T-14-WZ Snap-in Tire Valve Qty:1
Price: $0.42
6175-USA Air Chuck 6in.
Price: $16.94
OR-25-T Standard O-Ring For Tubeless Rims Qty/2
Price: $7.40
6014 Brass Cleaning Brush Qty/1
Price: $5.64
11-489 BN2 Bias 2-Ply 3in. Round 20/Box
Price: $26.43
51420-1 - Markal - B - Tire Mark White Qty:1
Price: $1.03
575 Truck/Bus Tubeless Tire Valve 1-1/8in. Qty/1
Price: $3.53
RE5563 Rema MTR Cushion Gum 2 lb
Price: $63.61
Author: Aleksey Kokorin
Experienced drivers are not surprised by such a trifle as a puncture, but for the first time beginners usually get confused in the sequence of actions, forget about important details and do not know what to do with a punctured wheel even in a tire shop - especially if they start offering choose from several options or intimidate with expensive repairs.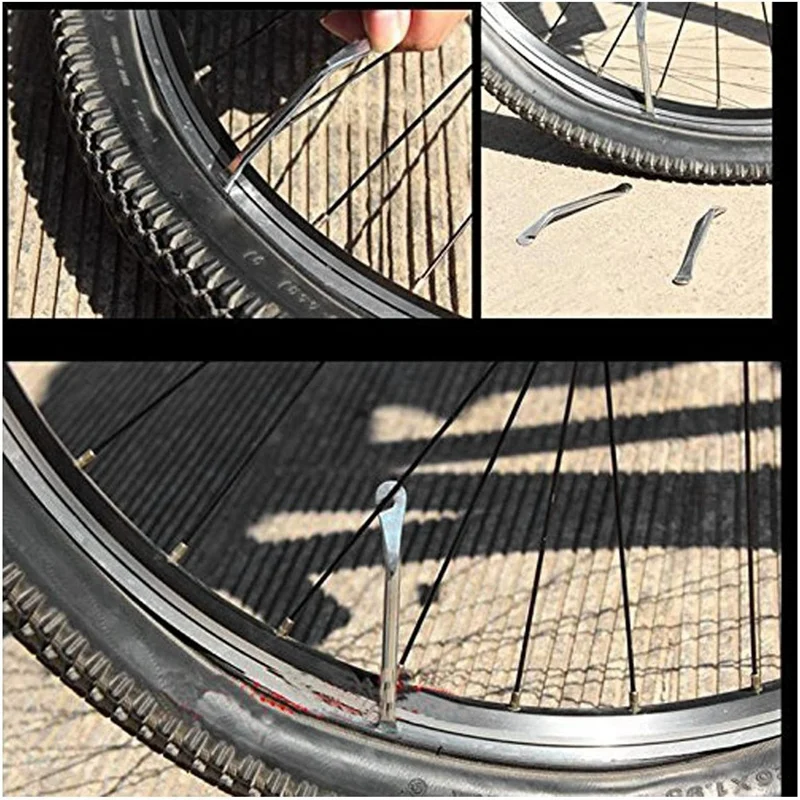 Let's set up an operation algorithm when a flat tire is detected and figure out what to do right away and what to choose later.
What to do when you find a puncture
Having found a flat tire, first of all you need to stop in a safe place, turn on the emergency alarm, assess visibility and, if necessary, set an emergency stop sign: according to traffic rules, it is installed at least 15 meters from the car in built-up area and at least 30 meters outside the built-up area. When choosing where to stop, consider the space to the side of the vehicle to handle a flat tire. You should not stop right on the road and in places where stopping and parking are prohibited: even if a punctured wheel belongs to the conditions of a forced stop, it is quite possible to drive several tens of meters on it to choose a safe and convenient parking place. At night or in conditions of limited visibility (for example, in fog or rain), it is imperative to wear a vest with retroreflective elements - this is required by clause 2. 3.4 of the SDA and common sense.
Now you can start working on the wheel. We will sequentially consider several options for action, and then move on to ways to repair a damaged tire.
The most obvious solution to a flat tire is to replace it. If you have a spare tire that you are sure is in good condition, the best option is to install it and visit a tire shop to repair a punctured tire - such repairs will be more reliable and of high quality than doing it yourself.
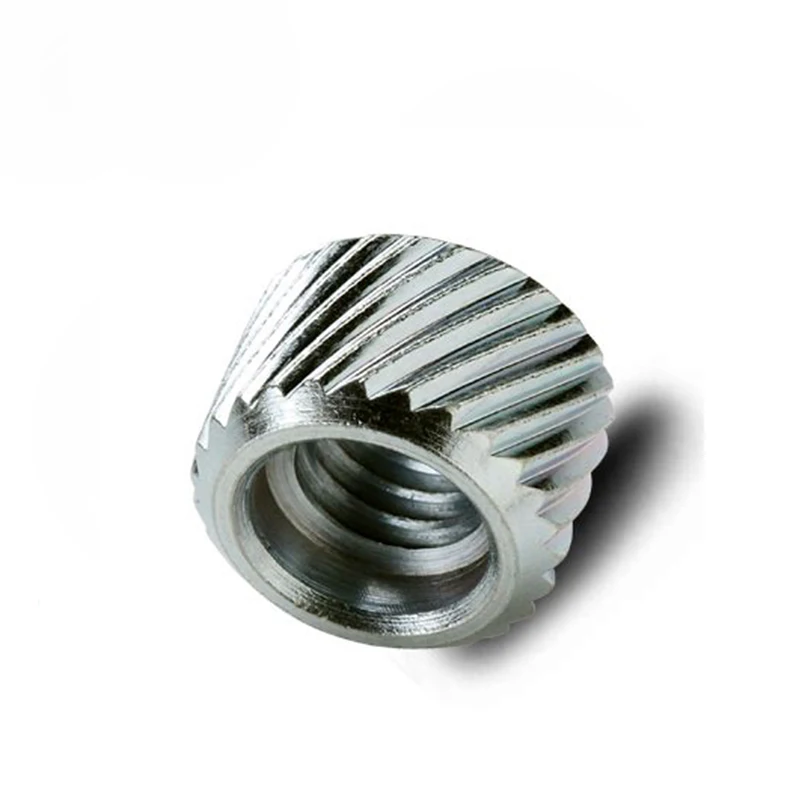
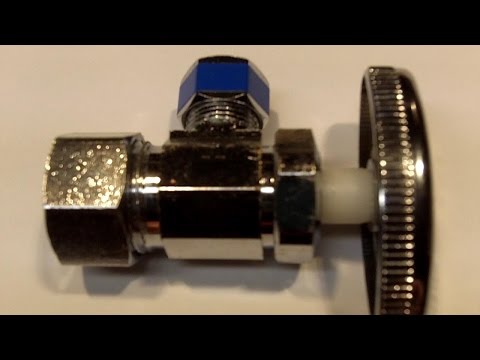
If you don't have a suitable spare tire, but you do have a pump or compressor, you can assess the damage to the tire and try to pump it up again to get to the tire shop. It is better to start searching for an air leak with a valve (aka “nipple” or “nipple”): often a faulty spool becomes the cause of a flat tire. It is easy to check it: unscrew the protective cap (if there is one), pour water on it (or slobber it, as in childhood): air bubbles will leak. In this case, you can try to replace the spool valve by unscrewing it and screwing in a new one, but if there is no new valve, as well as a store nearby, you can try just unscrewing and screwing it back in.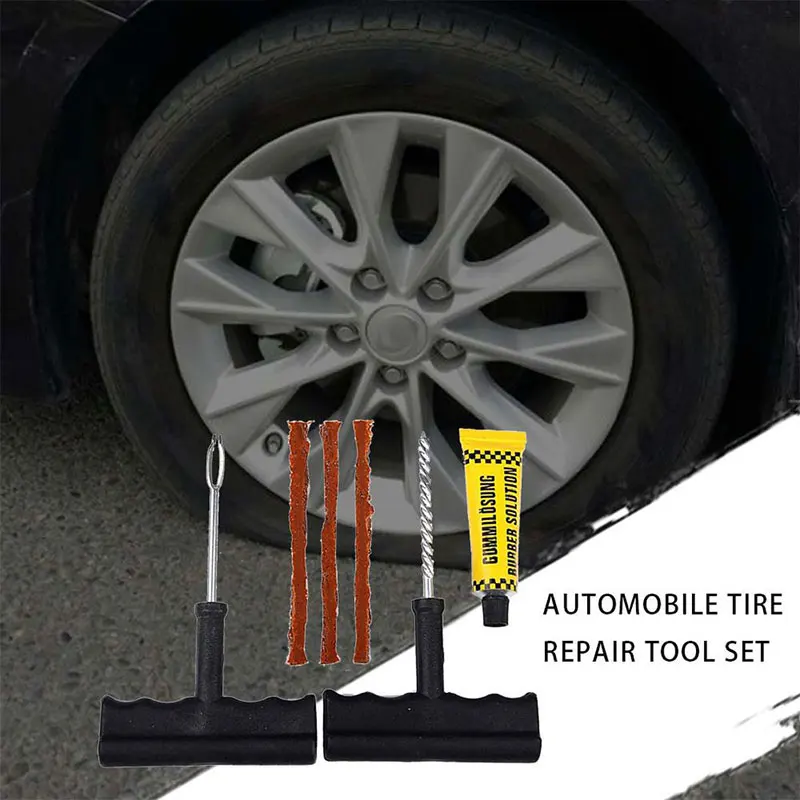 Regardless of whether it helped or not, you need to visit a tire shop to replace the entire spool or valve.
If the valve is tight and the tire is flat, it is most likely a puncture. The easiest way to find a puncture that is free of foreign objects is to pour water on the tire while looking at the surface: the damage will reveal itself as air bubbles. However, often the cause of the puncture can be found along with it: a self-tapping screw, nail or other arbitrary object sticking out of the wheel will clearly indicate the place of depressurization. In this case, you do not need to immediately remove the foreign object from the tire: it partially seals the hole, and if the pressure loss is slow, you can try to pump up the wheel and drive to the tire shop.
The same goes for wheels that are leaking from the rim or from a faulty valve. Usually, in this case, the air is bled slowly, and you can pump up the wheel and have time to get to the place of repair. By the way, rim leakage can occur due to disk deformation upon impact - for example, when hitting a pit with sharp edges. Such situations are fraught with damage to both the disk and the sidewall of the tire, in which case the disk will need to be corrected, and the tire repaired or even replaced. To avoid rim leaks, you need to inspect the rims every time you change tires. The loss of tightness occurs either due to corrosion or due to disc deformation, and not only steel, but also light alloy wheels can corrode. So if you see paint blistering or rust on the rim, the tires need to be put on rim sealant: when changing tires, this will be cheaper than the subsequent removal and re-tire to fix a leak on the rim.
If you find a puncture, but there are no foreign objects in it, and you do not have a spare wheel and tire repair kits, there is another popular method of temporary "repair". You can screw a self-tapping screw into the found hole - if, of course, you have one. In extreme cases, you can look for a self-tapping screw in the cabin by unscrewing it from some interior detail. This method cannot be called reliable: it is unlikely to ensure complete tightness of the wheel, but at least it can help you get to the nearest tire shop.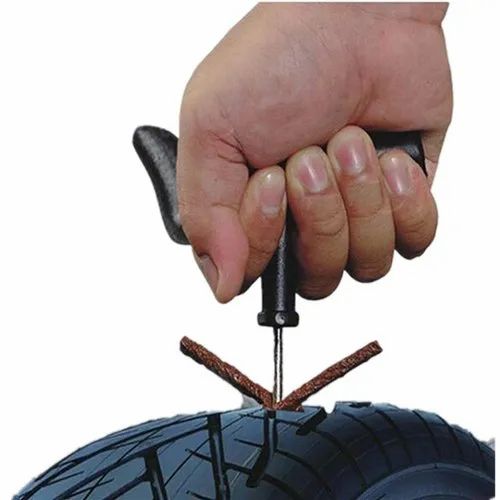
And a couple more useful remarks. If the wheel is completely flat, then it is easier to inflate it without a spool: the latter must be unscrewed, then the tire must be inflated and quickly screwed back in. The fact is that the spool itself, when inflated, resists the compressor, and in the event of a loose fit of a flat tire to the disk, the power of a simple magazine compressor may not be enough, and the absence of a spool helps to increase air flow and facilitate the operation of the compressor. If this does not help, you can jack up the car by hanging a flat tire: this will improve the fit of the tire to the disk, and the chances of inflating the tire will increase.
On-Site Repair Methods
Now let's look at options for repairing a tire yourself using special materials that you should carry with you or, if a puncture caught you in the city, buy it at the nearest auto shop.
1. The most common, cheapest and easiest way to do it yourself is to install a raw rubber band.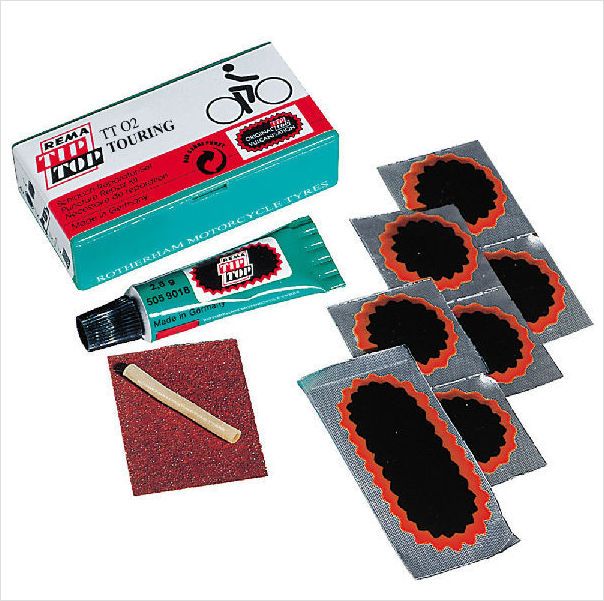 The harnesses are sold complete with an abrasive awl to expand the hole in the tire and improve the contact of the repair harness with its edges, as well as a needle for installing the harness and an adhesive to fix it and at the same time seal the puncture. When choosing a repair kit in a store, you should pay attention to the following nuances:
Install the harness in the following order. First, the found hole is expanded with an abrasive awl - you need to insert and remove it several times into the puncture site. Then the tourniquet is inserted into the eye of the needle, and glue is applied to it. After that, the needle with the tourniquet must be inserted into the hole in the tire and pulled out sharply - so that the tourniquet remains in the hole, and the needle comes out without it.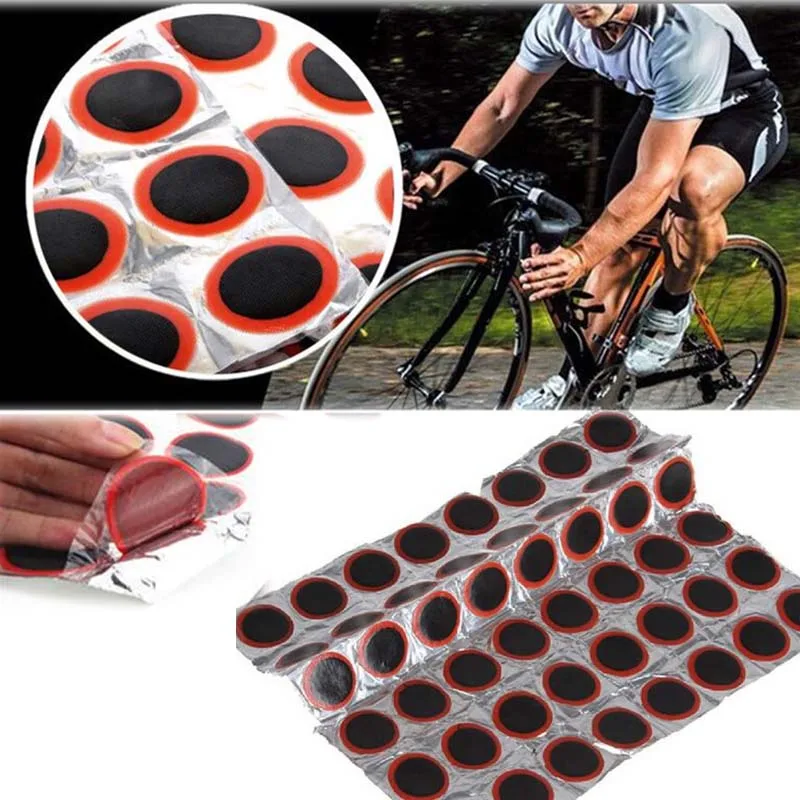 If everything worked out, it remains only to cut the end of the harness flush with the surface of the tire and pump up the wheel.
The advantages of repairing with a harness are quite decent reliability, simplicity and low cost. On a well-repaired tire, you can drive for a long time, and if the repair site starts to poison, you can either replace the harness or have the tire repaired in a quality service. Among the minuses is the possibility of damaging the cord during installation, as well as lower reliability compared to “full-fledged” repair methods in a tire shop. Strictly speaking, a tourniquet is still a temporary repair, so if it is possible to pump up a wheel and get to a tire fitting, then it is better not to enlarge the hole in the tire and get to the experts.
2. The second repair option is aerosol liquid sealants sold in cans. To repair a punctured tire with sealant, you need to remove the foreign object from the puncture site, then pour the sealant into the wheel through the valve, twist it to distribute the composition inside the tire, pump up the wheel and drive several kilometers at low speed for the final uniform distribution of the sealant.
Among the advantages of this repair is the simplicity and less labor intensity compared to installing a harness. However, there are also disadvantages: the larger the hole, the higher the chance that the sealant will not be able to eliminate it, and such a repair can affect the wheel balance. Compared to a tourniquet, it can be considered even less reliable and preferable, but simpler.
Repair options at a tire shop
If you put on a spare tire and brought the wheel to a tire shop, you may also be offered several repair options. Consider the most popular with an indication of the advantages and disadvantages.
1. The first repair method is the same harness installation as described above. As we remember, the tourniquet refers to a temporary repair, so among tire specialists this method is considered bad form, but many workshops do not exclude it from the list of services. All the advantages and disadvantages are the same here: such a repair will be the fastest, simplest and cheapest, but less reliable than other methods.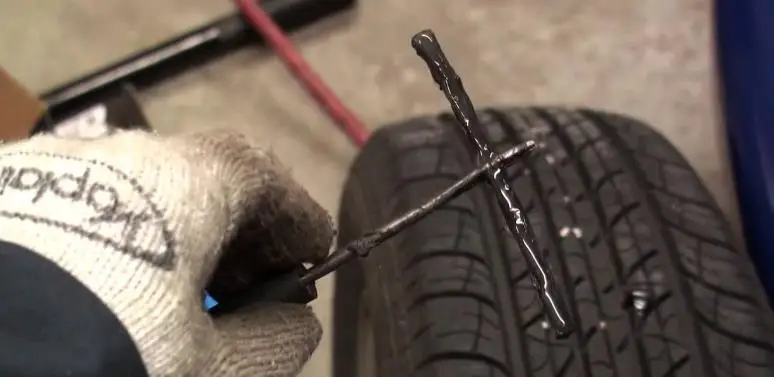 It is worth choosing it in cases where the price and / or speed of the procedure is more important to you than anything else. If quality is a priority, then it is better to fork out for the options listed below.
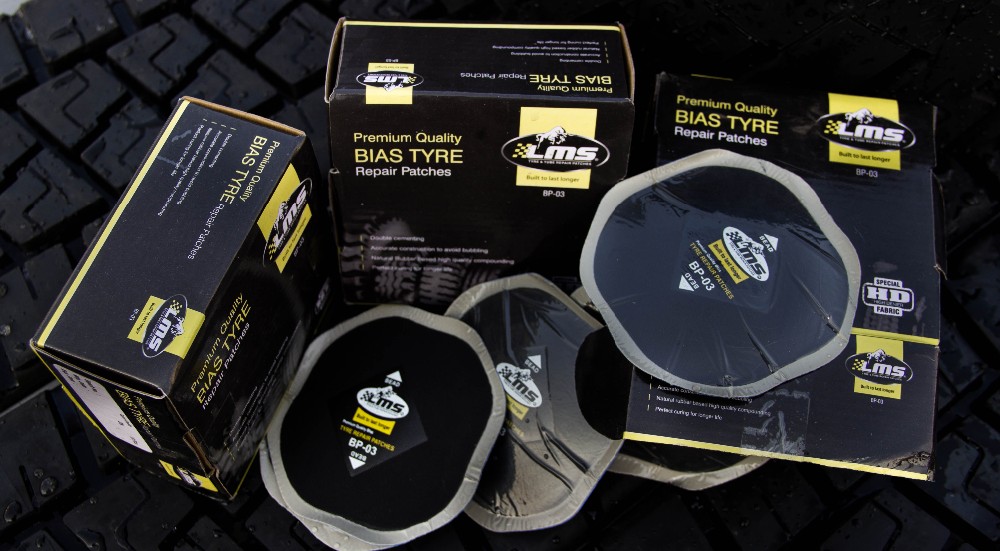
2. The second option for repairing a puncture is to install a patch on the inside of the tire, the so-called cold vulcanization. In this case, the tire is removed from the disk, the surface around the puncture is treated with an abrasive, and the damage is sealed with a special patch. This is a more preferred repair method than a tourniquet: it is more reliable and durable, especially in the case of side punctures, when not the thick tread part of the tire is damaged, but the thinner sidewall. Among the minuses, only a higher cost can be noted: in addition to the actual tire repair, you will have to pay for the removal and installation of the wheel (or do it yourself), tire fitting and balancing.
3. The third option is a "complex" of the first and second: installation of the so-called repair "fungus".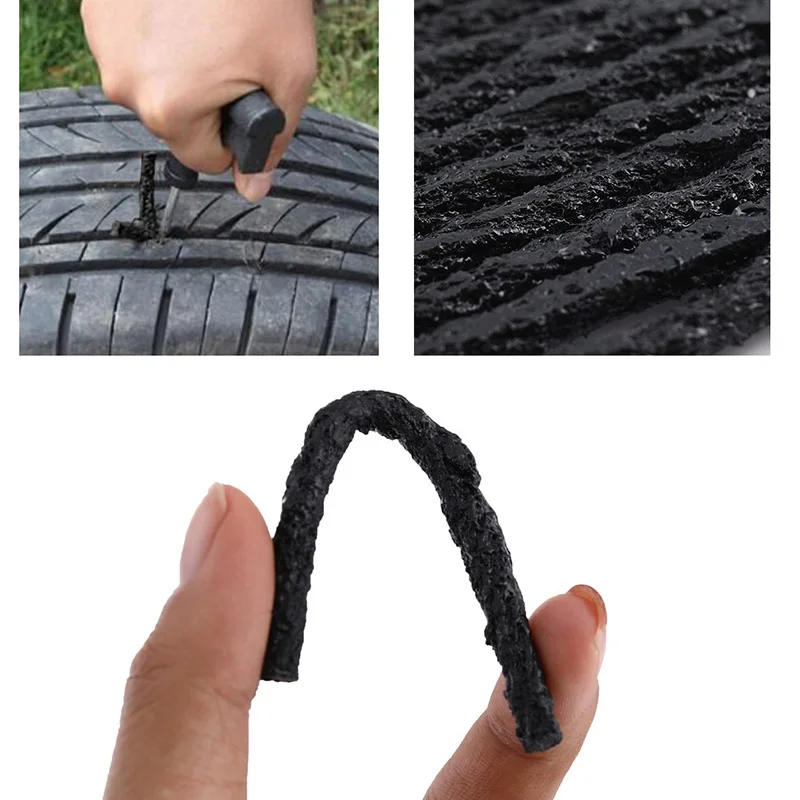 The “hat” of the fungus is a patch, and the “leg” is threaded from the inside of the tire to the outside. After gluing the patch, the excess part of the leg is cut off, as in the case of the tourniquet. Thus, not only the inner surface of the tire is closed, but also the hole itself. The advantages and disadvantages of this repair method are generally the same as those of a patch.
4. An extreme, “emergency” measure when repairing a punctured wheel is to install a camera in it. Typically, this method is used for tires that are no longer worth repairing, or “for reliability” after repairing a complex puncture. It should be understood that almost all modern tires are tubeless, that is, they are not designed to install a camera, so it’s not worth driving a wheel repaired in this way for a long time. Installing a tube is a temporary solution for riding until a new tire is purchased, and sometimes such wheels are left as spares. So this repair method can be kept in mind as a backup.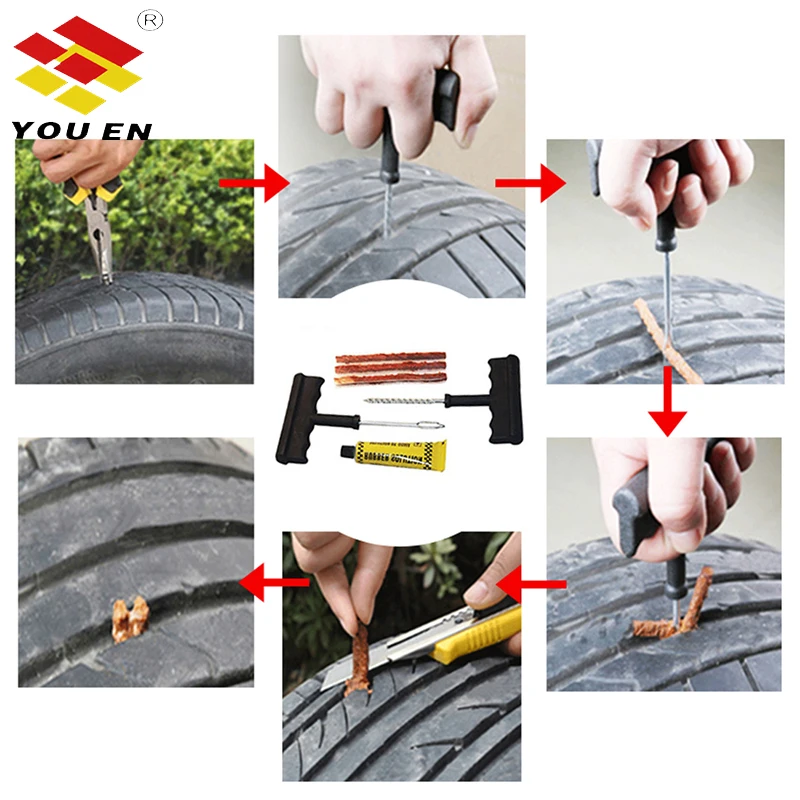
Finally
We have deliberately left out of this text such methods as combined repair of tires with a tourniquet and a patch and hot vulcanization. The first is used quite rarely and for specific damage, and it is enough just to know about its existence. Well, the second is used to repair serious side cuts, and it is not only rare, but also very expensive. The cut site in this case is prepared, filled with raw rubber and processed with a hot press for vulcanization. Equipment for this procedure is not available in every tire shop, and the cost of repair can be about half the cost of a new tire.
interesting popular questions
Articles / Used cars 5 reasons to buy and not to buy Volkswagen Passat CC "King of the track, but in the city he tears everyone"; "does not go at all"; "model of reliability"; “is pouring, without waiting for 100 thousand”; “great interior, quality materials”; “the interior is miserable, like in Polo”; ".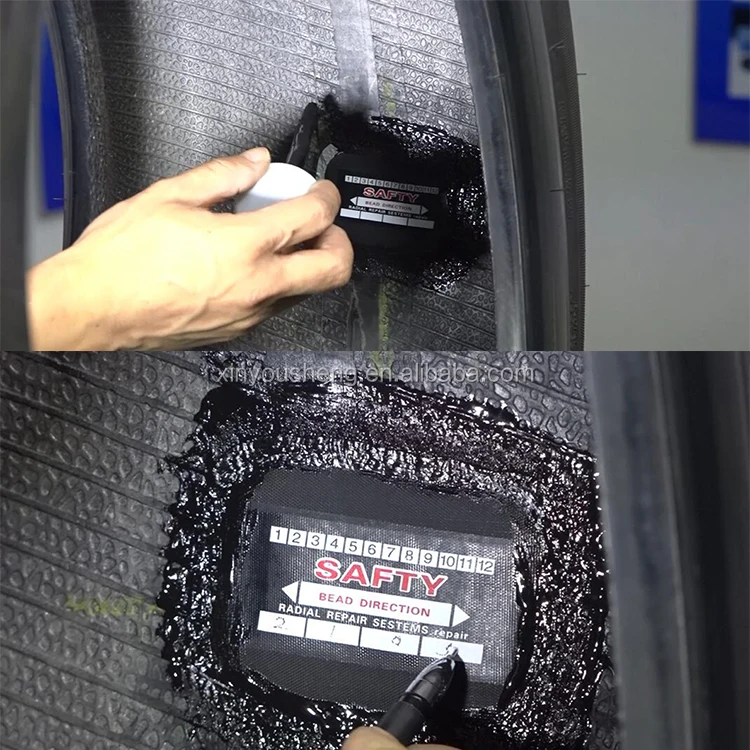 .. 58 one 0 11/27/2022
Articles / Tests Taxi fleet test: check what you know about the first generation Renault Logan "Citizen of the World", known to us under the name Logan and produced in the world under several different brands, this year celebrates its 18th anniversary. In honor of the "coming of age" of this involuntary love... 1007 0 2 11/26/2022
Articles / New cars So that's what you are, Moskvich 3: getting acquainted with the car at the official start of production Yesterday, November 23, the Moscow Automobile Plant, which for a long time existed only in the status of a Renault Russia enterprise (until 2014 it was called Avtoframos) and stood idle for more than six months after the. .. 7321 12 3 11/24/2022
Test drives / Test drive Haval Dargo vs Mitsubishi Outlander: the dog is barking, the stranger is coming In the Haval dealership in the south of Moscow, life is in full swing: buyers look at cars, communicate with managers and sign some papers. While I was waiting for the test Dargo, the same cross... 17552 7 205 13.09.2022
Test drives / Test drive Motor from Mercedes, emblem from Renault, assembly from Dacia: test drive of the European Logan 1.0 It would seem that what's new can be told about the second generation Renault Logan, known to every Russian taxi driver, as they say, up and down? However, this car has. .. 14152 ten 41 08/13/2022
Test drives / Test drive Geely Coolray vs Haval Jolion: Free Cheese? If! Do you want to buy a car today with a full warranty, on credit at an adequate rate, without wild dealer markups? Now this is still a task, because a full-fledged chain of "representation - s... 11293 26 thirty 08/10/2022
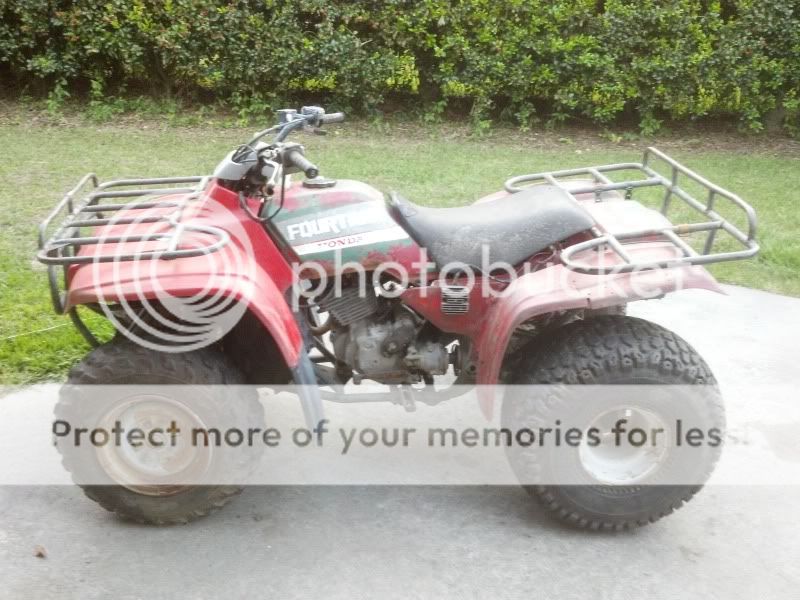
The motorcycle gives a feeling of freedom, allowing you to discover new routes. However, in reality, this freedom can turn into a trap in an instant if you are unlucky enough to puncture a tire somewhere in the middle of the road.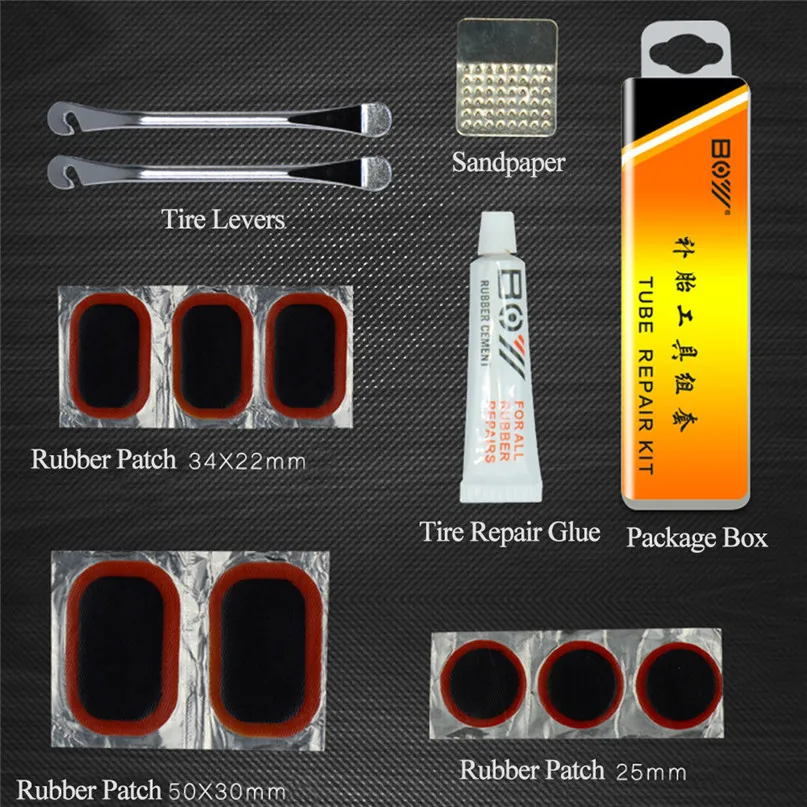 The feeling of annoyance will be ten times stronger if there is no way to fix a punctured wheel. At this point, it remains only to hope for cellular communication and help from other drivers on the road. Therefore, consider the basic recommendations for repairing a motorcycle tire on the road.
Always keep a rubber band or tire repair insert in the trunk. This simple tool will add peace of mind on the road. It will be much better if you learn how to use it in advance. You don't want to be the guy who has the right tool but lacks the skills to fix a problem, even something as simple as fixing a tire, do you?
The repair technology for tube and tubeless tires is different, but both types are subject to restoration (at least to such a state as to get home). Repairing a tubeless tire is easier. Repairing a tubed tire requires removing the wheel, removing the tire, and removing the tube to install the patch.
So you run over a nail, screw, glass, or that damned sharp stone and punctured a motorcycle tire.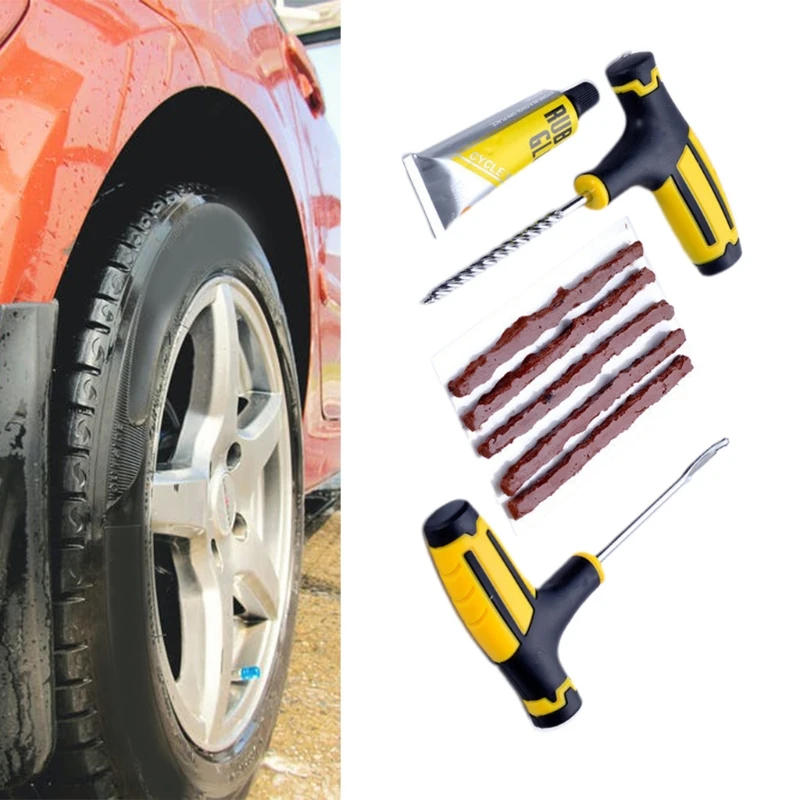 If the object that caused the damage is still in the rubber, the first step is to remove it. Pliers are great for this. Therefore, you should always keep this tool in the trunk: with it, you need to grab an object sticking out of the tire. Try to pull it out along the same path that it entered the tire so that the puncture does not increase and become torn.
After removing the object, clean the edges of the pierced hole. To do this, the repair kit must have a special tool - a tool for cleaning holes. All debris and rough edges must be removed to create a surface for patching.
Then you need to install a patch. Different kits offer different types of patches, so you should read the kit's manual to complete this step correctly. However, there are two main types of patches: long cord patches and fungus patches. Some kits may include adhesive to bond the patch to the tire rubber.
Patches or cord inserts are supplied with an awl for installation. It is necessary to bend the cord in half, and thread one half into the tool.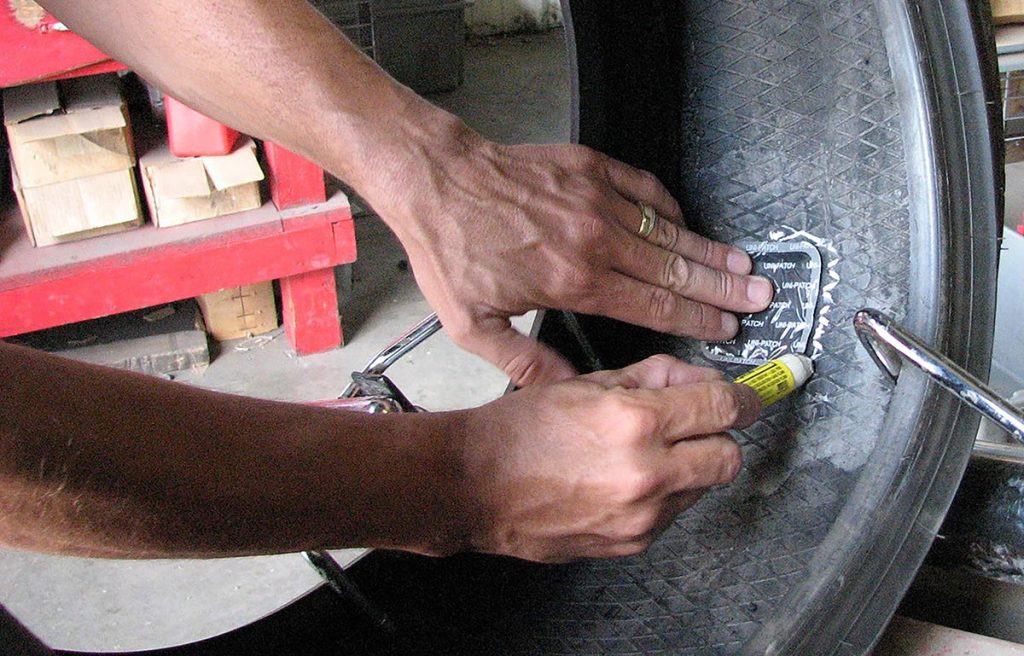 This is necessary for a tight fit of the material. Next, bring the cord into the hole until it protrudes above the tire by about 1 centimeter. Then you can pull it out of the awl and put the tool aside. Take a knife and cut off the excess patch material by about 0.5 centimeter.
Fungus patches (plug and play type) require the use of a special tool for installation. Again, you must follow the instructions for the specific repair kit. Then stretch the patch material with pliers. When the puncture is closed, you can cut the patch over the tire.
After installing the patch, the tire needs to be inflated. For repairs on the road, you will need either a 12V electric compressor that can be connected to the motorcycle's electrical system, or a CO bottle 2 . Carrying a compressor with you is not always convenient. A more compact and more portable option is to use the small cans of CO 2 in combination with the tire inflator. This is the fastest way to inflate tires on the road.
If possible, apply some soapy water to the patch to make sure it is airtight. If there is a leak, you will see tiny air bubbles around the repaired area.
On-road retreading of tube tires is a more labor-intensive process. If your motorcycle is equipped with such tires, then you will need a few more tools to repair them. In most models, you will have to remove and disassemble the wheel in order to get to the camera. The vehicle owner's manual should describe how to do this and what tools to pack in your luggage. In addition, you will need a tire removal tool. It makes the job easier.
After the inner tube is removed from the wheel, the remaining air must be completely bled out. The next step is to prepare the camera for patching. The repair kit should include a special scraper to roughen the surface around the punctured hole. This treatment is necessary to ensure adhesion of the patch to the chamber material.
After completing the preparation, you can start installing the patch.