Most of us have experienced running our cars on a slow leak. The hard part about it is trying to fix it in the middle of the road or during a long drive. It’s annoying and inconvenient especially when you are on the go.
People always take extra precautions to bring an extra tire, but frankly speaking, not every car owner knows how to change a tire properly.
You need a specific set of tools and experience to replace your tire with a spare one. It’s time-consuming and stressful to go through, especially for new drivers. Using aerosol repair such as Fix-a-Flat is a good way to start repairing your tire with slow leaks.
Things You Need to KnowFix-a-Flat was invented in the ’70s by Snap products. Fix-a-Flat aerosol sealant became a well-known brand because of its genius way to mend punctured tires
. For over 50 years, it is still doing its job and has made huge strides in the automotive industry.
Even to this day, Fix-a-Flat has been able to compete with other brands in terms of mending vehicle tires. They have proven enough that they can help out vehicle owners with flat tires and slow leaks.
Before you start with the procedure, it is best to research how to apply Fix-a-Flat property to prevent any wastage and tire complications. Here is a quick list on what are the things to do and to observe before considering using the product.
While the serviceable life greatly depends on the severity of the climate and location, you can still make the most out of your winter tires’ value within their lifespan. In order to do so, you need to identify what makes it unique compared with regular, all-season tires, so you can apply appropriate care and maintenance specifically for these types of tires.
Repairing a Tire Using Fix-a-Flat SealantTo better understand the situation, knowing where the slow leak is coming from is the top priority. It’s best to touch the tire and try to determine where the air is coming out from. That way, drivers will be able to check how many slow leaks are possibly there. Touch the treads and sidewalls. If the slow leaks can’t still be found, Applying water with soap on the tire will also be helpful. By dropping the water soap on the tire, It will be easier to know the area where the slow leak is by checking the bubbles.
Now that you have established that your tire has indeed slow leaks on it, you can now use Fix-a-Flat aerosol repair to mend your broken tire and get back on the road as quickly as possible. The good thing about it is you will instantly see the instruction at the back of the aerosol can.
Compared to the traditional way of changing tires in the middle of the road, Fix-a-Flat offers a more convenient way of putting your tire back together again.
Step 1: Check Where The Puncture isSince we have already mentioned that it’s important to know where the leak is coming from, you now need to press on the punctured area of the tire by moving it to the bottom.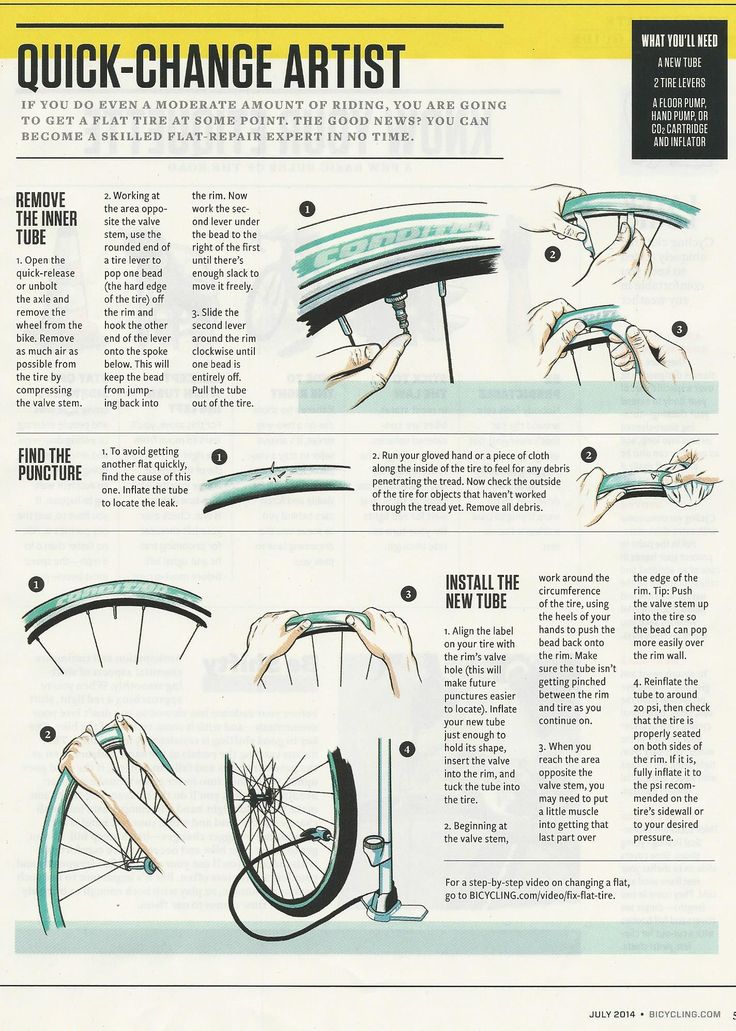 You can do that by slowly moving your car up until the punctured area of the tire is on the bottom part. The reason why you need to do this is to minimize slow leaks when applying the Fix-a-Flat sealant aerosol.
Keep in mind that Fix-a-Flat can repair small punctures and cuts to the tread alone. It cannot be used for any sidewall punctures. If the punctures are found on the sidewall, not forcing to drive the vehicle would be the primary option. Use your spare tire or better yet, consult a mechanic for a more detailed and furnished repair.
Step 2: Check The Date Your Aerosol Sealant Was ManufacturedA very vital piece for the process is to know when was the sealant manufactured. Fix-a-Flat has a shelf life of 2 years. Using an expired one could result in a much more alarming state.
Step 3: Shake your Fix-a-Flat Can Well for 30 Seconds to 1 MinuteMake sure that all components of your Fix-a-Flat sealant are fully incorporated. To do that, you have to shake it well for at least 30 seconds to 1 minute before using it. This is a simple and very important part of the process.
Note that there were some reviews whereas the aerosol spray did not work because it was not shaken well before use. This could result in a critical error that would lead to an even bigger problem. Not following this crucial instruction may lead to product waste and the tire may possibly not get repaired.
Step 4: Attach the Hose on The Air Valve StemThis is the time where you’ll apply the sealant to your tire. Attach the hose to the valve, remove the safety pin and press the yellow button to start putting air and sealant to the tire. Keep in mind that you will use the whole sealant can on your tire. Make sure that you apply the whole sealant to your tire to prevent any malfunctions. We will give you a quick guide on which size to use for every type of vehicle.
It’s easy to know if the procedure was done correctly. The tire rim should start to lift off the ground during the process. If you see that the white liquid stops flowing to the hose, that simply means that you’ve used up all the sealant from the can.
Step 5: Drive Your Car AfterwardsYou do not want your sealant to sit on the bottom part of the tire. It will cause malfunction and imbalance to your car. You want to make sure that the sealant is completely flowing in the tire. To do that, you have to drive your car for about 5 to 10 minutes and check whether there are changes. After driving for 5 to 10 minutes, inspect your tire once again and see if there are improvements.
For some cars, TPMS (Tire Pressure Monitoring System) is a way to determine whether your sealant was effective. You can easily see the TPMS on your car dashboard. If the light turns on, it means that the procedure was able to fix the problem.
As soon as you were able to fix your tires using Fix-a-Flat, it is highly recommended that you seek help from tire experts to check the condition of your tires. You would want to make sure that the tire is properly checked and fixed. That being said, Fix-a-Flat is a very effective tool to fix your tires for an emergency. But you need to make sure to cross out every possible factor as to why your tire had a slow leak. Consulting from experts and securing spare tires, and another Fix-a-Flat can is most helpful.
You only have to resort to aerosol sealants when there is an emergency at hand. Depending on this, every time you have tire trouble will result in unexpected tire replacement and could cost you more money.
Step 7: Measure The Pressure Of The Tire Using a GaugeIt is very well proven that having a gauge can serve as a huge help whenever you have tire problems. By measuring the PSI of your tire, you would be able to determine whether the aerosol worked or not. Keep in mind that the standard pressure of the tire should be around 30 to 35 PSI. If the PSI still falls behind the recommended range, it is most likely that the slow leak issue has not been solved yet.
Every vehicle has a different tire size. Surely, an SUV vehicle has a bigger tire compared to a sedan. Subcompacts would have the smallest tire size while trucks have the biggest ones. It is imperative to determine your tire size before availing Fix-a-Flat. That way, you will be sure that you have enough, not less sealant for your tire whenever you get a slow leak.
We will list down different sizes of Fix-a-Flat sealant and tell what size of the vehicle is it best used for.
If ever you have a larger size for a smaller vehicle, it’s best to consult tire experts on how to proceed with the method. Alongside this, you can also monitor the fixing by using a tire pressure gauge to check the tire’s air pressure.
Risks and ConditionsYou can see tons of reviews from the internet whereas they say that Fix-a-Flat indeed works. However, there are also reviews that state that it did not help at all. It is hard to argue about the matter, that is why it is important to keep in mind that Fix-a-Flat is not a permanent solution
Aside from that, we have to remember that Fix-a-Flat can fix small punctures such as nails or small shards (1/10th of an inch or lower). However, there is not enough evidence that FIx-a-Flat can mend broken tires with large holes (a quarter of an inch or higher).
Slow leaks are frequently associated with pinch damage to the sidewall, particularly on the inner sidewall where these are not apparent. These are results from low-pressure collisions with curbs, potholes, and railroad tracks. These usually cause a bubble on the sidewall between the layers of the case, which might subsequently burst more forcefully. Even if the source of the initial leak is fixed, sealants will not be able to repair this sort of damage.
Even with tiny punctures, tire sealants may react differently with the tire, preventing a proper fix and may result in a tire replacement.
There were reports that Fix-a-Flat does not seem to work well in cold regions. The reason behind this is that sealant gets frozen quickly and causes the tire to have an imbalance movement when on the go.
Keep in mind that by using any sealants, the tire is at risk for a long period of damage. It may not manifest quickly but if not treated right away, it can cause the tire to be inefficient and be subject to replacement.
Lastly, Improper use of any sealants can disrupt the detection of TPMS for vehicles. That is why it is highly recommended to follow all the steps precisely to prevent this from happening.
FAQ’sHow Long Can Fix-a-Flat Be Effective?Fix-a-Flat sealant can be effective for as long as 3 days or 100 miles of driving if the sealant is applied correctly. Knowing that this is not certainly a permanent solution to slow leaks, it is better to get your tires repaired and consult the experts whether it needs a replacement.
No, Quiet tires have treads that are coated with foam. If any sealant is applied, the sealant may absorb all the foams from the tires resulting in strong vibration and unwanted noise. Since there is no way to remove the foam, this will lead to tire replacement.
Are There Any Other Sealants That Are Also Proven Effective?Yes, there are. But what makes Fix-a-Flat aerosol sealant stand out is its household name. Primarily, its reputation in fixing small punctures has been tested and proven by many car owners. Aside from that, Fix-a-Flat has by far, the easiest and quickest method for mending slow leaks.
ConclusionWhether the reason for having a slow leak is a rough road or a nail on the road, we proved that there are ways to mend our tires easily and quickly. However, we have to remember that aerosol such as Fix-a-Flat is only as good as a bandage. Learning how to replace a flat tire, and determining whether a tire has a slow leak is important for us to be able to decide on which best route to take.
A slow tire leak is more than just a nuisance. A leak can lead to low tire pressure. Not to mention, prolonged running on an underinflated tire can lead to more extensive tire damage or even cause a dangerous blowout.
If you’re experiencing a slow leak, here are some things to look for:A tire puncture: It is a common misconception that a puncture will cause the tire to immediately go flat. However, in many cases the object that caused the puncture remains lodged in the tire and prevents the air from leaking out quickly. As with all tire leaks, it is important not to ignore a puncture. Eventually the object will either wear down and/or work its way out of the tire. For more on this read our article How to Repair a Tire with a Safe, Permanent Fix.
Wheel damage: Another common cause for slow tire leaks is damage to the area where the tire bead meets the rim. This type of damage is typically cause by the driver hitting the curb, taking a speed bump at high speeds OR those dreaded potholes! The impact deforms the wheel’s metal surface which may cause the tire to pull away from the mounting surface of the wheel.
Valve stem damage: The third most common cause for slow tire leaks is worn out or damaged valve stems. Time, use and exposure to elements can cause your valve stems to wear out and cause leaks.
Diagnosing your tire leak:
If your vehicle is equipped with TPMS, you will know right away if you have a leak. If the sensor light on your dashboard goes off, you inflate all the tires back to proper pressure and the light goes back on a few days later – you likely have a leak.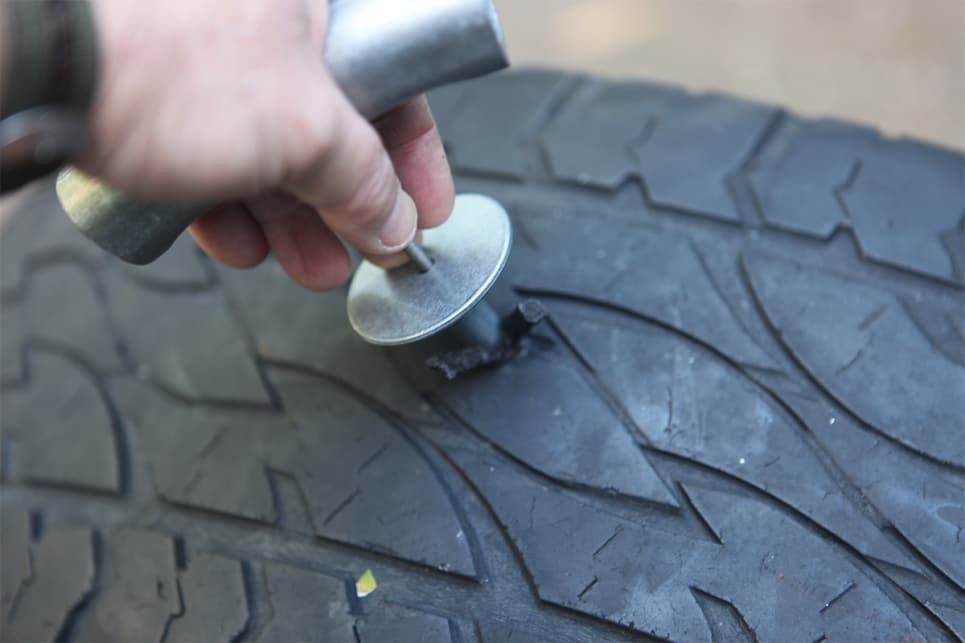 If your vehicle does not have TPMS, its important to check your tire pressure regularly.
Once you’ve identified that you have a leak, use TECH Chek to locate the source of your leak. Simply spray the product all around the tire. Where the surface of the tire begins to bubble is likely the source of your leak.
It’s important to have your tire diagnosed by a professionally trained tire shop or mobile tire repair service as soon as possible. In the case of a puncture, you may want to use a tire repair kit to keep your tire properly inflated until you can have it serviced. The leak should then be permanently fixed using a proper tire repair consisting of a cured rubber stem and repair unit.
If the leak is caused by a damaged valve, a trained tire technician can typically replace the valve at a minimal cost. In some cases, however, the tire may need replaced.
If the leak is caused by a damaged wheel, a tire technician may be able to reseat and seal the tire using a bead sealer. However, if the damage to the wheel is significant, unfortunately that means you may need to replace the wheel itself.
To read more about the types of damage that can and cannot be repaired, click here!
Many apartment owners looking forward to a housewarming experience face unpleasant surprises. Joy can be overshadowed by the detected shortcomings - while the time for their elimination does not always meet expectations. What to do in this case, how to prepare documents and make a reasonable claim to the developer? Let's try to deal with all the nuances.
The legislation provides for the right of the shareholder to demand compensation for the deficiencies found. However, under Law No. 214, the request is granted within a “reasonable time”. The extensibility of the concept is associated with the complexity of determining the essence of specific problems.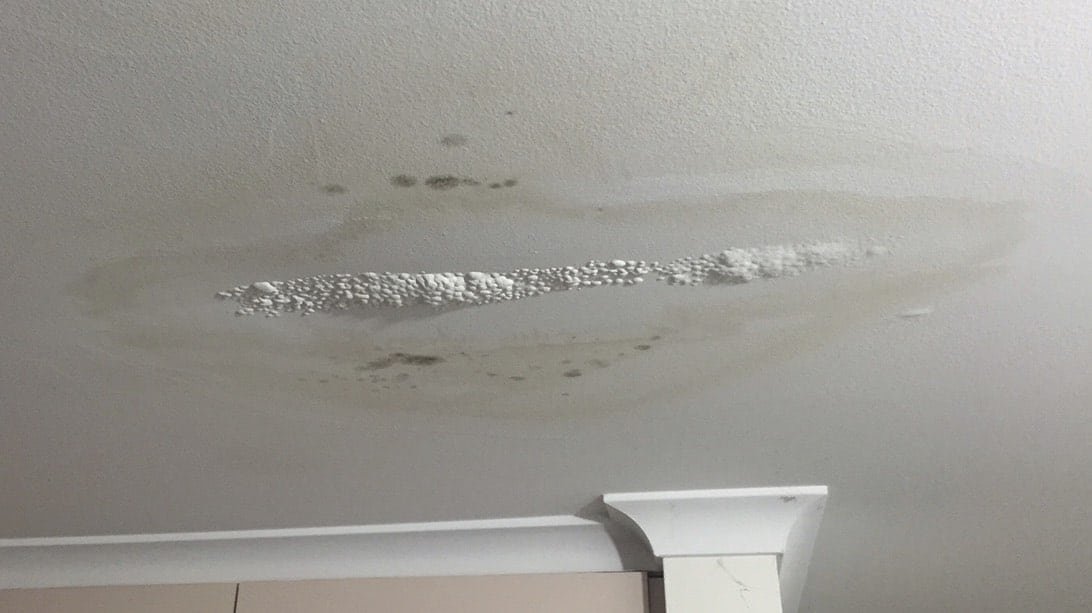 Obviously, replacing a concrete screed or eliminating a serious flaw is more difficult than changing low-quality fittings. Taking advantage of such a legislative flaw, developers delay the elimination of defects for an indefinite period. Therefore, the date of the work must be documented.
In 214-FZ there is a provision that will not allow the developer to postpone the obligations indefinitely. According to the Consumer Protection Law, the maximum period for troubleshooting does not exceed 45 days. However, as practice shows, construction companies do not want to risk their reputation and correct the shortcomings voluntarily. The shareholder can count on the rapid elimination of defects or material compensation.
It is very easy to solve the situation if the text of the sale indicates the exact terms with prescribed penalties. In this case, conversations are unnecessary: if it is not possible to reach an understanding with the developers, the interest holder files a lawsuit in court to resolve the problem.
In addition to the date of rectification, it is very important to understand the warranty period for the work. According to the law, allocated:
The term is counted from the date of signing the acceptance certificate in automatic mode. This document confirms the fault of the developer, obliging him to eliminate the defects found.
But not all problems can be detected when accepting housing. There is another category that is difficult to identify when accepting an apartment - the terms for eliminating shortcomings in this case are discussed directly with the developer. For example, these are roof leaks, leaky windows and other hidden defects.
The level of housing readiness is preliminary specified in the DCT. Most often, apartments in new buildings are rented without a fine finish. The buyer performs it independently or entrusts a team of craftsmen. At this point, you can carefully examine all the premises and assess the condition of the apartment. It will be much easier to identify flaws that are not hidden under decorative trim.
What to look for:
Be sure to use the standard inspection sheet. It can be prepared independently or with the help of specialized specialists. At the same time, it is important to understand that one inspection is not enough to check thermal devices; their performance is assessed using special equipment.
Based on the results of the inspection, the buyer has the right to refuse the developer to sign the act of acceptance, if during its course serious shortcomings are revealed and the object does not comply with the accompanying documentation:

The further procedure is as follows:
As soon as the responsible party fulfills the obligations, sign the acceptance certificate. At this stage, the real estate acquisition transaction is considered completed. In some cases, it is possible to agree with the developer on material compensation for the mistakes made.
If shortcomings were found after the transaction was completed, you must act quickly. Unfortunately, there is a category of unscrupulous developers who, during the construction of each facility, draw up a new LLC. After the bankruptcy of the legal entity with which you signed the contract, it is useless to demand compensation. Firms that simply ignore claims or drag out deadlines for elimination are simply indecently falling into the same category.
Once a defect is found, file a claim detailing the circumstances. Refusal to issue compensation may be justified by law in the following cases:
Having recorded and substantiated claims, the newcomer can count on several options for solving the problem:
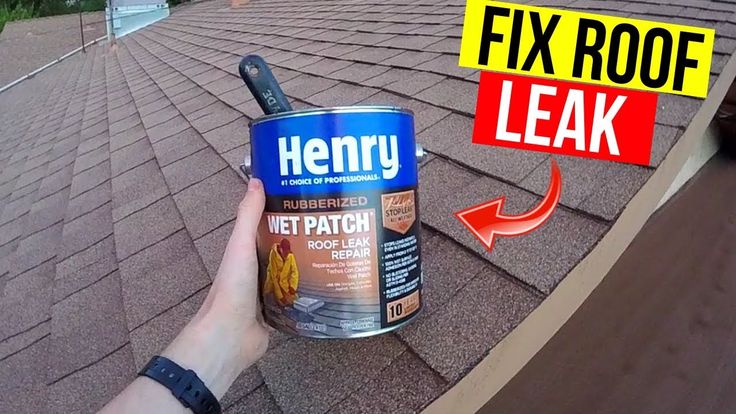
The first option is especially beneficial for the buyer, because repairs carried out on their own do not always give the expected result. To eliminate defects, you will have to involve hired workers, and these are extra costs, risks of violating the deadlines, using low-quality materials and dishonest performers.
In cases where, apart from repairs, other work was performed, they are also recorded in the documentation. Keep all receipts. Supporting papers will be required when applying to the court.
Prepare:
If you are going to sue for compensation, never start repairs yourself until a decision has been made. Otherwise, compensation will be denied or your payment will be reduced.
The services of an expert company will be needed if the developer refuses to sign the act with the problems recorded in it. In this case, the experts will record all the detected shortcomings, including hidden ones. They will check the quality of the apartment’s finish, draw up an inspection sheet and help bring the unscrupulous contractor to justice.
During the warranty period, there is a chance not to prove that the defects were the fault of the builder. But if the warranty period has expired, the situation changes somewhat. You can send a claim, but the chance of receiving full compensation is significantly reduced.
The accompanying paper indicates a specific list of deficiencies. If the owner expects to receive a penalty, it is taken for each day in the amount of 1% of the cost of housing or the total cost of repairs.
If the developer does not voluntarily remove the defects, the injured party is left to go to court. As in the case of drawing up a claim, all the problems found are registered in the statement of claim. Other penalties can be included in this list:
Before filling out the documentation, you should consult with professional offices that will help you correctly draw up a statement of claim and determine the amount of payments for each of the items.
In order to recover damages, it is important to assess the situation comprehensively. Remember: even through the court it is not always possible to receive a payment - there is a risk of intentional or unintentional bankruptcy of a construction organization. Try to solve the problem peacefully, but if the developer is not ready to meet the halfway, involve experts.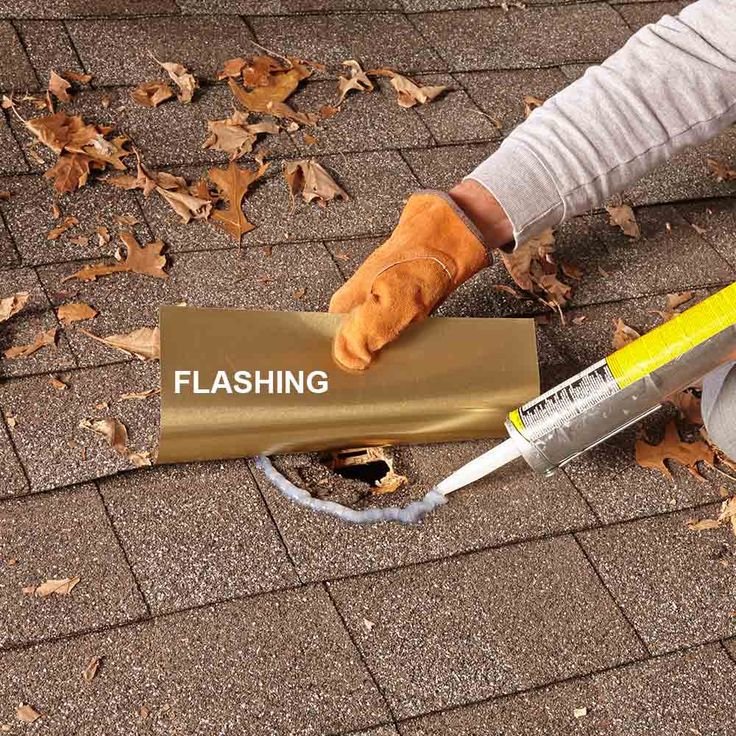
Breathing sewer odor is not only unpleasant, but also harmful to health. It happens that even the most advertised means cannot cope with this task. And then the question arises, where does the smell of sewage from the bath come from, and how to eliminate it forever?
1 Why the bathroom smells of sewage
2 Ways to eliminate the smell of sewage in the bathroom
2.1 Professional
2.2 Folk
3 Prevention of blockages
High levels of hydrogen sulfide and ammonia are the result of the decomposition of organic matter, that is, sewage. With prolonged inhalation, headaches, irritability, dizziness and even nervous breakdowns are possible.
In order to understand where everything comes from, it is important to know how the plumbing system in the room works. A common cause of sewer smell in a home is a dry trap. The U-shaped trap allows a small amount of water to be collected after each use of the sink, which acts as a barrier against sewage odors. When everything is working properly, water remains in it after you turn off the sink, tub, or flush the toilet. A small amount of liquid is enough to prevent the smell from the sewer from entering the house. Incorrect operation of the trap is often the cause of stench.
It is more difficult to determine the presence of a leak in sewer and septic systems. If the toilet is gurgling, and in addition to the smell of slow flushing, there is probably a leak in the sewer line.
If the walls near the toilet give off a persistent smell of sewage, the cause may be improper installation or cutting of the ventilation pipe. The vent pipe helps regulate the air pressure in the plumbing system. They also redirect odors out of the room. However, sometimes contractors install pipes incorrectly, which can lead to odors in the bathroom.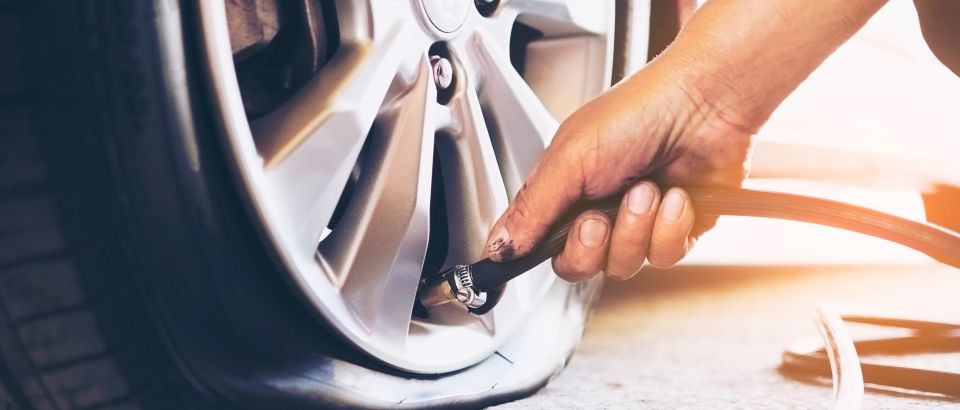 Other reasons could be:
The first step is to find out the source of the sewer smell in the bathroom. If the installation is incorrect, the call of the masters is inevitable. If it's something else, you may be able to solve the problem yourself.
Many sources of sewage odors are easy to eliminate at home. However, do not overestimate your own abilities. Professional workers will quickly cope with the elimination of an unpleasant odor that has captured the entire apartment in the absence of the desire and ability to cope with the problem. Calling a plumber is indispensable in the following cases:
 Most likely you will have to reinstall everything again;
 You can test the operation of the ventilation shaft by placing a sheet of paper against the grate. If the hood is working properly, the air flow will draw the sheet to the grate.
When installing the system, it is better to turn to professionals. This will guarantee the quality and durability of the work done.
By yourself, folk methods can fix blockages, leaks and other minor sewer malfunctions. There are many recommendations, each homeowner selects the most suitable option for himself.
First, the location of the blockage is determined. The drain in the bathroom, sink and toilet is checked. Next, you need to choose a cleaning agent. Instead of expensive store-bought products, you can use a mixture of salt and soda:
A simpler and more affordable cleaning agent is table salt. Fill the drain pipe with plenty of salt and leave for several hours. Then rinse with hot water. The method is suitable for small blockages.
You can drop a couple of Alka-Seltzer tablets into the pipe. Pour table vinegar, leave for two minutes, then rinse with warm water.
In addition to traditional cleaning methods, there are other methods:
