How Do ATV Snow Plows Work? Choosing an ATV Snow Plow Steps to Install a Snow Plow on Your ATV
This post will help you choose and install an ATV snow plow blade so you can make your favorite machine a winter weather lifesaver.
Simply, you attach a snow plow blade to the front of your ATV.
Snow plows for ATV are blades made of metal or tough composite materials that are attached to your machine with a mounting frame and a lift mechanism.
With a snowplow installed, you can plow as much as eight inches of light snow in as wide a path as the plow is wide. With higher or heavier snow, you may do better with a snow blower.
Remember to drive no more than 5 mph and to be mindful of obstacles that may damage your snow plow or make you lose control of your ATV.
There are many things to consider when you install an ATV snow plow.
There are manufacturer-specific snow plows and general aftermarket ones to choose from. Of course, manufacturer-specific ones will be made with your ATV in mind.
Plow blades usually come in sizes from 42 inches to72 inches, though some are larger, and you'll need to combine the size of your vehicle with the intended use of the plow to determine the size you'll need.
A good general rule is that a larger and/or more powerful ATV or UTV will be able to effectively use a larger plow blade. A smaller blade is usually best for ATVs 500cc or lower and a larger blade is usually best for ATVs 600cc or higher.
The width of the plow should cover a sweet spot between plowing as much snow as it can to save yourself work without being overly large and knocking into things near where you'll be plowing. Also, a blade wider than necessary may have more difficulty going through heavy snow than a narrower blade. But narrow is not automatically better, because an excessively narrow blade can compact the remaining snow as you plow.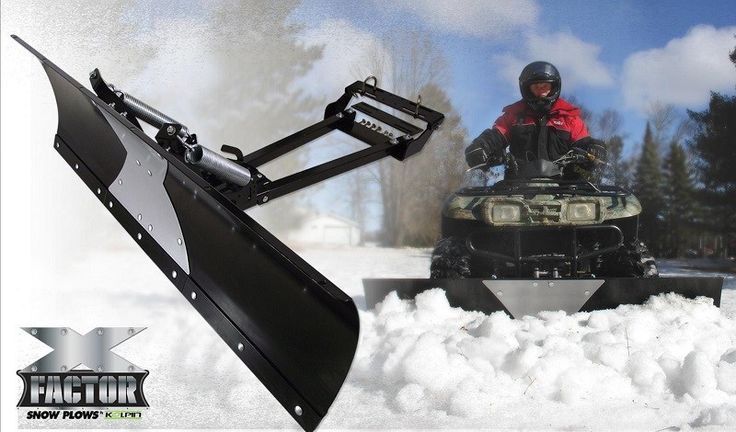 Basically, a moderate size will probably be best, taking the specifics of your ATV, the area to be plowed, and the type of snow into consideration.
Plow blades come in V or straight designs. V blades can tackle thicker snow and ice while straight ones are less expensive and lighter. V blades can also give you more control of where you deposit the snow.
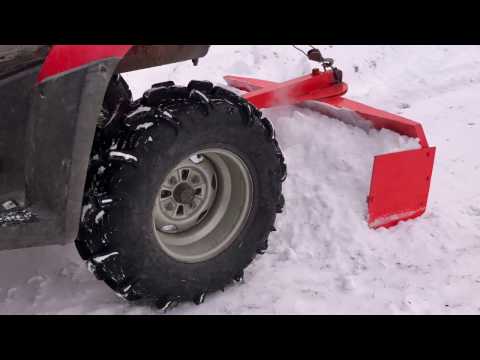
Many mounting frames attach to the underside of the ATV using a bracket and pin locks. This is one of the more complicated aspects of buying an ATV snow plow as you'll need to compare the requirements of the individual mounting frame with your individual ATV frame to make sure you can both install the frame without damaging your ATV and that you can easily remove the frame when it isn't needed, unless it provides enough clearance you can leave it year round.
An electric winch that can be operated from the driver's seat is the ideal lift system, but there are also cheaper and easier-to-install manual lift systems where you angle the plow yourself and raise or lower the plow by hand.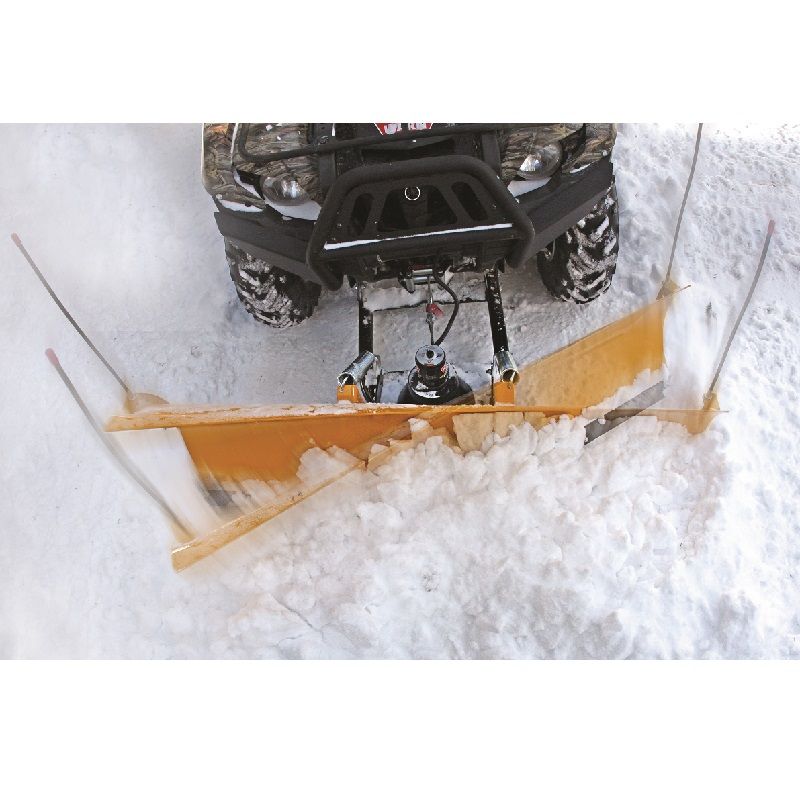
Both plow materials will serve you well. Steel is durable and slices through the snow easier and it is the less expensive option. Poly is known for its slick surface making depositing the snow as easy as possible and preventing corrosion.
ATV are the core piece of riding gear for off-road riders
Find out the best look for you
The first thing to do is raise the ATV on a jack and jack stands.
Attach the bracket for the mounting frame to the bottom of your ATV with U-bolts.
The plow tubes come with latches and pins to attach the mounting frame to the bracket you just installed. They may need to be assembled. If so, they will come with instructions to tell you how to do that for your individual tubes.
The plow blade may also require some assembly.
Depending on the plow blade you purchased, you will either attach the blade to the tubes and slide the plow tubes under the ATV or drive the ATV up to the plow blade.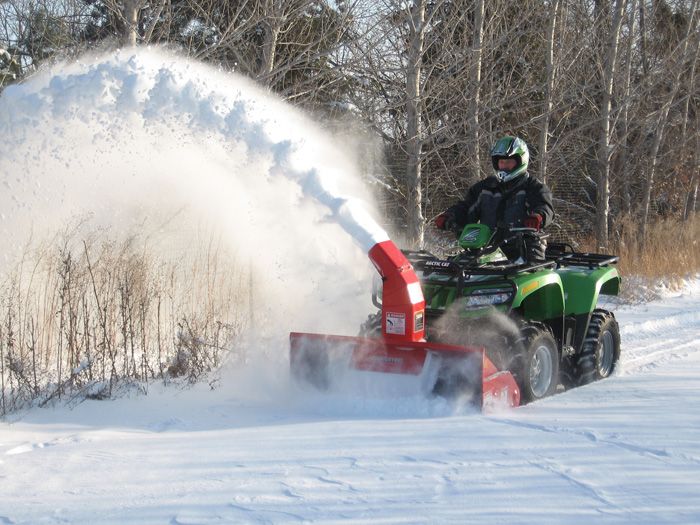
With the slide under method, slide the end of the plow tubes under the ATV and line them up with the bracket. Having a furniture dolly or someone to help you will make this much easier. Once they are positioned under the bracket, lift them and stick the pins into the holes to secure them. Pull the winch cable down to connect to the plow tubes and test the plow to make sure it works.
With the drive up method, activate the float feature on your plow controller, line the ATV up with the plow blade, and slowly drive the ATV up to the blade until the pins touch the pin receiver under the machine. Set the parking brake and turn the lever on the pin couplers to the ATTACH position. Plug the electrical wires into the wire harness. Activate the float feature again and, with the coupler handler, push the coupler up until the spring pins snap into place. Pull the kickstand handle out and raise the kickstand.
You now have an ATV and snow plow in one.
SPORTSMAN Black
36 EUR
28. 80 EUR
-20%
HIT
ENDURO LIGHT Graphite
the most durable
458 EUR
366.40 EUR
-20%
HIT
ENDURO Camogrey
the most durable
657 EUR
525.60 EUR
-20%
HIT
ENDURO Graphite
the most durable
279 EUR
223.20 EUR
-20%
HIT
ENDURO Graphite
the most durable
657 EUR
525.60 EUR
AQUAMASTER-ZIP LIGHT Camogrey
with central zipper
598 EUR
352.70 EUR
-20%
HIT
ENDURO LIGHT Camogrey
the most durable
458 EUR
366.40 EUR
AQUAMASTER LIGHT Red
reliability & comfort
438 EUR
360.30 EUR
NEODRY Black
17 EUR
10. 20 EUR
-20%
HIT
ENDURO Camogrey
the most durable
279 EUR
223.20 EUR
AQUAMASTER Blue
reliability & comfort
647 EUR
517.60 EUR
-30%
HIT
AQUAMASTER Red
reliability & comfort
259 EUR
181.30 EUR
-50%
HIT
AQUAMASTER Orange
reliability & comfort
259 EUR
129.50 EUR
AQUAMASTER Red
reliability & comfort
677 EUR
577.40 EUR
-50%
HIT
AQUAMASTER Camogreen
reliability & comfort
259 EUR
129.50 EUR
BELT
9 EUR
7.20 EUR
ENDURO BF Camogrey
bootfoot waders
528 EUR
422. 40 EUR
ENDURO BF Camogreen
bootfoot waders
289 EUR
144.50 EUR
ALL SEASON Black
62 EUR
49.60 EUR
ENDURO BF Camogrey
bootfoot waders
329 EUR
263.20 EUR
Explore all
BEST VALUE PLOW
COMPLETE PLOW SYSTEM IN 1 BOX.
ATV - $369.99 / UTV - $469.99
Universal and complete ATV & UTV standard plow system that contains everything to start plowing today in 1 box.
Blades can be adjusted and set to 2 different widths.
|
Lift Height |
10 inches |
|
Underbody Mid Mount |
✔ |
|
Assembly Time |
60-75 minutes |
|
Power Angle (Optional Accessory) |
✖ |
|
Construction |
Bolted Construction |
|
Quick Attach |
✔ |
View Comparison Chart
BEST SELLING ATV PLOW
FIND THE SNOW, PLOW AWAY
$514.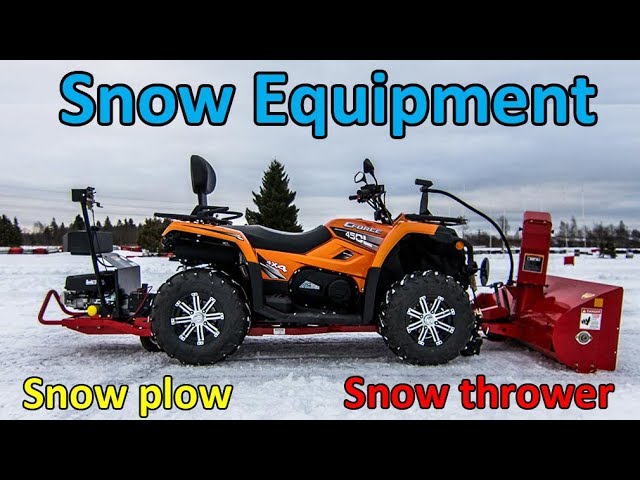 97 - $739.97
These push tubes have been pushing snow around for years, and deservedly acquired a very suiting nickname: Storm Chaser.
These push tubes are workhorses, designed with the same heavy-duty square tube chassis as big brother, High Rise, but without the lift height of power angling capabilities.
|
Lift Height |
10 inches |
|
Underbody Mid Mount |
✔ |
|
Assembly Time |
30-45 minutes |
|
Power Angle (Optional Accessory) |
✖ |
|
Construction |
Welded Construction |
|
Quick Attach |
✔ |
View Comparison Chart
|
Lift Height |
21 inches |
|
Underbody Mid Mount |
✔ |
|
Assembly Time |
30-45 minutes |
|
Power Angle (Optional Accessory) |
✔ |
|
Construction |
Welded Construction |
|
Quick Attach |
✔ |
View Comparison Chart
|
Lift Height |
30+ inches |
|
Bumper/Front Mount |
✔ |
|
Assembly Time |
30 minutes |
|
Power Angle (Optional Accessory) |
✔ |
|
Construction |
Welded Steel Construction |
|
Quick Attach |
✔ |
Home | Tests and reviews | Accessories Reviews | Snowplow Review – Winter Tamer
Photo courtesy of www.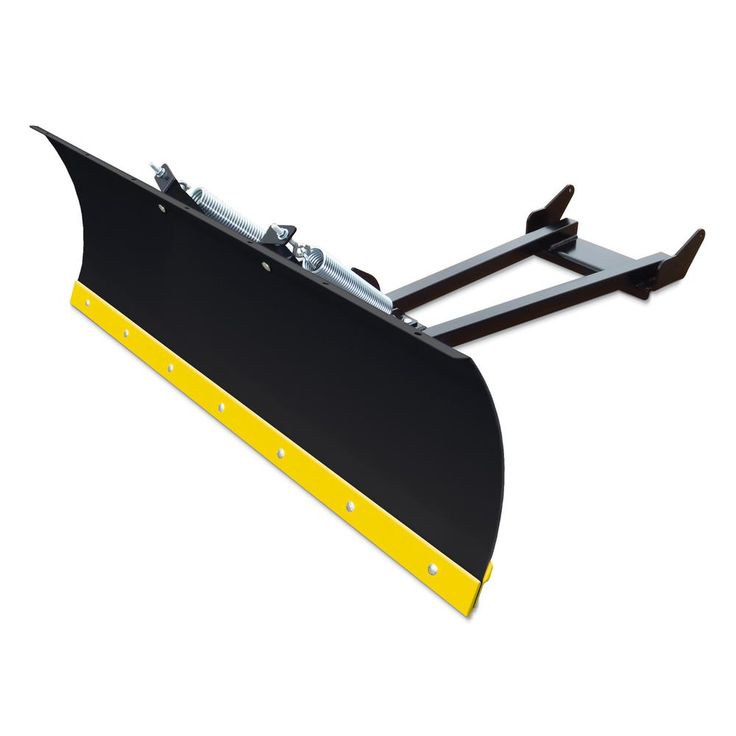 atvillustrated.com Testing the second generation Orel snow blower
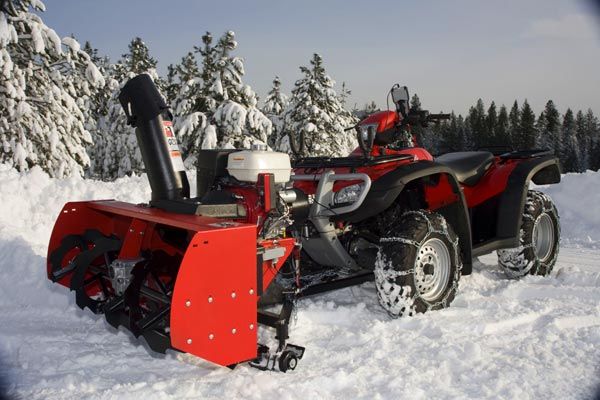
We like the Can-Am Commander sporty anyway, but this one looks great with the Eagle snow blower and tracks mounted on it.
Next to the removable roof and windshield, the snow plow is one of the most popular accessories for ATVs and SUVs. In fact, it's quite natural. An ATV or Side x Side is better and easier to maneuver over difficult terrain than a Jeep, Pickup or Tractor, and as long as the snow isn't too deep, they do a great job of clearing snow off a trail or road. If you already have an ATV or Side x Side, then you can use it in winter for your needs. The market offers a huge number of snow blowers, some of them we liked, others we would not recommend to buyers, but one snow blower we did install and test last season, and this is an American-made Eagle Snow blower. nine0005
On the market you can find Eagle Snowblowers for almost every ATV model, so we installed it on Suzuki King Quad 750.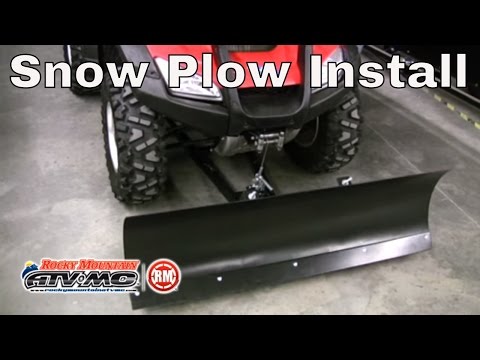 there is a winch available - half the job is done. On our Suzuki ATV, we installed an Eagle winch of the same brand as the snowplow. Here is a brief summary of the snow blower and its installation process.
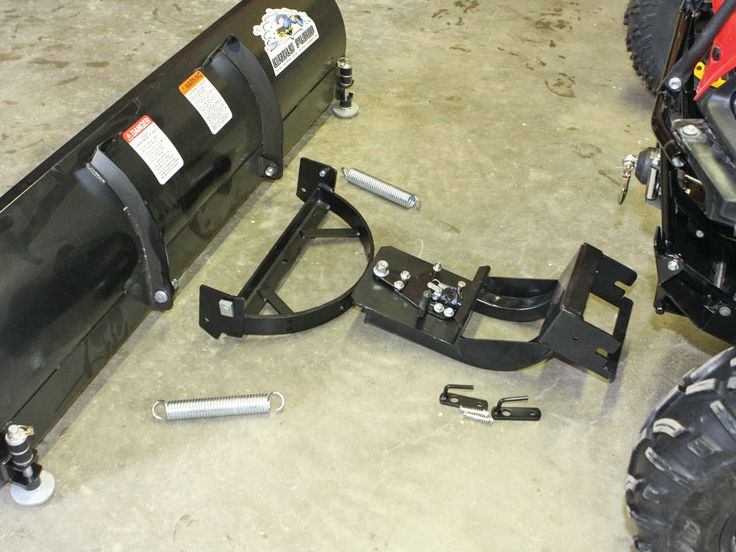
Prepare all parts. It will be very helpful if you know and prepare all the main parts before installation.
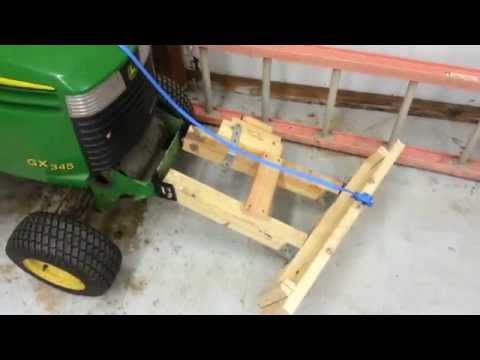
Install the winch if necessary.
Install the snow blower hardware. This was pretty simple, but instead of using the 5/16" bolts that came with the kit, we used 8mm clamps. This is a metric machine - use the same clamps.
The Orel snowplow kit includes: the snowplow panel itself, swivel and lifting mechanisms and mountings for your ATV. It was quite easy and quick to attach and mount the snow blower to our Suzuki 750 ATV. However, you will need a winch for mounting anyway. nine0005
A little trick we always resort to when screwing a base plate or any other part to our frame is to place a small piece of rubber between the two surfaces to be fastened. In this project, we cut off a small piece of radiator hose and placed it between the snowplow mounting hardware and the ATV frame. This helps isolate any vibration and protects the frame.
Attach the rotating frame (PIVOT FRAME) to the snow blower blade. Most snowplows are shipped unassembled so they can be shipped via shipping companies such as UPS or FedEx rather than in special heavy containers. This greatly reduces the cost of delivery, but it also means that you will have to assemble the snow blower. It is not difficult. nine0005
Bolt the rotating frame to the back of the snow blower blade and install the large springs. The springs will allow the frame to move up and down to avoid any object or obstacle that is invisible under the snow. They will protect you, your ATV and snow blower from possible harm.
Attach the impact frame (PUSH FRAME) to the rotating frame. Bolt the impact frame to the rotating snow blower blade frame. This will allow you to turn the blade in any direction. When you do this, the blade should move easily and smoothly. nine0005
Attach the winch cable. Rewind the cable so that the winch hook catches the hook on the impact frame and slowly pull it back until the snow blower blade is raised. You must stop before the snow plow frame hits the fasteners! Once you have stopped, fix the cable in this position. DO NOT PULL THE CABLE AFTER THE SNOWBLOWER FRAME HIT THE HARDWARE, YOUR VEHICLE, WINCH, OR SNOWBLOWER MAY DAMAGE.
Adjust suspension and tire pressure. Additional weight at the front of the ATV will affect vehicle handling. On our ATV, we set the pressure to 5 pounds-force per square inch (psi) on the front wheels and 4 on the rear.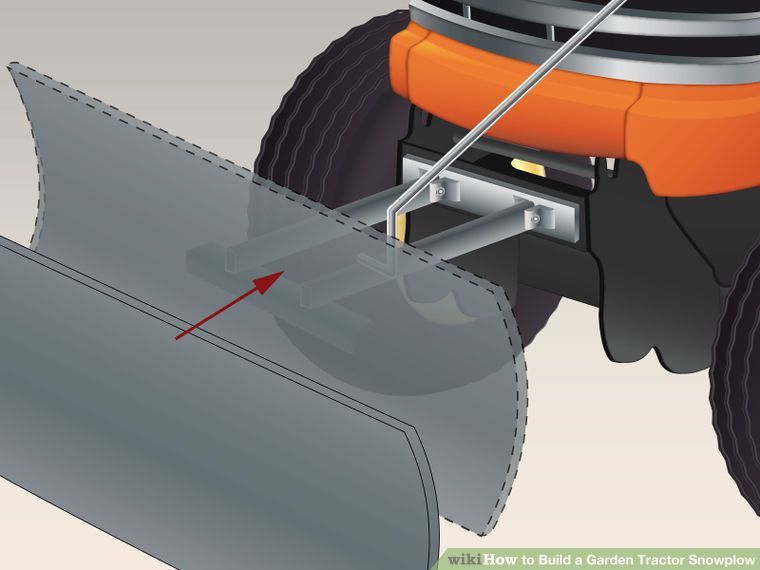 This is easier to do if the tires are not on the ground. nine0005
Adjust the slope of the snow blower. If you want the snow thrower to glide over the ground and not leave a huge amount of snow behind it, adjust the snow thrower so that it is as low as possible in relation to the ground.
Fluffy snow is easy to clear, so the real test for our snow blower will be wet snow that wants to pile up on the snow blower blade rather than slide off to the side. The snow we're about to clear is going to be a real test for the Eagle Snowplow. We fired up our Suzuki and took it to a place where it will show Mother Nature what our snow blower can do. nine0028 We were wondering if the Suzuki would have trouble pushing the 60 blade through wet, sticky, heavy snow. Luckily, it didn't take long for us to find out the answer and make sure that the Generation 2 Snow Blower does a great job clearing snow, not piling it up on the blade, but brushing it aside.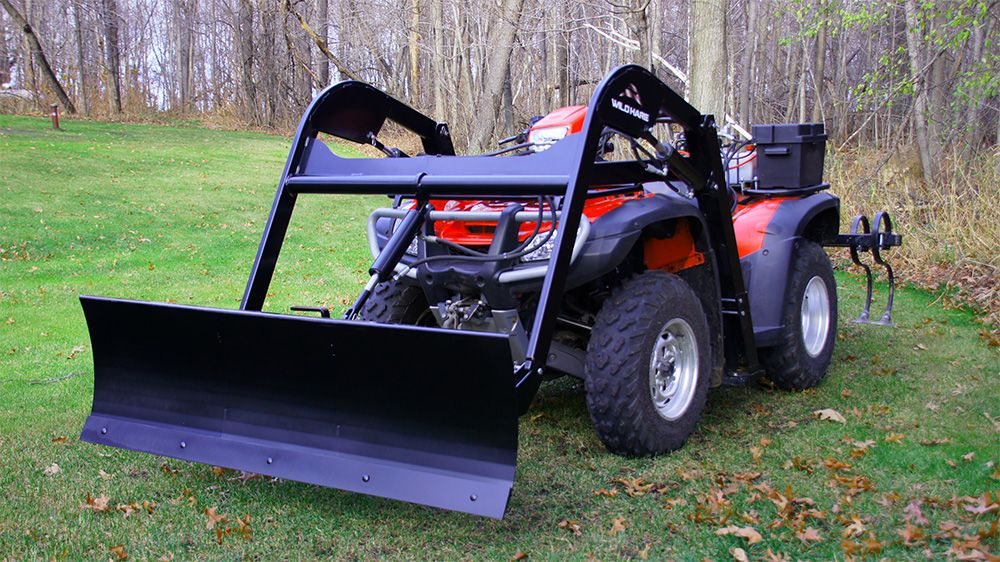 Suzuki easily cleared his way at a speed of 4 km / h. At the end of the road, we looked back: behind us lay a perfectly cleared road. We also tested the Orel snow blower without blade tilt and it pushed the snow with no problem, this time raking it where we wanted it and leaving a wide clear space. Changing the angle of the blade takes only a few seconds, just like cleaning the discs proved to be a breeze. The work turned out to be so easy that we even began to look at neighboring areas that could be cleared of snow and snowdrifts. In fact, if the Second Generation Snow Blower can handle wet, heavy snow with ease, it certainly won't have a problem with soft, small drifts either. This is a great winter tool that does its job much better than you could imagine, we rate the Eagle Snowplow as an outstanding tool. nine0005
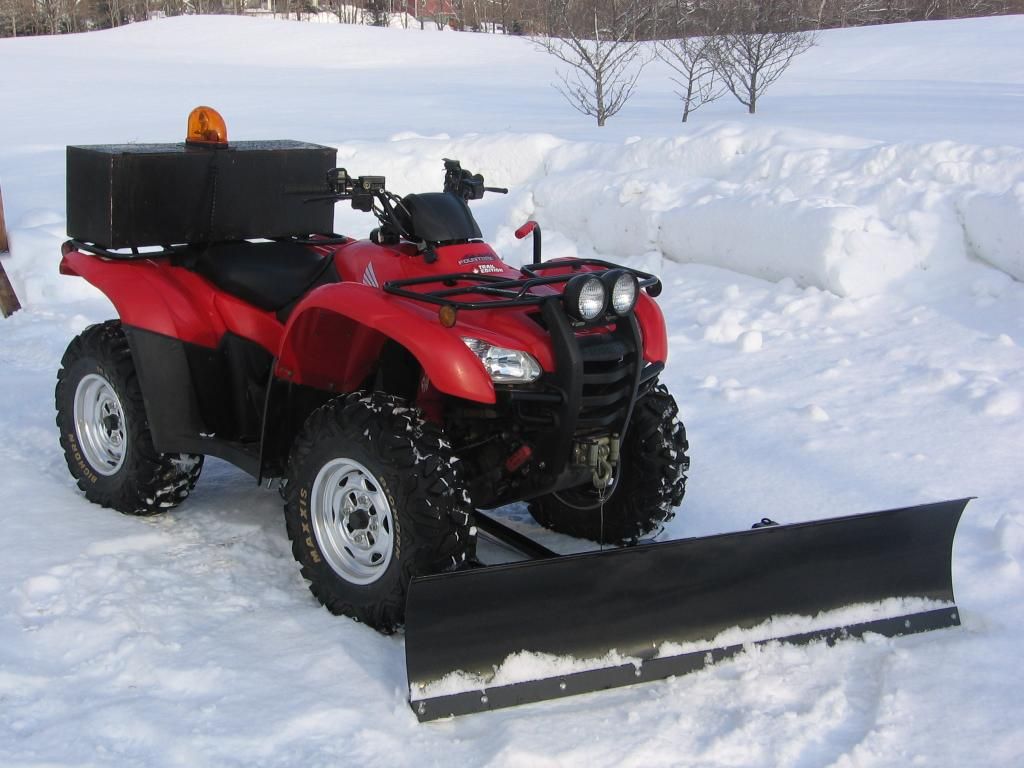
Mounting the snow blower on our ATV
The quality of all components of the Eagle Snow Plow kit is very high. The laser-cut fasteners were free of burrs or sharp edges, the holes were clean, and the folds showed no tool marks or damage.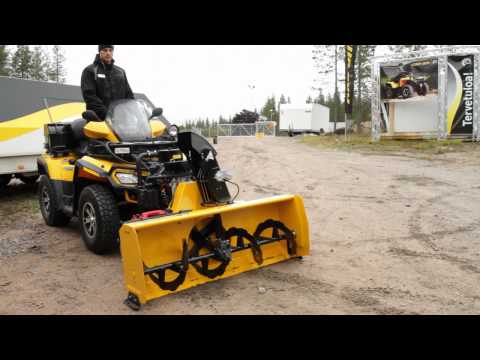 The welding quality is also very high, and every part of the snow blower is coated with an anti-corrosion coating. But two things would make a snowplow even better. nine0028 A good set of instructions would be nice. The manual provided is more like a general usage guide rather than specific ATV step-by-step instructions. This manual leaves a LOT of room for interpretation. This can be a big barrier to installing a snow blower and will literally prevent some from installing a snow blower themselves. A few photos of the instructions would also be useful, especially for the vehicle on which the snow blower is installed. This applies to everything from the installation of the apparatus to the location of the solenoid. nine0005
We also feel it would be better if the kit included high quality special clamps rather than bolts. On an ATV where every clamp is metric, all attachments and accessories must also be metric, especially those that come into contact with the ATV. We unscrewed two bolts with ease, which could have been avoided by using special metric clamps.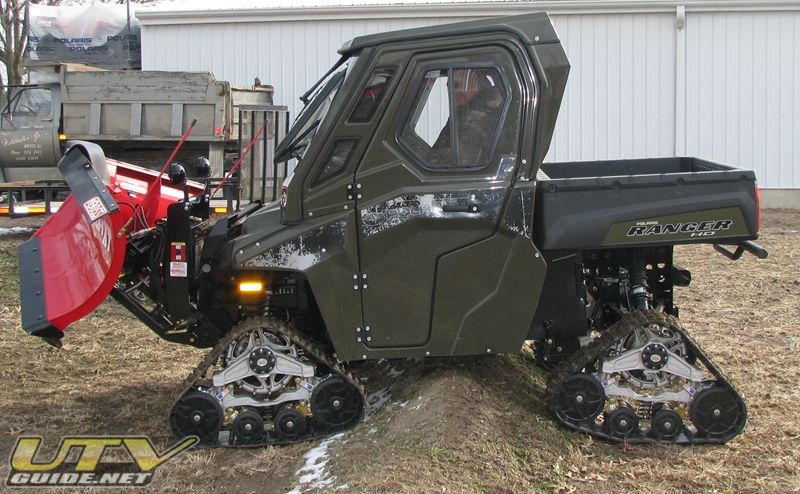
Second Generation Eagle Snow Plow did a great job even in wet snow. He did a quality job, he quickly performs painful complex work, which would have taken hours before. He practically makes us wait for next winter... practically. nine0005
Second Generation Eagle Snow Plow Feature:
• Blade width from 50 to 70 inches;
• Blade shape pointed, straight, or new V-shape;
• Blade material 12 gauge, high strength steel;
• Two-piece mounting system, Quick Latch fastening system is used;
• Mounting pin for Heavy Duty 5/8” blade;
• All parts are covered with anti-corrosion coating;
• Warranty: full warranty against manufacturing defects. nine0028
Snow plow installed on our ATV is ready for use. It will take you no more than a few seconds to change the angle of the blade. Grasp the handle, pull the blade to a new angle, and get back to work.
Winch adjustment button.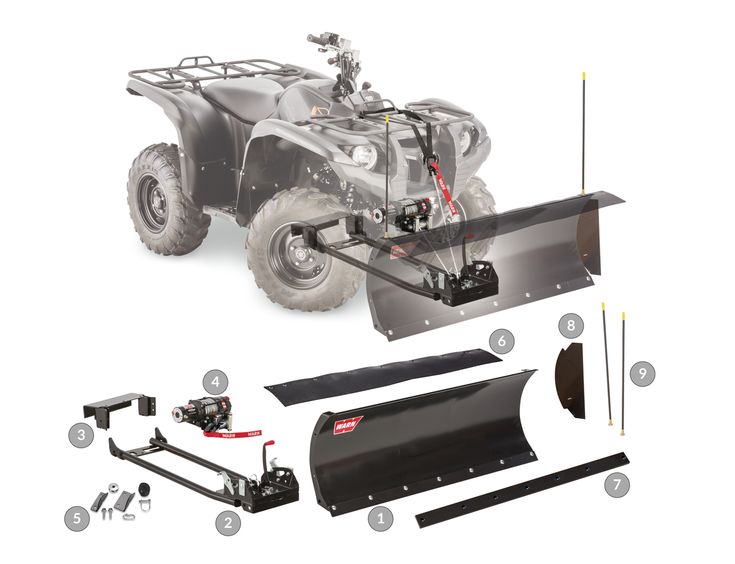 It will help you raise and lower the snow blower.
Our Suzuki ATV handled the Eagle 60 Snow Plow with ease. nine0005
Source: www.atvillustrated.com by Staff.
When using materials from the site, a hyperlink to the site sagamoto.by is required.
Views: 4961/5475
Back to list with reviews
Commenting Rules
Comments are published only after they have been reviewed by a moderator.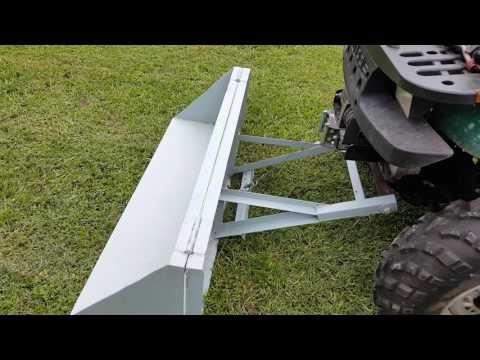
Comments are not published:
- containing obscene language,
- intended to offend other reviewers and authors,
- containing a large number of lexical, spelling and other errors,
- typed in Latin letters,
- advertising (phone numbers, addresses, links to other sites),
- requests to find some other product,
- any other extraneous text .
LLC "Sagamoto" is not responsible for the content of user comments published on the site www.sagamoto.by, as they express the opinion of users and are not editorial material. The site moderator www.sagamoto.by reserves the right not to publish comments that do not meet the requirements listed above, and also reserves the right to remove any review at any time without giving reasons and without prior agreement with the comment author. nine0005
Removing snow with a shovel is a rather laborious process.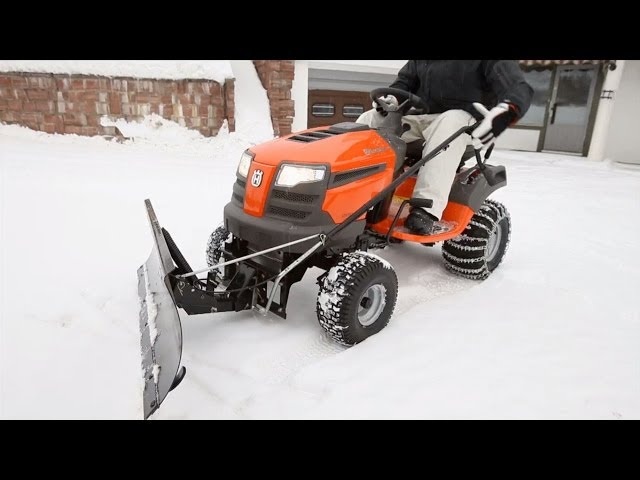 To facilitate it, a homemade snow blower can come to the rescue. Having made it, you will not only free yourself from the hard work of clearing the snow, but also save a lot of money by not spending money on expensive models of units in the factory.
Contents
The main task of a snow blower is to capture and throw snow masses from the place of their accumulation, for example, from the sidewalk. Snow blowers made by craftsmen have a different design. But according to the type of snow capture, the models differ in screw and rotary.
The main part of the snow removal unit is the auger, which resembles a meat grinder screw. nine0004
There are two types of screw units.
 When moving the mechanism with a bucket, a layer of snow is cut, which immediately falls under the rotating knives. The latter crush the snow and move it to the central part of the hull. Since the blades are located in the center of the auger, they capture the crushed snow and throw it into the nozzle installed at the back of the bucket. The higher the speed of rotation of the shaft with the blades, the further the snow is thrown. Auger knives can be either with a smooth edge or with a serrated one. Blades with a smooth edge are used for clearing fresh snow, and are often made from a conveyor belt. A toothed auger is used when it is required to remove icy and packed snow. nine0117
  The following figure shows the structure of a two-stage type snow blower. nine0117
The rotary type snow blower is the simplest design and consists of a round volute body and guide vanes . In the upper part of the body there is a sleeve through which snow is thrown out.
Rotor with blades is installed in the central part of the volute. This impeller is driven by an engine (petrol or electric). The rotor, rotating at high speeds, captures the snow, crushes it in the body of the snail and throws it out through the sleeve. nine0005
Homemade snow throwers can be of two types.
Before you make a manual snow blower, you need to understand what type of engine is better to choose - electric or gasoline.
Electric units are quiet and very easy to maintain . They also do not require any consumables. The only inconvenience of electric devices is the electric cable that constantly interferes with movement. Of course, you can use the engine running from batteries, but the operating time of such a cleaner will be limited by the battery charge level. Therefore, if you are going to make an electric snow blower, be aware that it can only work within the yard, that is, the range of movement of the unit will be limited by the length of the power cable.
Petrol snow blowers are powerful and rather noisy units . They cope with thick snow covers, including icy ones. Gasoline devices have an advantage over electric ones, not only in terms of power, but also in mobility, since they do not depend on the electrical network.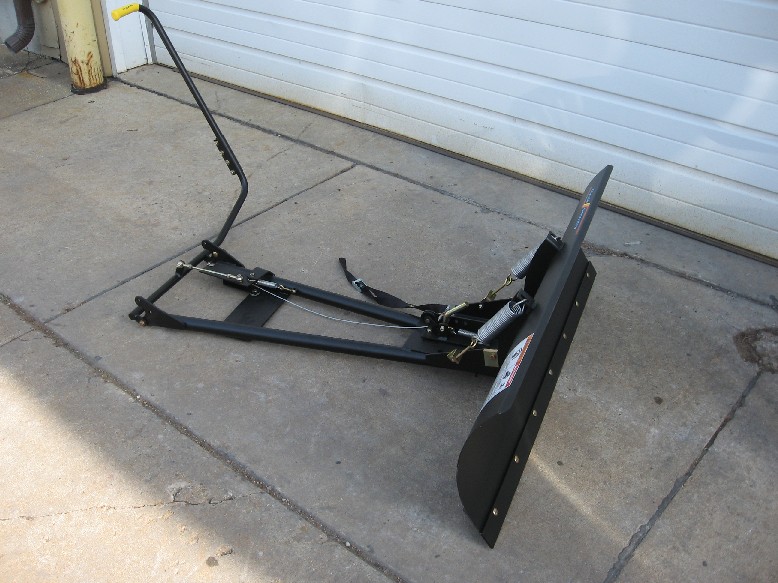 Due to this, the units can be used for cleaning snow drifts in large areas, for example, near private sector yards, in high-rise building yards, on sidewalks, on separate sections of the road, etc. But despite the listed advantages of gasoline devices, they also have disadvantages:
Based on the above, you can understand that if you need to clear the yard of a summer house or a small private property from drifts, then it is better to stop at the manufacture of an electric snow blower. If you intend to regularly clear large areas of snow, then a gasoline drive will cope with this task better than an electric one. nine0005
To make a snow blower with your own hands, you will need to choose an engine that will rotate either the auger or the rotor of the unit.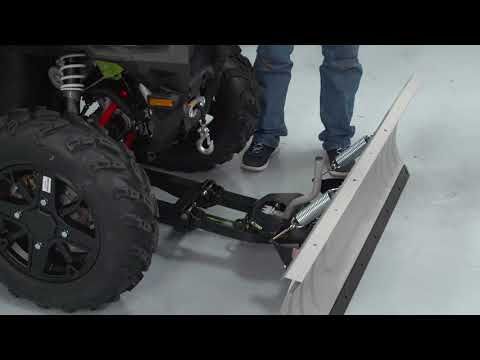 If you are going to make an apparatus with an electric motor, then any asynchronous type electric motor with a power of at least 2 kW and a rotation speed of 1500 to 3000 rpm is suitable as a drive component. If you take an engine with less power, then it will not cope with thick layers of snow and will stop all the time. In this case, cleaning drifts with a shovel will be much more effective. nine0005
As a drive component, some craftsmen use motors from electric trimmers and chain saws. It is not uncommon to find homemade snow plows made from a lawn mower. But the power of these units is only enough for cleaning freshly fallen and loose snow.
A more powerful variant of the driving part for the snow thrower is the Internal Combustion Engine (ICE). It can be taken from a chainsaw or petrol trimmer. Also, a snow removal unit can be made from a motor cultivator or a motor block. nine0005
The auger for the snow blower is the main moving part of the machine, the manufacture of which is not difficult.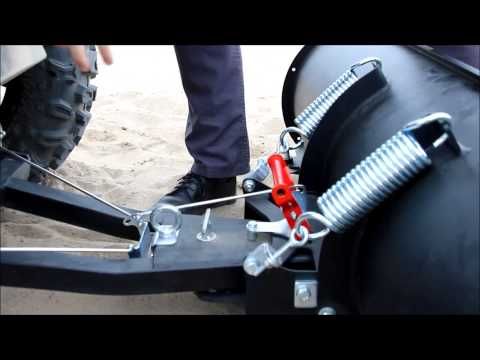 It is best to use a rubber belt from a conveyor 10 mm thick and 1.5 m long for the manufacture of the auger . From the rubber strip, it is necessary to cut out rings in the amount of 4 pieces with a diameter of 28 cm. The details are easily cut using an electric jigsaw.
Tip! To cut rings from the tape, you can do without a jigsaw. Screw 2 sharp screws into a small board and use this device as a compass. After a few full turns of the cutter, the ring will be cut. nine0005
Below are drawings of all auger parts.
Shaft is metal pipe with a diameter of 27 mm . Adapters are fixed to its ends, on which bearings are installed. A cut 120 mm long is made in the central part of the pipe, into which a central plate will be installed, designed to throw snow. Also, 4 plates are put on and welded onto the pipe. Rubber rings will be attached to them and to the central plate. How this is done can be clearly seen in the next photo.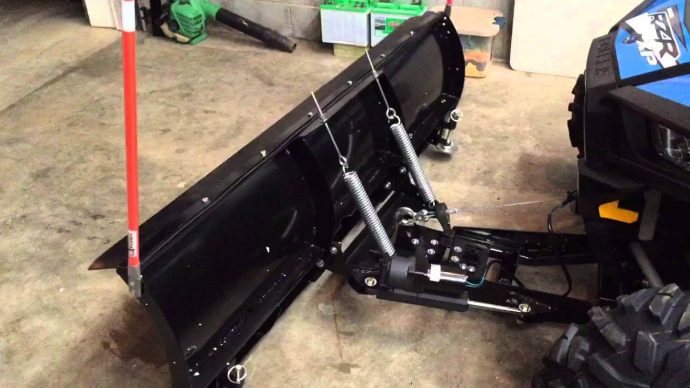 nine0005
A metal strip can also be used to make the auger. But it is preferable to use rubber, because it does not scratch the paving slabs and is not damaged when it comes into contact with a hard obstacle, such as a curb or a fence.
It's also easy to make a bucket that will serve as a housing for the auger. For this purpose, roofing iron is usually used. The drawing below shows the dimensions of the bucket. nine0005
For bucket sides, plywood or 10 mm thick OSB can be used. The latter option is more suitable for this purpose, since it is more moisture resistant than plywood. Bearings are installed on the sidewalls of the housing (you can use the 205th, closed), and the screw shaft is already inserted into them. Bearings must be closed with glasses.
Important! When assembling the snowplow assembly, it is necessary to make a small gap, about 2 mm, between the bucket and the auger so that the latter does not touch the body.
nine0005
To remove snow from the bucket, a hole is cut in its upper part. As a drain, you can use sewer plastic pipe with a diameter of 150 mm or another. The main thing is that the diameter of the chute exceeds the width of the folding blades of the auger.
In order to direct the snow ejected by the shovel to the side, a plastic bend can be put on the pipe.
The bucket with auger is mounted on a pre-made of metal angles (50 x 50 mm) frame (see drawing above). To fix the engine on it, corners of 25 x 25 mm are used. nine0005
Tip! If you attach a slightly curved sled to the frame, as shown in the following figures, then working with a snow thrower becomes much more convenient, since it becomes possible to tilt the mechanism for better gripping of snow.
But this unit can be further improved. The modification of the snow blower is to add small wheels to the rear of the skid . In this case, the snow blower will be more convenient to pull back and transport. Snow blowers based on the auger are the most powerful and capable of handling even icy snow. In addition, the auger is most often used in self-propelled snowplows. This snowplow is made by hand quite simply. Since it will be powered by a chainsaw engine, a few additional parts for the chain drive will be required. For these purposes, you can use front and rear sprockets from a motorcycle, as well as a chain from it. How the frame and auger are made has been described above. A long handle is attached to the frame. A large sprocket from a motorcycle is installed on the auger shaft on the right side, and a small sprocket is installed on the chainsaw engine shaft. Next, the chainsaw is mounted on the frame, after which the chain is put on and pulled on the sprockets. To control the engine, the gas cable is brought to the handle attached to the frame. Below are homemade drawings on a chassis, where a chainsaw is used as the main part of the drive. But there is one caveat. The gearbox for this type of unit is quite expensive, and it is not advisable to buy it for the manufacture of attachments to the trimmer. Therefore, on the basis of the latter, rotary-type snow blowers are made, which will be discussed later. nine0005 The simplest addition to the motoblock is snow plow. A self-made snow plow attachment (shovel) on a walk-behind tractor is screwed to the frame of the unit, after which it turns into a small bulldozer. Tip! Instead of a blade, an auger can be attached to the front of the frame of a walk-behind tractor or a motor-cultivator, as a result of which you will get a self-propelled snowplow. This attachment for a walk-behind tractor, if not needed, can be easily disconnected from the main unit. nine0005 Below is a diagram that clearly shows the construction of a snow blower based on a cultivator. The scheme is decoded as follows. A self-propelled snow blower makes clearing snow much easier, especially in large areas where the use of a device on skis, pushed by the operator, requires a lot of physical strength of the latter. You can use the drawings below to make a snow blower. The material for the manufacture of the rotor and its blades is sheet steel 2 mm thick. The rotor housing is made of roof iron or sheet steel thinner than 2 mm. All dimensions of parts are indicated on the drawing. nine0005 The transmission of rotation from the motor to the rotor shaft can be done using the belt or the chain. Please note that the electric snowblower based on the trimmer should not be subjected to heavy loads, as its gearbox may fail. The same recommendation applies to the lawn mower if you decide to assemble a snow thrower on its base. nine0005 A simpler design of the unit mounted on a frame with skids can be assembled according to the diagram from an old magazine. Thanks to the above drawings, the assembly of a snow blower cannot be difficult for any home craftsman. Often there are situations when you need to remove snow at night: in this case, the snow blower headlight will be a useful addition to . If installing a headlight on an electric snow blower is quite simple, then with units powered by internal combustion engines, things are more complicated: you need to connect to the electrical circuit of the device using special relays and electronic boards.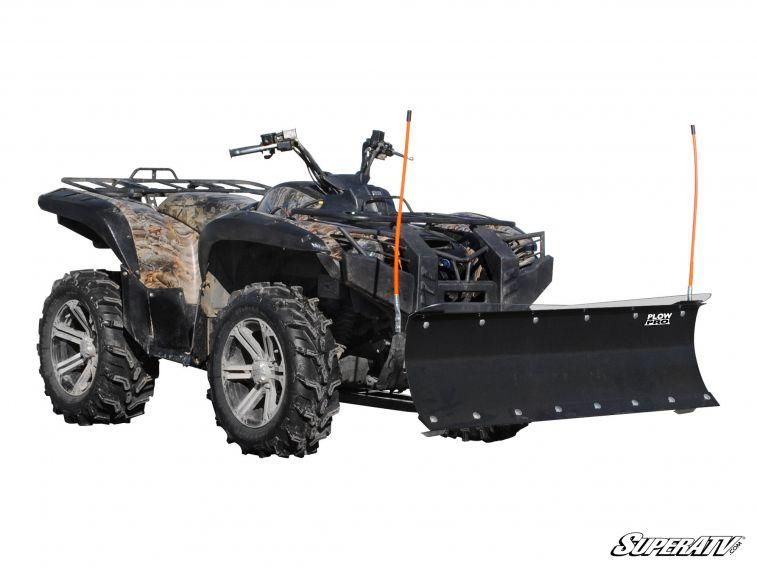 nine0005
 Snow blower assembly
Based on chainsaw

Based on the trimmer
On the basis of a motor-cultivator (motoblock)
Making a rotor
 It is also possible to connect the gearbox shaft of an electric trimmer or lawn mower to the rotor shaft. Fortunately, these units already have an angular gearbox. The whole structure is mounted on a frame with a chassis. The result is a lightweight handheld snow blower on wheels.